
rockstar143's '04 NBP progress thread (part deux continues after 6 year hiatus)
 05-24-2012, 09:52 AM
#3241
takin care of Business in
iTrader: (5)
Join Date: Jan 2008
Location: Kansas City, MO
Age: 40
Posts: 30,994
Received 4,732 Likes
on
4,064 Posts
^^^ 
hahaha well scenario differs from people to people....
we have like a PM conversation when he was doing the procats....i told him to loosen the o2 sensor while the cats are still on there, then unplug the connector....take the cats out and then take the o2 sensor out....
and he confirmed this with me 4 times LOL....but when install day came he did something else....so maybe he was faced with a scenario where removing the o2 sensor could help him out/make things easier....so i feel its more of an experience....not that he doesnt like us, but he has a brain which he uses (dont mean it sarcastically).....
Last edited by swoosh; 05-24-2012 at 09:55 AM.

The following users liked this post:
rockstar143 (05-24-2012)
05-24-2012, 09:57 AM
#3242
Race Director
iTrader: (1)
Lol
The following users liked this post:
rockstar143 (05-24-2012)
05-24-2012, 11:05 AM
#3243
My main problem is that I overthink everything...I ask for solutions etc...and then plan to use them and when the day comes to ACTUALLY tackle it, I end up having to take whatever route seems easiest as it happens.
I had a BIT*H of a time getting the rear lower O2 sensor unclipped to remove it with the cat...so when I was under the car trying to remove that extra bracket (the two 14MM bolts) I saw the O2 from below and saw that that and the last 10MM nut from the heatshield were accessible...figured FK it, I can get it from here and will make it easier to remove from above so I ended up unbolting.
PLUS, remember, I'm getting advice from you guys, and from what I read online and from what I read on AZ. But for this, I appreciate your advice fellas...why reinvent the wheel and have to go on a mission for fitment. If the 90 degrees work...and have room...I'll go that route.
Anyone know where I can get a set of those...I want to do this to both lower O2 sensors in one shot.
J.
05-24-2012, 11:07 AM
#3244
takin care of Business in
iTrader: (5)
Join Date: Jan 2008
Location: Kansas City, MO
Age: 40
Posts: 30,994
Received 4,732 Likes
on
4,064 Posts
PM richie 

The following 2 users liked this post by rockstar143:
swoosh (05-25-2012),
veggiemonster (05-25-2012)
05-25-2012, 09:47 AM
#3247
Race Director
iTrader: (3)
Join Date: Feb 2012
Location: South Florida
Age: 31
Posts: 18,278
Received 3,824 Likes
on
2,847 Posts
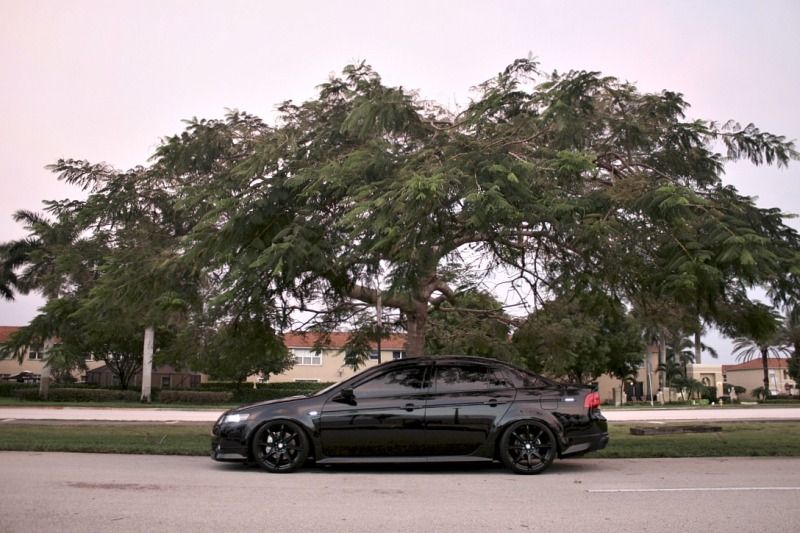
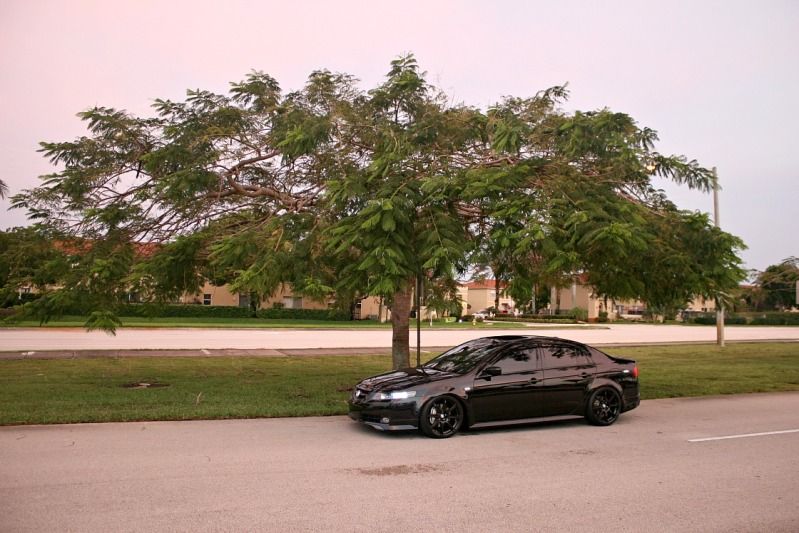
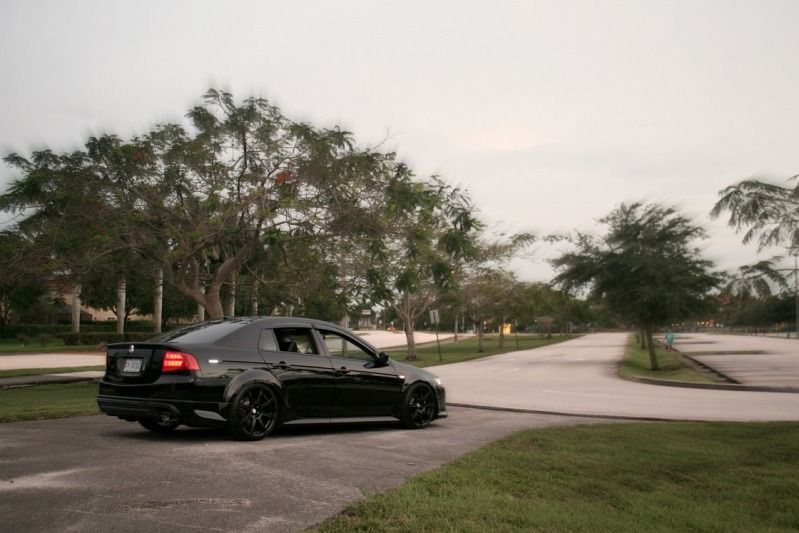
Looks hawt J although idk what it is about your car, it looks great with the wing.
05-25-2012, 10:05 AM
#3248
takin care of Business in
iTrader: (5)
Join Date: Jan 2008
Location: Kansas City, MO
Age: 40
Posts: 30,994
Received 4,732 Likes
on
4,064 Posts
^^^ I agree with Sean....
The car looks HELLA clean without the wing....but you have made the wing your trademark bro....doesnt look like your car without the wing.....
but looks SICK....clean as fawk....
The car looks HELLA clean without the wing....but you have made the wing your trademark bro....doesnt look like your car without the wing.....
but looks SICK....clean as fawk....
05-25-2012, 10:33 AM
#3249
Race Director
iTrader: (3)
Join Date: Feb 2012
Location: South Florida
Age: 31
Posts: 18,278
Received 3,824 Likes
on
2,847 Posts
I'm not Sean...wtf...
05-25-2012, 10:35 AM
#3250
Thank you Fellas...and that, honestly is why I won't fully commit to having it OFF...because I know I'll undoubtedly put it back on! 
Plus, it only takes me 10 minutes to put on or off at this point.
Plus, it only takes me 10 minutes to put on or off at this point.
05-25-2012, 11:10 AM
#3251
takin care of Business in
iTrader: (5)
Join Date: Jan 2008
Location: Kansas City, MO
Age: 40
Posts: 30,994
Received 4,732 Likes
on
4,064 Posts
05-25-2012, 03:39 PM
#3252
2014 Jeep SRT


The following users liked this post:
ebelp (05-25-2012)
05-25-2012, 04:27 PM
#3254
Moderator
iTrader: (3)
I would NEVER put it on my car but I love the wing spoiler on yours 
Need moar pics.
Need moar pics.
 05-25-2012, 08:59 PM
#3256
Race Director
iTrader: (3)
Join Date: Feb 2012
Location: South Florida
Age: 31
Posts: 18,278
Received 3,824 Likes
on
2,847 Posts
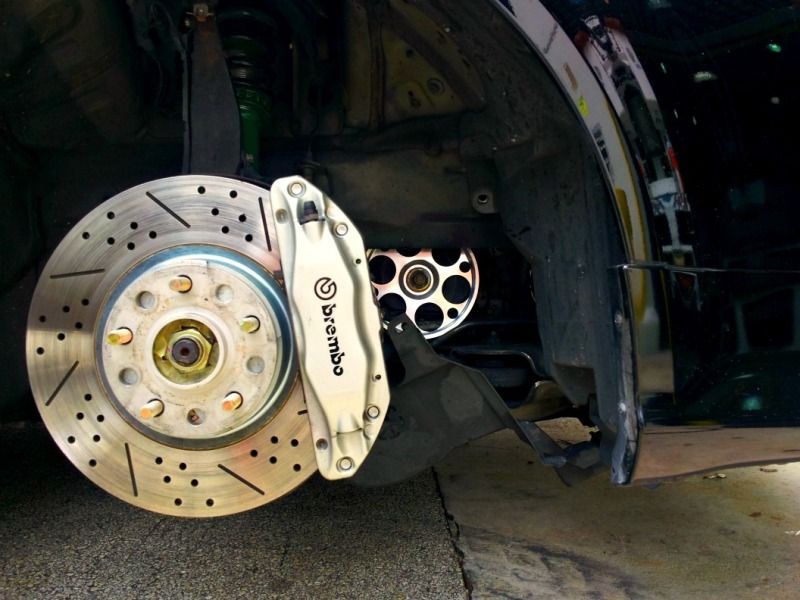
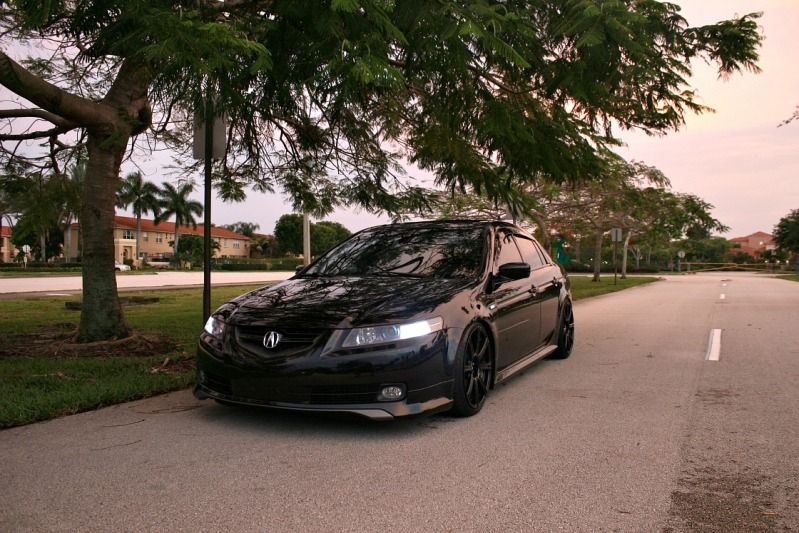
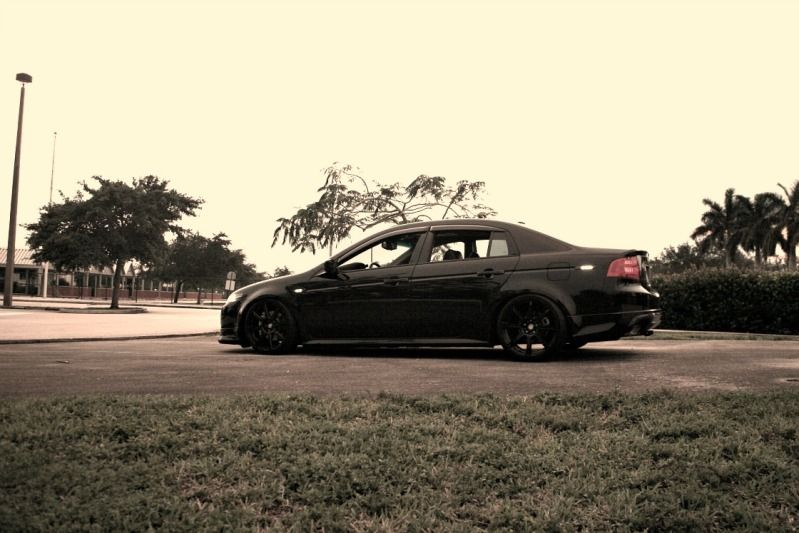
DEM ROTORS

The following users liked this post:
rockstar143 (05-25-2012)
05-25-2012, 09:33 PM
#3257
Moderator
iTrader: (3)
Sick!!!!!
The following users liked this post:
rockstar143 (05-25-2012)
05-25-2012, 09:46 PM
#3258
did you notice my ninja mod in backround in that pic??!
Ok, Austin, you asked my impressions...Ok, when downshifting, the engine seems to "stop" less when you drop to a lower gear...if that makes sense, like the car feels lighter, acceleration seems a little more effortless...as far as tearing it up acceleration, I didn't do much of that on the way home but I could definitely feel that the rpm's moved more quickly on the way up AND on the way down.
Overall, I'm happy with the money spent on it.
J.
05-25-2012, 10:05 PM
#3259
Race Director
iTrader: (3)
Join Date: Feb 2012
Location: South Florida
Age: 31
Posts: 18,278
Received 3,824 Likes
on
2,847 Posts
I know exactly what you mean, the car wants to glide to a stop instead of the down shift dramatically slowing it down.
Yes I saw the ninja mod! DUH! I just really love the rotors Can't wait to put mine on.
Yes I saw the ninja mod! DUH! I just really love the rotors
Can't wait to put mine on.
05-26-2012, 09:39 AM
#3260
I KNOW you saw it, Austin, I had already told you I did it, was wondering if Tyler noticed it.
Actually, since I'm rockin no wing for a bit, decided to commit to cleaning up what 8 years of the wing did to the clear on the trunk lid...last night, wetsanded 3000 grit then compounded with wool pad and makita rotary and M105 then polished with white pad and Porter cable and M205 Looks MUCH better...going to look for some little plugs to pop in there...although my vinyl circle cutouts look pretty decent at hiding the holes as it is.
Actually, since I'm rockin no wing for a bit, decided to commit to cleaning up what 8 years of the wing did to the clear on the trunk lid...last night, wetsanded 3000 grit then compounded with wool pad and makita rotary and M105 then polished with white pad and Porter cable and M205 Looks MUCH better...going to look for some little plugs to pop in there...although my vinyl circle cutouts look pretty decent at hiding the holes as it is.
05-26-2012, 09:45 AM
#3261
Race Director
iTrader: (3)
Join Date: Feb 2012
Location: South Florida
Age: 31
Posts: 18,278
Received 3,824 Likes
on
2,847 Posts
I wish I had your skill set with cars. 
05-26-2012, 10:02 AM
#3262
Moderator
iTrader: (3)
Of course I saw the mod 
I've thought about getting one but everyone says the difference isn't too noticeable with A/T
I've thought about getting one but everyone says the difference isn't too noticeable with A/T
05-26-2012, 10:05 AM
#3263
Race Director
iTrader: (3)
Join Date: Feb 2012
Location: South Florida
Age: 31
Posts: 18,278
Received 3,824 Likes
on
2,847 Posts
From the way J is describing it I'd say you'd feel a difference.
05-26-2012, 10:09 AM
#3264
Moderator
iTrader: (3)
That's what I was thinking but it's not worth the risk
05-26-2012, 10:26 AM
#3265
Race Director
iTrader: (3)
Join Date: Feb 2012
Location: South Florida
Age: 31
Posts: 18,278
Received 3,824 Likes
on
2,847 Posts
If you don't like it it wouldn't be hard to sell
05-26-2012, 12:27 PM
#3266
Team Owner
iTrader: (2)
Join Date: Jan 2008
Location: Kansas City, MO (Overland Park, KS)
Posts: 36,545
Received 6,470 Likes
on
5,162 Posts
I miss the wing. I know most people don't like them, but I do....
05-26-2012, 12:35 PM
#3267
takin care of Business in
iTrader: (5)
Join Date: Jan 2008
Location: Kansas City, MO
Age: 40
Posts: 30,994
Received 4,732 Likes
on
4,064 Posts
Very well done J....great first impressions....
05-26-2012, 12:43 PM
#3268
Team Owner
iTrader: (2)
Join Date: Jan 2008
Location: Kansas City, MO (Overland Park, KS)
Posts: 36,545
Received 6,470 Likes
on
5,162 Posts
^^^^ Wait....aren't you in Dallas?
05-26-2012, 01:13 PM
#3269
takin care of Business in
iTrader: (5)
Join Date: Jan 2008
Location: Kansas City, MO
Age: 40
Posts: 30,994
Received 4,732 Likes
on
4,064 Posts
 yes Sir i am....gonna come back Monday evening....
  05-26-2012, 01:35 PM
#3270
Team Owner
iTrader: (2)
Join Date: Jan 2008
Location: Kansas City, MO (Overland Park, KS)
Posts: 36,545
Received 6,470 Likes
on
5,162 Posts
^^^ LOL girl is gonna whack you for being on AZ on a holiday weekend while you're attending a wedding.....
05-27-2012, 07:22 AM
#3271
Ha! And I feel like I'm a total noob, my friend...I guess I take for granted the 15 years I've been doing this (actually...10 years really, I've always loved cars but was mostly too cheap to ever do anything about it when I was young). Thank you though!
Hmmm...well, to be honest, at WOT, I'm not certain if that's where I feel the difference....I actually feel like I reap the benefits more from normal, chilled 3K shift driving...just, off the line when I take off from a red, it just feels like the car gets going much more easily and DEFINITELY when you let off the gas, there's less of a "lugging" feeling, like the car keeps rolling afterward, also, more of a smooth transition on downshifts...
That said, I can't comment on whether or not it would make a whopping difference for an automatic.
Steve...that's the exact reason why I polished the trunk off, and just used some little circle carbon fiber vinyl cutouts to cover the holes (used a dime for a template). I change my mind often and want the ability to put it back on anytime. Taking it off is more difficult since it's hard to grab the 10mm before it falls off into the trunk skin (and is NOT retrievable) and that only takes me 10 minutes...putting it back on takes me 7 minutes.
Thanks Anil! Love, love, love it! It is definitely one of those mods that makes the car more fun to drive...even chill.
J.
Oh, and stay tuned for an update later today or tomorrow, did some mods to allow me to max my teins and have the car NOT drive like poop...will likely make a diy (although it's not rocket science so it'll just be to give guidance.
Stay tuned!

That said, I can't comment on whether or not it would make a whopping difference for an automatic.
Steve...that's the exact reason why I polished the trunk off, and just used some little circle carbon fiber vinyl cutouts to cover the holes (used a dime for a template). I change my mind often and want the ability to put it back on anytime. Taking it off is more difficult since it's hard to grab the 10mm before it falls off into the trunk skin (and is NOT retrievable) and that only takes me 10 minutes...putting it back on takes me 7 minutes.
Thanks Anil!
Love, love, love it! It is definitely one of those mods that makes the car more fun to drive...even chill. J.
Oh, and stay tuned for an update later today or tomorrow, did some mods to allow me to max my teins and have the car NOT drive like poop...will likely make a diy (although it's not rocket science so it'll just be to give guidance.
Stay tuned!
05-27-2012, 09:01 AM
#3272
takin care of Business in
iTrader: (5)
Join Date: Jan 2008
Location: Kansas City, MO
Age: 40
Posts: 30,994
Received 4,732 Likes
on
4,064 Posts
 05-27-2012, 09:08 PM
#3273
and from a DIY thread I posted:
Ok, this warranting a DIY is a little questionable but figured I'd share my experience since I went ahead and did this.
On the 3G side, we've been discussing why when you lower past a certain point (maxed on teins and just normal lowering on all the other F&F, HTs, N1 etc) and have an SPC or other adjustable upper balljoint installed, your car feels and sounds ridiculous when hitting even the most modest bump in the road. Decafe and a few others mentioned that a lot of people cut out an access hole to allow the nut to up into rather than slamming into the metal where the shock top (delicious!) mounts.
Here was my solution. And do yourselves a favor, don't be a cheapskate, get yourself a metal hole saw bit from harborfreight or home depot.
Using a dremel is kind of an option, but you really have very limited space and the angles to make the cuts are difficult...ESPECIALLY on passenger side which is RIGHT next to the AC hi/low pressure lines. BE CAREFUL and do NOT cut that or hammer it.
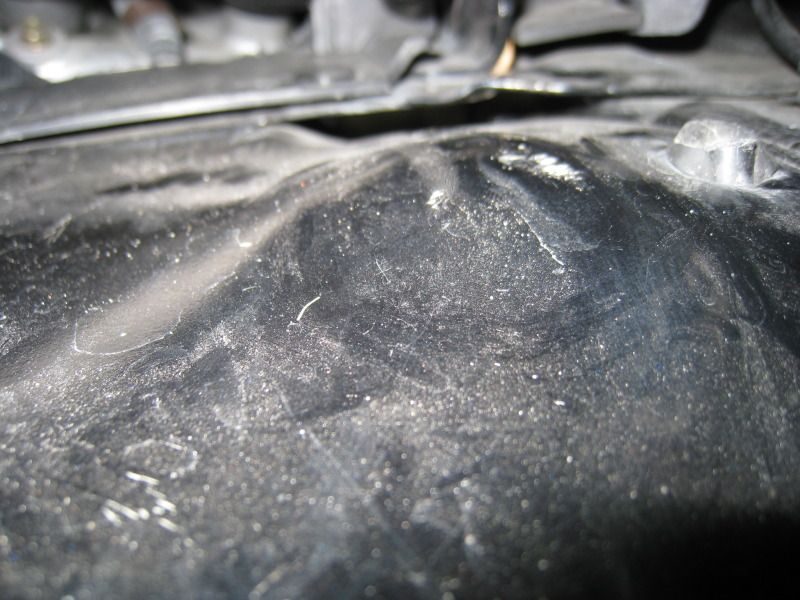
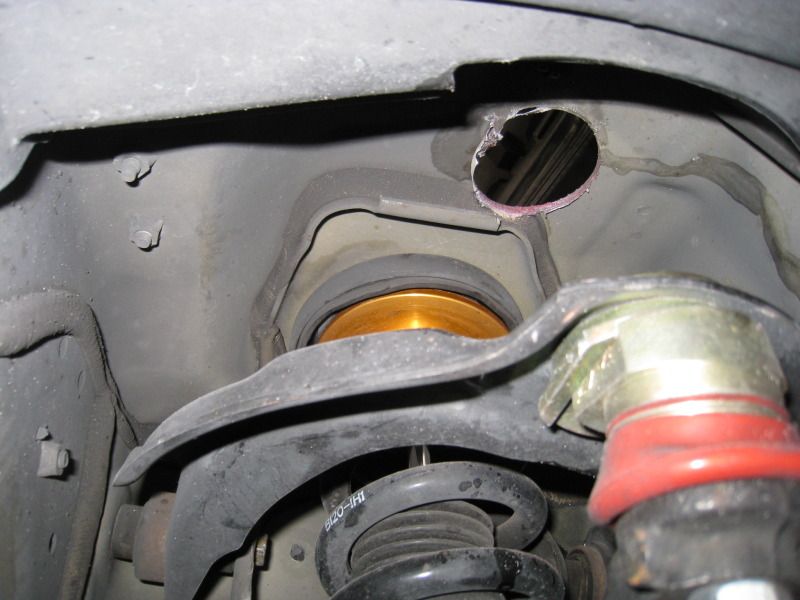
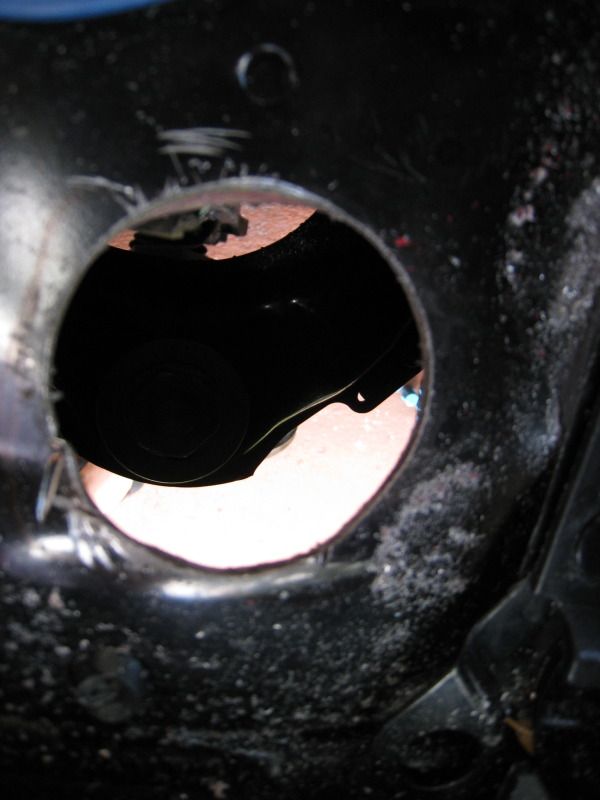
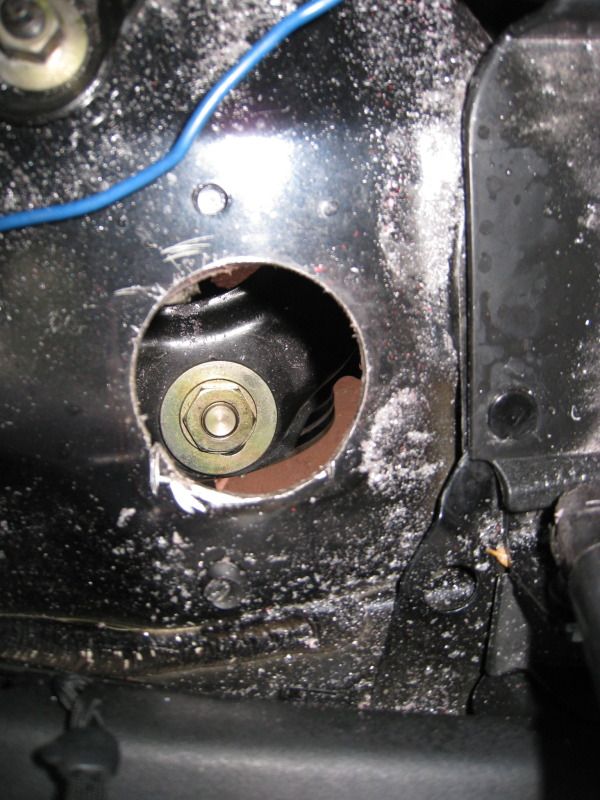
As discussed, a circular cut retains more of it's rigidity and to be honest, after trying to cut out a rectangle, is a lot easier. Another big one, below or above, there are no wires in the way to create the clearance. Go for it...also, I was lucky enough that my camber mount bolts had slammed into the metal hard enough for me to see where I needed the space from above...so technically, remove your covers, and inspect, you can likely just do this from above without even jacking the car up (although, for safety of knowing you won't drill into your upper control arm, I'd suggest you do jack it up.)
Here, you can see where it was hitting...
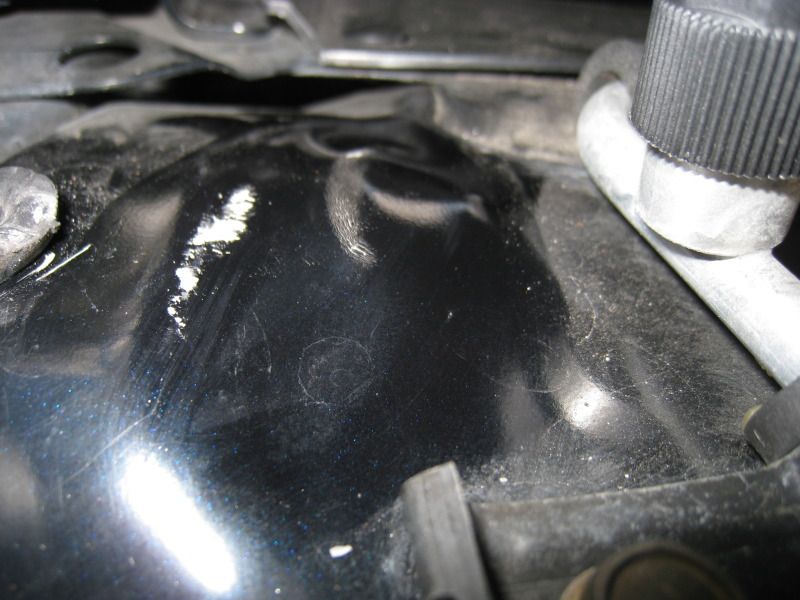
and here is where I started tackling it...and also why I suggested you guys go buy a metal saw...I used a blade that came in one of those cheap kits. Use a center punch to make an indentation to avoid the bit walking, and also, start with a small bit and work your way up to the huge 1/2" bit that goes with a hole saw bit. It's meant for wood, needless to say that I kinda made it through the first hole ok...but 2nd one it got a few mm down and wouldn't go anymore, even with me spraying water to keep the bit cool while drilling.
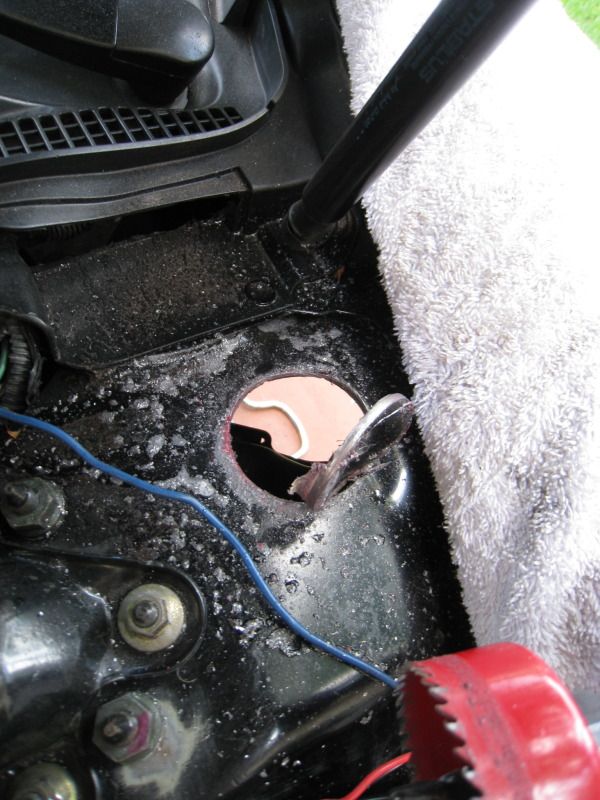
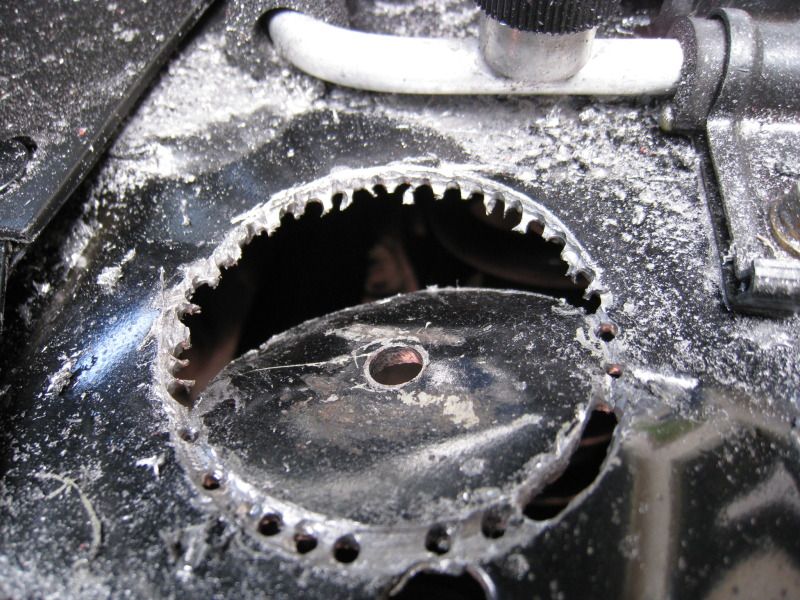
and here, filed it down a little.
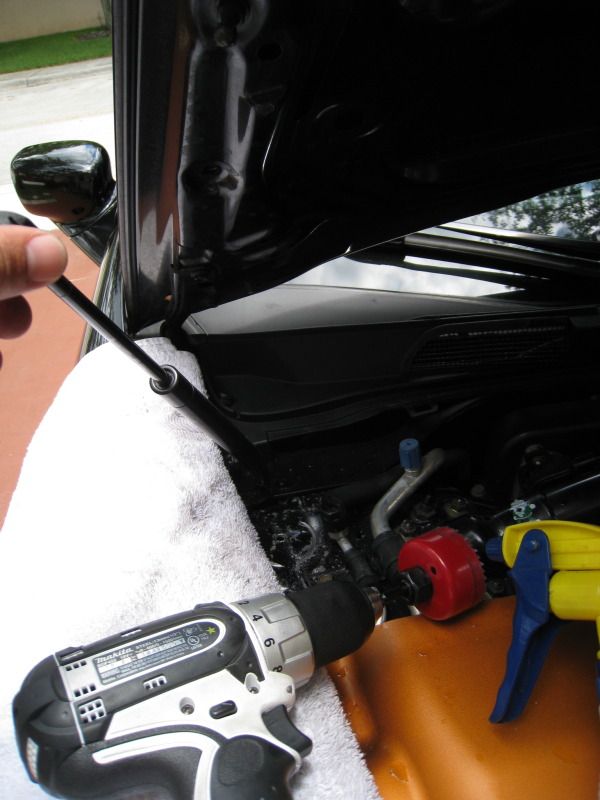
Now, passenger side was a PITA...since my bit died and it was hard to access this area, for this side I had to drill a little further out from center...so avoid the AC lines. I also detached the hood damper and moved it off to the side. The driver one was strong enough to hold it up alone (I've replaced them before).
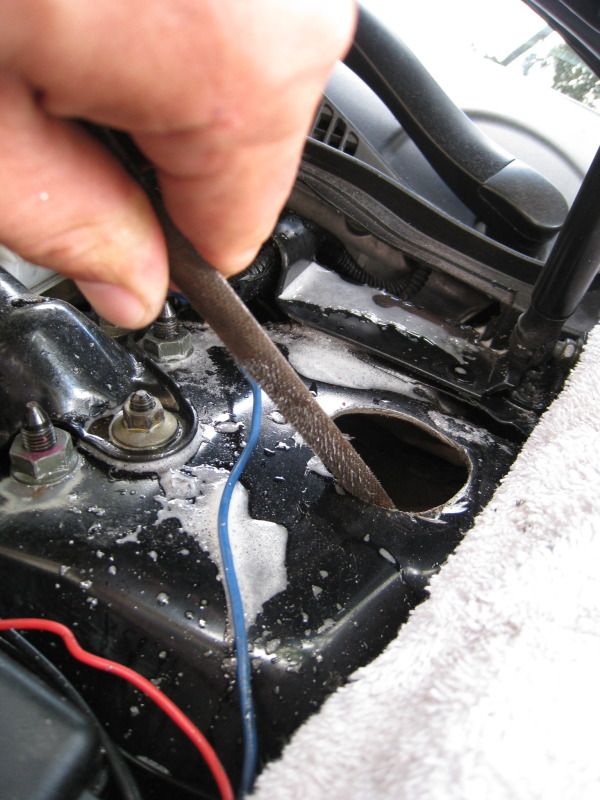
and here, on passenger side, bit got dull, ended up using some ghetto ingenuity and just used a small bit and drilled all the way around, then used a hammer and carefully knocked it through, cut the last piece with the dremel and then used the grinder to get rid of the ridges.
And that is it...very easy, and maxed the front teins...
Drove around last night and no problems, it's perfect, even on a highway with repairs going on, nothing. Didn't bottom out once with fiancee in car too.
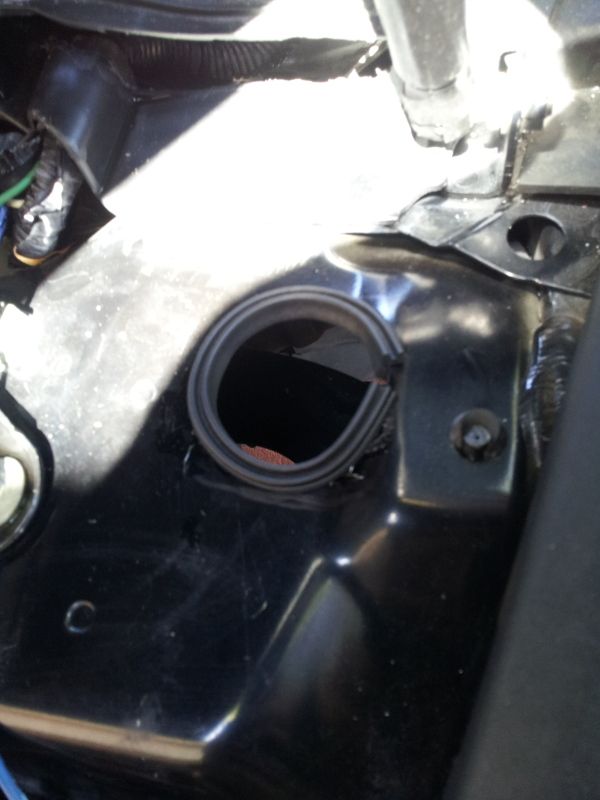
Added a dab of touchup paint on all exposed metal surfaces and a piece of rubber weatherstrip I had from another project just for looks.
and best part...you can now use a traditional extension and socket on this nut to make adjustments (it's a pain to adjust with a crescent wrench).
Also, this update will be a little ADDish...
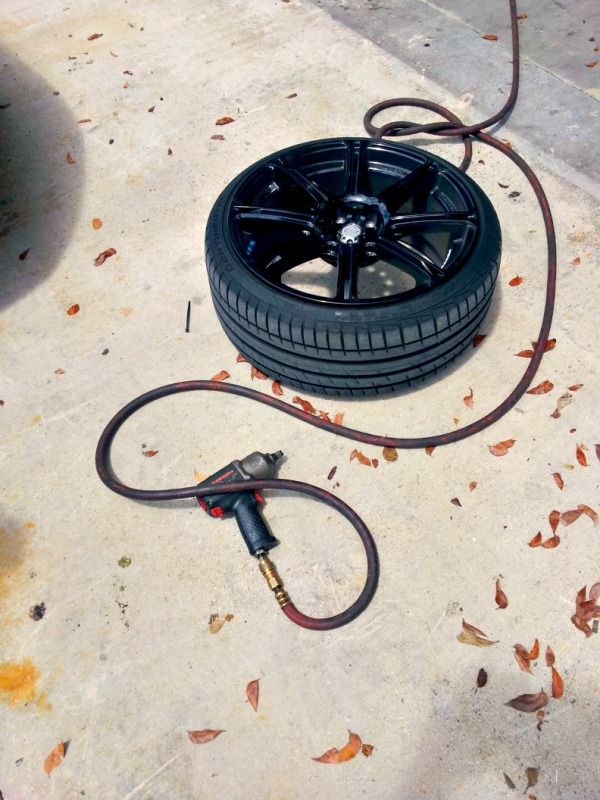
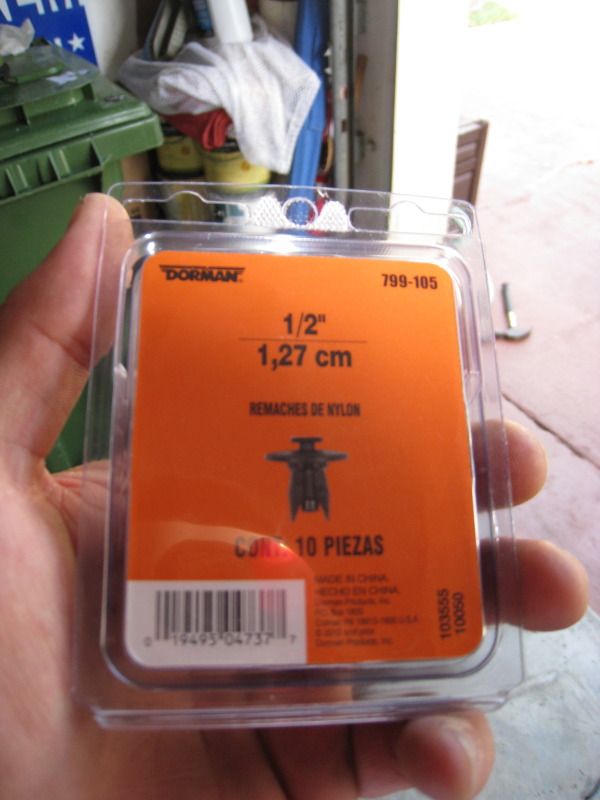
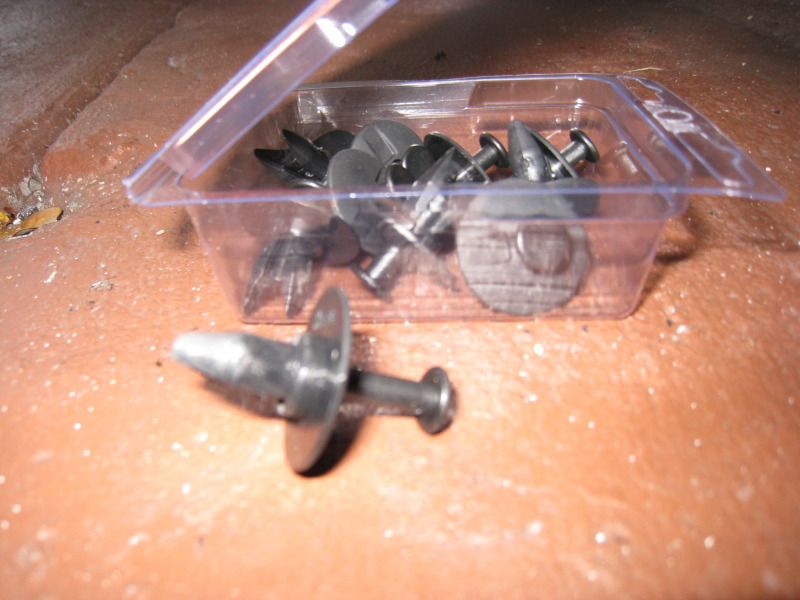
found these 1/2" nylon plugs at autozone...$4 for 10 and they work GREAT under the bumper (where I'm missing some).
and since I have to loosen and tighten my nuts by hand...treated myself to one of these!

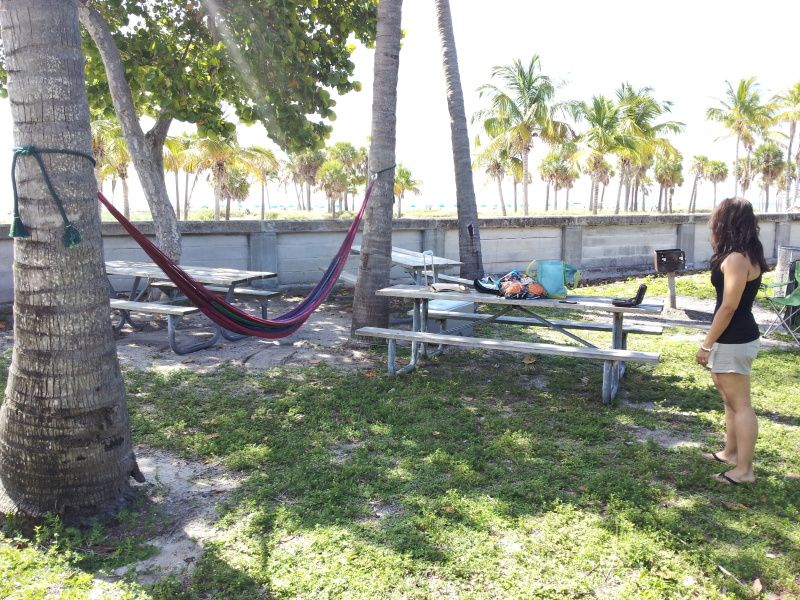
and today, went to Crandon Park, what a gorgeous day! hammock and all!
and went to the local elementary school and the storm that came through earlier knocked this flag down on the ground...can't have that, especially on Memorial Day weekend! I hung it from the fence!

J.
Ok, this warranting a DIY is a little questionable but figured I'd share my experience since I went ahead and did this.
On the 3G side, we've been discussing why when you lower past a certain point (maxed on teins and just normal lowering on all the other F&F, HTs, N1 etc) and have an SPC or other adjustable upper balljoint installed, your car feels and sounds ridiculous when hitting even the most modest bump in the road. Decafe and a few others mentioned that a lot of people cut out an access hole to allow the nut to up into rather than slamming into the metal where the shock top (delicious!) mounts.
Here was my solution. And do yourselves a favor, don't be a cheapskate, get yourself a metal hole saw bit from harborfreight or home depot.
Using a dremel is kind of an option, but you really have very limited space and the angles to make the cuts are difficult...ESPECIALLY on passenger side which is RIGHT next to the AC hi/low pressure lines. BE CAREFUL and do NOT cut that or hammer it.
As discussed, a circular cut retains more of it's rigidity and to be honest, after trying to cut out a rectangle, is a lot easier. Another big one, below or above, there are no wires in the way to create the clearance. Go for it...also, I was lucky enough that my camber mount bolts had slammed into the metal hard enough for me to see where I needed the space from above...so technically, remove your covers, and inspect, you can likely just do this from above without even jacking the car up (although, for safety of knowing you won't drill into your upper control arm, I'd suggest you do jack it up.)
Here, you can see where it was hitting...
and here is where I started tackling it...and also why I suggested you guys go buy a metal saw...I used a blade that came in one of those cheap kits. Use a center punch to make an indentation to avoid the bit walking, and also, start with a small bit and work your way up to the huge 1/2" bit that goes with a hole saw bit. It's meant for wood, needless to say that I kinda made it through the first hole ok...but 2nd one it got a few mm down and wouldn't go anymore, even with me spraying water to keep the bit cool while drilling.
and here, filed it down a little.
Now, passenger side was a PITA...since my bit died and it was hard to access this area, for this side I had to drill a little further out from center...so avoid the AC lines. I also detached the hood damper and moved it off to the side. The driver one was strong enough to hold it up alone (I've replaced them before).
and here, on passenger side, bit got dull, ended up using some ghetto ingenuity and just used a small bit and drilled all the way around, then used a hammer and carefully knocked it through, cut the last piece with the dremel and then used the grinder to get rid of the ridges.
And that is it...very easy, and maxed the front teins...
Drove around last night and no problems, it's perfect, even on a highway with repairs going on, nothing. Didn't bottom out once with fiancee in car too.
Added a dab of touchup paint on all exposed metal surfaces and a piece of rubber weatherstrip I had from another project just for looks.
and best part...you can now use a traditional extension and socket on this nut to make adjustments (it's a pain to adjust with a crescent wrench).
Also, this update will be a little ADDish...
found these 1/2" nylon plugs at autozone...$4 for 10 and they work GREAT under the bumper (where I'm missing some).
and since I have to loosen and tighten my nuts by hand...treated myself to one of these!
and today, went to Crandon Park, what a gorgeous day!
hammock and all!and went to the local elementary school and the storm that came through earlier knocked this flag down on the ground...can't have that, especially on Memorial Day weekend! I hung it from the fence!
J.
The following users liked this post:
SSM4DR (05-27-2012)
05-27-2012, 09:17 PM
#3274
Team Owner
iTrader: (2)
Join Date: Jan 2008
Location: Kansas City, MO (Overland Park, KS)
Posts: 36,545
Received 6,470 Likes
on
5,162 Posts
J, nice job, as always. You need to just enjoy your car! You work so hard on it. Sometimes I wonder if you have to just sit back and "enjoy the ride" !!!!
The following users liked this post:
rockstar143 (05-27-2012)
05-27-2012, 09:19 PM
#3275
Whats up with RDX owners?
iTrader: (9)

Well done.
BTW, if you dont have any of that weatherstripping lying around, go up to AutoZone and pick up those door edge protectors. It will cover the edge well.
Or you can even use some clear tubing, like the type used for fish tanks.
BTW, if you dont have any of that weatherstripping lying around, go up to AutoZone and pick up those door edge protectors. It will cover the edge well.
Or you can even use some clear tubing, like the type used for fish tanks.
The following users liked this post:
rockstar143 (05-27-2012)
The following users liked this post:
rockstar143 (05-27-2012)
05-27-2012, 09:32 PM
#3277
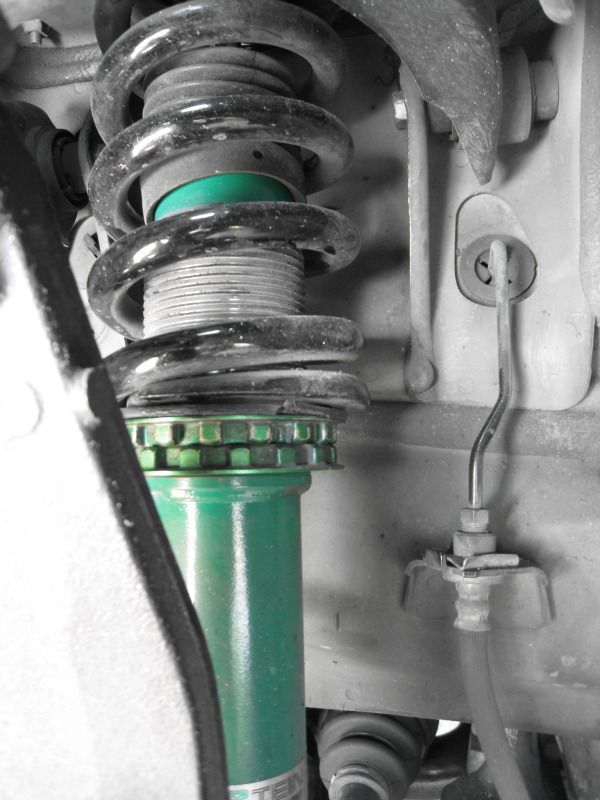
Yeah, it was freaking me out, couldn't figure out why the ride was SO bad with only another 1/2 inch lower!and here is why...about 3 threads left on rear and maxed front:
The following users liked this post:
SSM4DR (05-27-2012)
05-27-2012, 09:42 PM
#3278
Tell me about bro, my mom freaks out when I take her to the store and I'm driving along the unfamiliar roads. Not knowing where the bumps and whatnot are and just trying the best I can to spot them lol. It slaps and she'll say: I feel soo bad and sorry for your car. We should've took mines instead. I see you're running without your fender liners?, I'm still a chicken shit to go without them since Winter gets nasty here in MN haha.
Last edited by SSM4DR; 05-27-2012 at 09:45 PM.
05-27-2012, 09:53 PM
#3279
Yeah, brother...I can't stand the feeling and forget it, people think the car is a total POS when they hear it! I actually have my fender liners...this part is accessible from the top though, the fender liner doesn't cover this up.
The following users liked this post:
SSM4DR (05-27-2012)
05-27-2012, 09:55 PM
#3280
takin care of Business in
iTrader: (5)
Join Date: Jan 2008
Location: Kansas City, MO
Age: 40
Posts: 30,994
Received 4,732 Likes
on
4,064 Posts
am liking the no wing look a lottttttt......and great DIY....looks OEM even after the cutting !!!....
The following users liked this post:
rockstar143 (05-27-2012)