Well, the TSX needed new wheels....ISF is back (Page 64)
 01-19-2017, 01:36 PM
#1641
Chapter Leader (Southern Region)
I know.. just joking with Kam.. 

The following users liked this post:
CCColtsicehockey (01-19-2017)
01-19-2017, 01:37 PM
#1642
Chapter Leader (Southern Region)
Effing hellcats..
I'd love to have a V and hellcat in the garage.
That new Trackhawk..
I'd love to have a V and hellcat in the garage.
That new Trackhawk..
01-19-2017, 01:37 PM
#1643
Chapter Leader (Southern Region)
I'm sure it's going to be 80k though.. 
01-19-2017, 02:45 PM
#1645
Moderator
Regional Coordinator (Southeast)
Regional Coordinator (Southeast)
Thread Starter
Join Date: Dec 2003
Location: Mooresville, NC
Age: 38
Posts: 43,555
Received 3,755 Likes
on
2,536 Posts
How many hp are they saying that thing will have? I thought they barely got the Hellcat to pass emissions. How will the Demon pass?
01-19-2017, 02:49 PM
#1646
Chapter Leader (Southern Region)
The Demon makes no sense to me.. they already have the Drag Pack
Street legality is burrshiett when the Fatcat is already sketchy..
Street legality is burrshiett when the Fatcat is already sketchy..
01-22-2017, 04:36 PM
#1648
Moderator
Regional Coordinator (Southeast)
Regional Coordinator (Southeast)
Thread Starter
Join Date: Dec 2003
Location: Mooresville, NC
Age: 38
Posts: 43,555
Received 3,755 Likes
on
2,536 Posts
So did several maintenance items on the V this morning. Removed the bolt I snapped off when checking my brick last week, cleaned as much of the supercharger and supercharger cover as I could, cleaned filter for intake, and changed the oil.
Started with the broken bolt and taped this off so that I wouldn't get any metal in the engine.

Thought I was going to need to run to the store for some tools but forgot I had these. They removed the broken bolt really easily. Was out in less than 5min.


Started cleaning the blower and runnersa on the side. Cleaning the entire thing and the lid took me about 3 hours an a entire can of WD40 almost.
Before
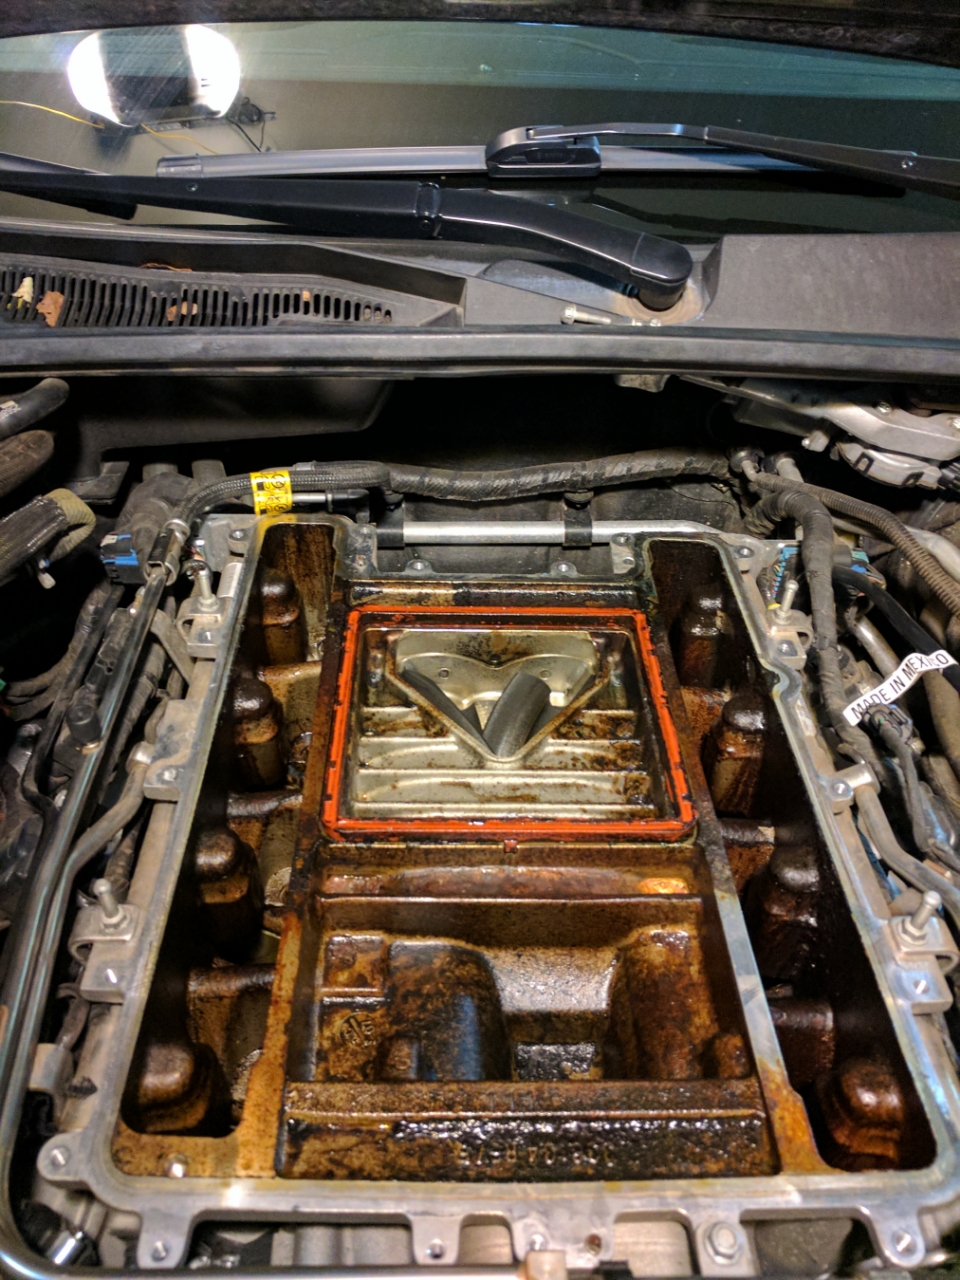
While cleaning I noticed that it almost looks like coolant in the cover. I am not sure what else would lead to the green coloring and some of the orangish stuff that I could not even get completely off.
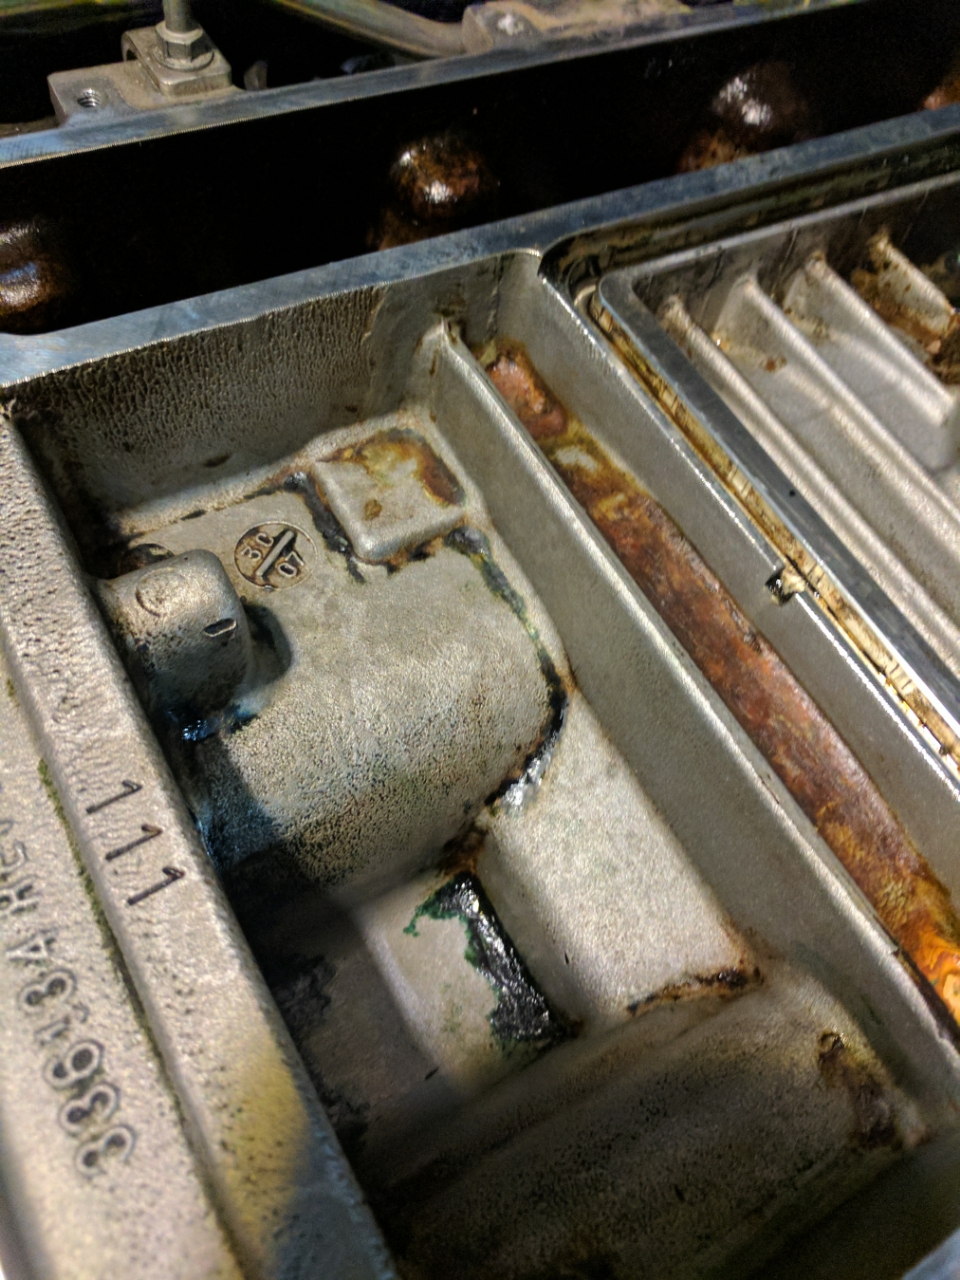
The orange in here I almost wonder if it is baked on dexcool.

Oil and almost seems like coolant is baked everywhere. I didn't remove the snout but it could need a cleaning as well. Going to see if they will clean it when they put the new 2.5in pulley on.
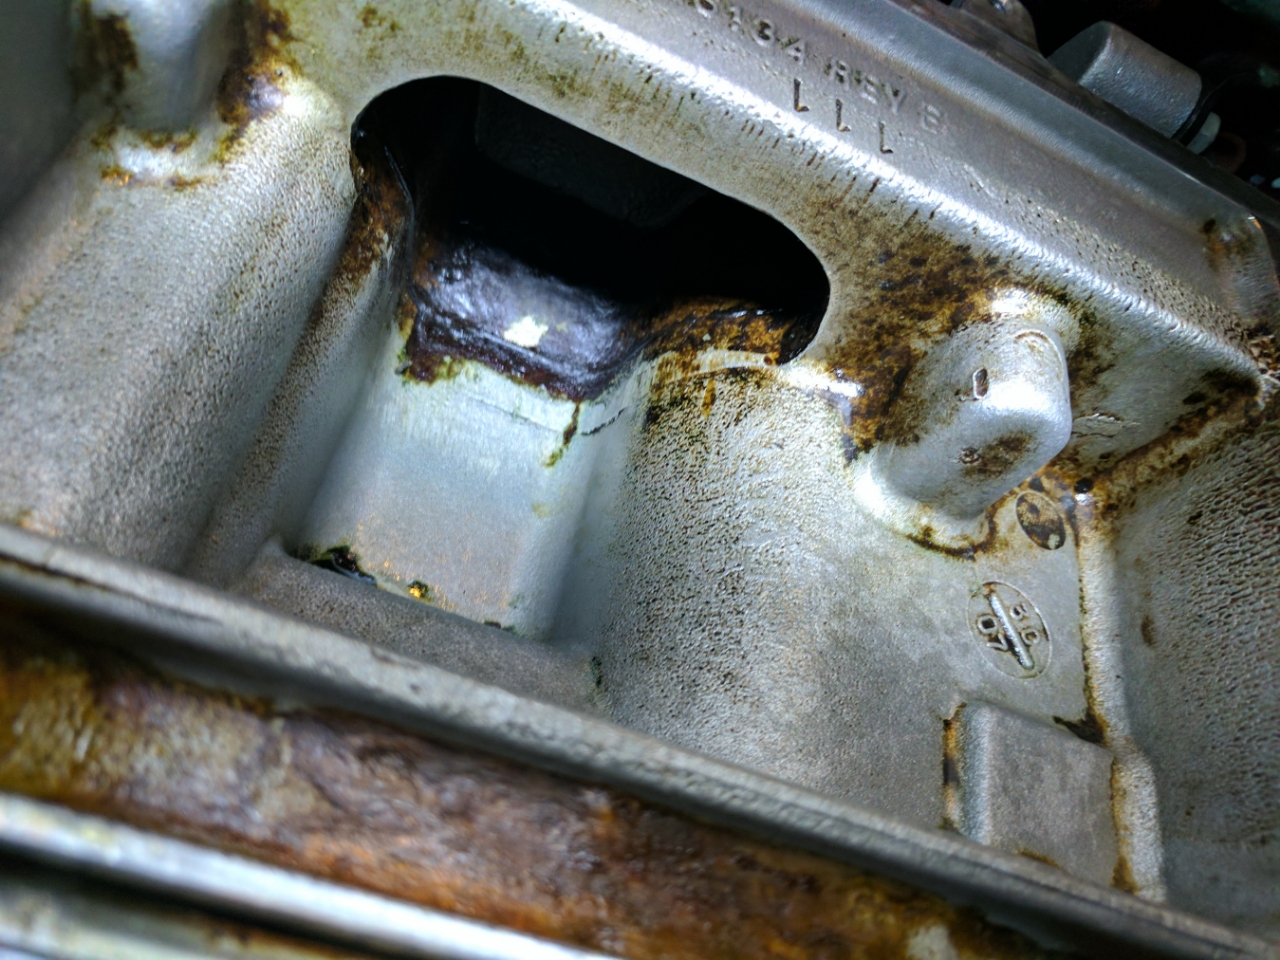
The buildup in the runners was super thick

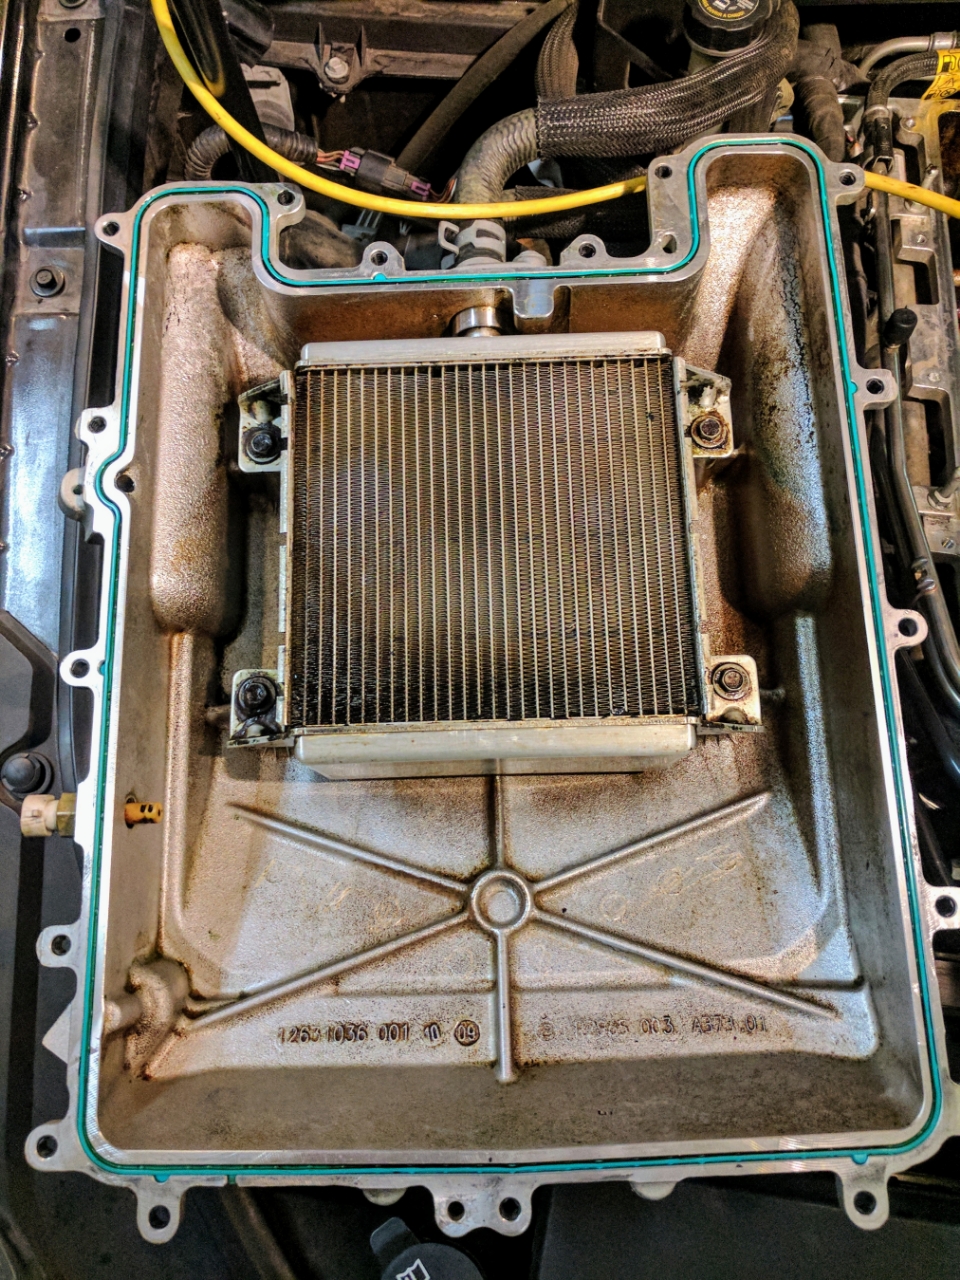
The lid cleaned up pretty well. I didn't bother removing the brick to clean under it since I will be getting a cleaned up used ZL1 installed with the new parts in the next two weeks.
Lid Before

Lid After
A spot on the lid where even after cleaning I noticed green coloring left on the metal. Thinking my brick might not only be collapsed but also has a leak.

Noticed a little bit of a gasket sticking out in one of the runners. Should I be concerened or need to fix this at all? I would need to remove the blower to fix it so hoping it isn't a big deal.

So after I had finished 3 hours of scrubbing here are the finished before and after pics.
Before:
After:


Cleaned the gasket up real well.

Started with the broken bolt and taped this off so that I wouldn't get any metal in the engine.
Thought I was going to need to run to the store for some tools but forgot I had these. They removed the broken bolt really easily. Was out in less than 5min.
Started cleaning the blower and runnersa on the side. Cleaning the entire thing and the lid took me about 3 hours an a entire can of WD40 almost.
Before
While cleaning I noticed that it almost looks like coolant in the cover. I am not sure what else would lead to the green coloring and some of the orangish stuff that I could not even get completely off.
The orange in here I almost wonder if it is baked on dexcool.
Oil and almost seems like coolant is baked everywhere. I didn't remove the snout but it could need a cleaning as well. Going to see if they will clean it when they put the new 2.5in pulley on.
The buildup in the runners was super thick
The lid cleaned up pretty well. I didn't bother removing the brick to clean under it since I will be getting a cleaned up used ZL1 installed with the new parts in the next two weeks.
Lid Before
Lid After
A spot on the lid where even after cleaning I noticed green coloring left on the metal. Thinking my brick might not only be collapsed but also has a leak.
Noticed a little bit of a gasket sticking out in one of the runners. Should I be concerened or need to fix this at all? I would need to remove the blower to fix it so hoping it isn't a big deal.
So after I had finished 3 hours of scrubbing here are the finished before and after pics.
Before:
After:
Cleaned the gasket up real well.
The following 4 users liked this post by CCColtsicehockey:
01-22-2017, 04:44 PM
#1649
Moderator
Regional Coordinator (Southeast)
Regional Coordinator (Southeast)
Thread Starter
Join Date: Dec 2003
Location: Mooresville, NC
Age: 38
Posts: 43,555
Received 3,755 Likes
on
2,536 Posts
Also while planning my SMC catch can install I noticed my airraid intake had come apart. I think this might be why the car was running lean. So not sure I really needed the injectors in the end but excited to have even more power. Going to ask them since I found that to do a before dyno again so I can hopefully get a baseline before the mods if possible. It definitely seems to idle better for sure though.
The following users liked this post:
CCColtsicehockey (01-23-2017)
01-23-2017, 10:23 AM
#1651
Moderator
Regional Coordinator (Southeast)
Regional Coordinator (Southeast)
Thread Starter
Join Date: Dec 2003
Location: Mooresville, NC
Age: 38
Posts: 43,555
Received 3,755 Likes
on
2,536 Posts
I have no idea how it feels as so far I have only driven it my 1.6 mile commute to work since I cleaned it. I am sure it will feel better but more from the fixed intake leak rather than anything else. The idle is so much smoother now. However, that was fixed the same time as the cleanup so it could be some of both. Mine is so bad though that when I opened my throttle body with the intake off I could see it was caked on just as bad through there as well. Hoping I can get them to clean it out with the snout off cause it needs it and I don't really want to have to take the snout off myself.
01-23-2017, 12:37 PM
#1653
Moderator
Regional Coordinator (Southeast)
Regional Coordinator (Southeast)
Thread Starter
Join Date: Dec 2003
Location: Mooresville, NC
Age: 38
Posts: 43,555
Received 3,755 Likes
on
2,536 Posts
I went with the SMC. Now I just have to figure out how I am going to install it. It should be here tomorrow or the next day. I still need to get some hose, a T fitting, and a grommet if I am going to follow this install. Airaid + Saikou Michi Dual Catch Can Install I also still haven't figured out exactly how I want to design my drain setup. I really want to route some house to the very bottom of the car and put a drain down there but it worries me to have the drain hose contantly full of oil incase it somehow gets cut by something and leaks all over the engine bay.
I took the intake out for the first time today and I have no idea how you would get the filter out by itself so you could regularly drain the catch so I would like to not have to do that if at all possible.
I took the intake out for the first time today and I have no idea how you would get the filter out by itself so you could regularly drain the catch so I would like to not have to do that if at all possible.
01-24-2017, 12:51 PM
#1654
Moderator
Regional Coordinator (Southeast)
Regional Coordinator (Southeast)
Thread Starter
Join Date: Dec 2003
Location: Mooresville, NC
Age: 38
Posts: 43,555
Received 3,755 Likes
on
2,536 Posts
So the catch can showed up today. It is apparently a custom design by SMC for WeaponX Motorsports. I was unaware of this when I was ordering it. So it will not go in the intake area now. This should make emptying it easier but at the same time will not leave as clean of an install now in my opinion. It mounts back by the brake and collant tank.


01-24-2017, 01:00 PM
#1656
Moderator
Regional Coordinator (Southeast)
Regional Coordinator (Southeast)
Thread Starter
Join Date: Dec 2003
Location: Mooresville, NC
Age: 38
Posts: 43,555
Received 3,755 Likes
on
2,536 Posts
Thinking of ordering this remote drain kit to install down by the oil filter and just use a Y connection to join the two cans drain together.
HTP Catch Can Drains Now Available
HTP Catch Can Drains Now Available
The following users liked this post:
Majofo (01-25-2017)
01-24-2017, 01:02 PM
#1657
Moderator
Regional Coordinator (Southeast)
Regional Coordinator (Southeast)
Thread Starter
Join Date: Dec 2003
Location: Mooresville, NC
Age: 38
Posts: 43,555
Received 3,755 Likes
on
2,536 Posts
It was $219 + shipping.
CTS-V2 Racing by WEAPON-X Motorsports ? SMC dual catch cans
Ben at WeaponX has a couple of them in stock right now. Only color is gloss black right now.
CTS-V2 Racing by WEAPON-X Motorsports ? SMC dual catch cans
Ben at WeaponX has a couple of them in stock right now. Only color is gloss black right now.
01-24-2017, 10:02 PM
#1658
Moderator
Regional Coordinator (Southeast)
Regional Coordinator (Southeast)
Thread Starter
Join Date: Dec 2003
Location: Mooresville, NC
Age: 38
Posts: 43,555
Received 3,755 Likes
on
2,536 Posts
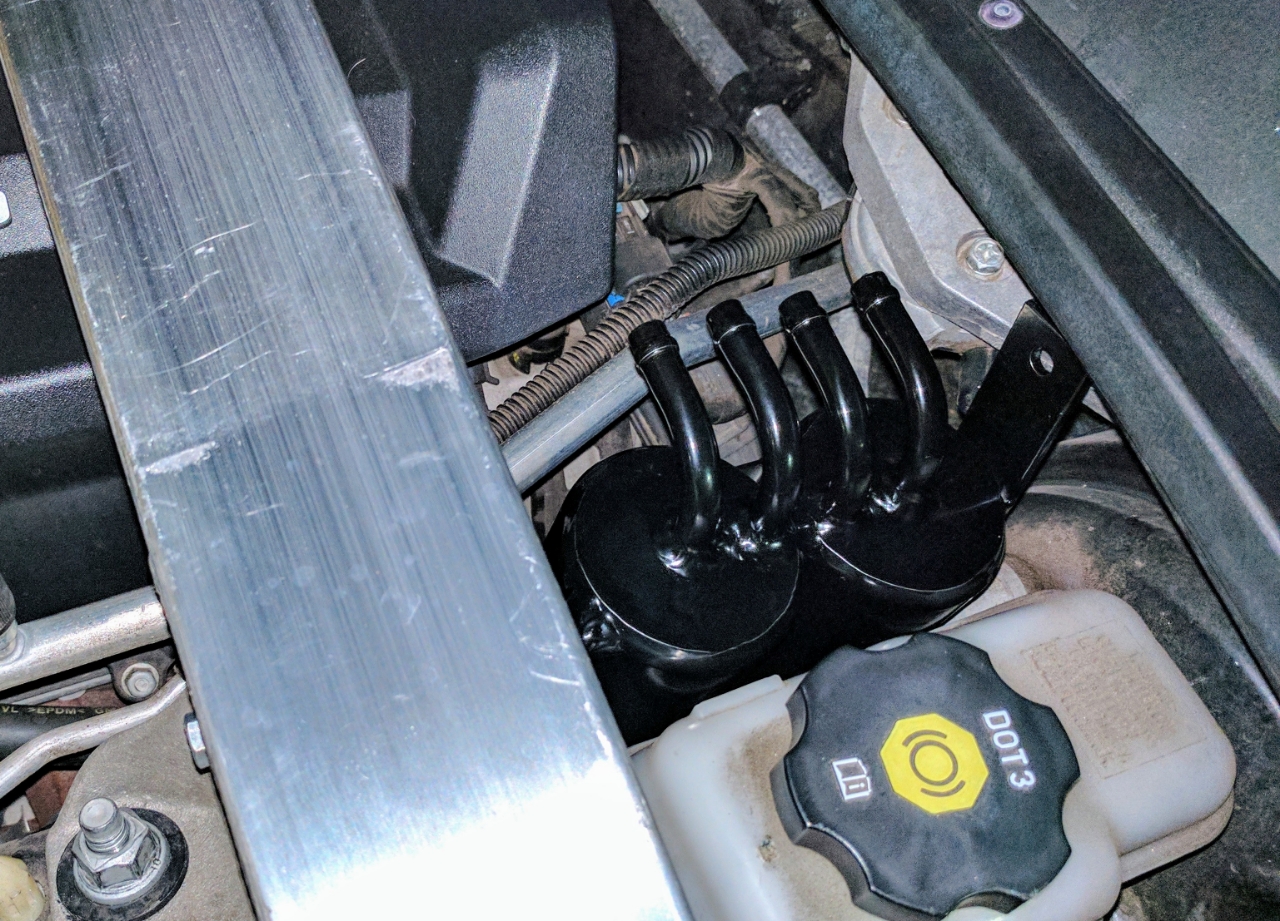
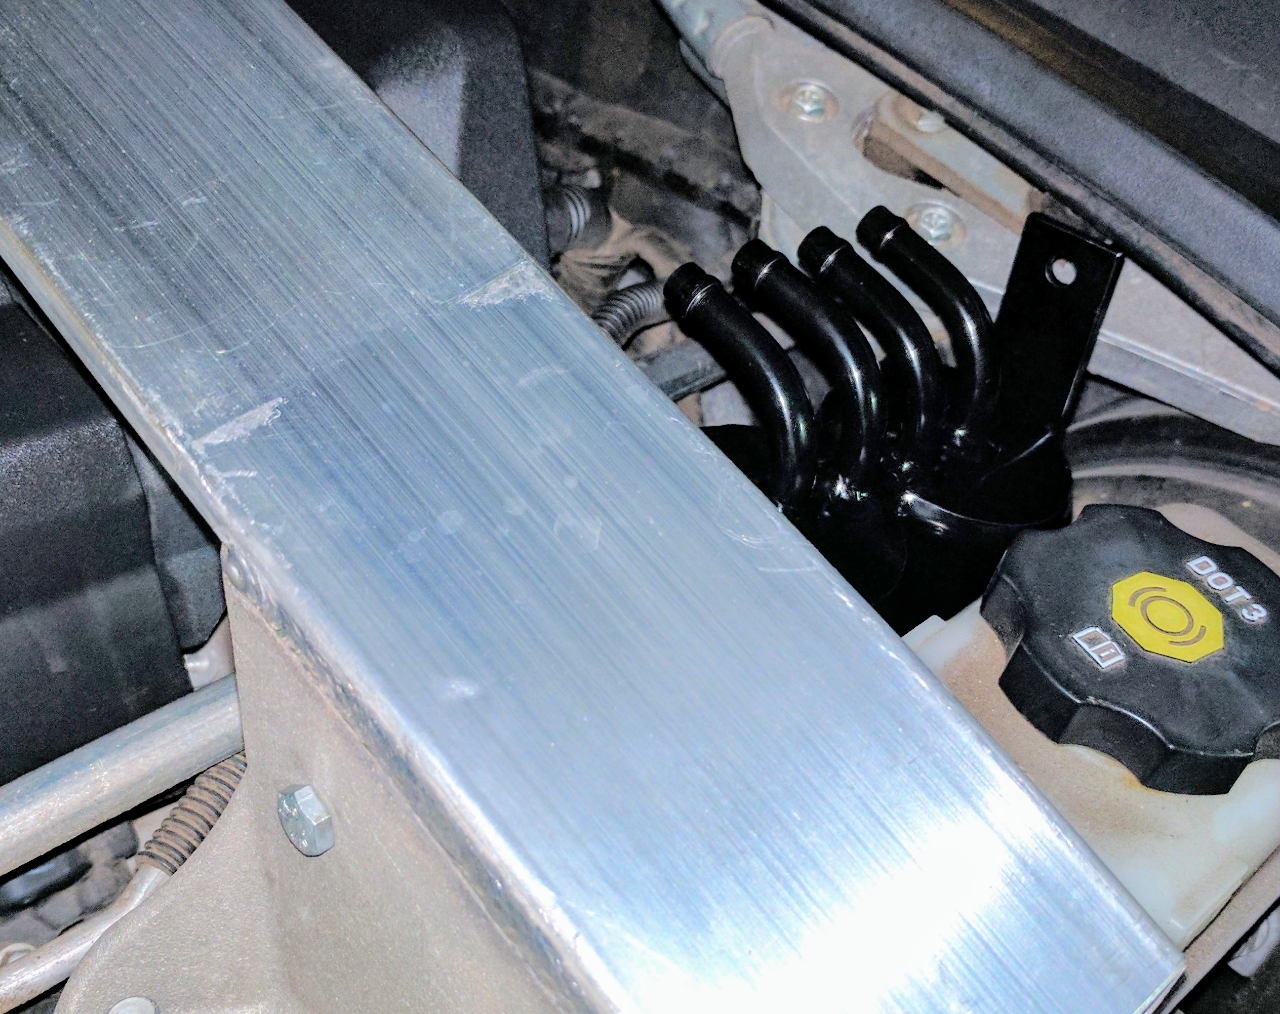
So just did a quick test fit of the can tonight so I can get an estimate of hose lengths to order for it. Interestingly it uses a just two bolt holes on the car that happen to line up exactly. I. Really curious what these are normally for but one is in the strut tower bar and the other is on the wiper cowl.
The following users liked this post:
KaMLuNg (01-25-2017)
The following users liked this post:
CCColtsicehockey (01-25-2017)
01-25-2017, 09:07 AM
#1661
Chapter Leader (Southern Region)
you could make one yourself 
01-25-2017, 09:20 AM
#1662
Chapter Leader (Southern Region)
Horree fucking shitt...
Check this vid out.. Awesome.. definitely get a catch can stat!
https://www.youtube.com/watch?v=Y9klkDCItEY
Check this vid out.. Awesome.. definitely get a catch can stat!
https://www.youtube.com/watch?v=Y9klkDCItEY
01-25-2017, 09:21 AM
#1663
Chapter Leader (Southern Region)
@IB Jason any update on youtube embeds?
01-25-2017, 09:24 AM
#1664
Moderator
Join Date: Aug 2014
Location: Dirty H-Town, Amerikkka
Posts: 28,432
Received 7,772 Likes
on
5,045 Posts

HFS. How much oil do you guys consume?
01-25-2017, 09:28 AM
#1665
Chapter Leader (Southern Region)
Not really consumed 
Check the comments..
Check the comments..
Showing how the Moroso Air/Oil Separators function. We built a clear body and went out on the highway. This is on a bone stock 2009 Cadillac CTS-V with 24,000 miles on it. This video was about 1/2 hour long and I cut out the boring parts. You can see a puff every time I lift, and oil running down the sides under hard acceleration and heavy downshifting as well as at the end when I am just driving back to the plant. 1:24 I am downshifting and it pulls a lot. 3:14 is a long acceleration and lift and it pulls a lot. Under normal driving conditions, (driving like my Mom) I get about 3/4 of an inch +/- of oil in a week. I think you get the idea. YOU NEED ONE! We have many direct fit applications, as well as universal part numbers. Moroso | Put "air-oil" in our search field
01-25-2017, 09:34 AM
#1666
Moderator
Join Date: Aug 2014
Location: Dirty H-Town, Amerikkka
Posts: 28,432
Received 7,772 Likes
on
5,045 Posts
Okay, Mr. Pedantic. Bad choice of words.
I mean, how much oil are you guys pouring over your engines regularly?
(an old friend of mine told me that's what you do with GM engines, pop the hood every 4 weeks and pour a quart of oil on the engine and that's why there's always oil spots on the driveway and parking spots).
I mean, how much oil are you guys pouring over your engines regularly?
(an old friend of mine told me that's what you do with GM engines, pop the hood every 4 weeks and pour a quart of oil on the engine and that's why there's always oil spots on the driveway and parking spots).
01-25-2017, 09:38 AM
#1667
Chapter Leader (Southern Region)
Not being pedantic just shallow..
That's what I'm saying.. I pour 6 qts in.. about 6 qts comes back out.
Remember, that blowoff gets cycled back in..
That's what I'm saying.. I pour 6 qts in.. about 6 qts comes back out.
Remember, that blowoff gets cycled back in..
01-25-2017, 09:44 AM
#1669
In the Mid-South meow
iTrader: (2)
OCC's FTW!!!
01-25-2017, 09:45 AM
#1670
Chapter Leader (Southern Region)
01-25-2017, 09:55 AM
#1671
Chapter Leader (Southern Region)
Never read the comments section.. buttt
I use this one myself on my 05 GTO , '11 CTS-V Coupe and my '13 ZR1. I was surprised at how much oil was inside inside the GTO's intake manifold and installed these immediately. After a 20 minute track session, my ZR1's separator in nearly full. Don't put this oil back into the motor.
01-25-2017, 09:55 AM
#1672
Moderator
Regional Coordinator (Southeast)
Regional Coordinator (Southeast)
Thread Starter
Join Date: Dec 2003
Location: Mooresville, NC
Age: 38
Posts: 43,555
Received 3,755 Likes
on
2,536 Posts
Thinking of ordering this remote drain kit to install down by the oil filter and just use a Y connection to join the two cans drain together.
HTP Catch Can Drains Now Available
HTP Catch Can Drains Now Available
01-25-2017, 09:58 AM
#1673
Chapter Leader (Southern Region)

I may have clicked your link and thought.. cool, check out this link I found. Maybe.
01-25-2017, 09:59 AM
#1674
Chapter Leader (Southern Region)
I'm going to go and thank your OG link 
01-25-2017, 10:00 AM
#1675
Moderator
Regional Coordinator (Southeast)
Regional Coordinator (Southeast)
Thread Starter
Join Date: Dec 2003
Location: Mooresville, NC
Age: 38
Posts: 43,555
Received 3,755 Likes
on
2,536 Posts
I am not 100% sure yet on this. My current thought process is since the can is how at the back of the engine bay I am going to take everything out around the back even it it means longer runs. I don't think longer runs should cause me a real issue at least I hope not.
So the supercharger snout lines will run back the left side of the bay since they come off the blower snout more on that side. Then make a single right bend around the back of the engine and over to the catch can. Then the left and right engine side connectors will travel to the back of the engine and I will use a T connector back there before they enter the catch can. This is the one I am questioning a bit as currently it appears that the stock lines are about the same length from each side and I don't know if I will have issues if one line is twice as long as the other before the T. But I believe going with these routes keeps the front of the engine bay less cluttered looking. Especially since I will now have my collant lines for lide coming out the front with the ZL1 lid. I hope that makes sense. I haven't mocked up a drawing yet for it.
Oh and as far as the drain goes I think I am just going to use a Y connector out the bottom of the catch can and then get one of those fancy drains that mounts down by the oil filter. I can just drive up on my ramps every 2 weeks or so and put a small container under the car and open the drain then.
Hoping I can find some nice looking hose clamps and hose to connect this all up with. Preferably black hose with no markings and black clamps.
Last edited by CCColtsicehockey; 01-25-2017 at 10:04 AM.
01-25-2017, 10:01 AM
#1676
Moderator
Regional Coordinator (Southeast)
Regional Coordinator (Southeast)
Thread Starter
Join Date: Dec 2003
Location: Mooresville, NC
Age: 38
Posts: 43,555
Received 3,755 Likes
on
2,536 Posts
 01-25-2017, 10:07 AM
#1677
Moderator
Regional Coordinator (Southeast)
Regional Coordinator (Southeast)
Thread Starter
Join Date: Dec 2003
Location: Mooresville, NC
Age: 38
Posts: 43,555
Received 3,755 Likes
on
2,536 Posts
Also WeaponX has a new front splitter in the works and I think it looks pretty damn good.
Cadillac CTS-V Forum at CTSVOwners.com
Cadillac CTS-V Forum at CTSVOwners.com
01-25-2017, 10:11 AM
#1678
Chapter Leader (Southern Region)
The lounge isn't viewable unless your a member
01-25-2017, 10:23 AM
#1679
Moderator
Regional Coordinator (Southeast)
Regional Coordinator (Southeast)
Thread Starter
Join Date: Dec 2003
Location: Mooresville, NC
Age: 38
Posts: 43,555
Received 3,755 Likes
on
2,536 Posts
I was wondering why it was taking the name of the thread out of the title. Didn't know that as I am never on the site not logged in.
01-25-2017, 12:37 PM
#1680

@IB Jason any update on youtube embeds?
Thanks for your patience!
The following users liked this post:
Majofo (01-25-2017)