When you click on links to various merchants on this site and make a purchase, this can result in this site earning a commission. Affiliate programs and affiliations include, but are not limited to, the eBay Partner Network.
Hardware Purchased An AUX Audio Input Adapter for your head unit. I had one of these already when I did my tablet install. The one I use is no longer sold. Ask around or use Google to find a good one.
Asus Nexus 7 (2013 version) (WiFi only version [FLO])
5 amp Automotive Micro Fuses (Purchased at local Honda dealer. The parts guy said no-one has purchased these in a long time).
Optional but Highly Recommended: A used Center Console and HVAC/Radio display for your vehicle. Both can be found on eBay for around $60 each. I made some big mistakes with my stuff. Thankfully, I still had the ones that came with my car to try again.
Other materials: Speaker wire (for extending stock wires) purchased at local Walmart for ~ $10. (I used 16 gauge wire, but I would use 18 gauge if I had to do it over again.) Heat shrink tube (purchased at a local Home Depot). You will need lots of these.
Tools Used (The Less Obvious Stuff) Safety Glasses Particle Filter Mask Dremel Multi-Tool (So helpful. If you don't have one, buy one.) Wire Stripper (Self-Adjusting) Exacto Knife Soldering Iron Solder
Software Purchased (I�ll assume you already rooted your tablet): $30 - Timur�s USB Kernel https://timur.mobi/timurs-kernel-n7-2013/ This is a kernel for the Stock ROM. It enables simultaneous fast charge with, USB-OTG, DAC, and Deep Sleep which makes the tablet shut off when it loses external power. Unless you have a better idea, I suggest you spend the money on it. It�s worked quite well for me. $6.49 � Tasker https://play.google.com/store/apps/d....taskerm&hl=en As of this date it�s on sale for $1.99. Automates functions on your android device. I tether my tablet to my 4G phone to get internet access on the tablet. I plan to setup Tasker on my phone to automatically enable WiFi Tethering when it detects that the Bluetooth antennae has connected to my Acura�s HandsFreeLink. That way the tablet will get internet access from the phone whenever I start the car, and I won�t have to touch the phone to make it happen. Notes
1: I'll start by saying that Murphy's Law applies to this project, so be ready for it to take longer than you expected.
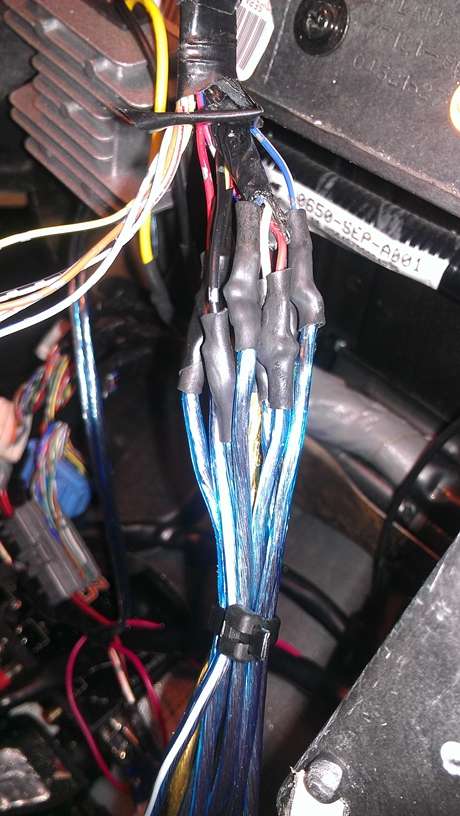
2: You will need to extend the existing wires using the speaker wire.
Solder the wires!
Don't try crimping the wires, or you'll be sorry. I tried it and several of the crimped connections came undone when I was struggling to stuff the head unit and display back in the dash. Yes, the thought of soldering over 40 wires (twice) is daunting, but you can do it.
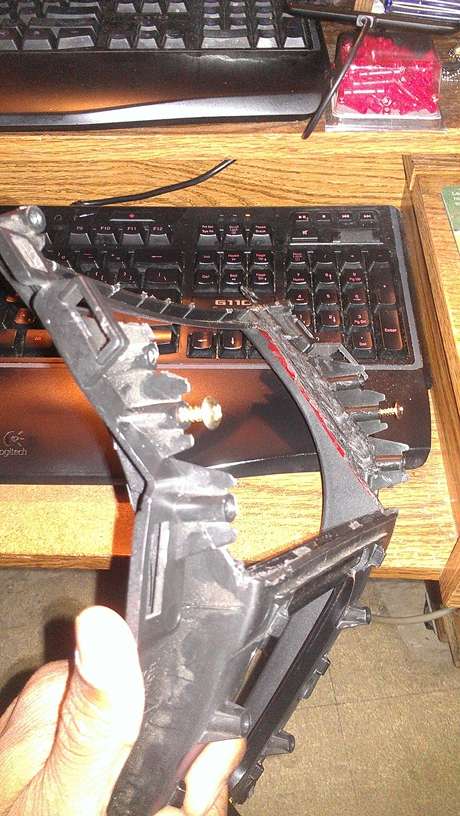
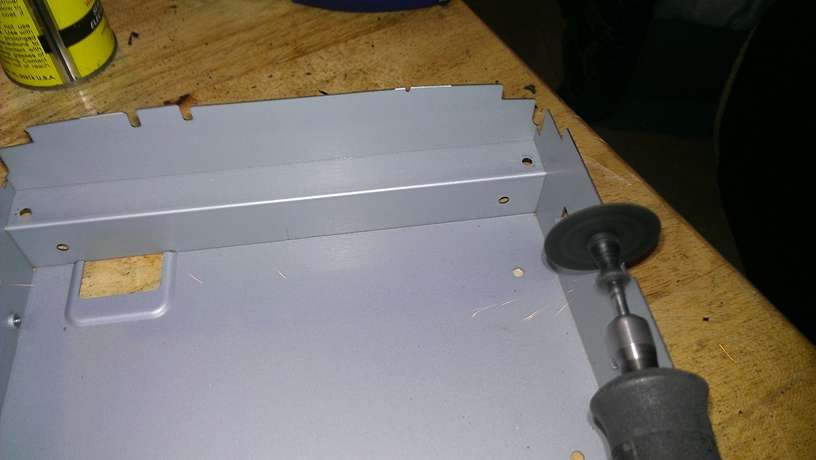
3. Be careful with your Dremel; one moment of carelessness can leave you slicing into things you don't want to cut. I again recommend you purchase used parts to experiment on.
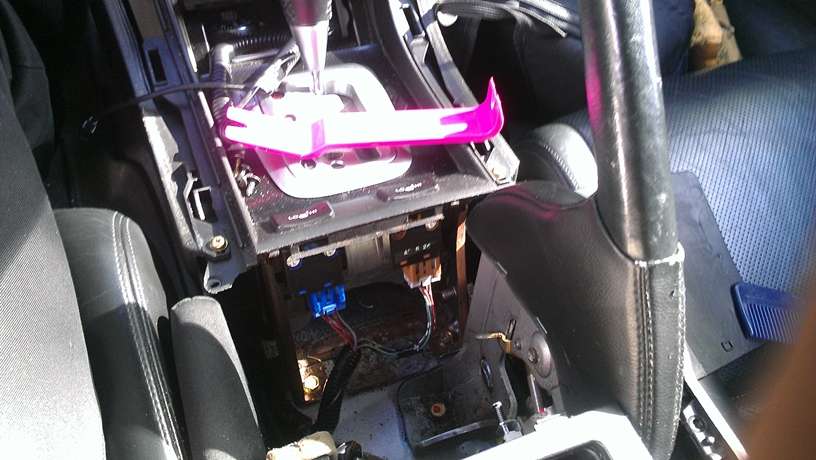
Picture Time
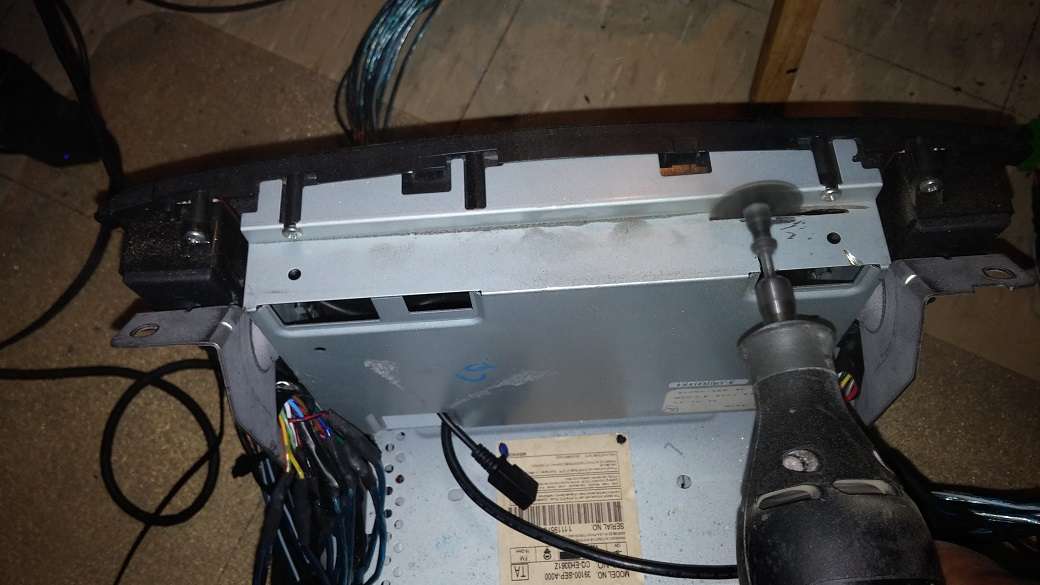
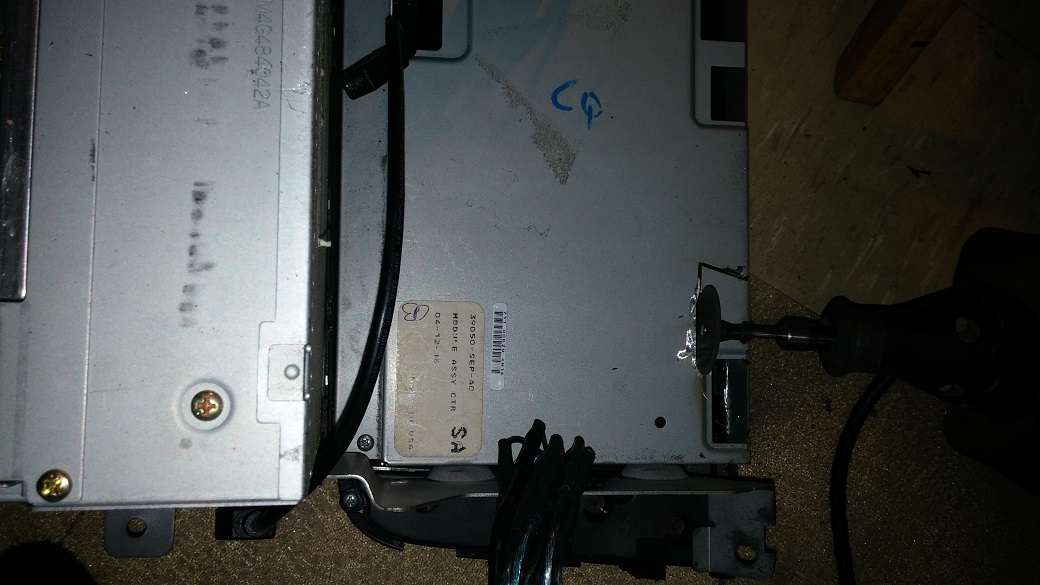
Disassembly
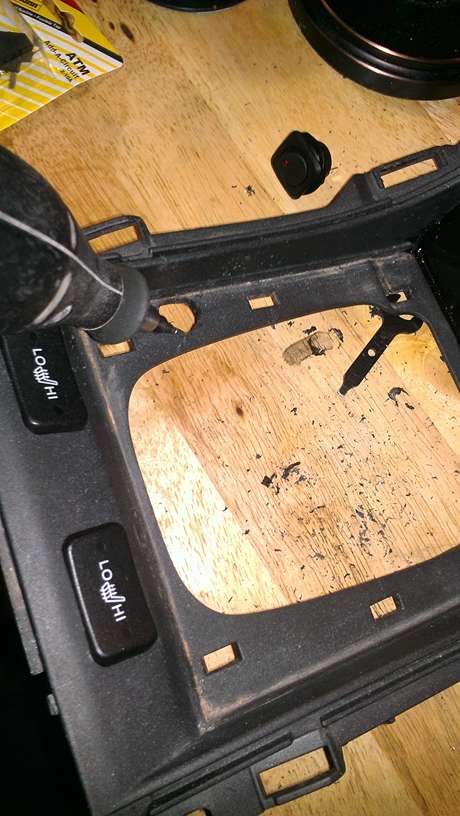
While this was apart, I decided to replace the bulbs in the heated seat switches. I used an aftermarket red bulb for the hi heat light, instead of the stock color.
Illumination bulb part# 35852-SEP-A02 It's $3-$5 each. The Honda dealer near me didn't have them. I had to get them from an Acura dealer.
Looking good again.
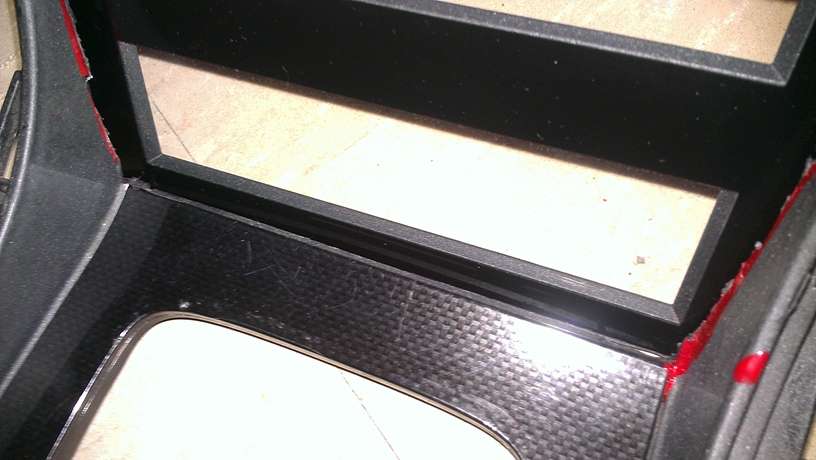
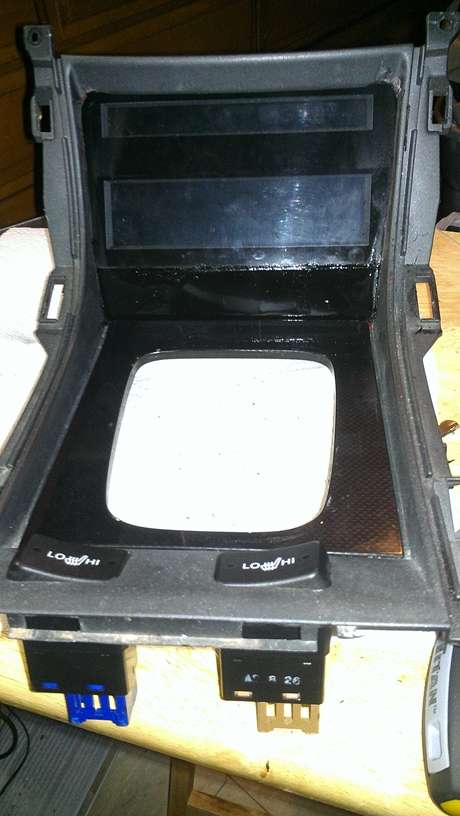
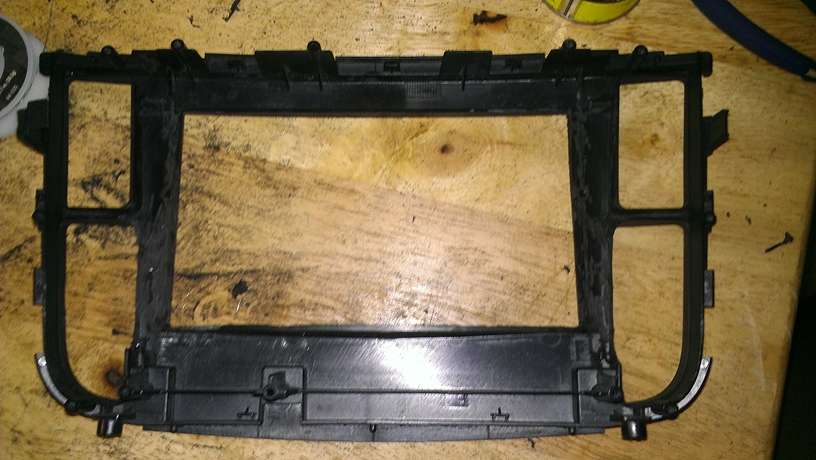
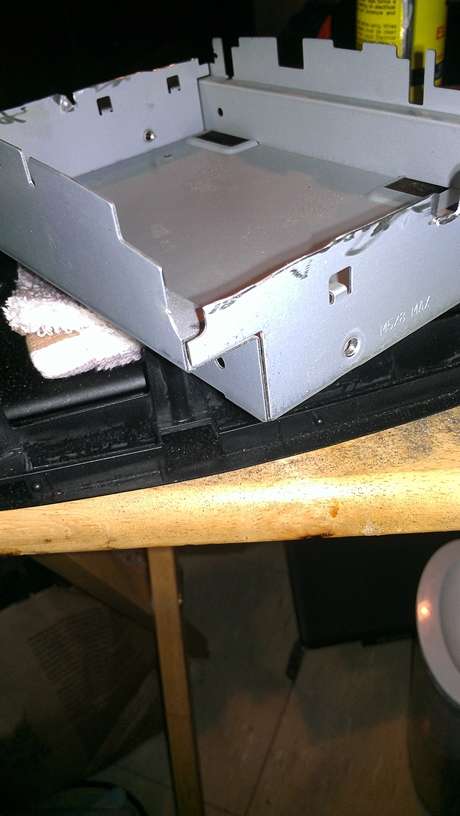
The stock HVAC/Radio display will be moved to where the cubbies are. The cubbies will be removed.
A flat surface is needed for the display to sit flush against the center console frame.
Test fit.
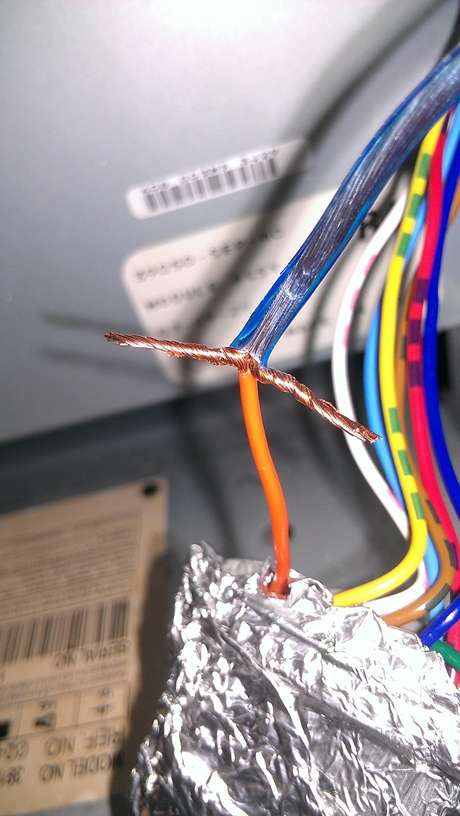
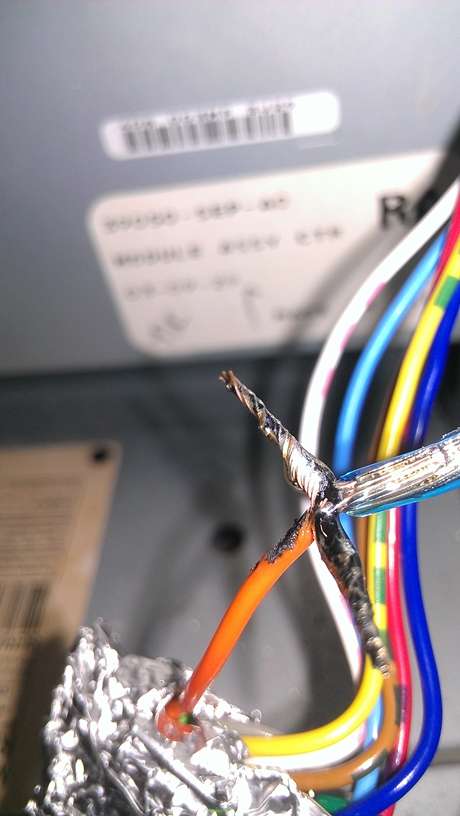
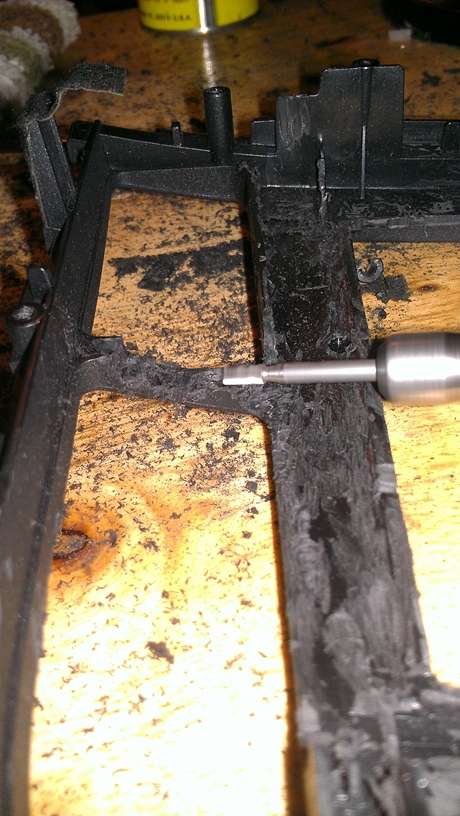
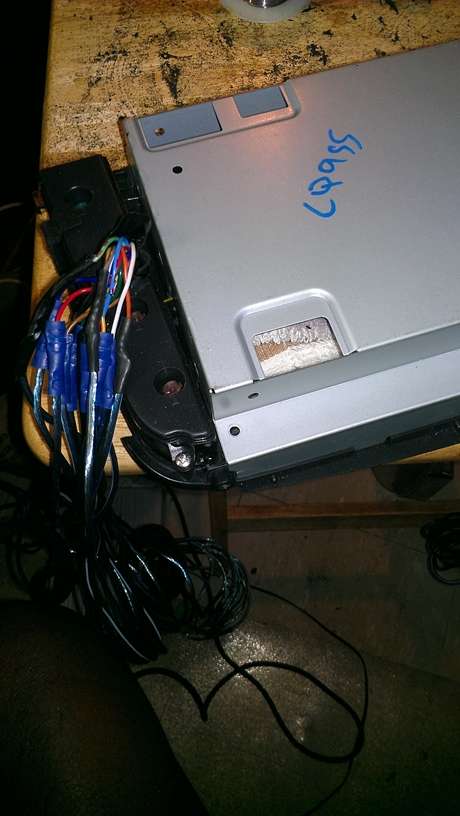
Lengthening the wires 2 feet of wire will be more than enough to reach the new HVAC/Radio display location. You're better off with wires that are slightly longer than necessary, than too short. Just remember there isn't much room in your dash so don't make them too long.
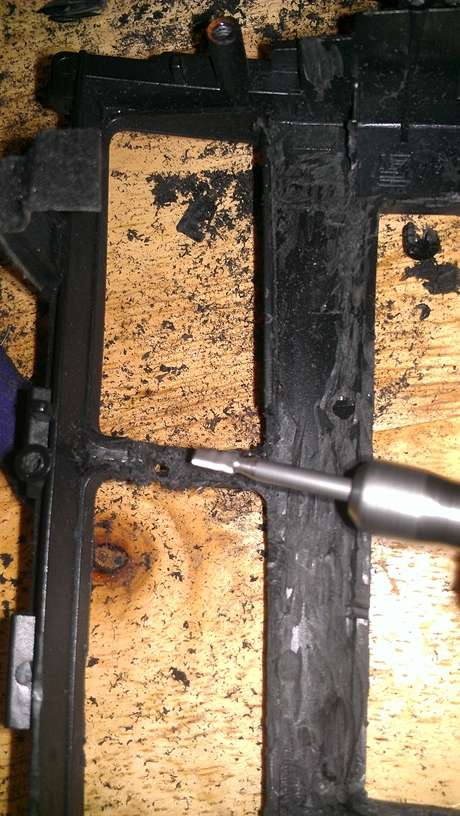
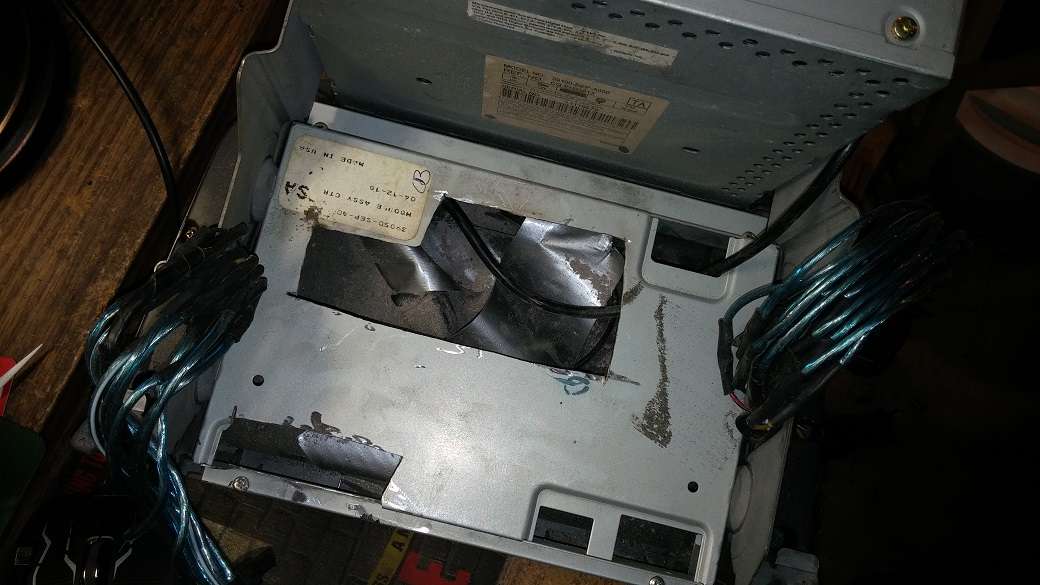
Soldering
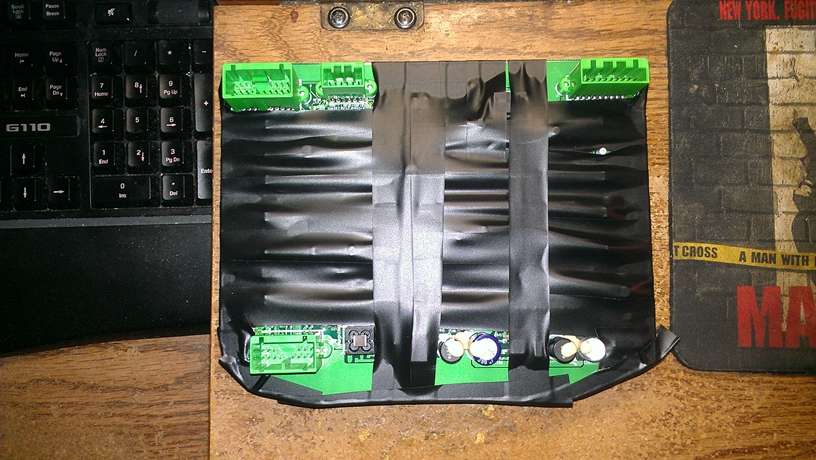
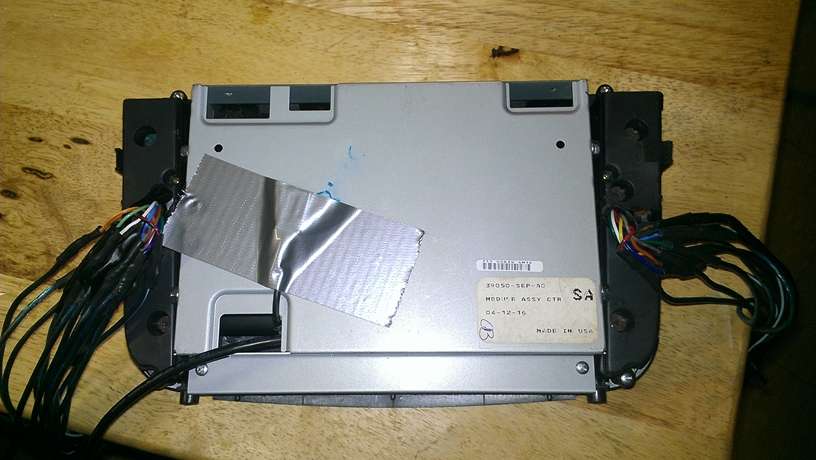
The foil you see is used to keep me melting the green harness, if I accidentally brush the soldering iron against it.
Heat Shrink tube.
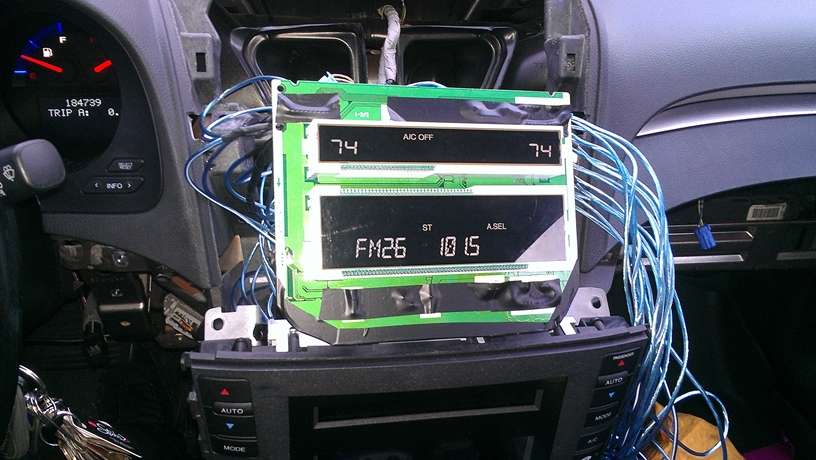
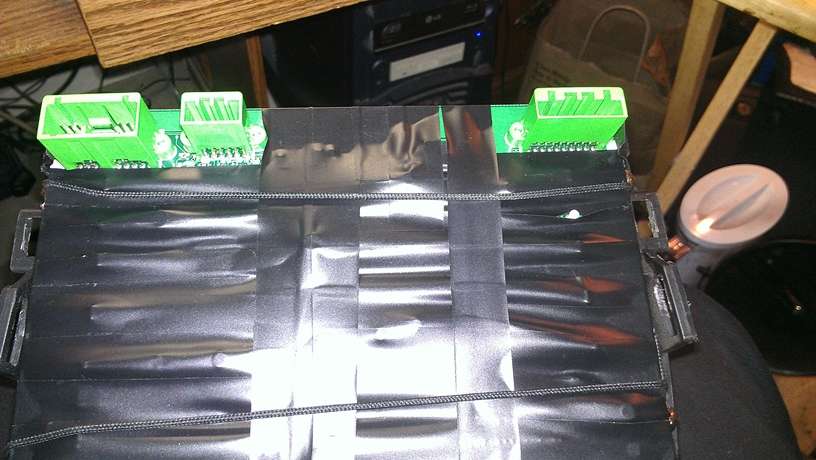
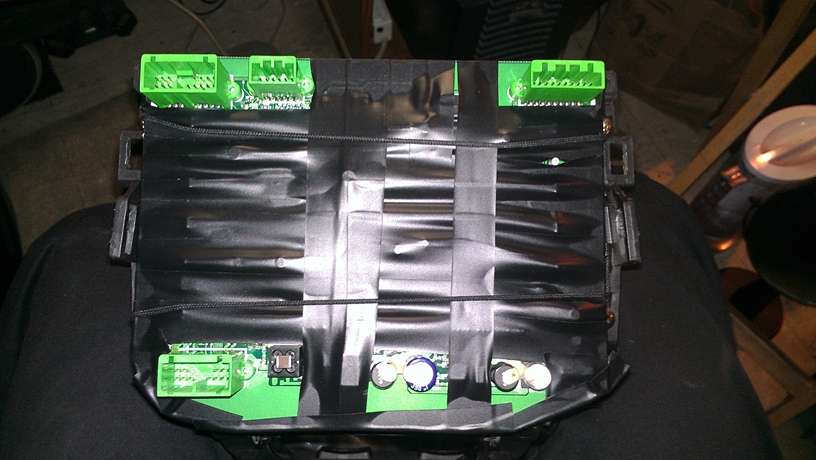
Many hours later....test run. You'll notice that the bottom corners are cut off of the printed circuit board. I needed to do this to accommodate the air ducts that run down the center console for the back seat vents.
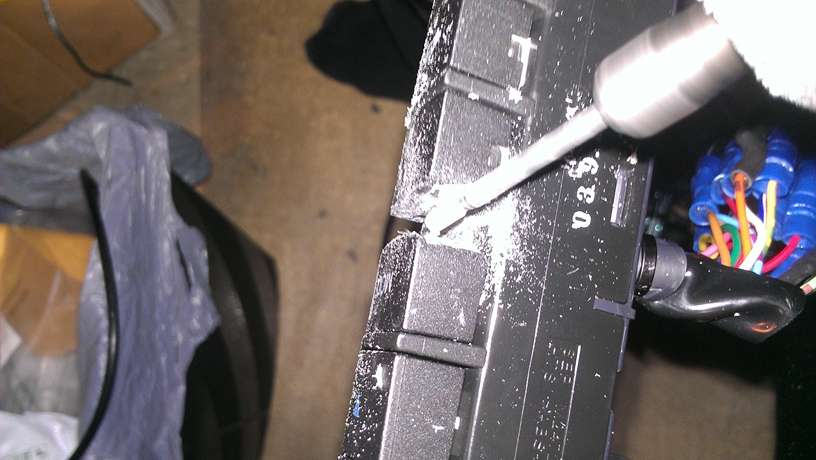
Electrical tape wrapped around everything, because I'm paranoid.
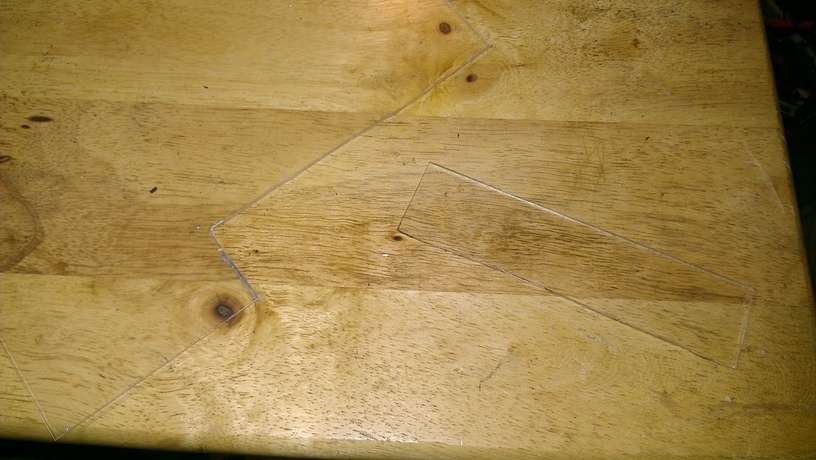
A piece of Acrylic from Home Depot used to take up the space between the HVAC/Radio Display and the center console frame.
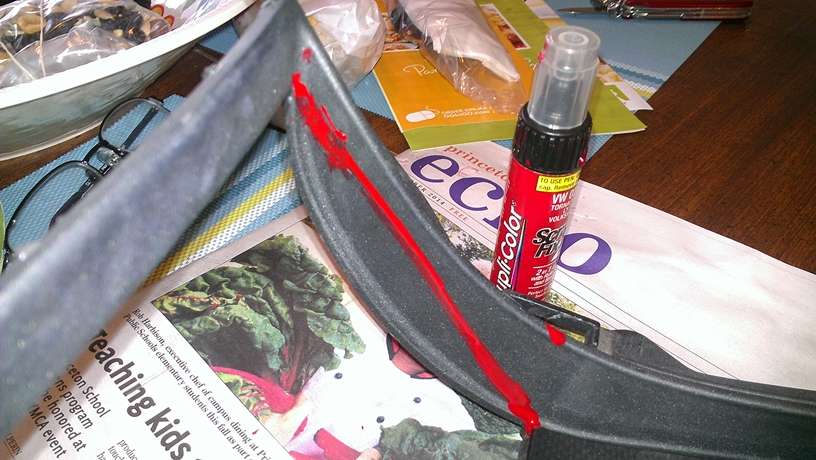
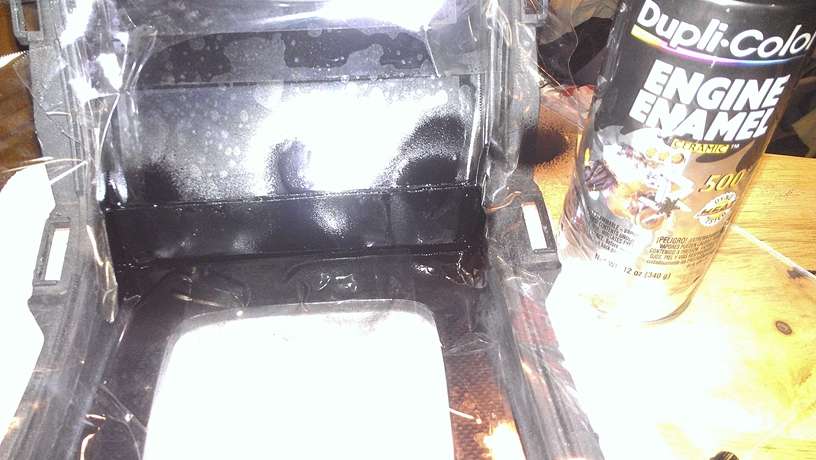
Painting the acrylic black. The surrounding areas are masked off with tape.
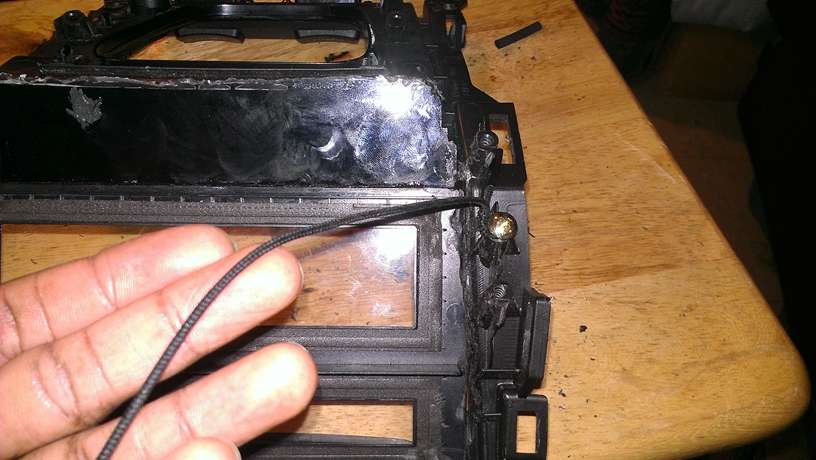
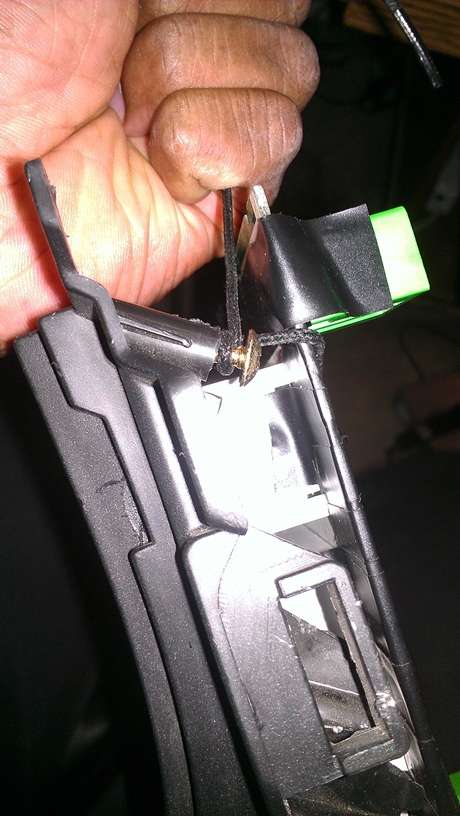
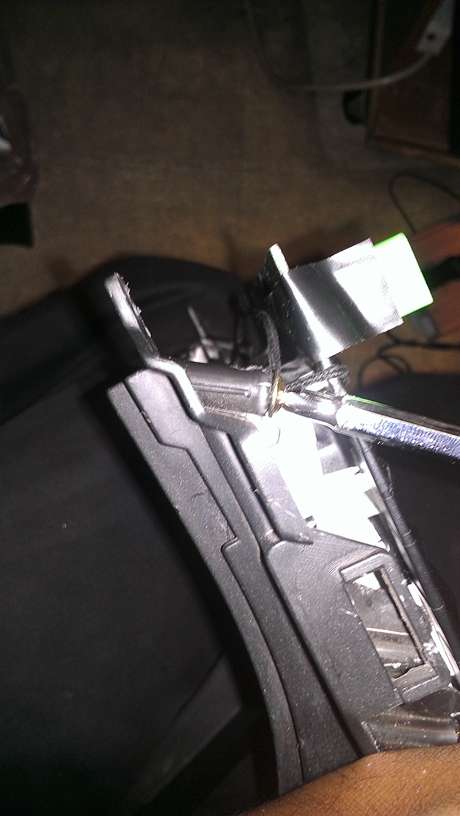
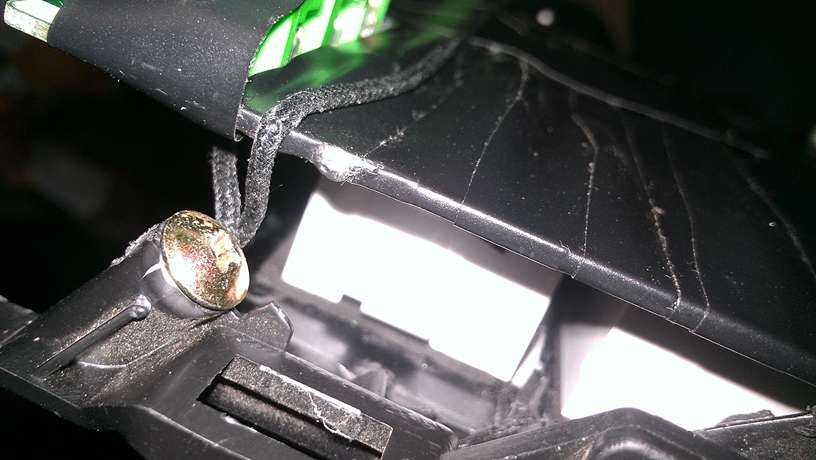
Securing the PCB to the Console Frame
Shoe lace tied around the stock screws.
Fitting the Tablet
This is the part that gave me the most difficulty during this project. The USB port on the 2nd generation Nexus 7 cannot be removed from the board. To make it the USB cable fit, I had to hollow out both the Mode and A/C buttons on the passenger side controls. It took a lot of trial and error to get it right. I would get it to fit, but the USB cable would cause the climate control buttons to stick.
There was also the issue of fitment of the tablet itself. There's little wiggle room in there, and sometimes the tablet itself would press against the sides of the climate control buttons causing them to stick.
Another problem was that sometimes when I did press the buttons, they would knock loose the USB cable from the tablet.
Eventually it all worked out, but it took a lot of cutting, and tweaking to get everything to fit flush and functional.
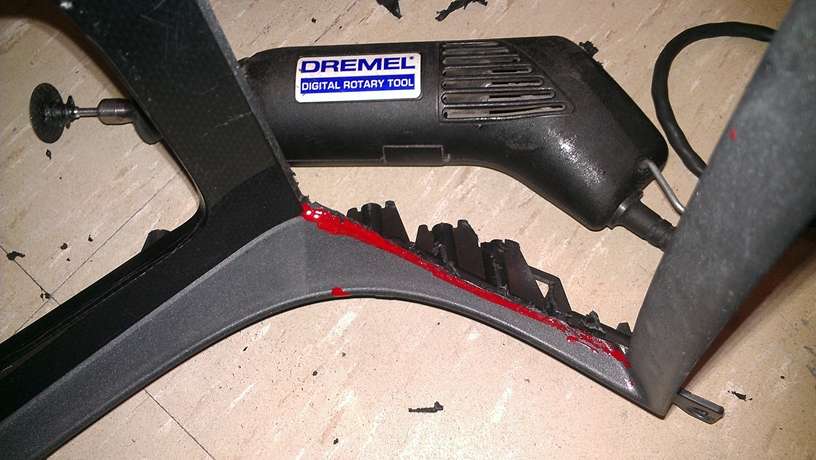
Oh @#$%. Be careful with that Dremel.
Hollowing out the HVAC buttons.
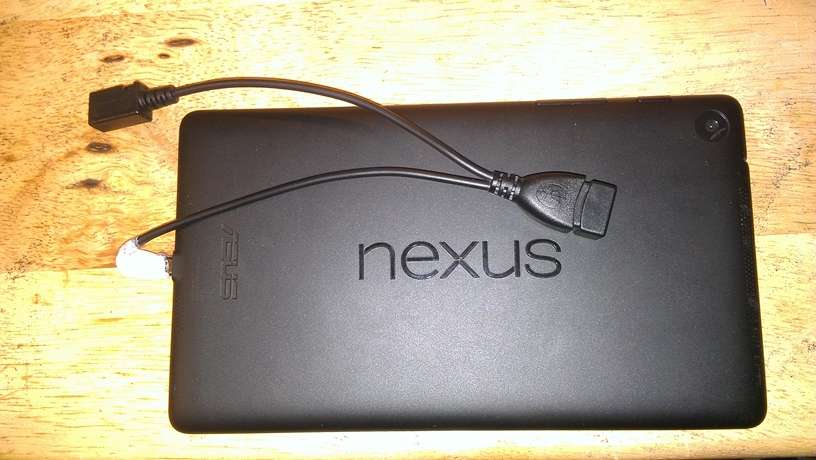
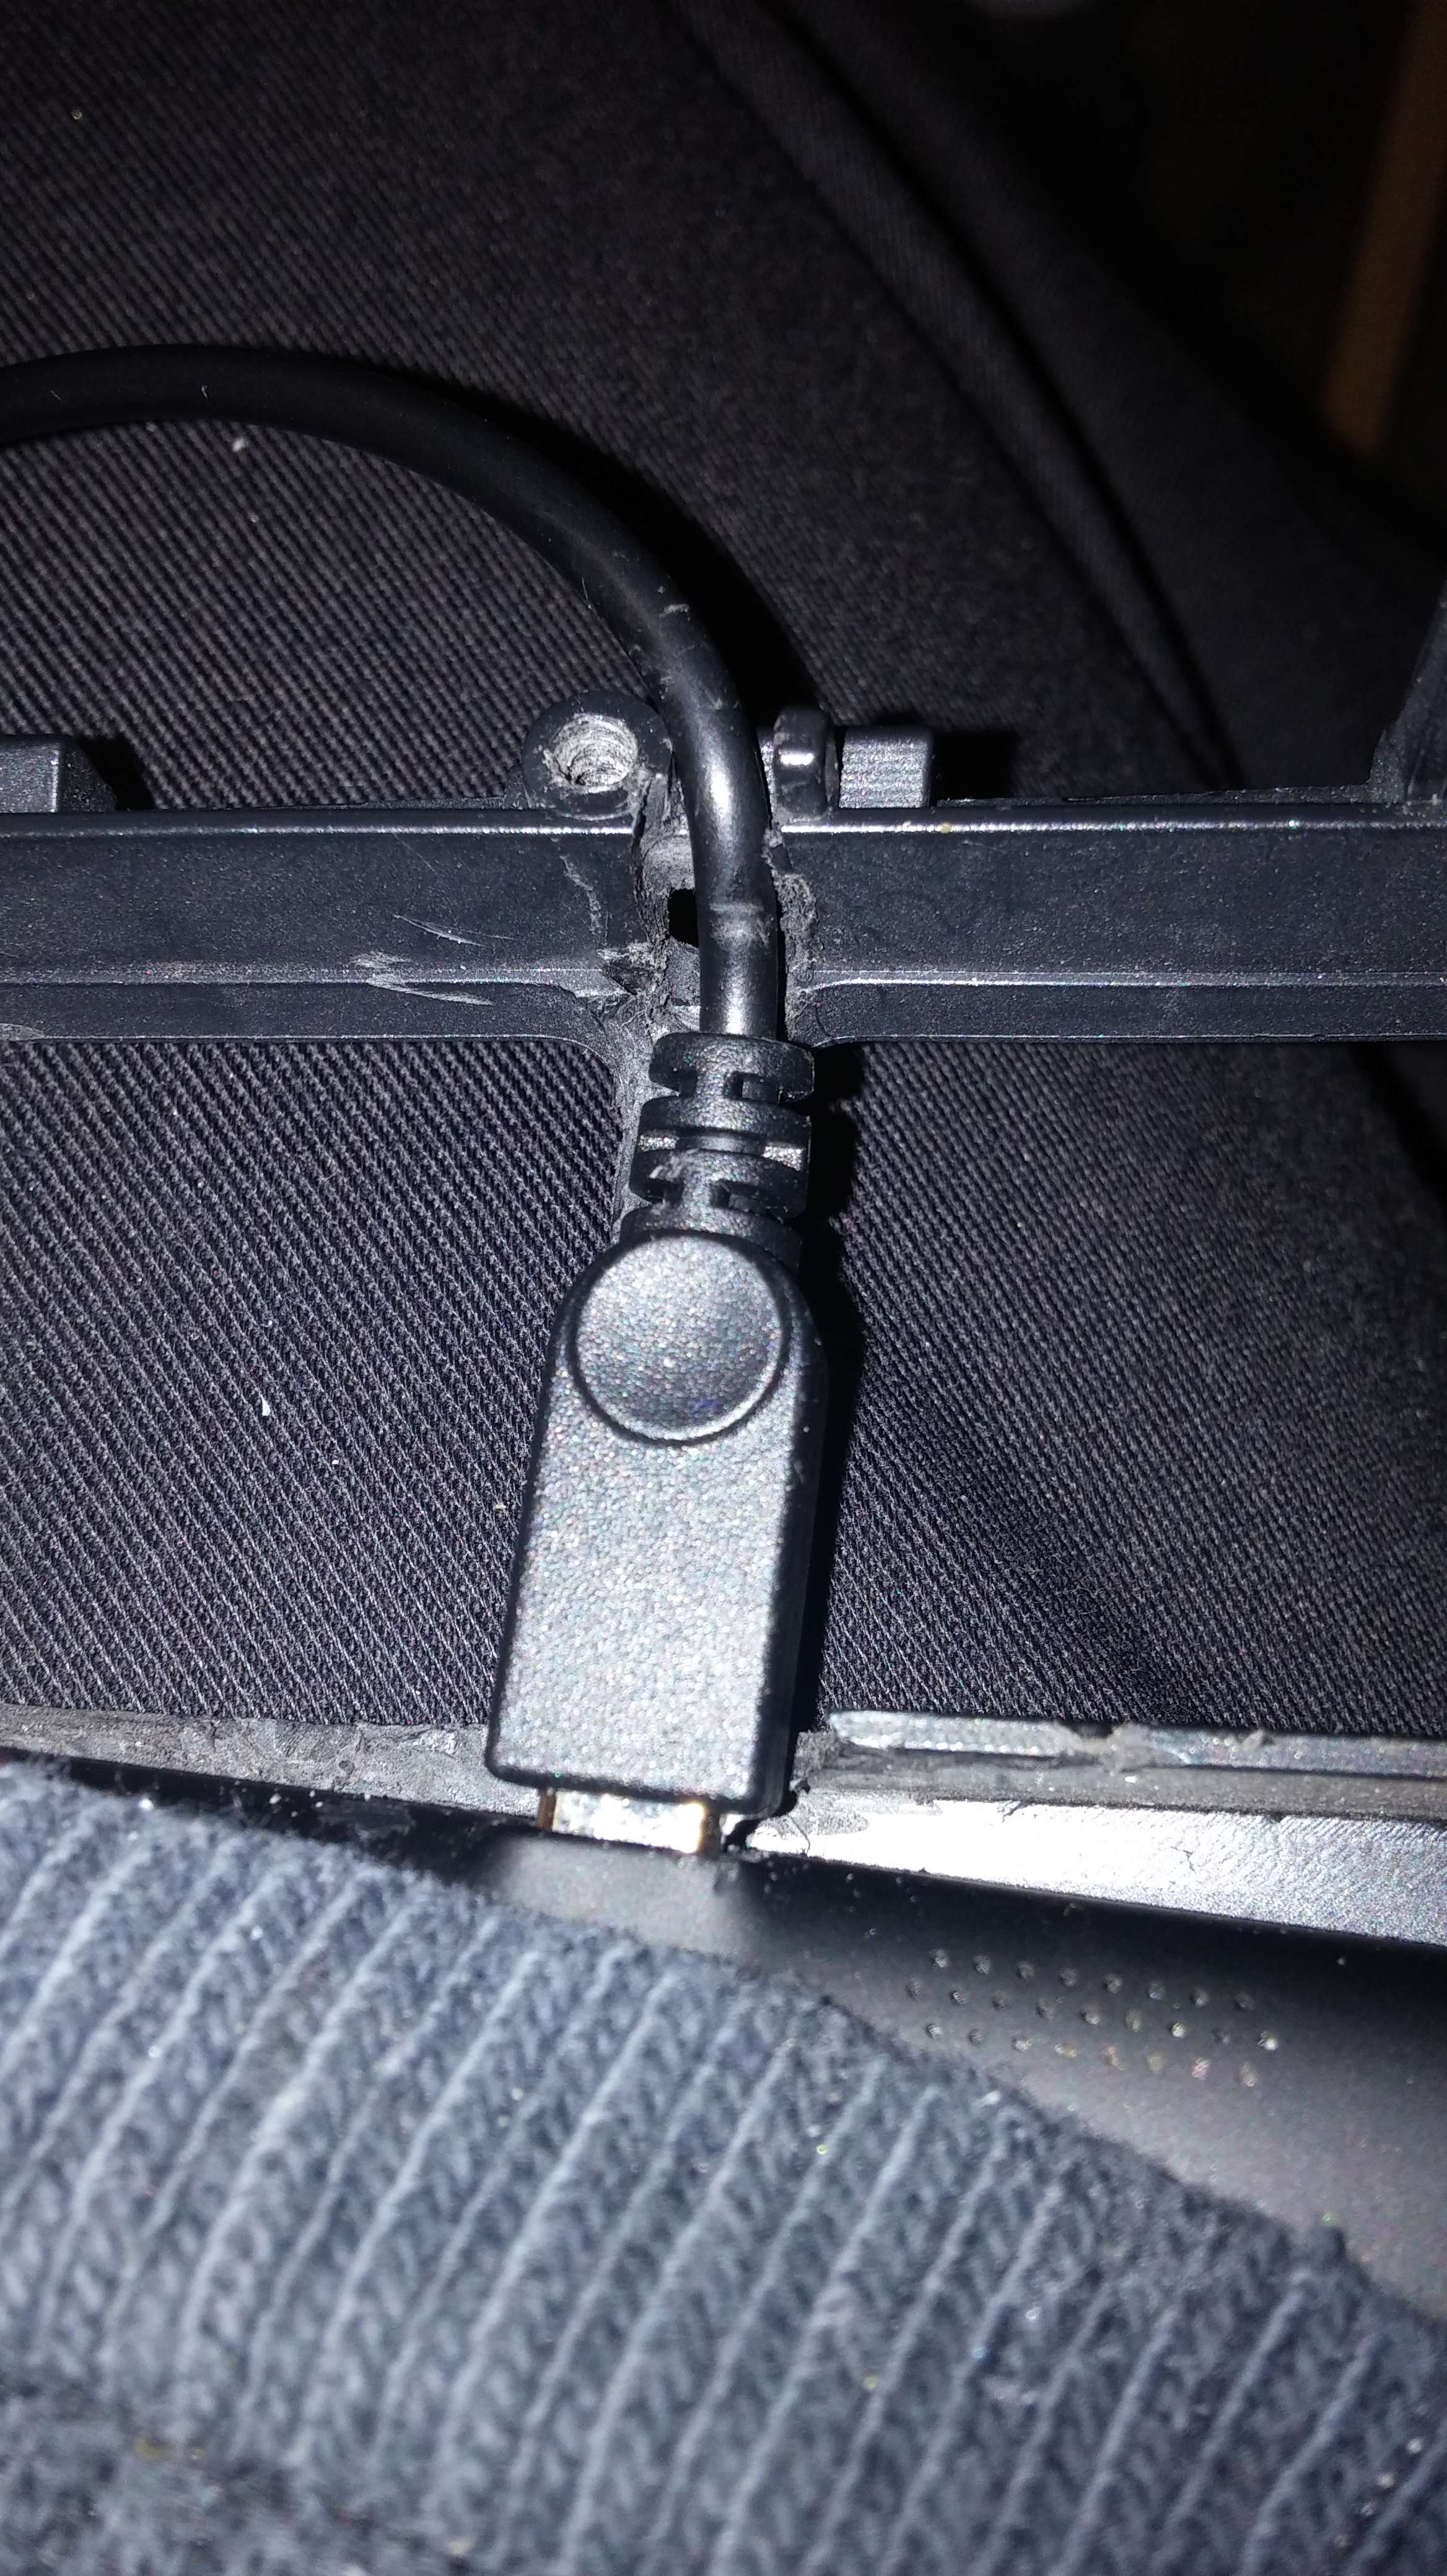
This is the USB OTG cable. As you can see, I had to break the casing off of the cable to make it fit between the tablet and the HVAC buttons.
Better safe than sorry, but even some of this had to be removed as it too ended up interfering with the HVAC buttons.
[img]http://imageshack.com/a/img907/9017/xss96y.jpg[/img Short USB extension cable.
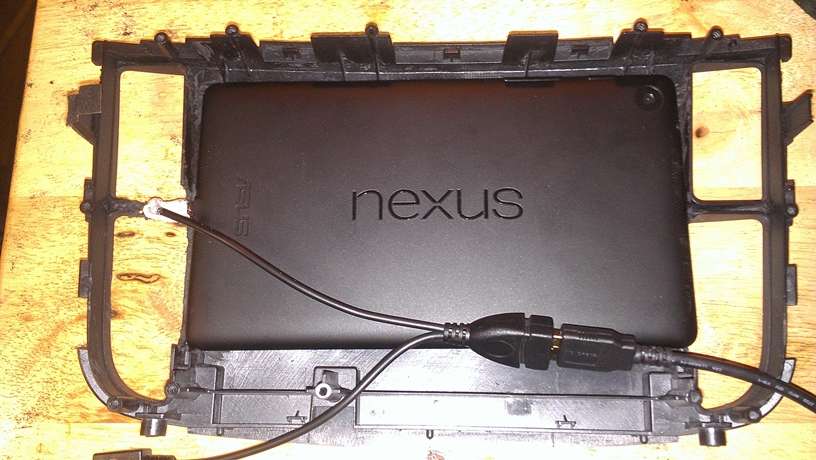
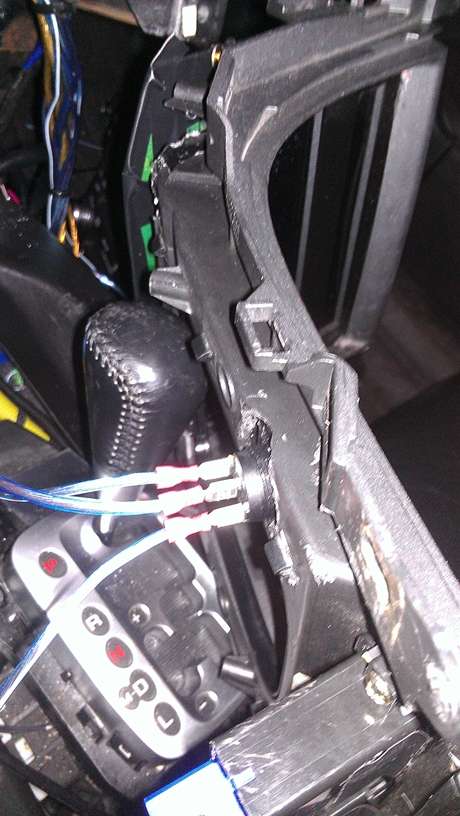
This is how I fastened the tablet to the frame. No glue needed here. Ignore the crimp connectors. This picture was taken before I went back to solder everything.
You'll need this to make everything stay attached in the car. I had to cut the sides way down to accommodate the tablet and the USB OTG cable.
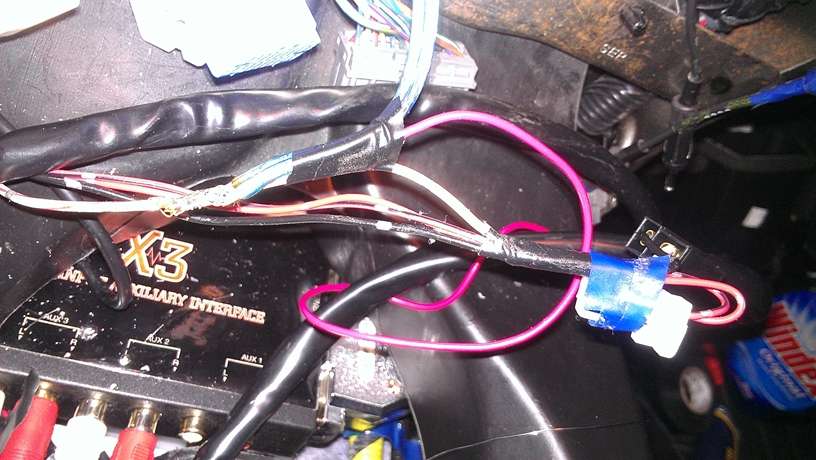
DC to DC power supply with micro USB connector I soldered on the output side, and an inline fuse connector I soldered to the input side.
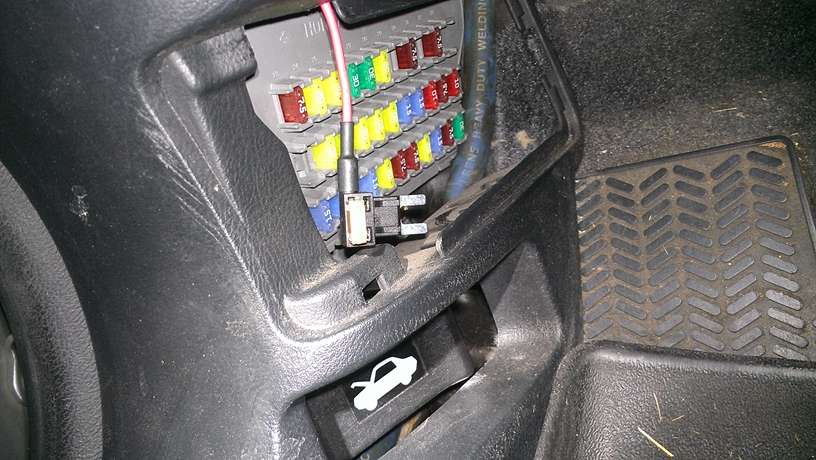
I soldered the input of the DC-DC power adapter to the cigarette lighter line. I used some speaker wire to extend the length of the connection so the DC-DC adapter can sit at the top of the dash, near the center channel speaker.
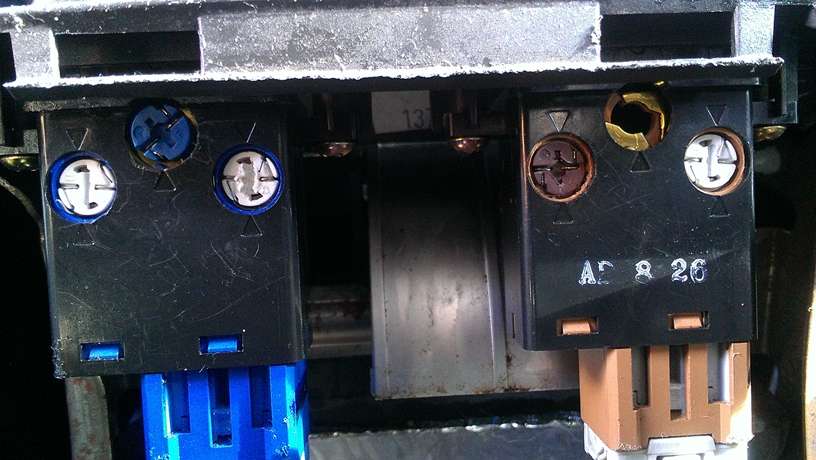
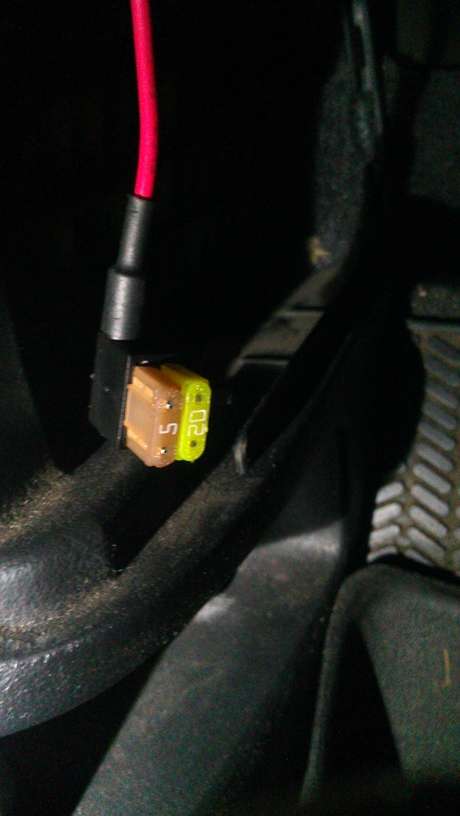
5 amp fuse.
I grounded everything here.
Toiling at crazy hours.
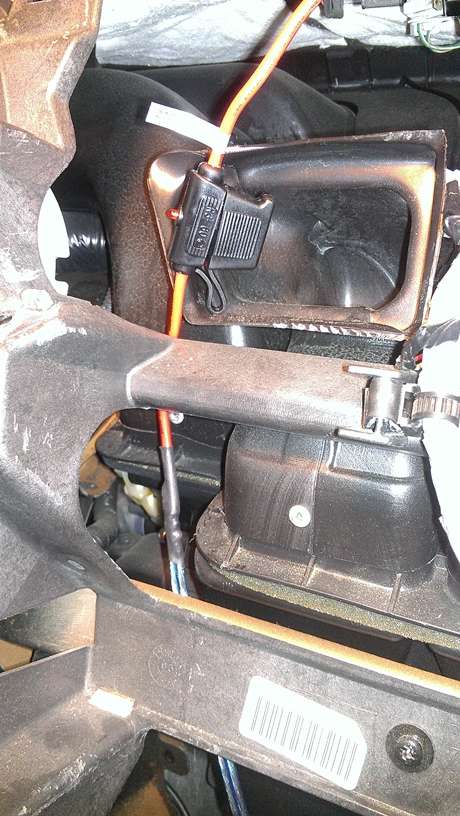
I had to lengthen these wires too.
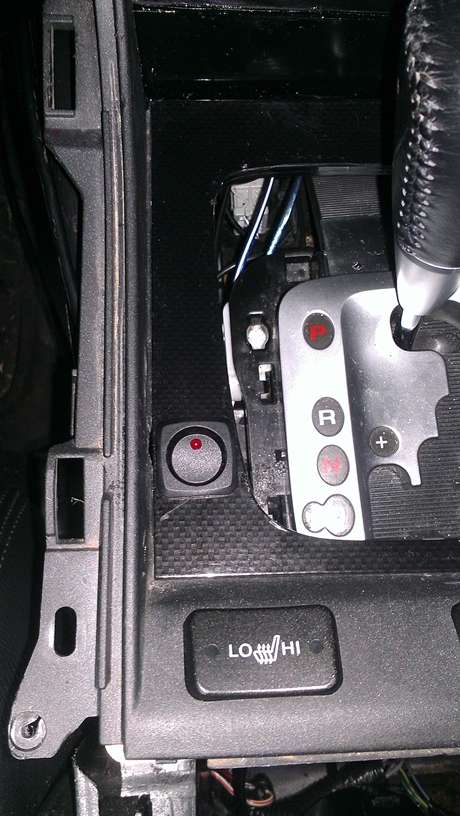
I opted to include a toggle switch so the tablet can charge while the vehicle is off. I mounted the switch to the center console, left of the transmission lever. I wired it to the driver seat slide fuse, since that fuse is constantly powered.
Switch end of the wire.
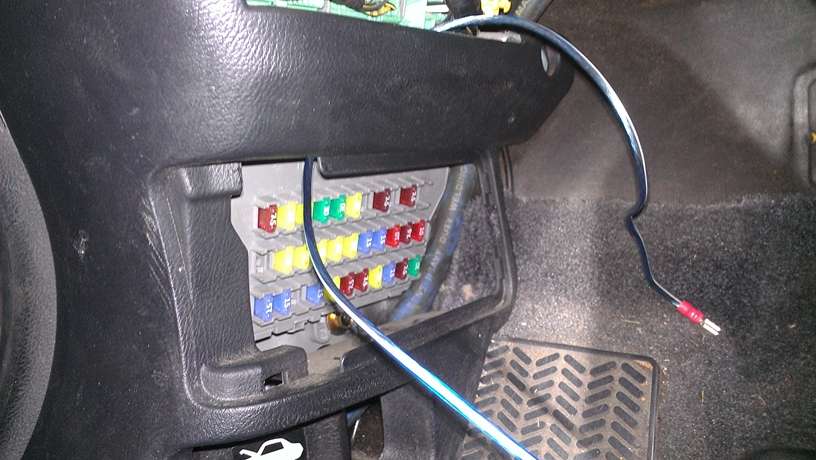
Fuse box end of the wire, with fuse tap soldered on
5 amp fuse for the switch, and the stock 20 amp fuse for the driver's seat.
Power in the middle, ground at the top, accessory at the bottom. I blew fuses figuring this one out.
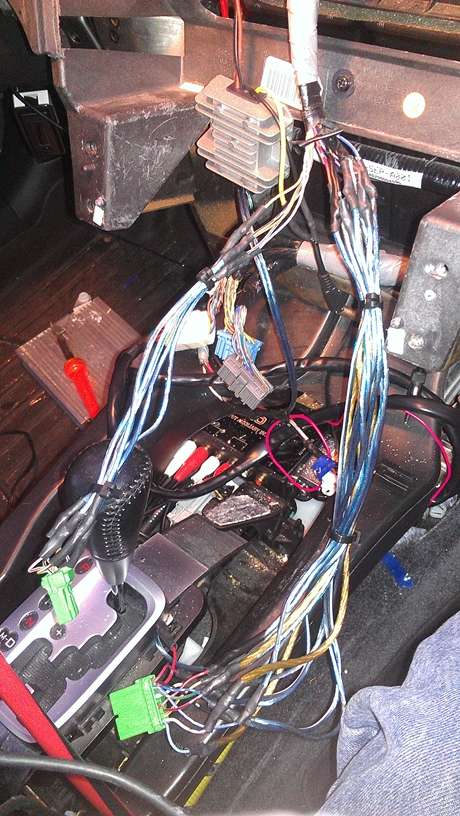
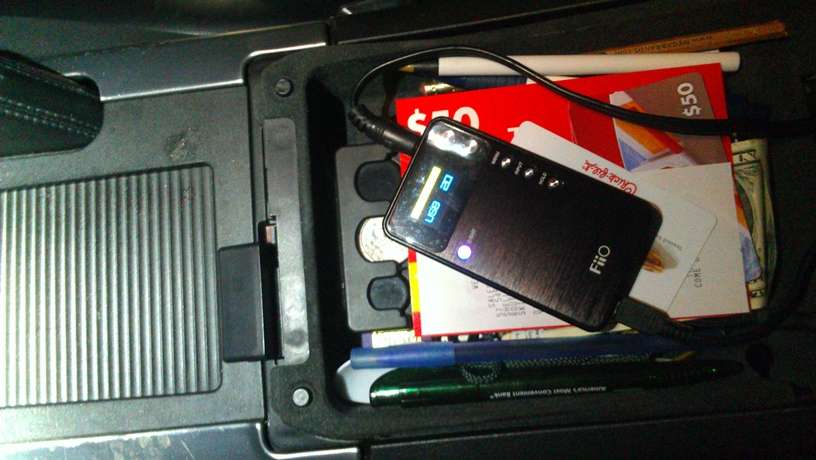
Audio USB DAC
Test run using DSub for Android. In the car, I found that a volume setting of 45 on the FiiO E17 worked best for me.
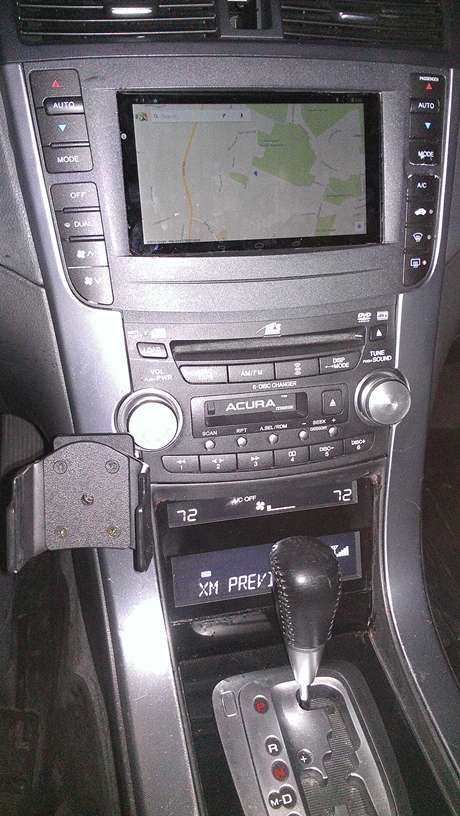
All buttoned up. The thing on the left is a ProClip brand holder for my cell phone.
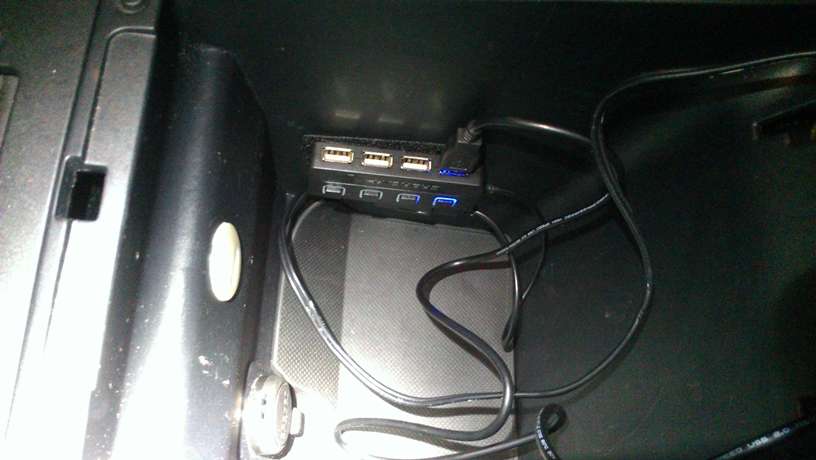
The longer USB extension cables run through the center console to this USB hub.
Remember to set the FiiO to remember the last volume setting you used, or it will reset to 20 every time you switch it back on.
The setup worked for a few days, then hiccups appeared.
1. The USB DAC occasionally soft disconnected from the tablet. I tracked the problem to the length of wire between the tablet and the hub. When I plugged the FiiO E17 directly into the OTG Y-cable, the sound worked consistently.
2. For some reason, USB hubs stopped working with the tablet. I tried using a hub with its own power source, but it didn't help. I'll experiment more and update as I figure things out.
3. Over the course of trying to diagnose what had gone wrong, I had to reach the OTG cable I taped to the back of tablet. Problem is, I didn't leave an access port for the wires in the metal frame that holds it all in the dash. So I had to dig everything out again, and cut access holes.
I also took a minute to cut an access port for the power and volume buttons, should I ever need to reach them.
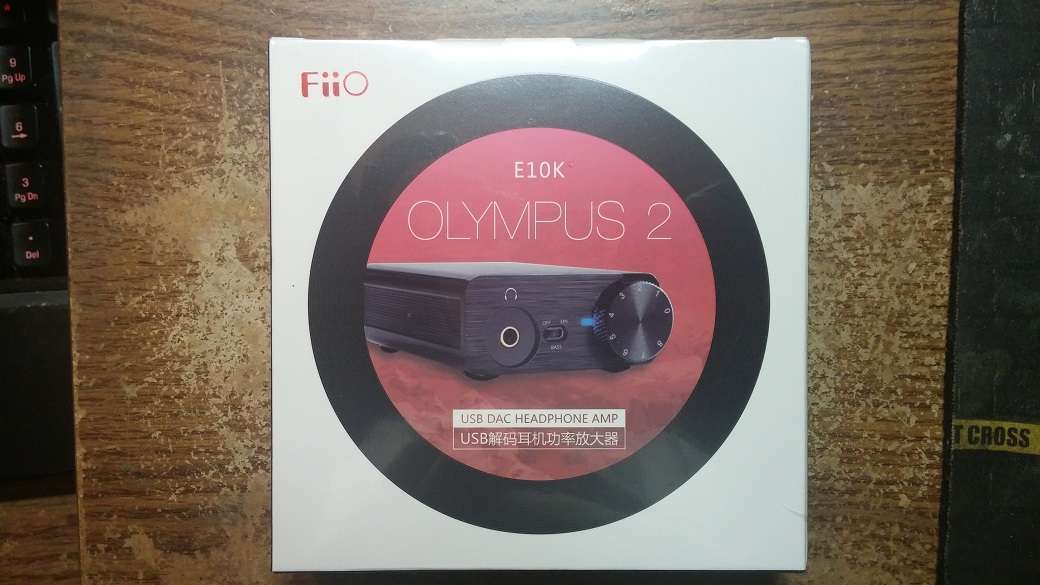
4. I grew weary of having to power on the E17 to hear the tablet every time I got in the car. To remedy this, I purchased a FiiO E10K [and not the vanilla E10].
It is bus powered, and activates on its own when I turn the key. It too did not work well with the long wires. When I removed one segment of the extended wire, the sound worked but it would garble due to what I assume is signal degradation, or the audio equivalent of an HDTV momentarily pixelating during a moment of signal loss. When I plugged the FiiO E10K directly into the OTG cable, it sounded fine.
What's strange to me is it all worked fine at the beginning.
I'll update further if as I progress.
Last edited by JMiles_T; Nov 17, 2014 at 12:49 PM.
Reason: grammar
The setup worked for a few days, then hiccups appeared.
1. The USB DAC occasionally soft disconnected from the tablet. I tracked the problem to the length of wire between the tablet and the hub. When I plugged the FiiO E17 directly into the OTG Y-cable, the sound worked consistently.
4. I grew weary of having to power on the E17 to hear the tablet every time I got in the car. To remedy this, I purchased a FiiO E10K [and not the vanilla E10].
Please keep us posted. I haven't had the issue with longer USB wires, and haven't heard about it with others, but good to share it in case it comes up.
Also a big fan of the E10k (replace the E07 for me) - good quality device, powers on as needed.
It was the USB OTG cable, but not because I cut the plug case off.
I tried it again with an unaltered USB OTG cable, and it worked while everything was on by desk but failed again when I put everything back in my car.
The problem was I apparently bent the wire too much when squeezing it between the HVAC buttons. This caused the death of two USB OTG cables. Thankfully I ordered 3 at the start. So I needed to find a way to get an unaltered USB OTG cable to fit through the HVAC buttons. The solution was lots more cutting of the buttons.
I had to remove a ton of plastic from the assembly. As you can see, I needed to dig down into the button casing a bit to make the USB OTG cable fit without altering the cable.
This is how I routed the wire on the third attempt. The bend of the wire is less severe this way. The wire is not visible once the center console trim pieces are put on.
In addition to the above, I found a way to route the USB extesion to my hub in the armrest using only one 3 foot extension, and one 1.5 foot extension. This should alleviate any problems that might have come up from the wires being too long.
Very short video. If you don't like house music, then don't play it.
It was the USB OTG cable, but not because I cut the plug case off.
I tried it again with an unaltered USB OTG cable, and it worked while everything was on by desk but failed again when I put everything back in my car.
The problem was I apparently bent the wire too much when squeezing it between the HVAC buttons. This caused the death of two USB OTG cables. Thankfully I ordered 3 at the start. So I needed to find a way to get an unaltered USB OTG cable to fit through the HVAC buttons. The solution was lots more cutting of the buttons.
[/url]
Thanks for the follow-up - congrats on tracking it down! Sounds like connecting the 2013 Nexus is much tougher than the 2012 Nexus, where the micro-USB port can be moved. The 2013 has a faster processor and better resolution, but I don't know if either of those is critical for this type of car application.
Yes. Since I've already discovered all the hurdles one might encounter, I feel like there's nothing to be afraid of anymore.
I've started using bluetooth tethering instead of Wifi to get internet access on the tablet.
It's less of a battery drain for my phone, and while I could plug it into the charger, I wanted this setup to be as close to get in, start up, drive off as possible.
The Tasker app is setup to start my music program as soon as I start the car.
A nice unexpected bonus is the front facing camera ended up pointing at an angle that will capture my face without my having to lean way over the center console, so I can use Skype in the car if I choose to. It's the same for whoever's sitting in the passenger seat.
Sounds like connecting the 2013 Nexus is much tougher than the 2012 Nexus, where the micro-USB port can be moved.
In my opinion this is the easier job. My troubles were with overestimating the durability of the USB-OTG cable. Once you've seen what needs to be done, and more importantly what not to do with your wires you'll be fine.
Between the two tablets, the choices are:
Modify the Gen 1 Nexus 7 to fit the car.
Modify the car's HVAC buttons to fit the Gen 2 Nexus 7.
Benefits of using the 2012 Nexus 7 are:
1. It has more ROMs from which to choose
2. It's about $80 cheaper than the 2013 Nexus 7
3. You won't need a USB DAC to get sound out of it since you can just use the headphone jack.
Personally, I'd rather just do more cutting the the Dremel than have to open up the tablet and perform surgery with the electronics. I feel like I made the right choice in using the 2013 version.
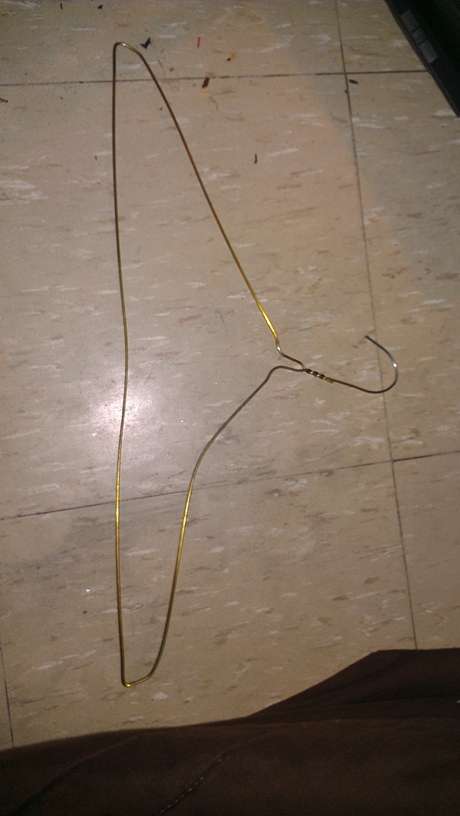
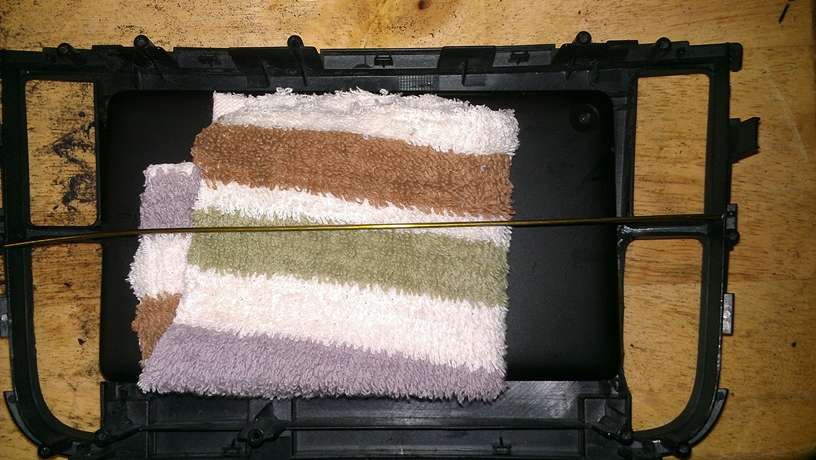
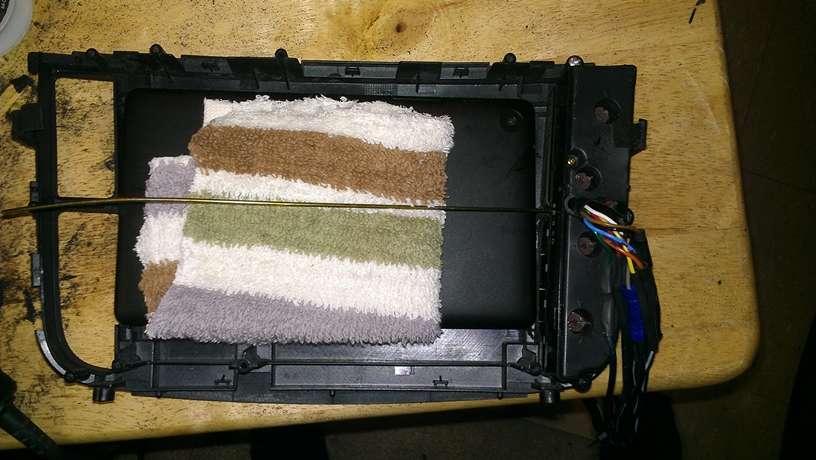
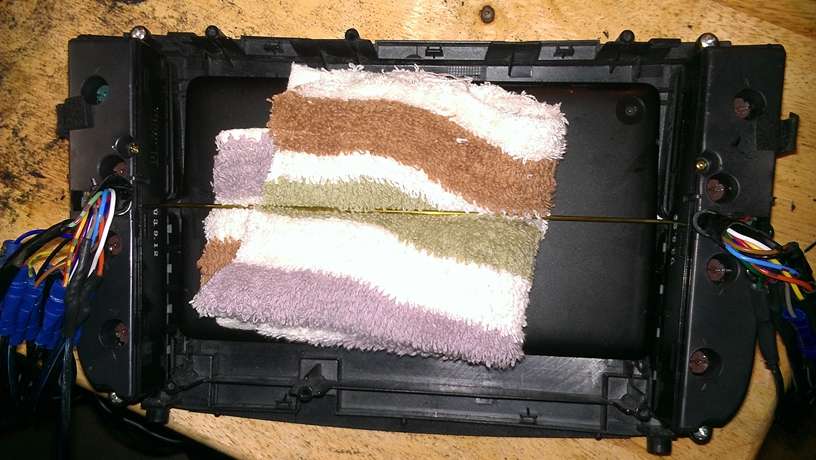
There has got to be a better way to secure the Nexus than a towel and a metal hanger.
I think this is an awesome project and will be purchasing a spare radio unit. I have an 07' Type S so I do not need to relocate the HVAC display, all I have to do is remove the Nav display.
If you find one that doesn't require gluing or otherwise permanently altering the tablet, let me in on it.
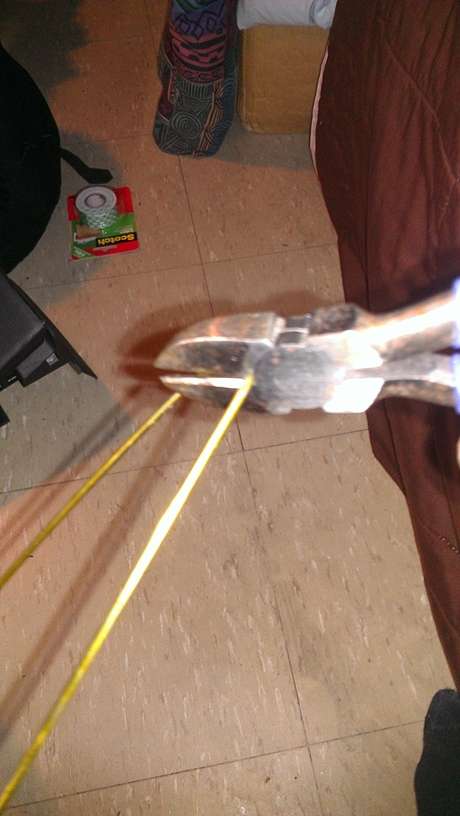
I actually used two pieces of coat hanger. It's not elegant but it's secure, and makes the tablet fit flush against the dash. In fact I have to deliberately push pretty hard to even begin to make the tablet budge back toward the firewall, and when I let go it just bounces right back.
If you find one that doesn't require gluing or otherwise permanently altering the tablet, let me in on it.
I actually used two pieces of coat hanger. It's not elegant but it's secure, and makes the tablet fit flush against the dash. In fact I have to deliberately push pretty hard to even begin to make the tablet budge back toward the firewall, and when I let go it just bounces right back.
I know in one of the Nexus 7 install here somebody used some sort of putty to make a mold, and it wasn't permanent. Looked a bit less ghetto than a coat hanger and a towel.
That said, I don't see why everybody wants to modify the crap out of the car to try and fit the tablet instead of modding the USB cable or the tablet.
You can technically make it *almost* flush with the port on the Nexus 7 (I don't know if a 90 degree angle connector would fit, but that could be an alternative without any soldering) and simply have the wires sticking out instead of having a whole inch of cable + insulation blocking you from fitting it properly. I'm not saying it's terribly easy, but it might net you enough space so you don't have to butcher your car control.
Buy one of these, wire it to your USB OTG cable
I imagine most people want to keep the table intact, but another option would be to simply solder to the pins where the USB connector attaches on the tablet and bring a second USB connector. Once again, should be decent. 5 little solders and a hella clean install.
That said, I don't see why everybody wants to modify the crap out of the car to try and fit the tablet instead of modding the USB cable or the tablet.
You can technically make it *almost* flush with the port on the Nexus 7 (I don't know if a 90 degree angle connector would fit, but that could be an alternative without any soldering) and simply have the wires sticking out instead of having a whole inch of cable + insulation blocking you from fitting it properly. I'm not saying it's terribly easy, but it might net you enough space so you don't have to butcher your car control.
That doesn't make any sense at all. Regardless of how you route the wires, you have to cut out the plastic of the stock display location to be able to see the tablet in the first place. So no matter what, you're going to cut into your dash if doing a tablet install.
The people who've taken on this project aren't stupid. I tried a 90-degree elbow, as I'm sure others who've taken on this project have thought to. It didn't fit. As I emphasized in the OP, the space is very tight.
Originally Posted by polobunny
That's my . I'd rather modify a $250 tablet than a 10K car.
The tablet is $250; the altered dash components are less than $60 on ebay. Not a hard decision.
That doesn't make any sense at all. Regardless of how you route the wires, you have to cut out the plastic of the stock display location to be able to see the tablet in the first place. So no matter what, you're going to cut into your dash if doing a tablet install.
The people who've taken on this project aren't stupid. I tried a 90-degree elbow, as I'm sure others who've taken on this project have thought to. It didn't fit. As I emphasized in the OP, the space is very tight.
The tablet is $250; the altered dash components are less than $60 on ebay. Not a hard decision.
I have never said anyone was stupid, these are your words and not mine.
As for the 90 degrees elbow, this was an idea, not an applied concept.
I have yet to see you address the second idea, which is 5 small solder points to the USB connector pins inside the N7 and routing the cables outside instead of having to butcher plastic and have difficulties with buttons sticking or similar.
That said, with the $60 price of the plastic parts (OEM or third party?), I imagine most would opt to butcher the plastic as you did. But to me, it looks like a ghetto solution at best and I'm sure you got the soldering skills to do something clean on the tablet. I also found out the whole daughter board with the USB connector goes for around ~$75, for what it's worth if anybody ends up totally burning the thing.
On an unrelated note, how do you manage with screen glare on the N7 in the car? I've seen another build with a matte screen protector put on the tablet to help and while I'm not a fan of it for my phone I imagine it could be a worthy addition for a car tablet install. Thoughts?
I'm planning a very similar build when winter's over and would rather use a N7 2nd gen than the 1st gen to take advantage of the better specs overall. I believe yours was the only one so far, so here's to that.
My bad if I offended you though, I might come out as nasty, but I swear it isn't the intention.
My bad if I offended you though, I might come out as nasty, but I swear it isn't the intention.
Fair enough.
Originally Posted by polobunny
I have yet to see you address the second idea, which is 5 small solder points to the USB connector pins inside the N7 and routing the cables outside instead of having to butcher plastic and have difficulties with buttons sticking or similar.
That might work, but it's a risk I choose not to take. What if a better tablet becomes available, and I want to remove this one to sell it? Who would want to buy a mangled tablet? Meanwhile, to get the car looking stock again, I'd just use this:
Originally Posted by polobunny
That said, with the $60 price of the plastic parts (OEM or third party?), I imagine most would opt to butcher the plastic as you did.
OEM. This is a very popular car. There are TLs crashing and breaking down all the time, leaving plenty of low priced junk parts for the rest of us.
Originally Posted by polobunny
But to me, it looks like a ghetto solution at best and I'm sure you got the soldering skills to do something clean on the tablet.
Bear in mind that we're putting a tablet into a dash; there's no way for that to not be ghetto.
I saw someone's use of molding putty (it's among one of the links in the OP) but I was concerned about durability. Which will take more abuse before surrendering, steel hangers or cured putty? I made the choice less likely to let the tablet fall back into the dash.
In addition, if I have to troubleshoot (which I did) I can disassemble and re-assemble everything using the same parts. Try that with adhesives.
I would have liked to keep the chopping to a minimum but at the end of the day, it's just a little more time with the dremel; no harm done. The links to other people's guides are at the top of my post. Had anyone else come up with a solution that's both elegant and at least as durable, I would have done it. When assembled, it all looks the same.
Here's someone's finished product:
Another one:
...and another:
How are the screens fastened to the dash in these cars?
If you want to risk doing surgery on the electronics, dig in. Let us know how it went. I'm not doing it.
Originally Posted by polobunny
On an unrelated note, how do you manage with screen glare on the N7 in the car? I've seen another build with a matte screen protector put on the tablet to help and while I'm not a fan of it for my phone I imagine it could be a worthy addition for a car tablet install. Thoughts?
I had a ScreenGuard on it, and I hated it.
There was a degradation in picture quality that I had trouble ignoring, so I pulled it.
One the bare screen, fingerprints are noticeable if there's enough sunlight shining into the car. I have a tiny microfiber cloth in the car for a screen wipe, but I haven't felt the need to use it. I usually have the brightness up higher during the day so any debris on the screen is harder to notice unless I'm deliberately looking for it.
Originally Posted by polobunny
I'm planning a very similar build when winter's over and would rather use a N7 2nd gen than the 1st gen to take advantage of the better specs overall. I believe yours was the only one so far, so here's to that.
That might work, but it's a risk I choose not to take. What if a better tablet becomes available, and I want to remove this one to sell it? Who would want to buy a mangled tablet? Meanwhile, to get the car looking stock again, I'd just use this:
OEM. This is a very popular car. There are TLs crashing and breaking down all the time, leaving plenty of low priced junk parts for the rest of us.
Bear in mind that we're putting a tablet into a dash; there's no way for that to not be ghetto.
I saw someone's use of molding putty (it's among one of the links in the OP) but I was concerned about durability. Which will take more abuse before surrendering, steel hangers or cured putty? I made the choice less likely to let the tablet fall back into the dash.
In addition, if I have to troubleshoot (which I did) I can disassemble and re-assemble everything using the same parts. Try that with adhesives.
I would have liked to keep the chopping to a minimum but at the end of the day, it's just a little more time with the dremel; no harm done. The links to other people's guides are at the top of my post. Had anyone else come up with a solution that's both elegant and at least as durable, I would have done it. When assembled, it all looks the same.
Here's someone's finished product:
Another one:
...and another:
How are the screens fastened to the dash in these cars?
If you want to risk doing surgery on the electronics, dig in. Let us know how it went. I'm not doing it.
I had a ScreenGuard on it, and I hated it.
There was a degradation in picture quality that I had trouble ignoring, so I pulled it.
One the bare screen, fingerprints are noticeable if there's enough sunlight shining into the car. I have a tiny microfiber cloth in the car for a screen wipe, but I haven't felt the need to use it. I usually have the brightness up higher during the day so any debris on the screen is harder to notice unless I'm deliberately looking for it.
Thank you for your opinion and observations. It's all very good information
Regarding junk/used parts, there's absolutely 0 3rd gen cars in junks around here. 0 parts available used here too, and I personally checked 3 places including the biggest one in Canada. Availability seems good for US owners, not so much for Canadian ones. Everything I buy I need to buy brand new and hope the shipping isn't bad if it's not from the local dealership.
Two small questions again: Have you thought about a backup camera, and if yes, have you found a way to interface it with the tablet so it would launch and app or something when you switched to reverse gear?
Second one: Have you thought of a way to interface screen brightness with the dimming of the dashboard lights when you switch your low/hi beams? When I tackle this project this upcoming summer I wish I could make the tablet as useful as possible and keep the "automation" of the car functions such as dimming.
It just occurred to me to thread long bolts through the metal backplate in order to hold the tablet in place. That will be a secure, and elegant solution. If I end up doing it, I'll post pictures.
Originally Posted by polobunny
Thank you for your opinion and observations. It's all very good information
Regarding junk/used parts, there's absolutely 0 3rd gen cars in junks around here. 0 parts available used here too, and I personally checked 3 places including the biggest one in Canada. Availability seems good for US owners, not so much for Canadian ones. Everything I buy I need to buy brand new and hope the shipping isn't bad if it's not from the local dealership.
You're welcome. I'm glad I could be of help.
For parts, use ebay. At the time of this post there are listings from at least 3 sellers who will ship parts through North America. Click Here for Parts
Originally Posted by polobunny
Two small questions again: Have you thought about a backup camera, and if yes, have you found a way to interface it with the tablet so it would launch and app or something when you switched to reverse gear?
I've had it in mind, but the holidays are upon us and I need to spend money toys for everyone else before I think about my own fun again. In theory, a mounted Bluetooth (or USB) camera could be powered by the backup lights which illuminate when you shift into reverse. Tasker could be programmed to switch to an app displaying footage from that camera when it detects the Bluetooth/USB connection.
When you shift out of reverse, the power is cut, and Tasker could be programmed to exit the viewer app when the camera stops transmitting.
Again, this is theoretical.
Originally Posted by polobunny
Second one: Have you thought of a way to interface screen brightness with the dimming of the dashboard lights when you switch your low/hi beams? When I tackle this project this upcoming summer I wish I could make the tablet as useful as possible and keep the "automation" of the car functions such as dimming.
I haven't noticed a dimming feature for the dash lights on my TL. Perhaps you have a newer model.
Tasker can adjust screen brightness using time of day and/or GPS data.
Mzilvar came up with a solution. He posted about it here.
It just occurred to me to thread long bolts through the metal backplate in order to hold the tablet in place. That will be a secure, and elegant solution. If I end up doing it, I'll post pictures.
You're welcome. I'm glad I could be of help.
For parts, use ebay. At the time of this post there are listings from at least 3 sellers who will ship parts through North America. Click Here for Parts
I've had it in mind, but the holidays are upon us and I need to spend money toys for everyone else before I think about my own fun again. In theory, a mounted Bluetooth (or USB) camera could be powered by the backup lights which illuminate when you shift into reverse. Tasker could be programmed to switch to an app displaying footage from that camera when it detects the Bluetooth/USB connection.
When you shift out of reverse, the power is cut, and Tasker could be programmed to exit the viewer app when the camera stops transmitting.
Again, this is theoretical.
I haven't noticed a dimming feature for the dash lights on my TL. Perhaps you have a newer model.
Tasker can adjust screen brightness using time of day and/or GPS data.
Mzilvar came up with a solution. He posted about it here.
I think the bolts will definitely be a more elegant and secure solution. Props.
As for the climate control, shipping ain't killing the deal this time. Hopefully I don't need it, but I know there's availability at least.
Regarding the theory of the backup cam, that's a good idea. I'm scared bluetooth would get annoyingly long for reconnecting/disconnecting though, which might make USB more advisable. Definitely interested in doing something of the sort when I do mine. I'll thinker more with the idea when I get closer to doing the N7 install. Tasker could definitely run an action whenever it sees the new device connected/disconnect.
The cluster can have 2 settings, one for day and one for night which activates whenever you switch from DRL to low-beams or high-beams. I'm looking to recreate this effect so as not to blind me while driving at night and ideally at the same as my headlight setting. I could build a tiny USB device that pretty much just once again intercepts the signal and acts as a new device on the tablet when switched on/off. Sounds a bit overdone for something that simple though.
Summary: Esky backup camera ($20) + Febon video converter ($77, convert analog video to digital). I'm not using Tasker, but you could automate the on/off process with that software. In fact, I may add that later today...
Summary: Esky backup camera ($20) + Febon video converter ($77, convert analog video to digital). I'm not using Tasker, but you could automate the on/off process with that software. In fact, I may add that later today...
I see that you got yours working and thank you for your build thread (always like pictures haha) but I'm mostly wondering how you would automate it yourself or if you would go the way Jmiles described about hooking in the reverse light to cut power or something else
I imagine you have an app for the backup camera? Have you coded it yourself or is there one people already use?
Also, have you thought of having steering controls for previous track/next track interface with the N7?
Yep, it would be similar to the plan JMiles described. The Febon device uses a small, free app called dashcam (linked), and power is supplied from the reverse light. So Tasker will look for power from the backup camera to the Febon device.
As I type this, I have my doubts it will work. Now I'm remembering why I just hit the app button manually when I'm backing into tight spaces. But it's worth a $2.99 shot (Tasker cost). I'll update this thread as I test.
Yeah, I'm not sure this will be possible unless the Febon device comes active/inactive depending whether the cam gets powered on/off and Tasker has something to be able to detect it.
Maybe you would be able to on/off the Febon using the reverse light and thus have something that could trigger Tasker and launch the app and whatnot.
Either way, keep us updated. It would really be cool. I'm trying to think of the simplest and cheapest way to do it... it ain't easy.
Idea:
What about a cheap hacked up joypad? "Press a key" > Tasker captures the event > Launches app/action.
Key doesn't really need to be pressed, just electrically triggered. Same could be done with the low-beams!
Cheap USB joypads are available on eBay and they're pretty easy to hack.
I felt inspired, so I decided to dig everything out and redo the mounting using my idea.
You're responsiveness/action is inspiring! After installing my system in June 2014, it took me 6 months before I would disassemble everything to improve positioning. Glad to see there is another good mounting solution - thanks!
Idea:
What about a cheap hacked up joypad? "Press a key" > Tasker captures the event > Launches app/action.
Key doesn't really need to be pressed, just electrically triggered. Same could be done with the low-beams!
Cheap USB joypads are available on eBay and they're pretty easy to hack.
Definitely possible and a good idea! I'll probably just stick with my manual on/off process, as I only need the camera selectively (living in Denver). When I lived in SF, I needed it all the time for parallel parking, etc. Keep us updated!
Definitely possible and a good idea! I'll probably just stick with my manual on/off process, as I only need the camera selectively (living in Denver). When I lived in SF, I needed it all the time for parallel parking, etc. Keep us updated!
I shall, whenever the time comes.
Also great job Jmiles! I might just go with that sort of mounting. Definitely looks better and less rickety.
That might work, but it's a risk I choose not to take. What if a better tablet becomes available, and I want to remove this one to sell it? Who would want to buy a mangled tablet? Meanwhile, to get the car looking stock again, I'd just use this:
OEM. This is a very popular car. There are TLs crashing and breaking down all the time, leaving plenty of low priced junk parts for the rest of us.
Bear in mind that we're putting a tablet into a dash; there's no way for that to not be ghetto.
I saw someone's use of molding putty (it's among one of the links in the OP) but I was concerned about durability. Which will take more abuse before surrendering, steel hangers or cured putty? I made the choice less likely to let the tablet fall back into the dash.
In addition, if I have to troubleshoot (which I did) I can disassemble and re-assemble everything using the same parts. Try that with adhesives.
I would have liked to keep the chopping to a minimum but at the end of the day, it's just a little more time with the dremel; no harm done. The links to other people's guides are at the top of my post. Had anyone else come up with a solution that's both elegant and at least as durable, I would have done it. When assembled, it all looks the same.
Here's someone's finished product:
Another one:
...and another:
How are the screens fastened to the dash in these cars?
If you want to risk doing surgery on the electronics, dig in. Let us know how it went. I'm not doing it.
I had a ScreenGuard on it, and I hated it.
There was a degradation in picture quality that I had trouble ignoring, so I pulled it.
One the bare screen, fingerprints are noticeable if there's enough sunlight shining into the car. I have a tiny microfiber cloth in the car for a screen wipe, but I haven't felt the need to use it. I usually have the brightness up higher during the day so any debris on the screen is harder to notice unless I'm deliberately looking for it.
Nice work man! I wanted to do the 2013 Nexus 7 but I couldn't bring myself to having to put up with all the extra cutting and modding so to you. A quick comment on the putty I used, its actually not an adhesive, it just forms a set mold that seals the tablet in. It's good up to 400 degrees F and is completely flexible once it sets which means I can just pop it in and out if I have to disassemble and re-assemble (which I've done numerous times). I've yet to have the tablet fall in, it's a bit different for me though since the navi brains is behind the tablet pushing on it as well. Anyways great job though, really looking good.
Awesome thread. Did you take the button housing apart when you dremeled out the buttons? If not how did you know where the physical button was inside the housing? I've got my dash torn apart at the moment but am stuck at this part and was a bit hesitant to mess with the buttons as I assumed they would be expensive to replace.
They are not to bad to replace. When I did mine I bought that whole display piece with the ac buttons for like 50 bucks on ebay. I didn't take the housing out when I did mine. If I remember correctly there isn't much to them.
Awesome thread. Did you take the button housing apart when you dremeled out the buttons? If not how did you know where the physical button was inside the housing? I've got my dash torn apart at the moment but am stuck at this part and was a bit hesitant to mess with the buttons as I assumed they would be expensive to replace.
Thanks.
Before you start, I recommend you put a few layers of tape over the button faces so you don't accidentally scratch them while you work.
I didn't originally know if the buttons would survive the cutting. Fortunately I had two sets of buttons so if I ruined one, I could try again with the other one.
It didn't come to that though.
I did not need to disassemble the button housing. When I cut into it, it was as you see it: From this angle you can see the white button structure in the gap between the black button covers and the housing. Look closely and notice that I didn't cut any further into the housing than the seam that runs horizontally across the housing.
This is how it looks when it's sitting in the frame; plenty of room for the USB-OTG cable.
JMiles_T thanks for the tip with the buttons. I ended up doing almost exactly as you described. I took a 1/4" drill bit and slowly drilled through the top half of the button assembly right where you had the picture of your cutout. Once I was through the outer wall I could see that there was nothing in the top half between the AC and Mode buttons. Once that was clear I used a hacksaw to cut the top portion off along the edge of each button then cleared it all out as much as I could with my Dremel tool. I still had to shave off a bit of plastic on the OTG cable to get it to fit right but once that was done it fit really nicely. The only issue is the mode button does not click down nicely as it's rubbing against the cable, but I can live with that as the button still works and it looks great.
I'd also like to give a huge thanks to Triax37 as my install aside from the Nexus 2013 is almost a carbon copy of his. I did mount the tablet a bit differently. I got some foam weather stripping from home depot and stuck it around the edge of the navi bezel to cushion the tablet and fill up any gaps. Then I took the metal box off of the old navigation screen and got some longer screws than the ones that were used to mount that screen. Then just screwed both of them down tight and it worked perfectly. Unfortunately I didn't take any pictures during the process but here is one of the finished product.
I'd also like to give a huge thanks to Triax37 as my install aside from the Nexus 2013 is almost a carbon copy of his. I did mount the tablet a bit differently. I got some foam weather stripping from home depot and stuck it around the edge of the navi bezel to cushion the tablet and fill up any gaps. Then I took the metal box off of the old navigation screen and got some longer screws than the ones that were used to mount that screen. Then just screwed both of them down tight and it worked perfectly. Unfortunately I didn't take any pictures during the process but here is one of the finished product.
You're very welcome, brother! My pleasure! Love the final picture - looks a lot like my car.
I am surprised OP didn't mention about batter drain during idle. My nexus 7 consumes 12-14% of battery during sleep. SMH.
That means there is something preventing your tablet from going into deep sleep. I typical Nexus install will lose 3-4% every 24 hours of deep sleep. Every now and then I have something that drains the battery while it's supposed to be sleeping.
What ROM and Kernel do you have? What apps did you installed?
I use Timur's Kernel V3.0. It does come with Firm Sleep mode which was enabled, this is why I don't understand why it still draws too much power while idle/standby SMH. Most of the draw comes from Android systems: 78%, next is idle: 22% and google play service 19% . I only installed one app so far "Here" from Nokia for GPS. I also downloaded the "Deep Sleep Battery Saver" App with no help, it still draws a lot of power. Hope you can help. Thanks.
Originally Posted by Rhydon
That means there is something preventing your tablet from going into deep sleep. I typical Nexus install will lose 3-4% every 24 hours of deep sleep. Every now and then I have something that drains the battery while it's supposed to be sleeping.
What ROM and Kernel do you have? What apps did you installed?
I would re-flash the tablet. That's what I just did with mine, but my issue wasn't with battery drain. There is something preventing firm sleep and a re-flash may solve this.


 http://www.amazon.com/gp/product/B00DVFLJKQ/ref=oh_aui_detailpage_o04_s01?ie=UTF8&psc=1" /> http://www.amazon.com/gp/product/B00DVFLJKQ/ref=oh_aui_detailpage_o04_s01?ie=UTF8&psc=1">http://www.amazon.com/gp/product/B00DVFLJKQ/ref=oh_aui_detailpage_o04_s01?ie=UTF8&psc=1


 . I'd rather modify a $250 tablet than a 10K car.