When you click on links to various merchants on this site and make a purchase, this can result in this site earning a commission. Affiliate programs and affiliations include, but are not limited to, the eBay Partner Network.
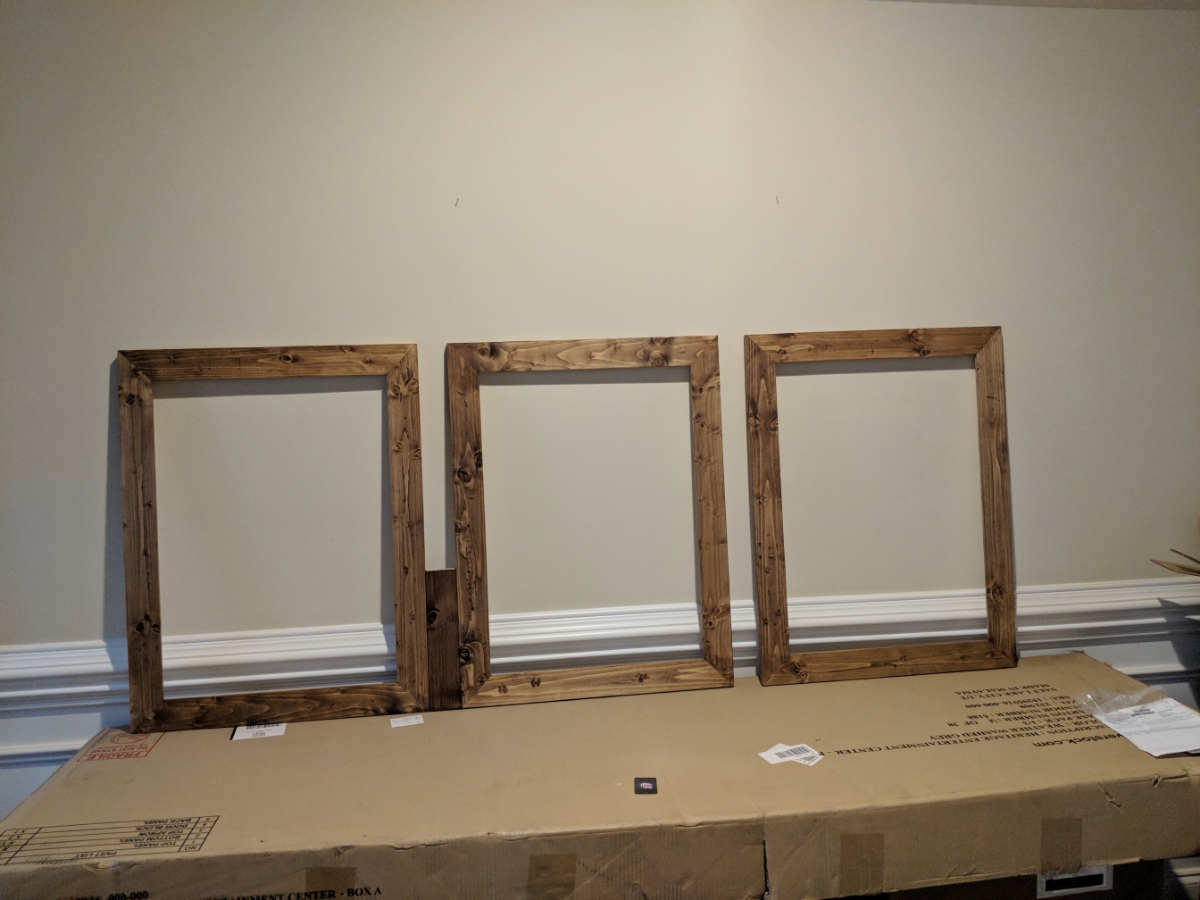
Finally got some more time to work on my pictures frames. My acrylic, matting, and backing board showed up this weekend so want to get them wrapped up so I can finally get these prints hung that I bought like 9 months ago.
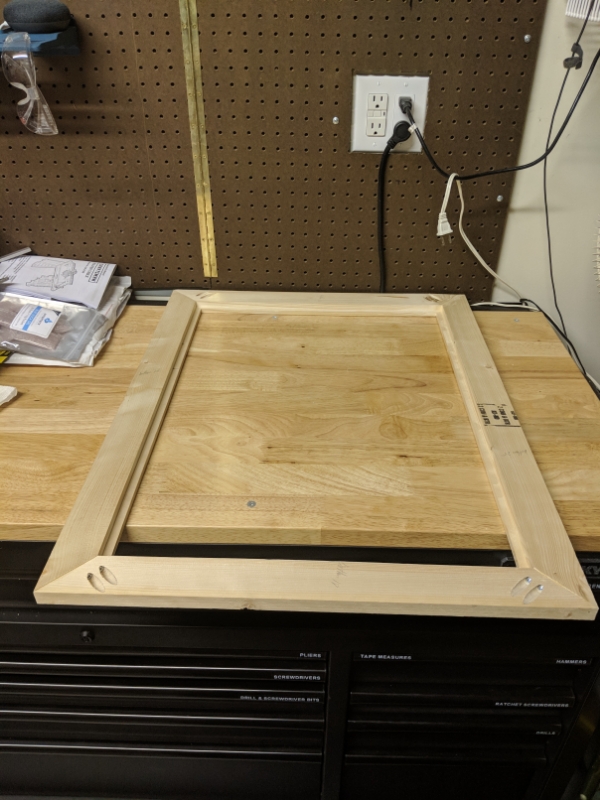
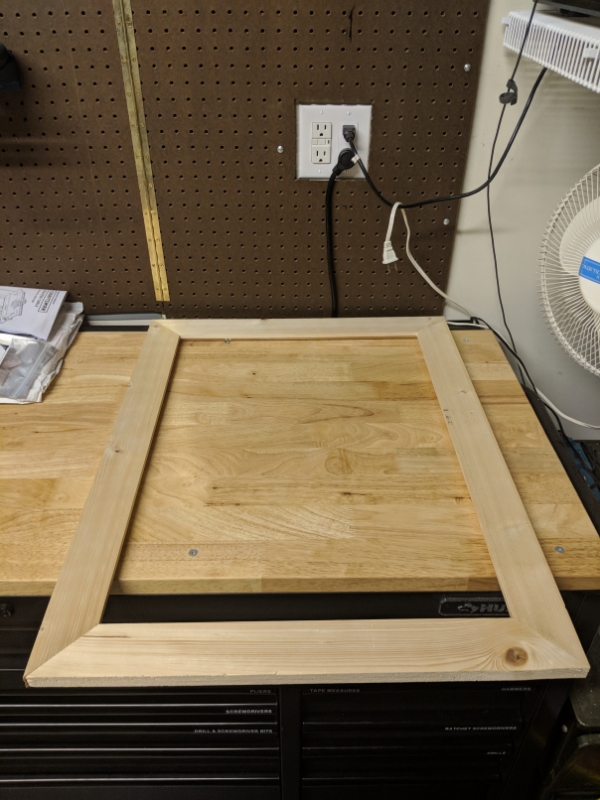
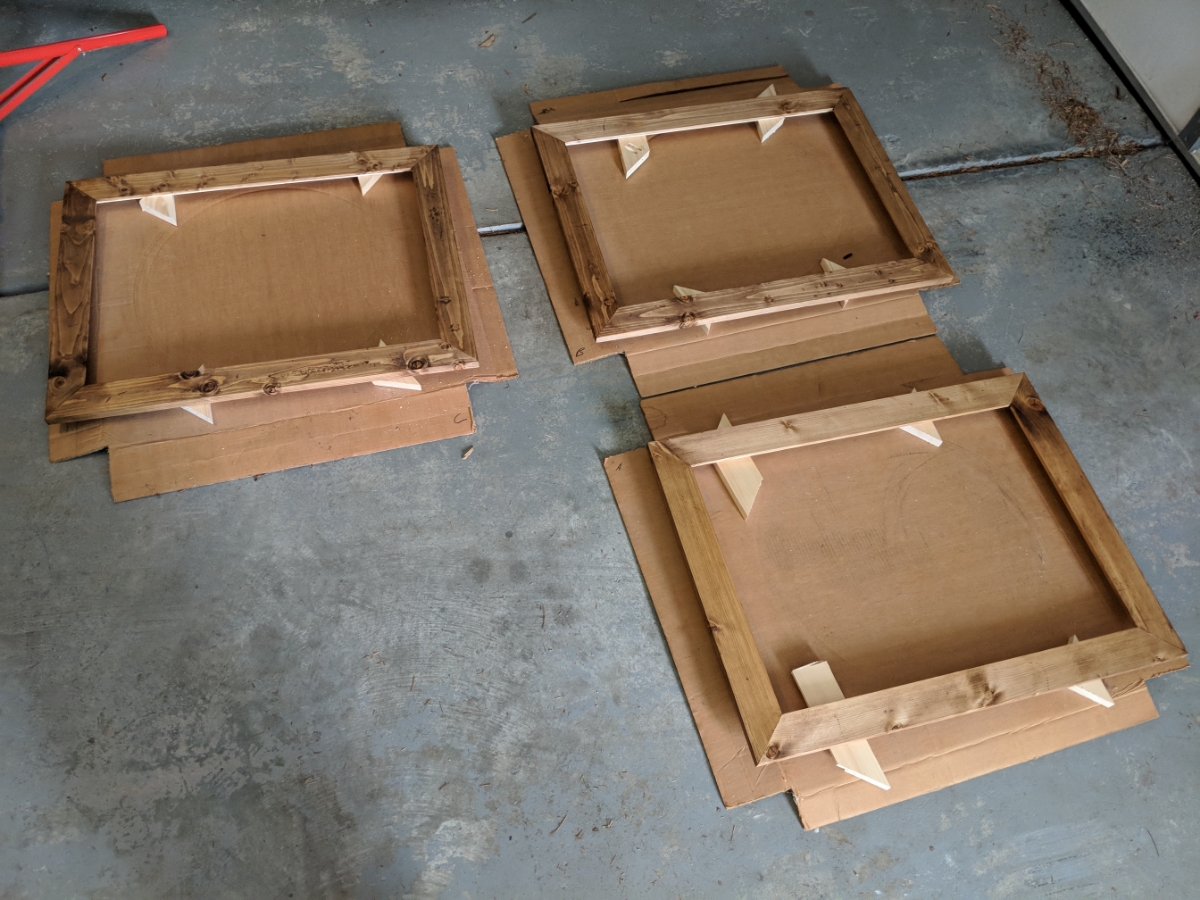
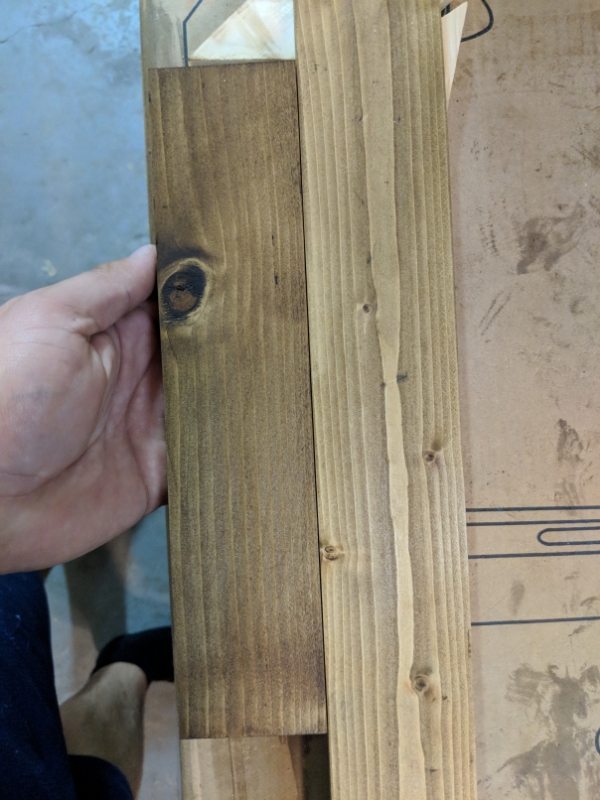
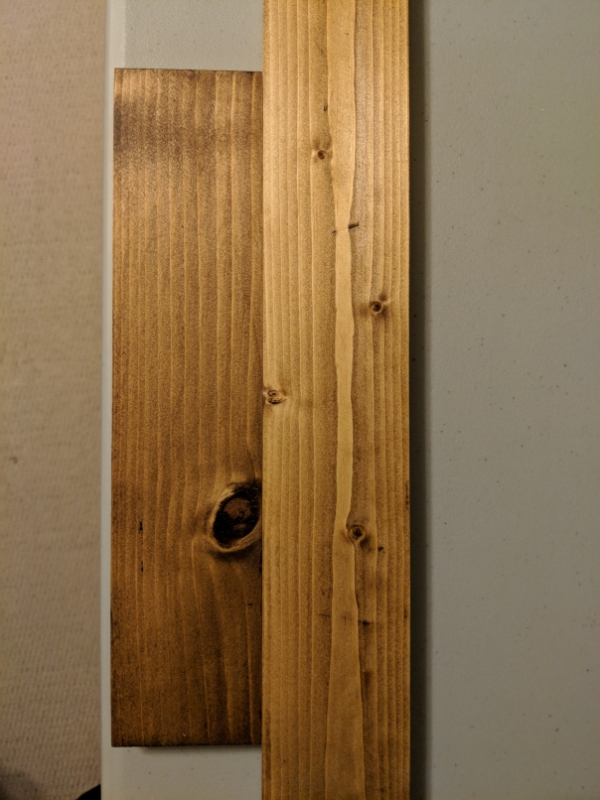
Built one of them first to test fit with everything
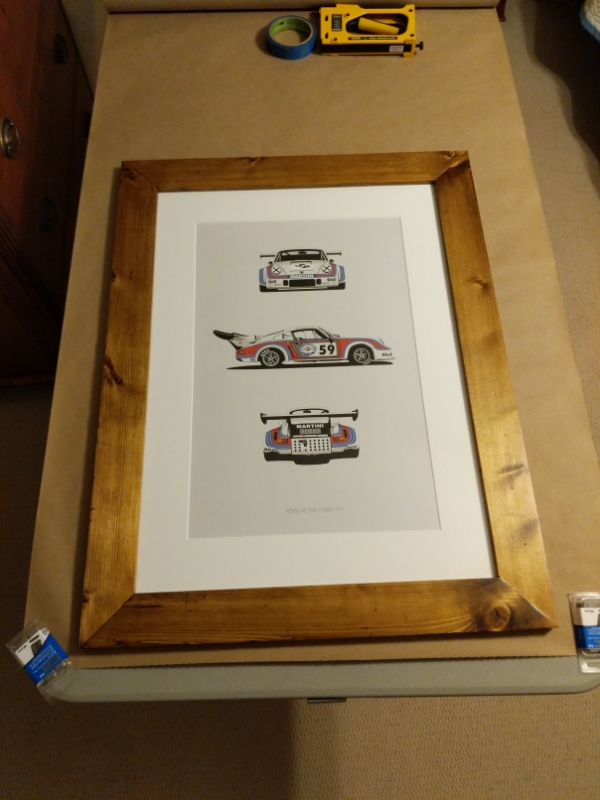
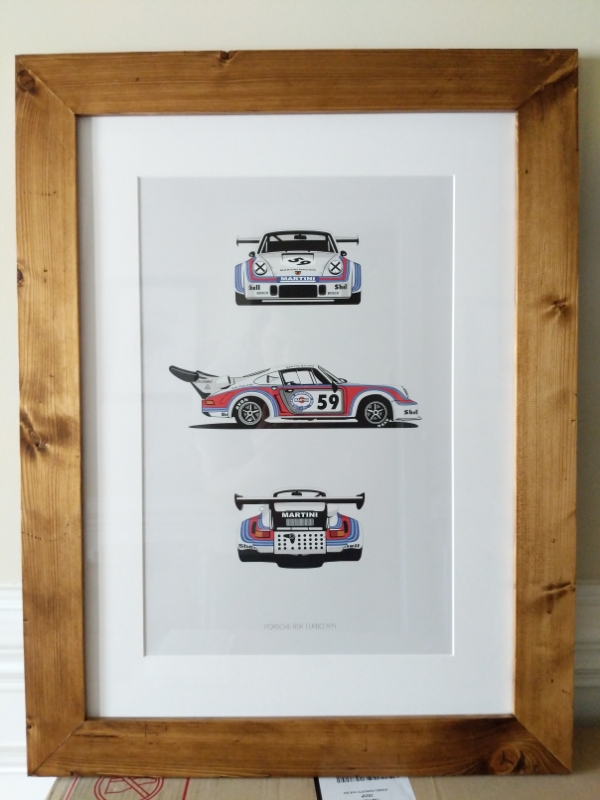
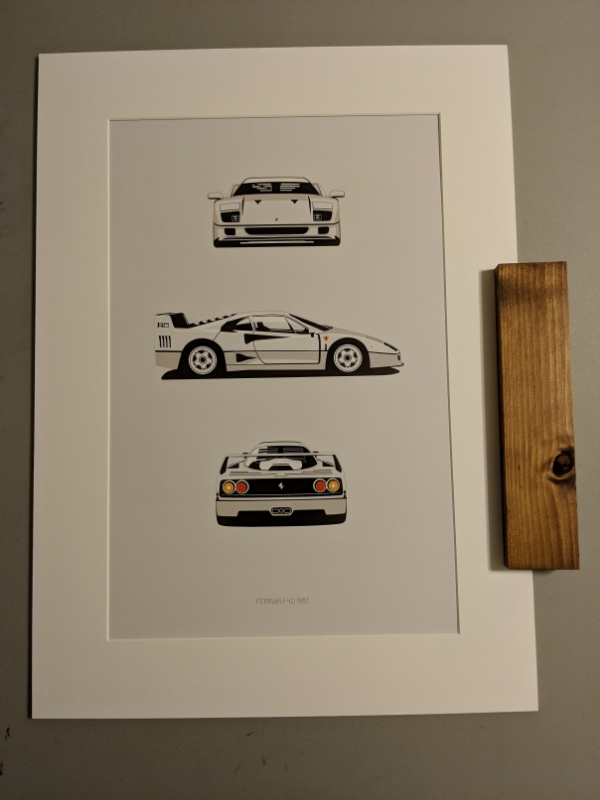
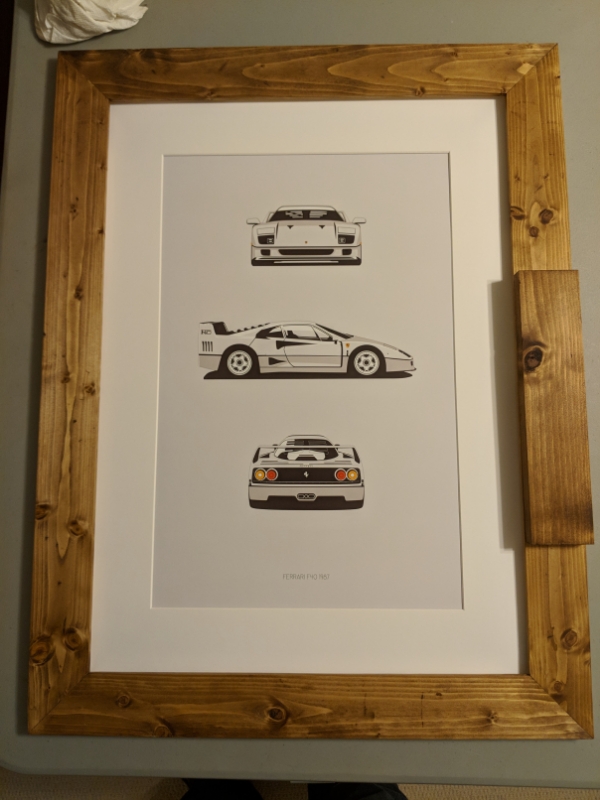
Sneak peak at the prints going in them. I have 4 more of these pictures from the same series. Three of them will be going in my entry hallway and one is slightly different so I will hang it in my office.
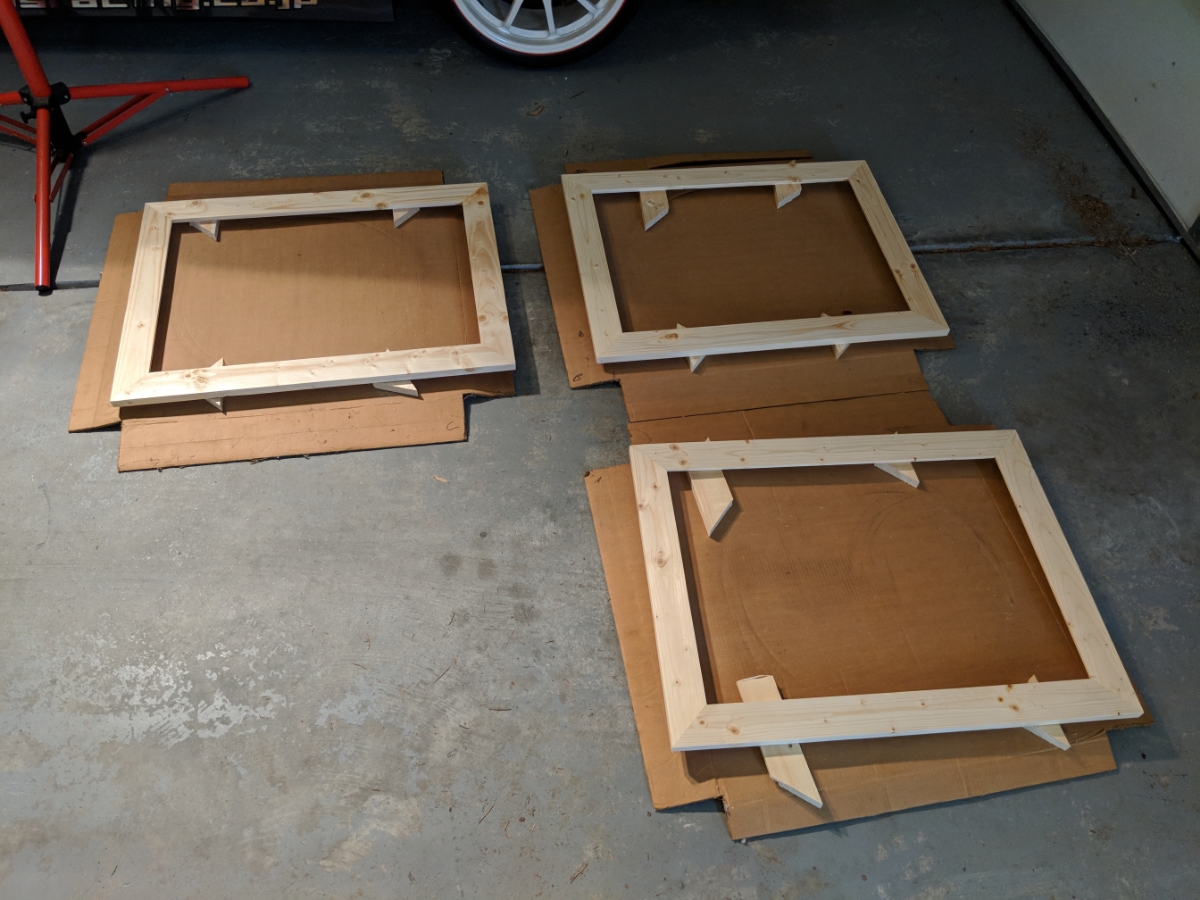
Once they past test fit I built the other three frames.
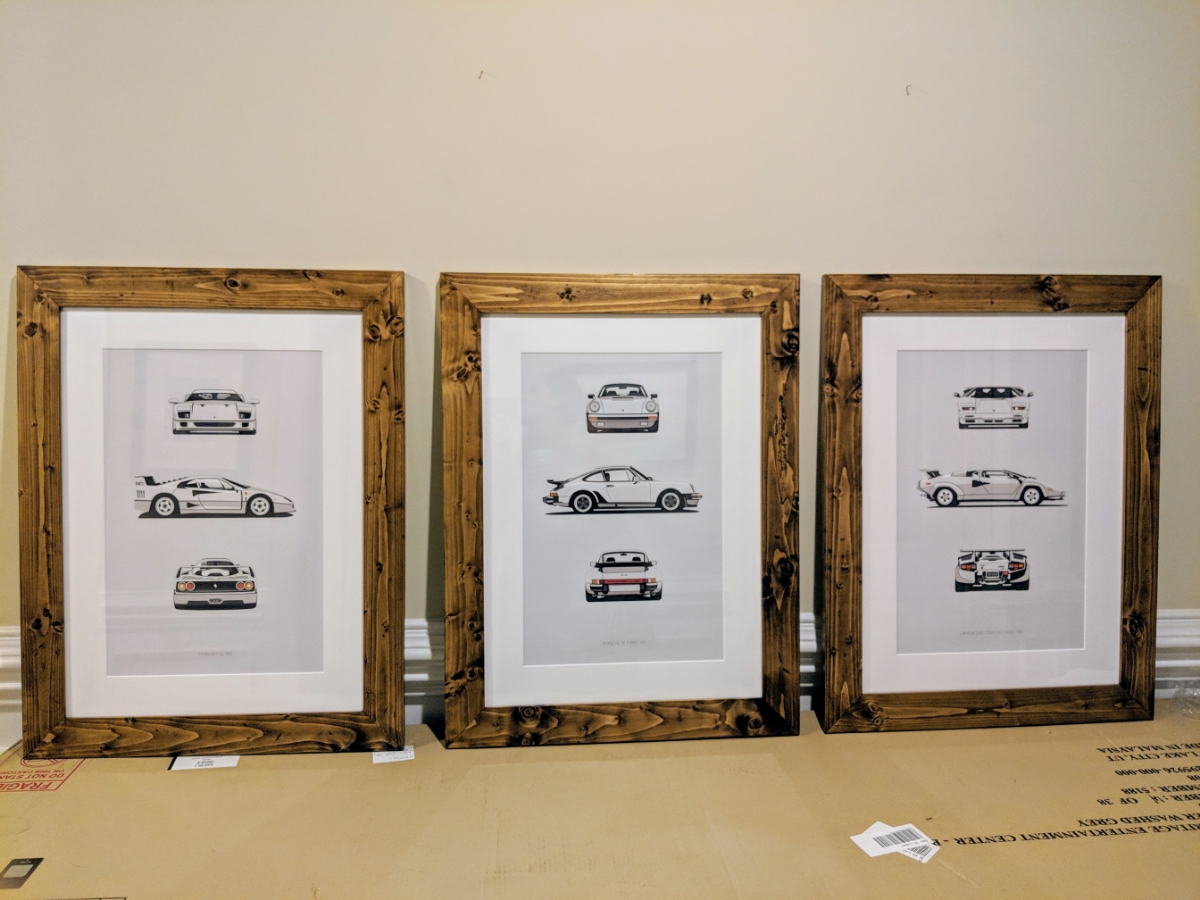
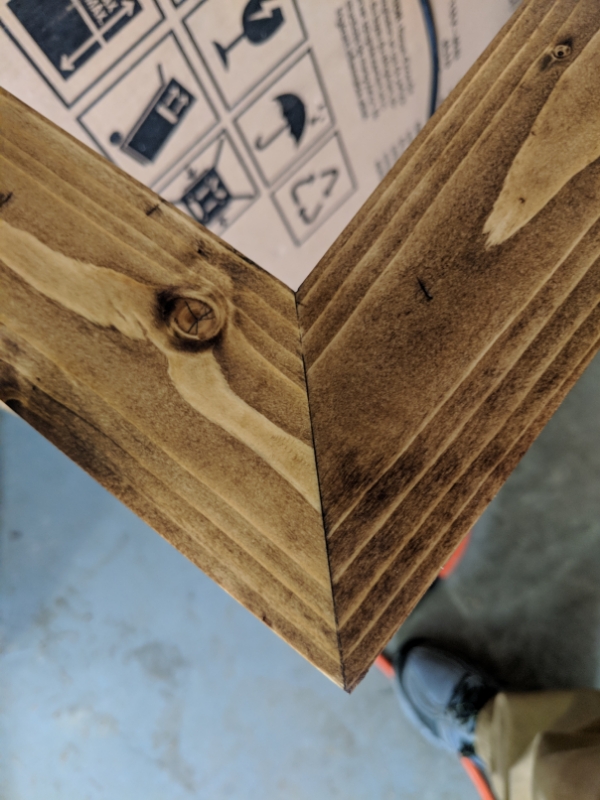
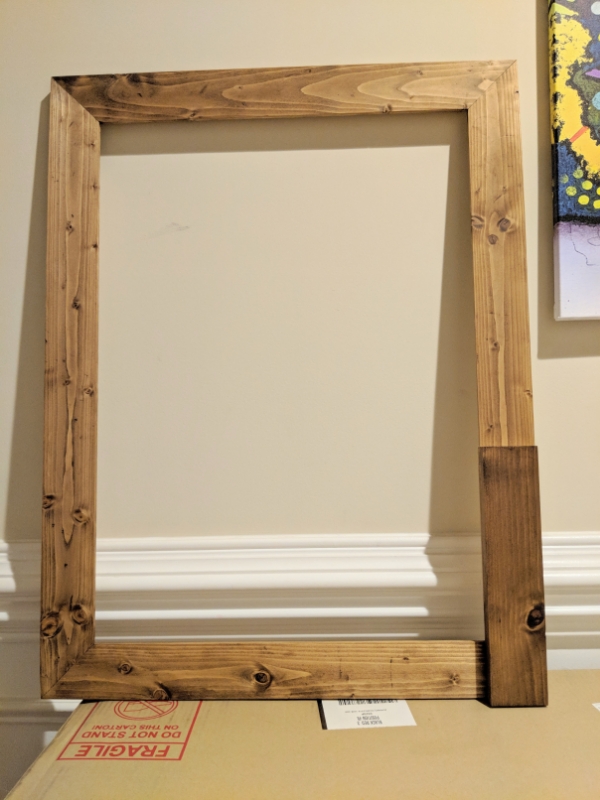
All four grames complete.
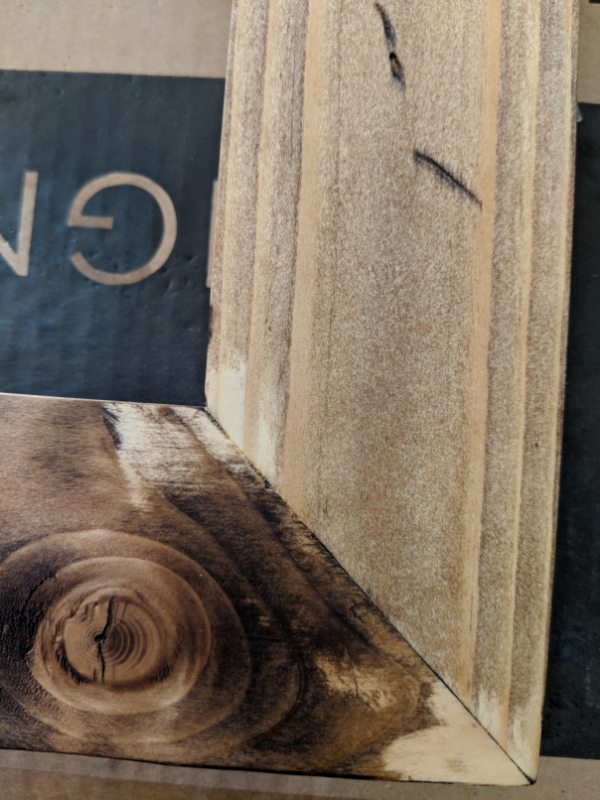
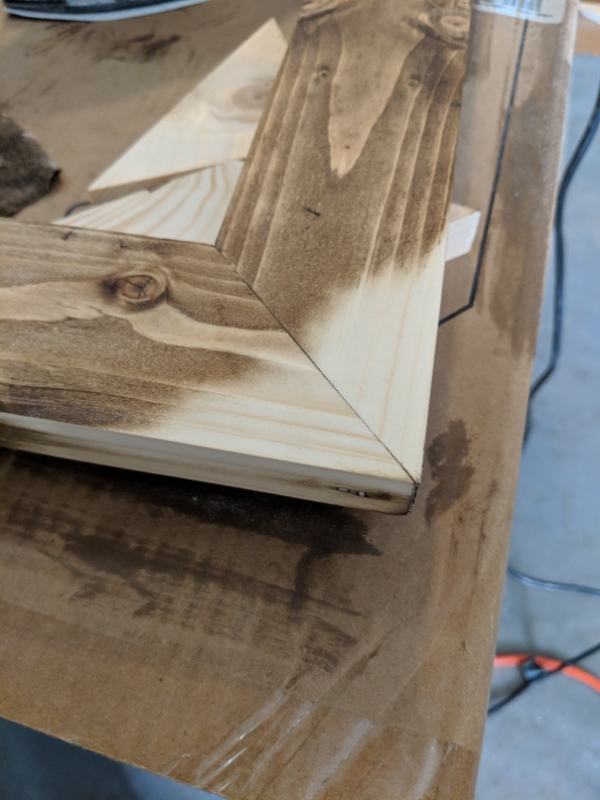
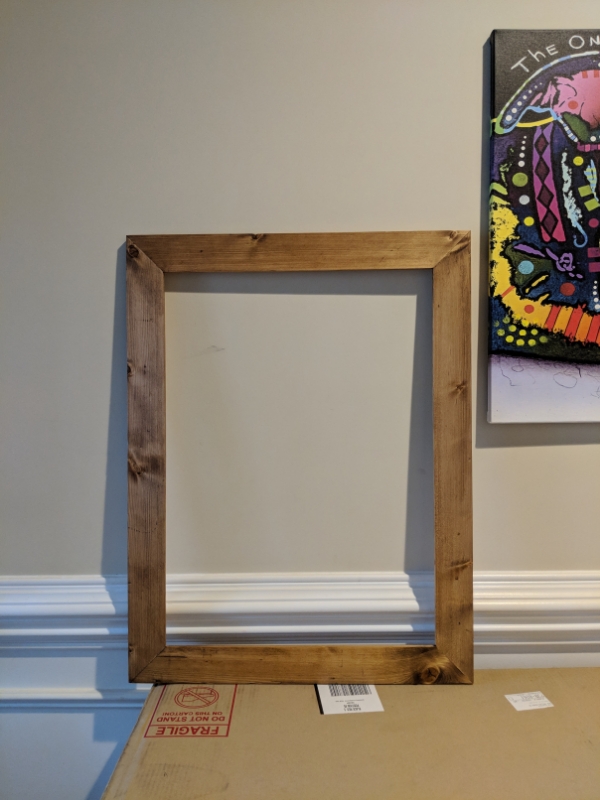
Only thing left to do is sand them, wood fill a few gaps in the corners, and pick a stain color to stain them. Leaning towards special walnut or dark walnut right now. Originally was going to use the same custom mix I used for my kegorator but with it being gray based and the background of the prints being gray I figured I should probably pick something with more contrast.
Last edited by CCColtsicehockey; Feb 6, 2018 at 08:50 AM.
Bad ass doing all this yourself, that silverware organizer is awesome. Also good call on the frames since people charge so freaking much for custom framing. Definitely will keep following this thread
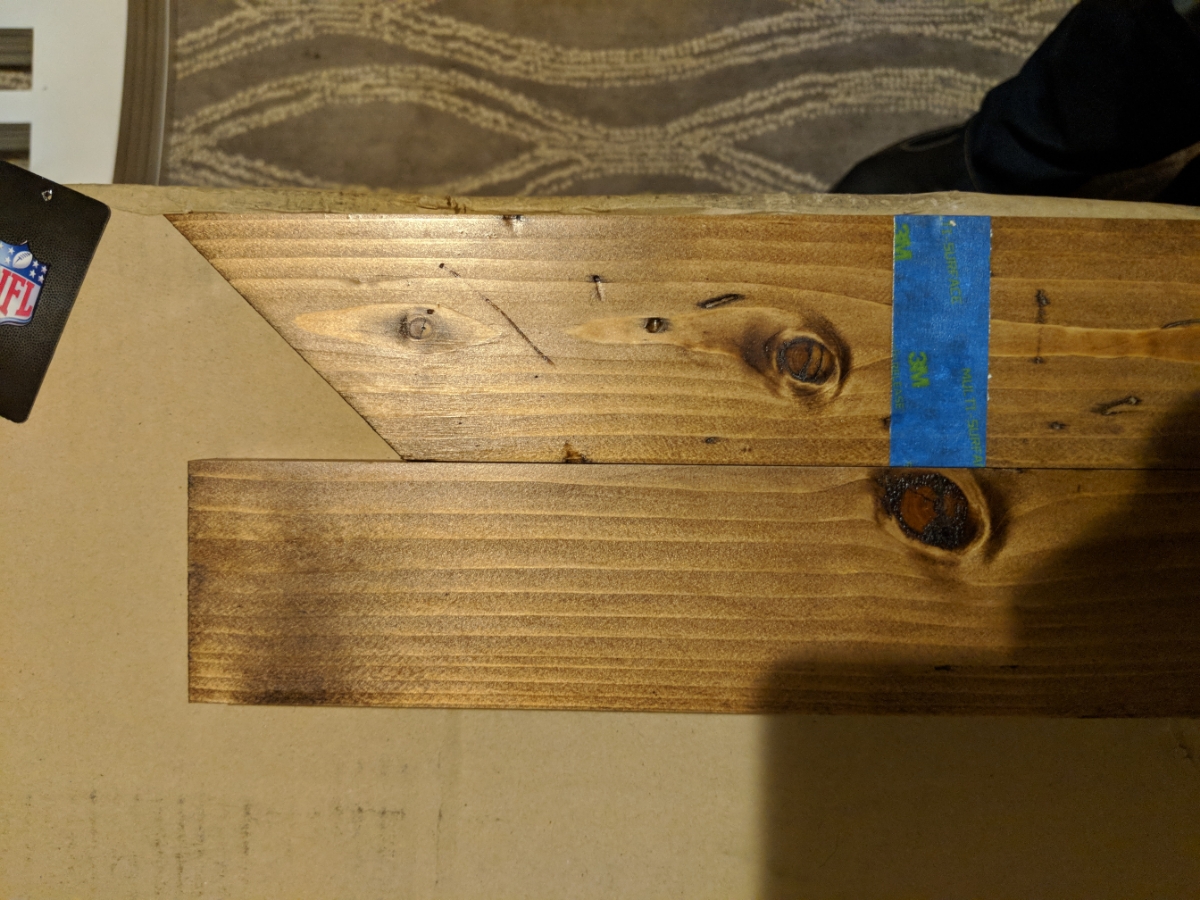
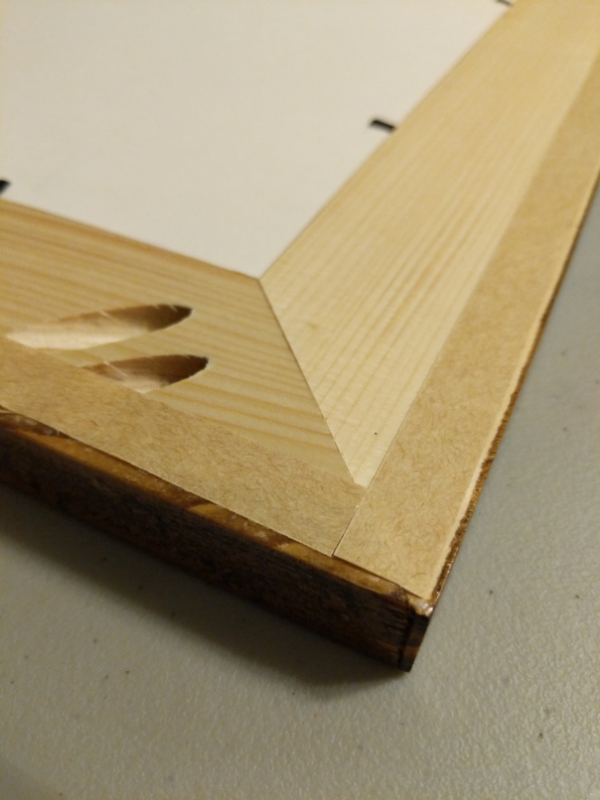
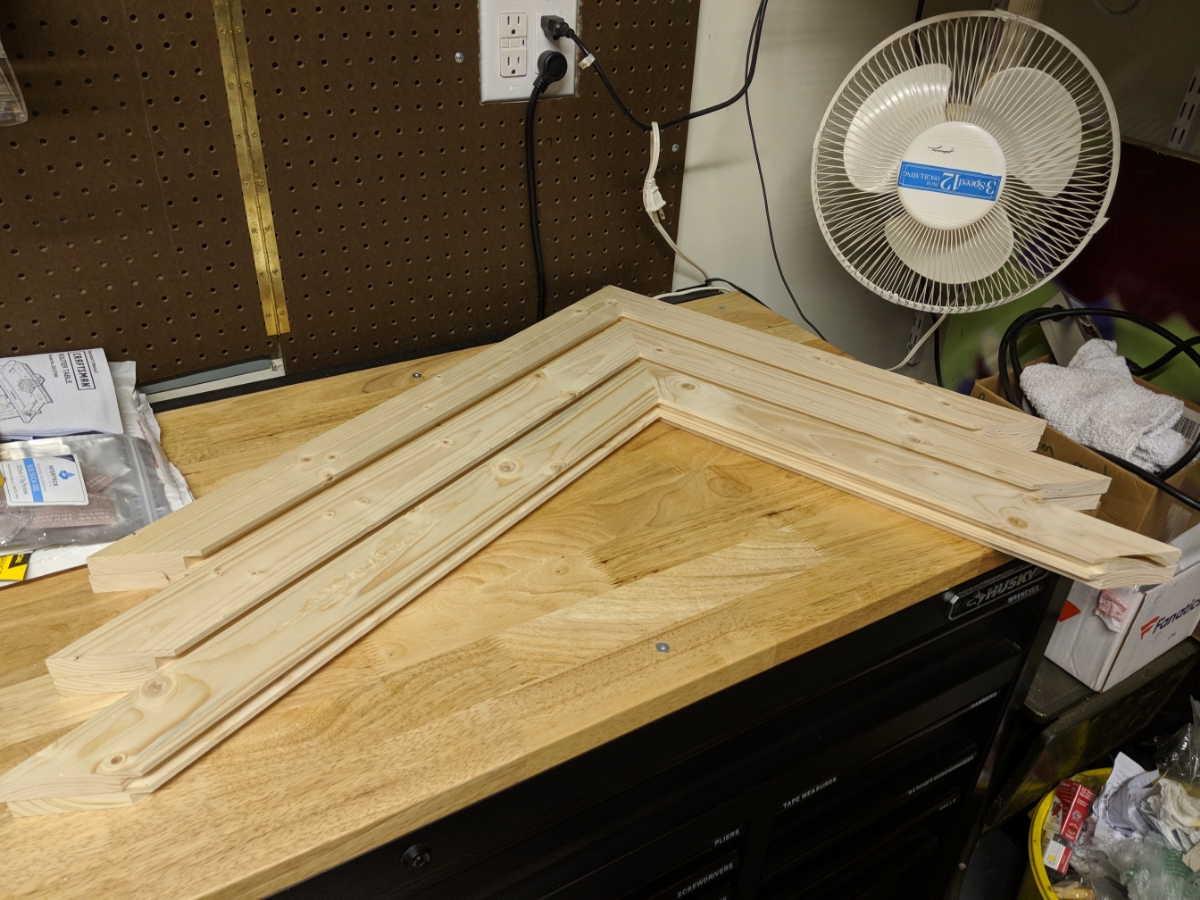
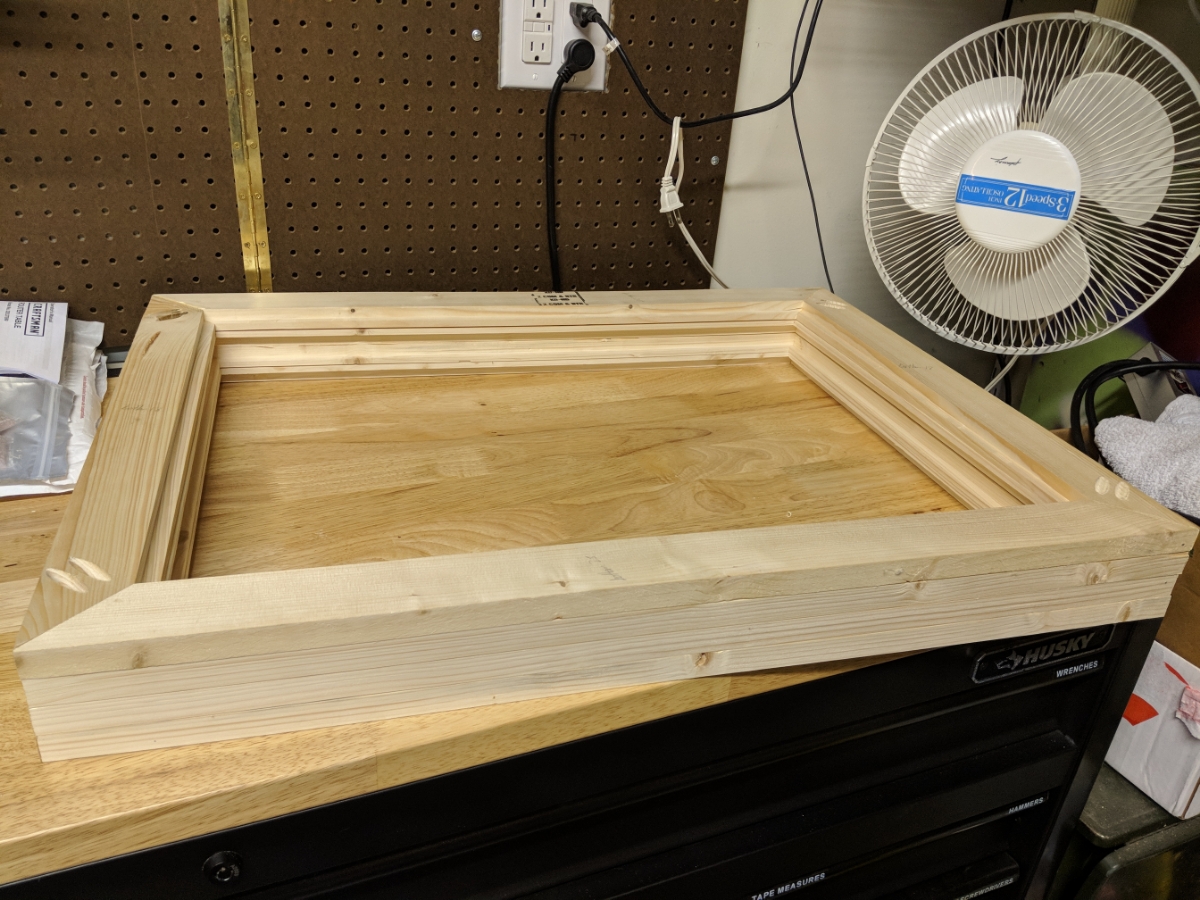
First use of the router to make a lap joing for the outer frame corners
Don't want to nail (pun intended) you on a technicality but this is called a rabbet joint, lap joint is different. Now you can use this word that no one knows when showing it off.
Also, one bit of advice if you want to build more of these. Use your router and cut dado's (larger grooves) into the boards for the cross pieces to fit into. This eliminates the need for nails, though you still can, and you can just glue/clamp the whole thing together. Also makes assembly super easy once you get your layout done. Kinda like this:
Originally Posted by CCColtsicehockey
Only thing left to do is sand them, wood fill a few gaps in the corners, and pick a stain color to stain them. Leaning towards special walnut or dark walnut right now. Originally was going to use the same custom mix I used for my kegorator but with it being gray based and the background of the prints being gray I figured I should probably pick something with more contrast.
If you just have small gaps to fill then just mix some native (same wood) sawdust with some wood glue and push it into the gaps. Works the same and color matches perfectly.
Don't want to nail (pun intended) you on a technicality but this is called a rabbet joint, lap joint is different. Now you can use this word that no one knows when showing it off.
Also, one bit of advice if you want to build more of these. Use your router and cut dado's (larger grooves) into the boards for the cross pieces to fit into. This eliminates the need for nails, though you still can, and you can just glue/clamp the whole thing together. Also makes assembly super easy once you get your layout done. Kinda like this:
If you just have small gaps to fill then just mix some native (same wood) sawdust with some wood glue and push it into the gaps. Works the same and color matches perfectly.
Frames look awesome BTW!
Thank you. Still learning the terms so guess I was bound to confuse something at some point.
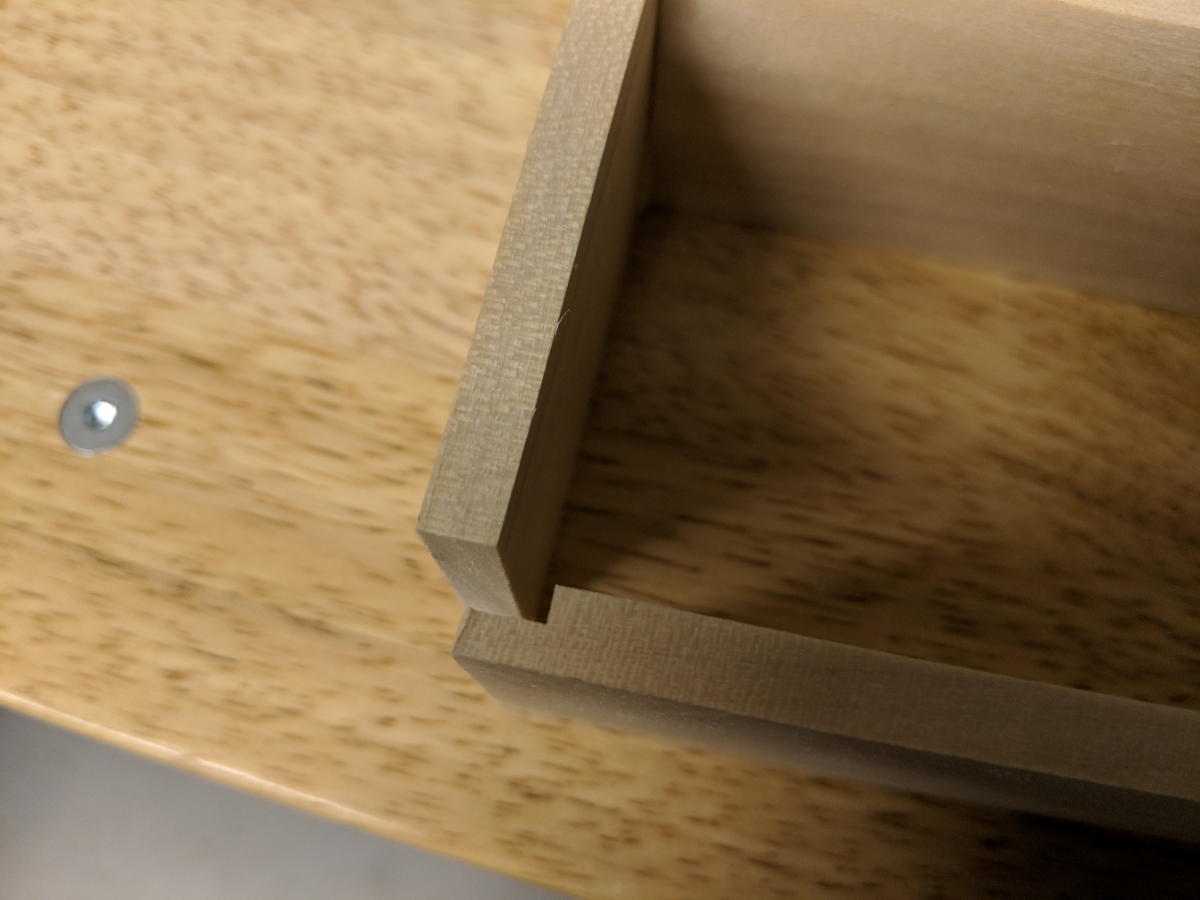
I wanted to do dado's for it but honestly couldn't figure out how to do it yet with the router. Also I have a 1/4in bit but when I cut a channel it was still a little smaller than my 1/4in thick wood when I tried to fit it. It was only a test cause I did it on the table and that wouldn't have worked for all the joints I needed to make. I was impatient so figured glue and nails would be strong enough for now and if it ever came apart I would figure out how to learn then. I do eventually want to figure it out through for sure.
Did not think about the glue and saw dust idea. I will definitely do that. Should have plenty of saw dust when I sand them down.
Thank you. Pretty happy with how they turned out. Might have to make one more since my first test one I might not have cut the rabbit deep enough for all the contents to fit and still have space to use the framing point nailer to hold everything in place.
Bad ass doing all this yourself, that silverware organizer is awesome. Also good call on the frames since people charge so freaking much for custom framing. Definitely will keep following this thread
Silverware organizer has paid off a bunch. So much easier to get at things. Now really thinking of doing 3 more drawers after using it for a few weeks.
Yeah the cost of frames pushed me to want to get all the tools for sure. I was quoted $400 for 4 frames setups with a 1.5in wide plain black painted frame, matting, backer board, and acrylic. That was still with me putting it all together then. I was able to get all the matting and Acrylic for $160 shipped and then have about $30 in wood and $90 for the router and table. Already had the rest of the tools. So saved money and got more tools out of it. I probably won't make frames smaller than 11x14 cause just isn't worth the time vs cost but I have several 12x18 pictures I want to frame with matting that I will be doing down the road.
Thank you. Still learning the terms so guess I was bound to confuse something at some point.
I wanted to do dado's for it but honestly couldn't figure out how to do it yet with the router. Also I have a 1/4in bit but when I cut a channel it was still a little smaller than my 1/4in thick wood when I tried to fit it. It was only a test cause I did it on the table and that wouldn't have worked for all the joints I needed to make. I was impatient so figured glue and nails would be strong enough for now and if it ever came apart I would figure out how to learn then. I do eventually want to figure it out through for sure.
Did not think about the glue and saw dust idea. I will definitely do that. Should have plenty of saw dust when I sand them down.
Thank you. Pretty happy with how they turned out. Might have to make one more since my first test one I might not have cut the rabbit deep enough for all the contents to fit and still have space to use the framing point nailer to hold everything in place.
Was the fit tight or impossible? The dado should be able to hold the board up by friction on its own so you don't want a loose fit at all. A 1/4" bit should work fine. If not, check out some plans on how to make a perfect size router jig for cutting dados of any size.
Was the fit tight or impossible? The dado should be able to hold the board up by friction on its own so you don't want a loose fit at all. A 1/4" bit should work fine. If not, check out some plans on how to make a perfect size router jig for cutting dados of any size.
Works awesome and you can put it together for pretty cheap.
The fit was impossible. I did eventually get it to fit using a rubber mallet but that wasn't going to work for all the joints without breaking something.
IMO, I'd go darker...but WAY darker. The knots and stuff in the wood are pretty distracting when you're trying to highlight the print inside the frame and not the frame itself. Good work on putting them together though!
Ugh, I wish I lived somewhere warm so I could get going on building stuff.
IMO, I'd go darker...but WAY darker. The knots and stuff in the wood are pretty distracting when you're trying to highlight the print inside the frame and not the frame itself. Good work on putting them together though!
Ugh, I wish I lived somewhere warm so I could get going on building stuff.
So you are saying basically go so dark as to hide all the grain detail? That is my fear of going dark is losing all that detail.
So you are saying basically go so dark as to hide all the grain detail? That is my fear of going dark is losing all that detail.
I don't think you'll lose the grain detail as much as you'd dull the appearance of it. I wouldn't go as far as a gel paint or anything but going to a dark walnut or ebony stain will still give you the grain texture but even out the dark/light spots.
Next time you make frames, I'd go with a tight grain wood like maple or cherry instead of lumber grade pine. It'll cost a bit more but the end product will look that much better.
Well I guess I was going for a pallet wood/rustic look for the frame. So I kind of wanted the knots and all. I will have to try another piece of prepped wood with darker stains. At this point I pretty much own a small container of like 15 different colors of Minwax stain. I have Ebony, Jacobean, and Espresso at home. Wood Stain Colors - Minwax Stain Colors & Wood Finish Guide | Minwax
What your saying is not go multiple coats as much as go with a darker color from the start then?
To change colors at this point though I would have to sand everything back down as well.
Last edited by CCColtsicehockey; Feb 26, 2018 at 12:25 PM.
Well I guess I was going for a pallet wood/rustic look for the frame. So I kind of wanted the knots and all. I will have to try another piece of prepped wood with darker stains. At this point I pretty much own a small container of like 15 different colors of Minwax stain. I have Ebony, Jacobean, and Espresso at home. Wood Stain Colors - Minwax Stain Colors & Wood Finish Guide Minwax
What your saying is not go multiple coats as much as go with a darker color from the start then?
To change colors at this point though I would have to sand everything back down as well.
I have a similar problem.
If you personally like it the way it is then just leave it alone and enjoy it. It's your creation and your house, make it what YOU like and what appeals to your tastes not what I think.
If you want my personal opinion then IMO, the pallet wood look (along with a lot of other things...) is just a trendy current fad. It's not going to be a timeless look unless you live in a log cabin.
In regards to stain color vs multiple coats, stain is a dye and will only get so dark regardless of the number of coats. When you get to a certain point, the stain will just start to go deeper and/or not soak in at all. If you want to go to a darker stain entirely, I'd stop the multiple coats now so you don't have to sand as much with the stain soaking in farther. You can always try a sample board and see what happens if you just drop a darker stain on top of what you have but I can't predict what it would look like. If not, then sand it off and start over. FWIW, if you invest in a good hand plane you can remove a fuck ton of material pretty fast compared to sanding and flatten the surface at the same time. Downside is that a good hand plane isn't cheap.
Edit: Based on your color chart you sent out, I'd personally go straight for the Ebony. Remember that the pictured samples appear to be on oak which is going to be a lot more consistent in grain than pine. If I were you, I'd just make one 4ft pine board with sample swatches of each color you have on hand so you can pick quickly. If you're going to hard wood, don't stain it at all as that would be a shame.
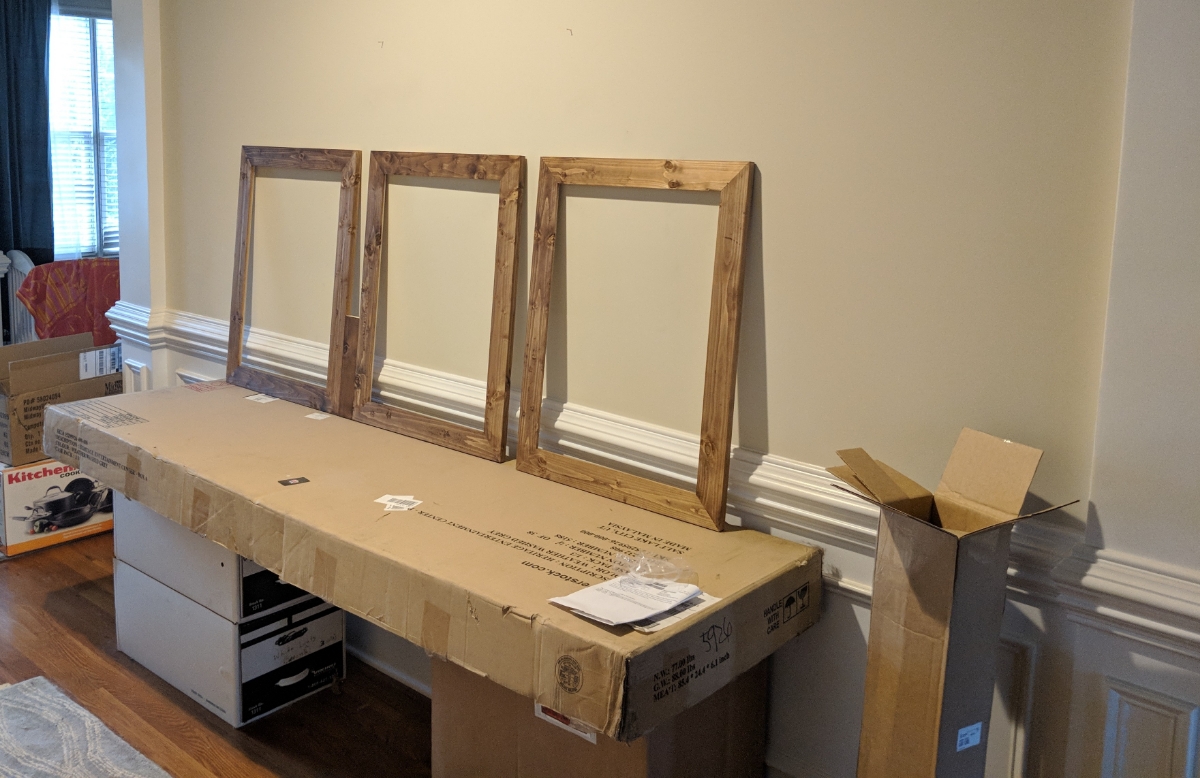
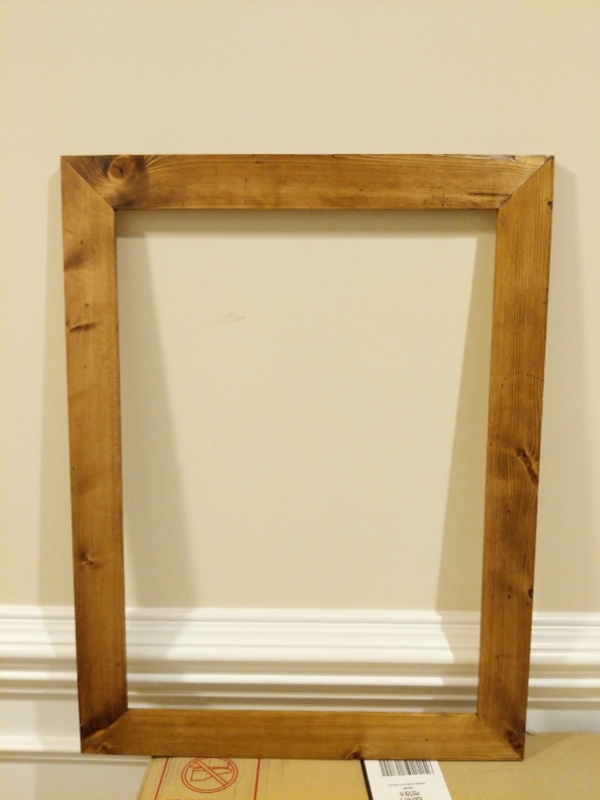
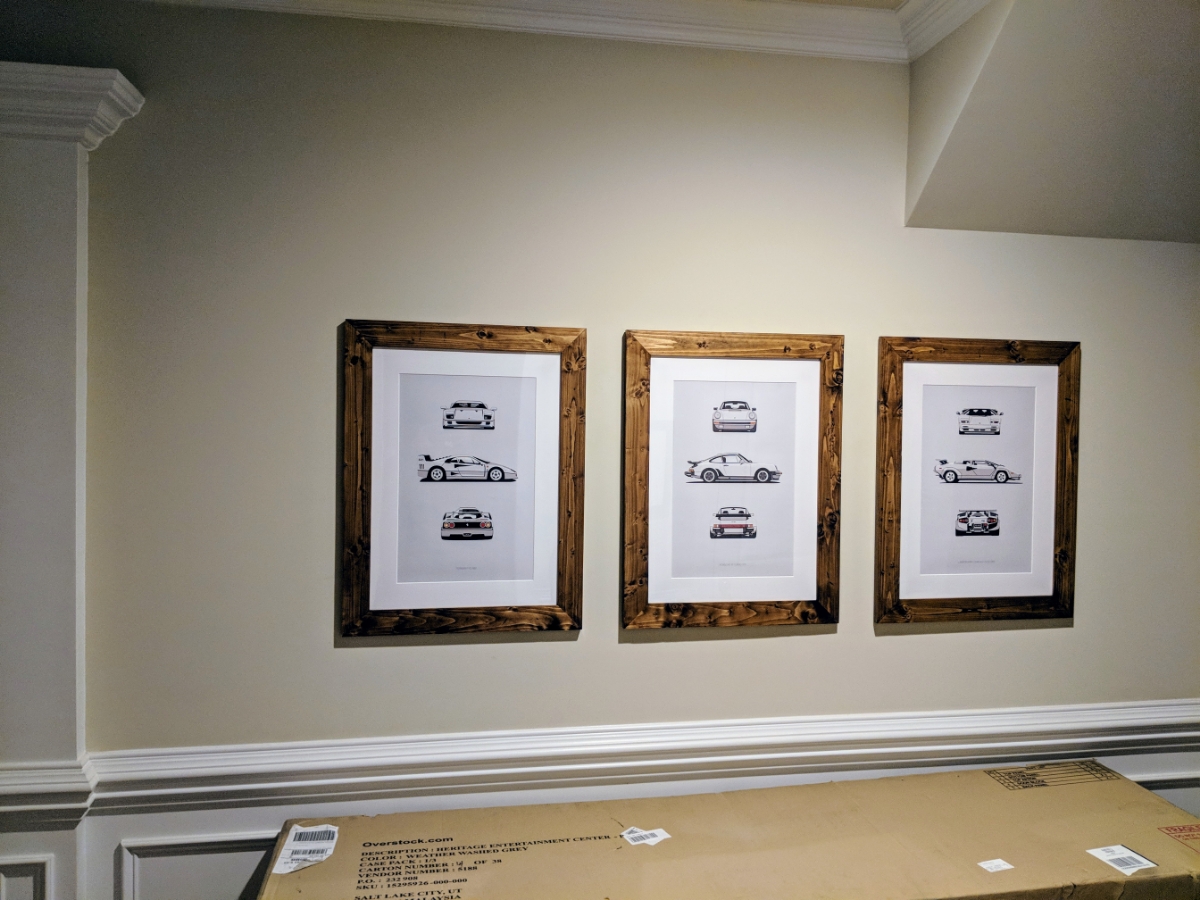
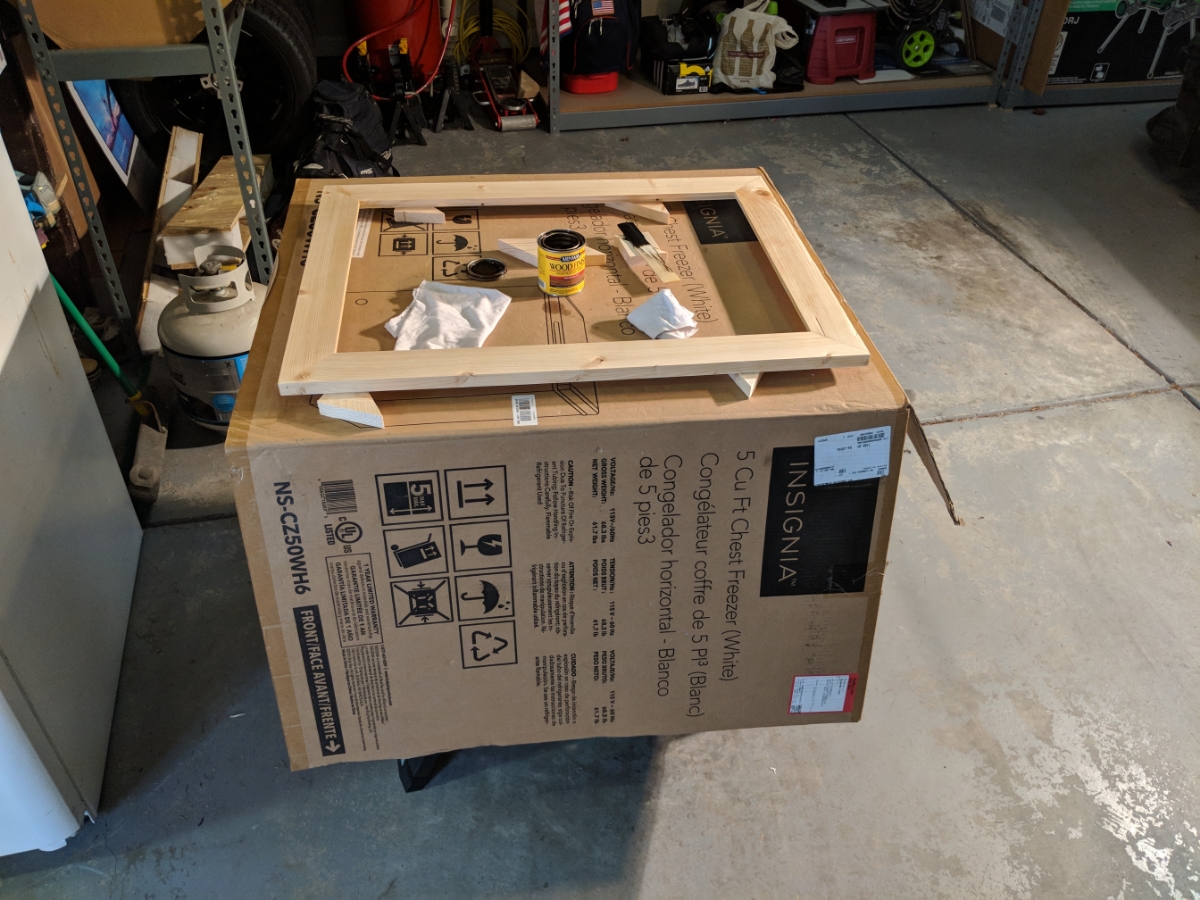
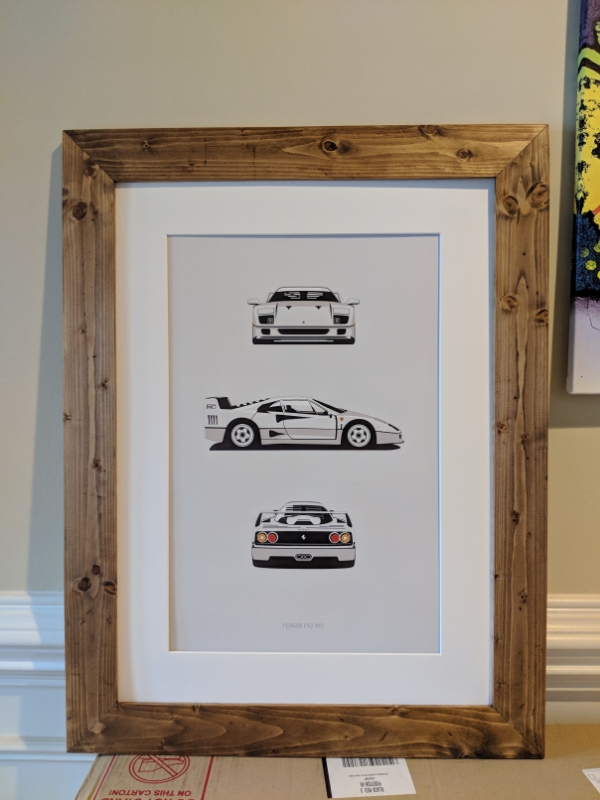
Here is how they will be laid out. The color is also the most accurate in this picture as well. Excuse my cardbaord box entry table. Trying to figure out what size table to go with against the wall. It is a really wide entryway.
Can't decide on color. Did decide after this sample to do one more coat though. So it be two coats and then satin water poly based clear cause I don't like how oil poly clear makes it have a yellow tint. Still deciding how many coats of clear. Thinking at least two though based on the samples I have done with just one below.
Two coats. Just seems to give it a bit more depth.
Two coats left. One coat right.
Still not 100% sure on the color but I don't dislike it either. I want to get the project finished though and get something on the wall. I have how empty the area looks. They were not that expensive to make so I can always make another set in a couple years if I decide I no longer like them.
Awesome, they look good in those pics and you're right, if you find that you don't like them in a few years then make another set. You know how at this point so it should be pretty easy.
For coats of poly, two is probably fine. No one is going to be touching it so no need to go nuts on the number of coats.
So got some more work in on my frames this weekend. Ended up going with three coats of clear as it seemed to be going on really thin. I might need to do a touch up in a few places as well as I ended up with a small run on two frames that I will need to sand out and if I can't polish back the shine then I will apply a new thin coat in those spots. They are on the sides too so at least they won't really get seen much.
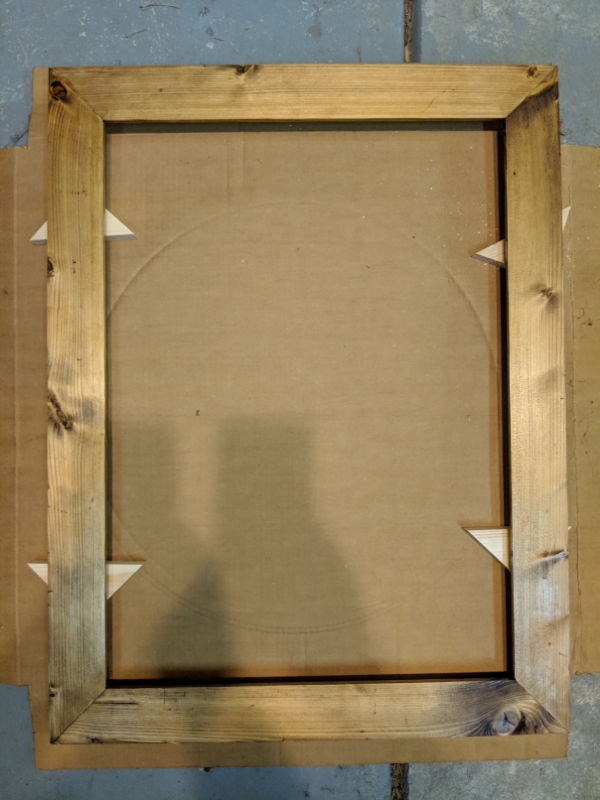
The frame I was using as my test frame I ended up putting finishing and putting together.
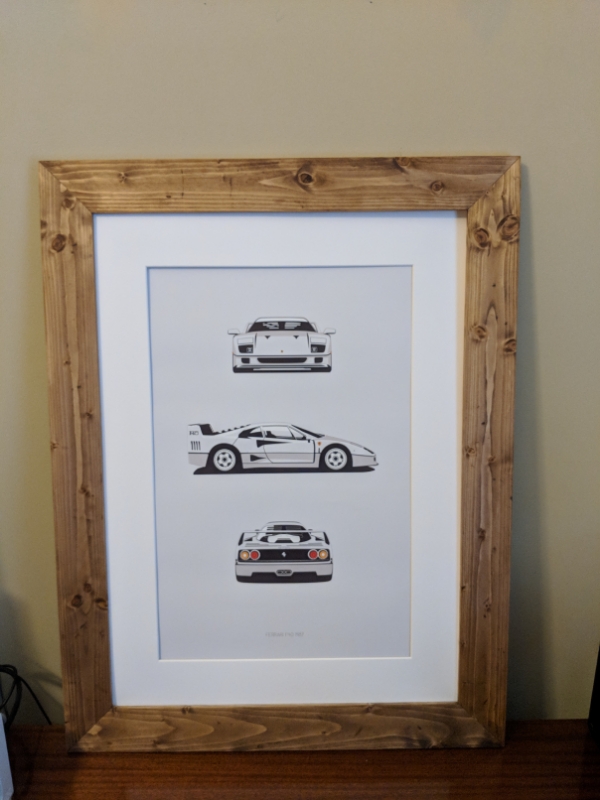
Three coats finished. At first this was my least favorite frame with the lack of knots compared to the others. Now that it is finished I think it might be my favorite. The color still doesn't show right in this picture though. Later on I have a picture that I think shows it the best.
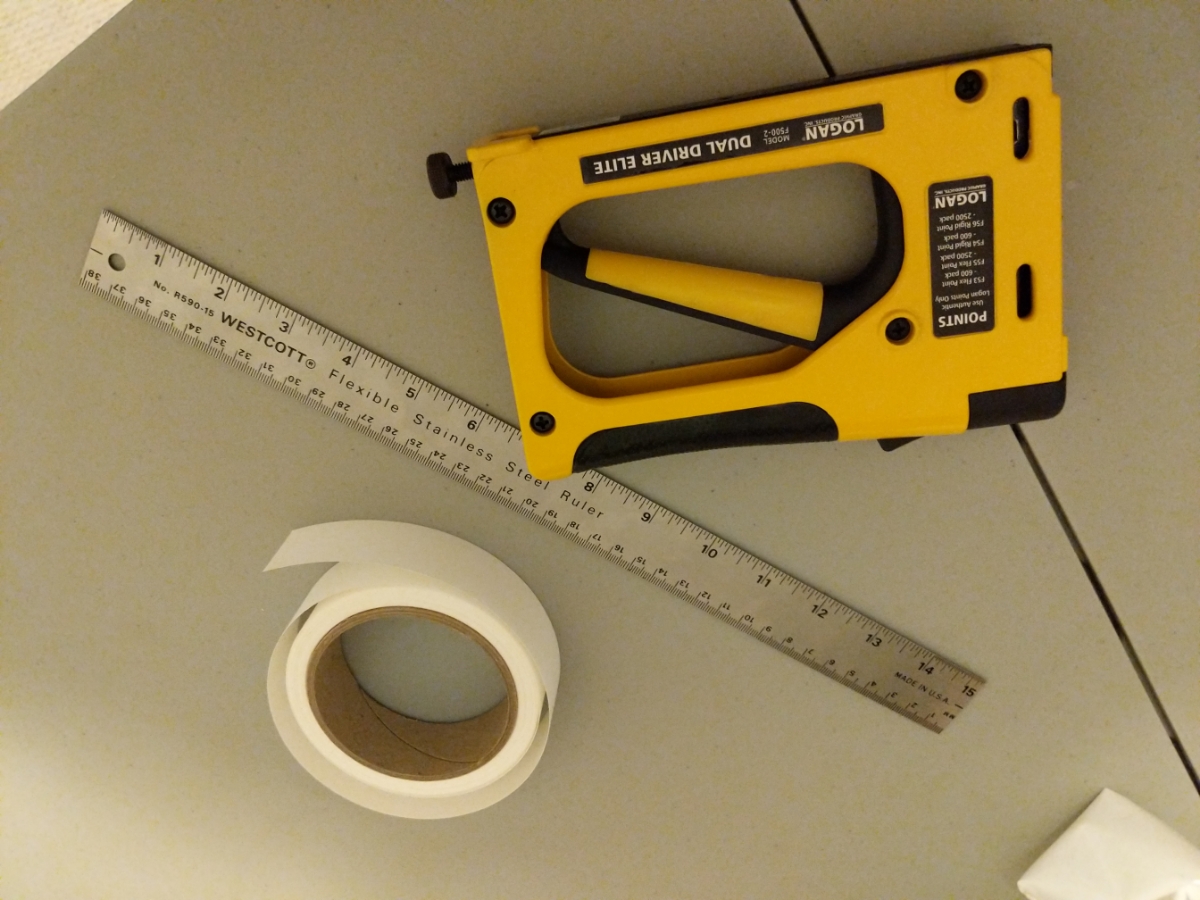
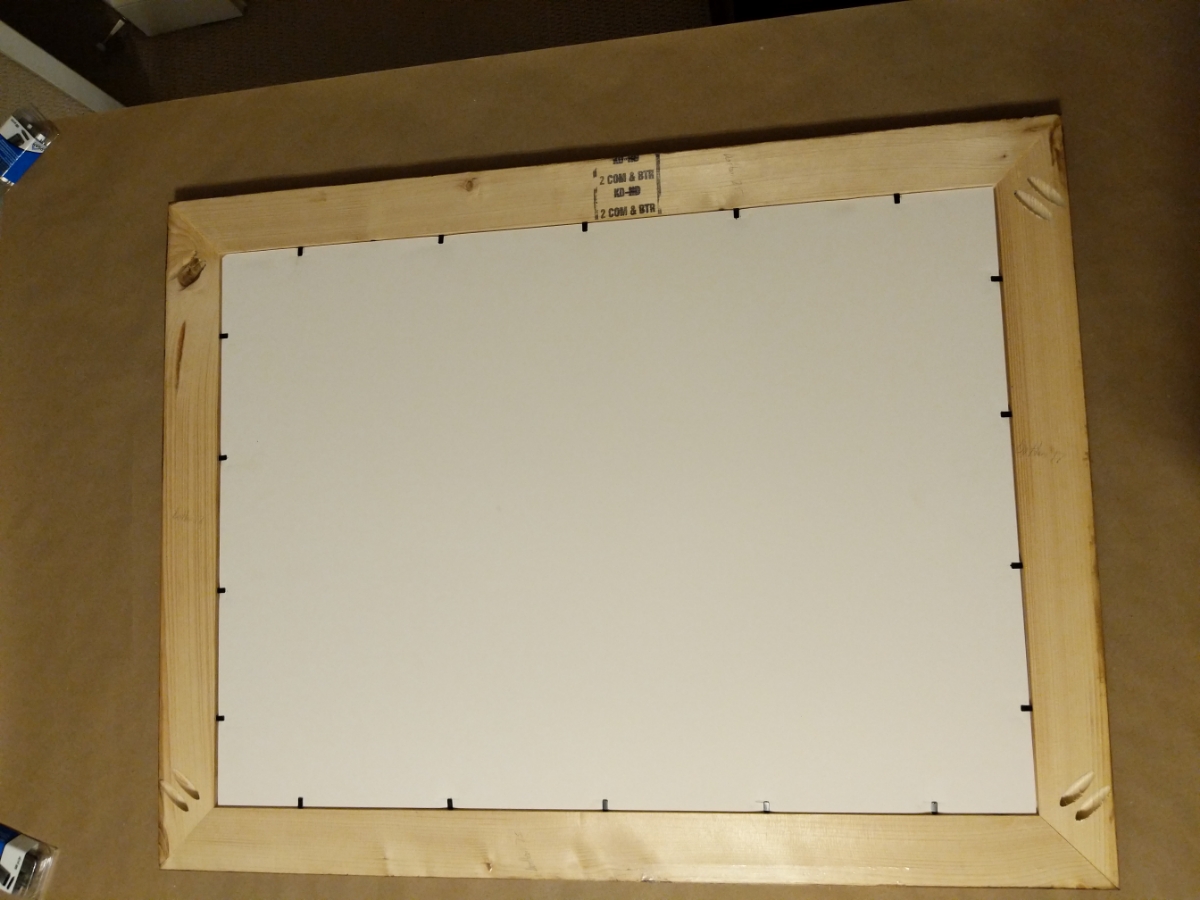
Tools for mounting the pictures
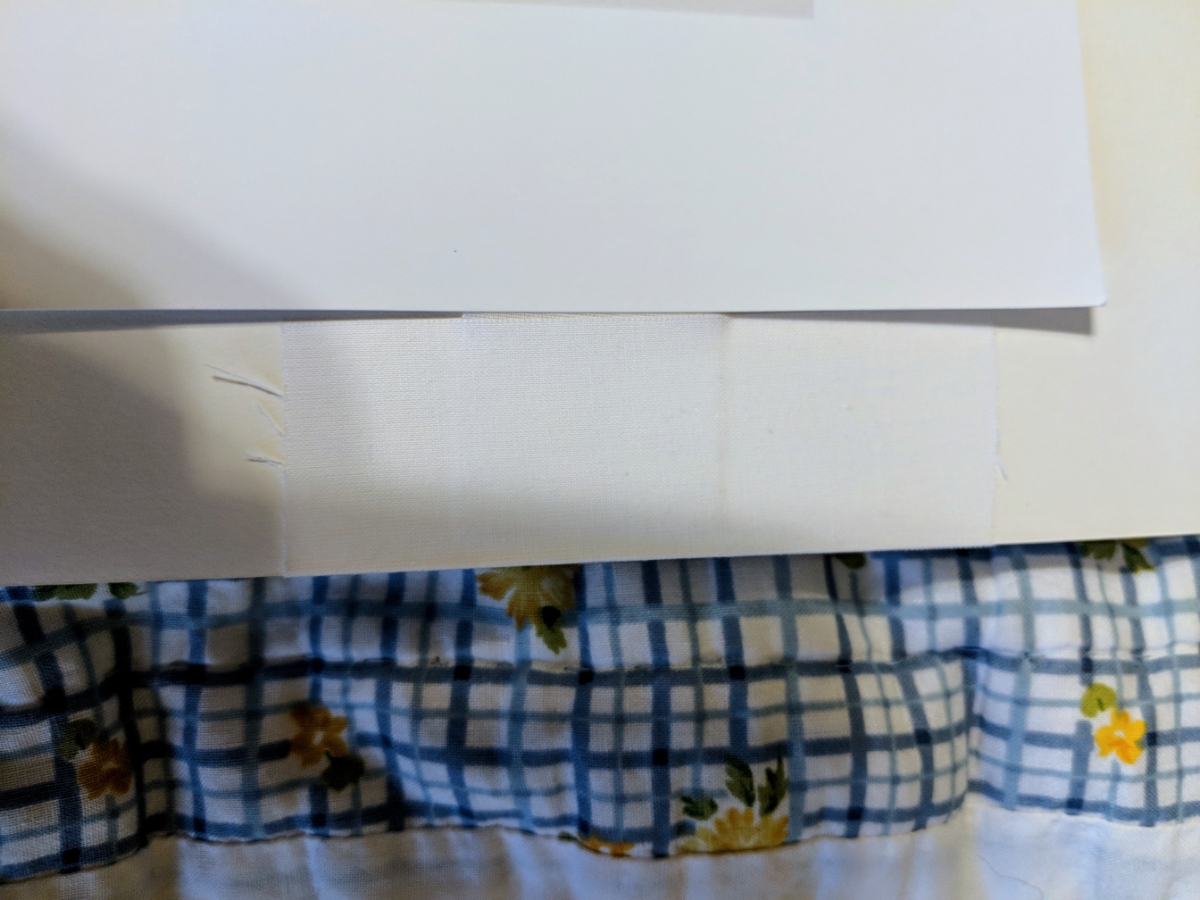
Took time to learn how to properly mount photos and prints to backing board when doing these compared to the way I have hung prints of my own before in frames. You use a T mount and put the tape on the back of the print and then cross that piece of tape as a T onto the backing board. This way you never tape on the front of the print or photo.
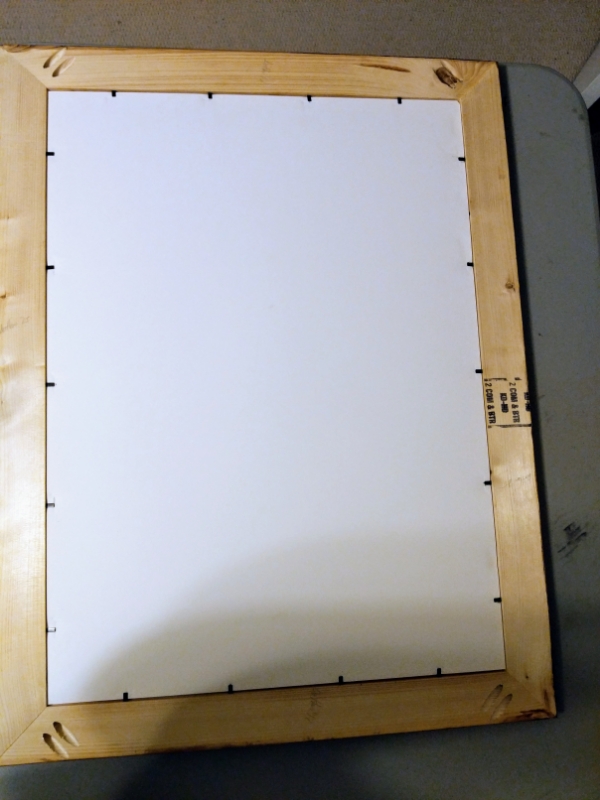
Using the point gun I inserted the framing points to hold everything in place. I was worried this frame wasn't deep enough for them and made my other frames with deeper rabbit cuts. Turns out They were just fine so I will go back to this dimension for other frames I make from now on.
Finally a framed picture. Not finished just yet though.
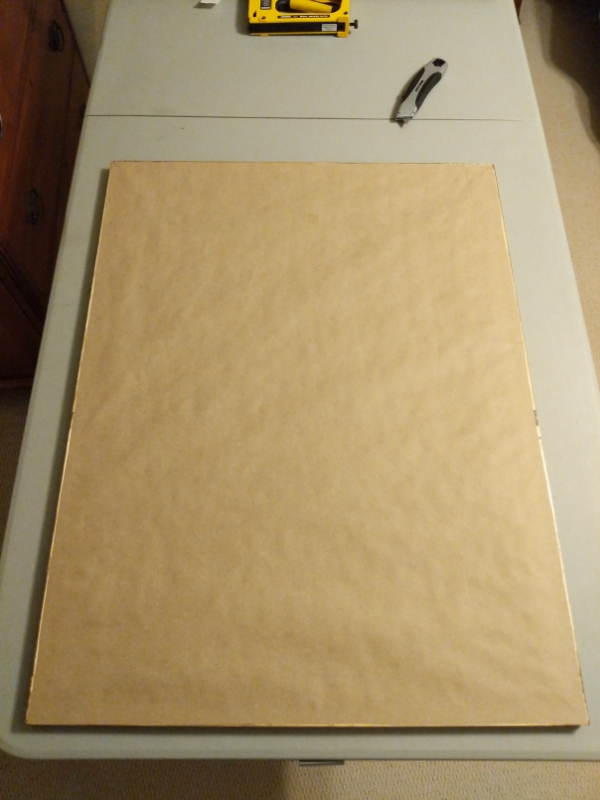
With all the dogs in my house and thus and increased about of dust and dog hair I wanted to put a dust backing on my picture to try and prevent that from getting in between the plexi over time.
Taping installed
You can barely see the tape now with the backing removed.
Flipped it over onto the brown paper backing.
All trimmed up
Just needs some hanging hardware and I can finally get one of them hung.
Still trying to decide between wire hanging hardware on the back or just two simple of those metal strip hangers. I like the idea of the metal strips as it keeps the picture more flat against the wall instead of the wire. The wire though is better for heavier pictures. Also since I am putting 3 in a row on the wall I think the metal strips would be easier to line up but who knows.
Your level of finishing detail is absolutely incredible, man.
Thanks man. I am a perfectionist to my own detriment when working on things. They always end up taking about 4-5x times longer than I expect cause it takes me so long to be happy with what I am doing.
I only think of it cause I crazy over research stuff. When I was reasearching making frames I learned of putting backing on frames and decided it might be a good idea.
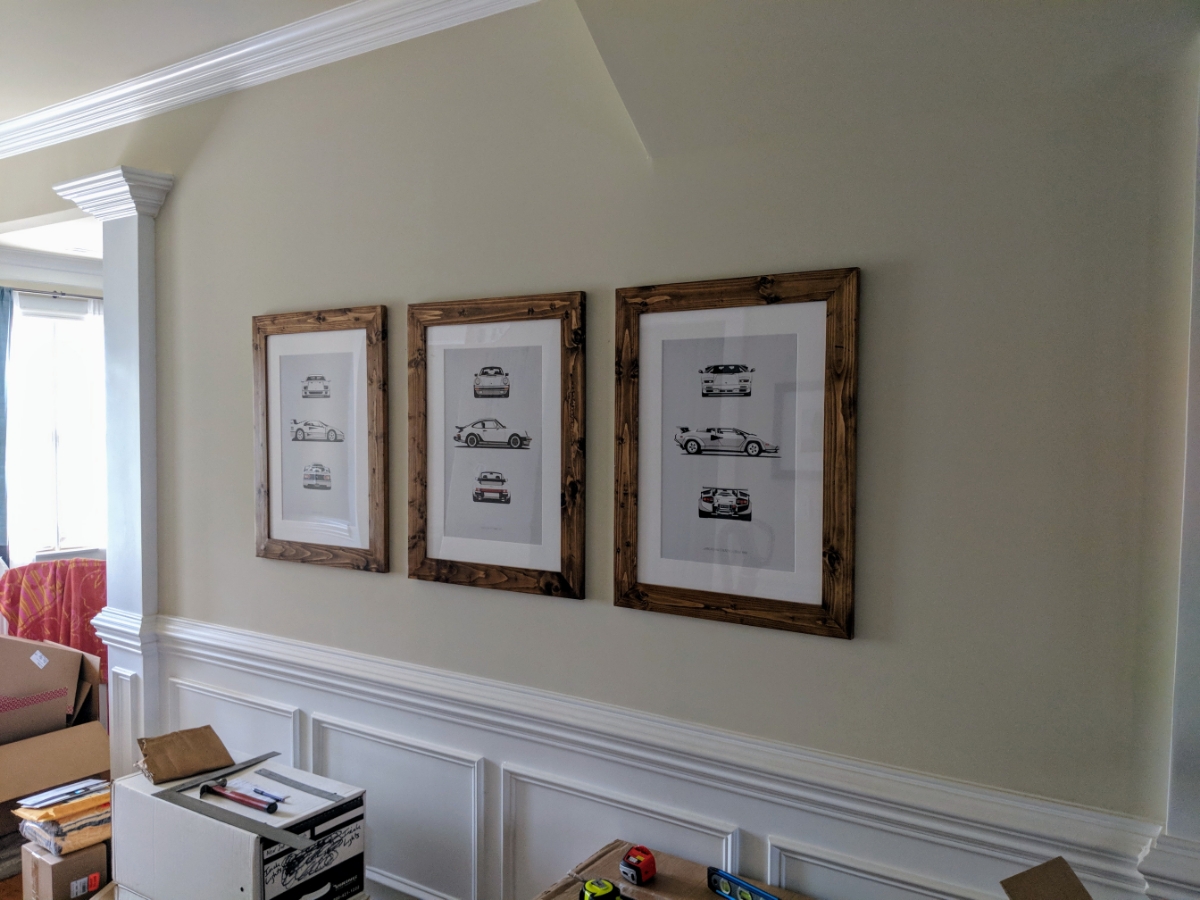
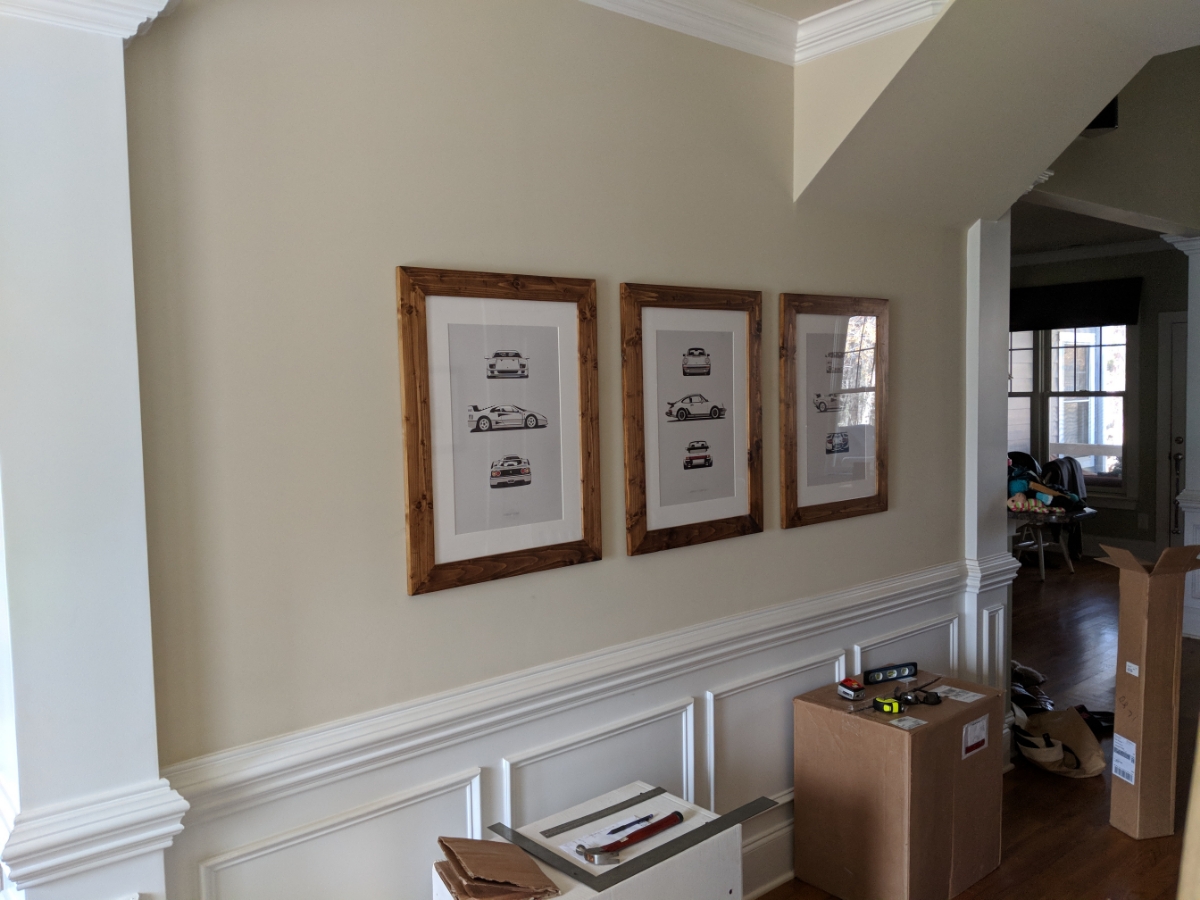
Got some more time last night to work on my frames. Got them all loaded finally. Still have to do the backing on the last 3 and install the hanging hardware which I still have not decided on yet. Here is a shot of all three though.
Those look great. I need to find a spot to do something like this, maybe the garage....
No wife to tell me I can't put them in my entry way so that is where they are going. My office is right off my front door so I will get to see them everytime I head to my office. The Martini RSR 911 will be in my office. I figure the 3 black and white ones look best kept together by themselves.
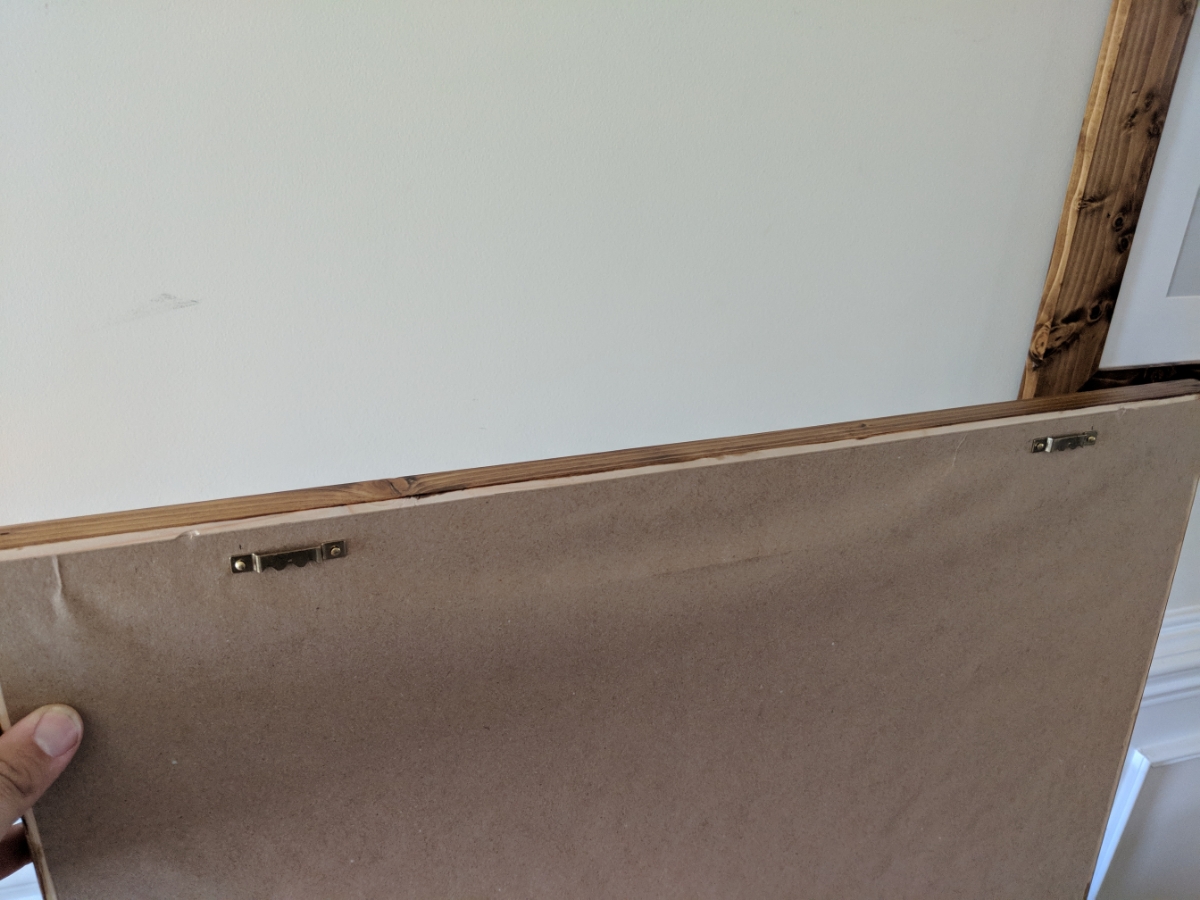
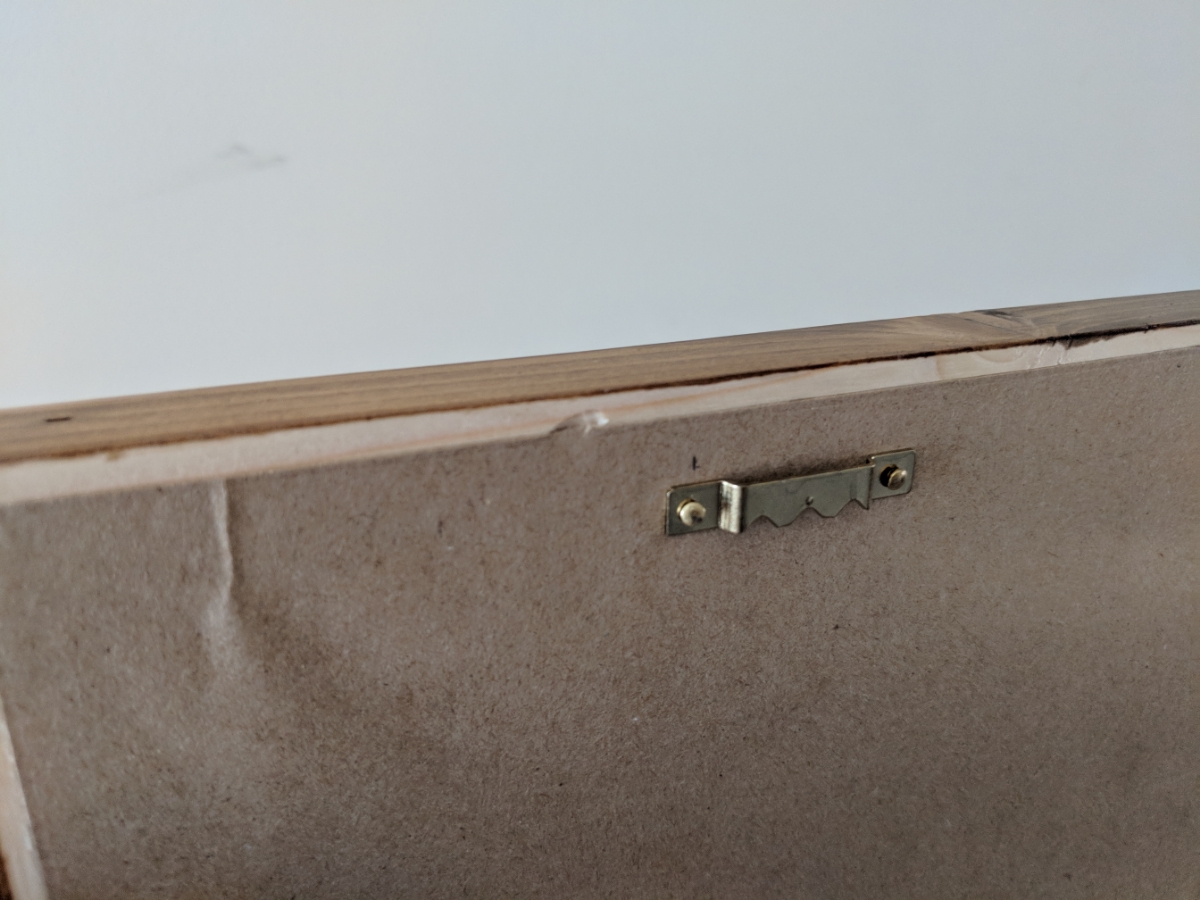
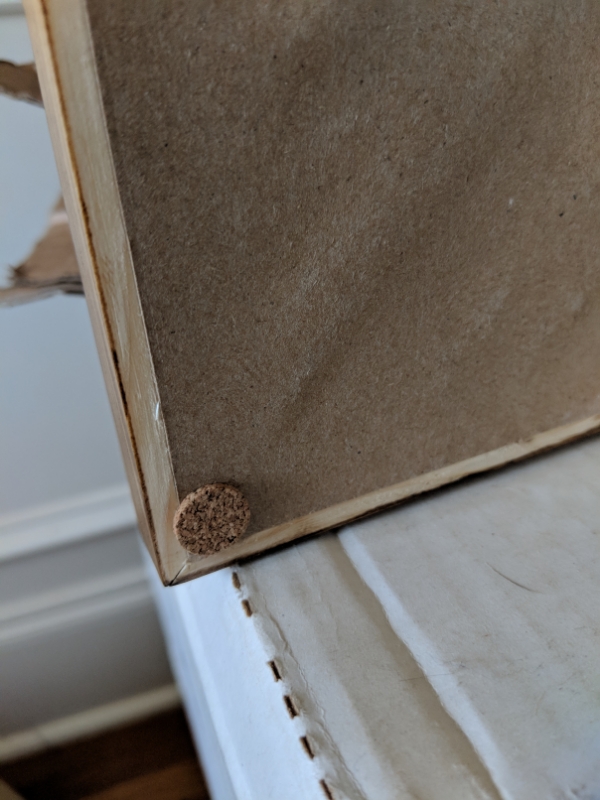
So I can finally mark this project off my list. Got it completed this weekend. Got the mounting hardware installed and them hung on the wall. I ended up going with the metal tooth hangers instead of wire as the pictures only weigh 6lbs each so much under the 20lb per hanger rating since I used plexi instead of glass in the frames. Sadly I figured when I mounted them that two of the frames are warped a bit and have a corner than sticks out about 1/4in from the wall. Only one frame lays completely flat.
Hardware installed
Cork feet on the bottom to level out the picture on the wall.
Finally hung on the wall
Now I need to finalize on a table to put on the wall under them.
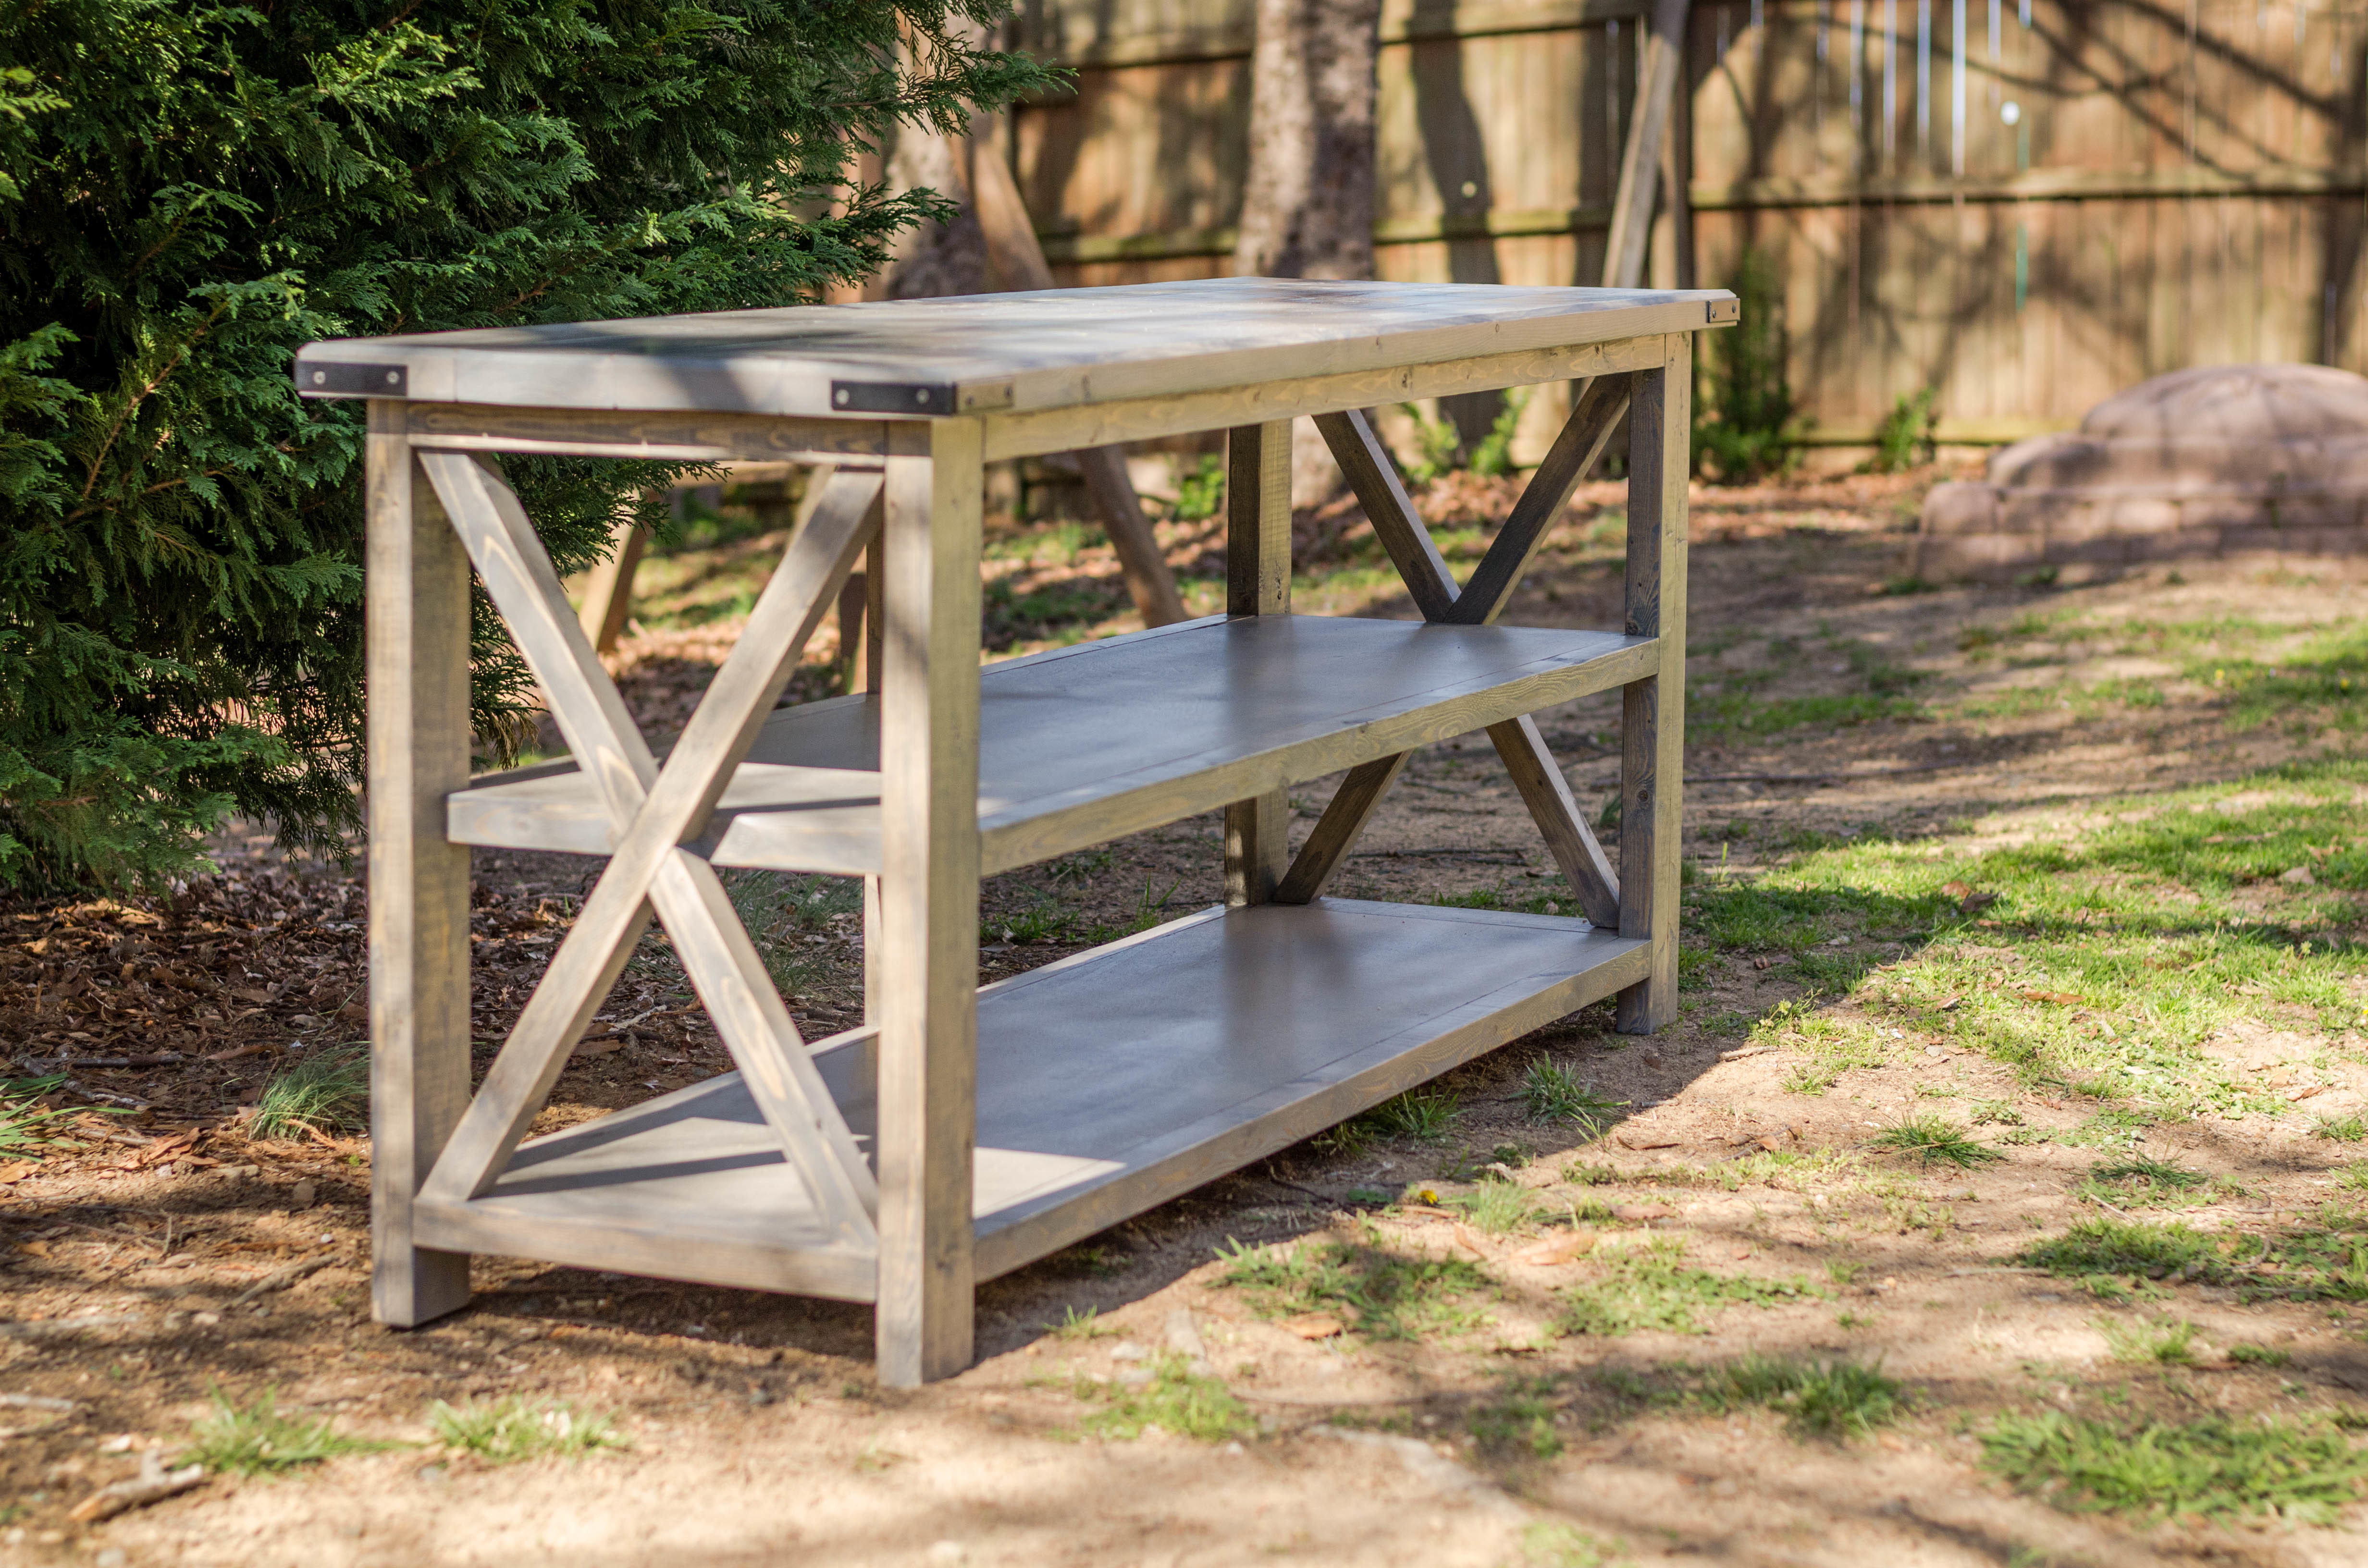
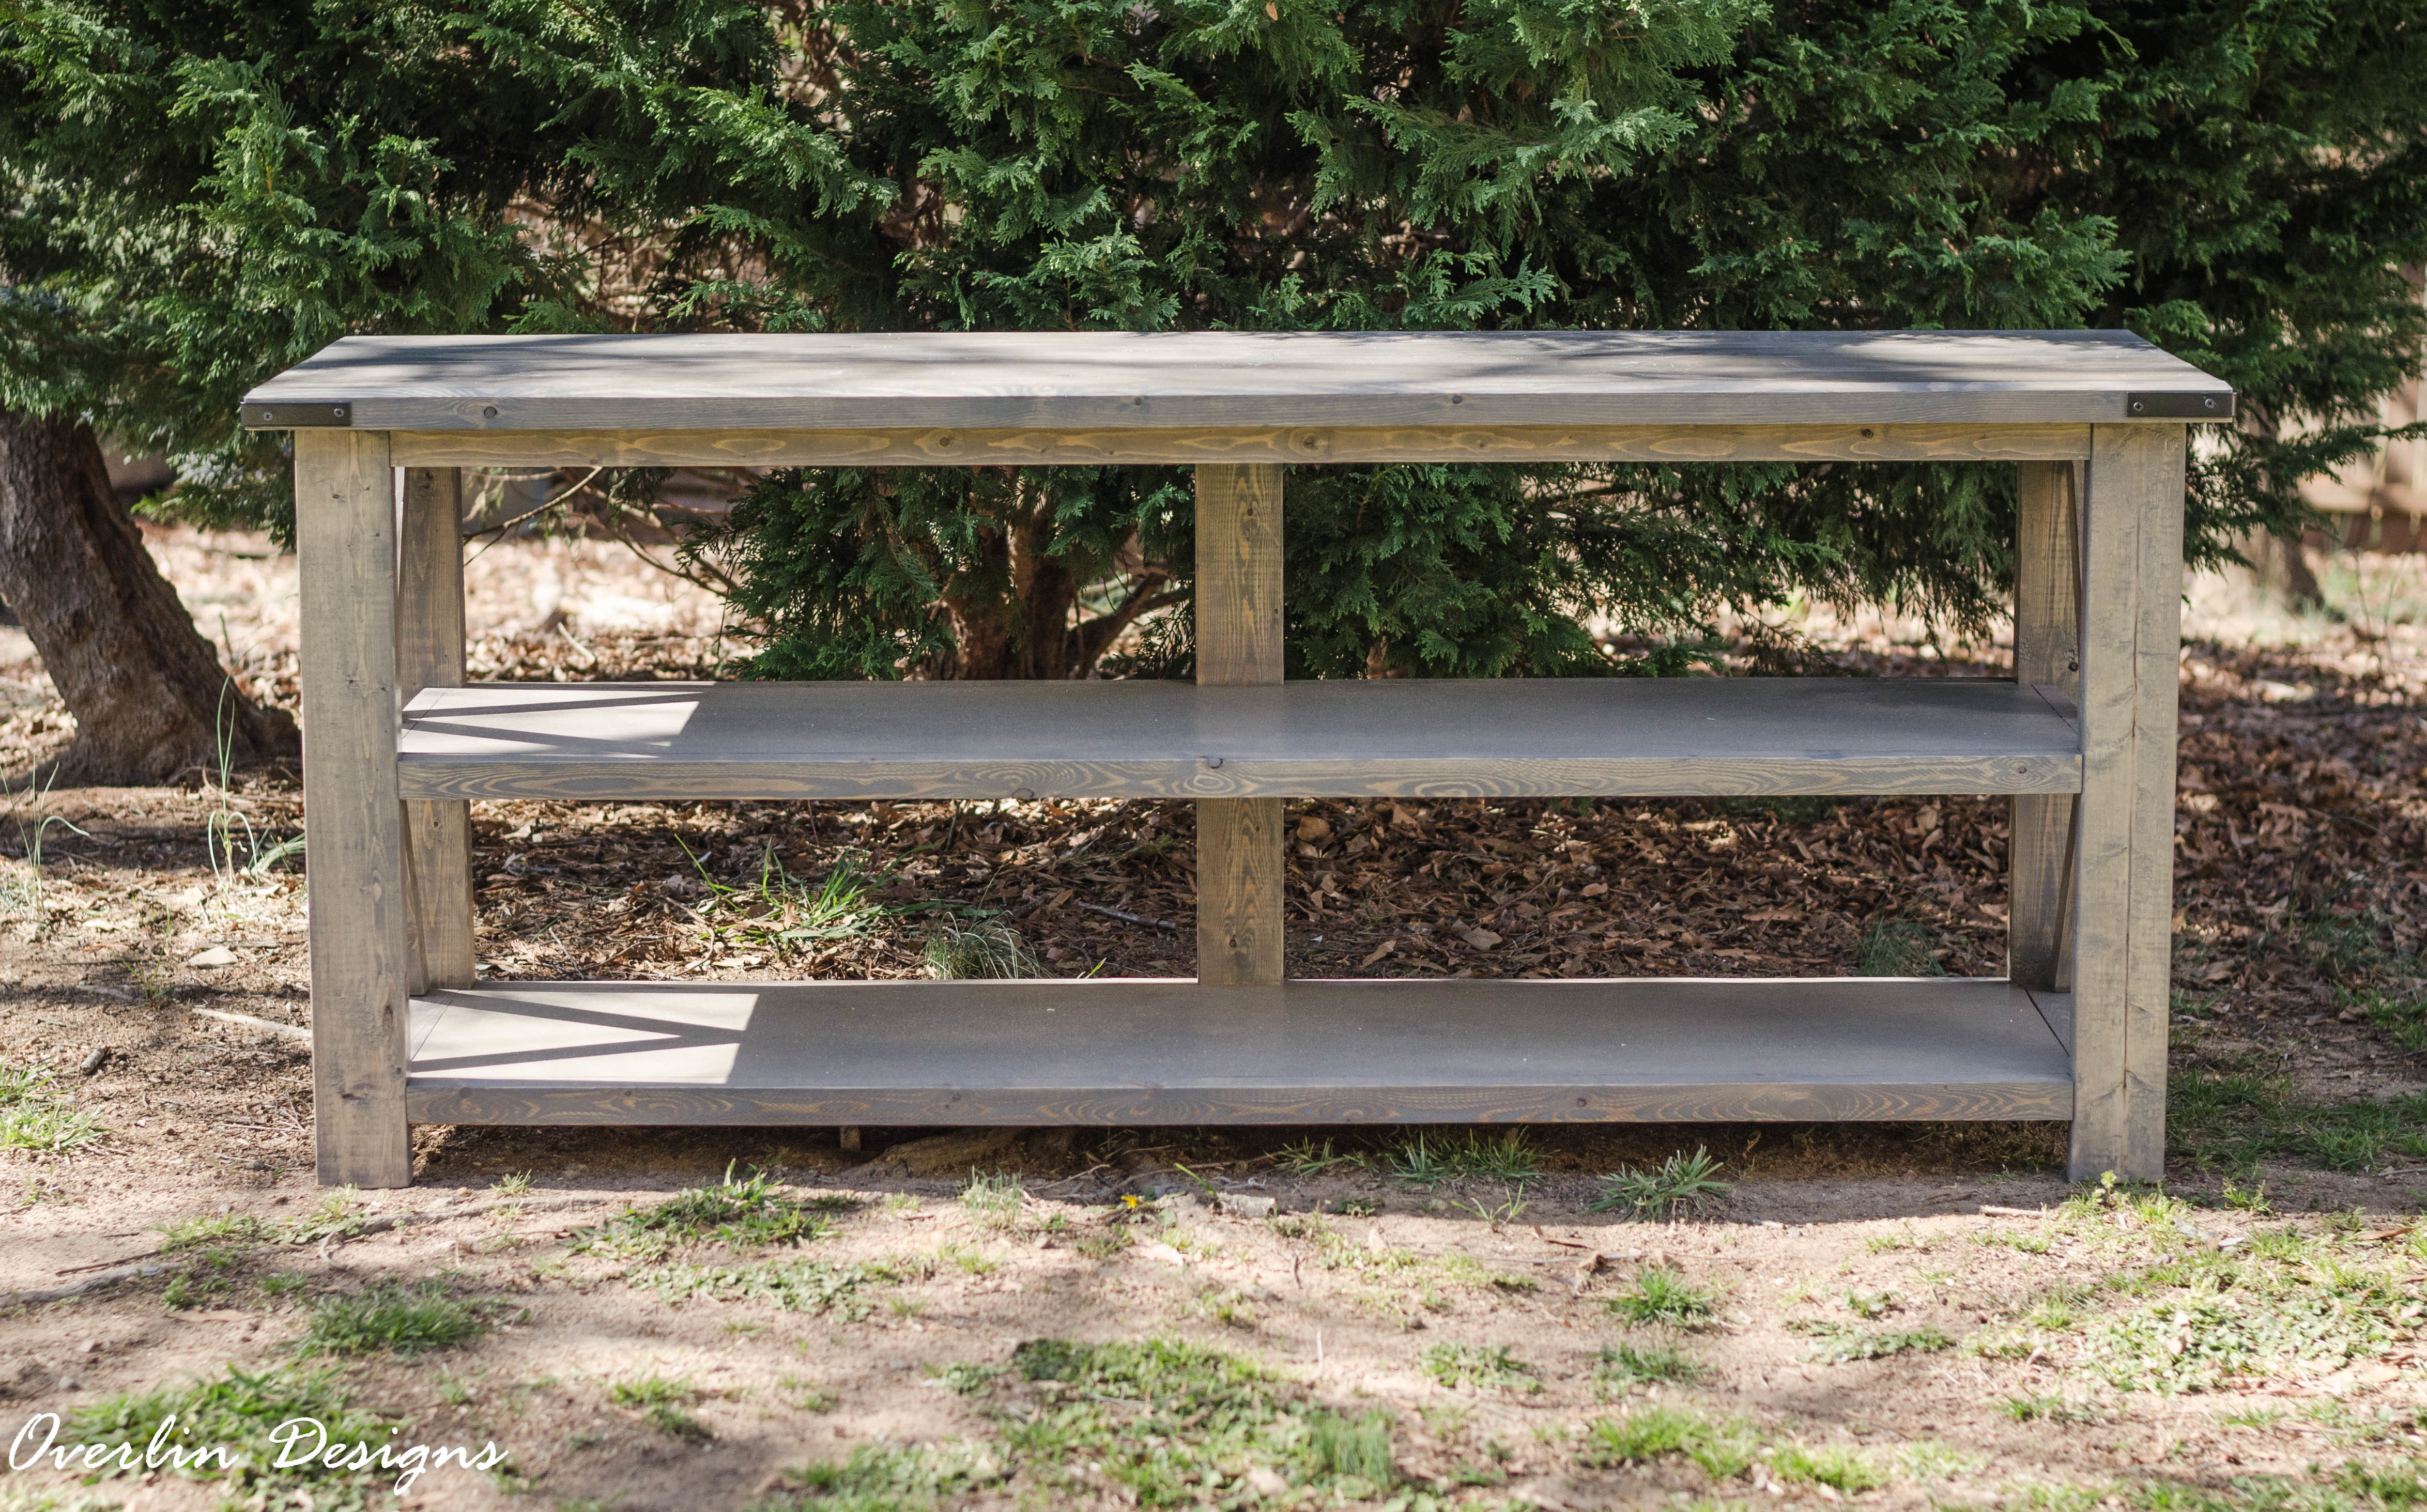
Kind of depends on the design I decide to go with. The two styles are a bit different. The one I am thinking of building is more basic and I am not sure flows with my foyer as the entry has all that decorative trim.
One considering making. There is also a local guy who makes this but he wants $850 for what I would be looking to have built. I think I could tackle it. Might not be as nice as I don't have all the wood tools needed to make it furniture grade but don't think it would turn out too bad.
People have the audacity of charging that much for those things?
Shit son, I'll build it for you if you buy materials and pay for shipping. Could probably design either of them to flat pack down and just screw it together when it gets to you.
People have the audacity of charging that much for those things?
Shit son, I'll build it for you if you buy materials and pay for shipping. Could probably design either of them to flat pack down and just screw it together when it gets to you.
Yeah I was shocked at the price being charged for the first one. The dimensions are 7ft x 22in x 36in. I figured maybe around $400-450 and I figure I should be able to build it for about $150-200. Maybe $300 depending on the type of wood I would choose to use.
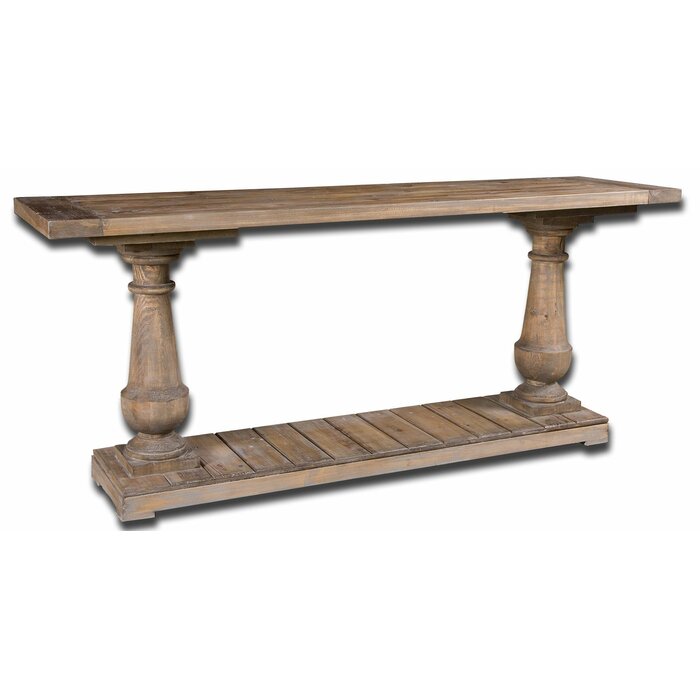
The second one from Wayfair I have no idea where to start with trying to build the pedstal legs. The rest looks really easy. The wayfair one I don't even mind the price as much and I think it might flow better with the house. Who knows though.
Yeah I was shocked at the price being charged for the first one. The dimensions are 7ft x 22in x 36in. I figured maybe around $400-450 and I figure I should be able to build it for about $150-200. Maybe $300 depending on the type of wood I would choose to use.
The second one from Wayfair I have no idea where to start with trying to build the pedstal legs. The rest looks really easy. The wayfair one I don't even mind the price as much and I think it might flow better with the house. Who knows though.
If you have a miter saw, jig saw, tape measure, kreg jig, and pencil you should be able to build it yourself no problem.
$850 is right in line with price for something like that done in actual low end hardwood with proper mortise and tenon joinery but not when it's pine 2x4's pocket holed together.
Offer still stands if you want me to do it for you to flat pack and ship it. No clue how much it would be though.
Yeah I have all the tools to build the first one so I don't believe it should be hard. Have seen lots of plans as well if I would need any. I appreciate the offer but if I go with that design I will probably try my hand at it.
Dang two of those pedestal legs are almost the price of the entire table I am loooking at
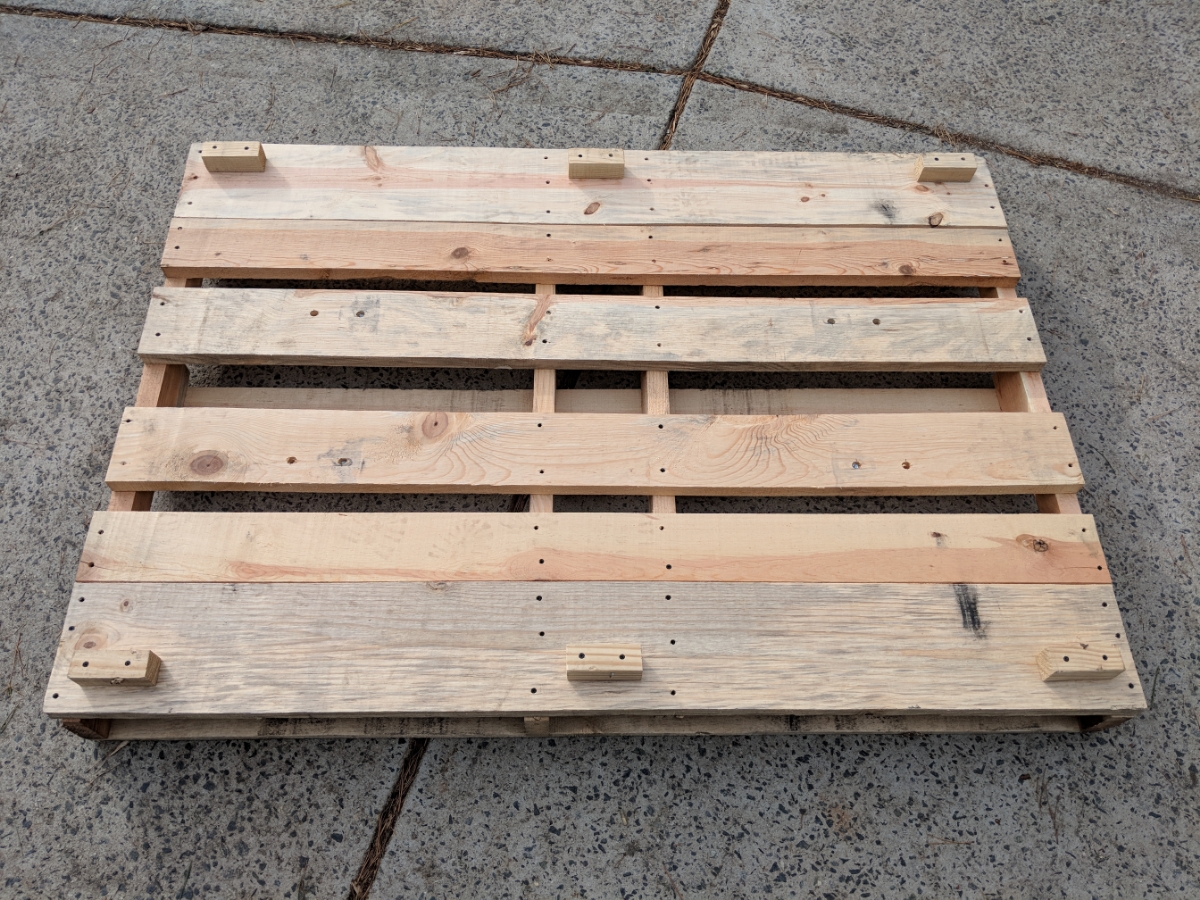
So with the frame project finished I am on to figuring out my next project. That table in the foyer is something I want to get done but I have some wood right now that is more suited for other projects. I have the 5 pallets I posted about earlier in this thread. My two ideas I have for them are either two chairs for outside with my fire pit or some nice floating shelves in the dog room. Leaning towards the shelves cause the wood is some of the nicest I have seen used for making pallets so it is probably best used for an indoor application.
If I were to make chairs it would be something like one of these two options
If I were to make shelves these are some ideas I found that I like.
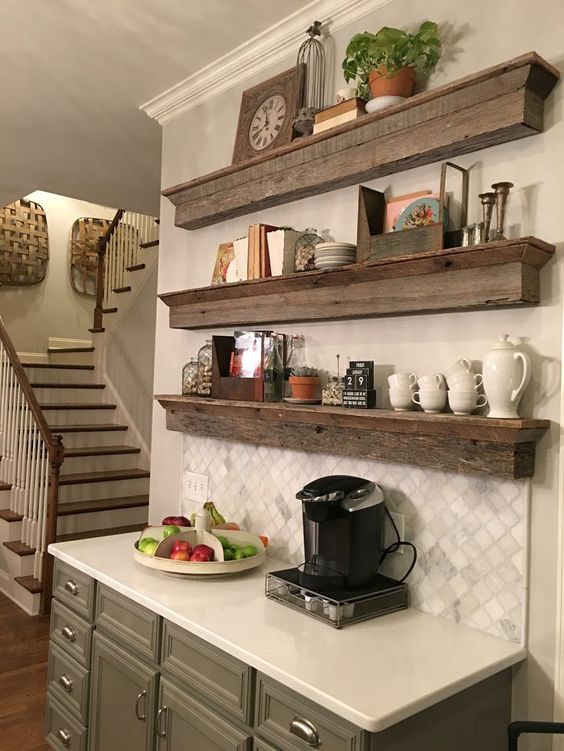
This is by far my favorite design. I think it might be a more timeless style as well than the pipe or angle iron brackets of the other two styles. I am not sure what really the style is called so I could find some more similar images but could easily build off just this image no problem.
Just need to get the table saw setup finally and get it properly aligned so I can cut those trim pieces at 45 degree angles.
To put the shelves in context they would be going in this room.
Later on this year I have some ambitious plans to build a set of these for each side of the room. The list of features keep growing on them so for right now they are pretty far down the road. They will have a camera in each kennel and led lighting as well. The plan is to finish them this way as well to.


 I have a similar problem.