
CCColtsicehockey's Home Projects Thread


Ex-OEM King


Joined: Dec 2013
Posts: 17,880
Likes: 7,026
From: Minnesnowta
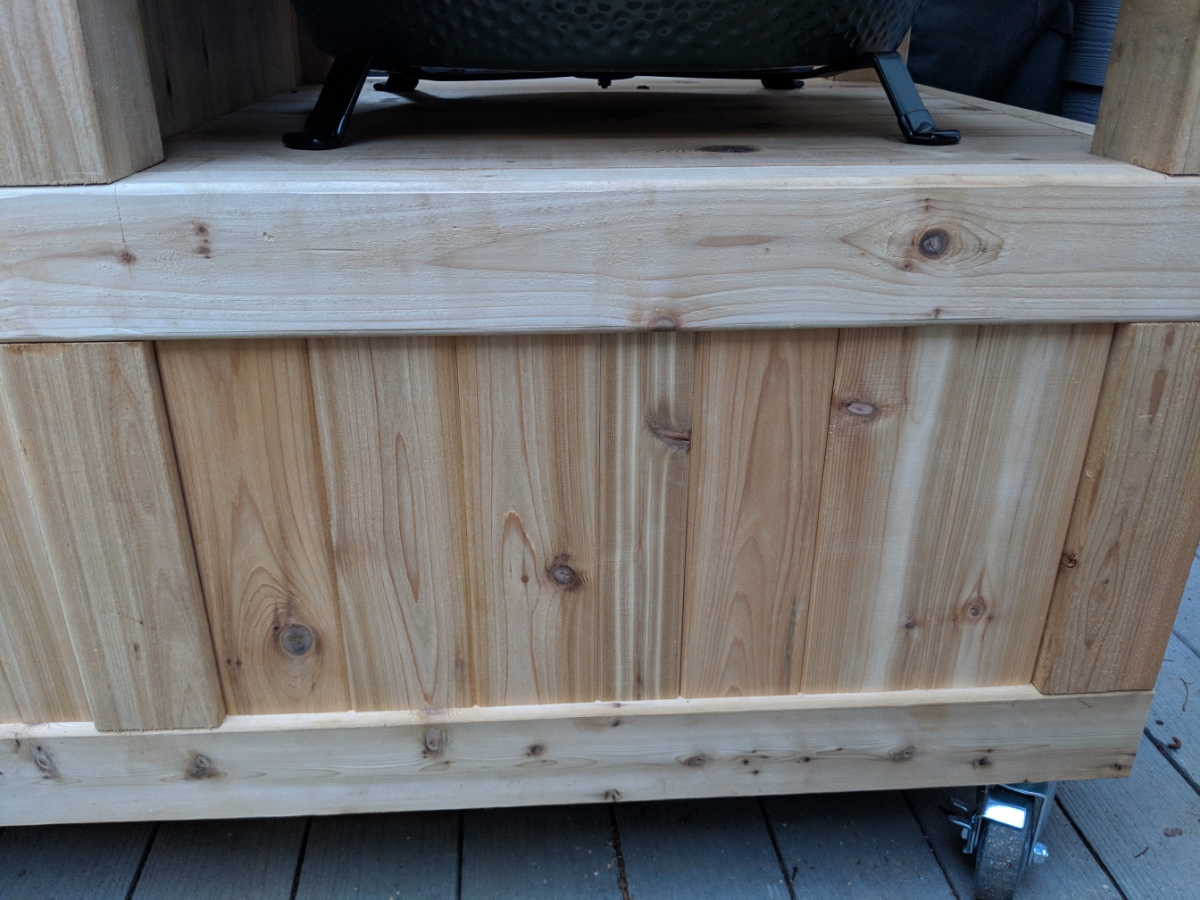
Basically the very bottom floor boards that will line below the drawer and line the bottom of the side cabinet and also the shelf boards the egg will sit on.
Similiar to the ones in this picture of the design I am kind of following. These appear to be nailed down.
Also wish I had bought a planer or gotten finish grade wood so that I had square corners instead of rounded off ones. Oh well. I will probably build another someday and hopefully flip this one for a slight profit.
You can get square corners by ripping the lumber down. A 2x4 (1.5x3.5) can be ripped to 1.5x3 to get square corners. This is what I do.
Thread Starter
Moderator
Regional Coordinator (Southeast)
Regional Coordinator (Southeast)


Joined: Dec 2003
Posts: 44,123
Likes: 4,433
From: Mooresville, NC
If those are sitting on a ledge then nails and glue are fine. You can measure the screw locations for a nice uniform look if you like that style but a couple nails and glue should be fine.
You can get square corners by ripping the lumber down. A 2x4 (1.5x3.5) can be ripped to 1.5x3 to get square corners. This is what I do.
You can get square corners by ripping the lumber down. A 2x4 (1.5x3.5) can be ripped to 1.5x3 to get square corners. This is what I do.
Yeah I probably should have ripped down the 4x4 posts and the 2x4s before starting. I guess learning as I go the little things to make it look better. Thinking about making a glue sawdust mixture to fill in all the seems because of the rounded edges.
Thread Starter
Moderator
Regional Coordinator (Southeast)
Regional Coordinator (Southeast)
Joined: Dec 2003
Posts: 44,123
Likes: 4,433
From: Mooresville, NC
So got a good bit done last night but still not as much as I wanted too. It also took a lot longer than I had planned. The dado blade was super helpful. It scared me though when I was done with it. The last two blades took me almost 20min to get off. Like they were too small even though they were for the right size arbor. Ended up taking it off one board to early as well. Forgot I had to notch almost the entire length of a 2x4 on the shelf for the floor boards. Had to that one the multi cut method. Halfway through assembly I ran out of screws. Thankfully Lowe's is right down the street and open till 10pm so I could finish the frame. I bought 24in drawer slides to use cause that is all they had in stock while I was there. The inside dimensions of the drawer and cabinet will be 27.5in. Debating on whether I should order 26in drawer slides to maximize my space since it is there.
Now the part you actually want to see.
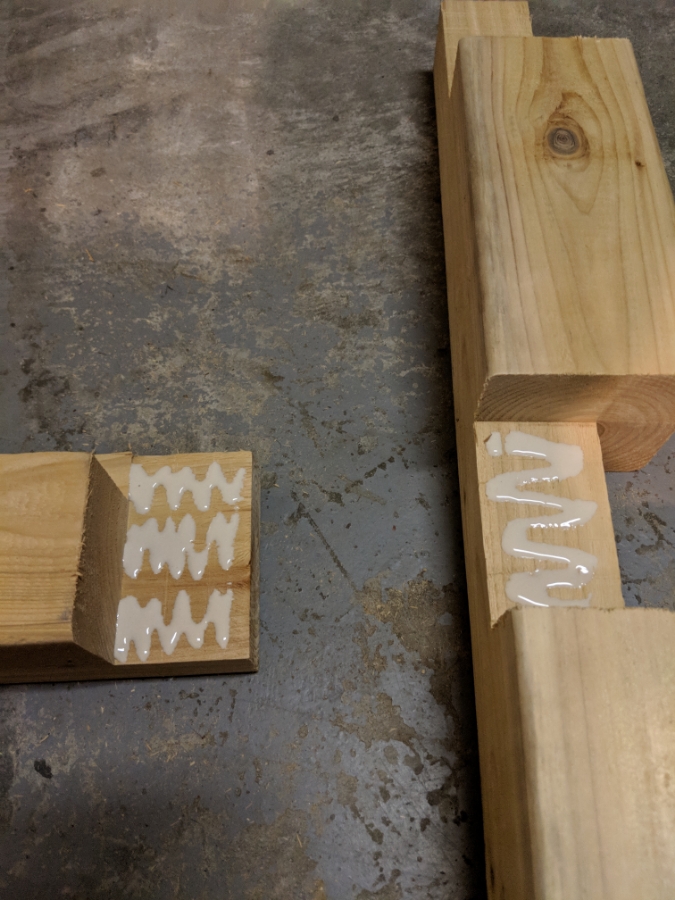
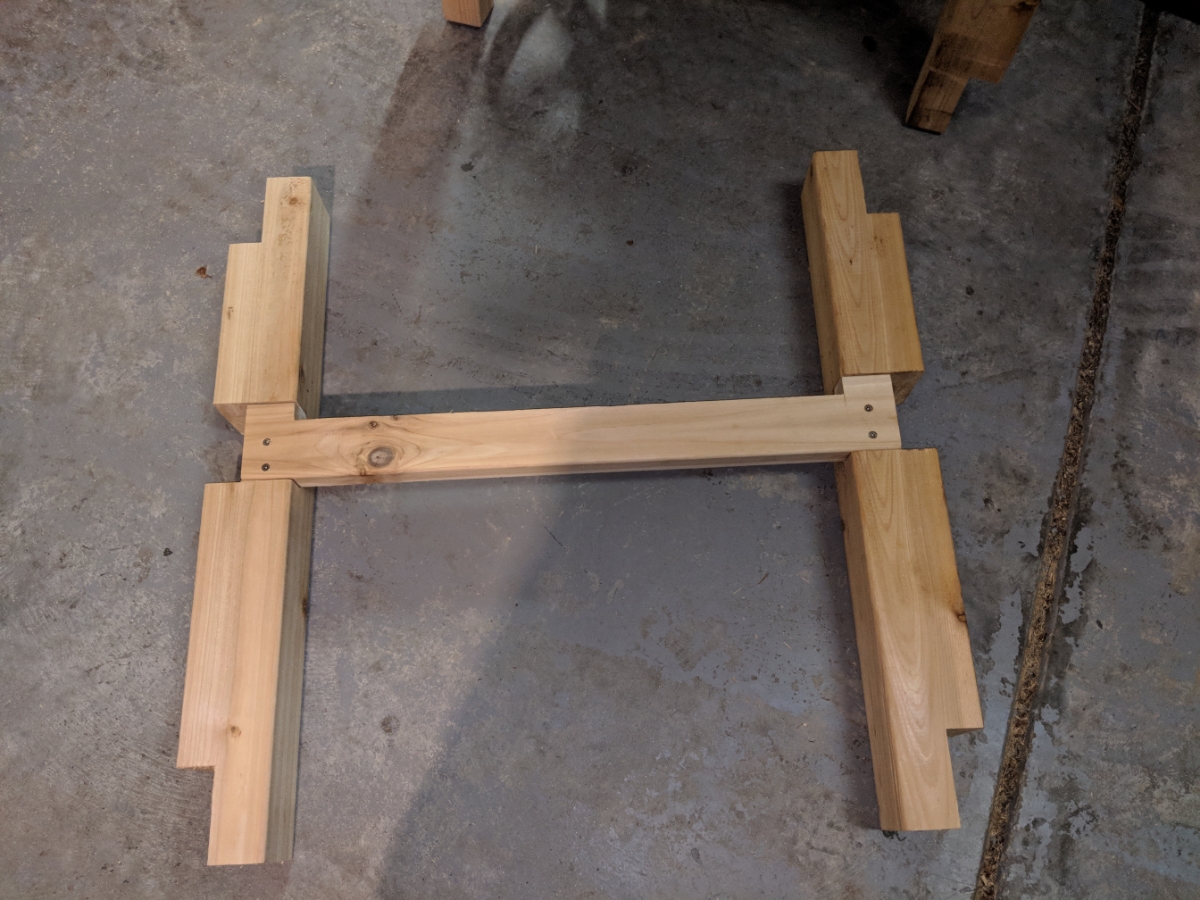
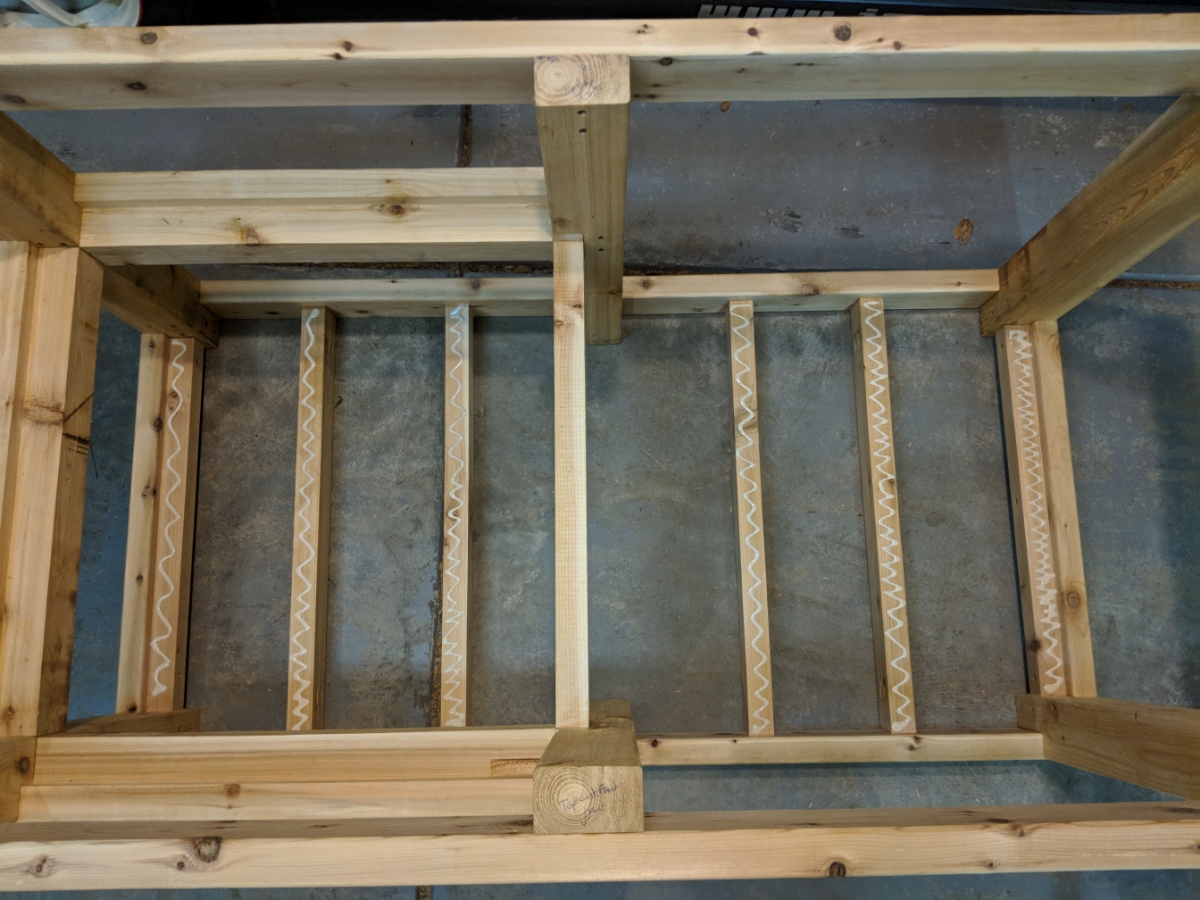
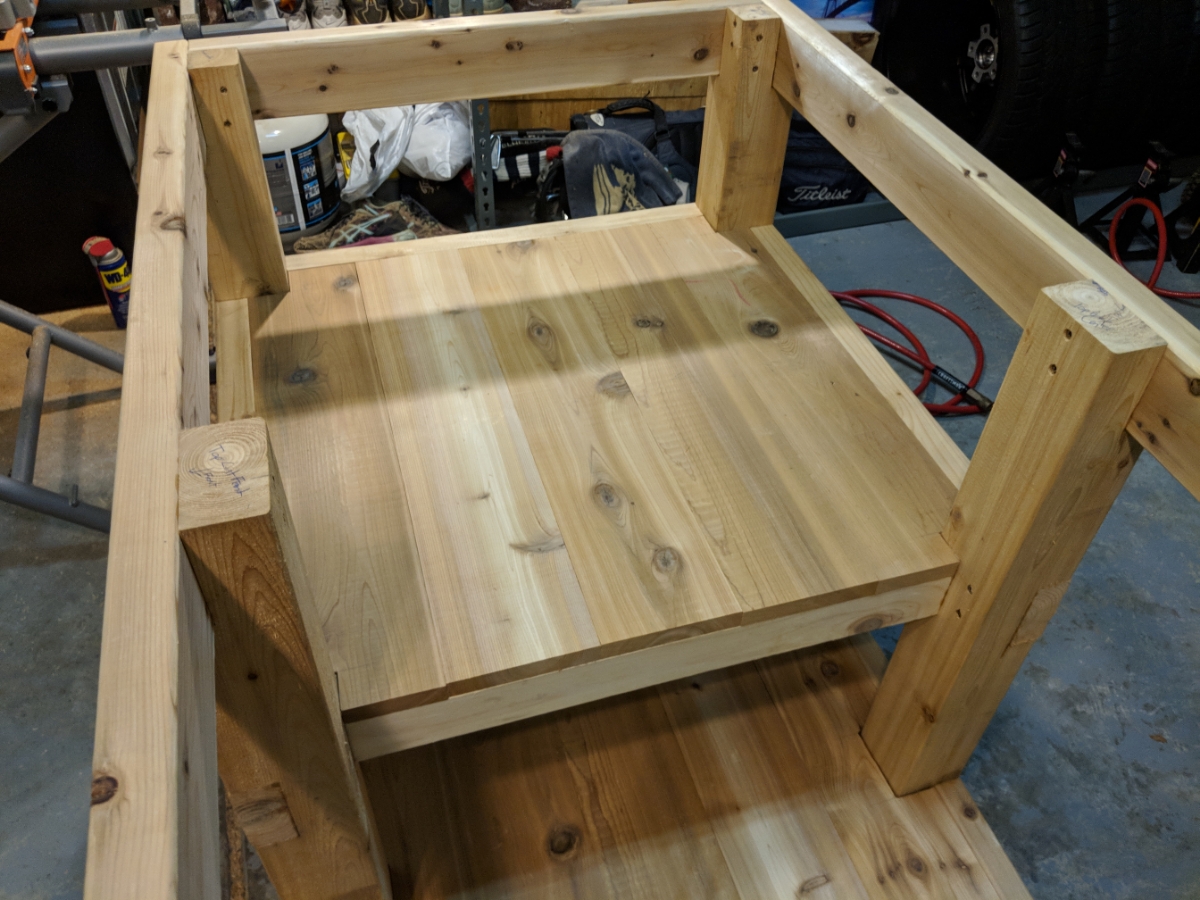
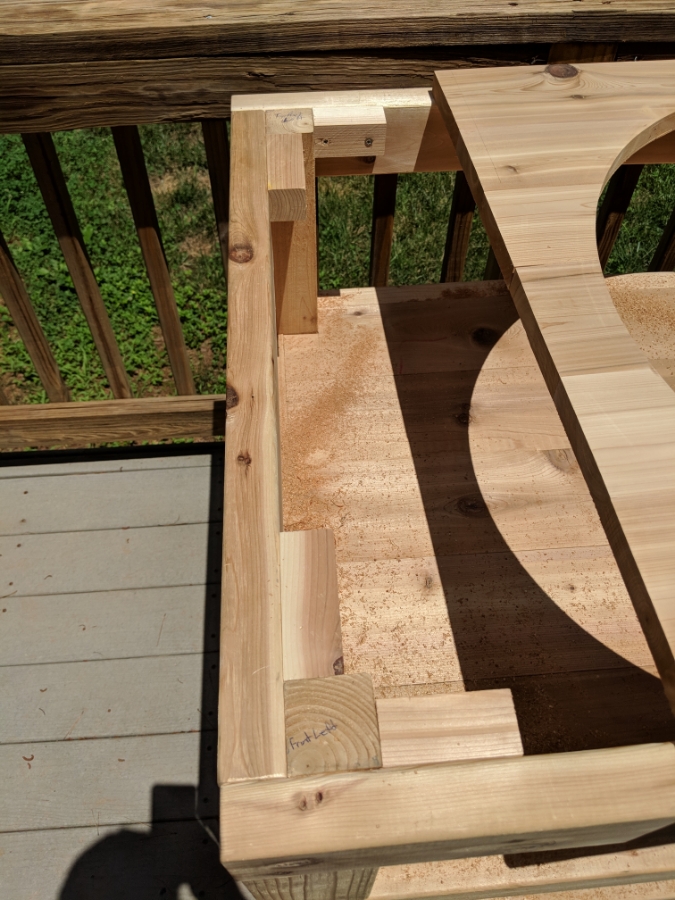
Cut a 2in x 7/8in rabbit in the 4x4 shelf beems for the flooring to sit in. This will give me a nice trim to the shelf of 1.5in all the way around the three open sides and on the inside the 2in will still be there on the right side of the shelf against the cabinet wall to give it a symetrical look.
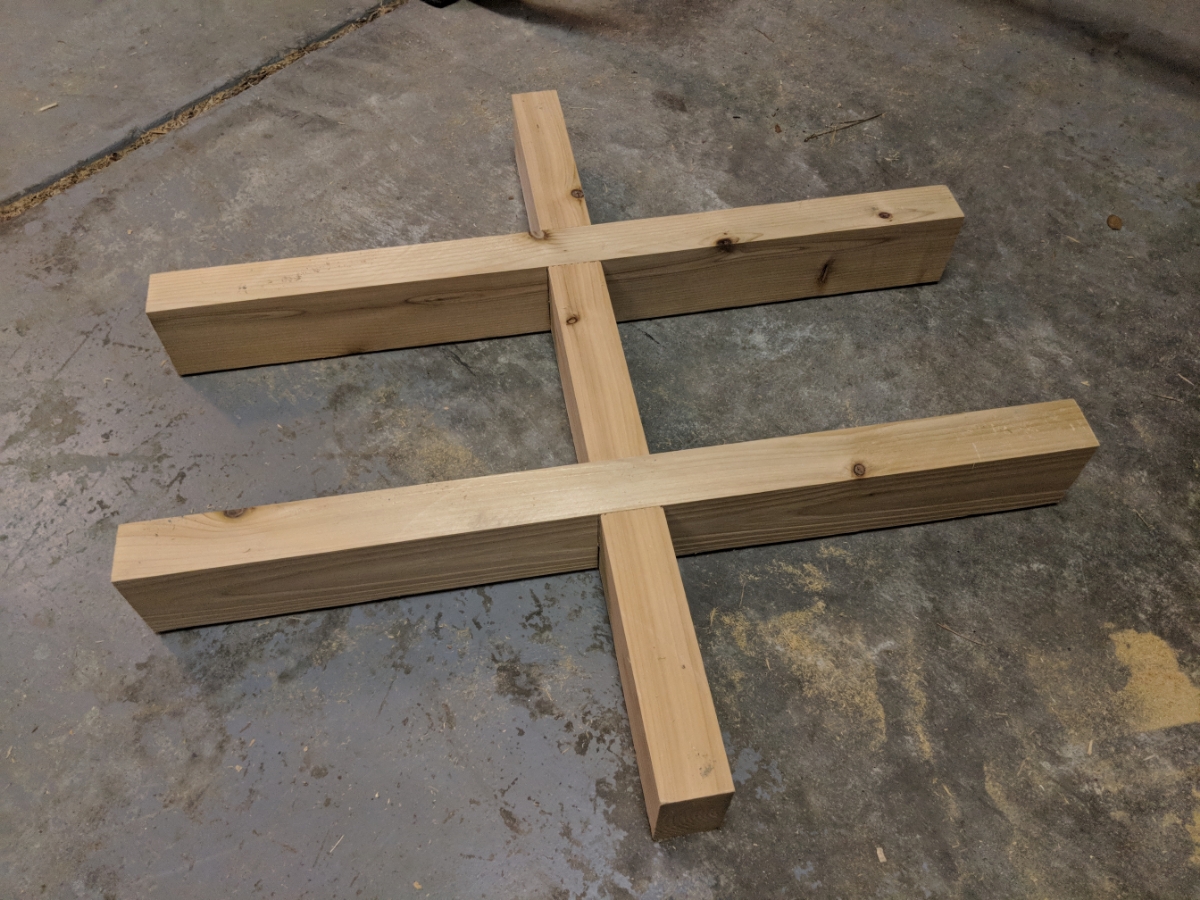
Starting to put together the first supports. Using plenty of Titebond III per Sam's recommendation.
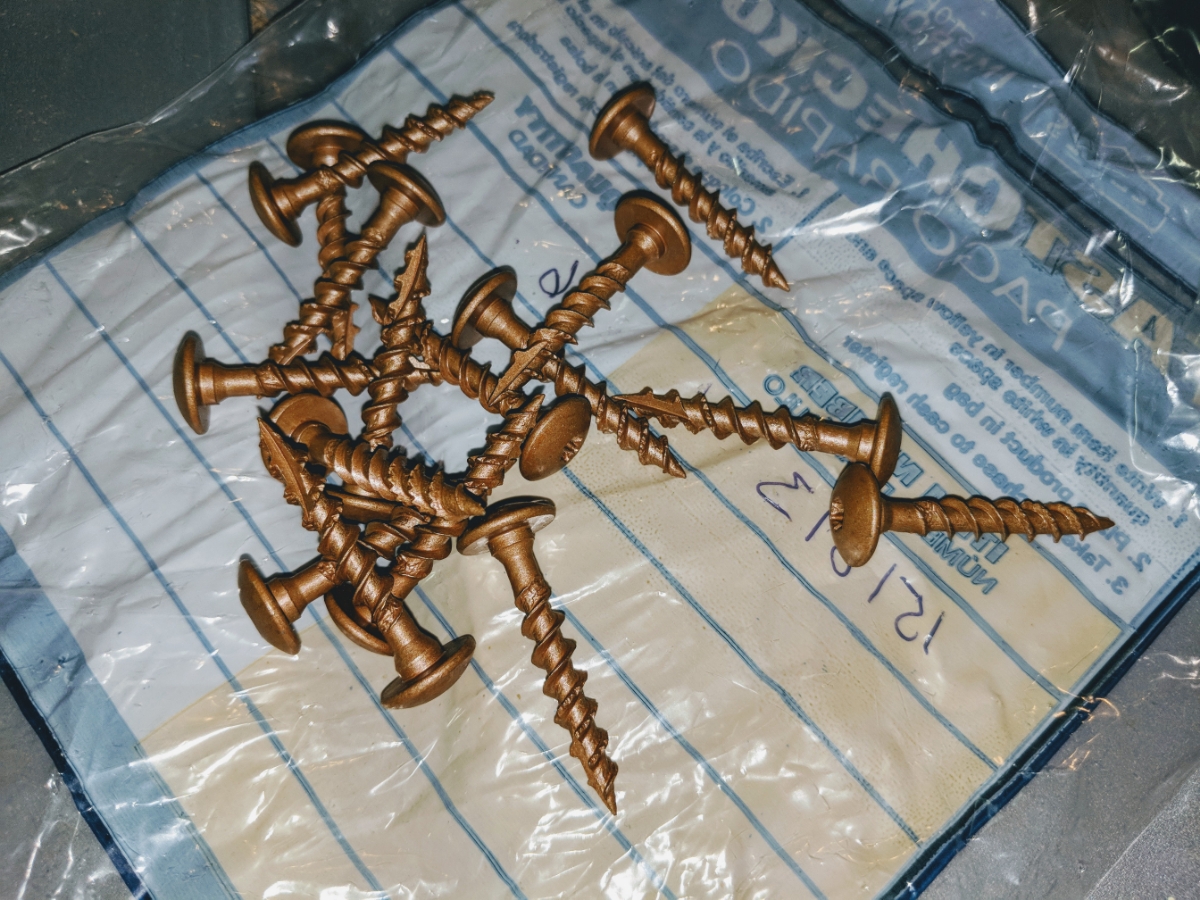
Followed by two 3in stainless steel deck screws.
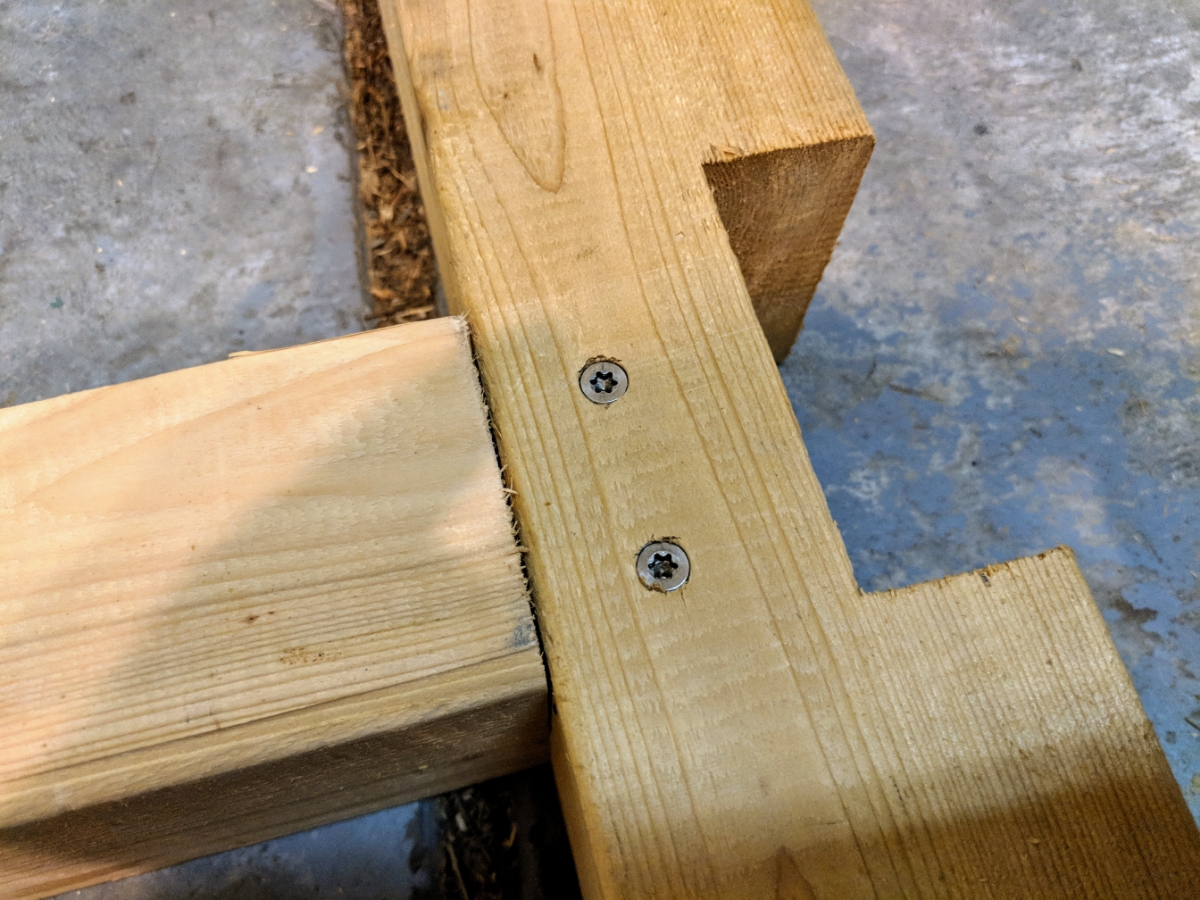
Middle support posts with notch for shelf in 2x4.
Front and rear shelf beems installed.
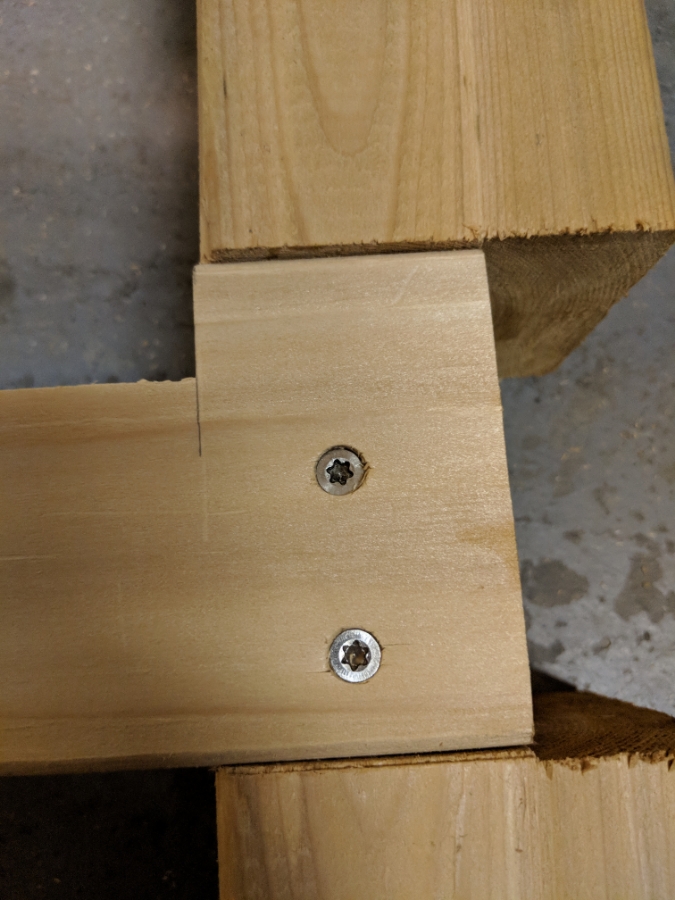
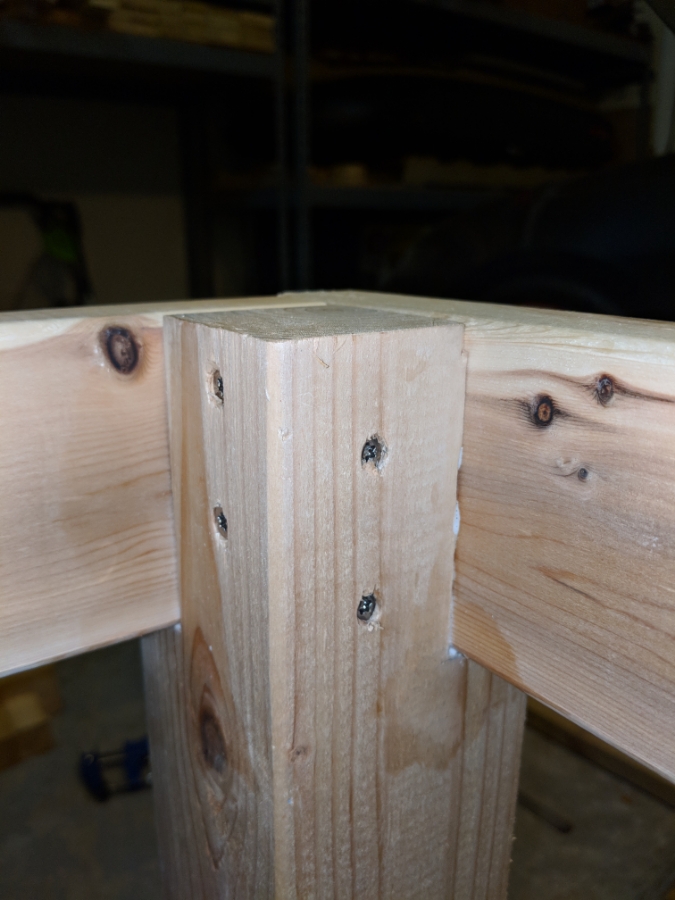
When I attached the one set of posts to the cross beems I realized at this point the last set of screws had no where to go. I drove them in at a downward angle and the heads will be covered by the shelf floor.
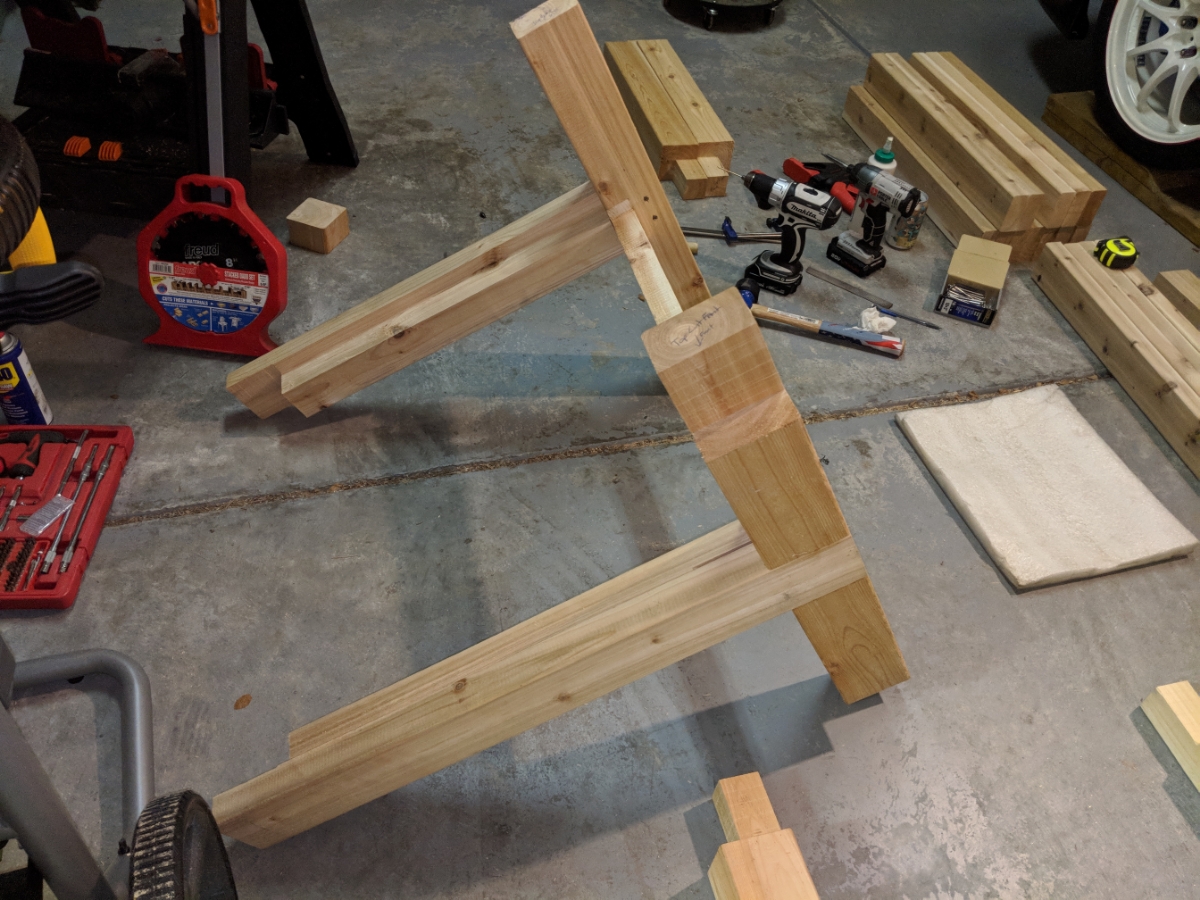
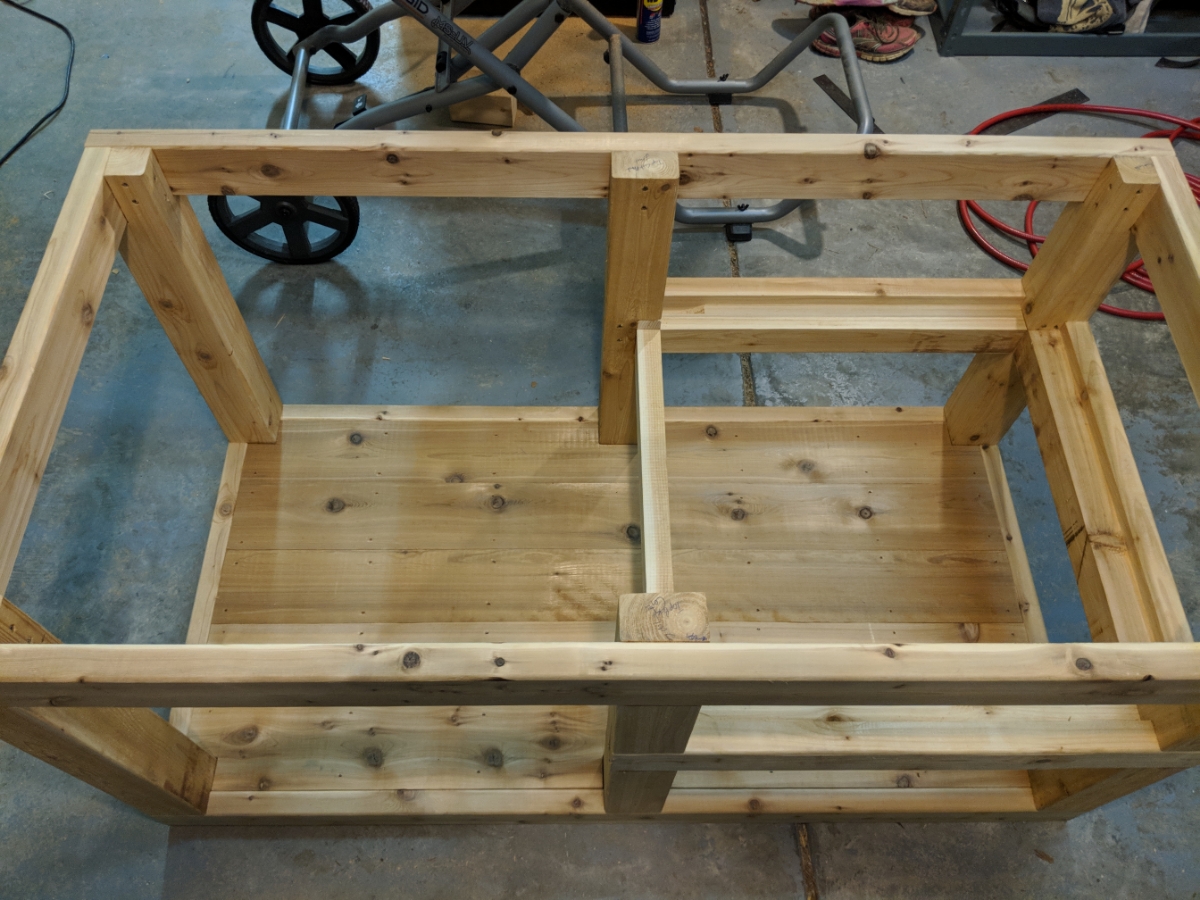
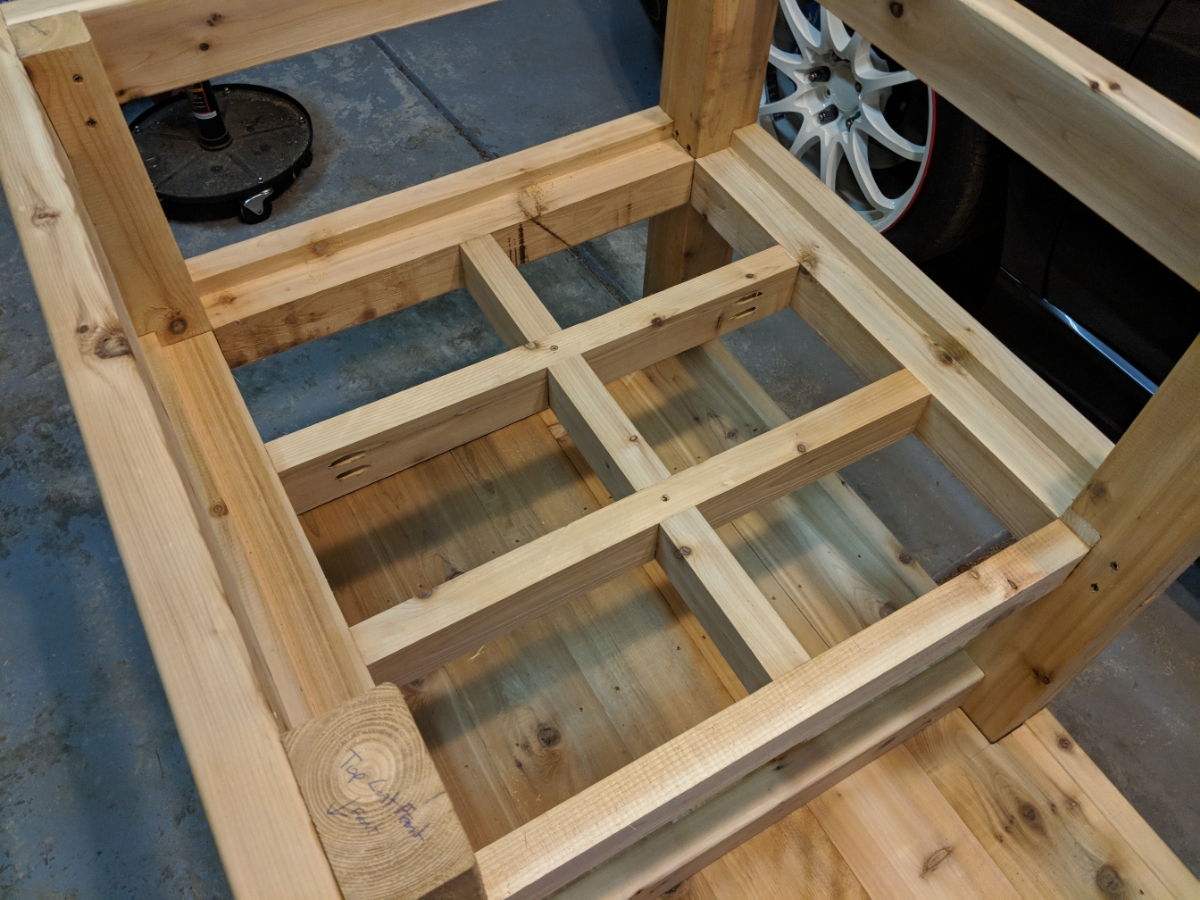
Four posts of the Egg stand portion of the table all attached.
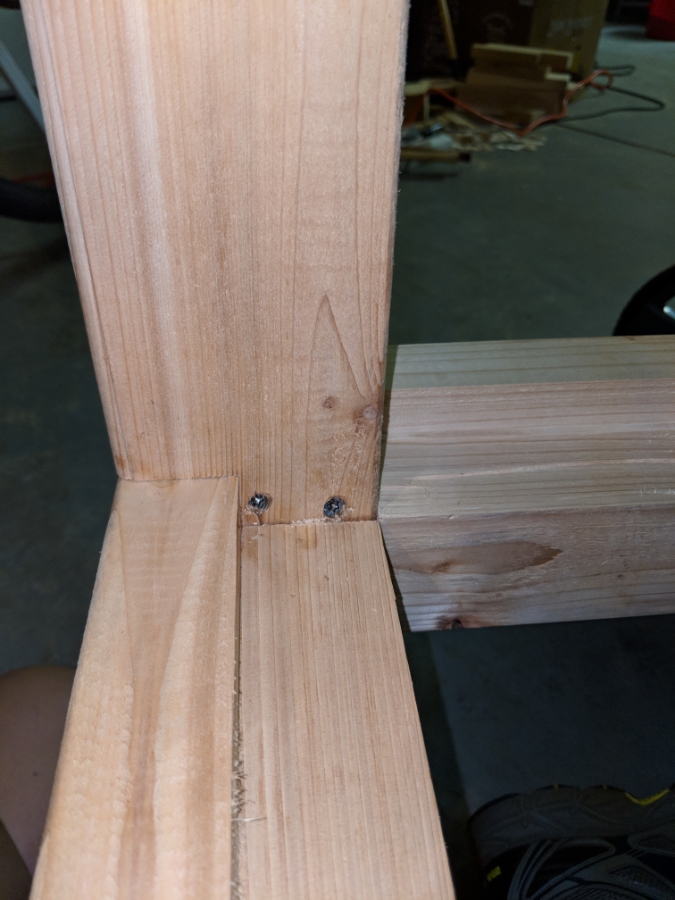
Screws at the top corner of the table. All on the inside so you should never see them except maybe from inside the cabinet if you are trying to find them.
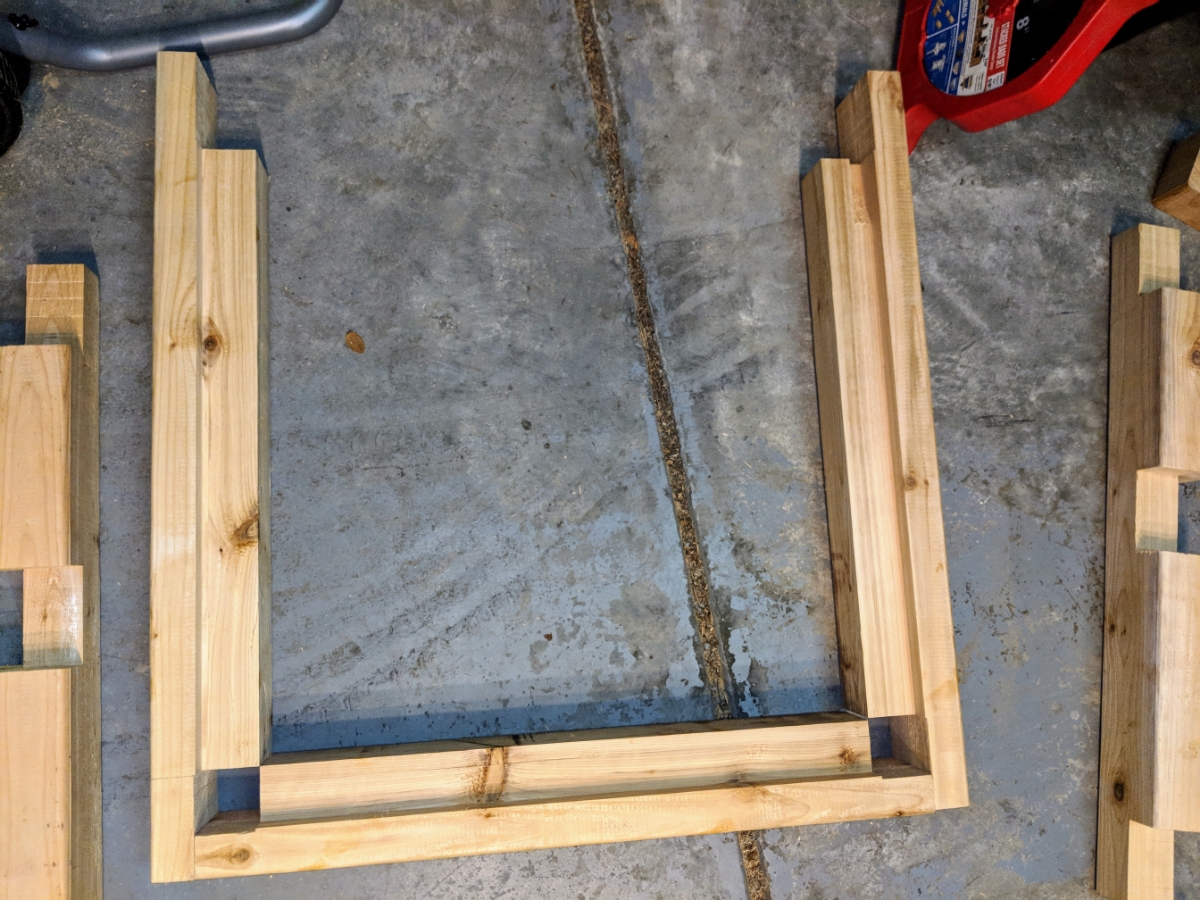
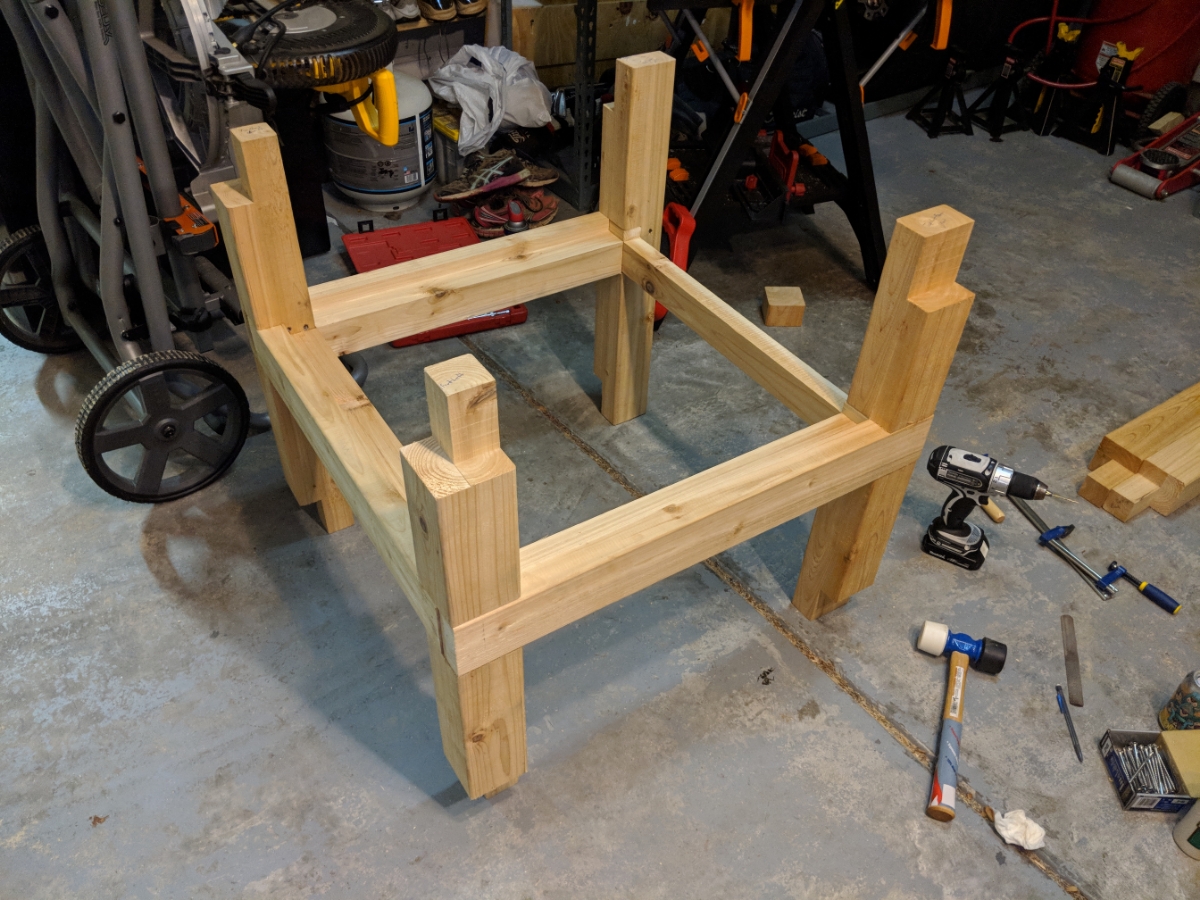
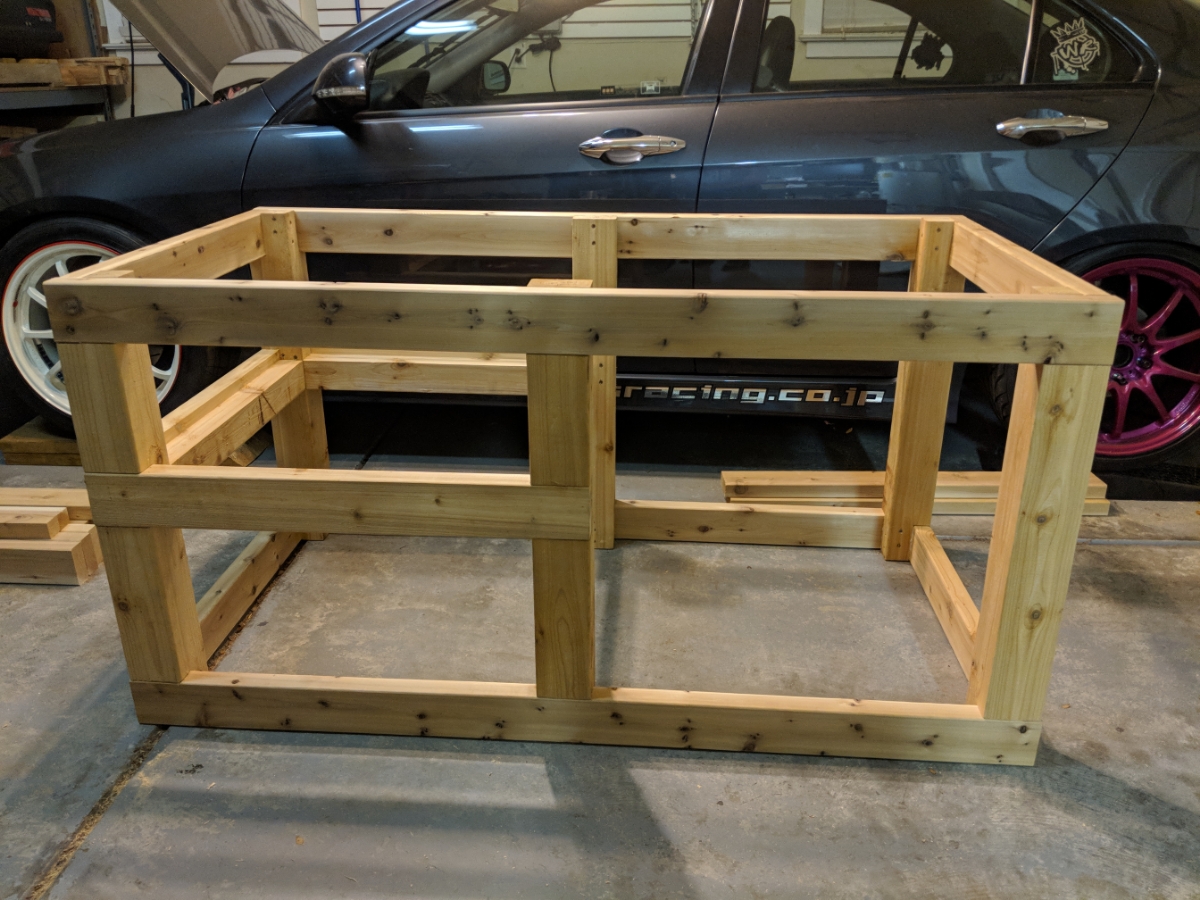
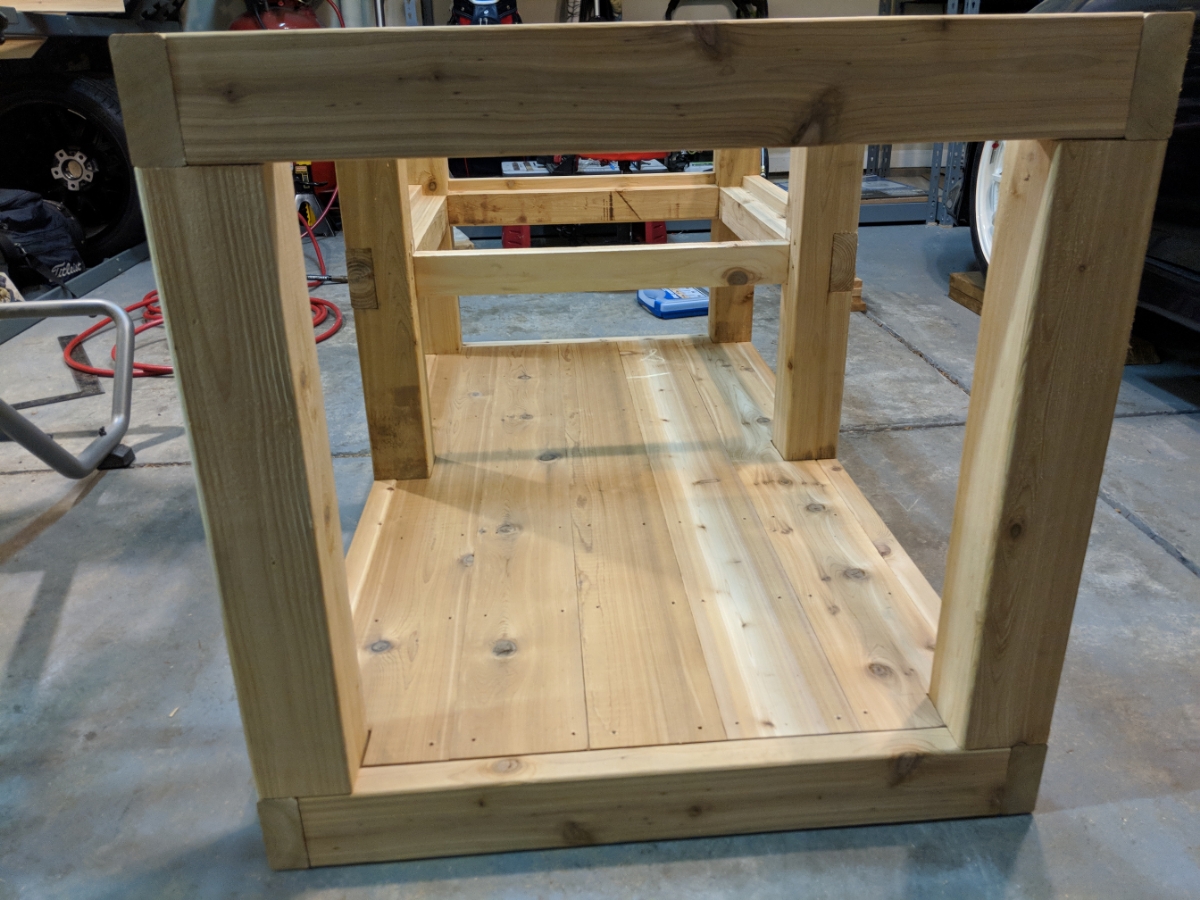
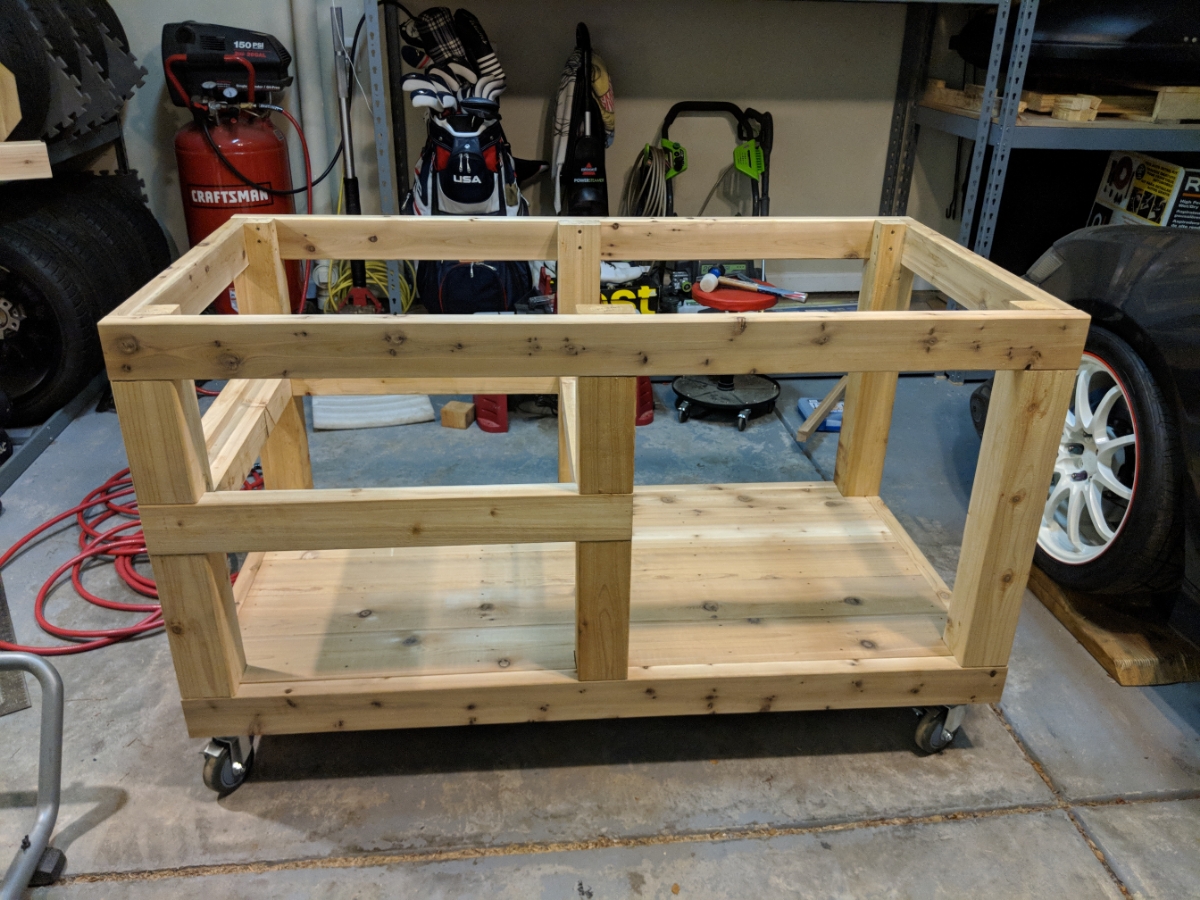
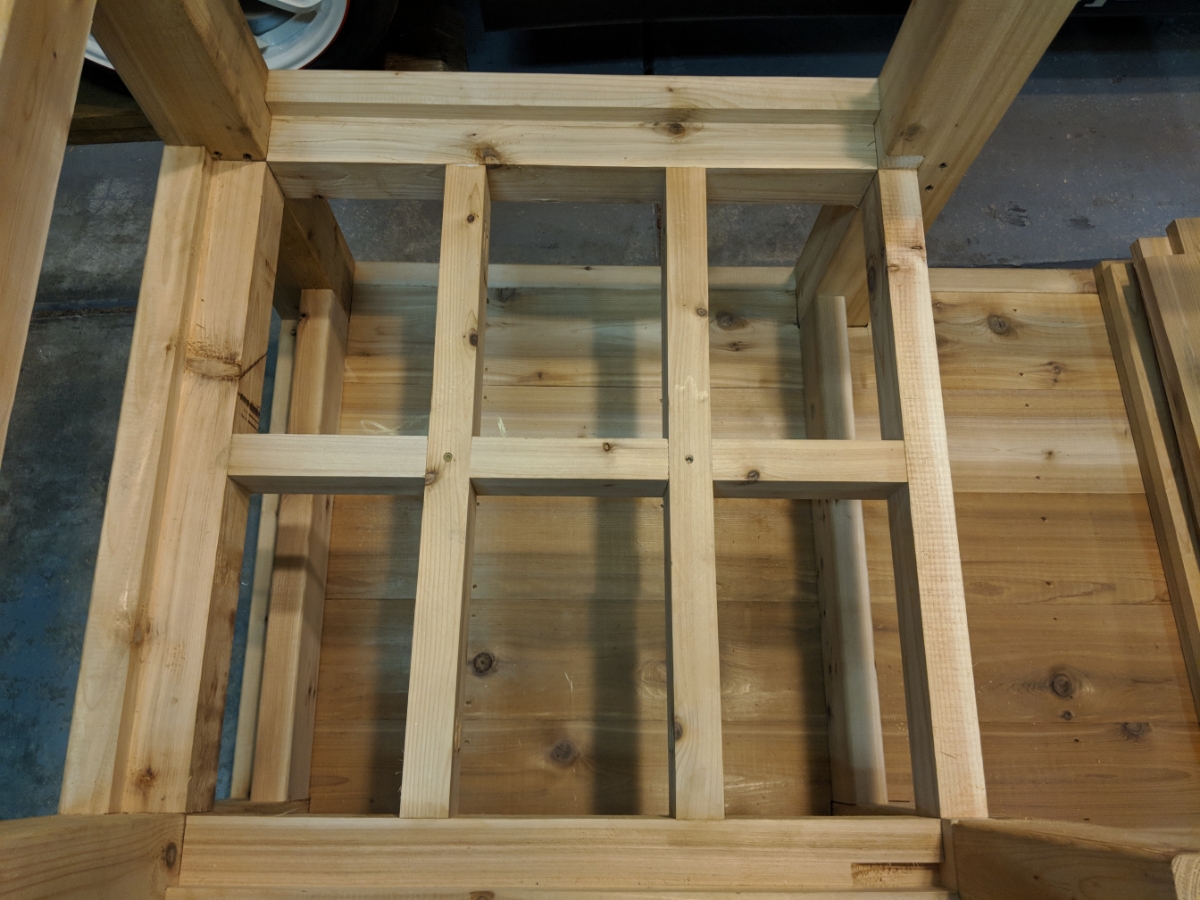
Frame completed
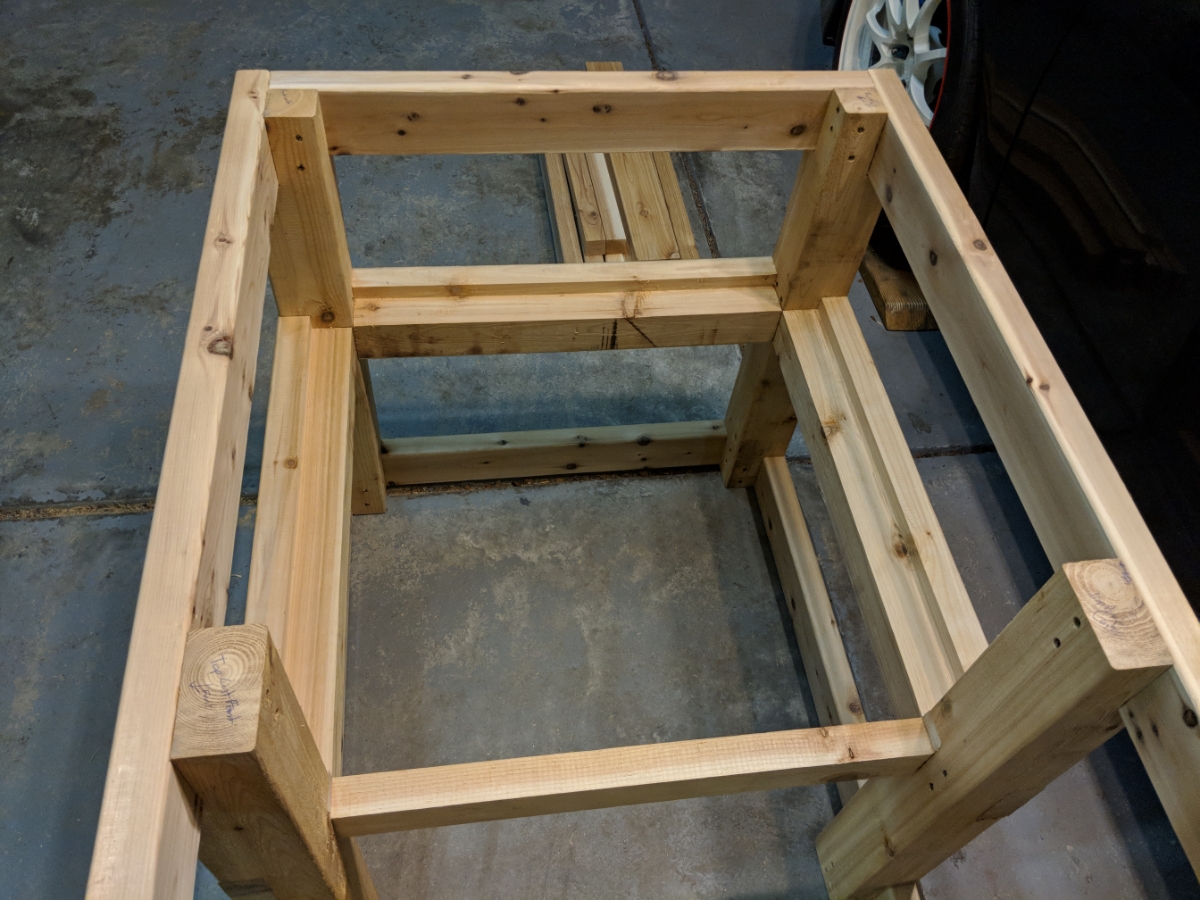
Shelf seat lines up perfectly.
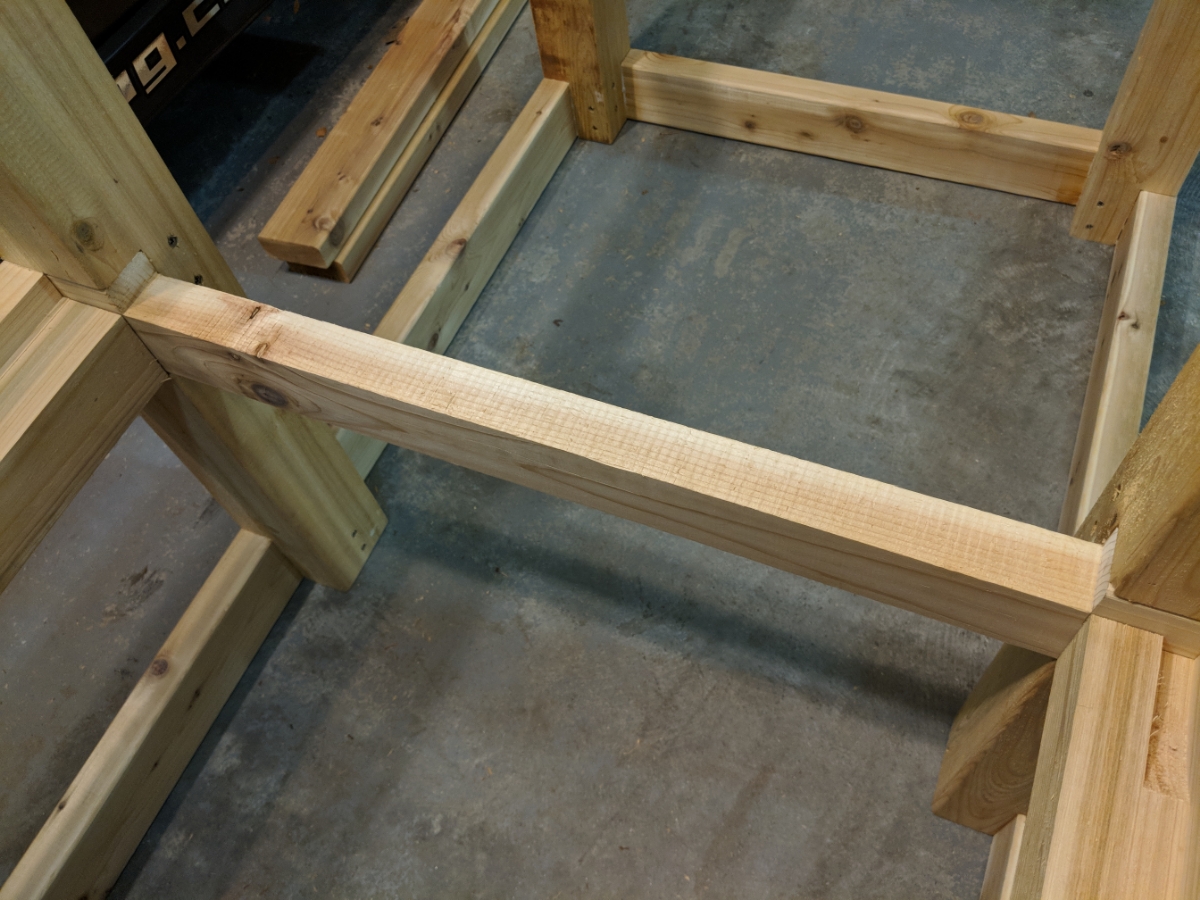
Using the multi cut method to notch this center support came out much cleaner than I thought it would without much work at all besides about 50 cuts.
The sides are much more busy looking than the front
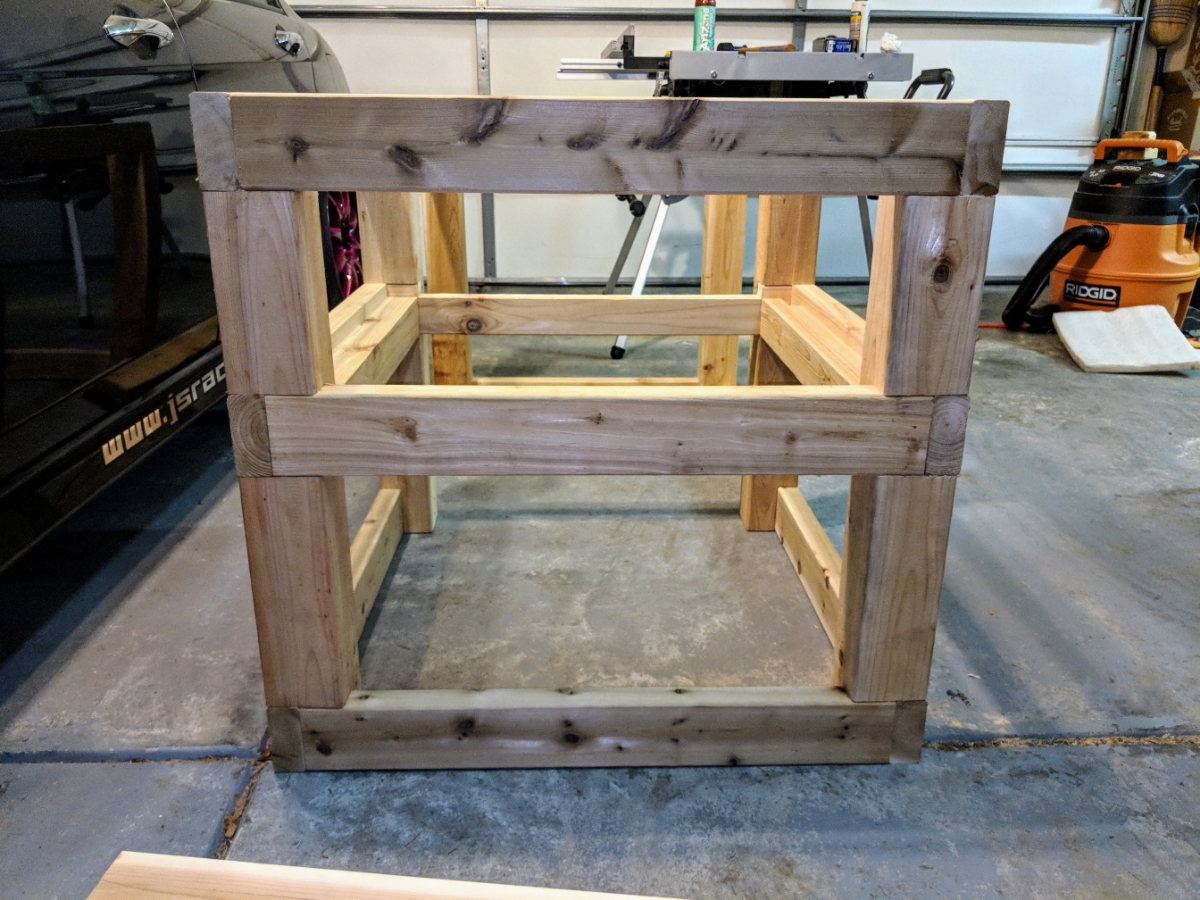
I have seriously overbuilt this thing I feel. With the lap joints, glue, and 3in deck screws this thing could probably hold over 1000lbs. Most of the joints came out looking much better than I expected. Unfortunately the worst looking corner joint is on the edge of the table that will be most visible. Such is life though. Will try and smooth it out with some aggressive sanding.
Now the part you actually want to see.
Cut a 2in x 7/8in rabbit in the 4x4 shelf beems for the flooring to sit in. This will give me a nice trim to the shelf of 1.5in all the way around the three open sides and on the inside the 2in will still be there on the right side of the shelf against the cabinet wall to give it a symetrical look.
Starting to put together the first supports. Using plenty of Titebond III per Sam's recommendation.
Followed by two 3in stainless steel deck screws.
Middle support posts with notch for shelf in 2x4.
Front and rear shelf beems installed.
When I attached the one set of posts to the cross beems I realized at this point the last set of screws had no where to go. I drove them in at a downward angle and the heads will be covered by the shelf floor.
Four posts of the Egg stand portion of the table all attached.
Screws at the top corner of the table. All on the inside so you should never see them except maybe from inside the cabinet if you are trying to find them.
Frame completed
Shelf seat lines up perfectly.
Using the multi cut method to notch this center support came out much cleaner than I thought it would without much work at all besides about 50 cuts.
The sides are much more busy looking than the front
I have seriously overbuilt this thing I feel. With the lap joints, glue, and 3in deck screws this thing could probably hold over 1000lbs. Most of the joints came out looking much better than I expected. Unfortunately the worst looking corner joint is on the edge of the table that will be most visible. Such is life though. Will try and smooth it out with some aggressive sanding.
Thread Starter
Moderator
Regional Coordinator (Southeast)
Regional Coordinator (Southeast)
Joined: Dec 2003
Posts: 44,123
Likes: 4,433
From: Mooresville, NC
That is what I used to make it. Just did about 50 passes over the table saw blade and then knocked out all the small pieces that were left. I had been using a dado blade to do my notching before 3/4in at a time which would have been faster had I not already removed it.


Ex-OEM King
Joined: Dec 2013
Posts: 17,880
Likes: 7,026
From: Minnesnowta
Ok then if nails and glue will hold that is what I will do for the flooring at least on the bottom and the shelf. Still need to make my decision on the top. I don't really want the groove in the top from using the 5/4x6 deck boards. (1x5.5) So probably going to rip them down to be perfectly square. Came up with a pattern that gets me my 32in (5x4.25x4.25x5x4.25x4.25x5). Need to pickup one more board to be able to do that. Think of using kreg screws to hold the top on to keep that seemless look I am going for plus would be easier than trying to make a line of screws perfectly straight. My OCD would kick in with that. Would 4 36in clamps be enough to hold together the boards for the top if I were to glue them all together? Top is 60x32. Also when glueing boards together for a table top do you do them all together at once or do you do in smaller groups then put those together? Maybe use the kreg jig again to attach them might be faster than waiting for glue.
Yeah I probably should have ripped down the 4x4 posts and the 2x4s before starting. I guess learning as I go the little things to make it look better. Thinking about making a glue sawdust mixture to fill in all the seems because of the rounded edges.
Yeah I probably should have ripped down the 4x4 posts and the 2x4s before starting. I guess learning as I go the little things to make it look better. Thinking about making a glue sawdust mixture to fill in all the seems because of the rounded edges.
For the top, I'd just use glue on the long end of the boards to be joined and drive a couple pocket hole screws through the bottom to "clamp" them together. The screws themselves won't provide much strength other than holding the glue together until it dries. If you don't have a future need for some big ass clamps, don't buy them and use the screws. Also, I'd get like 6-8 clamps for that length if you want to go that route since 2x4's don't really bend easily... If you are doing screws, you can do them all together. Just glue and screw each one as you go. If you are clamping, I'd do a 3 at a time and then clamp the larger panels after. When I do tops like this, I size them for the largest width I can fit through my planer to avoid epic sanding lol. If you have access to a biscuit joiner, it makes life a lot easier to align boards.
Thread Starter
Moderator
Regional Coordinator (Southeast)
Regional Coordinator (Southeast)
Joined: Dec 2003
Posts: 44,123
Likes: 4,433
From: Mooresville, NC
Nice work man! That thing looks really awesome! You also got it together pretty fast, impressive work.
For the top, I'd just use glue on the long end of the boards to be joined and drive a couple pocket hole screws through the bottom to "clamp" them together. The screws themselves won't provide much strength other than holding the glue together until it dries. If you don't have a future need for some big ass clamps, don't buy them and use the screws. Also, I'd get like 6-8 clamps for that length if you want to go that route since 2x4's don't really bend easily... If you are doing screws, you can do them all together. Just glue and screw each one as you go. If you are clamping, I'd do a 3 at a time and then clamp the larger panels after. When I do tops like this, I size them for the largest width I can fit through my planer to avoid epic sanding lol. If you have access to a biscuit joiner, it makes life a lot easier to align boards.
For the top, I'd just use glue on the long end of the boards to be joined and drive a couple pocket hole screws through the bottom to "clamp" them together. The screws themselves won't provide much strength other than holding the glue together until it dries. If you don't have a future need for some big ass clamps, don't buy them and use the screws. Also, I'd get like 6-8 clamps for that length if you want to go that route since 2x4's don't really bend easily... If you are doing screws, you can do them all together. Just glue and screw each one as you go. If you are clamping, I'd do a 3 at a time and then clamp the larger panels after. When I do tops like this, I size them for the largest width I can fit through my planer to avoid epic sanding lol. If you have access to a biscuit joiner, it makes life a lot easier to align boards.
Pocket screws it is then cause at the current time I don't have a need for large clamps. I will probably need them eventually when I do my wooden dog kennels but I can let that be the new tool expense for that project instead. I will need two large wood tops for that project. Maybe picking up two clamps though so I can clamp before putting the screws as I move down the length of the boards might make tighter joints.
No biscuit joiner or planer yet. If I keep up all these projects though I might need to look into adding one of each. Maybe a belt sander as well.
Last edited by CCColtsicehockey; May 30, 2018 at 10:36 AM.

Thread Starter
Moderator
Regional Coordinator (Southeast)
Regional Coordinator (Southeast)
Joined: Dec 2003
Posts: 44,123
Likes: 4,433
From: Mooresville, NC
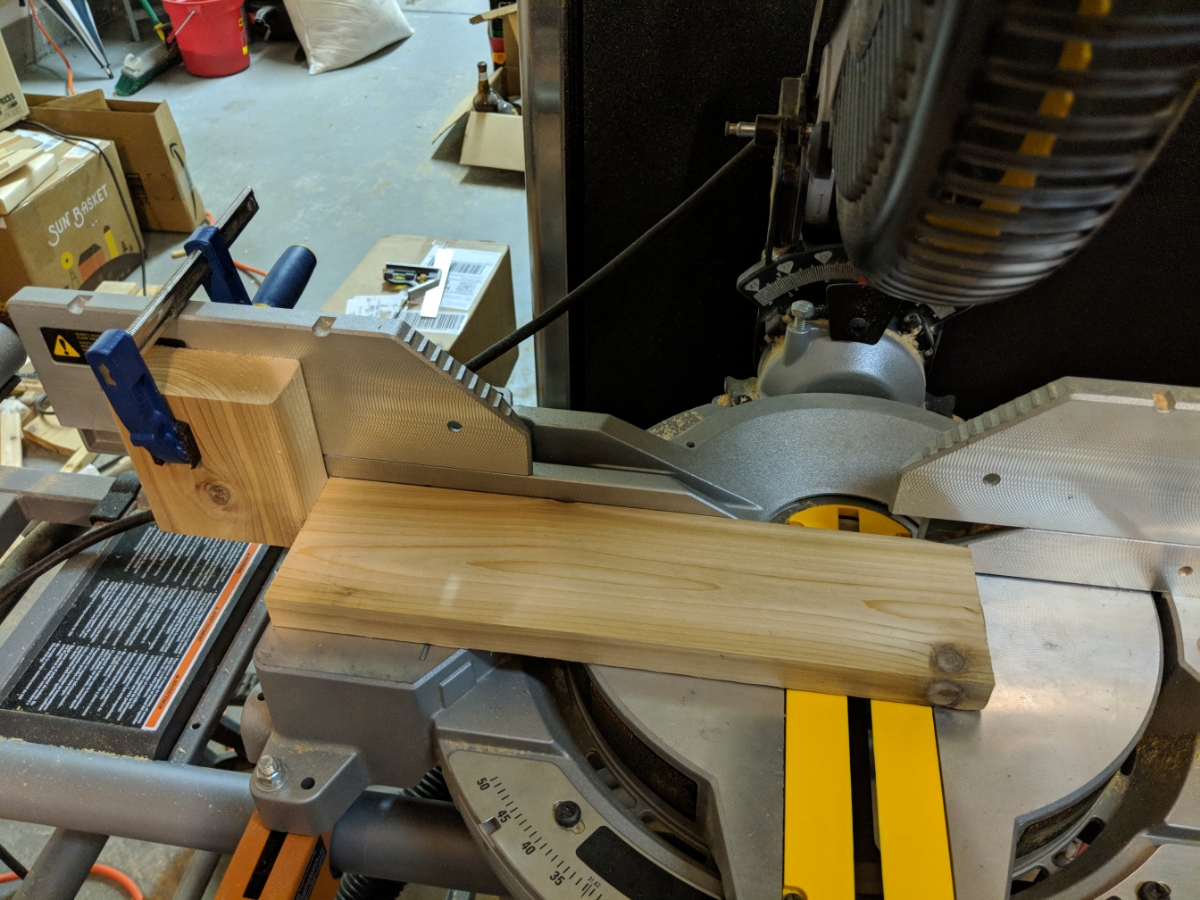
Got more completed last night but not as much as I would like. Starting to look like I might need to complete everything but the siding by the time the egg gets delivered. Worst case I have to attach the siding from the outside rather than from the inside after the egg is on the table.
Squared up and split a 2x4 in half to end up with two 1.5x1.5in for using as end supports for the floor.
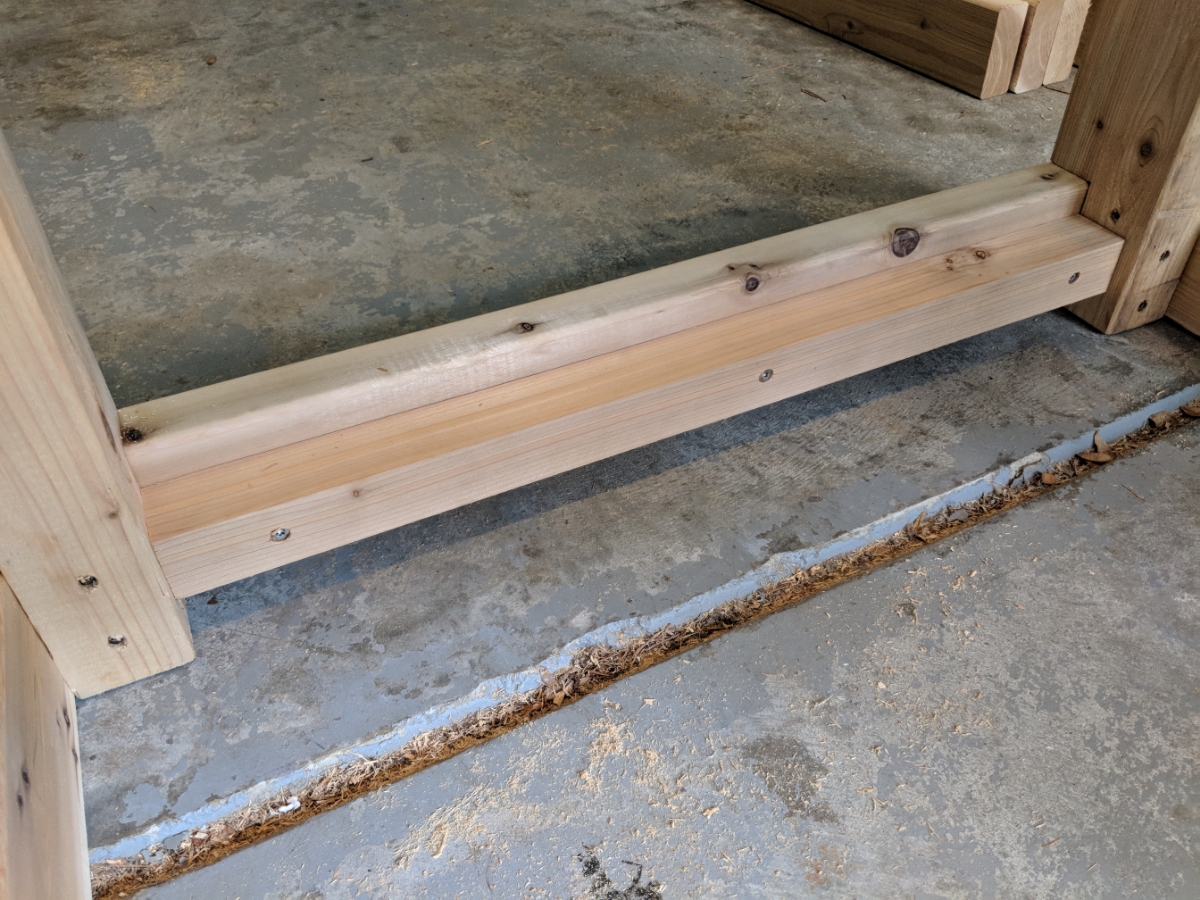
Ripped down some 2x4s by 7/8in so that the flooring could sit flush on the bottom.

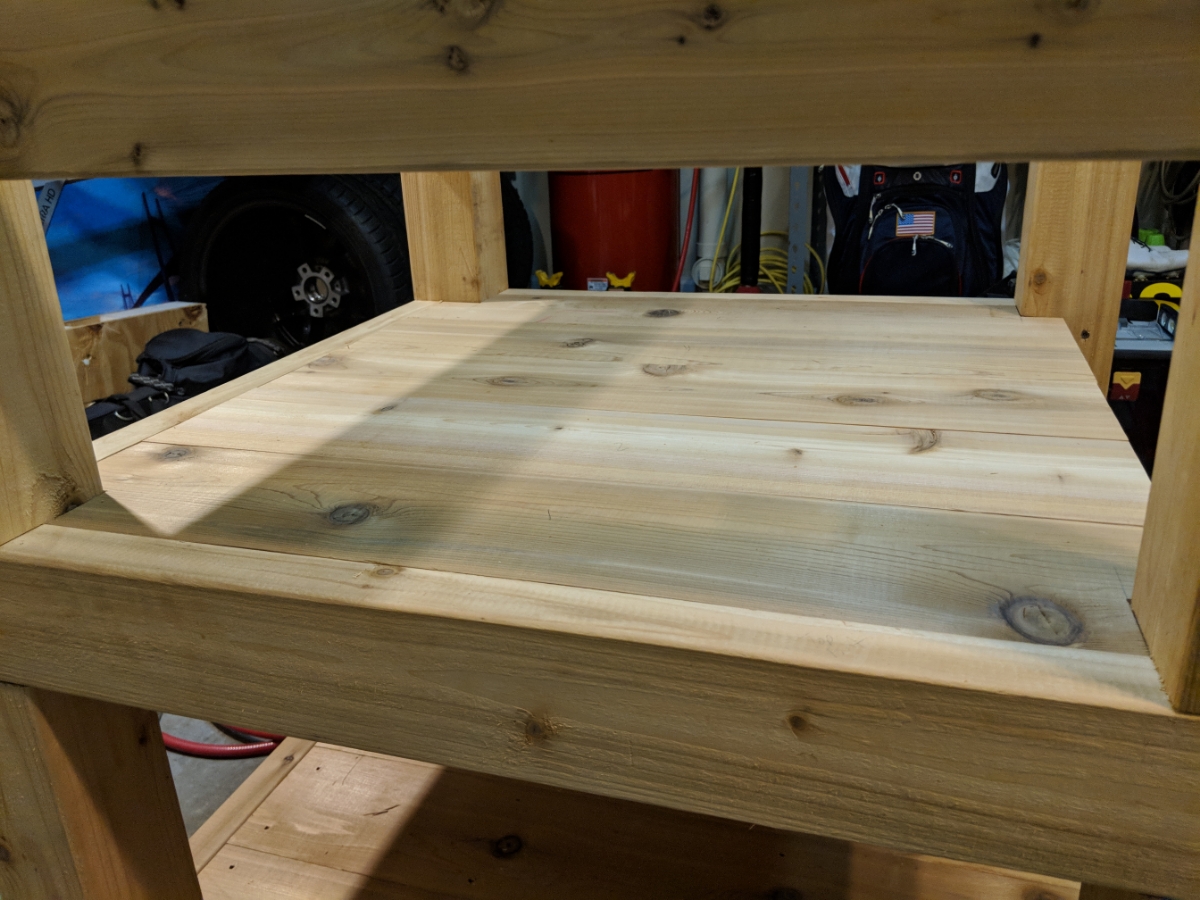
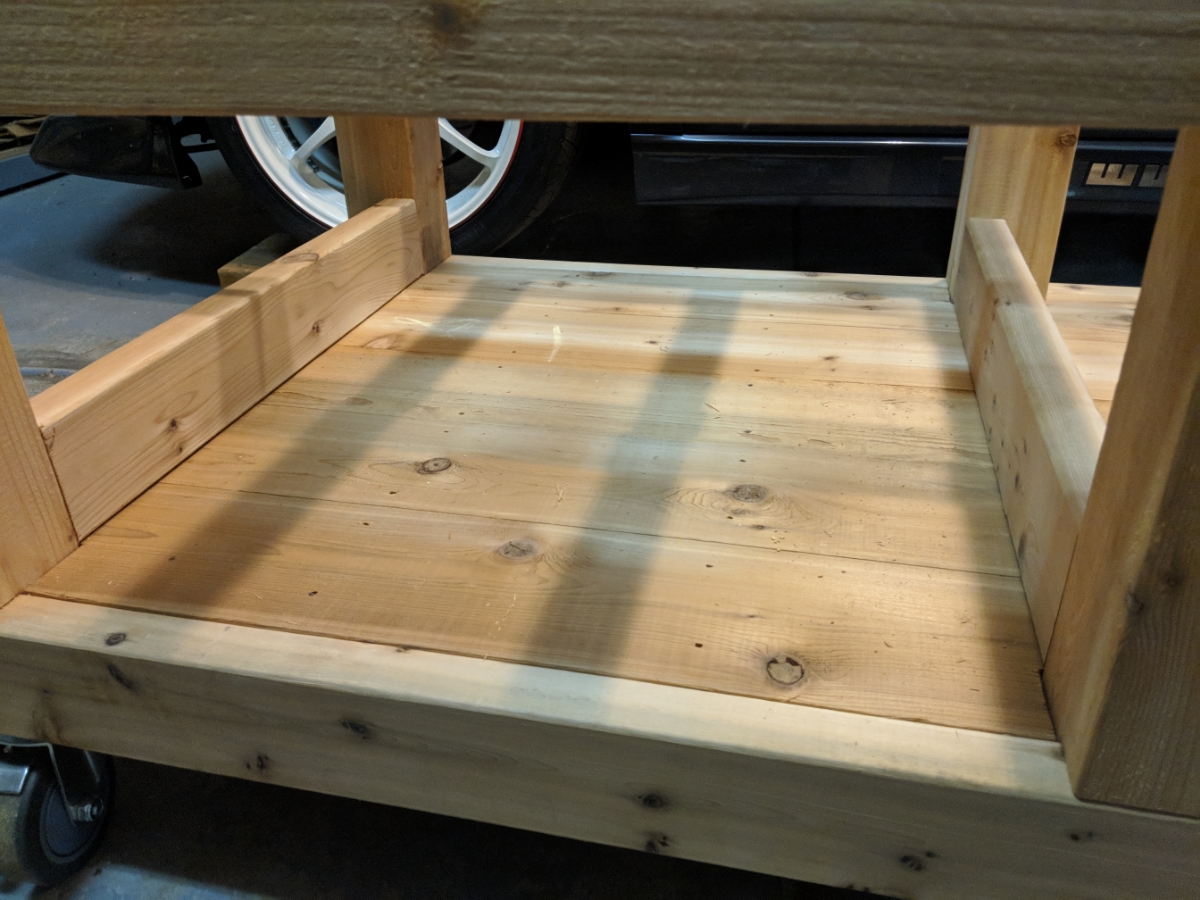
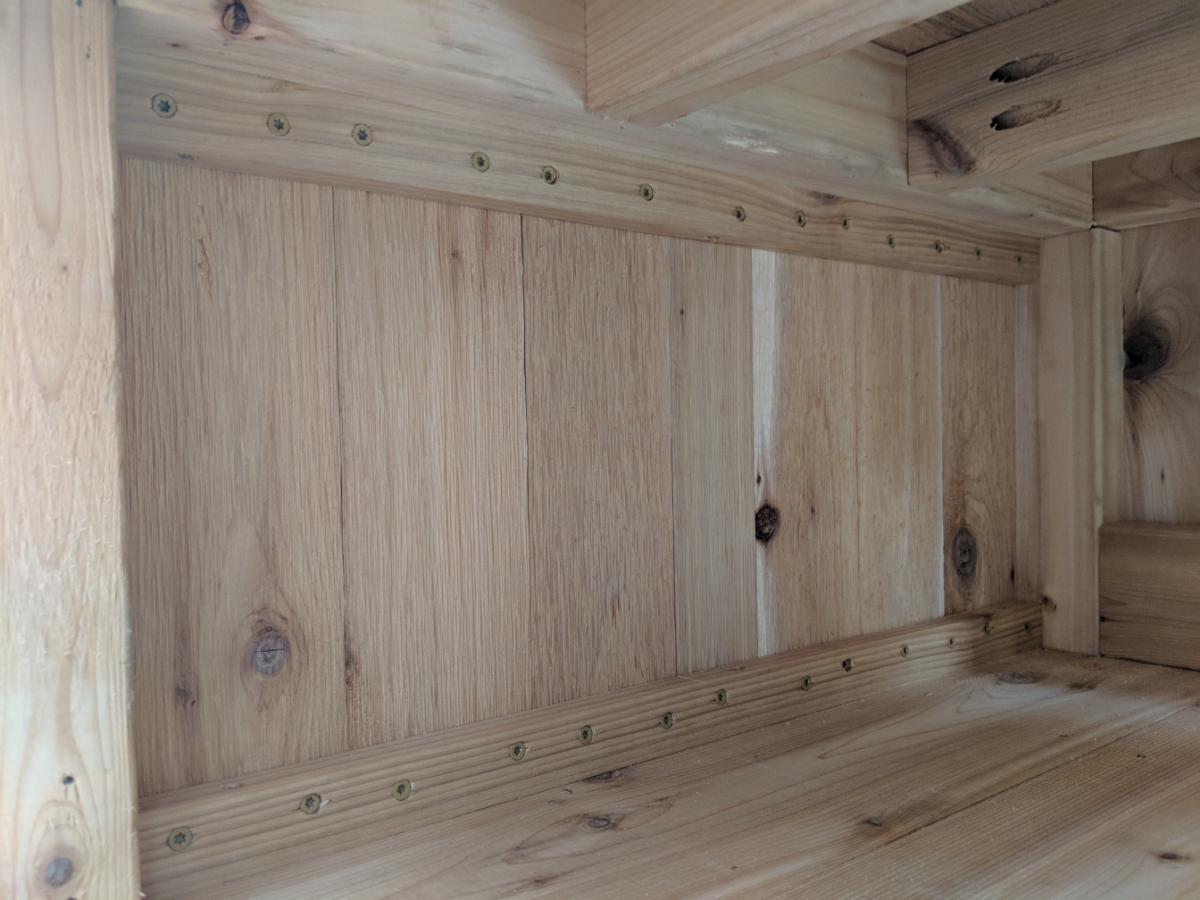
Flooring test fit
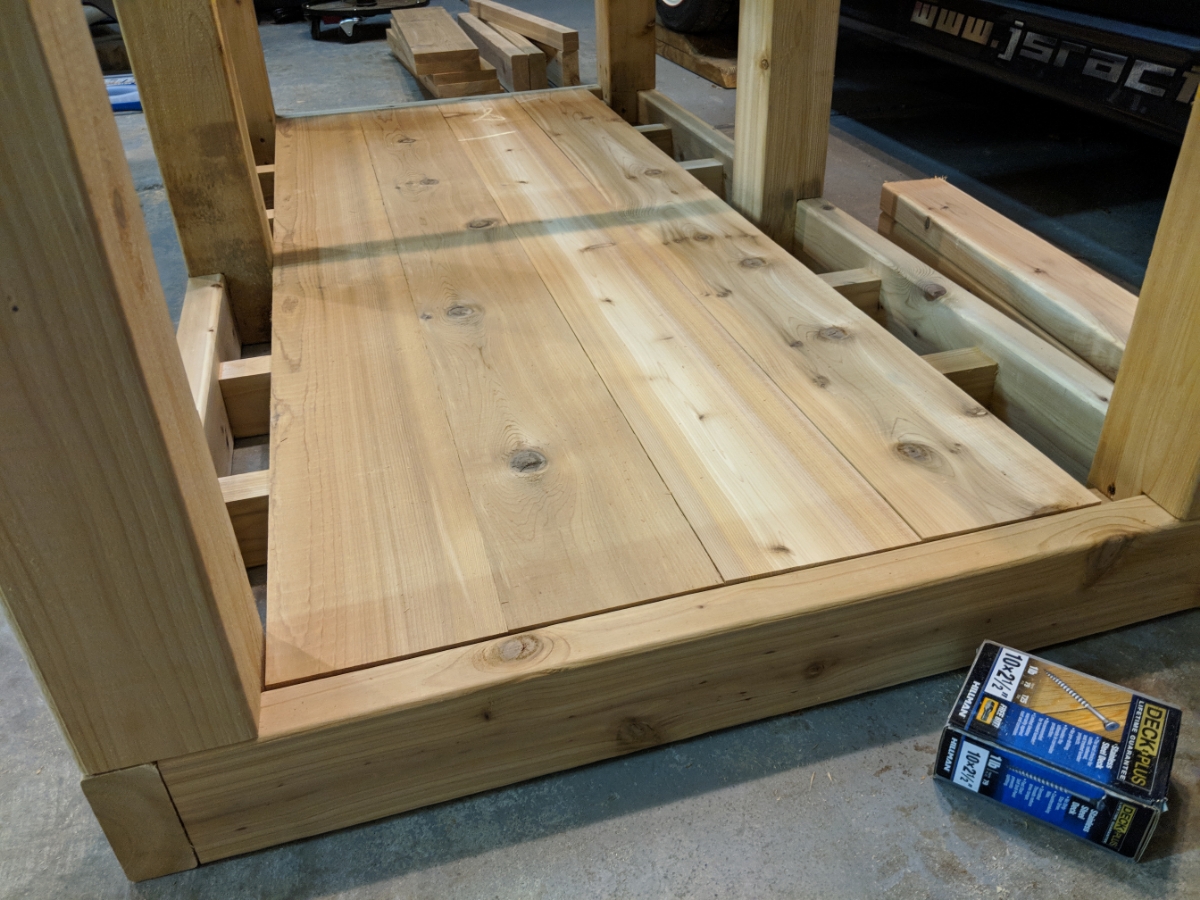
Test fit after notching the corners. Everything fits really snug. Had to use a rubber mallet to tap the last board in place.
Time for glue and nails to hold the floor in. Used 2in finishing nails to hold it down.
1 1/2in coated lag screws to hold the caster wheels on
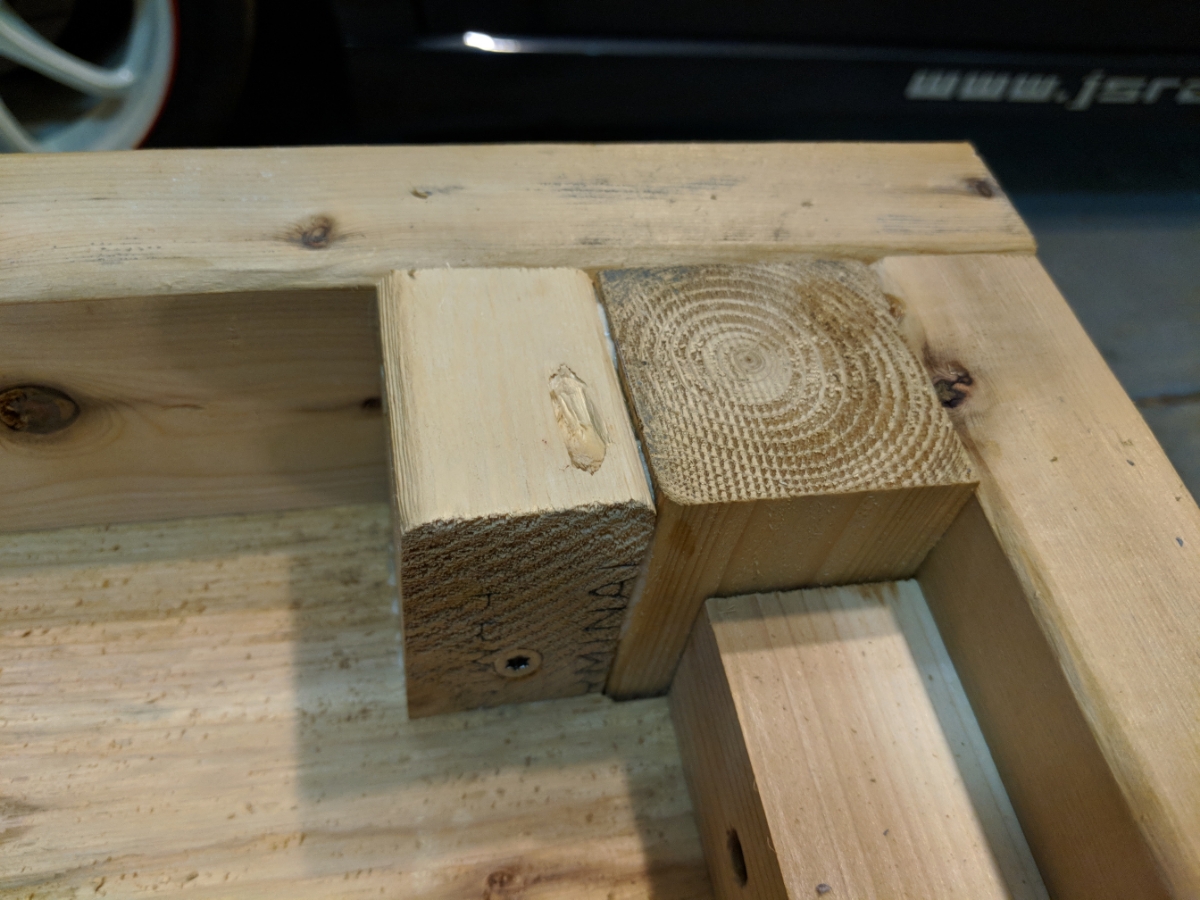
Turns out I didn't plan the wheel install very well
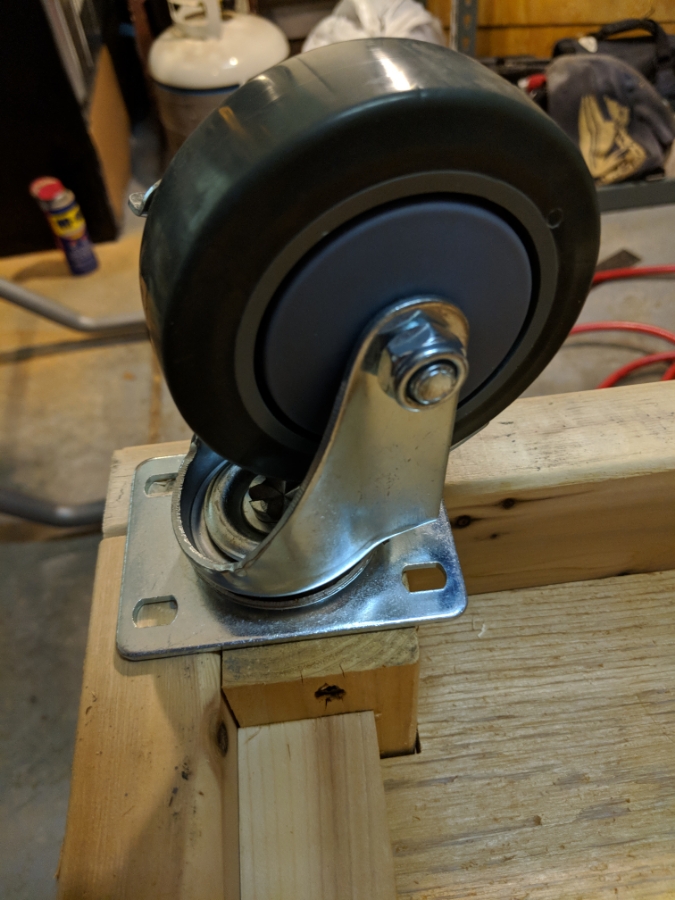
Time for a little improve. Small block, two screws, and a good bit of glue on three sides and everything should be good.
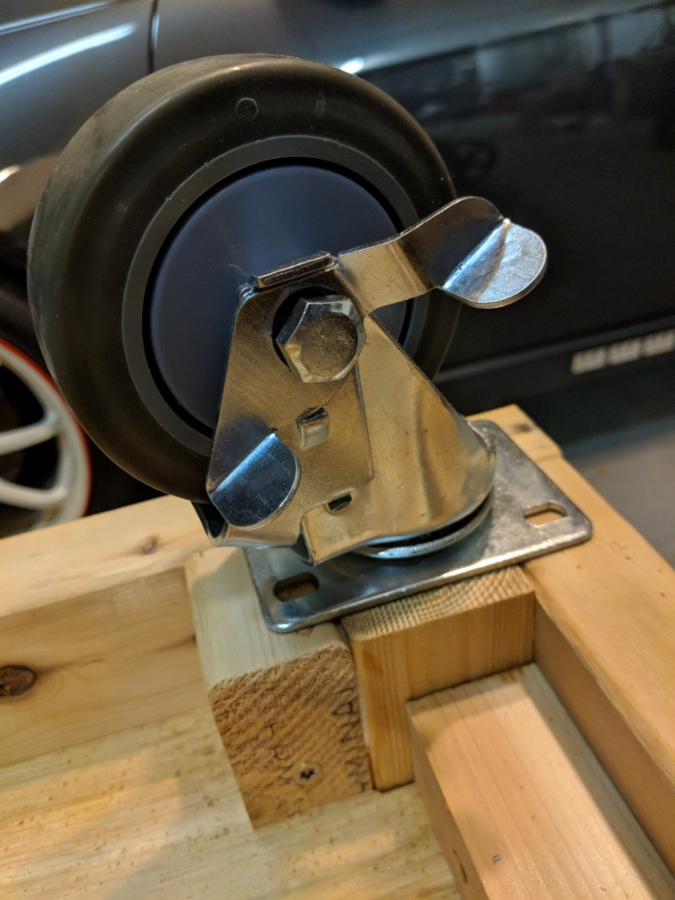
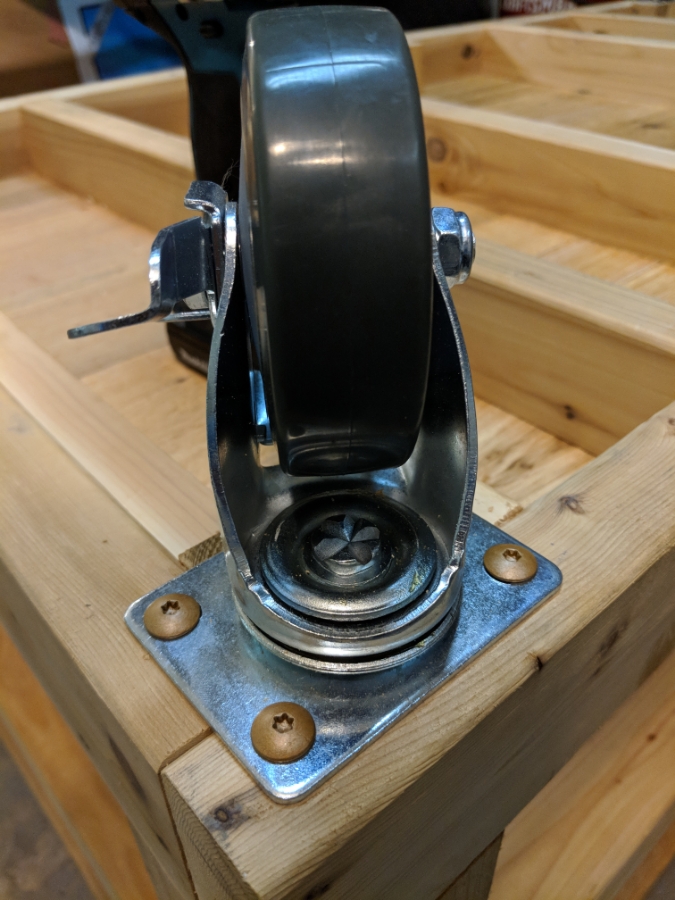
And we are rolling now. Man does it glide nice on these wheels. Hopefully it will still glide as nice on them once the egg is in as well. They are each rated for 250lbs so I can't imagine that with the weight of the table and the egg that they will be holding more than 500lbs total so should still move great.
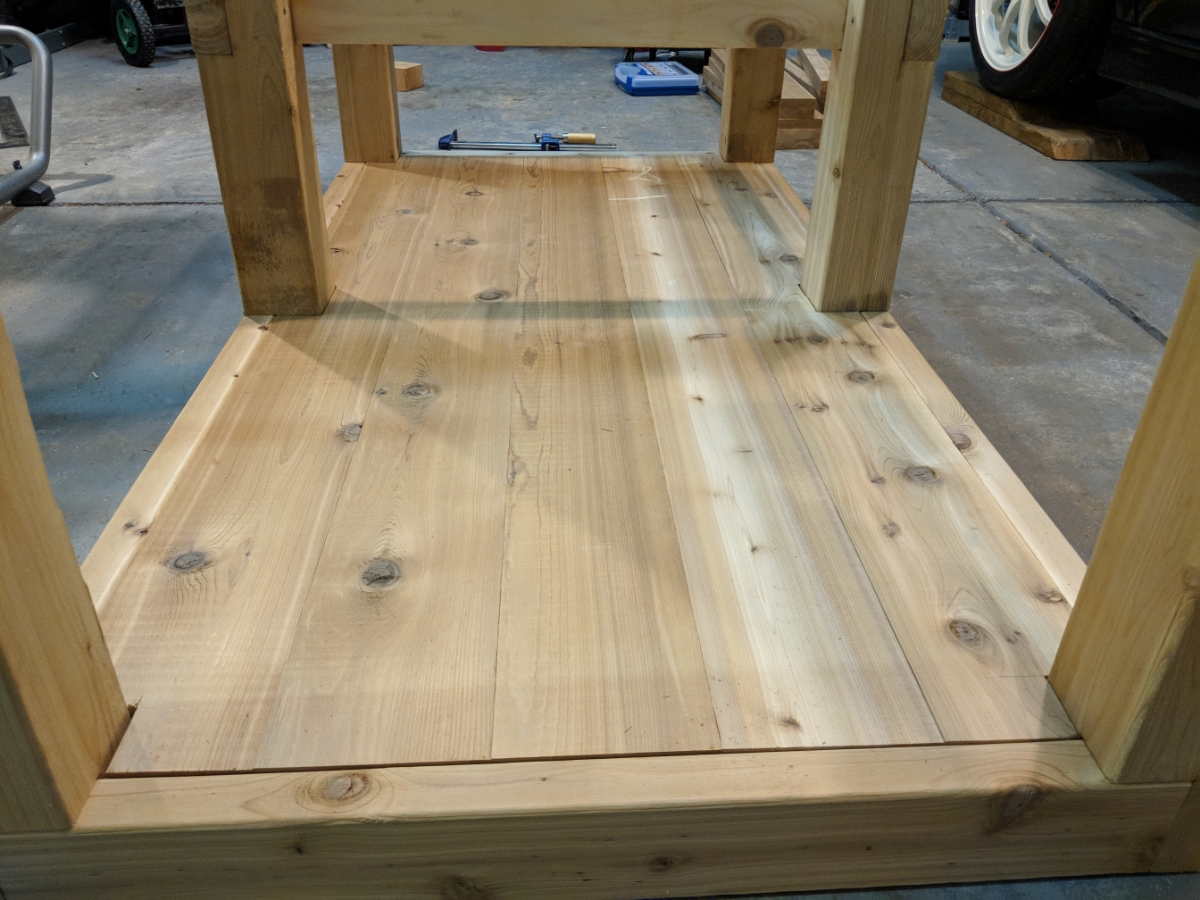
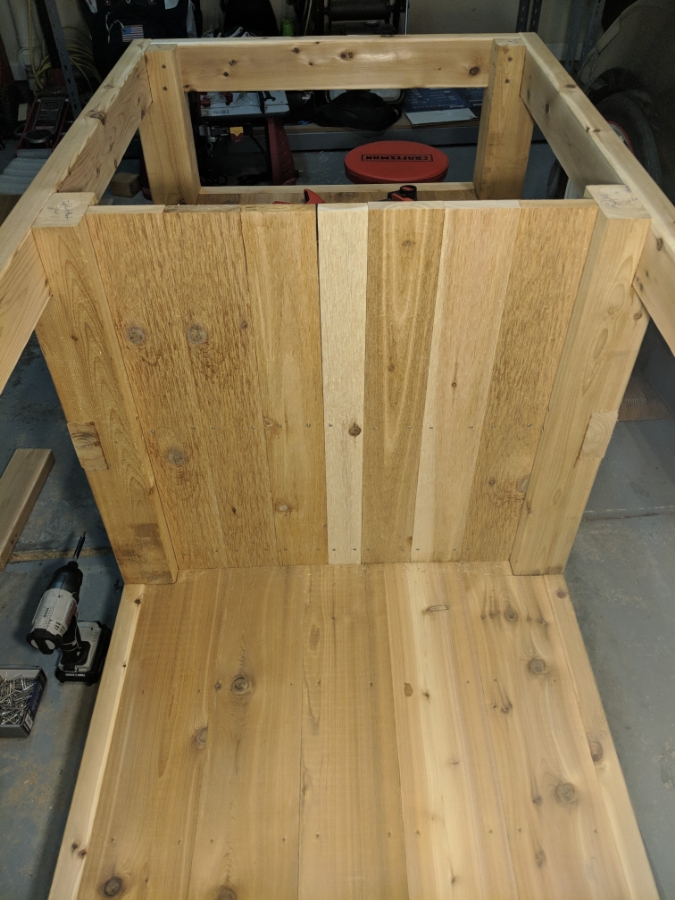
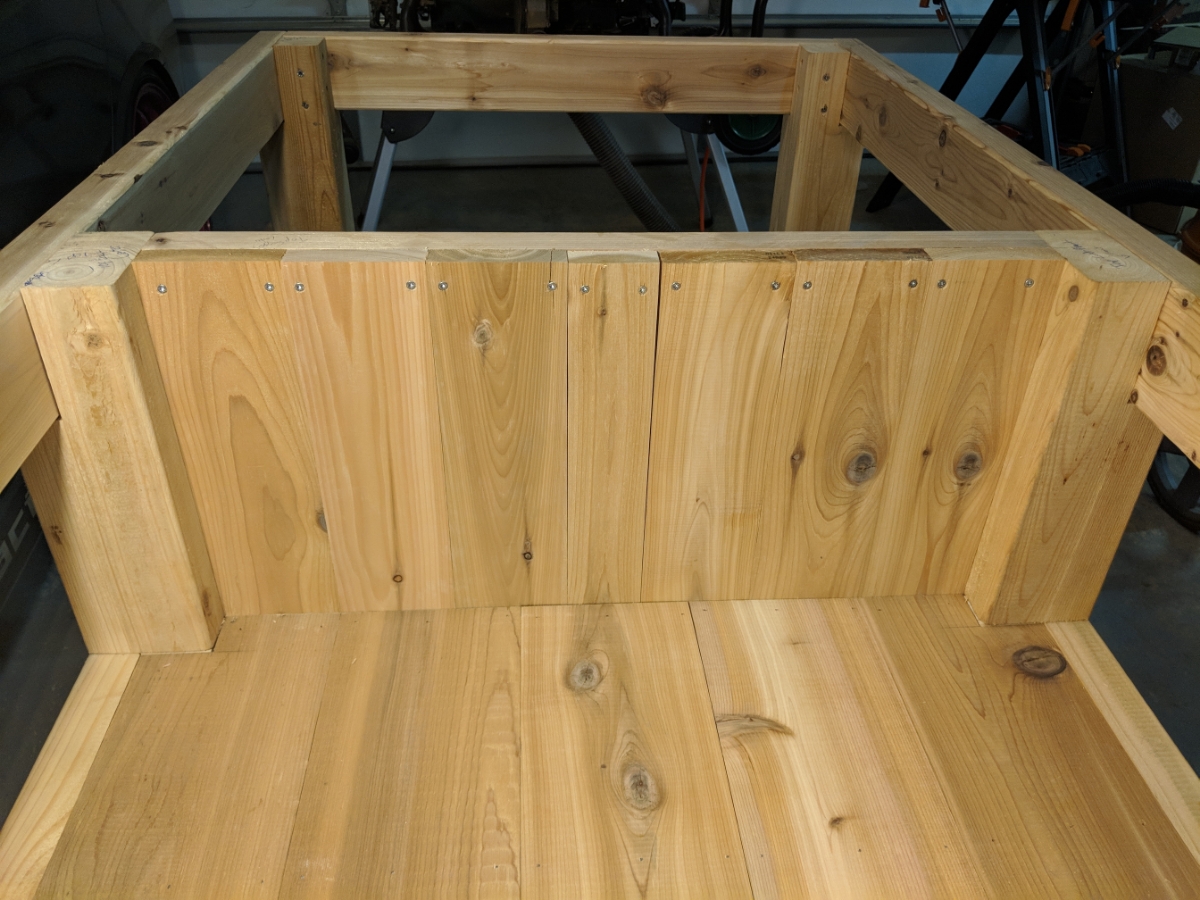
These are not installed but had to test fit them before heading to bed. I had to trim the middle board down 1/8in to make it even fit and even then it was really tight. I am wondering if I need to leave some room for expansion and trim even a little more off. I would prefer not too so as to try and keep the the floor as water tight as possible with the drawer being under it.
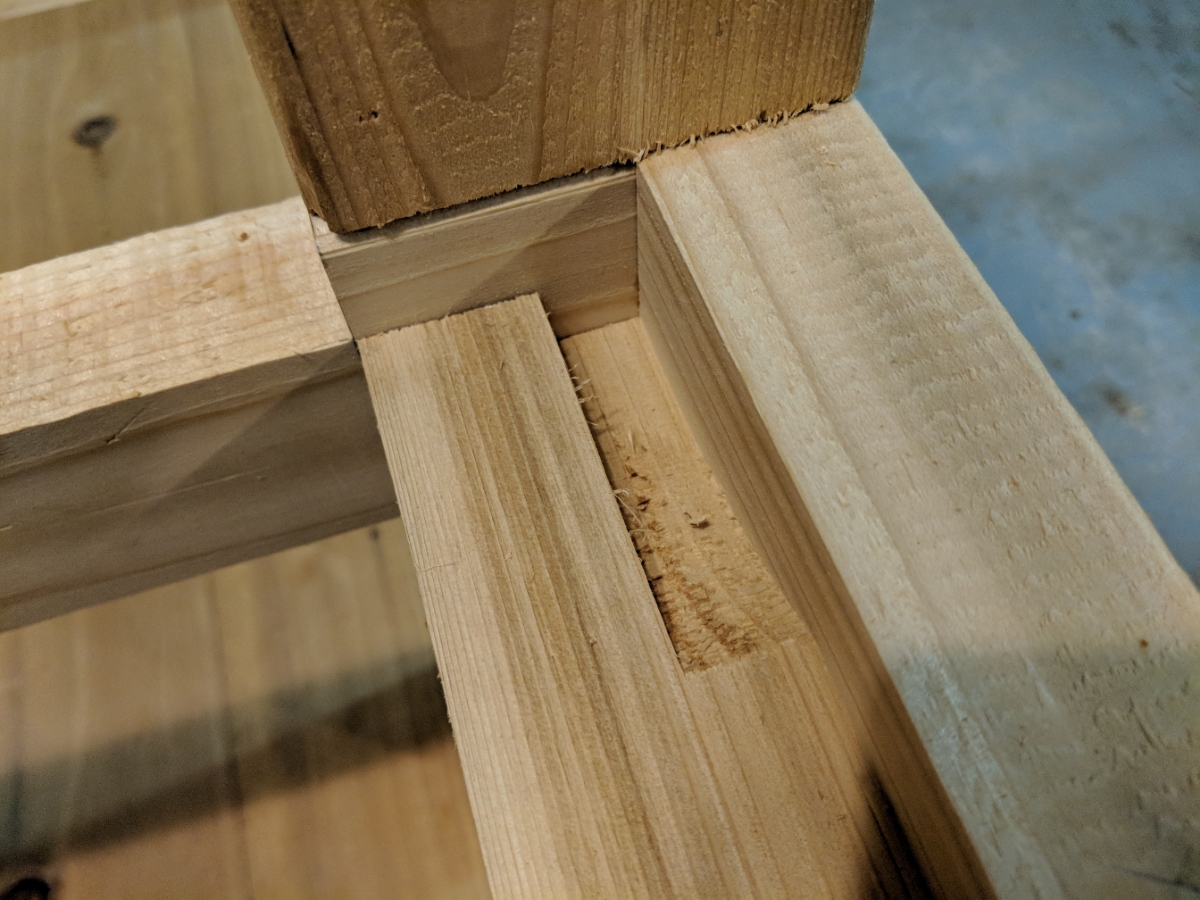
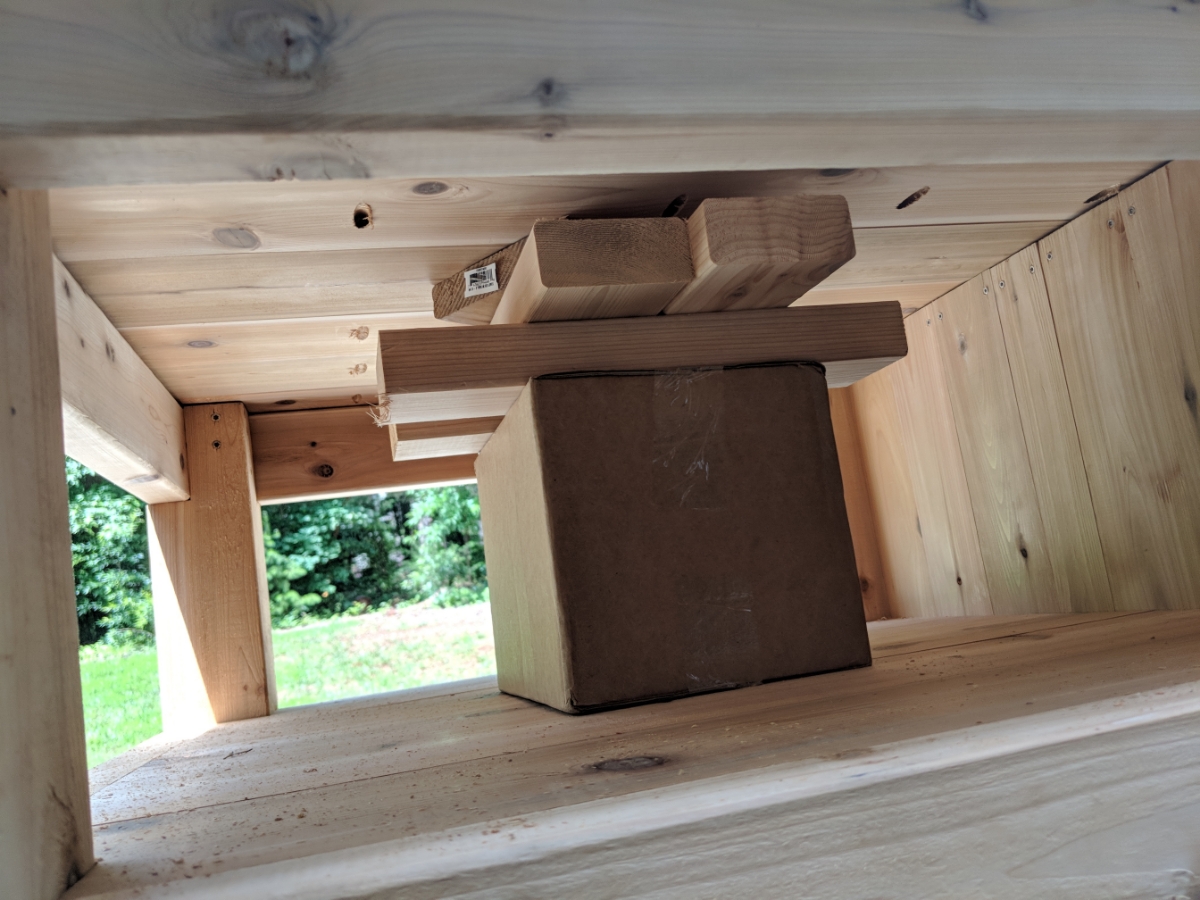
Question Sam, I made this slight mistake the other night. And started the pass on the dato blade about 1in too deep. This is the shelf support. I am worried it will leave a great pocket for water to sit in. Am I over thinking it or should I trim a piece to fill the space and then glue in place filling the curved section with some saw dust glue mixture? Or maybe fill the entire think with saw dust glue mixture? Or am I over thinking it and just don't worry about it?
Squared up and split a 2x4 in half to end up with two 1.5x1.5in for using as end supports for the floor.
Ripped down some 2x4s by 7/8in so that the flooring could sit flush on the bottom.
Flooring test fit
Test fit after notching the corners. Everything fits really snug. Had to use a rubber mallet to tap the last board in place.
Time for glue and nails to hold the floor in. Used 2in finishing nails to hold it down.
1 1/2in coated lag screws to hold the caster wheels on
Turns out I didn't plan the wheel install very well
Time for a little improve. Small block, two screws, and a good bit of glue on three sides and everything should be good.
And we are rolling now. Man does it glide nice on these wheels. Hopefully it will still glide as nice on them once the egg is in as well. They are each rated for 250lbs so I can't imagine that with the weight of the table and the egg that they will be holding more than 500lbs total so should still move great.
These are not installed but had to test fit them before heading to bed. I had to trim the middle board down 1/8in to make it even fit and even then it was really tight. I am wondering if I need to leave some room for expansion and trim even a little more off. I would prefer not too so as to try and keep the the floor as water tight as possible with the drawer being under it.
Question Sam, I made this slight mistake the other night. And started the pass on the dato blade about 1in too deep. This is the shelf support. I am worried it will leave a great pocket for water to sit in. Am I over thinking it or should I trim a piece to fill the space and then glue in place filling the curved section with some saw dust glue mixture? Or maybe fill the entire think with saw dust glue mixture? Or am I over thinking it and just don't worry about it?
Ex-OEM King
Joined: Dec 2013
Posts: 17,880
Likes: 7,026
From: Minnesnowta
You're overthinking it. If you're really worried about it you can just drill a hole in the very bottom of the dip to let the water drain out and call it good. That looks much too deep for just sawdust and glue to fill.
I'd start over. The whole table is trashed... You should be fine just leaving it or drilling a hole as Sam mentioned.
As for the water tight shelf with drawers under it. Can you buy a piece of thin plexi-glass or something similar and cut it to fit under so your seams don't have to be perfect? Obviously you'd have to buy that planer!
As for the water tight shelf with drawers under it. Can you buy a piece of thin plexi-glass or something similar and cut it to fit under so your seams don't have to be perfect? Obviously you'd have to buy that planer!

Ex-OEM King
Joined: Dec 2013
Posts: 17,880
Likes: 7,026
From: Minnesnowta
Missed the comment about expansion. You want space in between. It WILL expand so I'd leave at least 1/8th inch in between each board. As far as waterproof, you can do as said and just put something under to drain the water away. Plexi works but I'd use PVC sheet or something like that. It's cheaper and doesn't really care much about environment.
Thread Starter
Moderator
Regional Coordinator (Southeast)
Regional Coordinator (Southeast)
Joined: Dec 2003
Posts: 44,123
Likes: 4,433
From: Mooresville, NC
Guess I will have to skip water proofing as there isn't room to add plexi at this point with the frame together. Hopefully expansion doesn't ruin my floor then cause I used clamps to pull the outer to most boards as close as possible to the outer rails before gluing and nailing them down. Hate the idea of having to leave gaps cause it doesn't look as finished them but I guess if it will make it last longer then I have too.

Thread Starter
Moderator
Regional Coordinator (Southeast)
Regional Coordinator (Southeast)
Joined: Dec 2003
Posts: 44,123
Likes: 4,433
From: Mooresville, NC
I do like that idea. So then do I make the shelf look like the floor at this point cause I am not trying to rip the floor back out or do I just do the shelf with a seperate design since you most likely won't ever see the two at the same time.
Also does this mean I need to leave spaces between the boards I use for siding cause I think that would look really bad.
Also does this mean I need to leave spaces between the boards I use for siding cause I think that would look really bad.
Ex-OEM King
Joined: Dec 2013
Posts: 17,880
Likes: 7,026
From: Minnesnowta
I do like that idea. So then do I make the shelf look like the floor at this point cause I am not trying to rip the floor back out or do I just do the shelf with a seperate design since you most likely won't ever see the two at the same time.
Also does this mean I need to leave spaces between the boards I use for siding cause I think that would look really bad.
Also does this mean I need to leave spaces between the boards I use for siding cause I think that would look really bad.
In all seriousness, I think you'll be fine. These are all cosmetic panels and if things do go bad in the future, you can rip it out and do it again at that point.
Thread Starter
Moderator
Regional Coordinator (Southeast)
Regional Coordinator (Southeast)
Joined: Dec 2003
Posts: 44,123
Likes: 4,433
From: Mooresville, NC
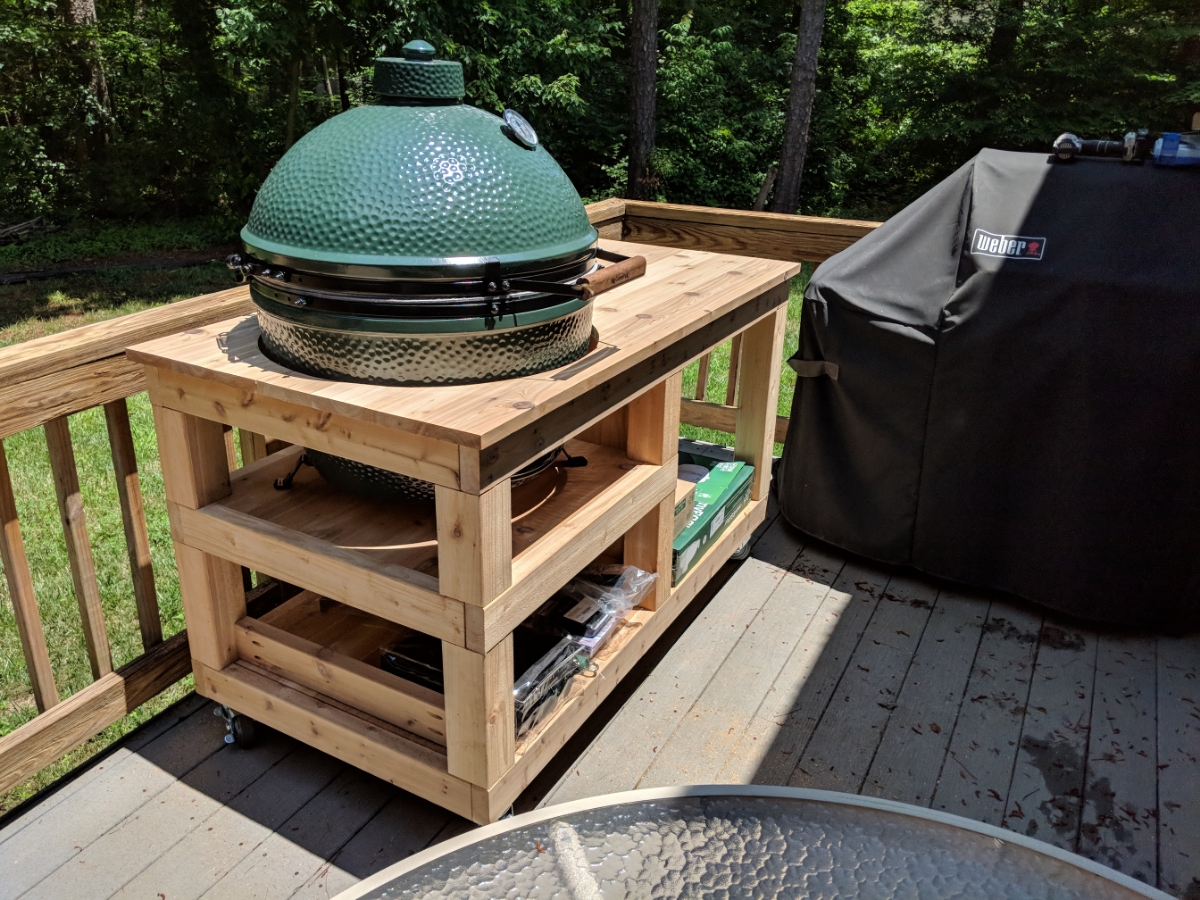
Another big and final update on this project.
So Thursday and Friday morning I had to get a lot done before delivery.
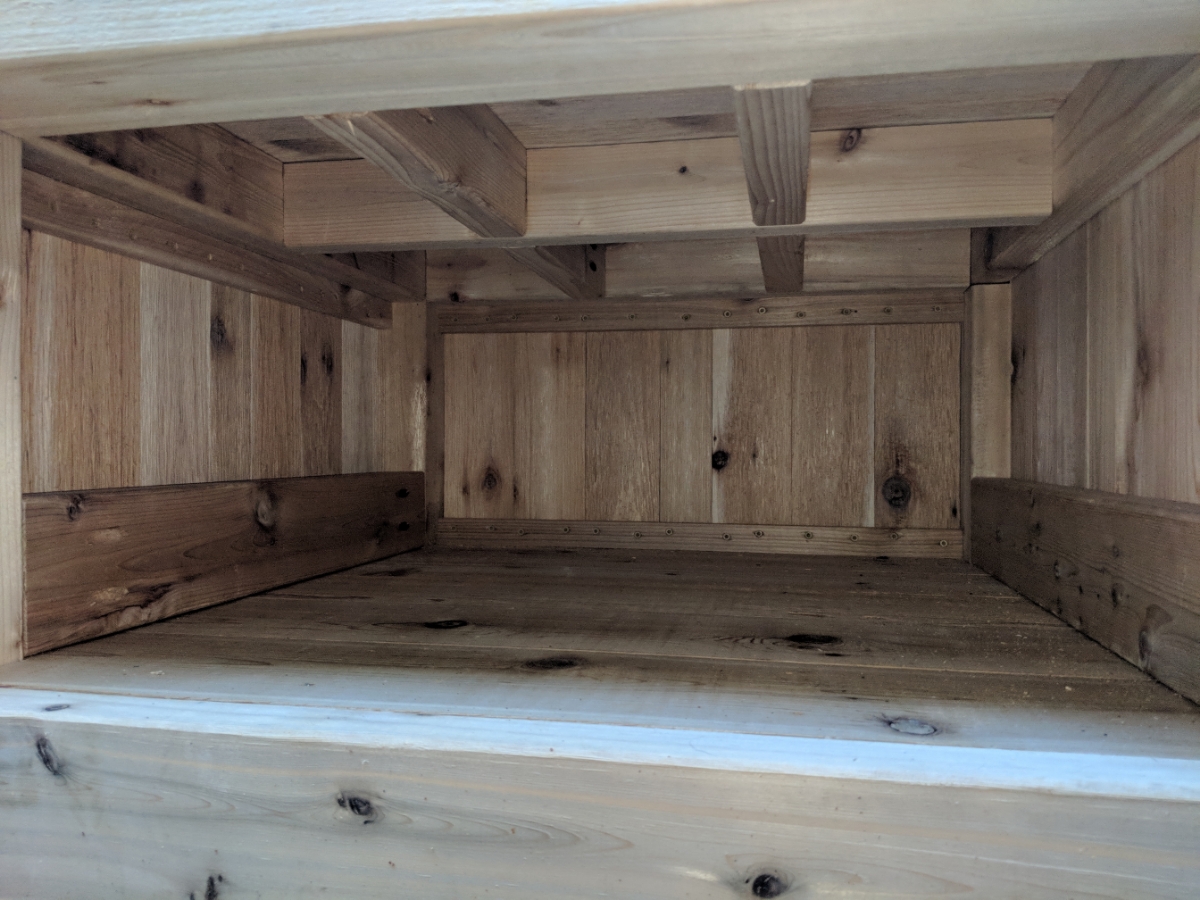
Started with building the main support structure in the middle of the shelf for the egg. Made some more lap joints to add strength. Then connected the piece with 2 pocket screws at each end.

Then installed the two lower boards that I will eventually mount the drawer slides to.

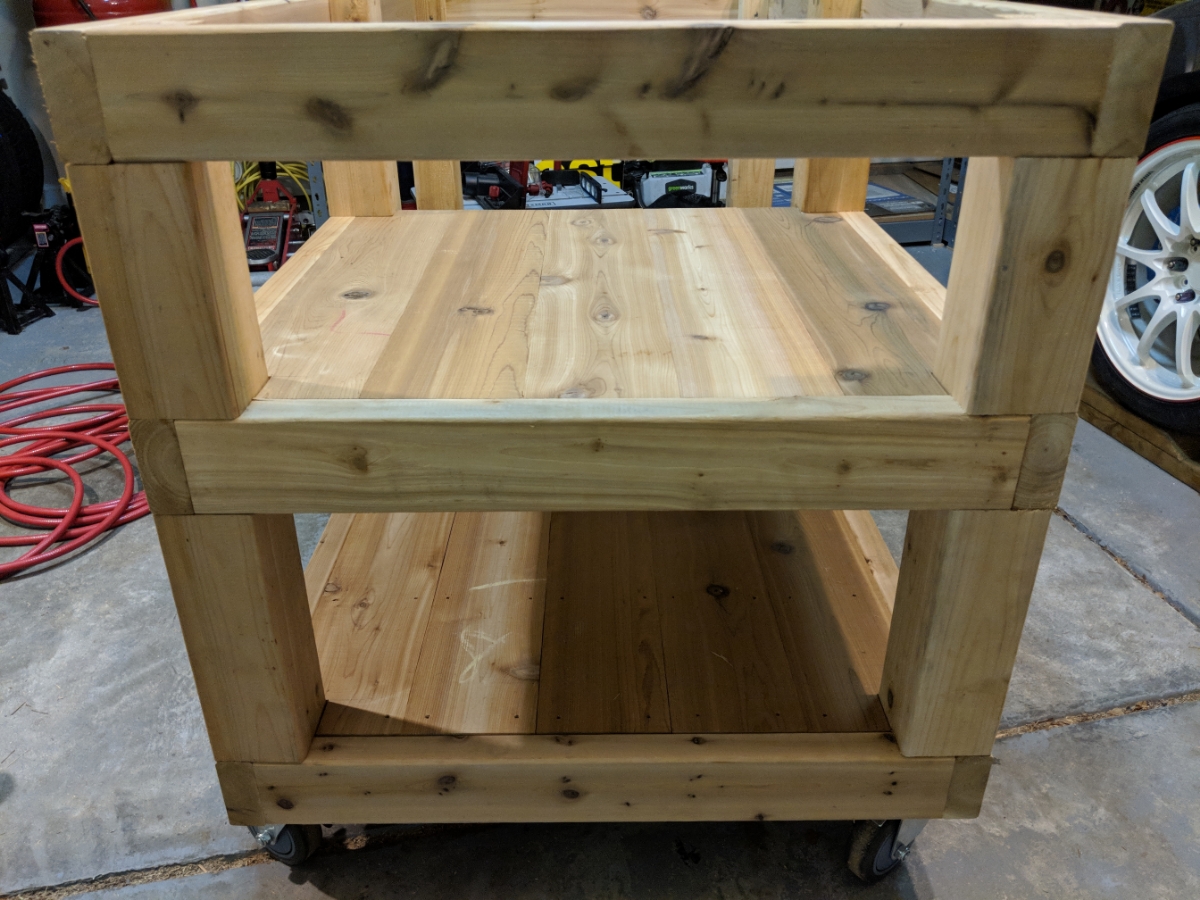
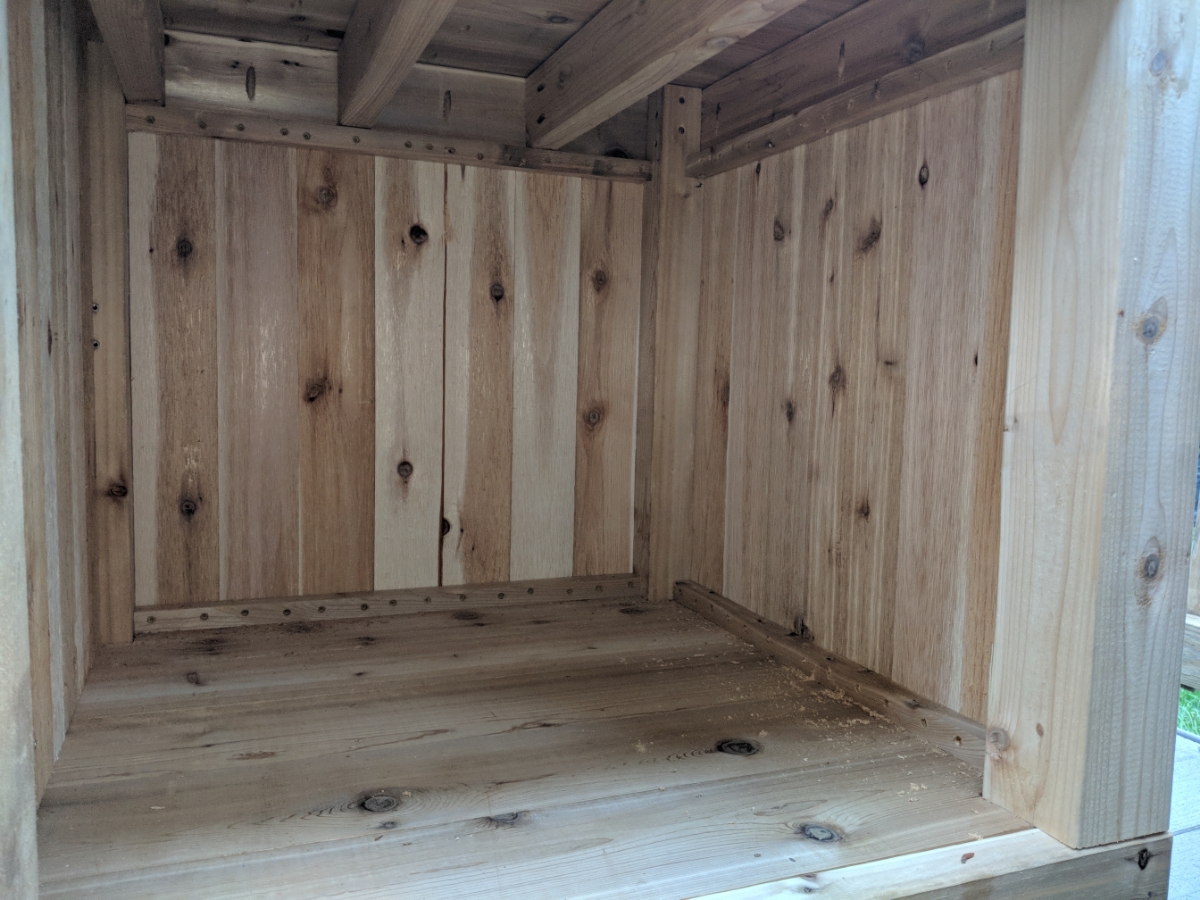
Then I installed the shelf floor. I used glue and brad nails to help hold it down while the glue dried.

Middle wall for the side cabinet. I used stainless steel deck trim screws for this.
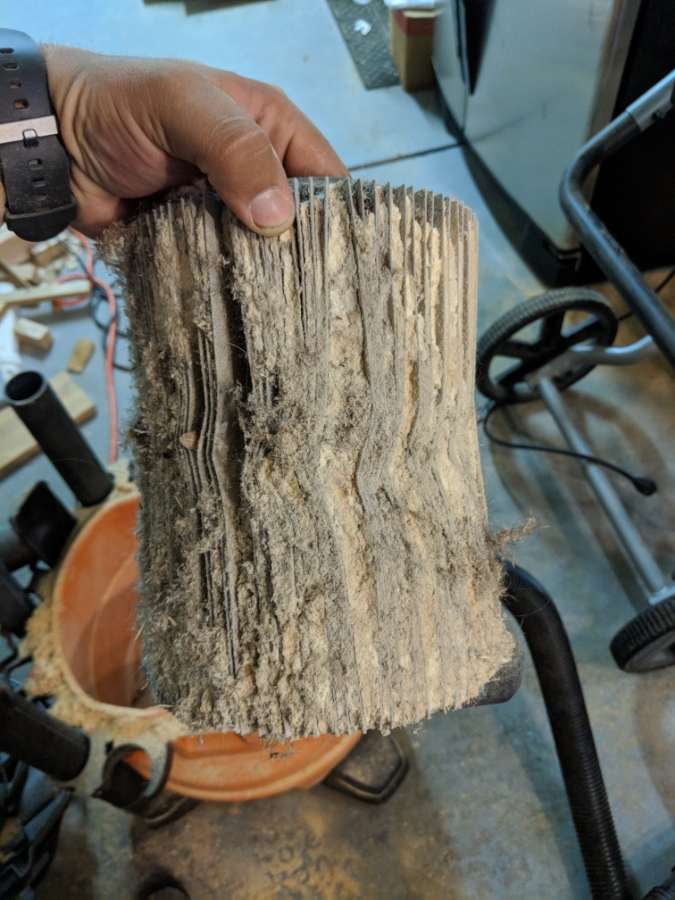
It was after this while I was cutting a board for something I realized I had an issue. I had now worked on three wood projects in a row and had never emptied my shop vac/poor mans dust collection system. This leaves you with no suction at all pretty much. Forgot to take a picture of how full it was but lets just say it was packed tight.

An entire trash bag full and that didn't even empty the thing fully.

This filter need replaced but it will have to do for the rest of the project. Knocked it all off and kept on going.
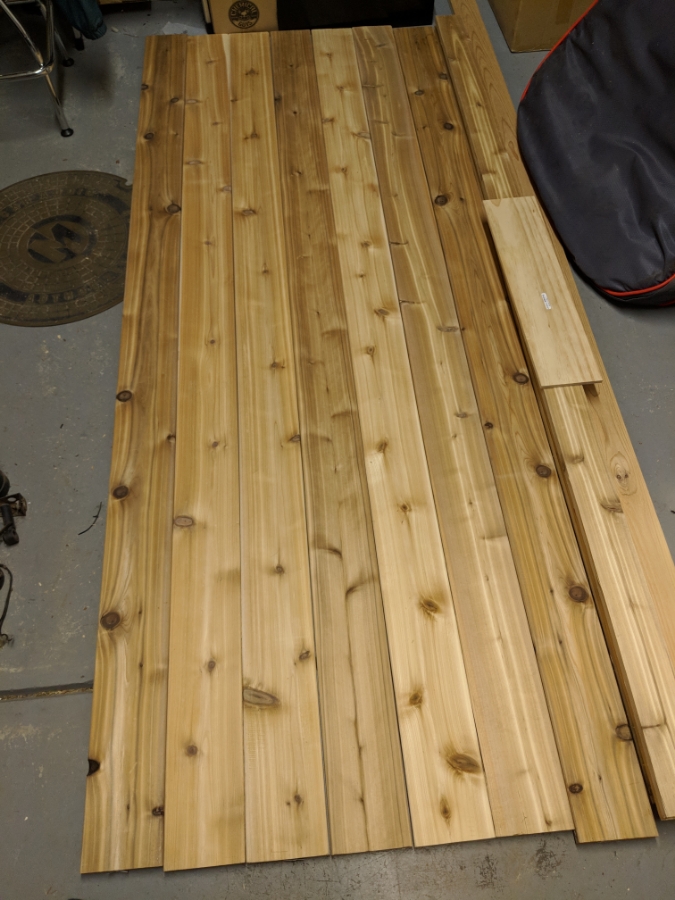
Spread out all my top boards so I could pick the sections I wanted to be used for my table top. It was at this time I realized by pure luck I had selected two boards that were cut from on top of each other out of the same tree so they had basically an identical knot location. I would use these as the front and back edge boards for my table top.
Trimmed to length
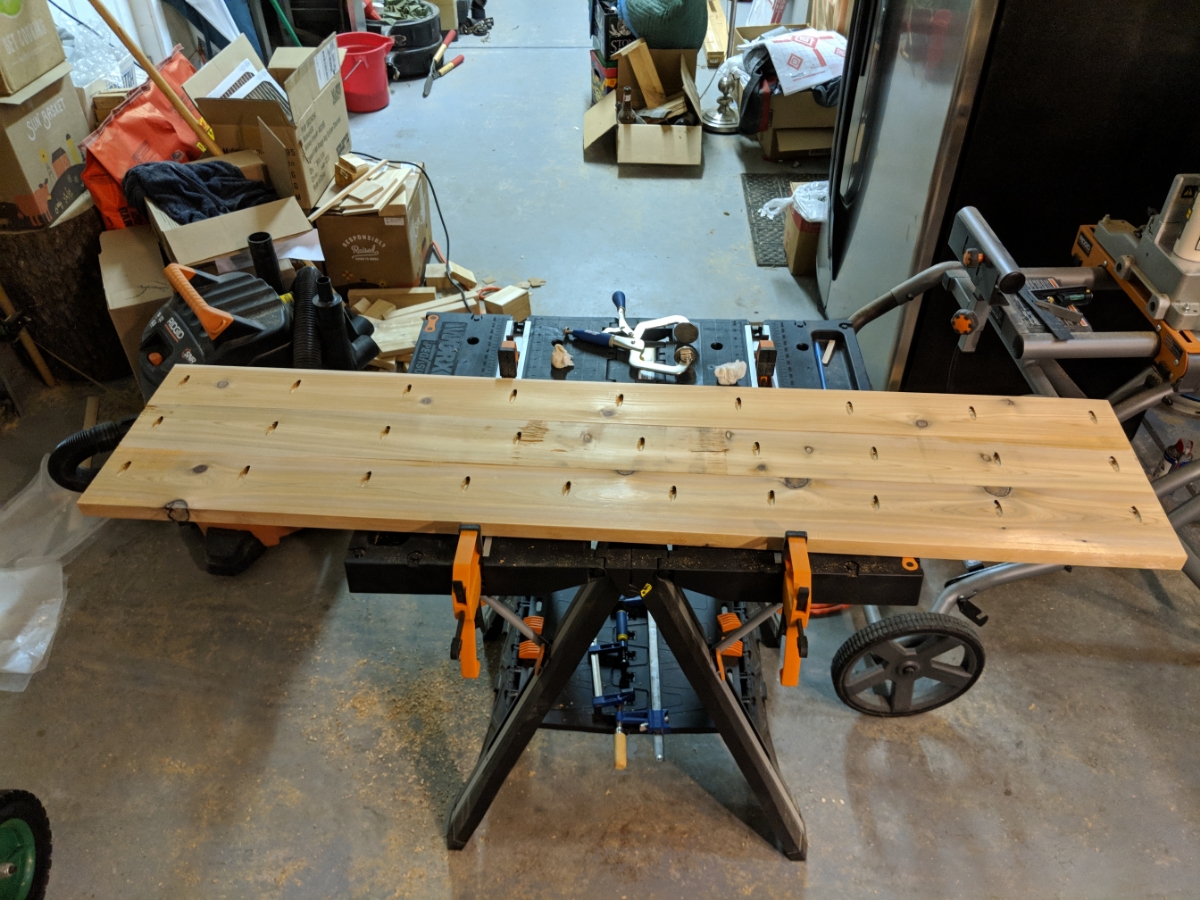
Joining the top together. I was able to do a group of 3 and a group of 4 with the two clamps I had. I ended up deciding againt buying 36in clamps as the cheapest I found locally were $41 each and I don't know what right now I would ever use them for again.
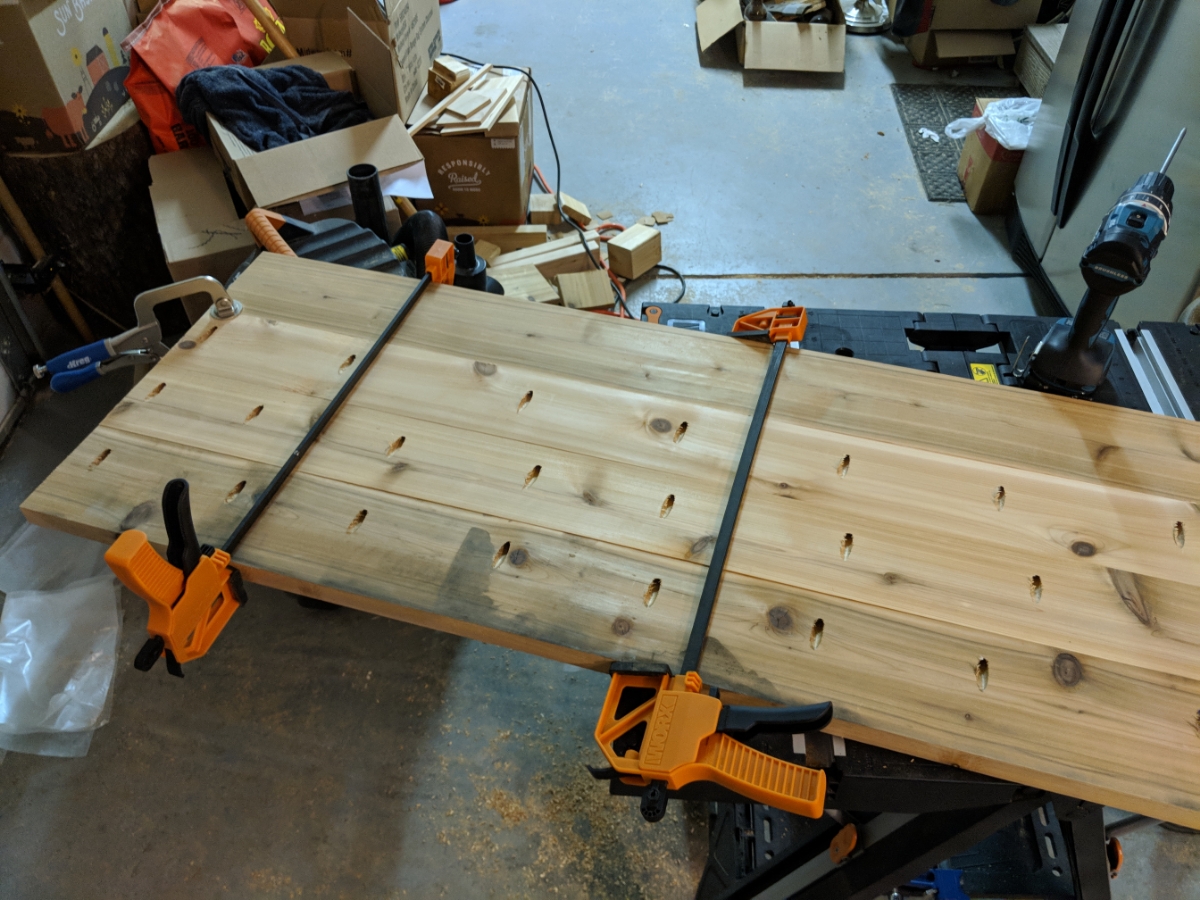
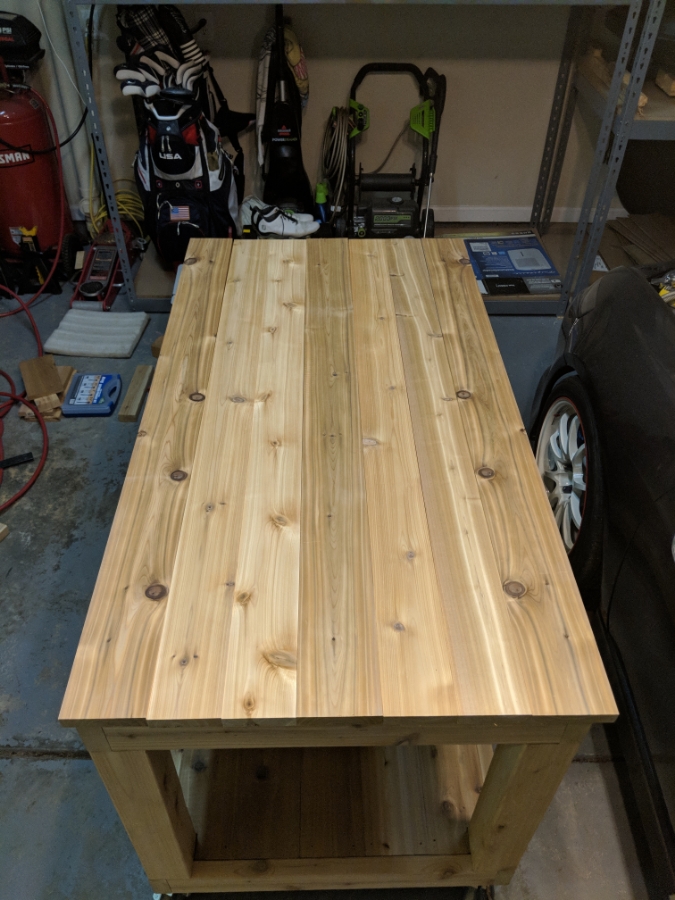
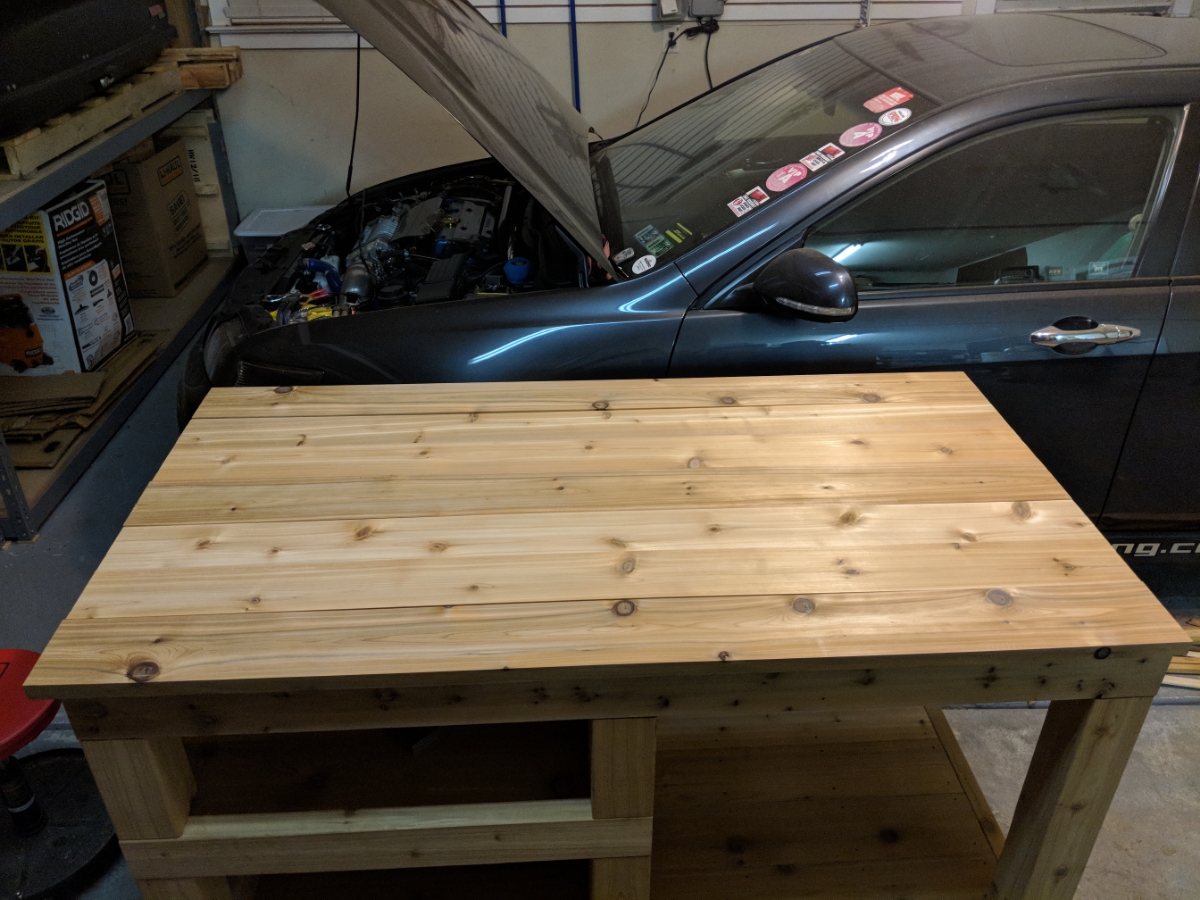
Full top glued and screwed together.
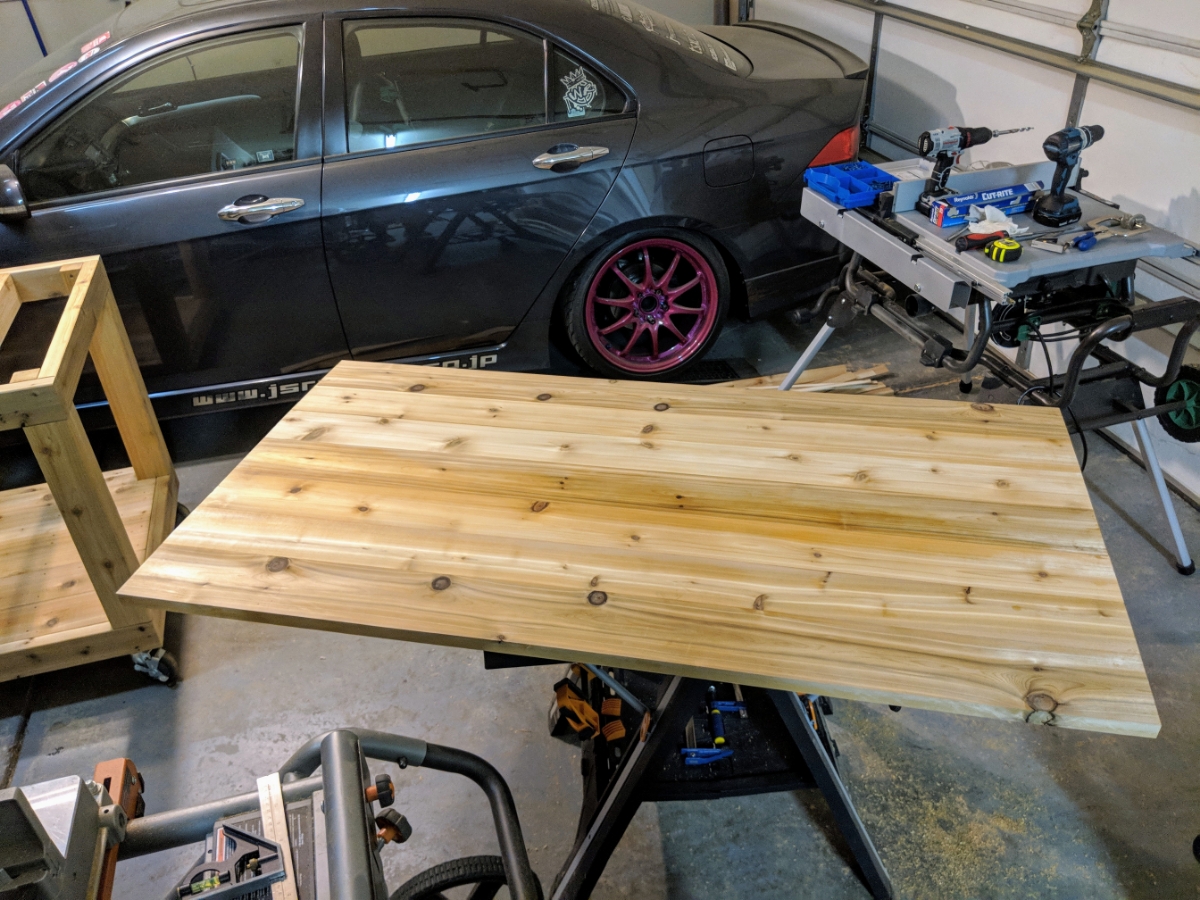
Next morning I got to sanding the top smooth once it had dried. Started with 80 grit on the really bad seems, then 100, 120, 180, and finally 240. Nice and smooth. I was very thankful to finally have a day with no rain cause I really did not want all that dust in my garage.

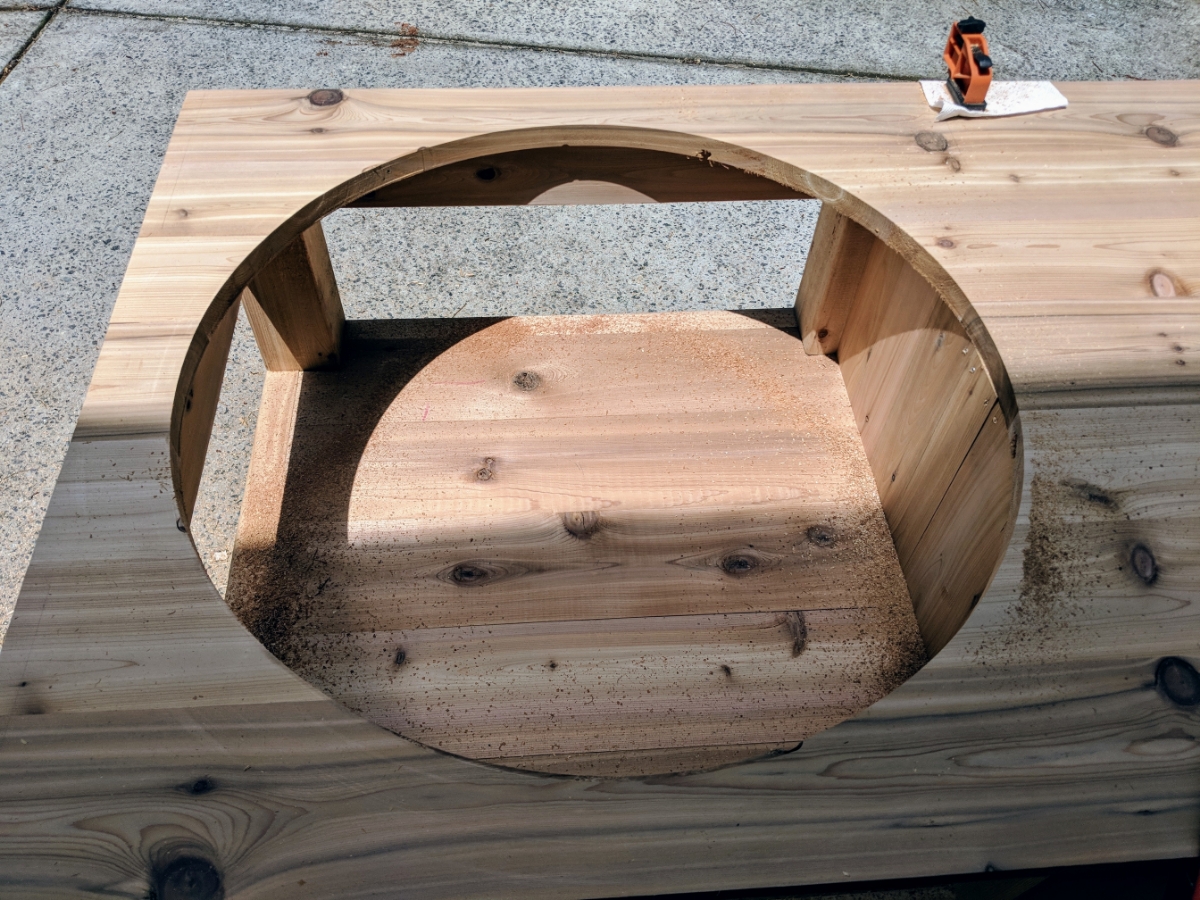
One of the moments of truth. Can I cut a circle using a jig on my first ever attempt.

Made a support so it wouldn't fall as I finished the cut.
Not as smooth as I would have liked. Finishing the cut at the front was a really stupid idea. Also lowered the bit a hair too far at the end and let the holder hit the surface. Nothing though that couldn't later be sanded out.
Super close shave

I was using pocket screws to hold the table top down on the cabinet side cut hadn't drill the holes ahead of time on the egg side and turned out I couldn't fit the kreg system in the space I had left So I ended up installed some wood blocks to bolt the top down. Not sure completely but I believe no using the pocket screws and using these blocks instead later causes me a problem due to lack of anything in the middle of the side. Also didn't want to use glue incase I decide someday to go poured concreate top or granite instead or even just make a new wood top.
The delivery guys were super cool as I had about 10 screws to go to get the table completed enough for them to install the top and they had no problem waiting. They also helped me carry it out back to my deck from the garage.
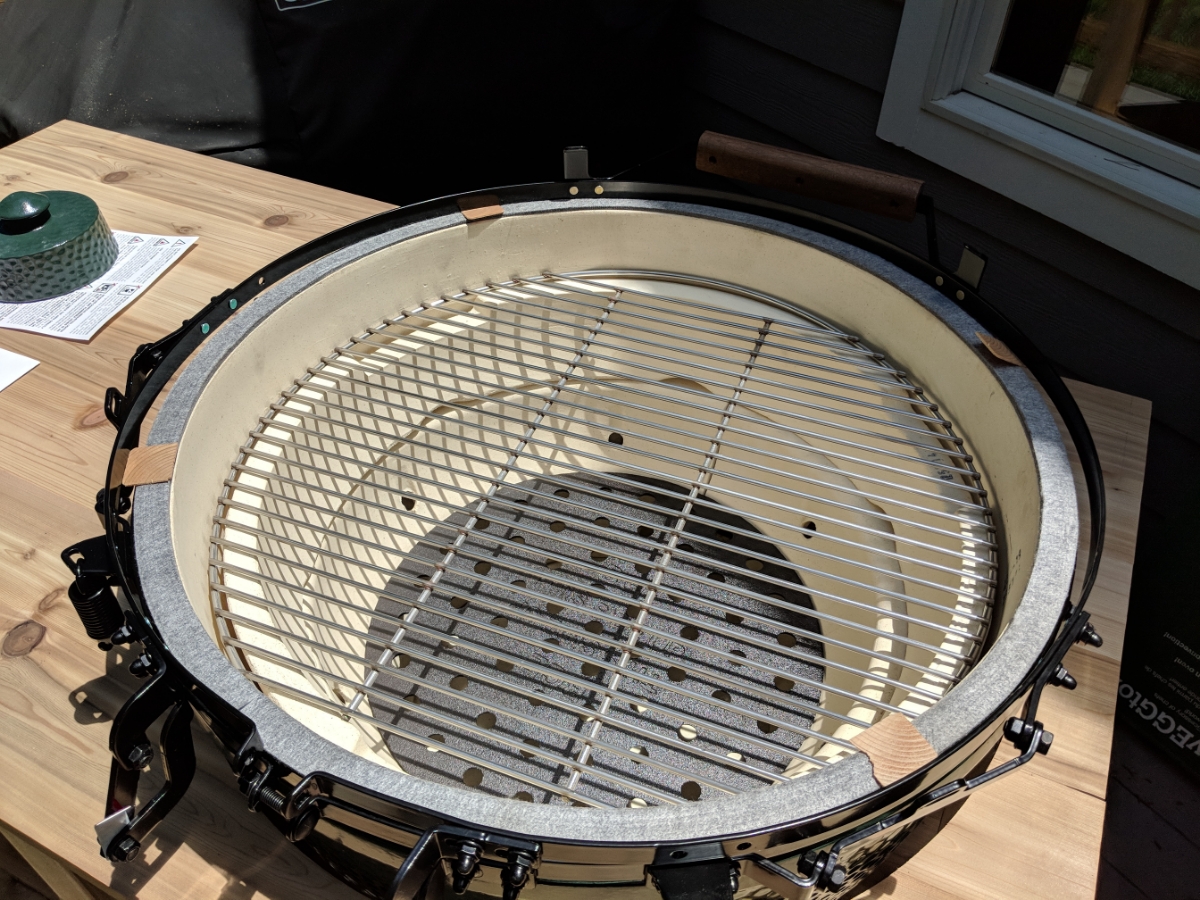
It was however, at this time once they left, that I realized that the entire thing was put together wrong. There were long screws used where short ones should go. This meant there was probably short screws used where long ones sould be. The worst part about all this is that the screws are color coded. It turns out the short ones which are mostly used for decorative things and to hold the front handle on were used to hold the hinge system on. ;what: Screws that had 5 less threads were used to mount the hinges that hold the heavy lid. Well I took the entire thing apart and put it back together correctly. I then called the store and informed them what their team was doing that was putting these things together and that it might be a safety issue they should probably fix.
All corretly back together.
So Thursday and Friday morning I had to get a lot done before delivery.
Started with building the main support structure in the middle of the shelf for the egg. Made some more lap joints to add strength. Then connected the piece with 2 pocket screws at each end.
Then installed the two lower boards that I will eventually mount the drawer slides to.
Then I installed the shelf floor. I used glue and brad nails to help hold it down while the glue dried.
Middle wall for the side cabinet. I used stainless steel deck trim screws for this.
It was after this while I was cutting a board for something I realized I had an issue. I had now worked on three wood projects in a row and had never emptied my shop vac/poor mans dust collection system. This leaves you with no suction at all pretty much. Forgot to take a picture of how full it was but lets just say it was packed tight.
An entire trash bag full and that didn't even empty the thing fully.
This filter need replaced but it will have to do for the rest of the project. Knocked it all off and kept on going.
Spread out all my top boards so I could pick the sections I wanted to be used for my table top. It was at this time I realized by pure luck I had selected two boards that were cut from on top of each other out of the same tree so they had basically an identical knot location. I would use these as the front and back edge boards for my table top.
Trimmed to length
Joining the top together. I was able to do a group of 3 and a group of 4 with the two clamps I had. I ended up deciding againt buying 36in clamps as the cheapest I found locally were $41 each and I don't know what right now I would ever use them for again.
Full top glued and screwed together.
Next morning I got to sanding the top smooth once it had dried. Started with 80 grit on the really bad seems, then 100, 120, 180, and finally 240. Nice and smooth. I was very thankful to finally have a day with no rain cause I really did not want all that dust in my garage.
One of the moments of truth. Can I cut a circle using a jig on my first ever attempt.
Made a support so it wouldn't fall as I finished the cut.
Not as smooth as I would have liked. Finishing the cut at the front was a really stupid idea.
Also lowered the bit a hair too far at the end and let the holder hit the surface. Nothing though that couldn't later be sanded out.
Super close shave
I was using pocket screws to hold the table top down on the cabinet side cut hadn't drill the holes ahead of time on the egg side and turned out I couldn't fit the kreg system in the space I had left
So I ended up installed some wood blocks to bolt the top down. Not sure completely but I believe no using the pocket screws and using these blocks instead later causes me a problem due to lack of anything in the middle of the side. Also didn't want to use glue incase I decide someday to go poured concreate top or granite instead or even just make a new wood top.
The delivery guys were super cool as I had about 10 screws to go to get the table completed enough for them to install the top and they had no problem waiting. They also helped me carry it out back to my deck from the garage.
It was however, at this time once they left, that I realized that the entire thing was put together wrong. There were long screws used where short ones should go. This meant there was probably short screws used where long ones sould be. The worst part about all this is that the screws are color coded. It turns out the short ones which are mostly used for decorative things and to hold the front handle on were used to hold the hinge system on. ;what: Screws that had 5 less threads were used to mount the hinges that hold the heavy lid.
Well I took the entire thing apart and put it back together correctly. I then called the store and informed them what their team was doing that was putting these things together and that it might be a safety issue they should probably fix.
All corretly back together.
Thread Starter
Moderator
Regional Coordinator (Southeast)
Regional Coordinator (Southeast)
Joined: Dec 2003
Posts: 44,123
Likes: 4,433
From: Mooresville, NC
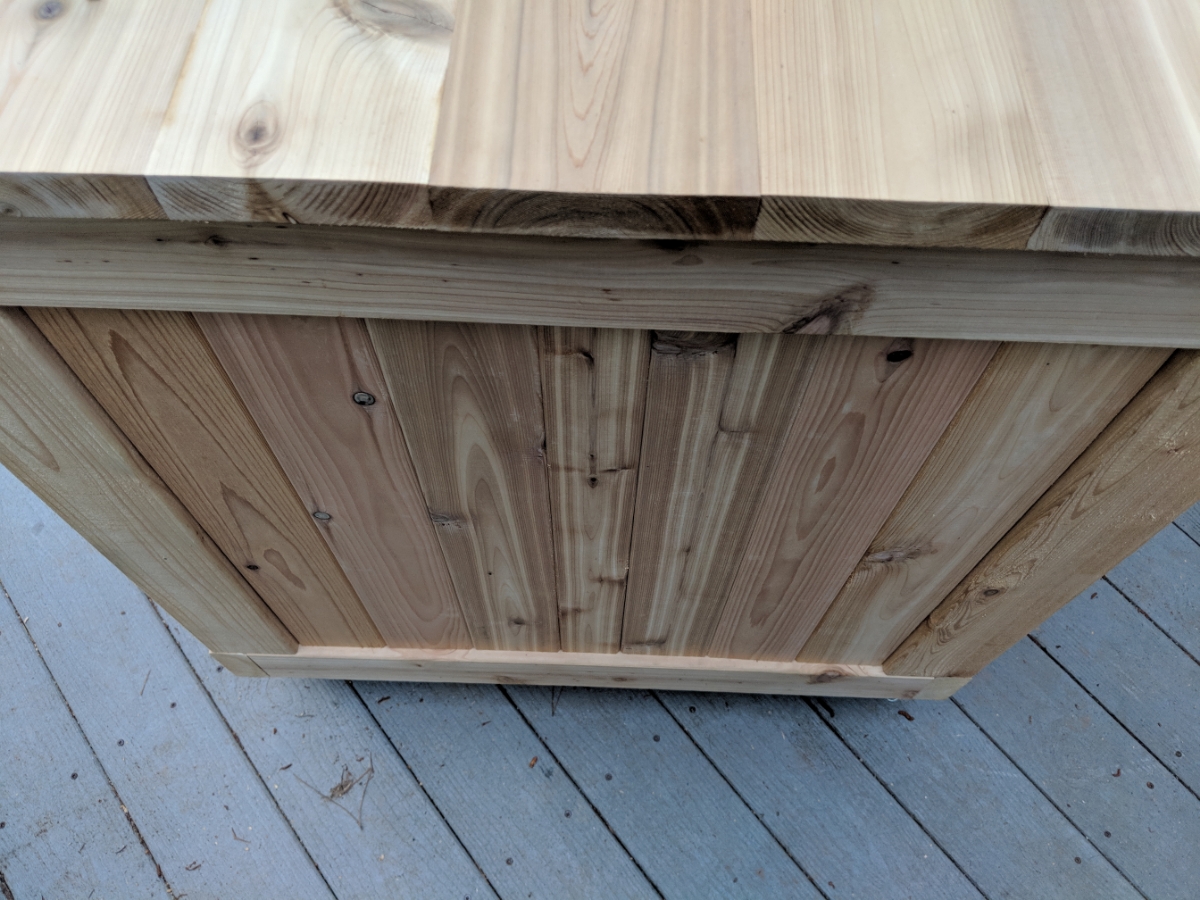
On to the side panels. Made sure to use setup a template so I made all boards exactly the same size.
Then installed the mounts for the sides.


First side complete. I had gone back and forth on leaving them fully flat but in the end went with the chamfer edge like thoiboi suggested.

Finished up the rest of them.
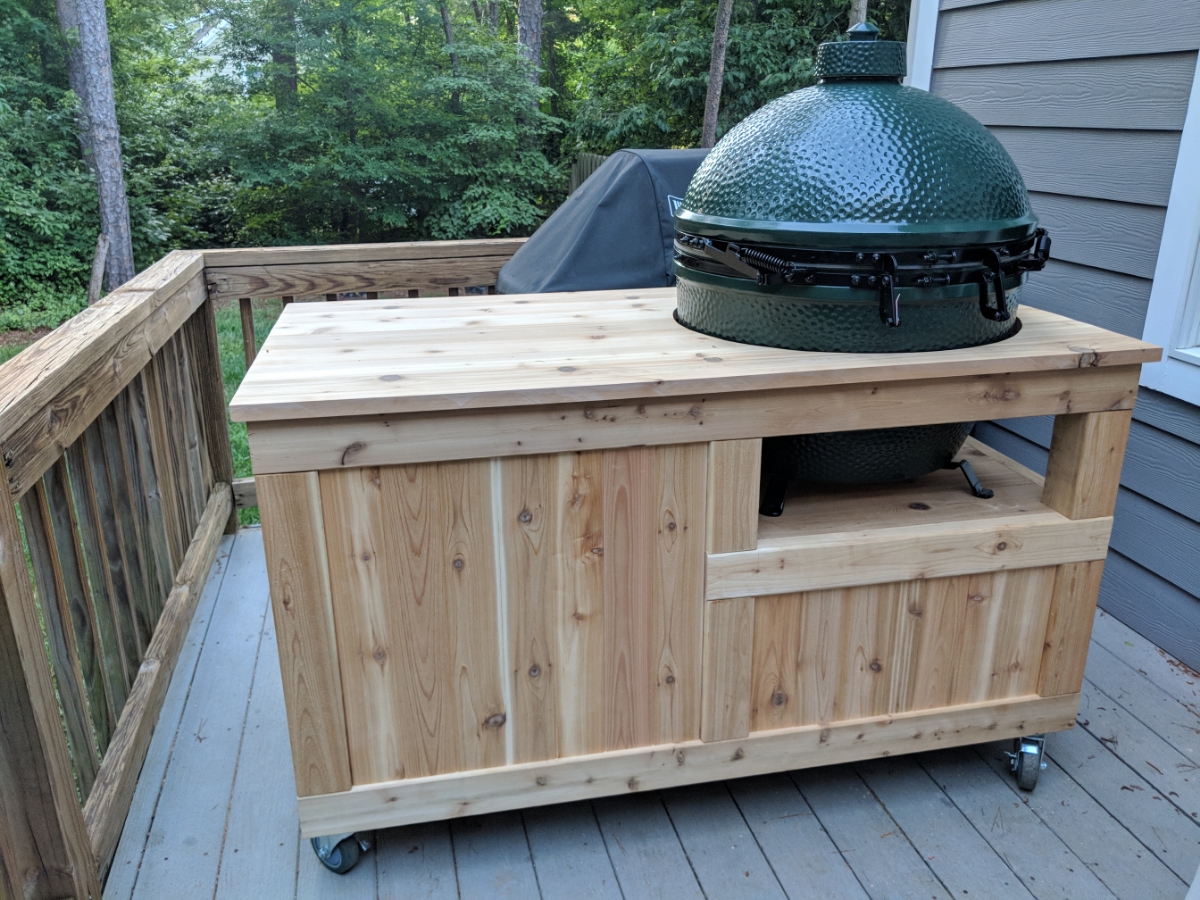
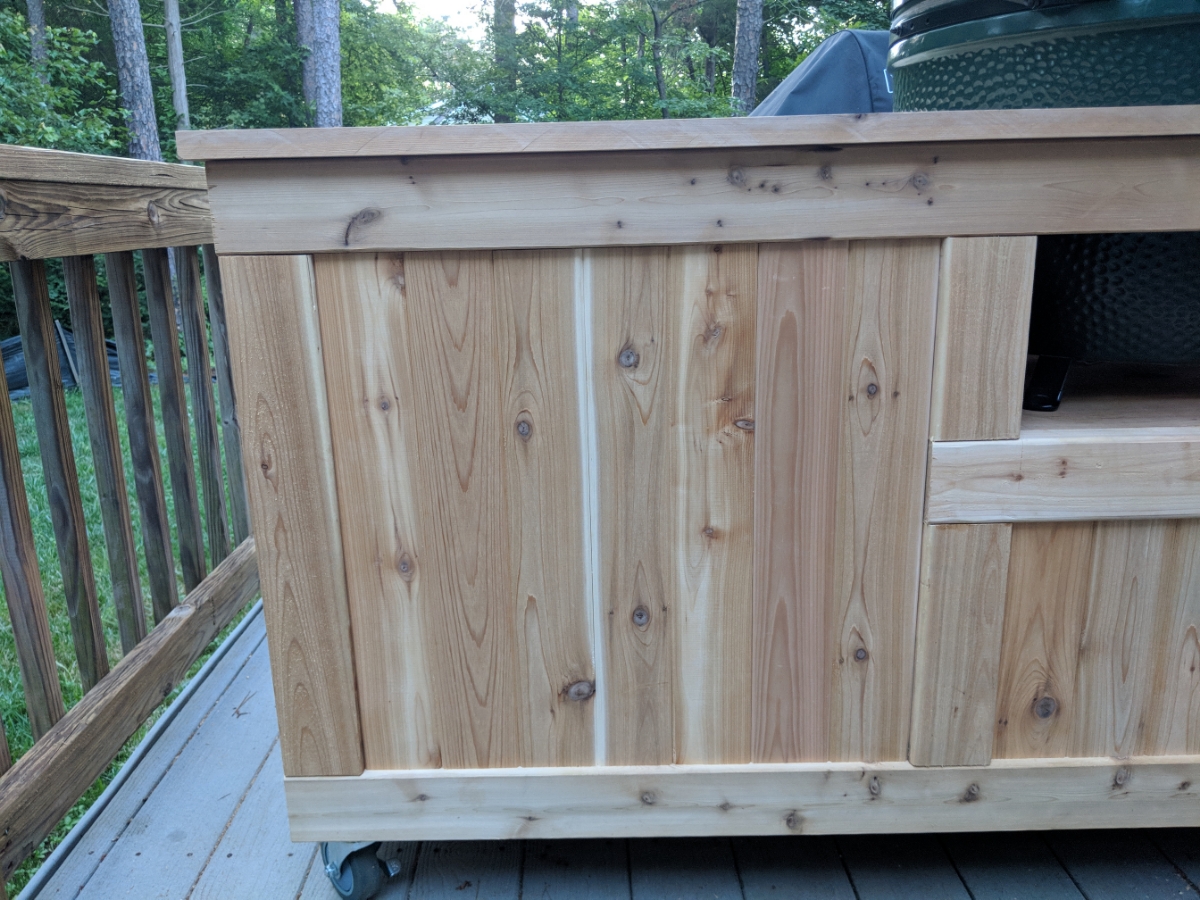
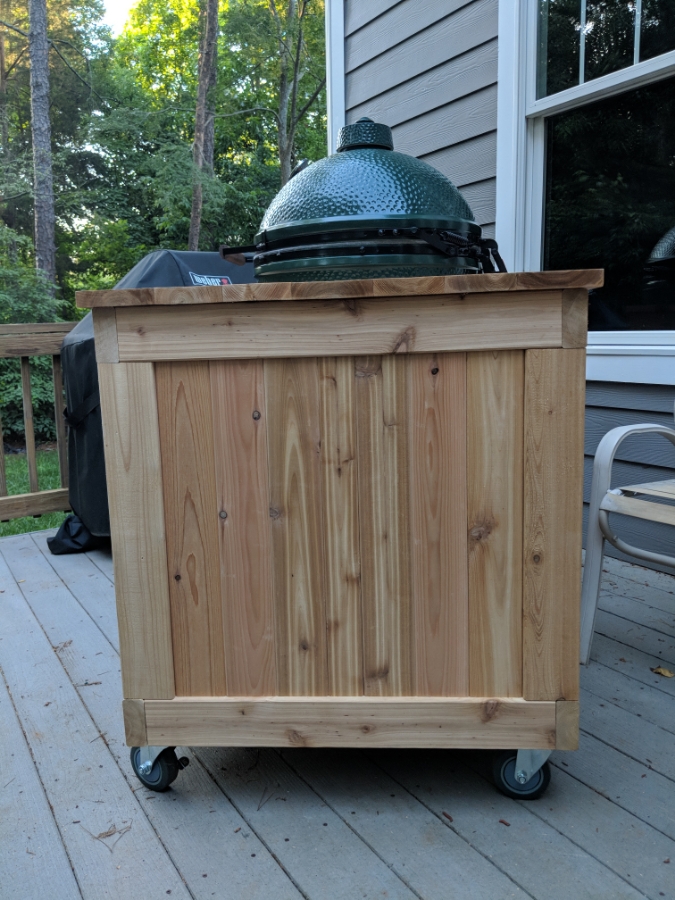
It is honestly pretty hard looking straight at it to even see the chamfer but this shot shows it pretty well.
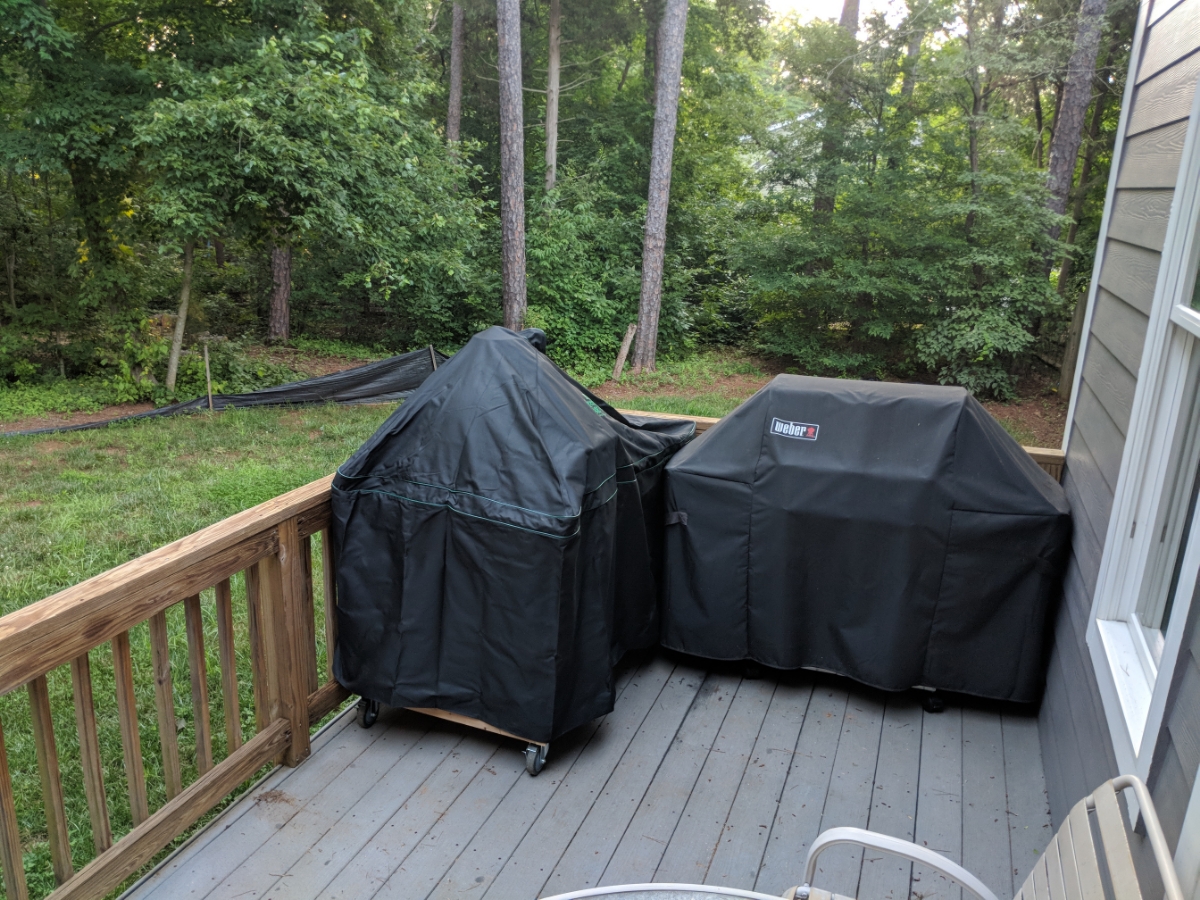
Even will follwing Green Egg plans they give for table design dimension and egg wise placement apparently their cover doesn't fit it. Their tables they sell much have the egg at a different location than
Then installed the mounts for the sides.
First side complete. I had gone back and forth on leaving them fully flat but in the end went with the chamfer edge like thoiboi suggested.
Finished up the rest of them.
It is honestly pretty hard looking straight at it to even see the chamfer but this shot shows it pretty well.
Even will follwing Green Egg plans they give for table design dimension and egg wise placement apparently their cover doesn't fit it. Their tables they sell much have the egg at a different location than
Thread Starter
Moderator
Regional Coordinator (Southeast)
Regional Coordinator (Southeast)
Joined: Dec 2003
Posts: 44,123
Likes: 4,433
From: Mooresville, NC
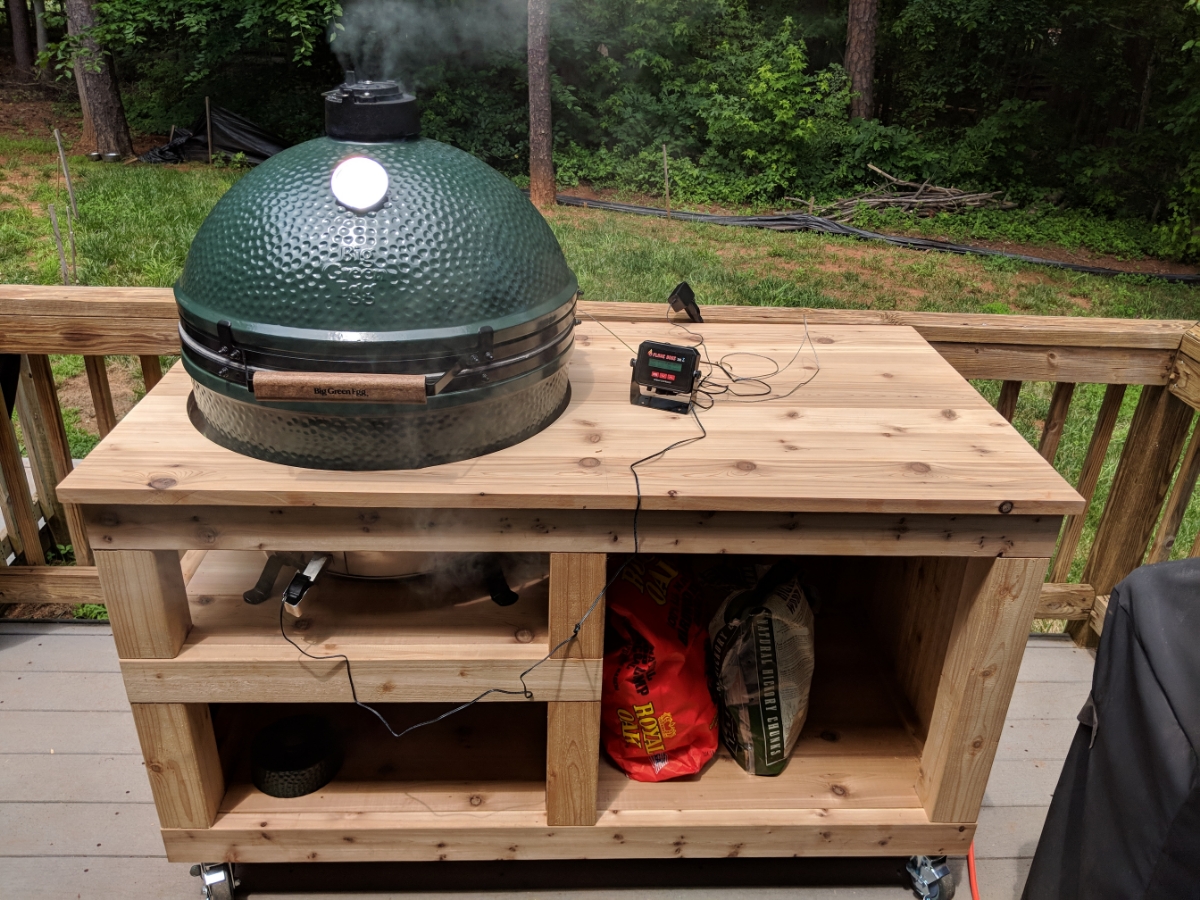
Now on to the inaugural cook on the new Egg.
Didn't shop around for ribs at all. Just on the way home from a cookout at a friends on Saturday I stopped at the grocery store and picked up the only two packs they had left out.

Put some mustard down first followed and then coated them in a rub recipe suggested to me by a friend. I wrapped them in foil then and put them in the fridge for the night. I had planned to start them exactly 12hrs later but life didn't cooperate and it ended up being 14hrs.

Got the ribs out of the fridge to warm up a bit while I started the Egg

Starting my Egg for the first time. I used 5 pieces of Hickory and 2 pieces of Apple wood for this cook.

Egg going good while it gets up to temp. Wood be cooking at 225 for this cook doing the 3-2-1 method.
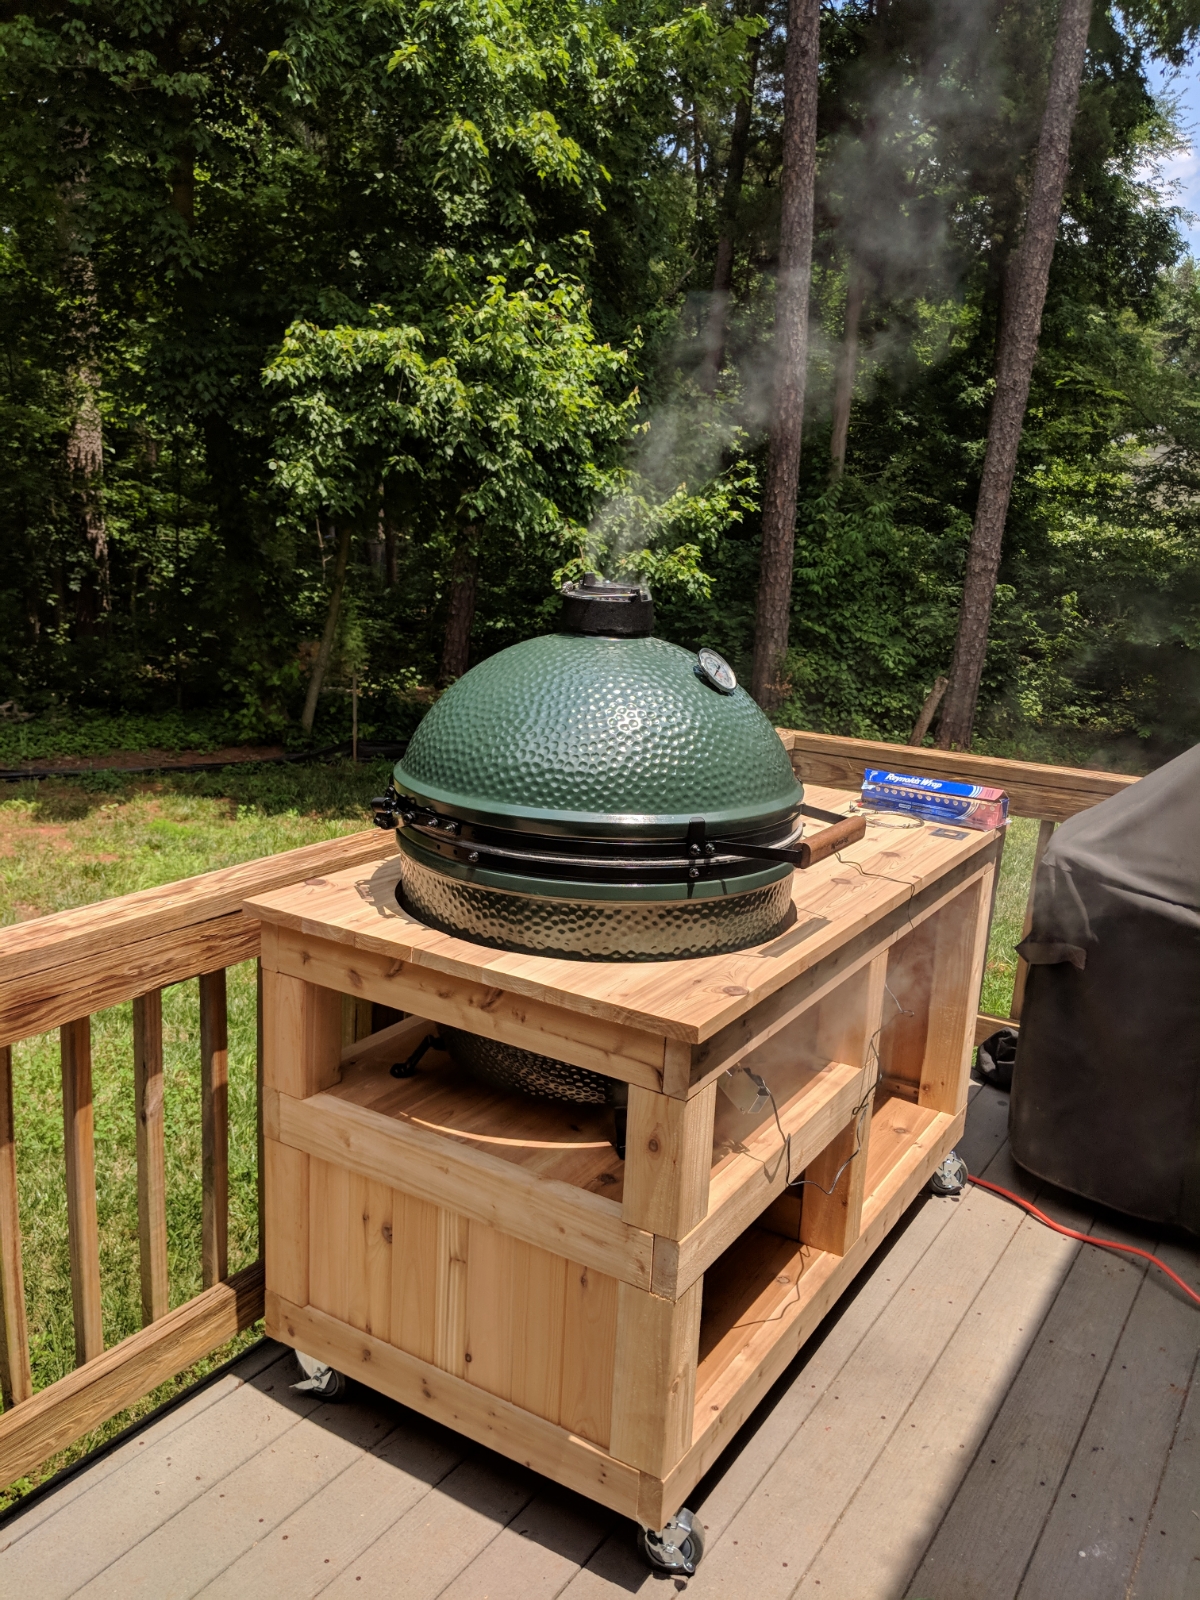
Flame Boss 300 all setup.
And we begin...

3hrs in time for a wrap

Honey, brown suger, and a little bit of whisky
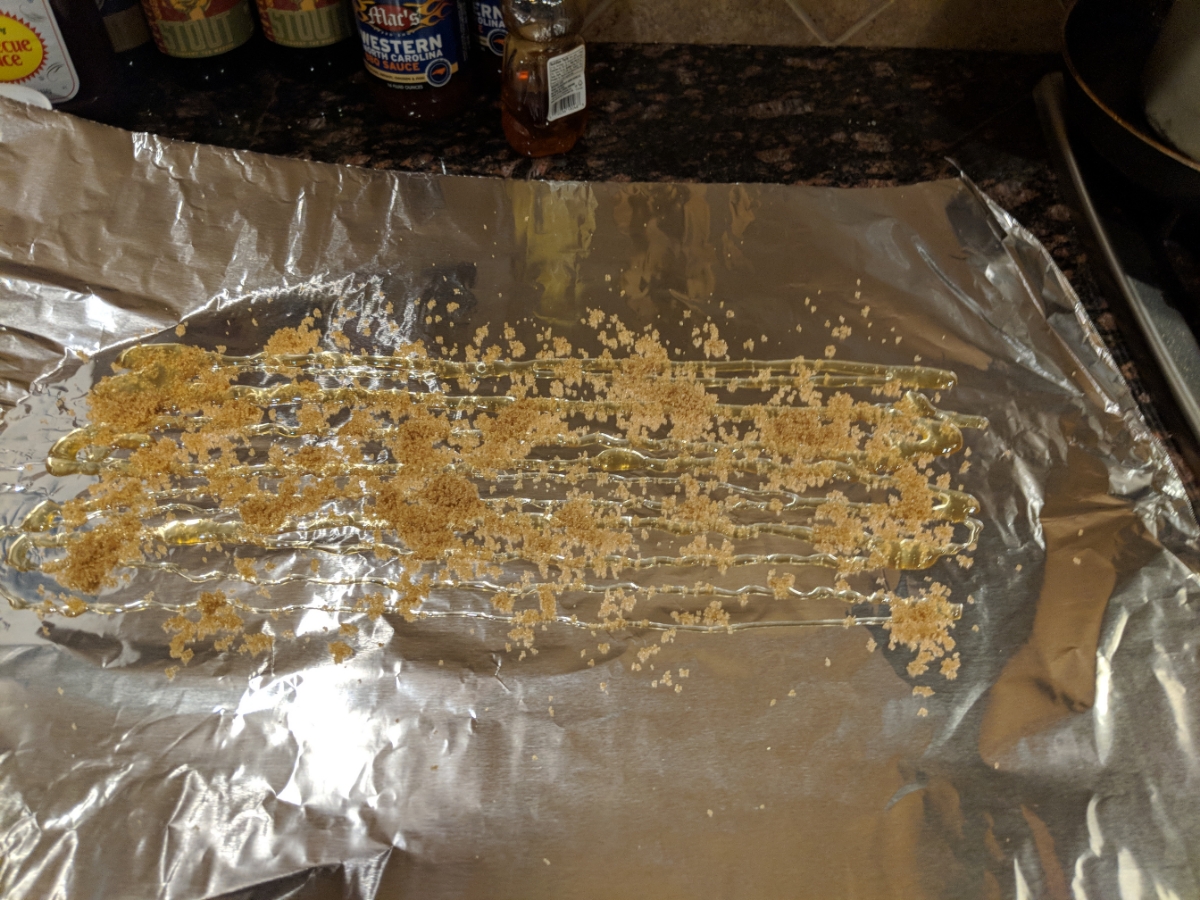

Wrapped up and back on for 2hrs more.

Unwrapped and back on for the last hour

Sauced up and also placed some corn on the cobb on the grill at this point as well.

Of course at this point it had to start to rain.
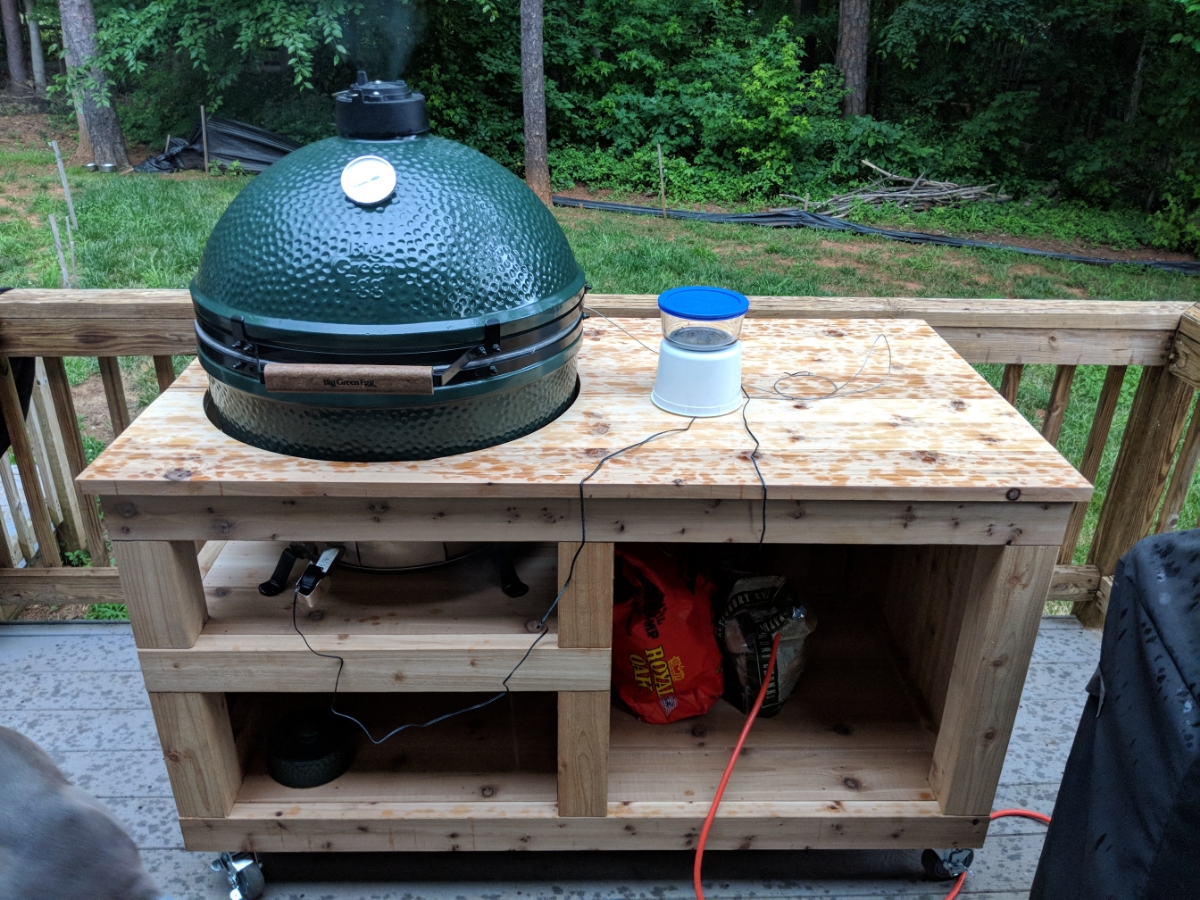
The wood looked really good all wet (I am sure someone will make a joke out of this comment so calling it out now)
The sky was a beautiful orange blue after the storm

Flame Boss still keeping a perfect 225.

Saucing them a second time after 30min

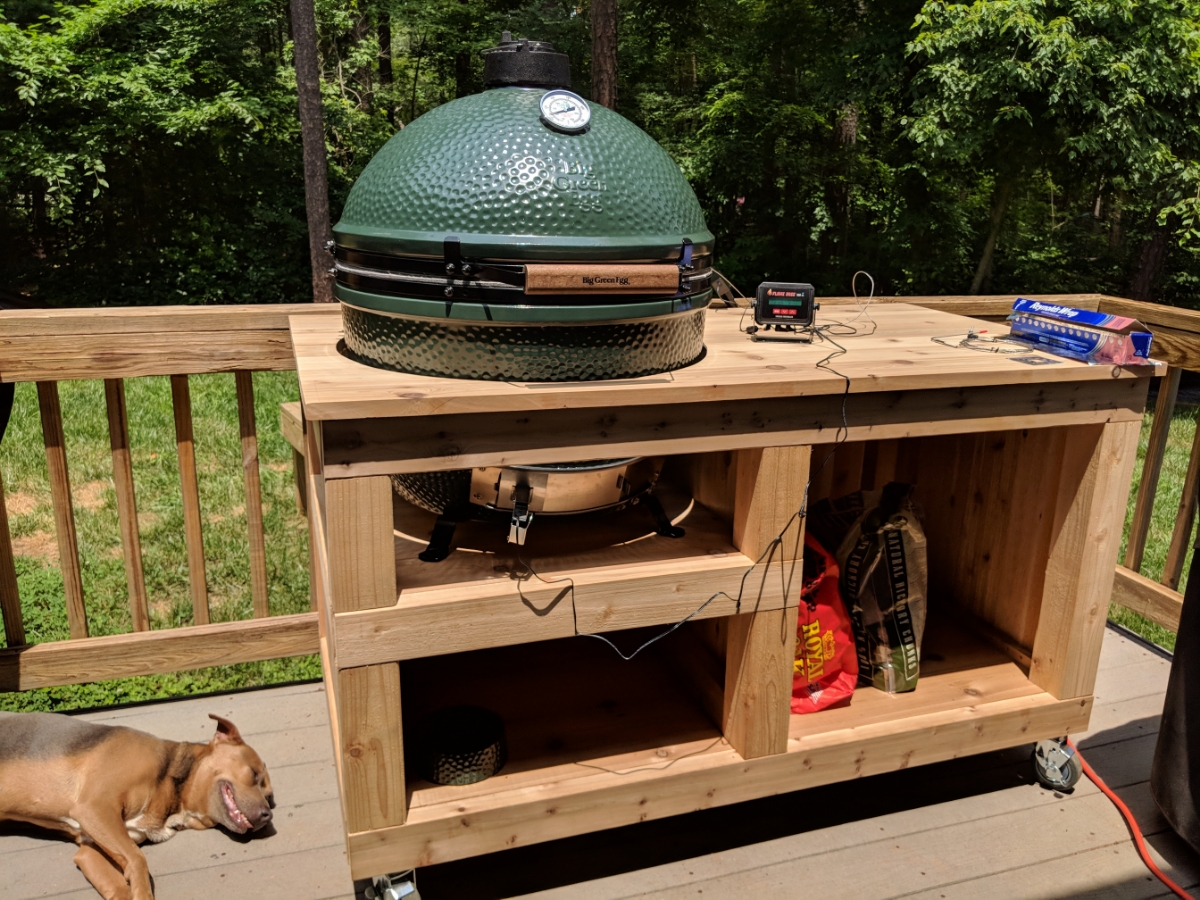
All finished. Time to eat!


Forgot to take a picture of the corn right away but here is one from my plate.

8.5lbs of ribs leaves a few left overs for this week.

The heat from the Egg dried the wood out near the egg very quickly. Just about an hour after it stopped raining.
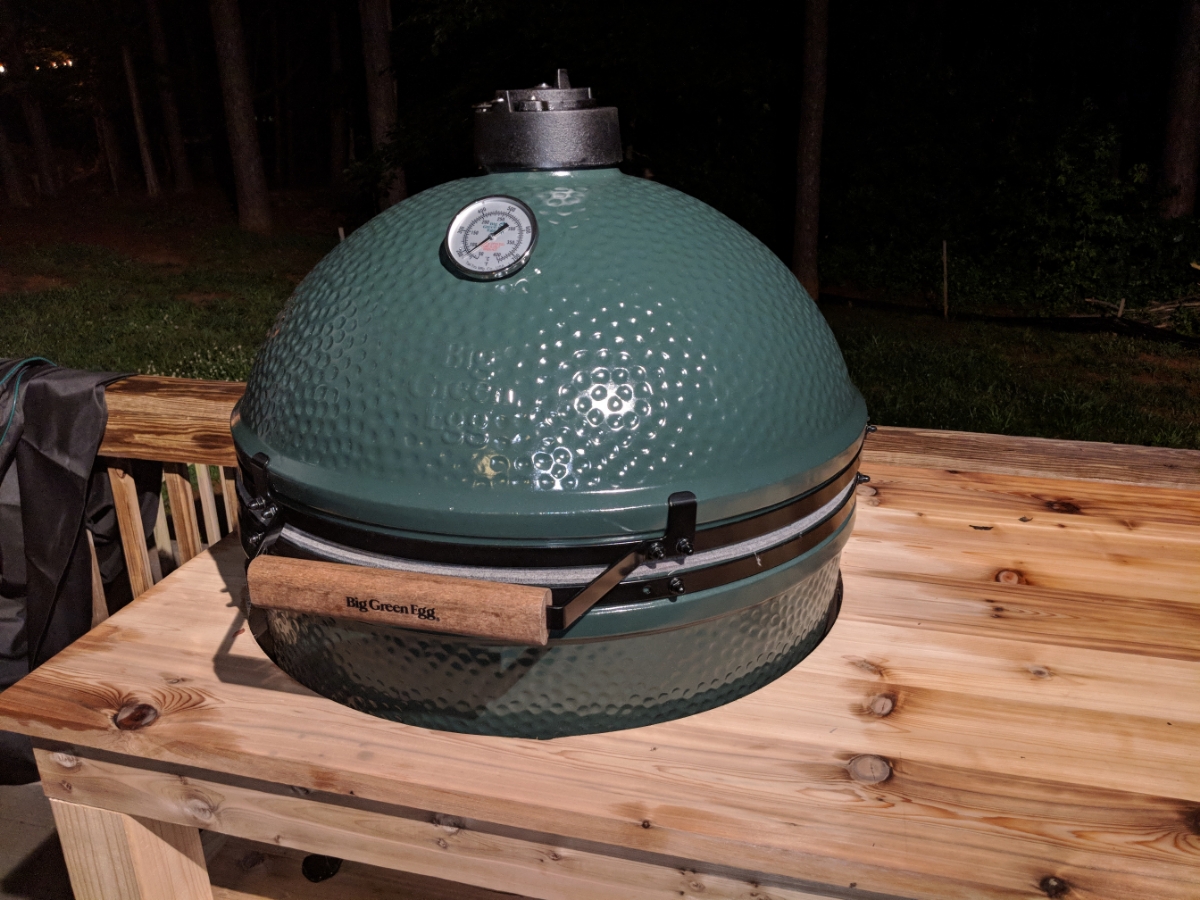
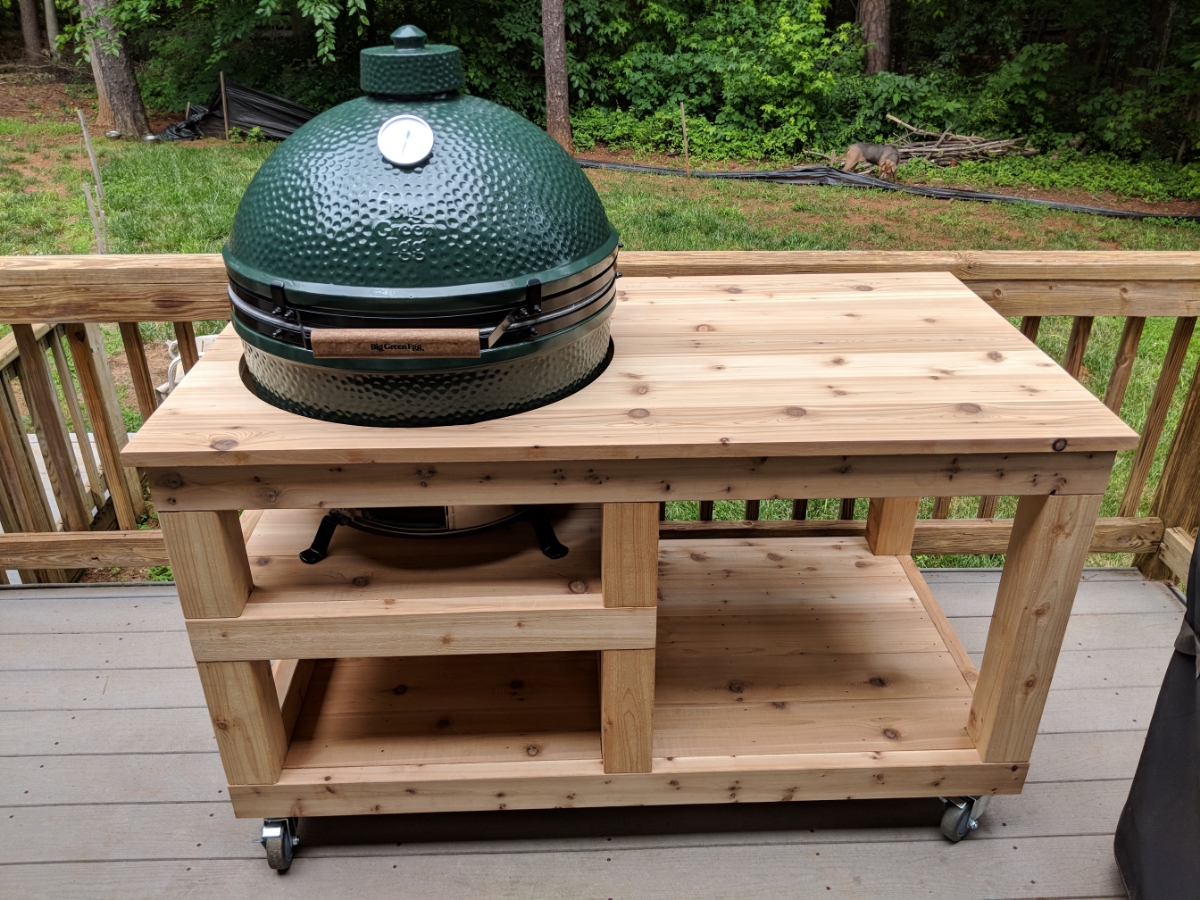
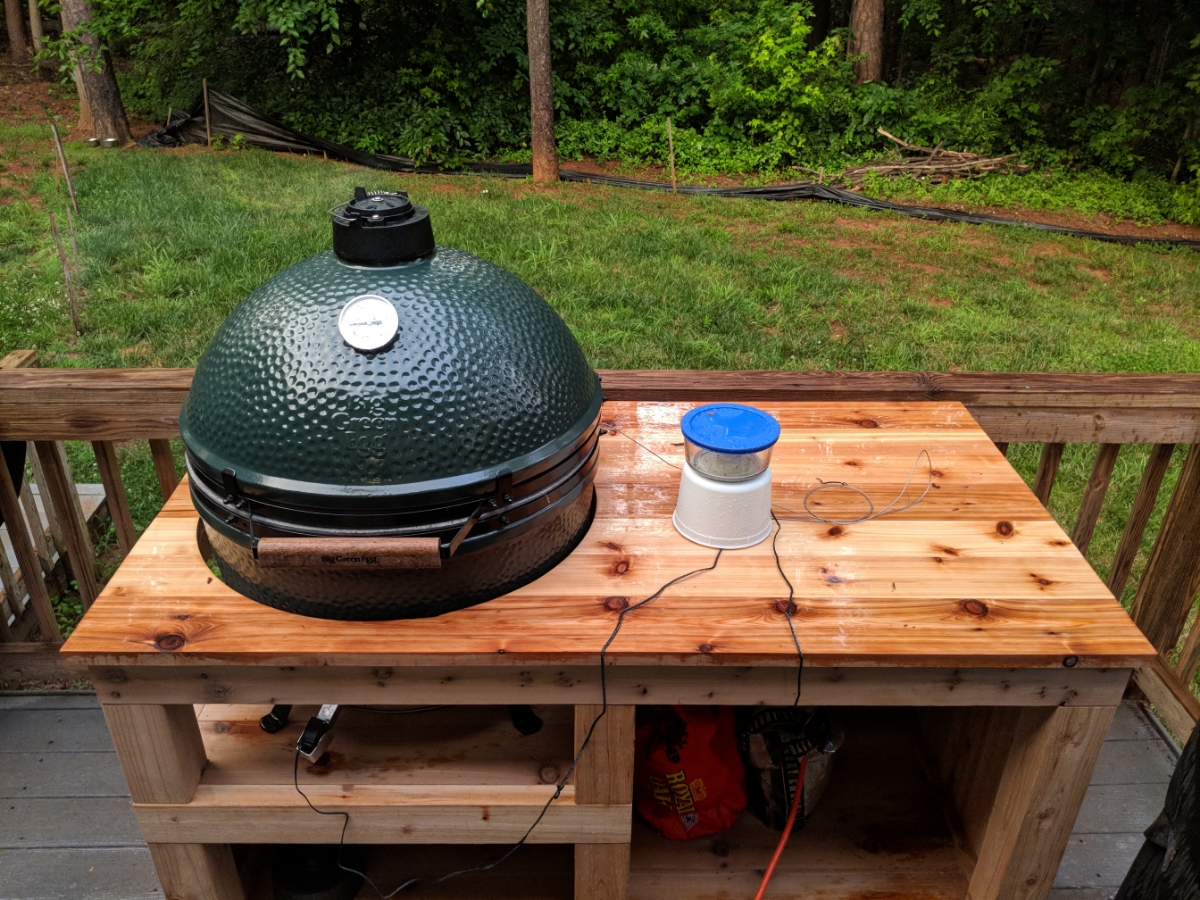
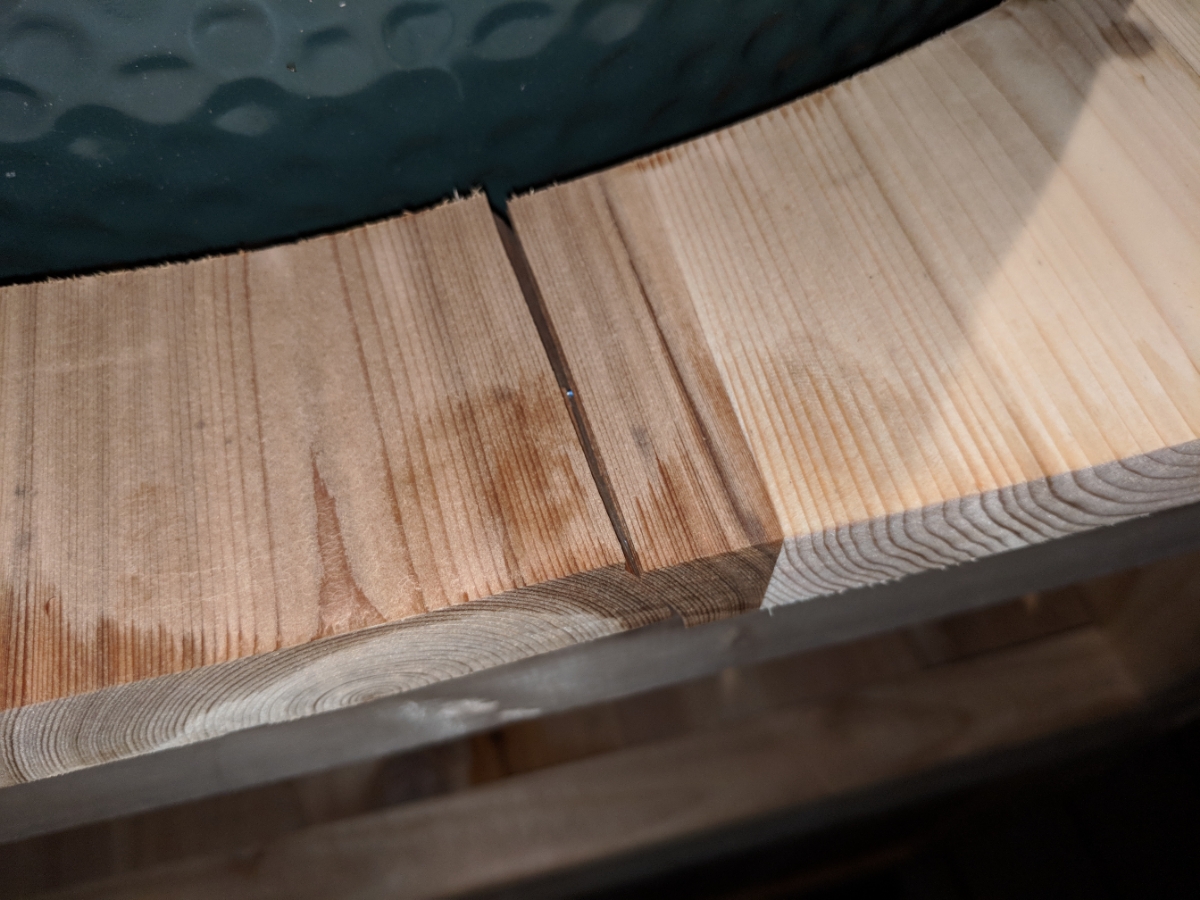
The first cook was not without issues though. I noticed that my table top was a casualty. It sadly cracked already. I imagine from the heat but not 100% sure.
Didn't shop around for ribs at all. Just on the way home from a cookout at a friends on Saturday I stopped at the grocery store and picked up the only two packs they had left out.
Put some mustard down first followed and then coated them in a rub recipe suggested to me by a friend. I wrapped them in foil then and put them in the fridge for the night. I had planned to start them exactly 12hrs later but life didn't cooperate and it ended up being 14hrs.
Got the ribs out of the fridge to warm up a bit while I started the Egg
Starting my Egg for the first time. I used 5 pieces of Hickory and 2 pieces of Apple wood for this cook.
Egg going good while it gets up to temp. Wood be cooking at 225 for this cook doing the 3-2-1 method.
Flame Boss 300 all setup.
And we begin...
3hrs in time for a wrap
Honey, brown suger, and a little bit of whisky
Wrapped up and back on for 2hrs more.
Unwrapped and back on for the last hour
Sauced up and also placed some corn on the cobb on the grill at this point as well.
Of course at this point it had to start to rain.
The wood looked really good all wet (I am sure someone will make a joke out of this comment so calling it out now)
The sky was a beautiful orange blue after the storm
Flame Boss still keeping a perfect 225.
Saucing them a second time after 30min
All finished. Time to eat!
Forgot to take a picture of the corn right away but here is one from my plate.
8.5lbs of ribs leaves a few left overs for this week.
The heat from the Egg dried the wood out near the egg very quickly. Just about an hour after it stopped raining.
The first cook was not without issues though. I noticed that my table top was a casualty. It sadly cracked already. I imagine from the heat but not 100% sure.
Do you plan on pulling it away from the grill when in use? Or is the table section and lower cabinet almost unusable when the grill is there?
Edit:
Nevermind, jumped the gun before you were finished! Turned out great!
Edit:
Nevermind, jumped the gun before you were finished! Turned out great!
Last edited by BreezyTL; Jun 4, 2018 at 09:25 AM. Reason: Jumped the gun
Thread Starter
Moderator
Regional Coordinator (Southeast)
Regional Coordinator (Southeast)
Joined: Dec 2003
Posts: 44,123
Likes: 4,433
From: Mooresville, NC
I used it pulled out this time. I have not checked the space but hoping I can still open the doors. I hope to just leave it in the corner from now on or pull it out get it started then push it back while cooking if I need more space on the deck.

Thread Starter
Moderator
Regional Coordinator (Southeast)
Regional Coordinator (Southeast)
Joined: Dec 2003
Posts: 44,123
Likes: 4,433
From: Mooresville, NC
We have been having issues with our air conditioning the past week or so. Noticed some water dripping out of my overflow pan drain line last week and turns out the emergency drain pan in the attic was an inch full but the pan is 2.5in deep and doesn't cut the system off till 1.5in of water in the pan. I have since adjusted that down to 1in of water for the auto shutoff switch. The unit was 2lb low on freon so there is a leak in the system. Most likely in the coils cause they are rather rusty. The system is 11 years old so probably on its way out and it runs on R22 which will be illegal to use come January 1st, 2020. At that point if you have a leak you will have to put in a new system that uses the new coolant standard. So they filled the system and that unit seems to be running well. It can lower temps of the upstairs about 2.5-3 degrees per hour. Hopefully that leak is slow and I will get some more life out of the system. If it keeps working I will make sure to call and have them come out and top off the coolant December of 2019. However, already going to start saving for a new system as I know it is coming.
Unfortunately, I was out of town this weekend and when I got back into town my girlfriend informed methe down stairs unit wasn't keeping temp. She had it set to 68 inside and it was 94 outside and it couldn't cool below 72. Not a big deal to me as I am fine at 72. Her on the other hand thought it was the end of the world. I had the unit looked at last year and was told it was fine and that it is normal that a unit can only cool 20 or so degrees below the outside temp. I call bullshit on that though cause I know it has been 104 before when I lived at my parents place down here and I had it cooling the house to 70 degrees. So either this unit is now failing or it might just be undersized. I normally only use the downstairs unit to cool the first floor as our house has a door at the top of the stairs to the second floor but I might need to start using both units to not stress either one too hard during the hottest times of the year.
It is supposed to be 96 today so I turned off our auto schedule that lets the temps get hotter during the day and set both the upstairs and downstairs to 70 degrees. With my ecobee thermostats I can monitor temps on a graph all day long so we are going to see if both can keep up or not. Tomorrow I will do the same test but with the door open.
Anyone here with any real good HVAC knowledge to share anymore insight? I feel like these HVAC companies can sometimes be just as bad as some auto repair garages.
Looking like I could need to replace both units in the next 2-3 years. Yay home ownership Hey but at least then I should get 10-15 years out of those as well once replaced.
Unfortunately, I was out of town this weekend and when I got back into town my girlfriend informed methe down stairs unit wasn't keeping temp. She had it set to 68 inside and it was 94 outside and it couldn't cool below 72. Not a big deal to me as I am fine at 72. Her on the other hand thought it was the end of the world. I had the unit looked at last year and was told it was fine and that it is normal that a unit can only cool 20 or so degrees below the outside temp. I call bullshit on that though cause I know it has been 104 before when I lived at my parents place down here and I had it cooling the house to 70 degrees. So either this unit is now failing or it might just be undersized. I normally only use the downstairs unit to cool the first floor as our house has a door at the top of the stairs to the second floor but I might need to start using both units to not stress either one too hard during the hottest times of the year.
It is supposed to be 96 today so I turned off our auto schedule that lets the temps get hotter during the day and set both the upstairs and downstairs to 70 degrees. With my ecobee thermostats I can monitor temps on a graph all day long so we are going to see if both can keep up or not. Tomorrow I will do the same test but with the door open.
Anyone here with any real good HVAC knowledge to share anymore insight? I feel like these HVAC companies can sometimes be just as bad as some auto repair garages.
Looking like I could need to replace both units in the next 2-3 years. Yay home ownership
Hey but at least then I should get 10-15 years out of those as well once replaced.