CCColtsicehockey's Home Projects Thread


 10-19-2020, 08:45 AM
#1202
Moderator
Regional Coordinator (Southeast)
Regional Coordinator (Southeast)
Thread Starter
Join Date: Dec 2003
Location: Mooresville, NC
Age: 38
Posts: 43,563
Received 3,763 Likes
on
2,538 Posts
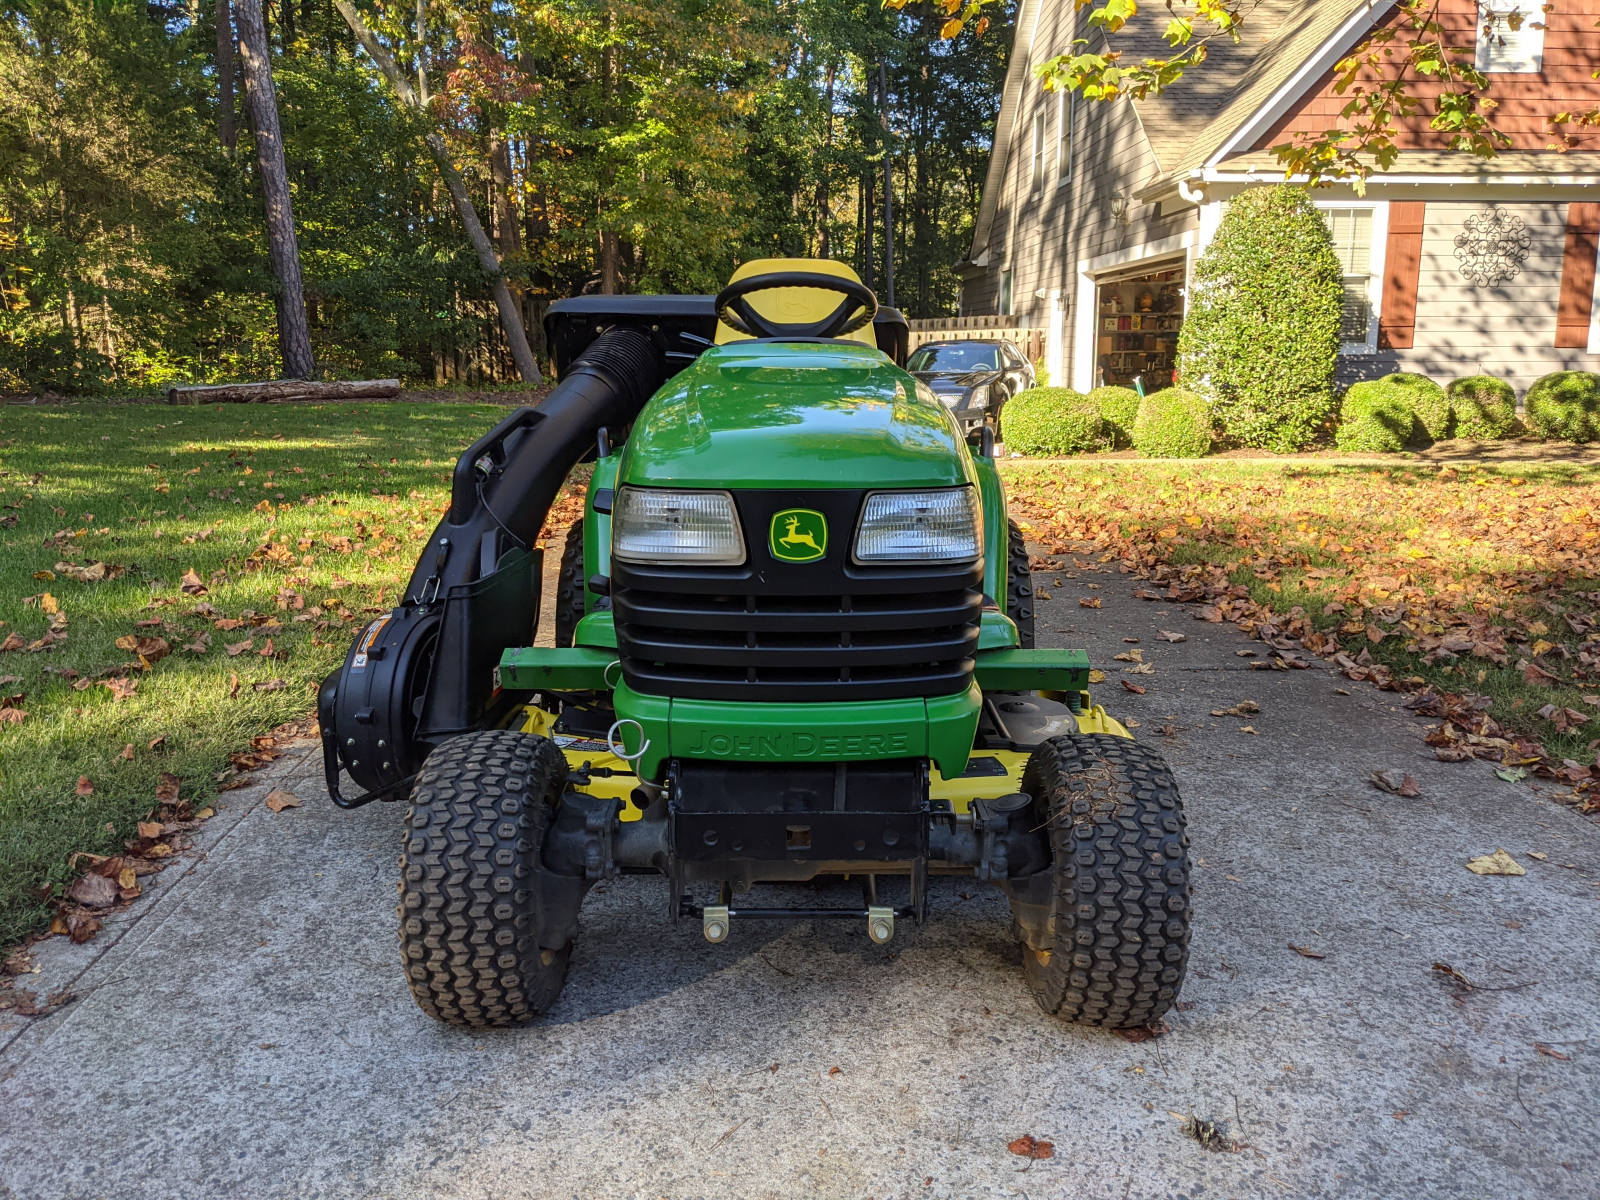
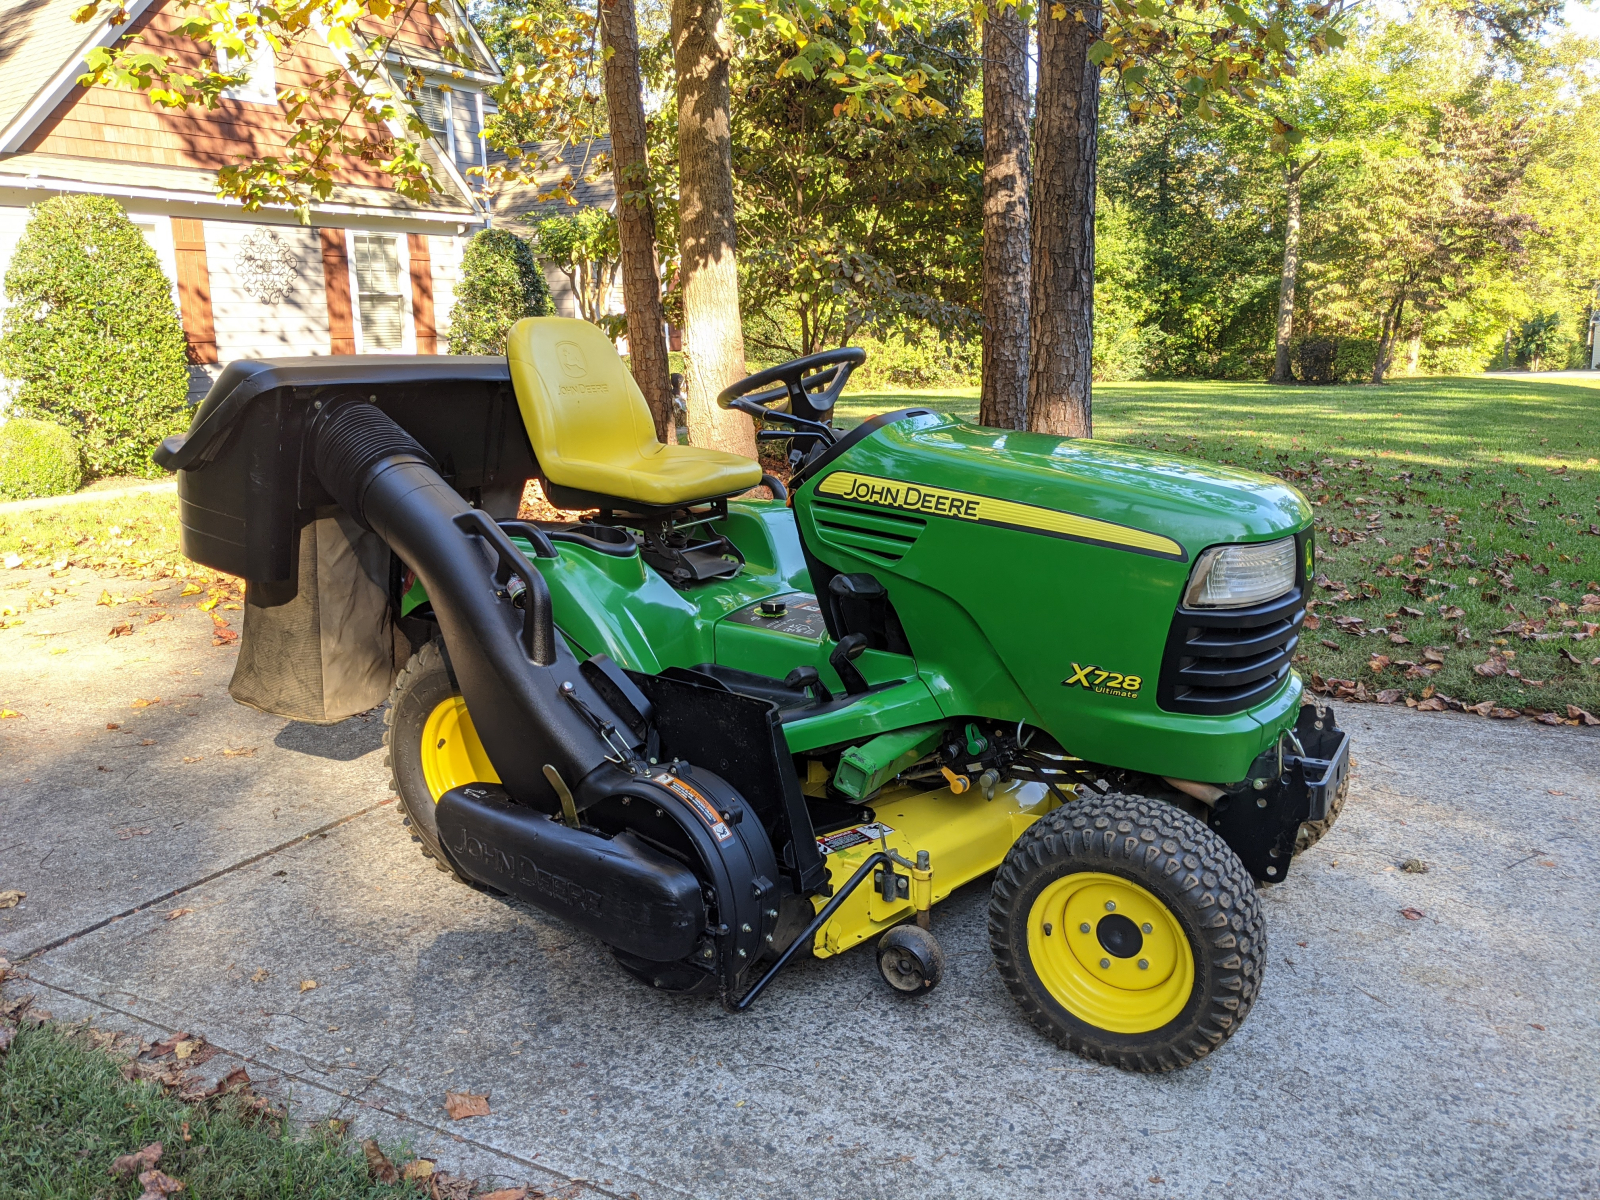
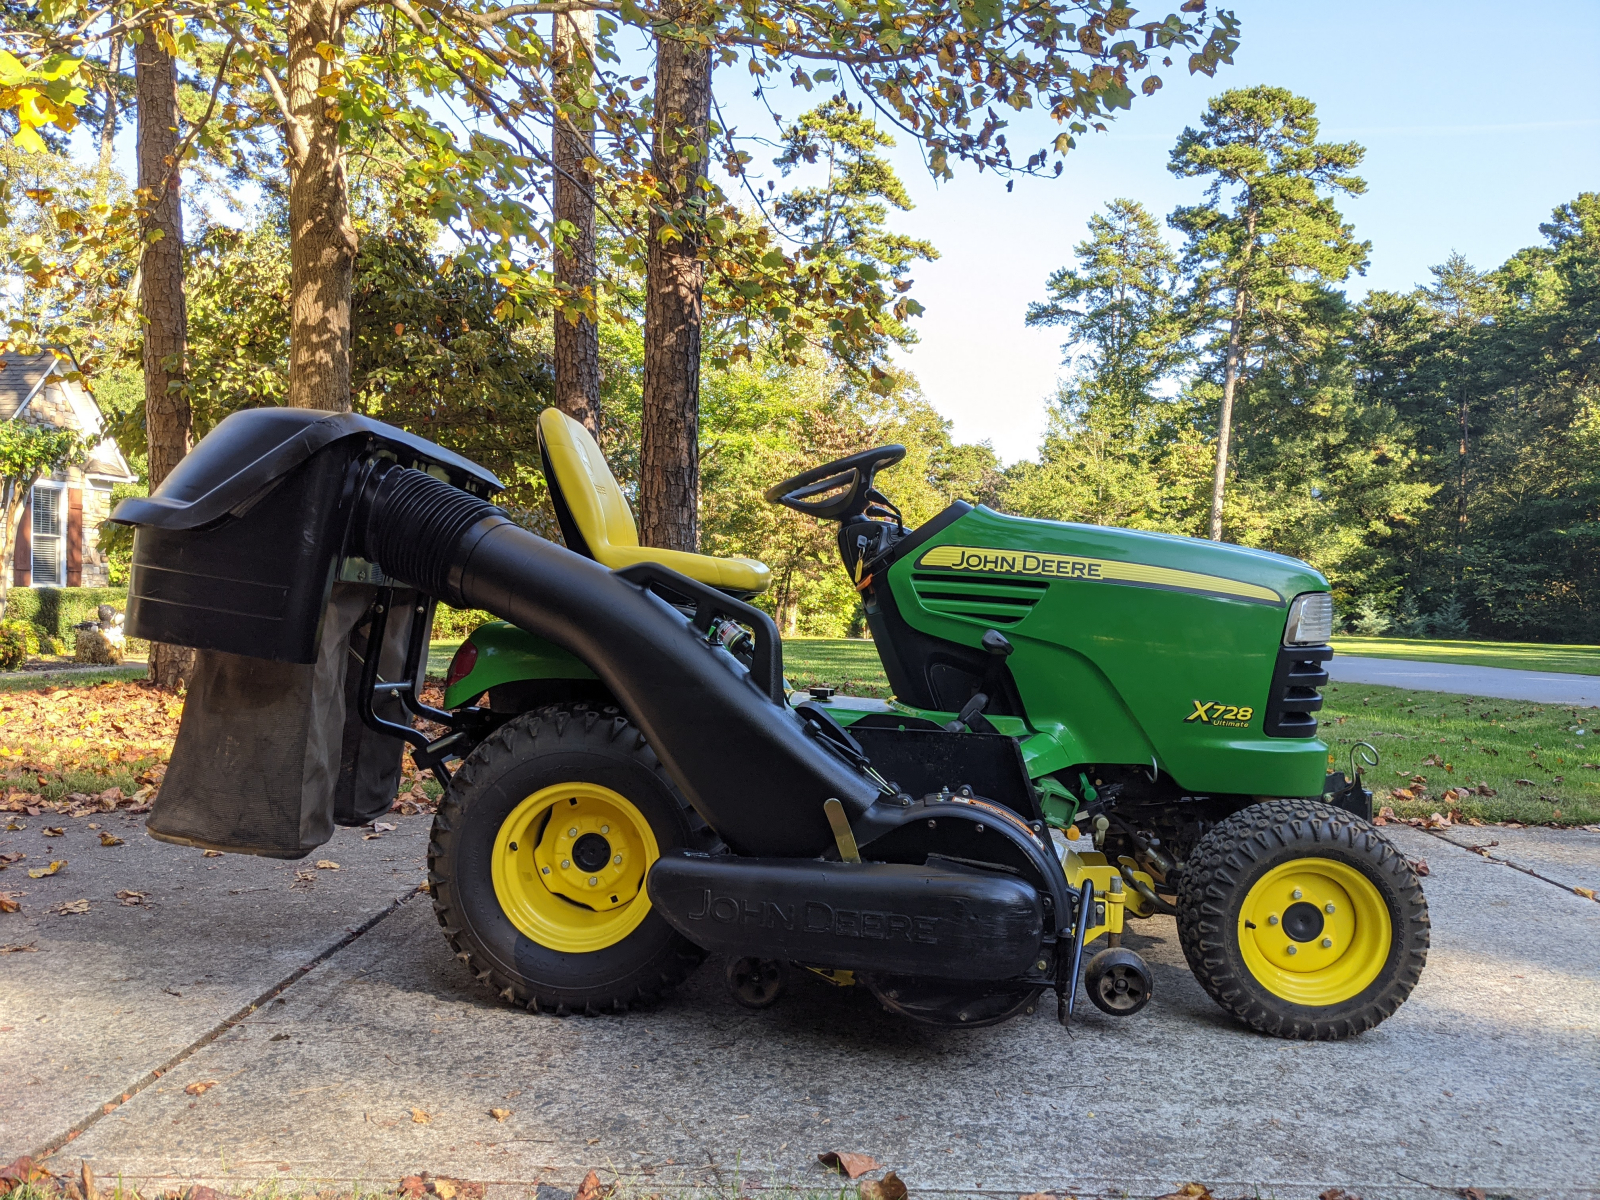
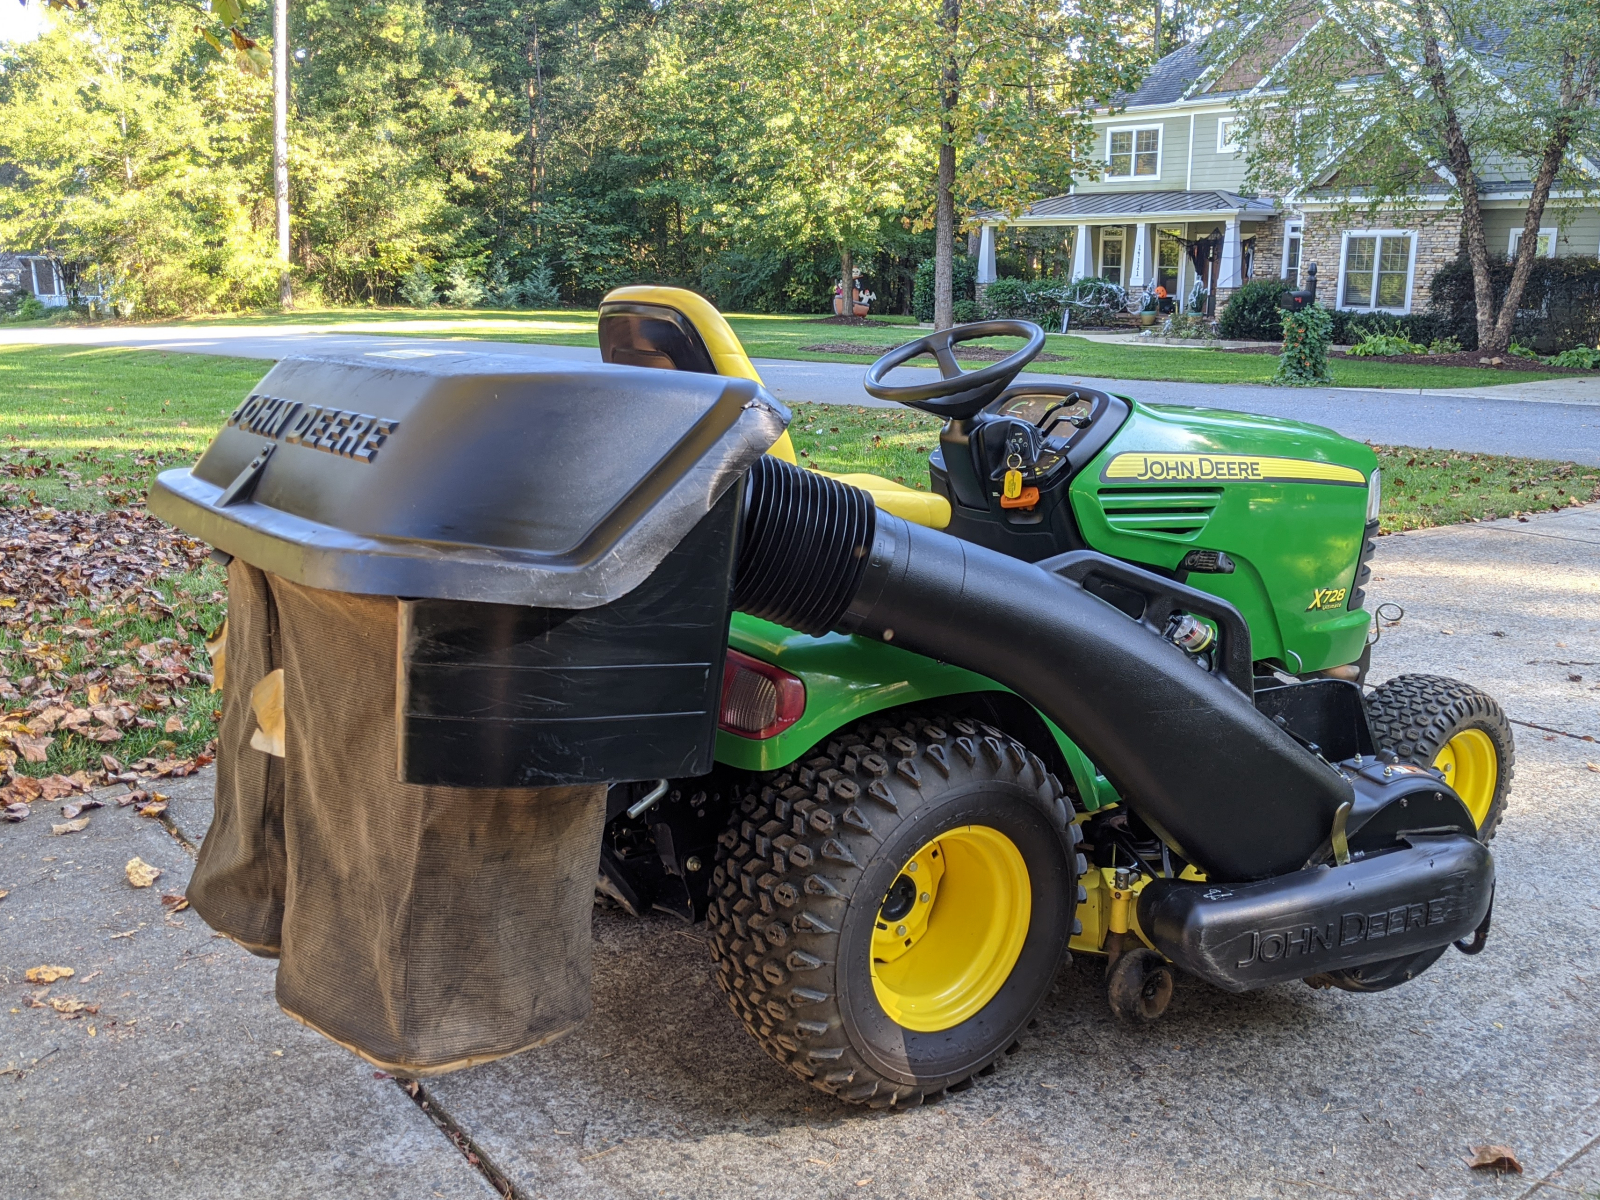
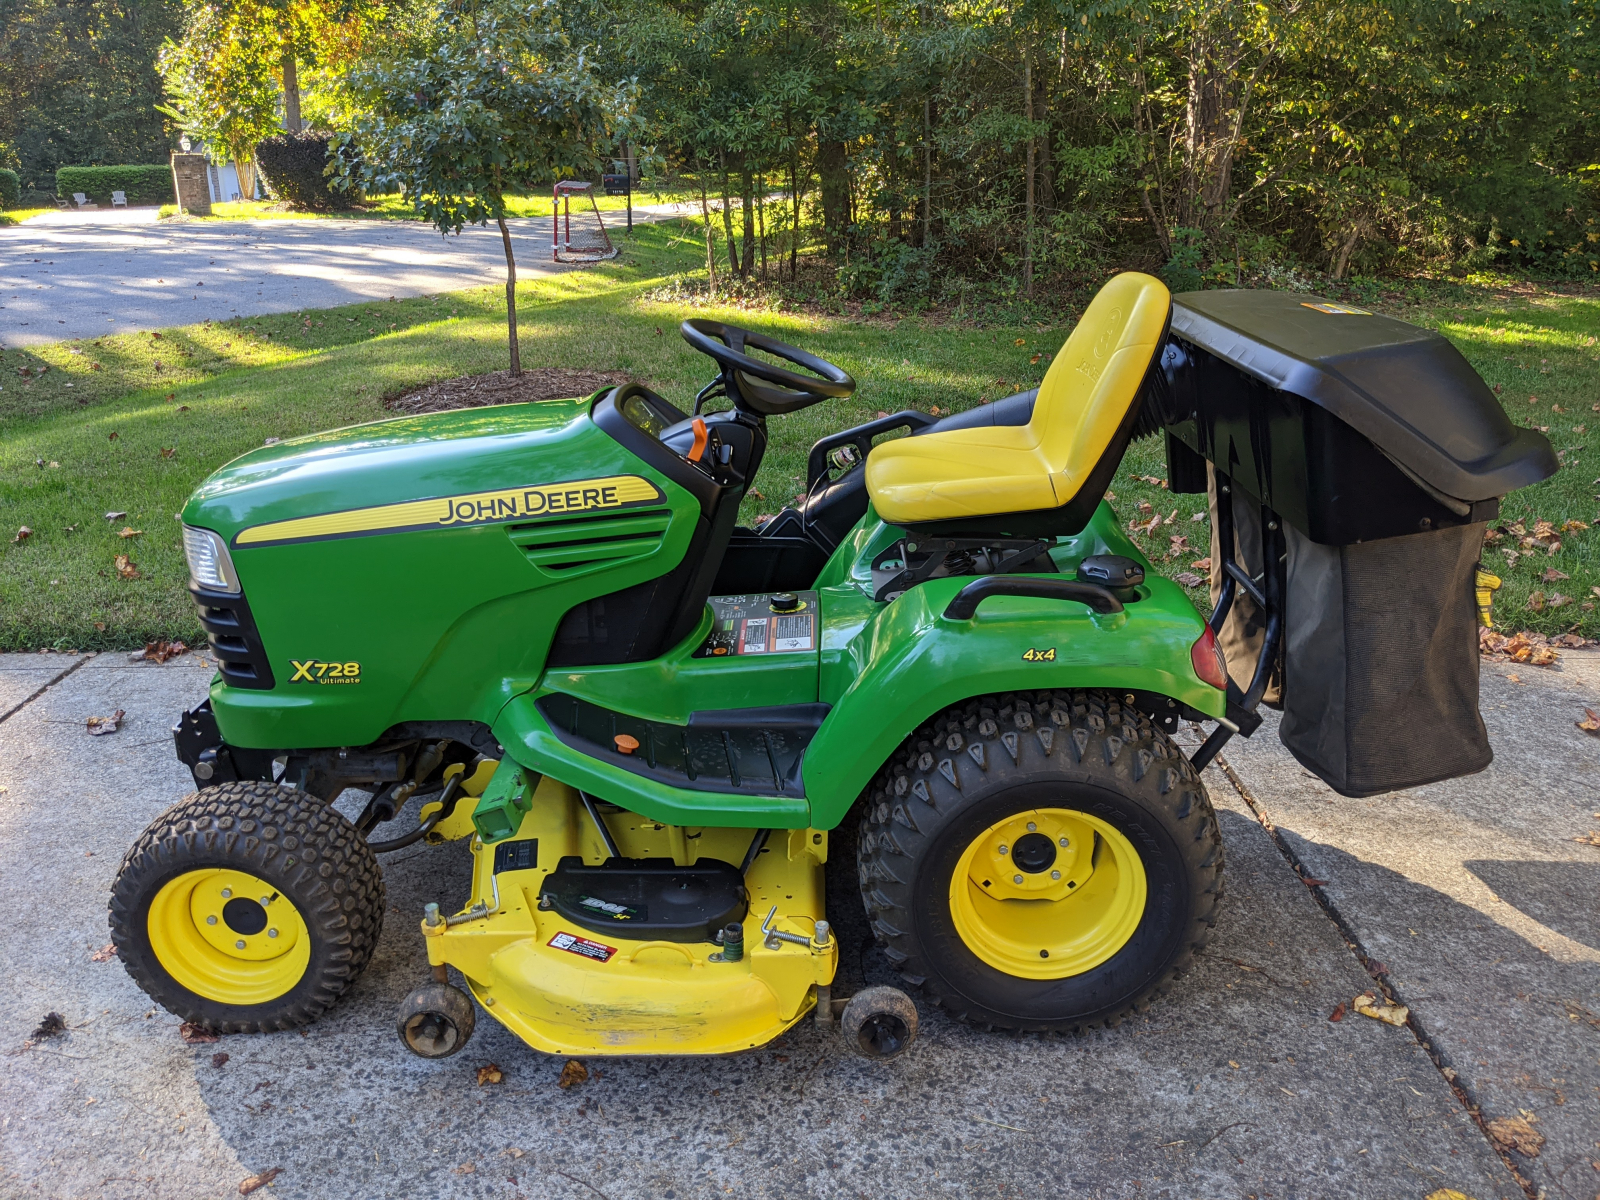
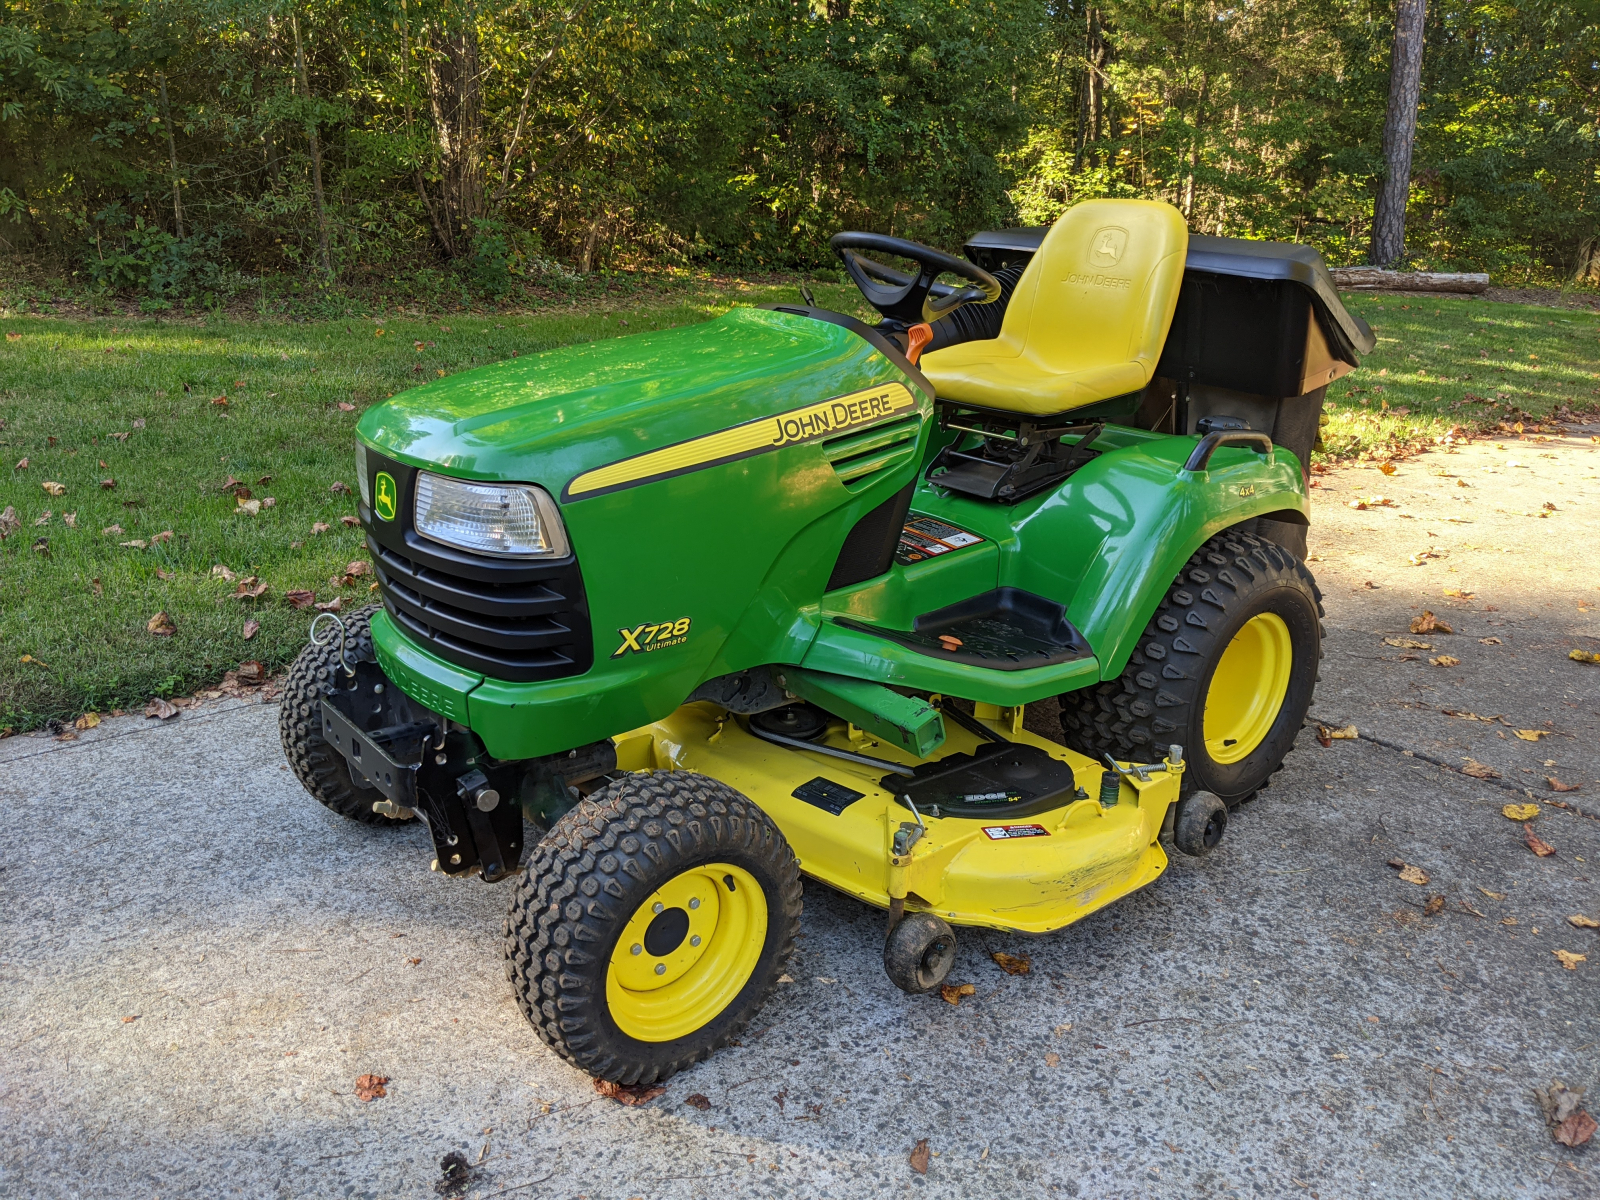
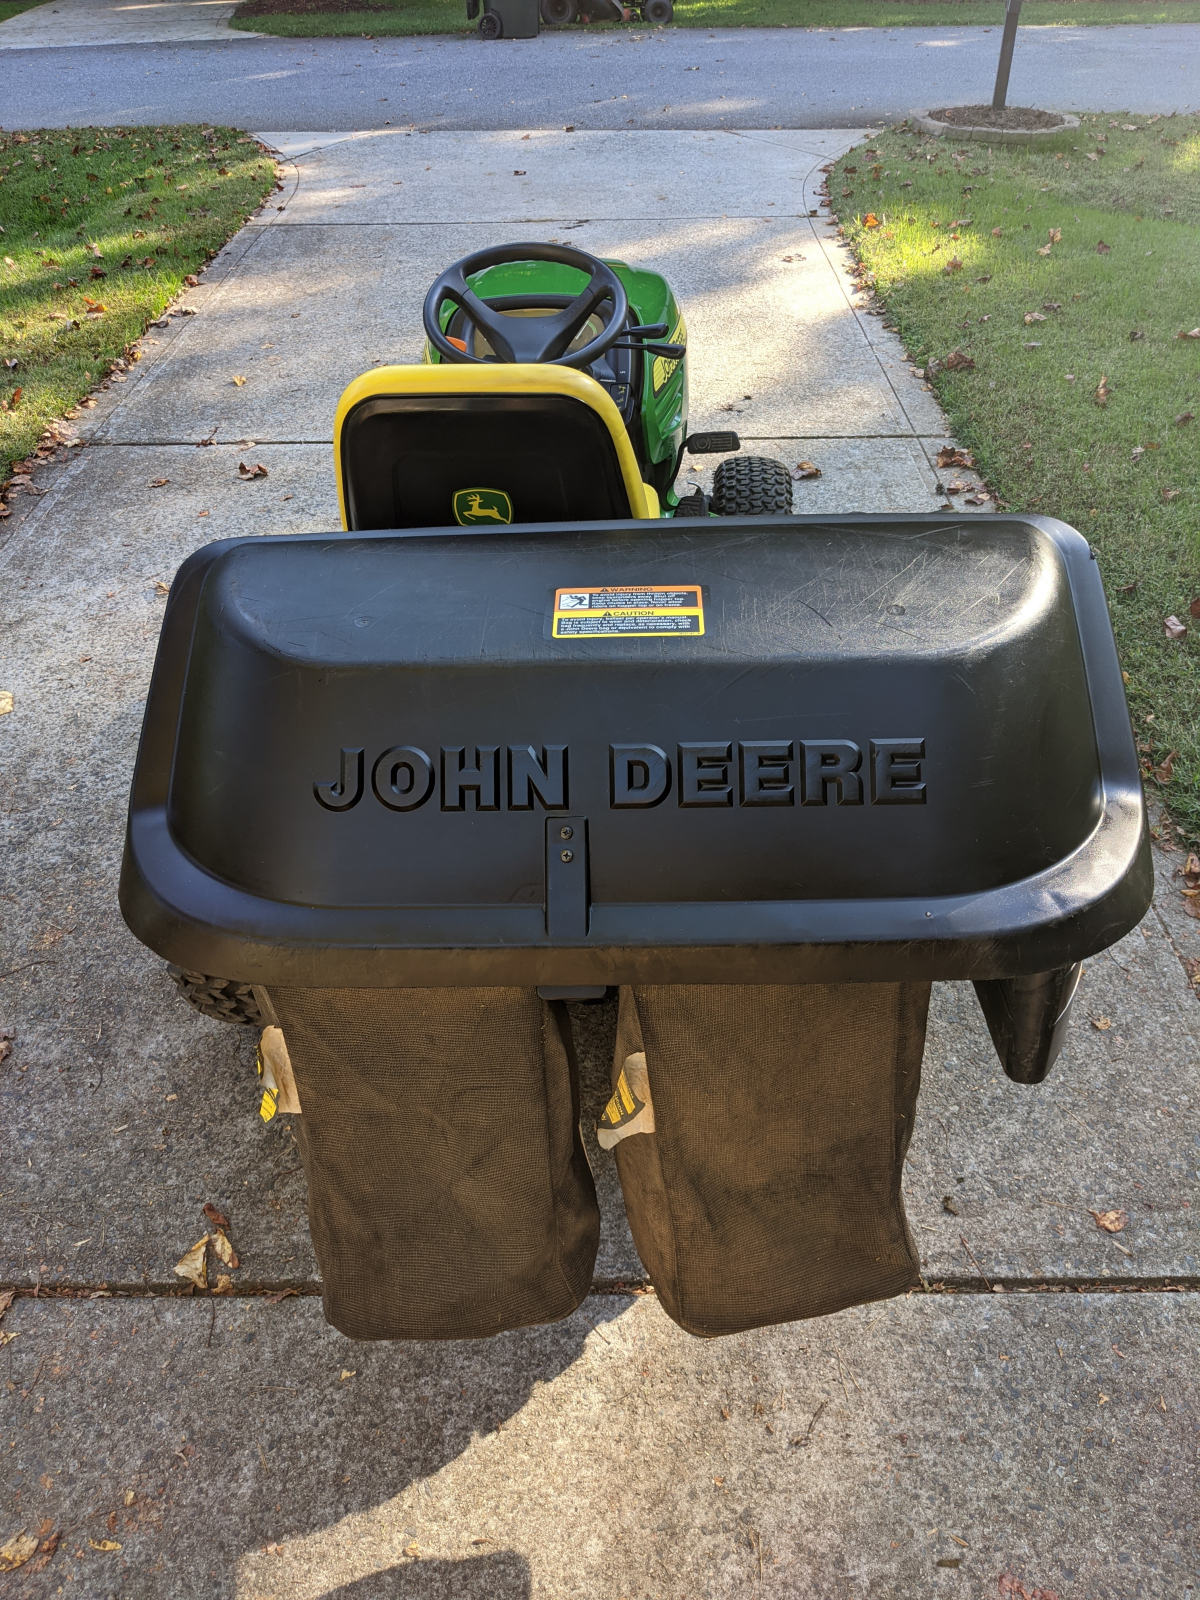
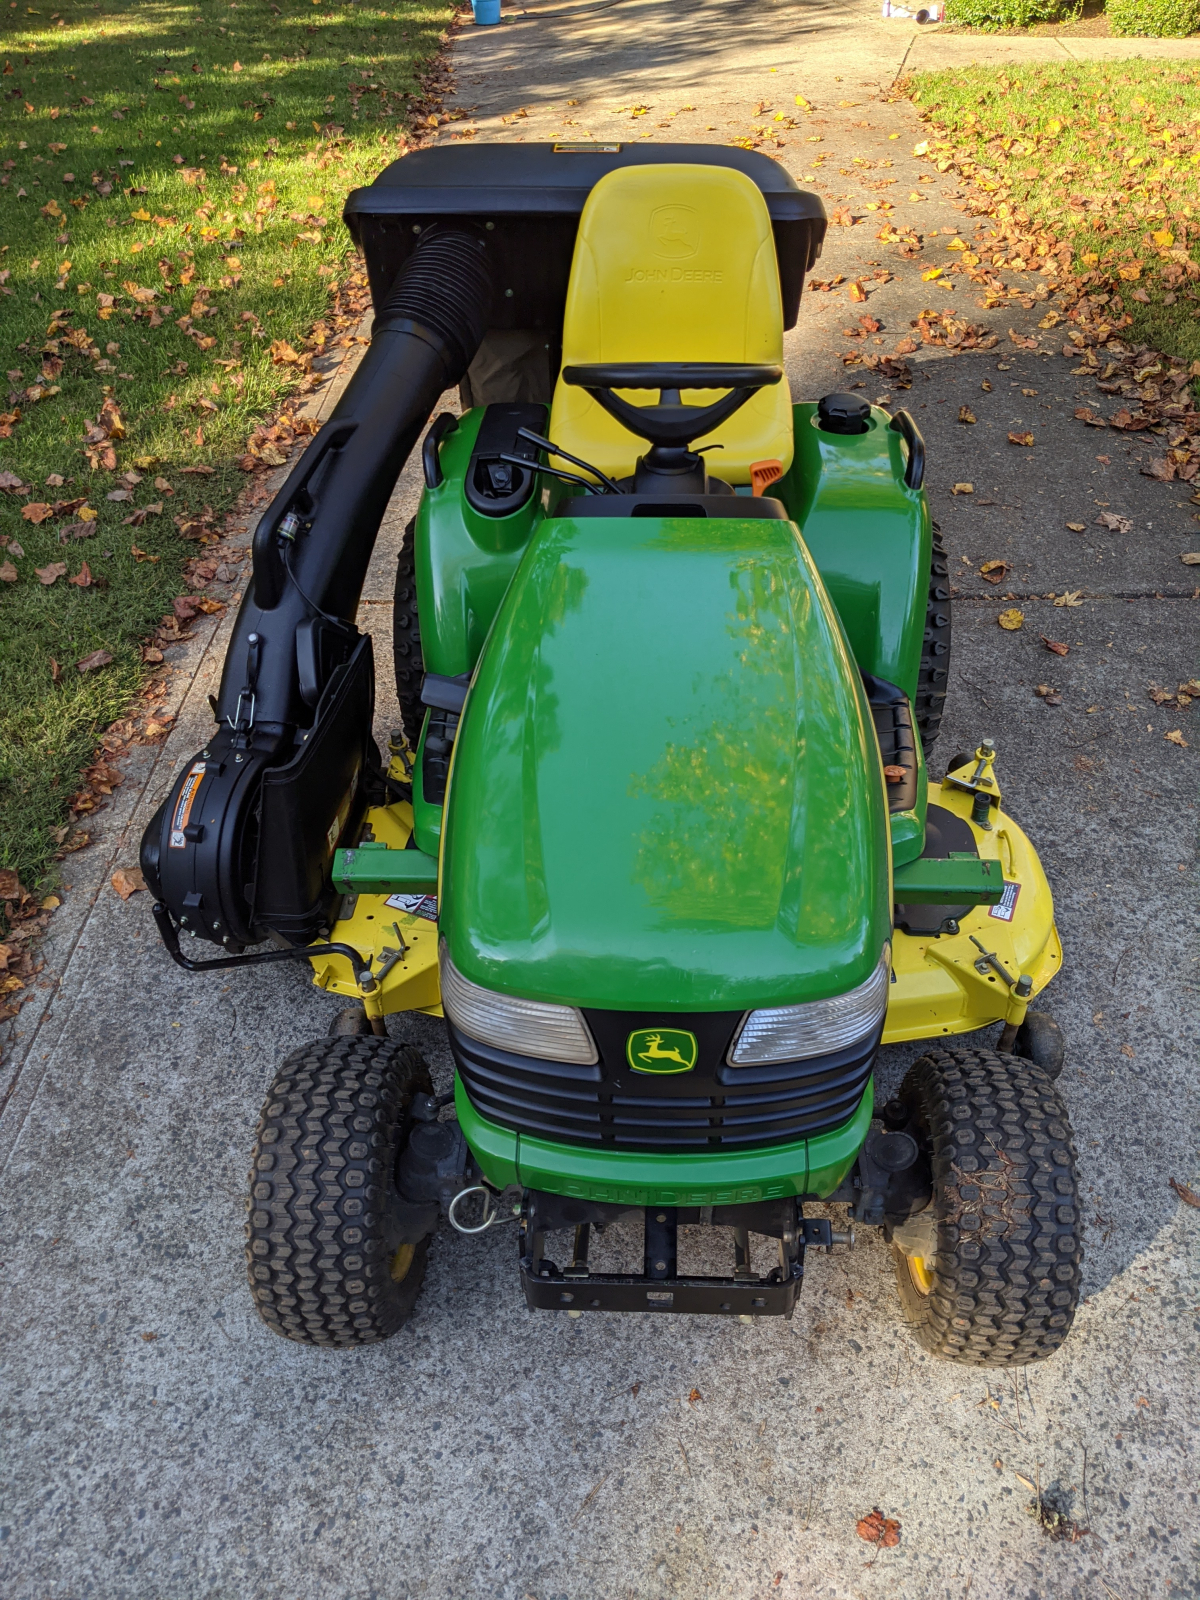
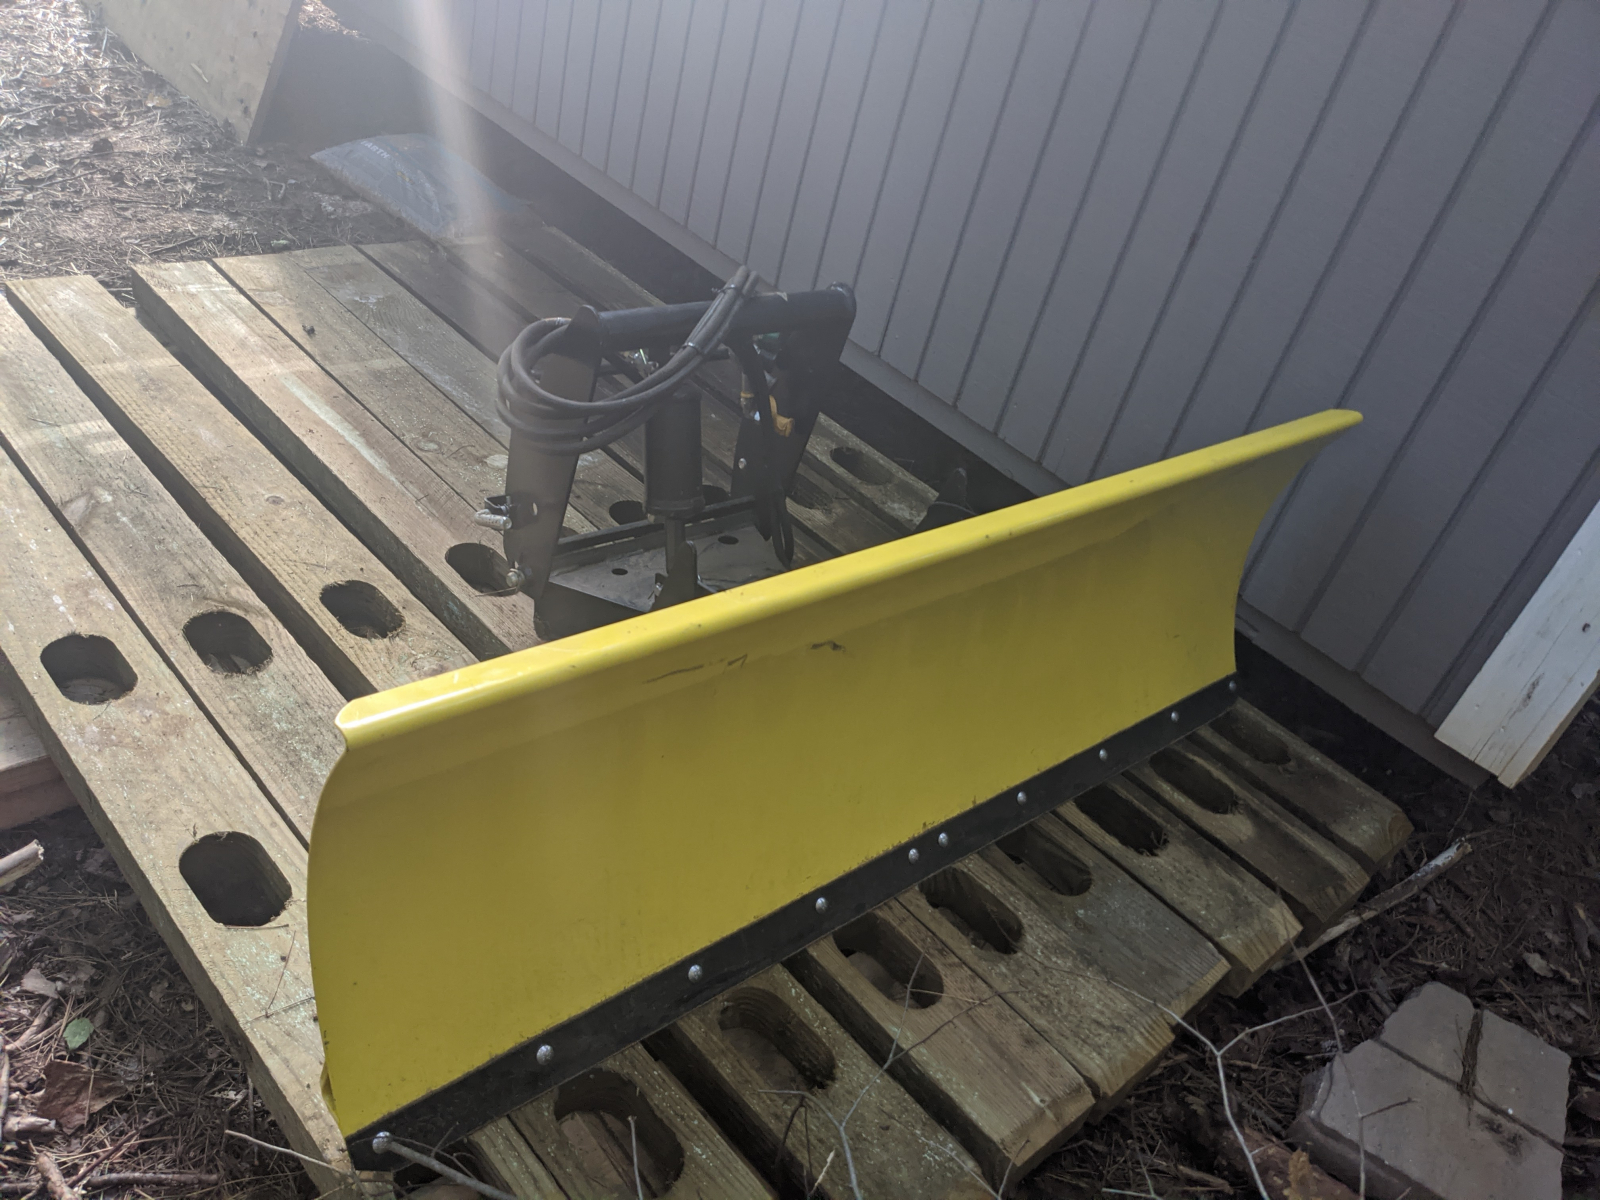
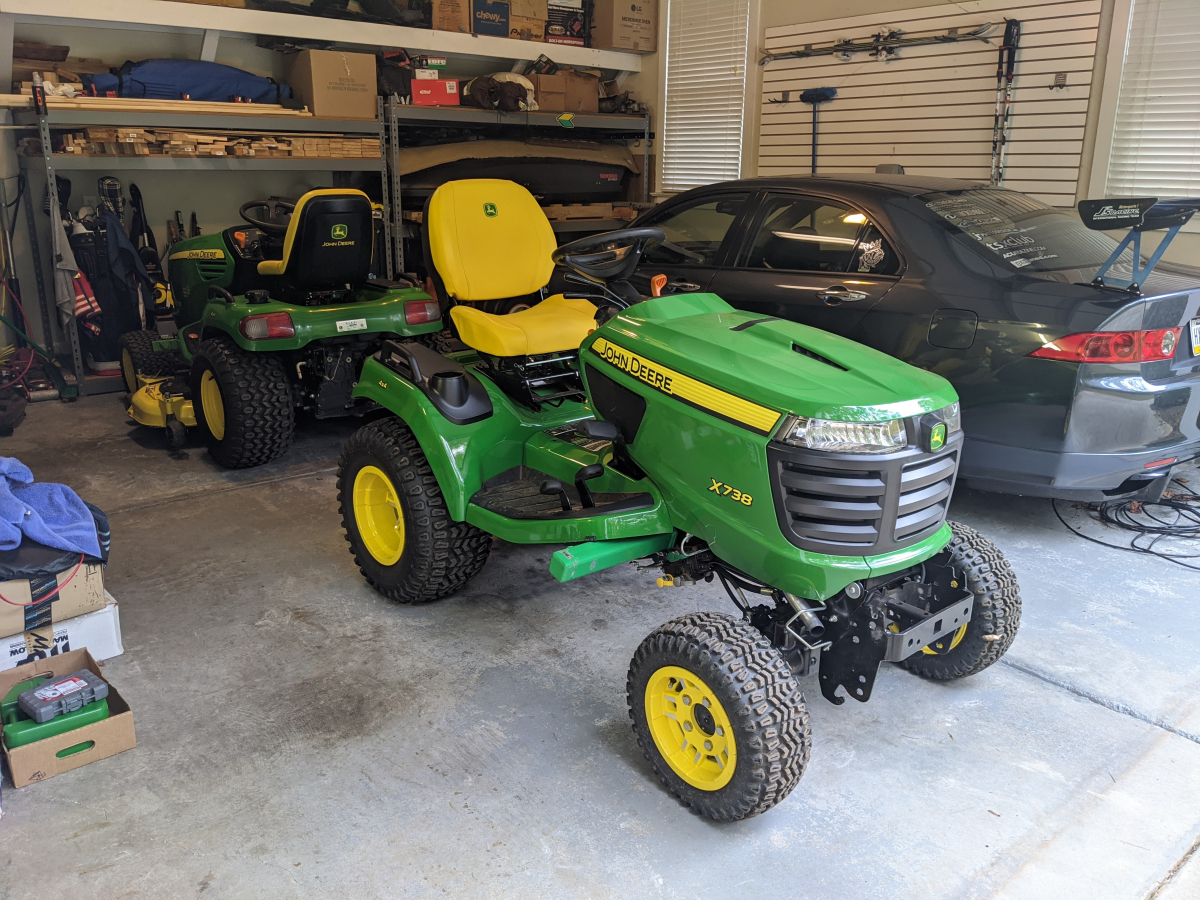
Got it all cleaned up and listed finally. Hopefully, I can move it quickly. Storing two tractors this size is a pain.
The following 2 users liked this post by CCColtsicehockey:
00TL-P3.2 (10-19-2020),
civicdrivr (10-19-2020)
10-20-2020, 10:11 AM
#1203
Moderator
Regional Coordinator (Southeast)
Regional Coordinator (Southeast)
Thread Starter
Join Date: Dec 2003
Location: Mooresville, NC
Age: 38
Posts: 43,563
Received 3,763 Likes
on
2,538 Posts
So with the loader comes the need for more storage space. The original plan of thought was to build an extension off the one side of the shed with a concrete pad that was 8x16. Turns out to pour a concrete pad for a shed needs to meet the same requirements as one for a garage in this county. There are other factors that keep me from doing that of my own doing and I didn't want to bother fixing that. It also was starting to dawn on me if I built that space and moved all of the tractor attachments to it that there would not be much left in the regular 10x16 shed. I also learned that any accessory building on the property can not exceed the sqft of the first floor of the heated space of the main house. So adding sqft to my shed would decrease the size of an eventual garage I would be able to build. With that knowledge and some ribbing from some friends I had discussed the project with saying I was overthinking it and I should just reorganize my current space I set out to see about doing just that.
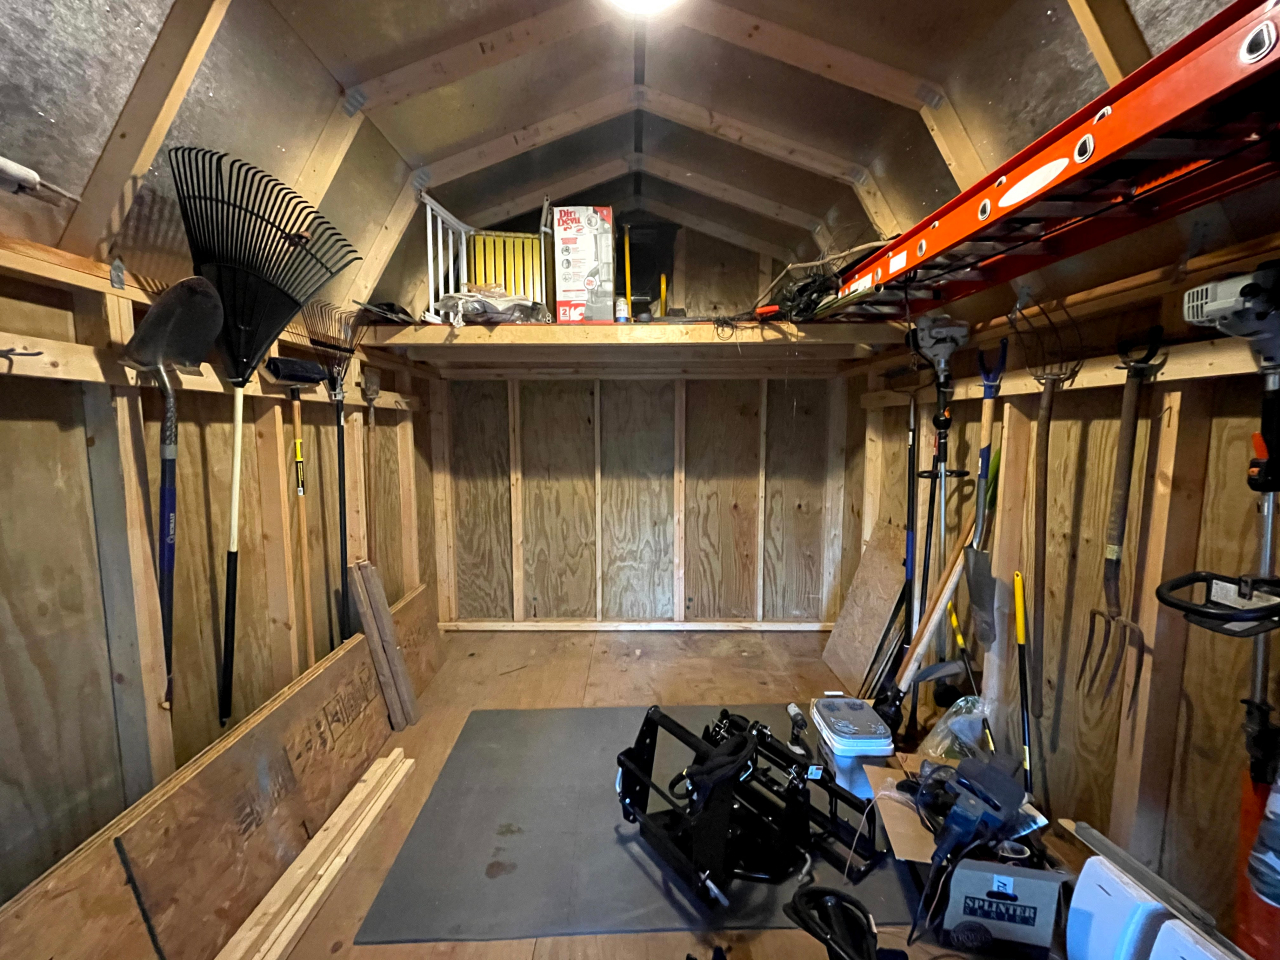
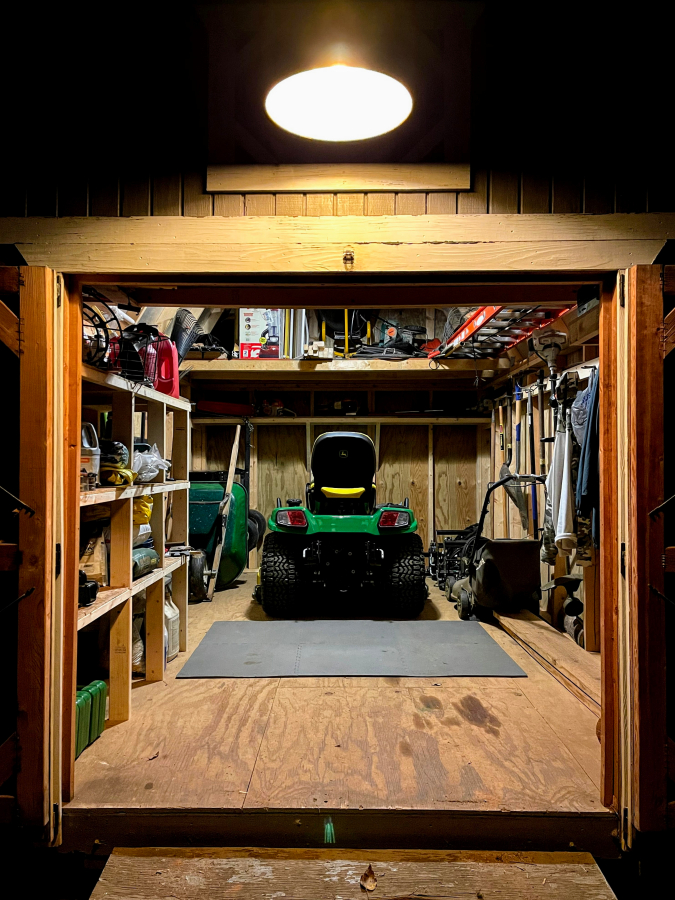
Currently, my shelves are on the back wall of the shed losing me 20in of depth. I do have 9ft 5in of shelving and doing this redesign I will only have 5ft 8in. Maybe 6ft if I go 4in past the stud which the way these are built probably would not be a big deal. Not sure I use my current shelving even half full though so not a big deal.
Current layout. The hand mower sits on the left behind the grapple and the wheelbarrow.
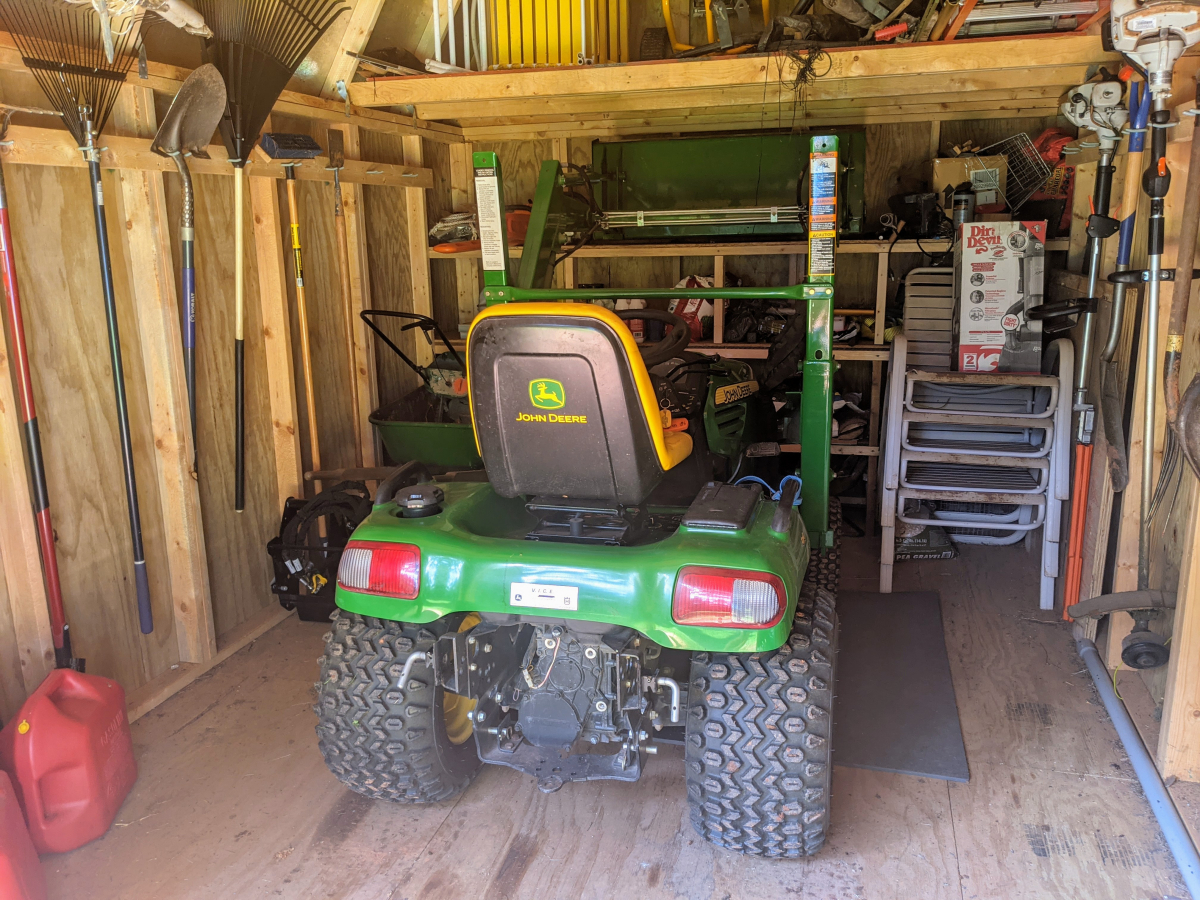
One of the main desires to get out of the new layout will be the ability to remove the drive-over mower deck with the tractor in the shed and then be able to attach the front loader. I don't care if I have to back the tractor out of the shed after removing the deck so I can move it out of the way before attaching the loader but I don't want to have to remove the deck outside. It works so much better on a hard level surface like the shed floor.
So with this in mind, I drew up several layouts. This was my fourth design and I think at this point I have accounted for everything.
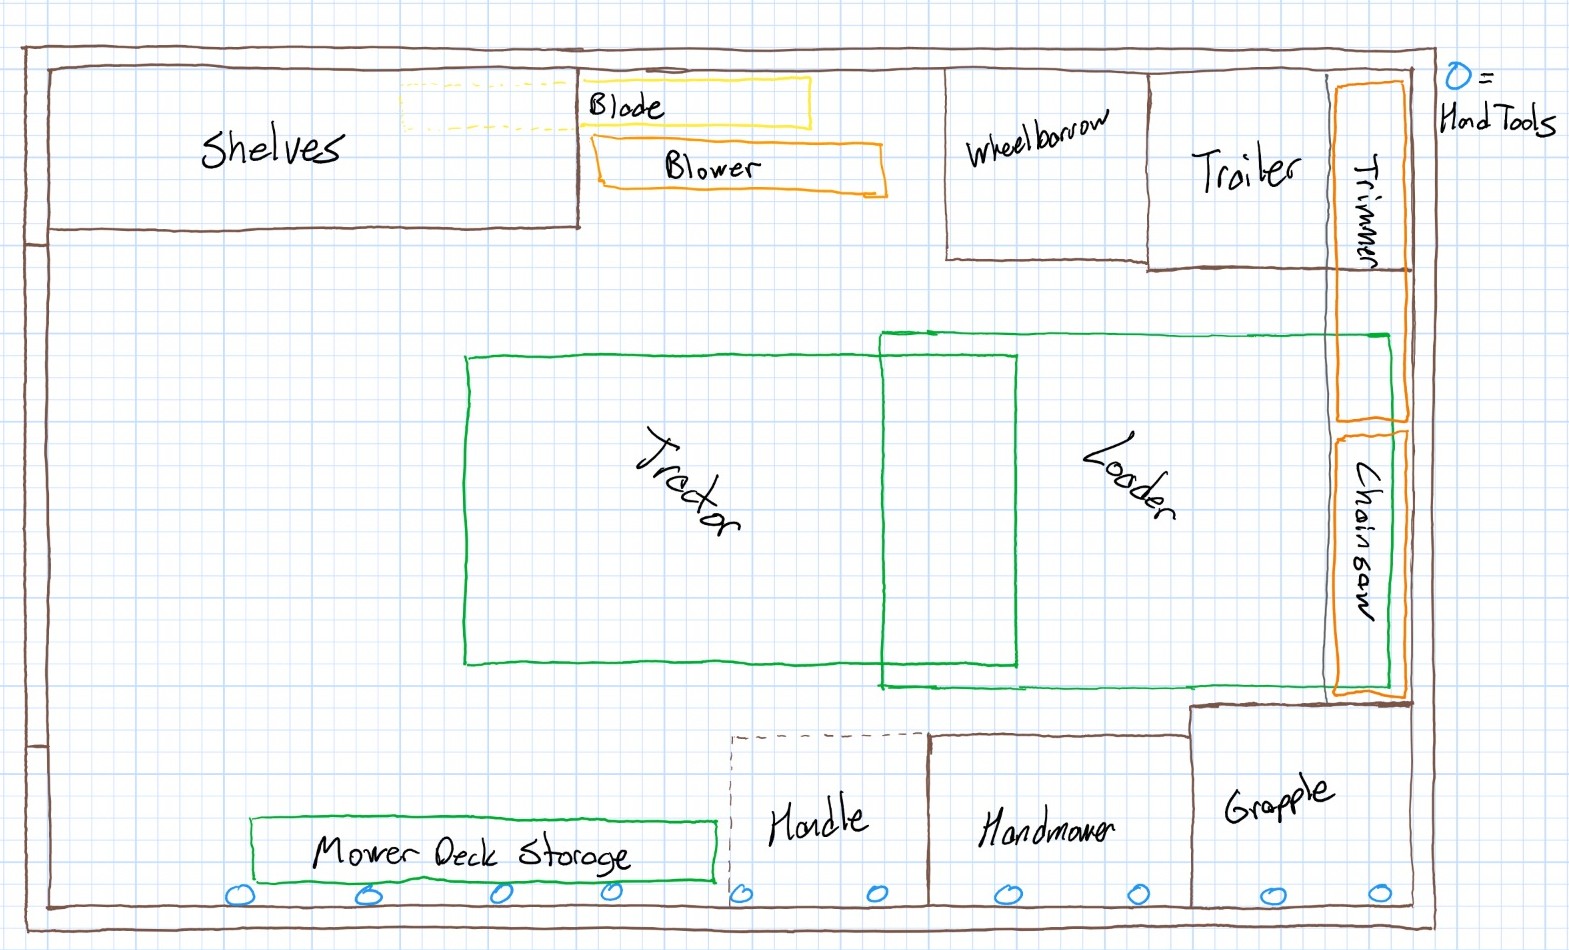
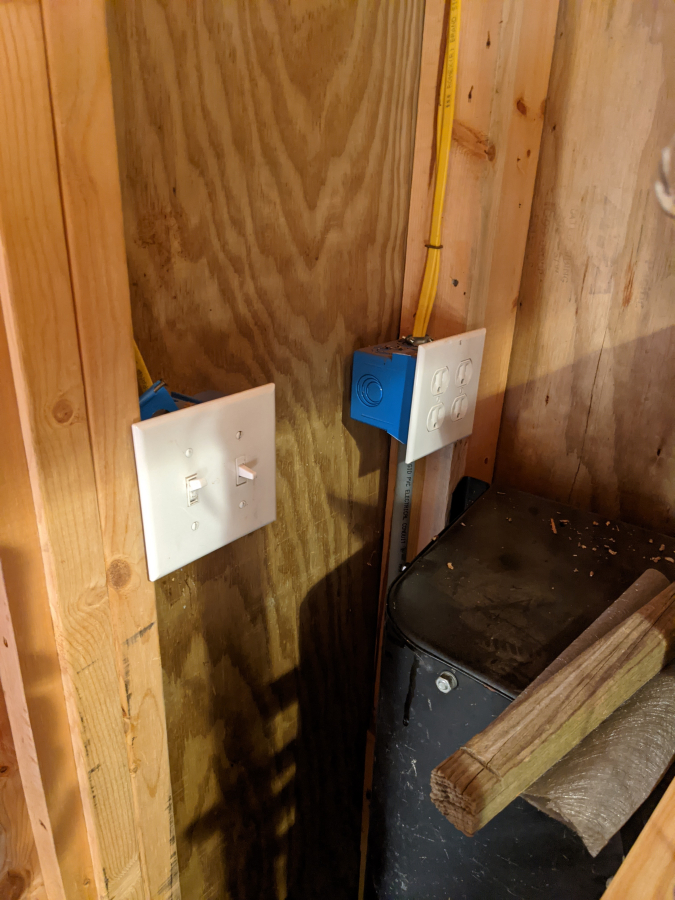
The only single gotcha with this layout is that the light switches and outlets will be inside one of the shelves. I can't put the shelves on the other side because of the conduit and receiver mount for the outside TV setup at my firepit.
Please play devil's advocate and challenge my decisions as I am sure there are things I have not thought about. Thinking of tackling this in the next 2-3 weeks.
Currently, my shelves are on the back wall of the shed losing me 20in of depth. I do have 9ft 5in of shelving and doing this redesign I will only have 5ft 8in. Maybe 6ft if I go 4in past the stud which the way these are built probably would not be a big deal. Not sure I use my current shelving even half full though so not a big deal.
Current layout. The hand mower sits on the left behind the grapple and the wheelbarrow.
One of the main desires to get out of the new layout will be the ability to remove the drive-over mower deck with the tractor in the shed and then be able to attach the front loader. I don't care if I have to back the tractor out of the shed after removing the deck so I can move it out of the way before attaching the loader but I don't want to have to remove the deck outside. It works so much better on a hard level surface like the shed floor.
So with this in mind, I drew up several layouts. This was my fourth design and I think at this point I have accounted for everything.
The only single gotcha with this layout is that the light switches and outlets will be inside one of the shelves. I can't put the shelves on the other side because of the conduit and receiver mount for the outside TV setup at my firepit.
Please play devil's advocate and challenge my decisions as I am sure there are things I have not thought about. Thinking of tackling this in the next 2-3 weeks.
10-20-2020, 10:32 AM
#1204
Whats up with RDX owners?
iTrader: (9)

You have open studs - move the switches and outlets.
The following users liked this post:
thoiboi (10-20-2020)
10-20-2020, 10:44 AM
#1205
Moderator
Regional Coordinator (Southeast)
Regional Coordinator (Southeast)
Thread Starter
Join Date: Dec 2003
Location: Mooresville, NC
Age: 38
Posts: 43,563
Received 3,763 Likes
on
2,538 Posts
The switches I can move but the outlets are where the mainline into the building terminates. So could change it out to a single box with an outlet or blank plate and just make it a junction box but can't unfortunately remove the box itself. Definitely a good idea to move the switches though since that they are by the second door and not the first door that opens right now which is a pain.
10-20-2020, 10:47 AM
#1206
Whats up with RDX owners?
iTrader: (9)
The easy (and reversible) way is to make it a junction box.
The following users liked this post:
CCColtsicehockey (10-20-2020)
The following users liked this post:
CCColtsicehockey (10-20-2020)
10-20-2020, 11:46 AM
#1208
Moderator
Regional Coordinator (Southeast)
Regional Coordinator (Southeast)
Thread Starter
Join Date: Dec 2003
Location: Mooresville, NC
Age: 38
Posts: 43,563
Received 3,763 Likes
on
2,538 Posts
I know right. Geez
11-02-2020, 01:47 PM
#1209
Moderator
Regional Coordinator (Southeast)
Regional Coordinator (Southeast)
Thread Starter
Join Date: Dec 2003
Location: Mooresville, NC
Age: 38
Posts: 43,563
Received 3,763 Likes
on
2,538 Posts
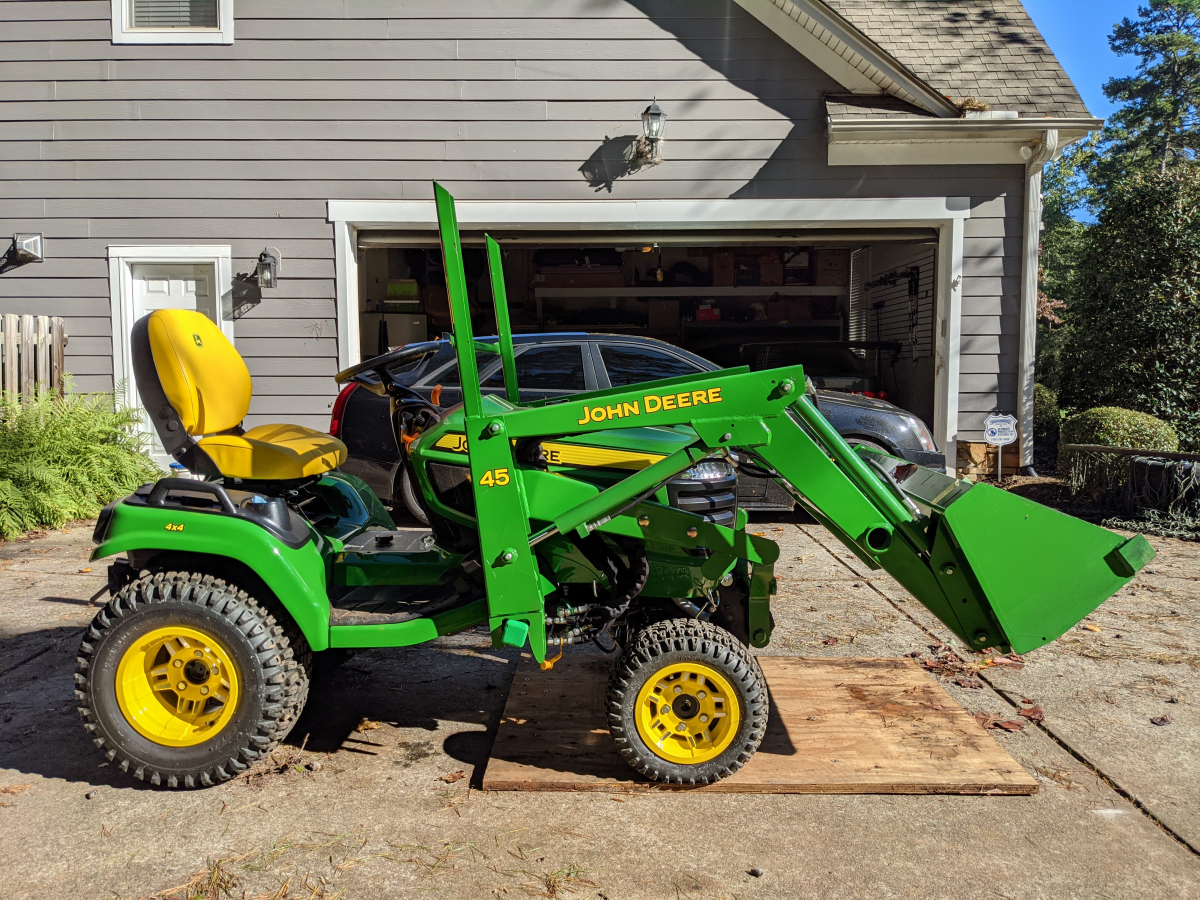
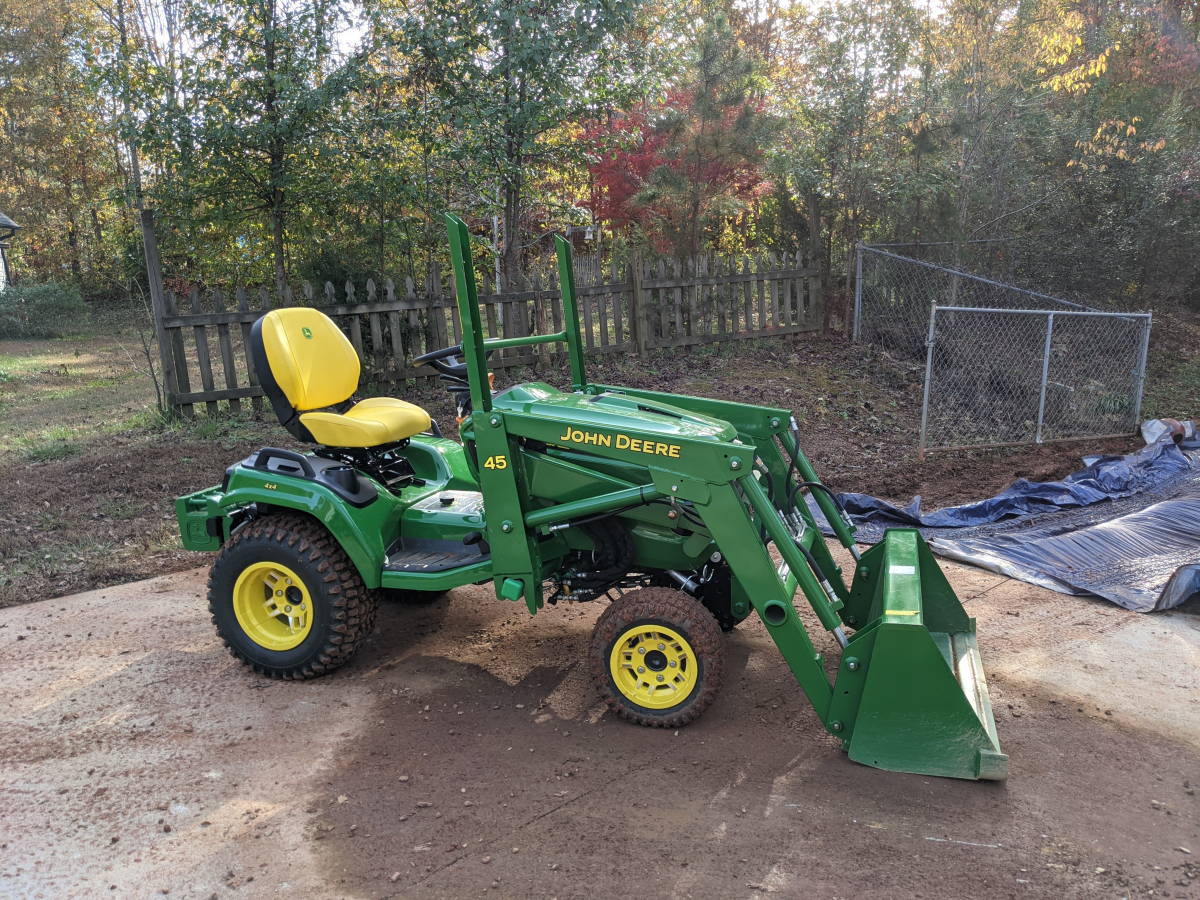
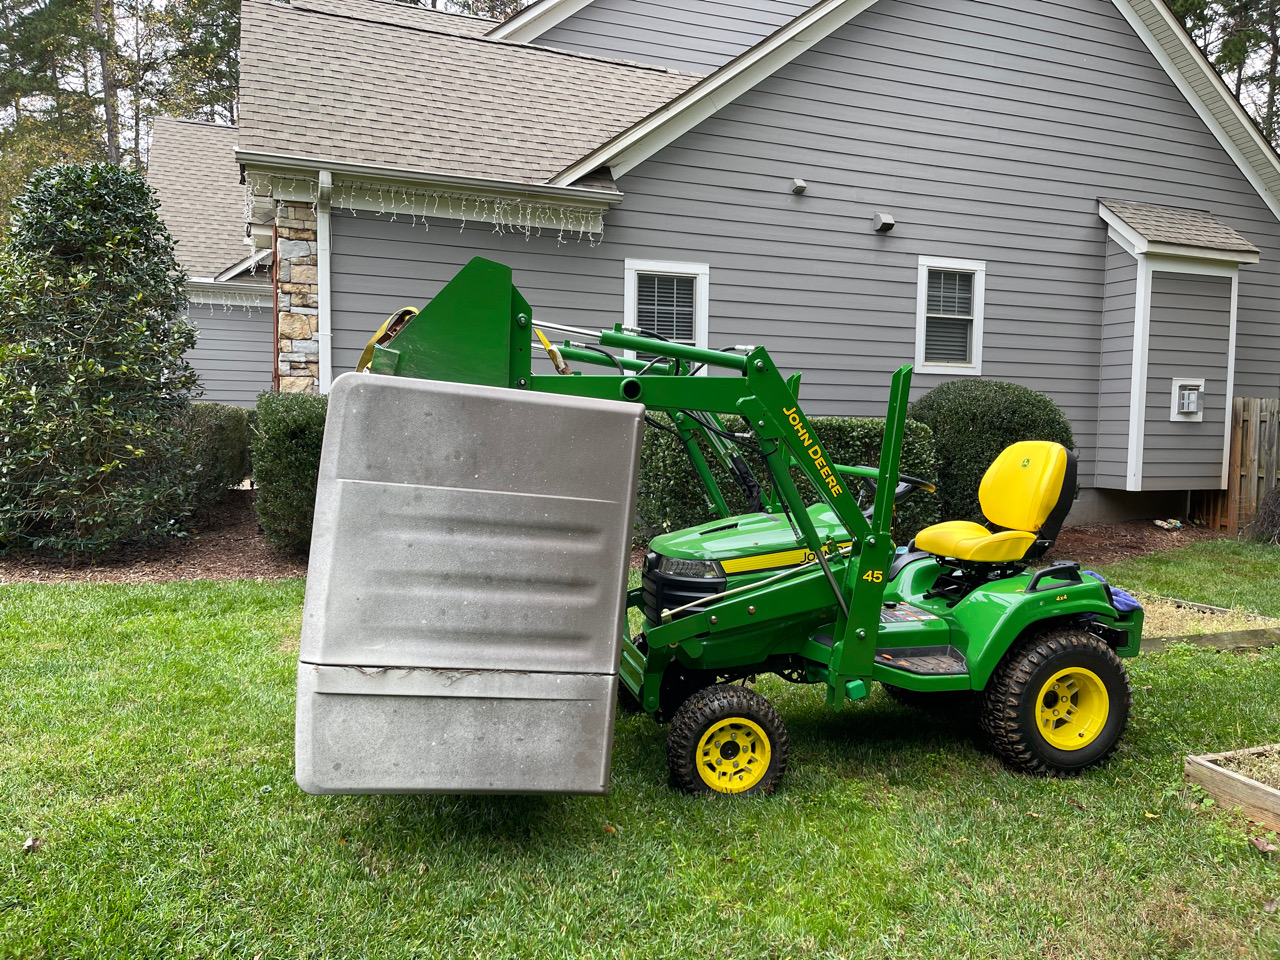
So finally got the loader setup on the X738.
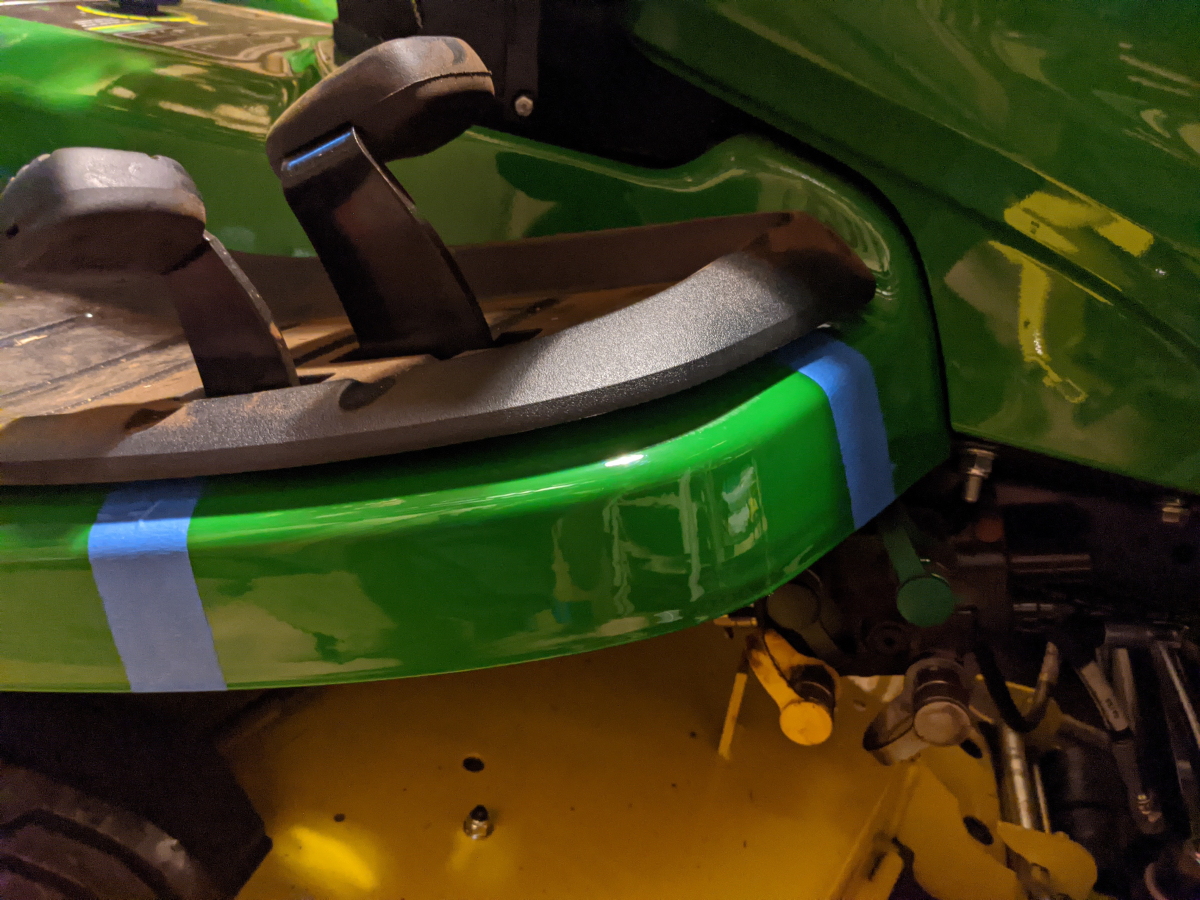
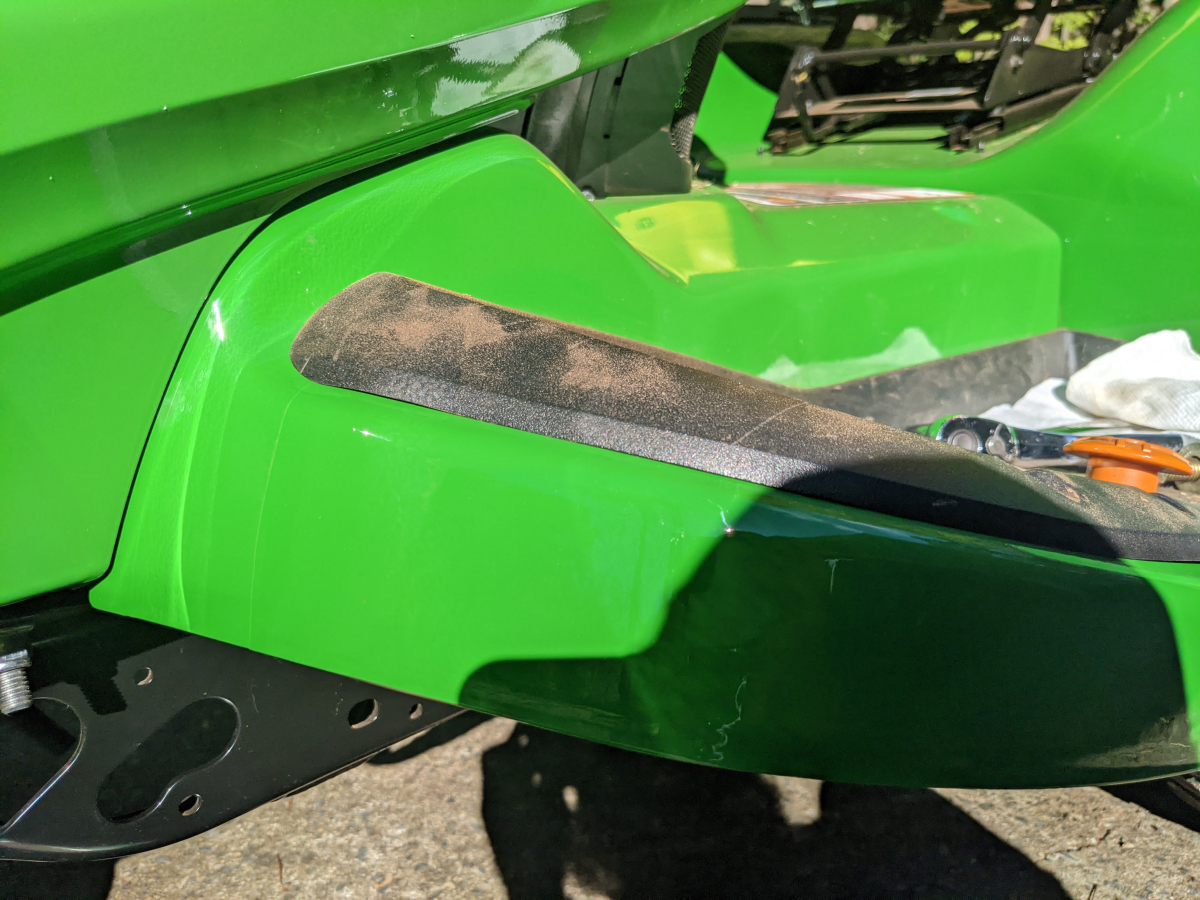
I started with some paint protection film on the foot rests since the loader fits so close to them compared to the older X700 series tractors. They made the footrests close to half an inch wider it seems from measurements between the two.
Was actually the first time I installed paint film but have installed headlight protection film before several times and it is very similar. Headlight film actually might be a better choice as it is thicket. You can barely tell it is there besides the faint edges.
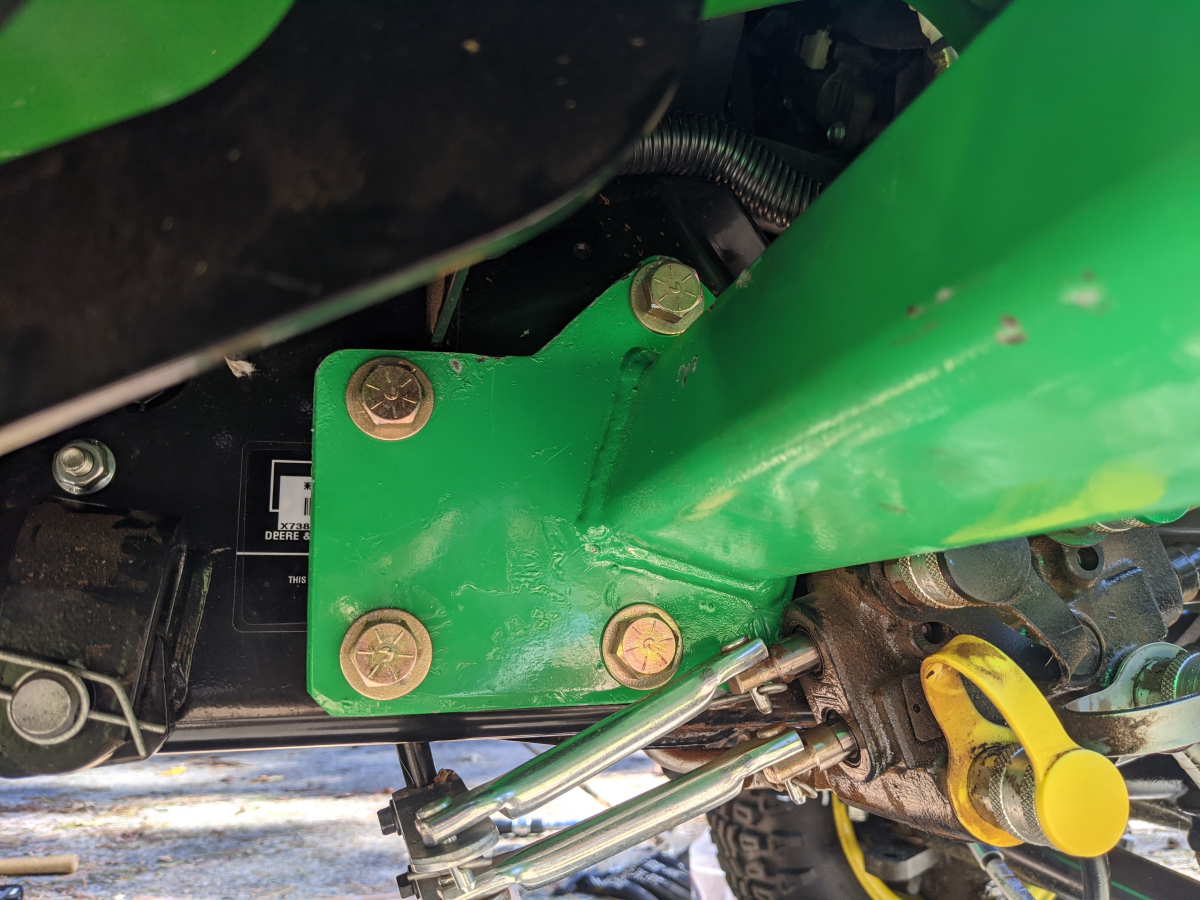
Next up was getting the custom loader mounts installed.
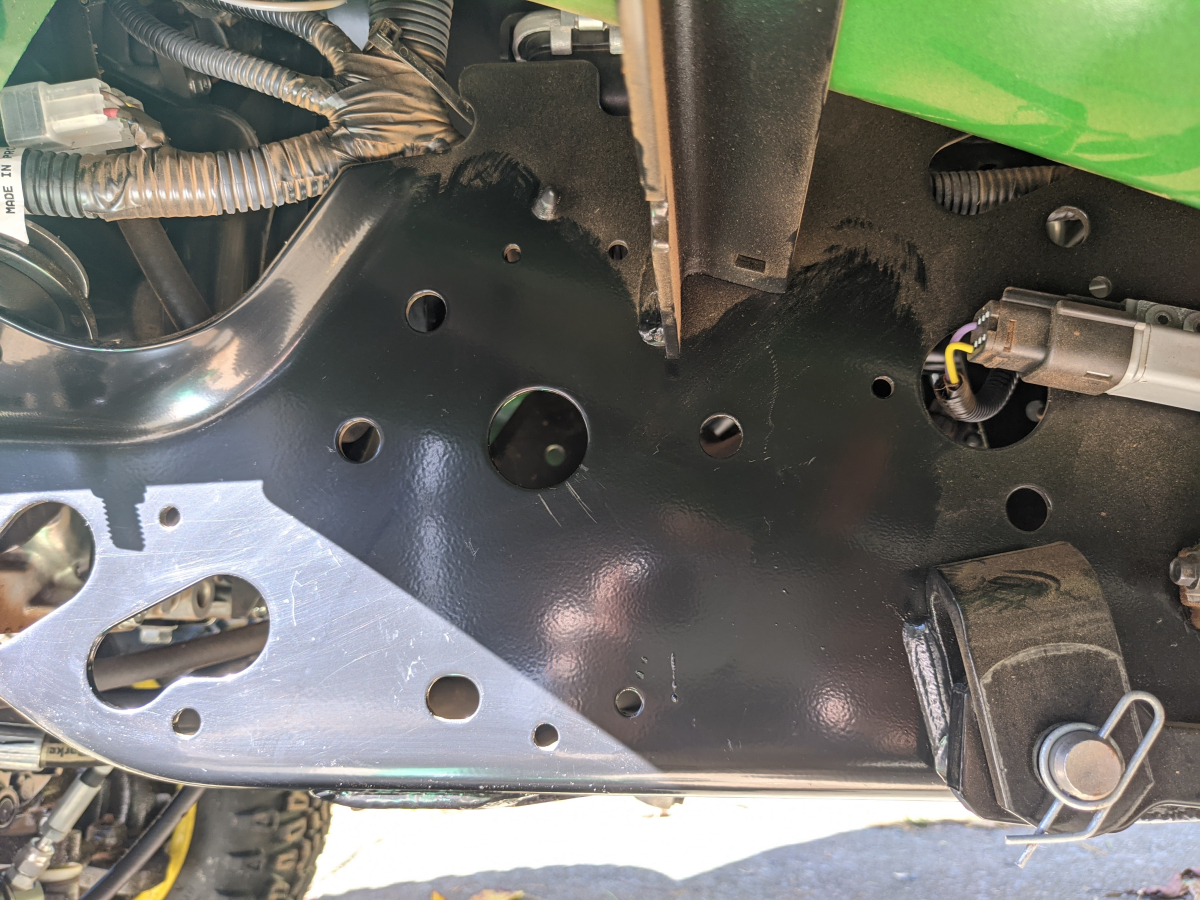
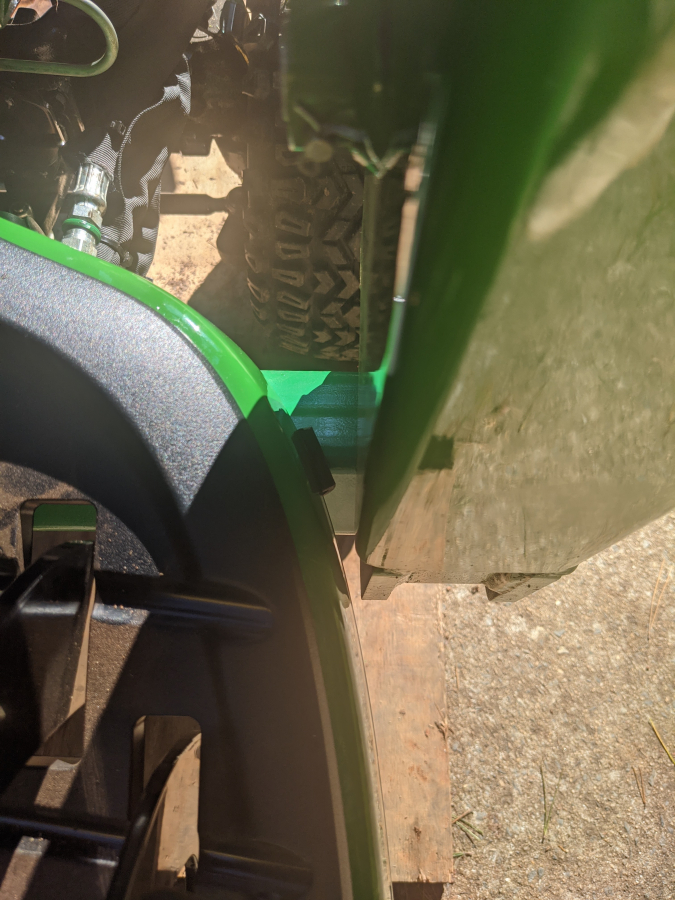
Three of the four holes in the brackets are in the frame to begin with. Have to drill the fourth hole. On some other that have had the brackets made have said the fourth hole on the right side of hydraulic side of the tractor has a line in the way. Mine did not have that issue I was able to drill the holes on both sides.
The holes are however very close a cross brace in the middle of the frame as well as the welds that hold it in place get in the way a bit.
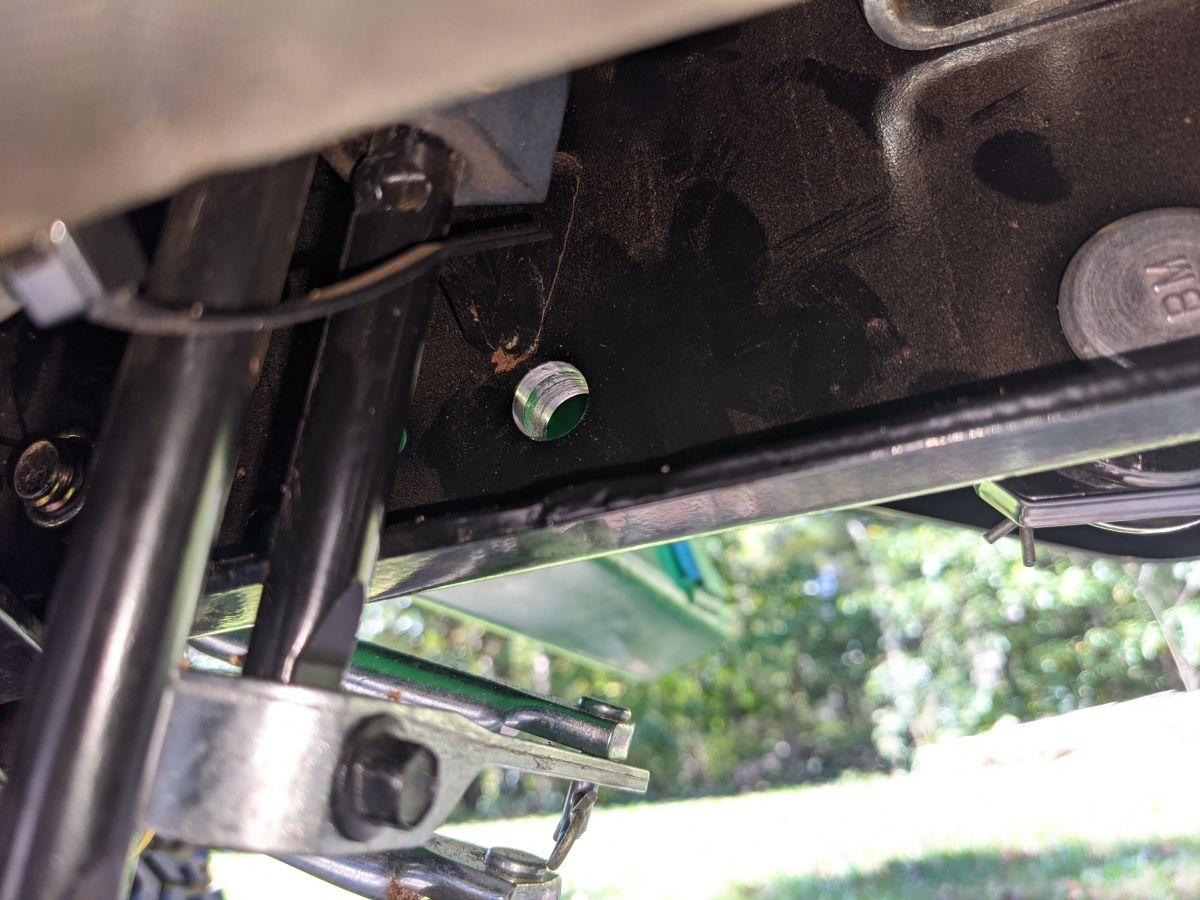
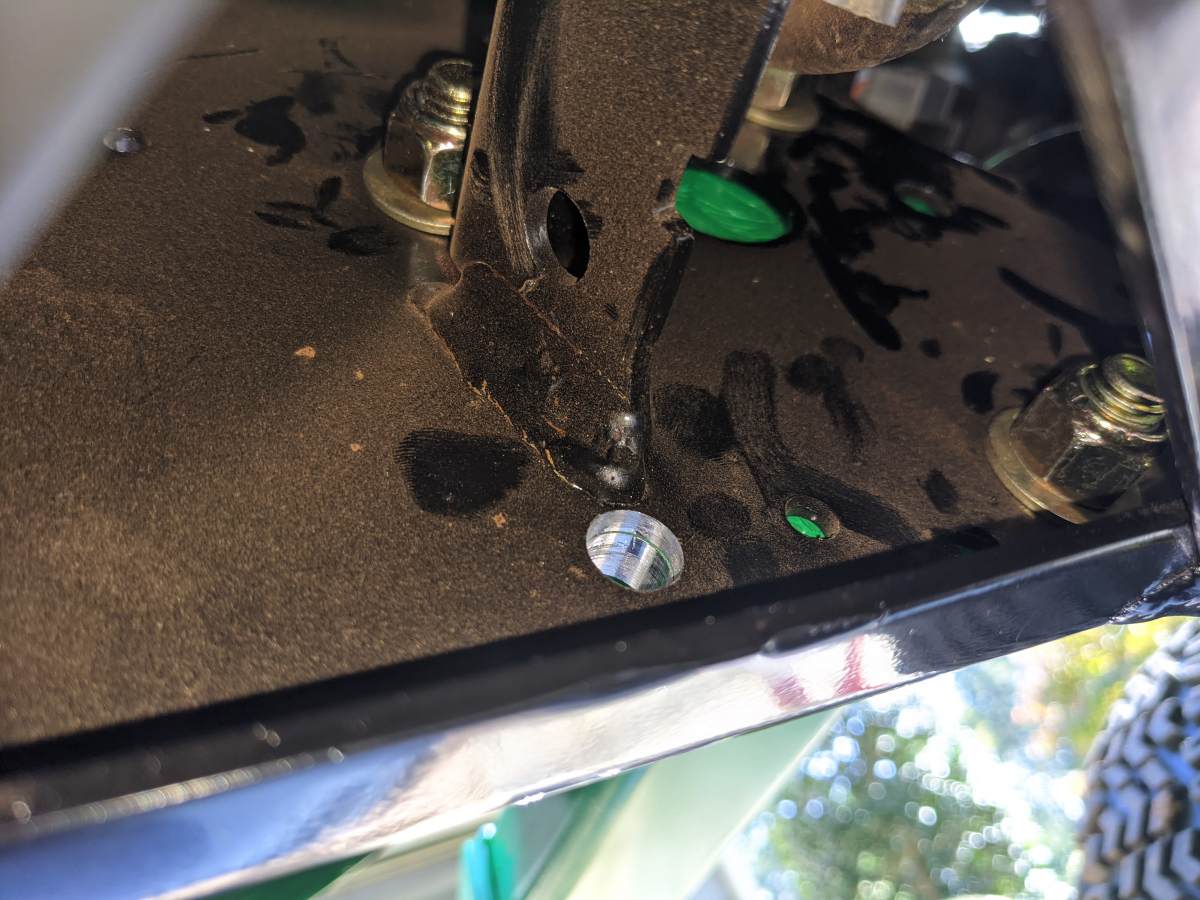
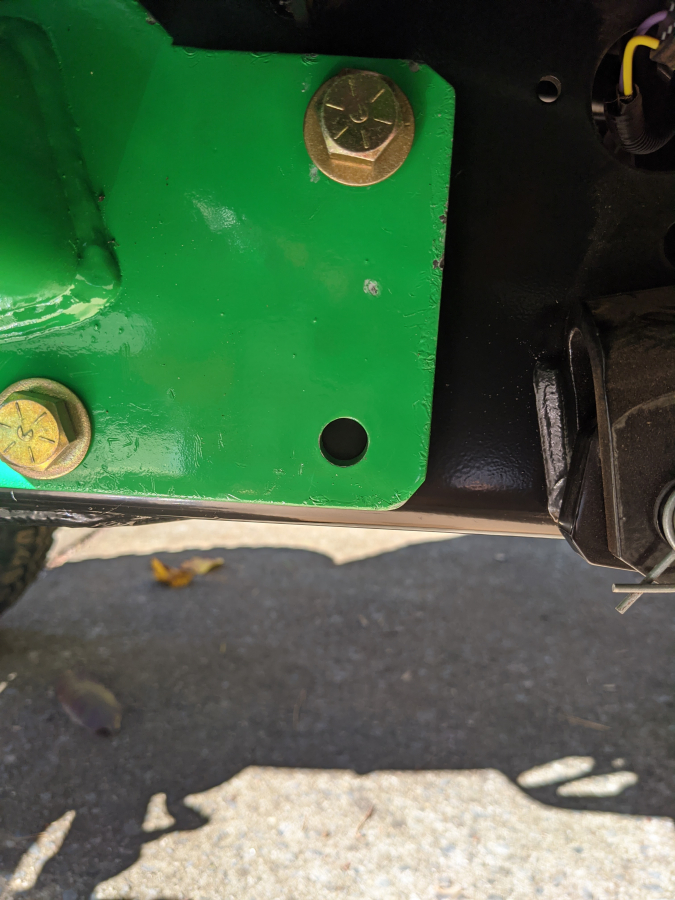
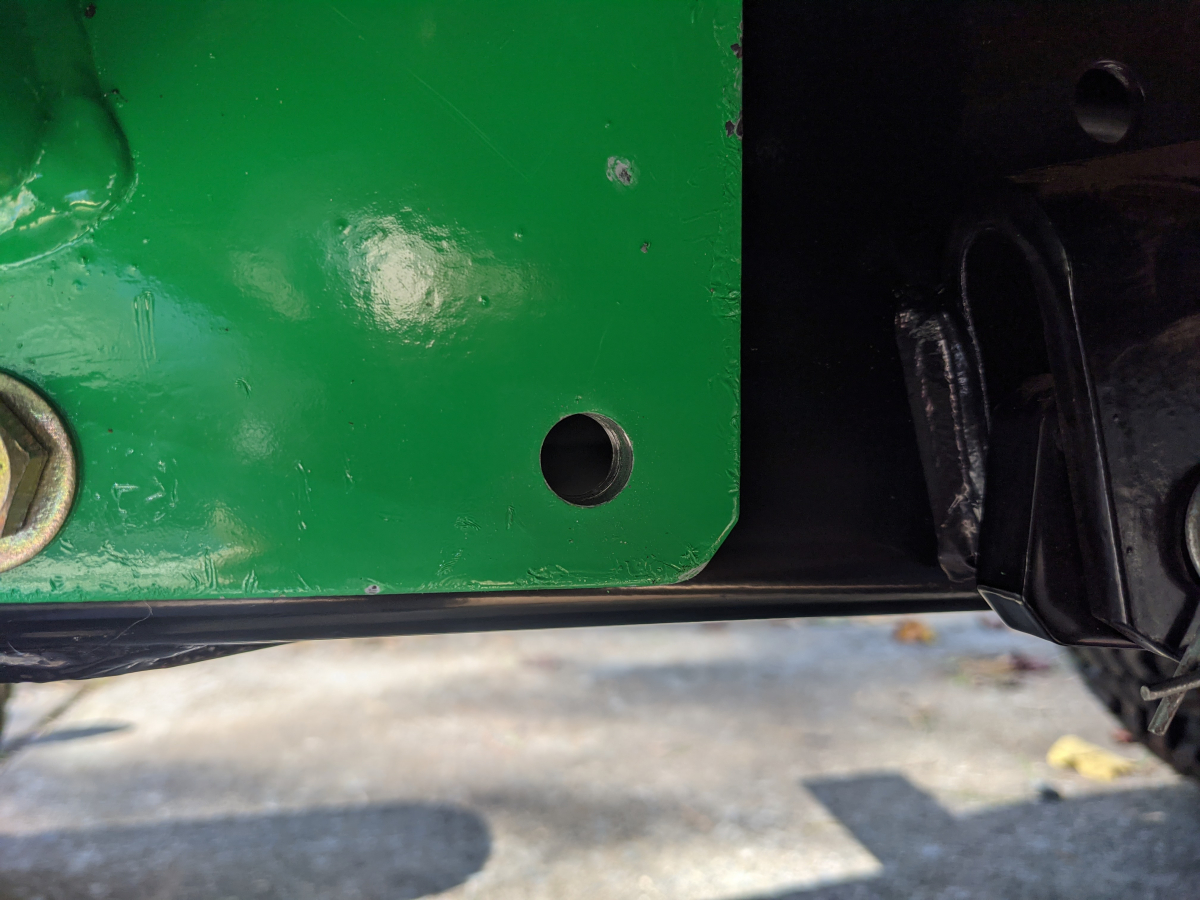
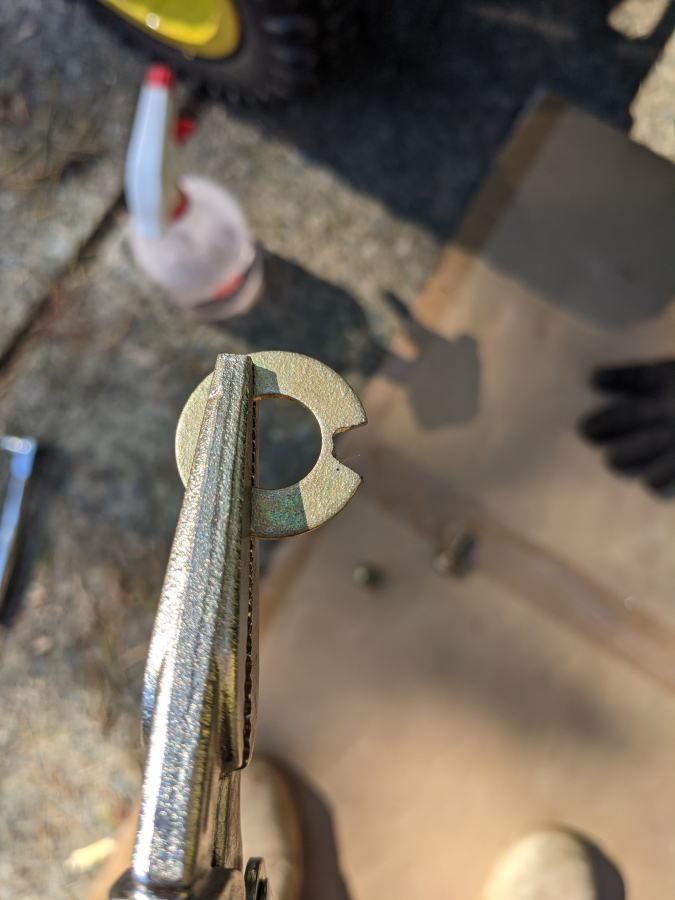
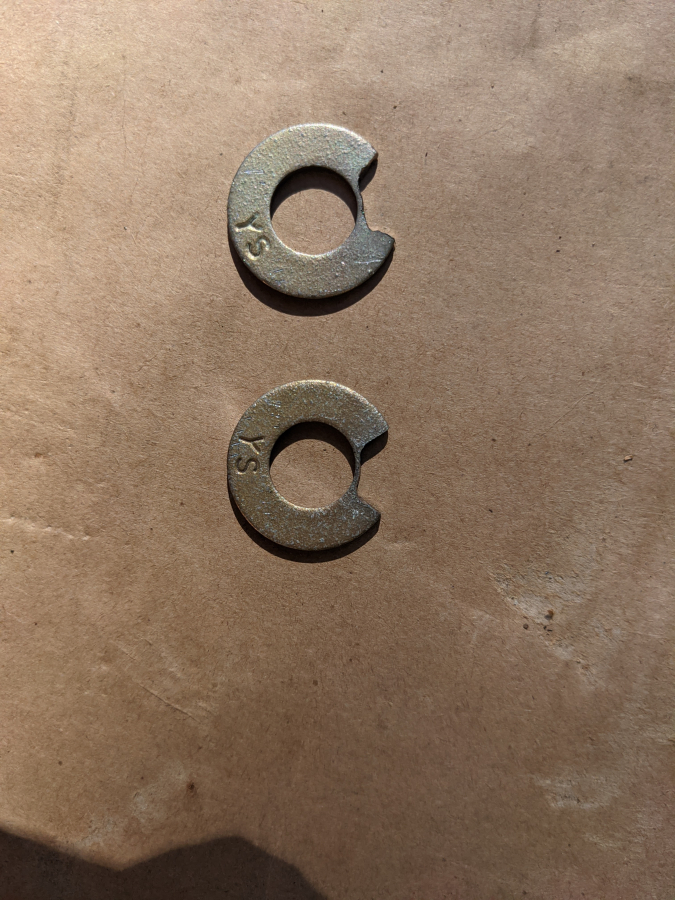
I didn't want to grind the welds out of the way so I modified some washers to clear the brace.
Getting all the bolts torqued to spec was also difficult. There was one on each side I was not able to.
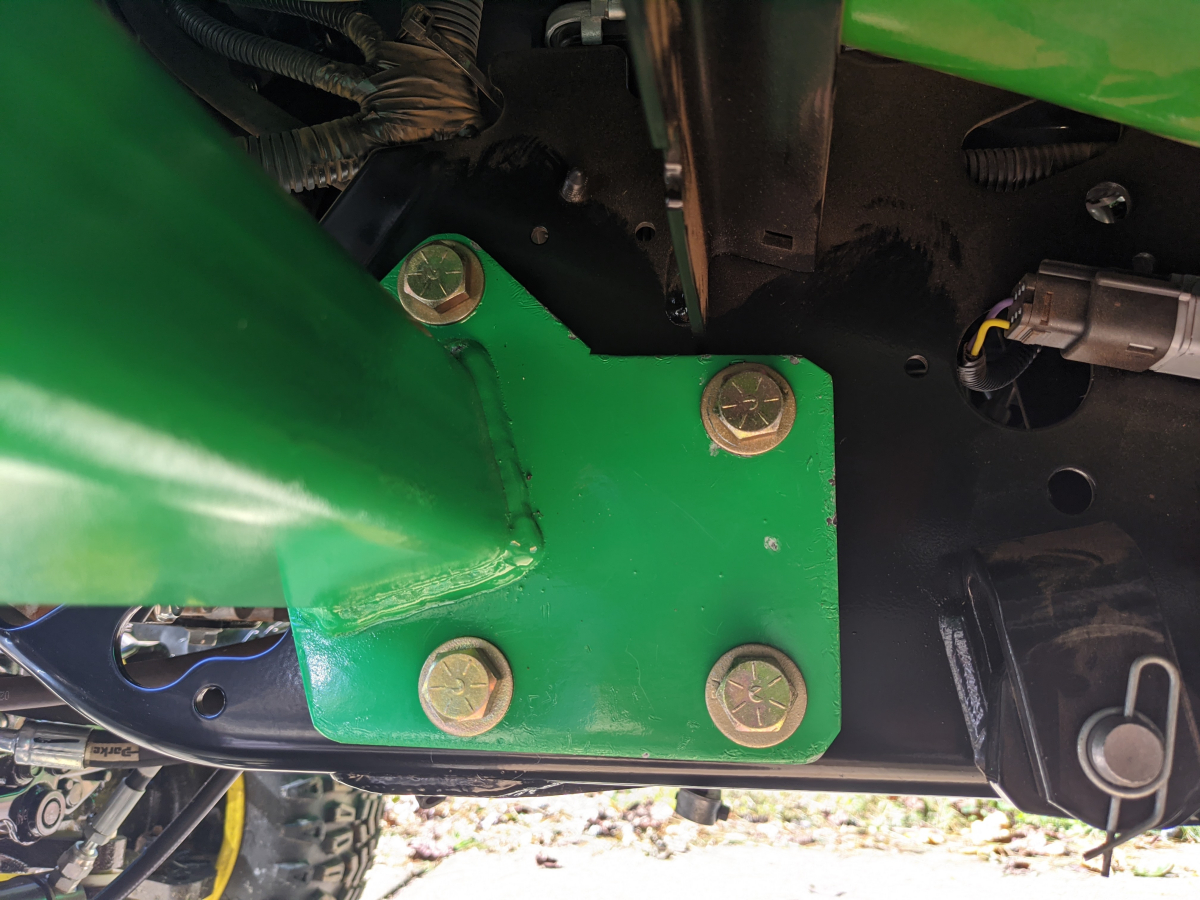
Also to install the bottom bolt on the hydraulic side I had to disconnect the top hydraulic control link to get the bolt in.
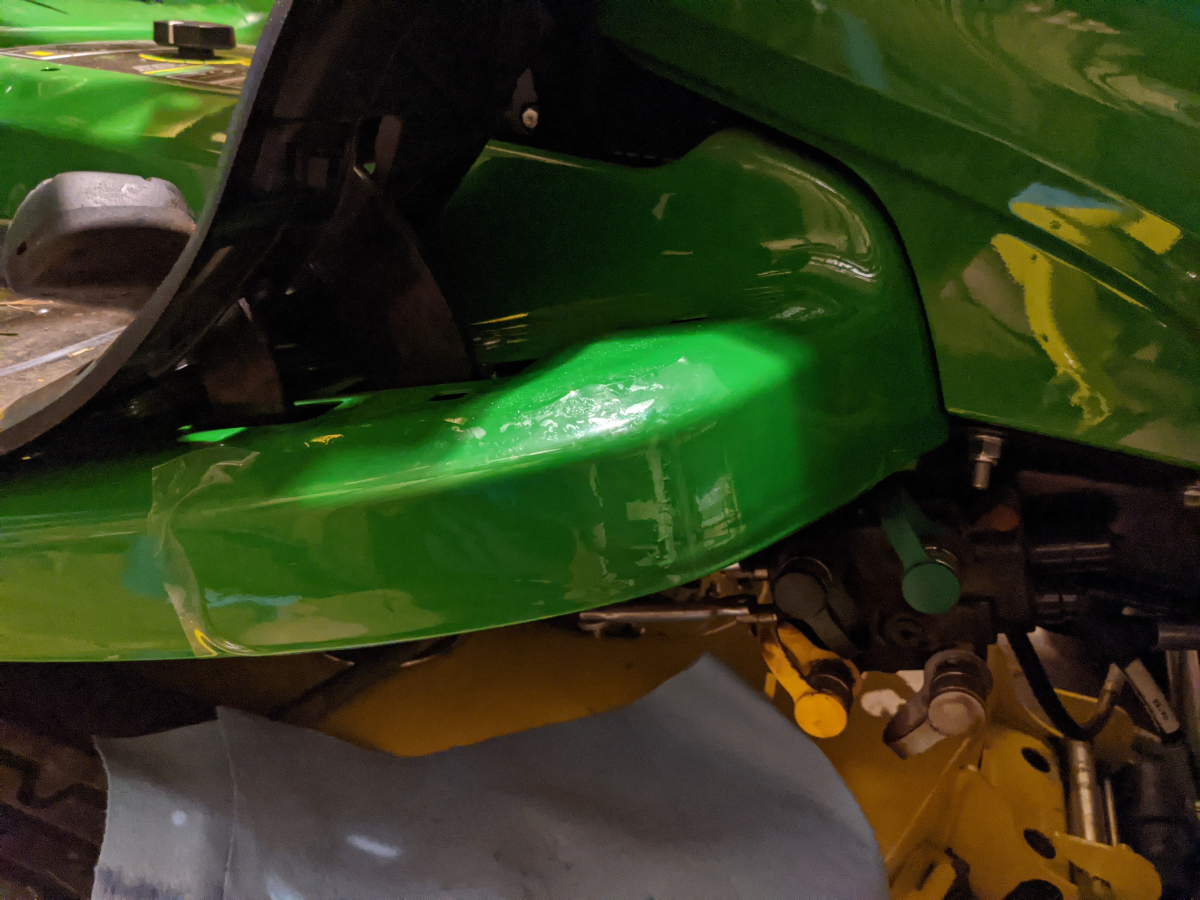
The wider footrests really put the alignment triangles close.
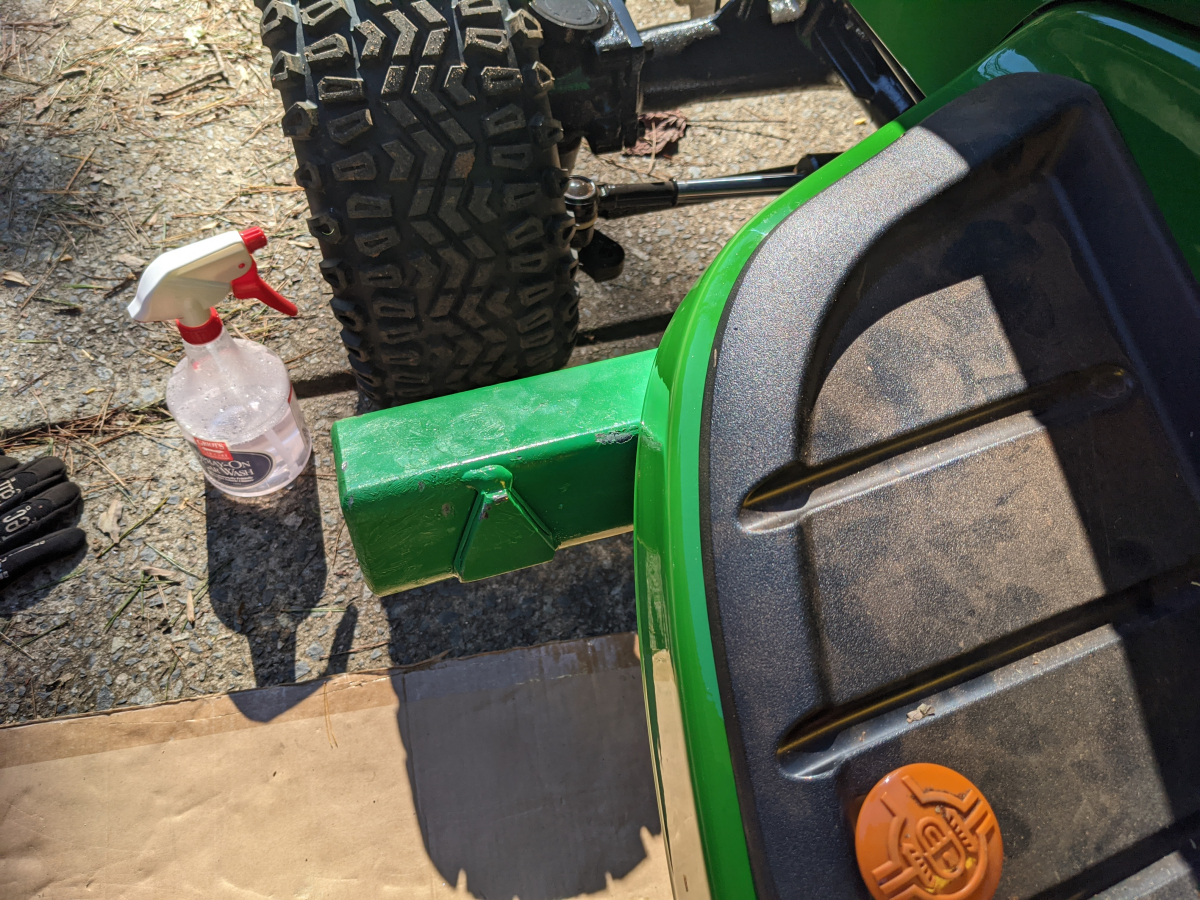
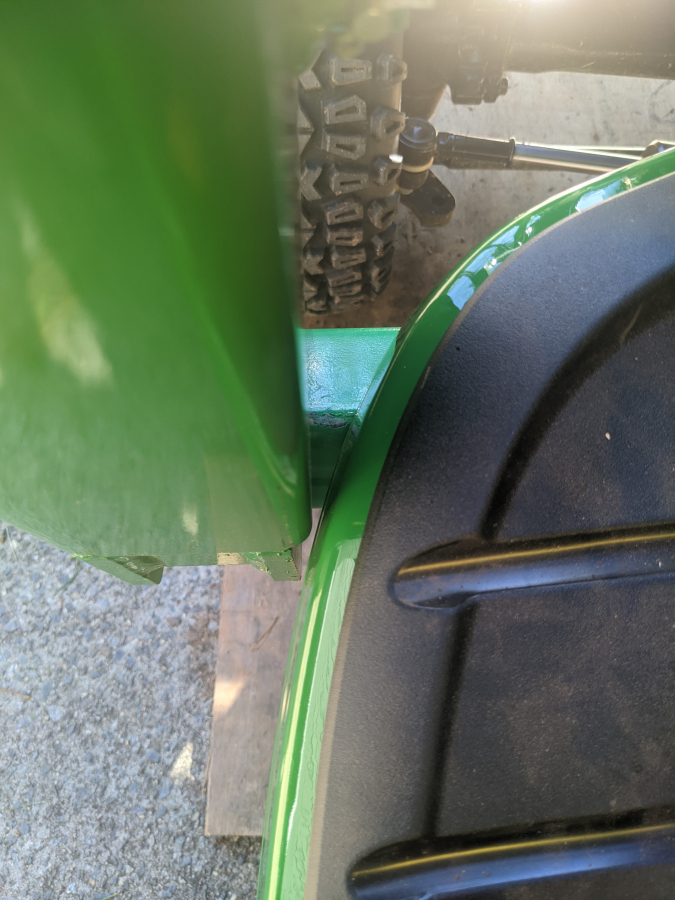
At last the loader was finally on my X738. I also figured I was done for the day.
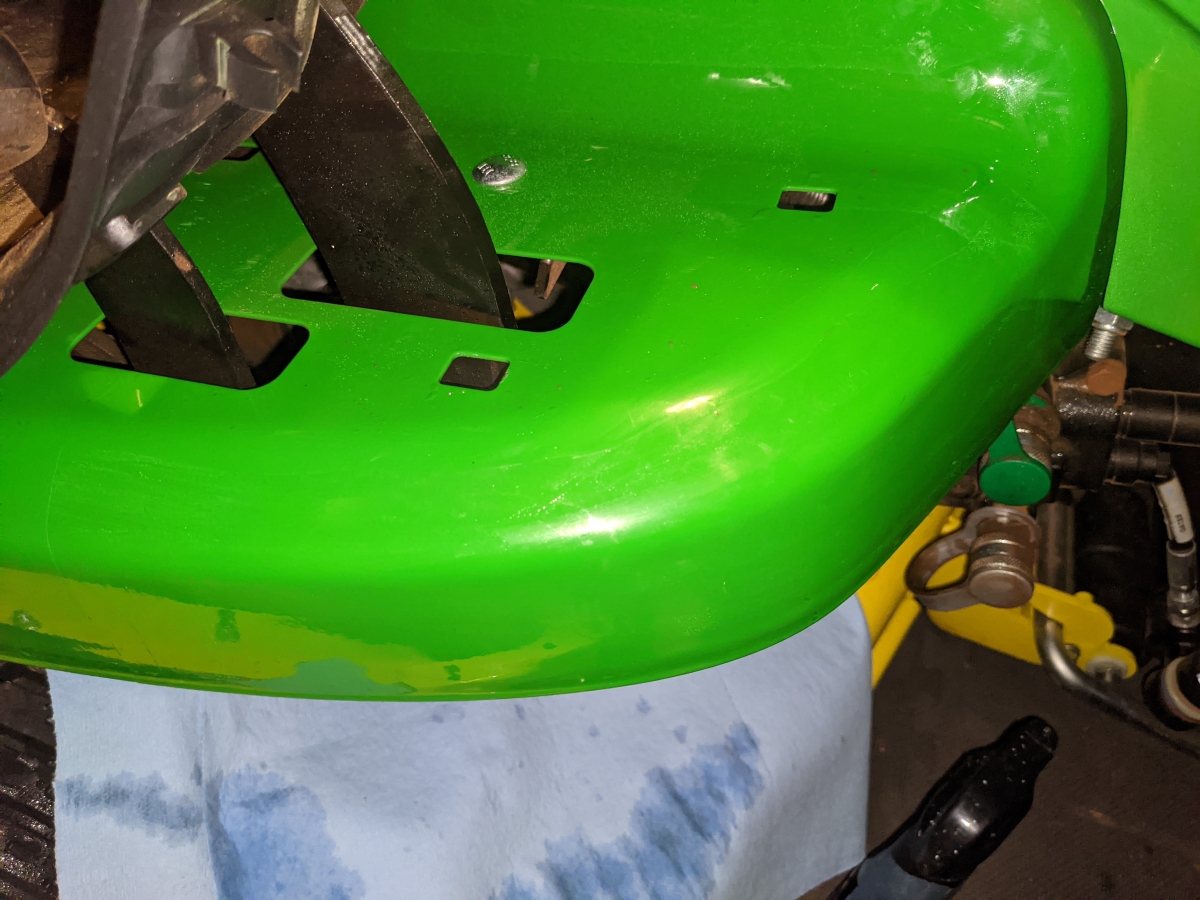
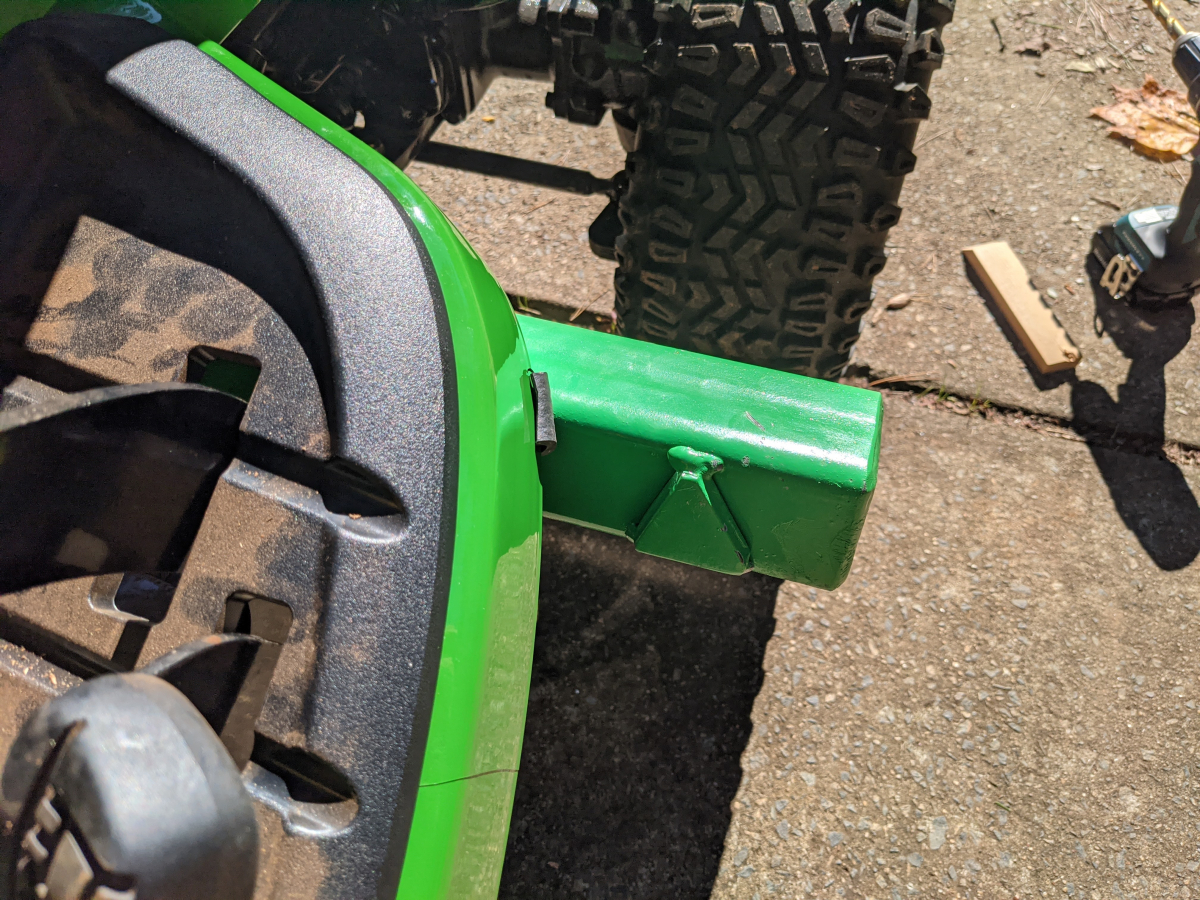
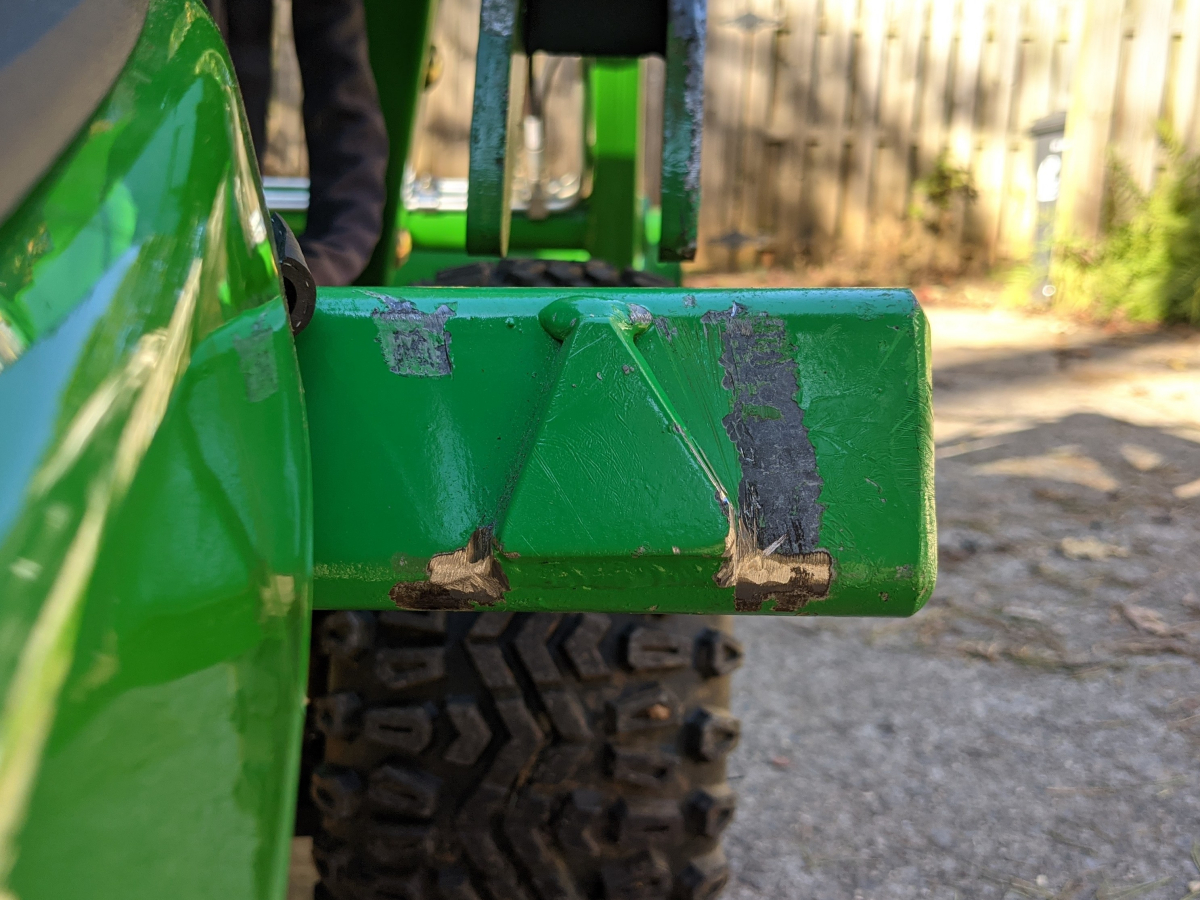
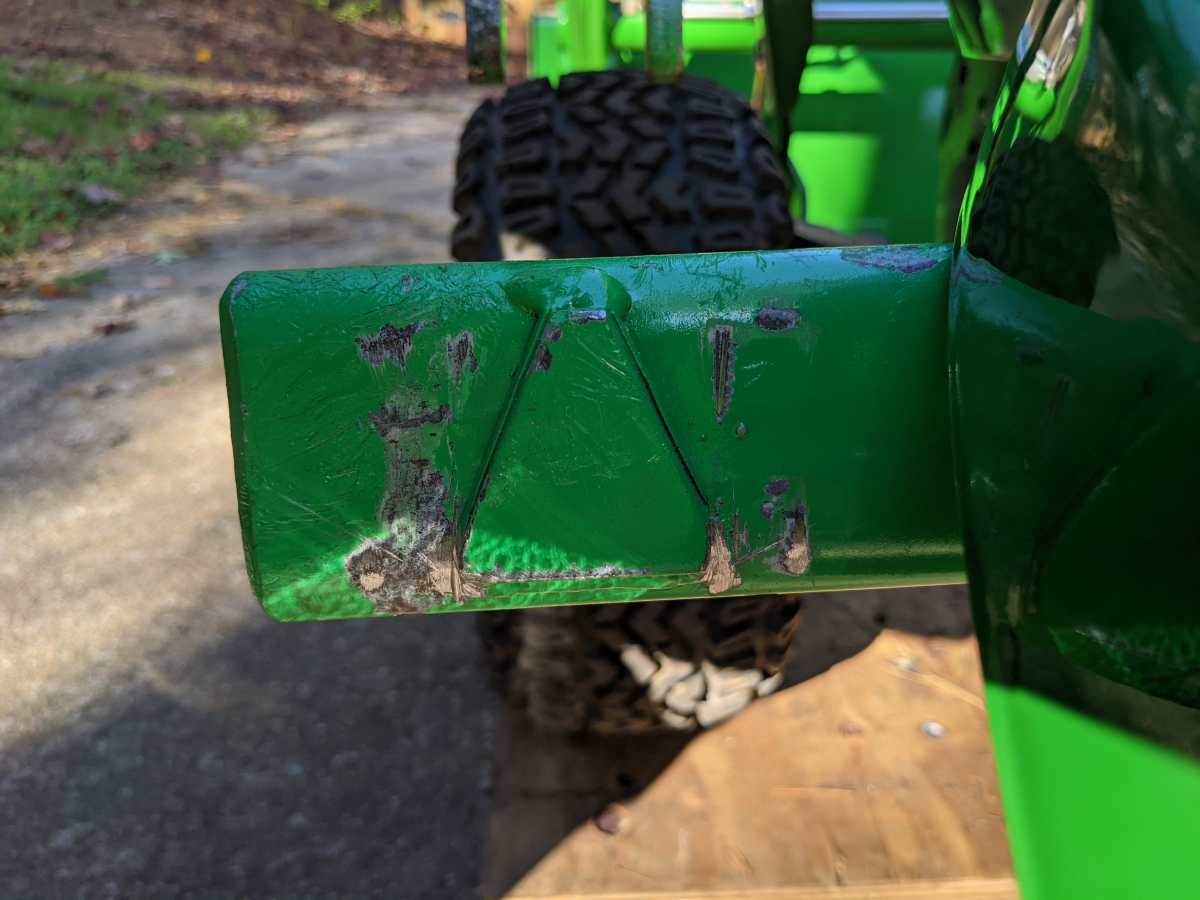
Unfortunately not quite. This might have been my own problem for not reading the instructions. I could not get the loader off the tractor bar. When one side was aligned with the alignment triangle the other wide was not. I noticed that the welds on the bottom of the triangle though went past the triangle and I thought that is what it was catching on.
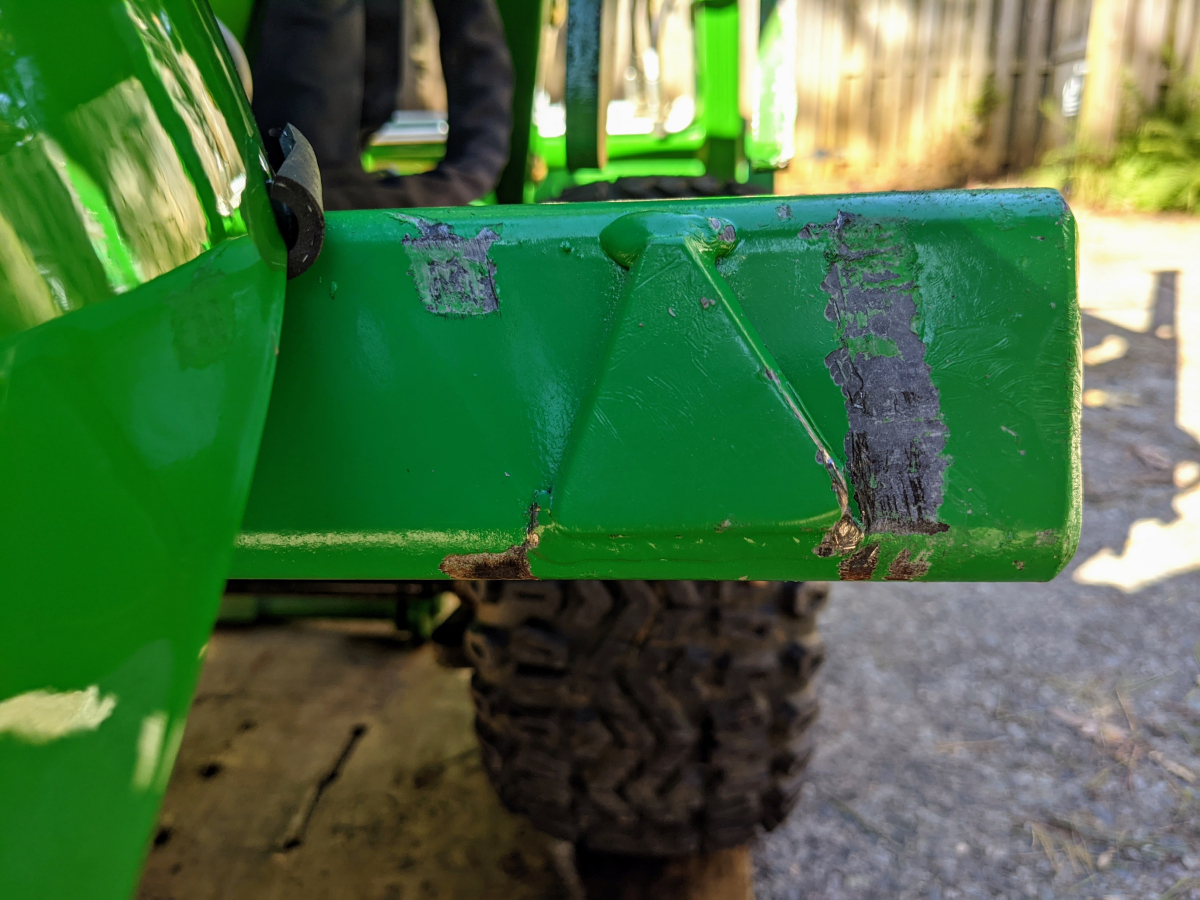
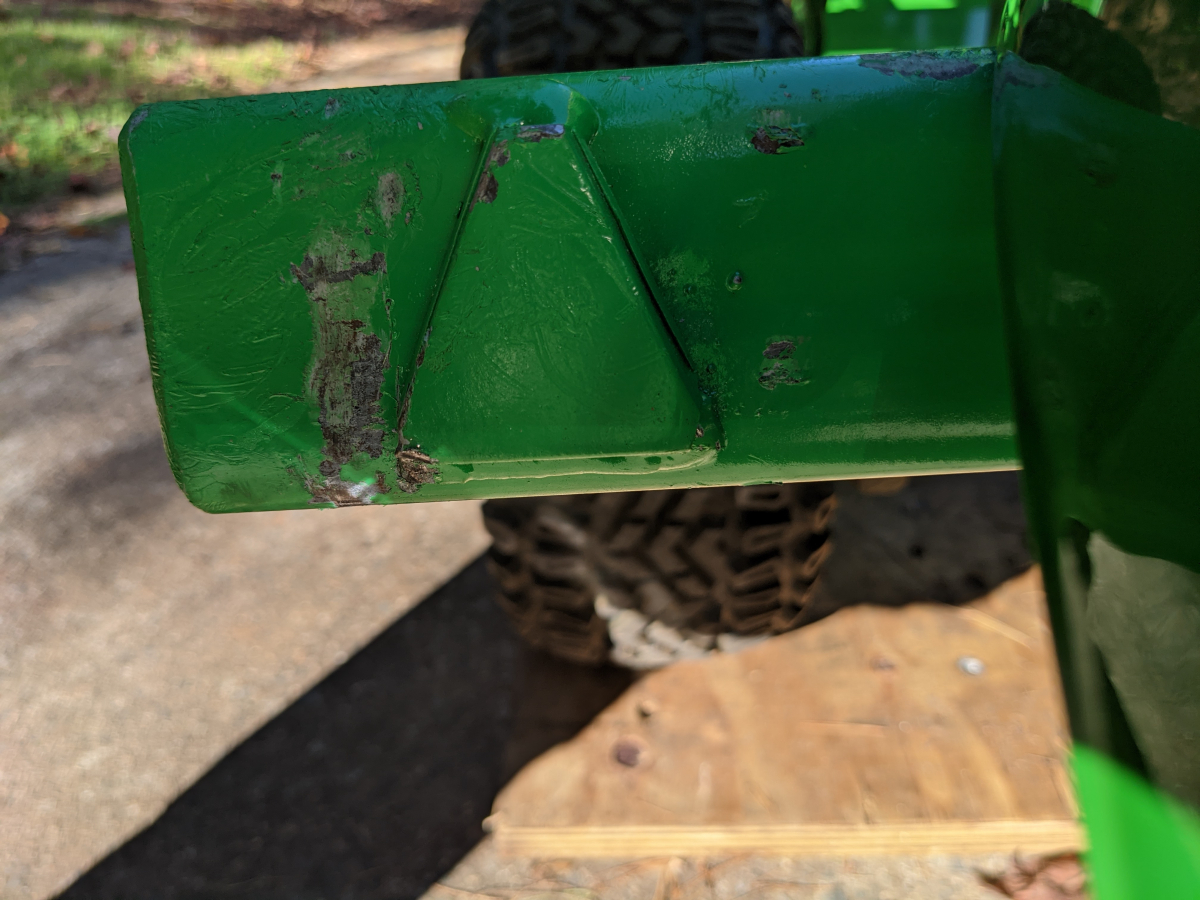
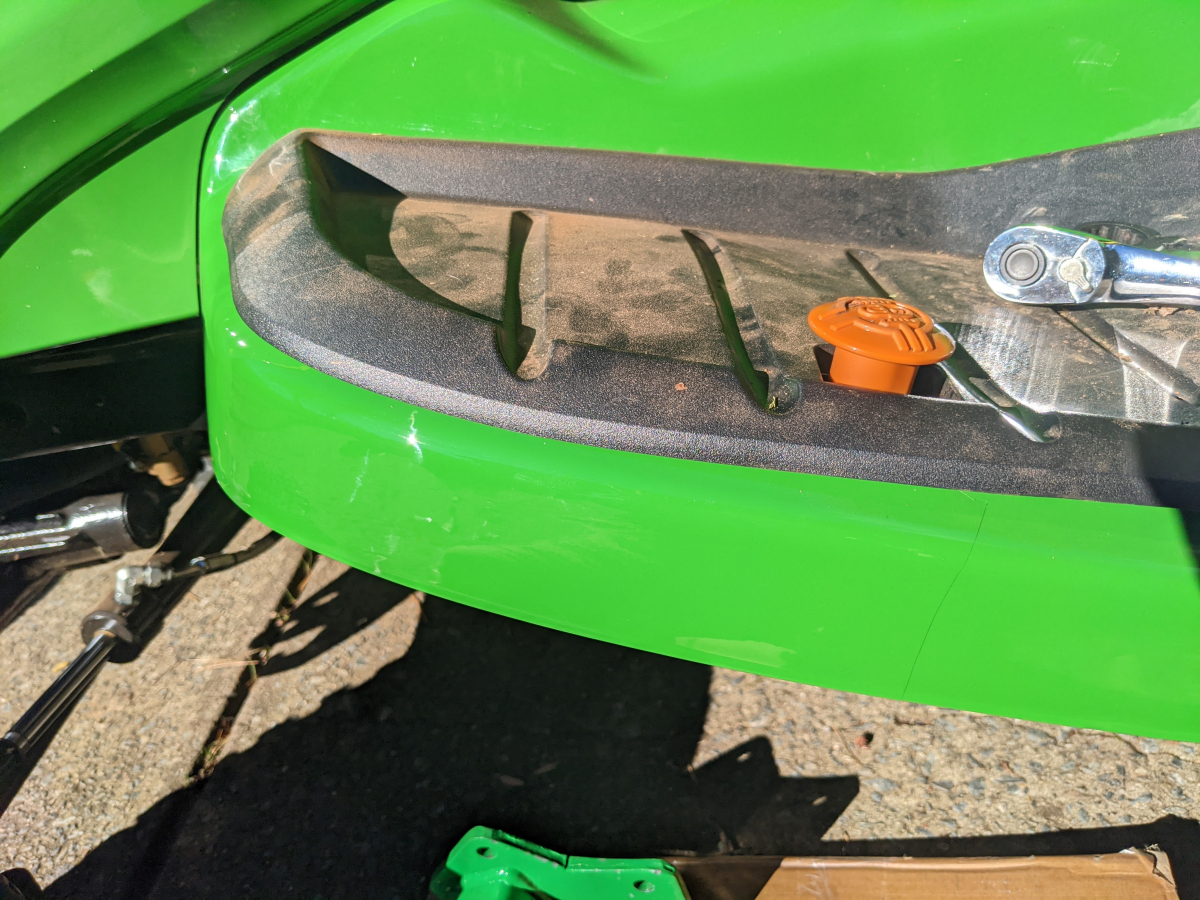
So since I had not read the part of the install procedure where you are supposed to loosen 8 bolts on the loader frame which probably will perfectly line up the loader to the brackets I got out a grinder and cleaned up the welds and also rounded the bottom of the corners a bit to make it come back off easier. These pictures are fairly close to the end state but I did round the corners a little more that I don't have pictures of right now.
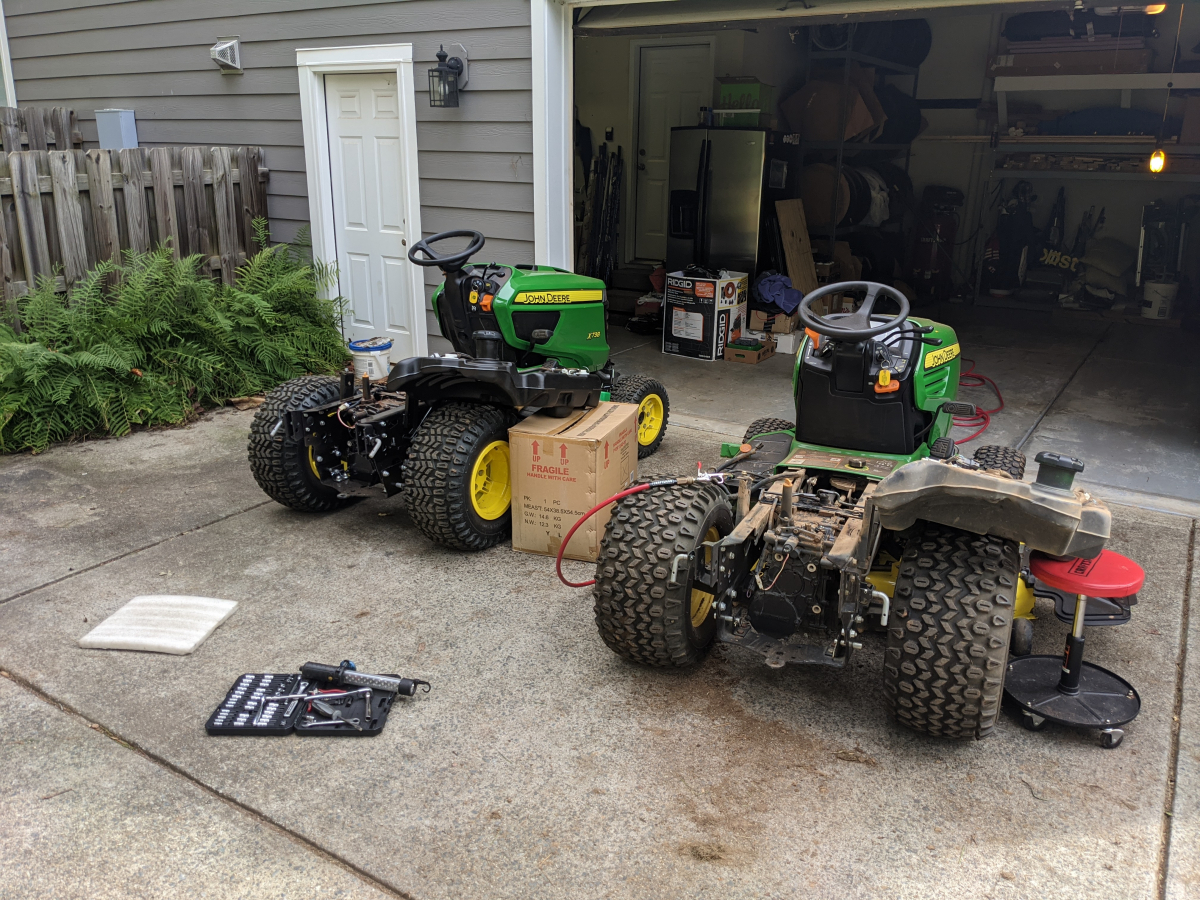
Once the brackets were finished the next day I tackled swapping the THRV from the X728 to my X738.
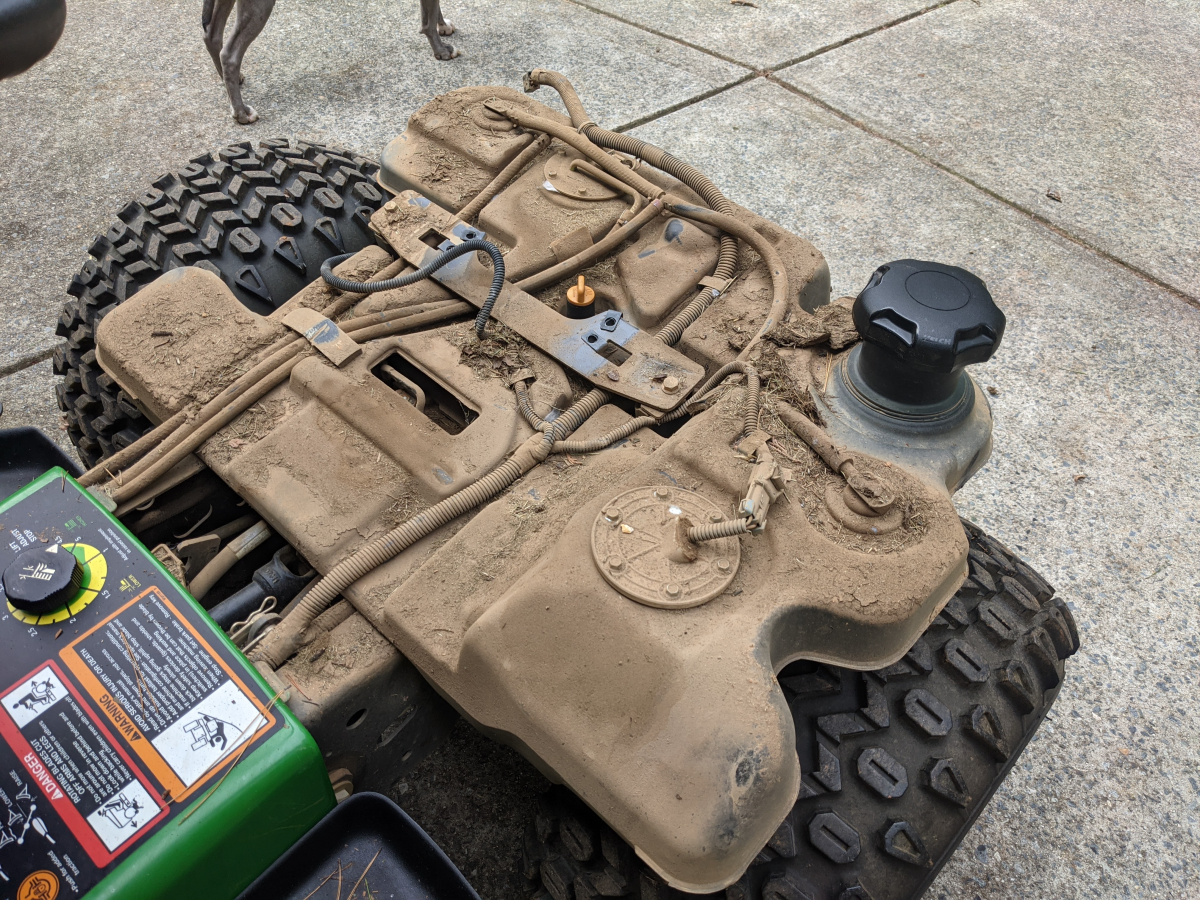
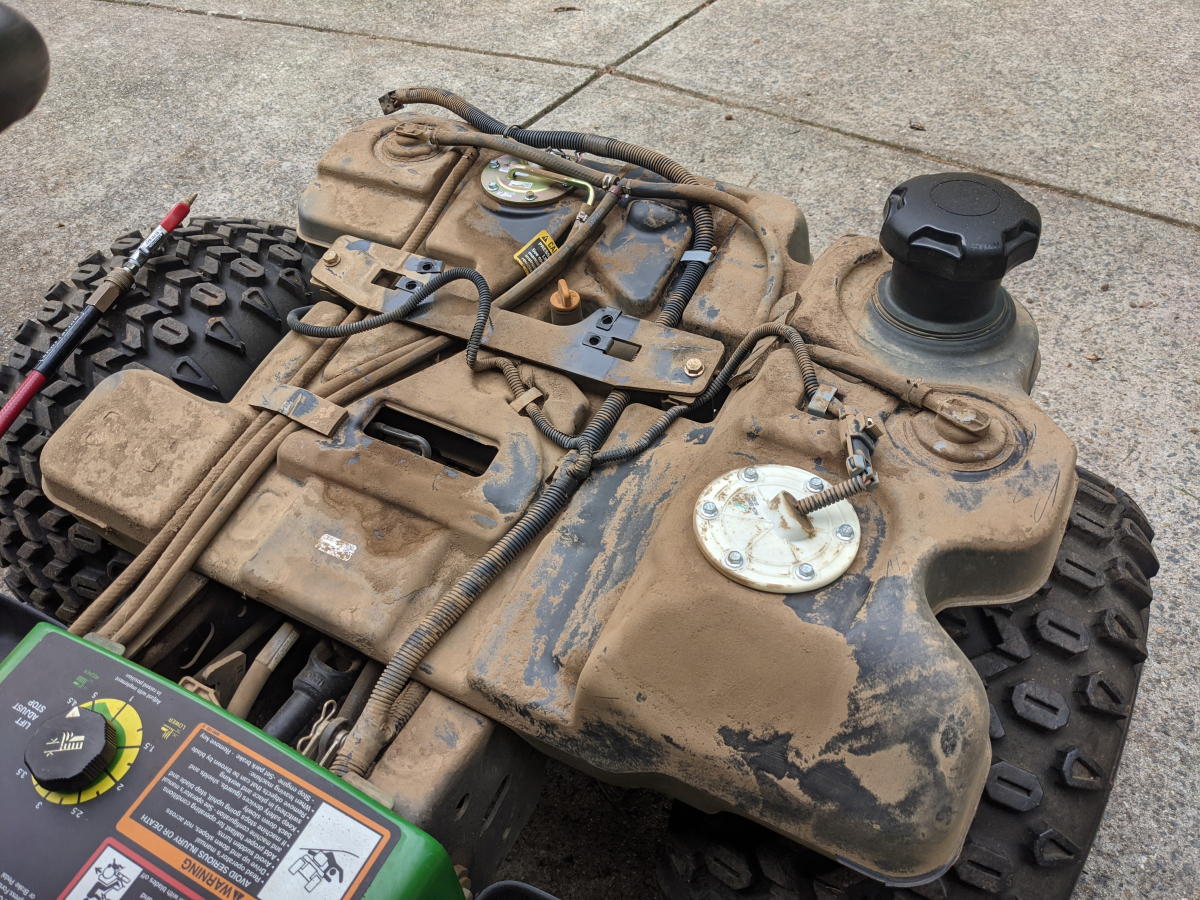
Amazing what an air compressor can clean off.
Found the THRV stuck. Soaking it in some Hyguard for about a half hour while I put the other tractor back together and also working some oil in the top seal from the outside eventually loosened it up.
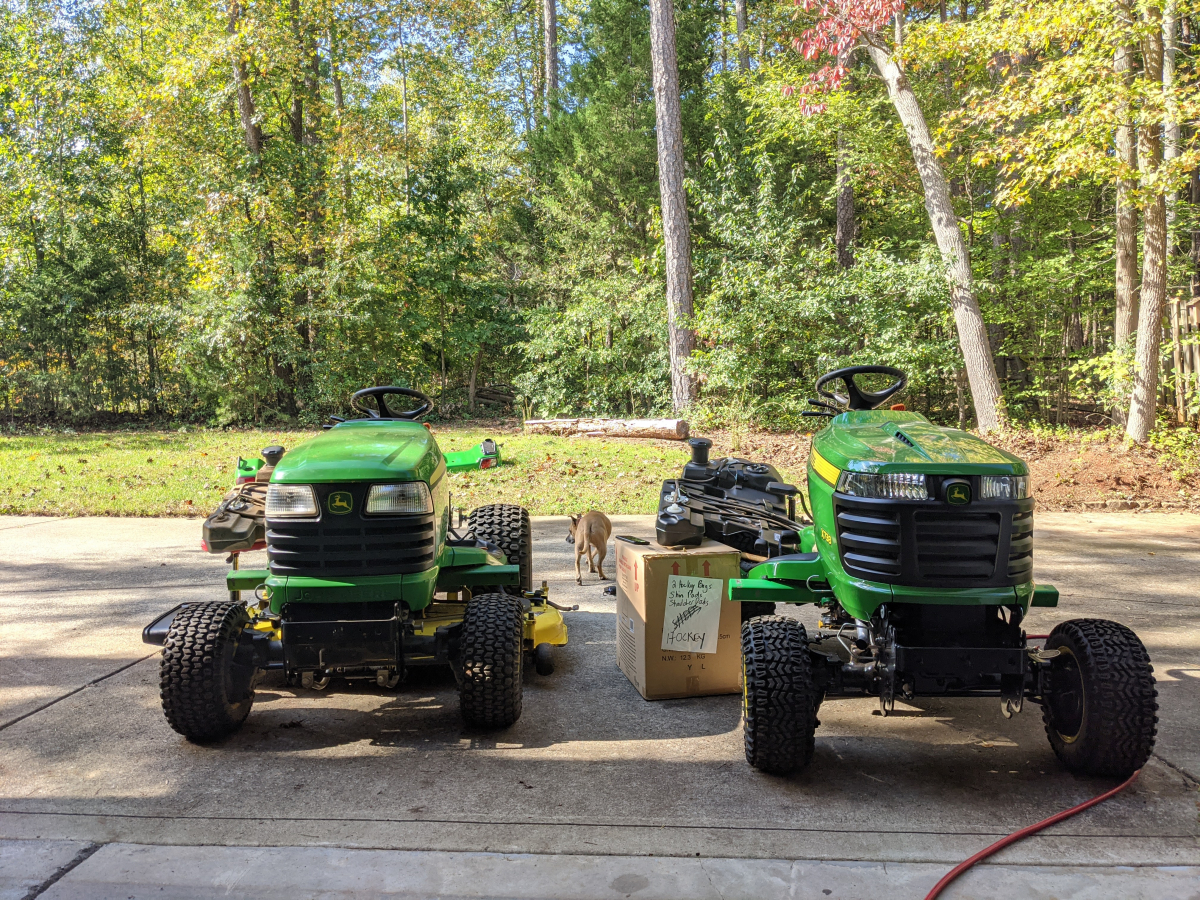
X728 vs X738. An interesting difference in the HDAP tire over the years.
My little helper outside.
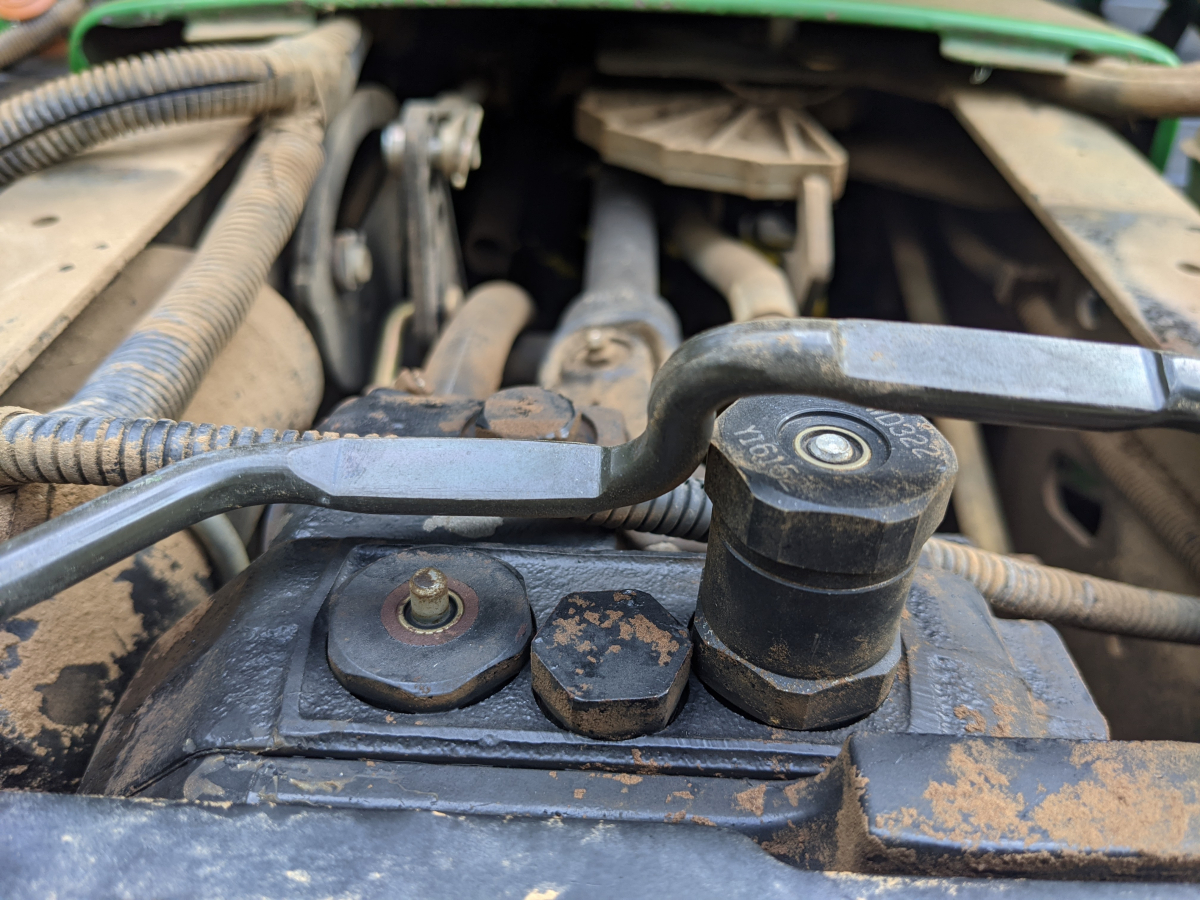
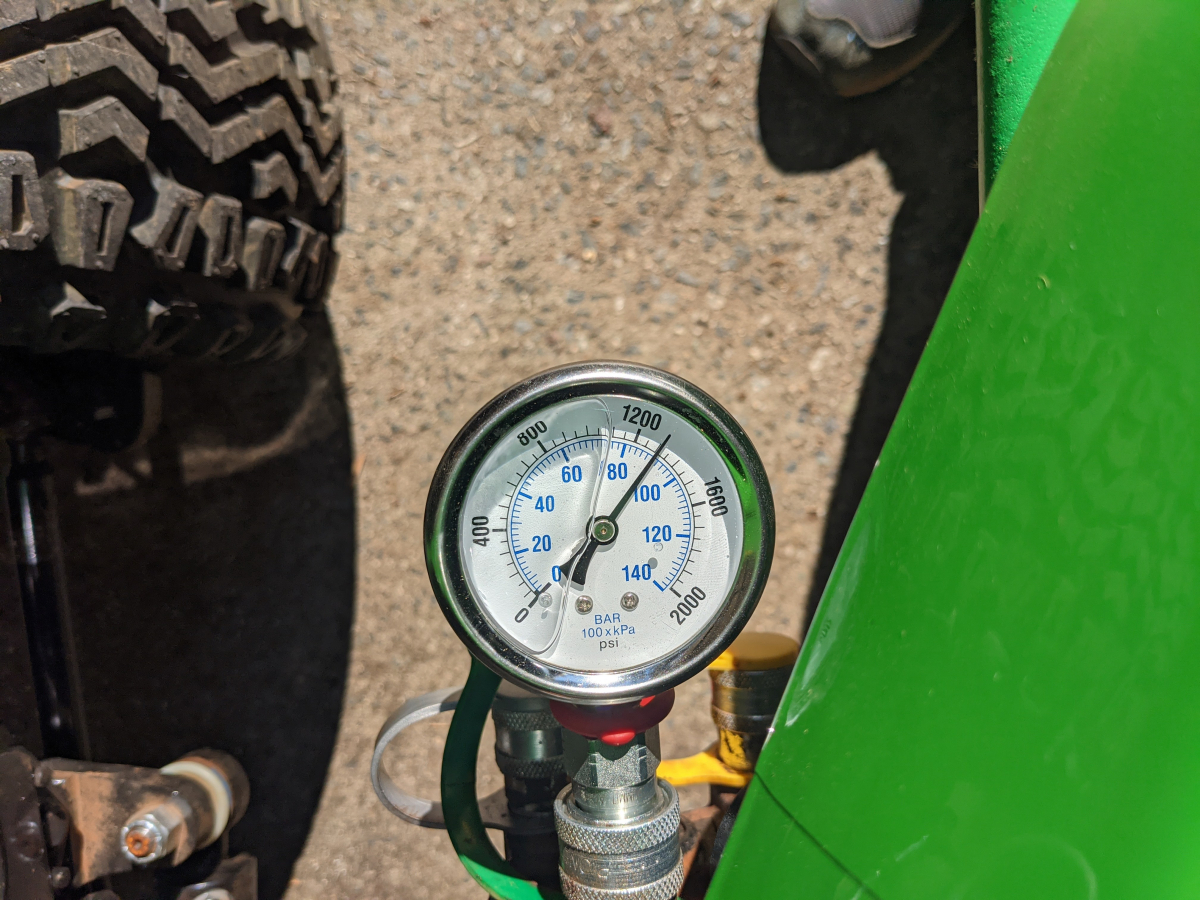
THRV installed on the X738 and no longer stuck. Also, got the shimming done with two .5mm washers.

Got it up to operating temp and tested the pressure. Got to 1300 PSI with the two washers. Was originally only shooting for 1200-1250 so hopefully, I don't ever push it too hard and damage something.

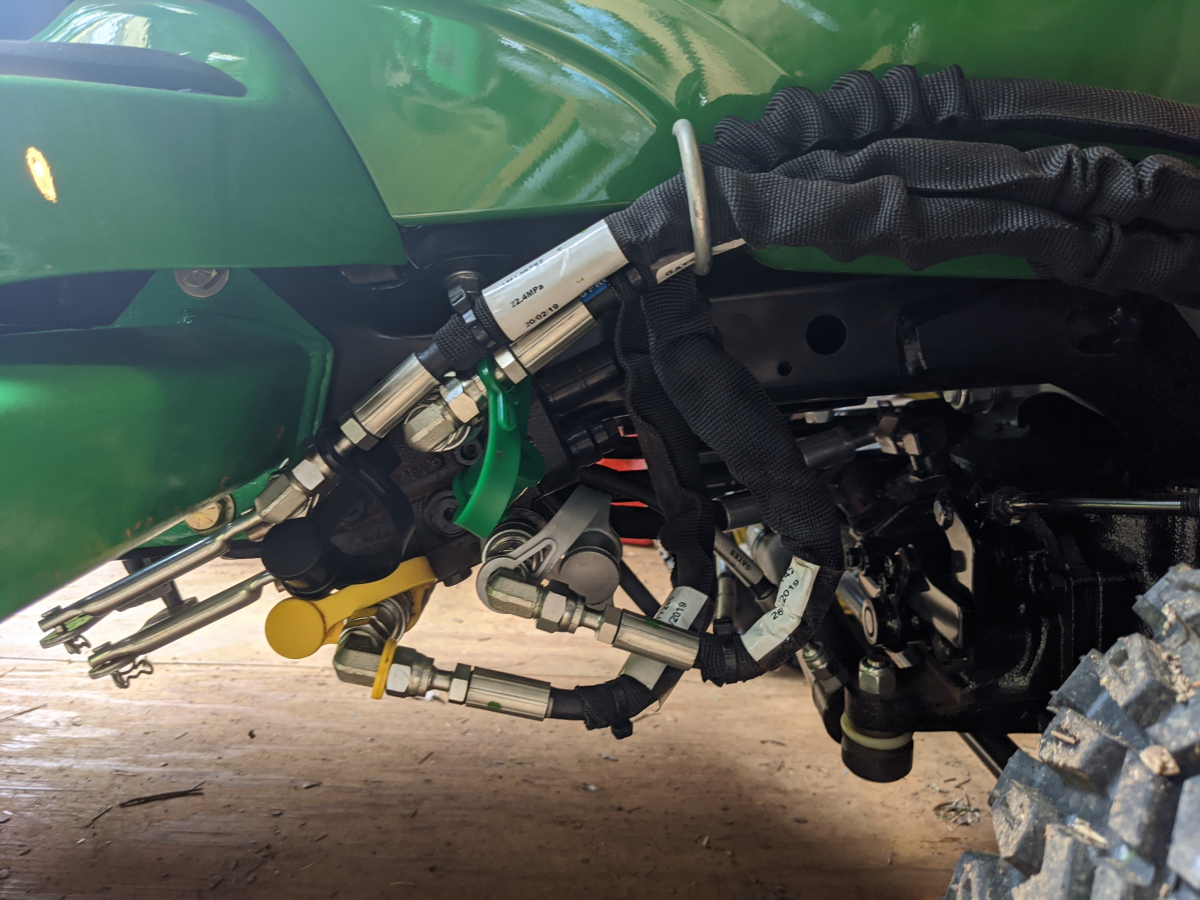
Lastly, unrelated but I had read another post a while back about adjusting your hydraulic lines to fit better by loosening the swivel and then getting things lined up and tighen them back up. Makes a big difference for install.
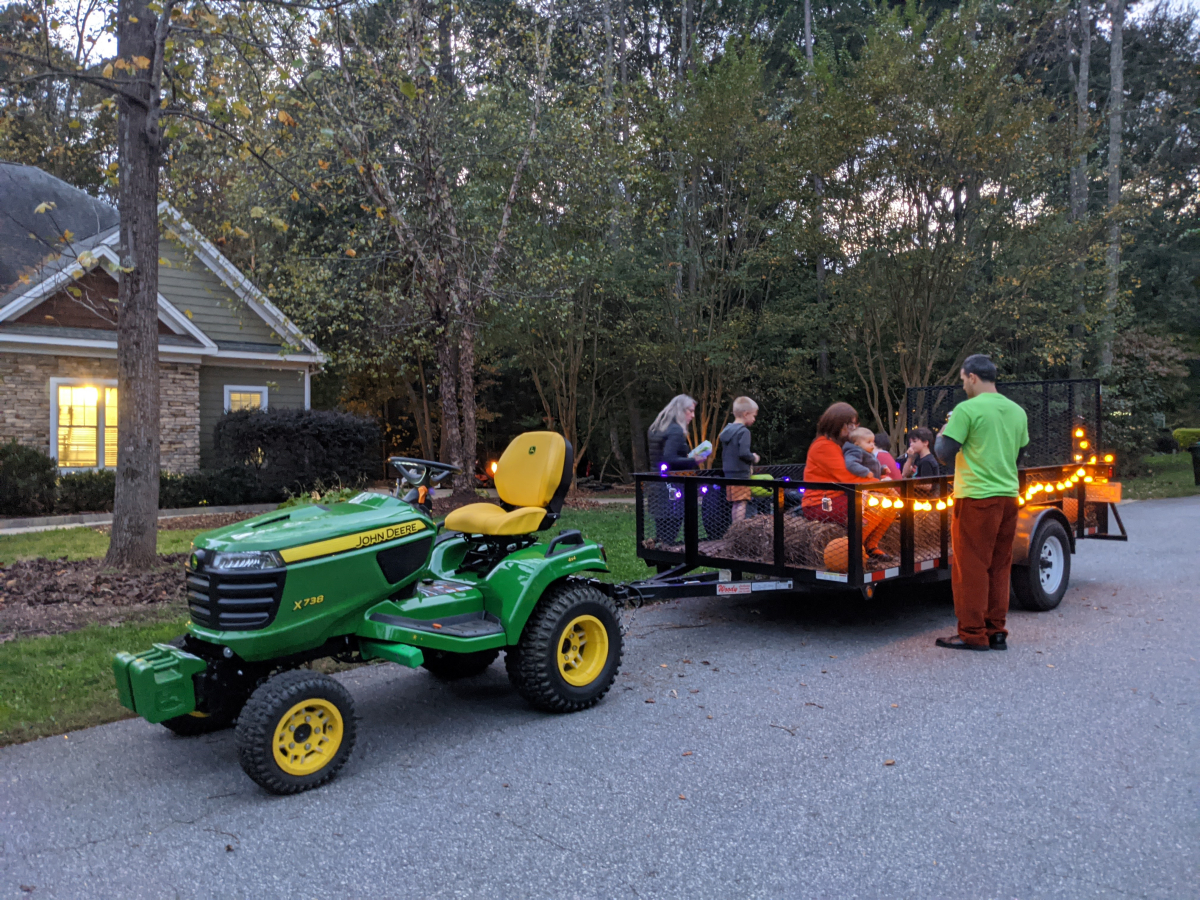
After, two days of work I loaned my tractor to my neighbor so he could use it with his trailer and take a bunch of neighborhood kids on a Halloween hayride.
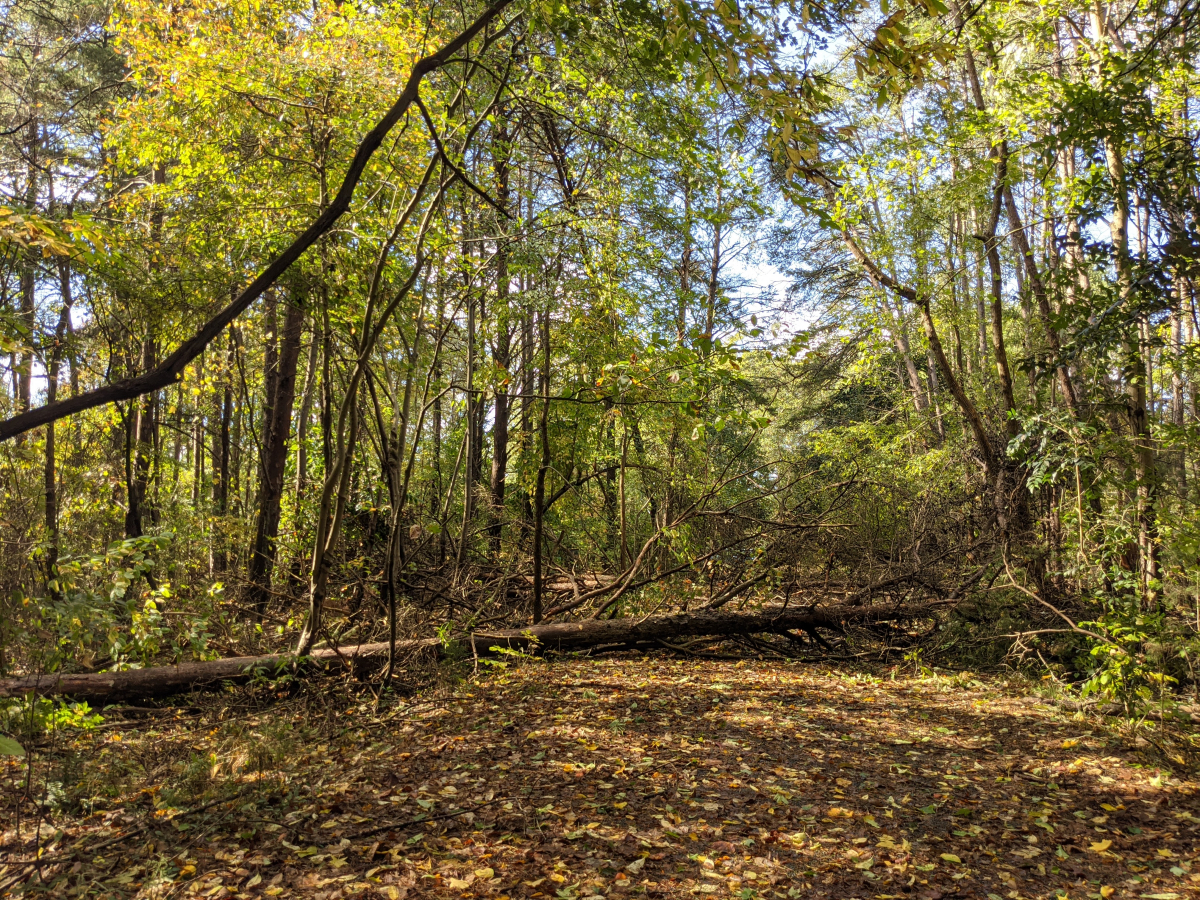
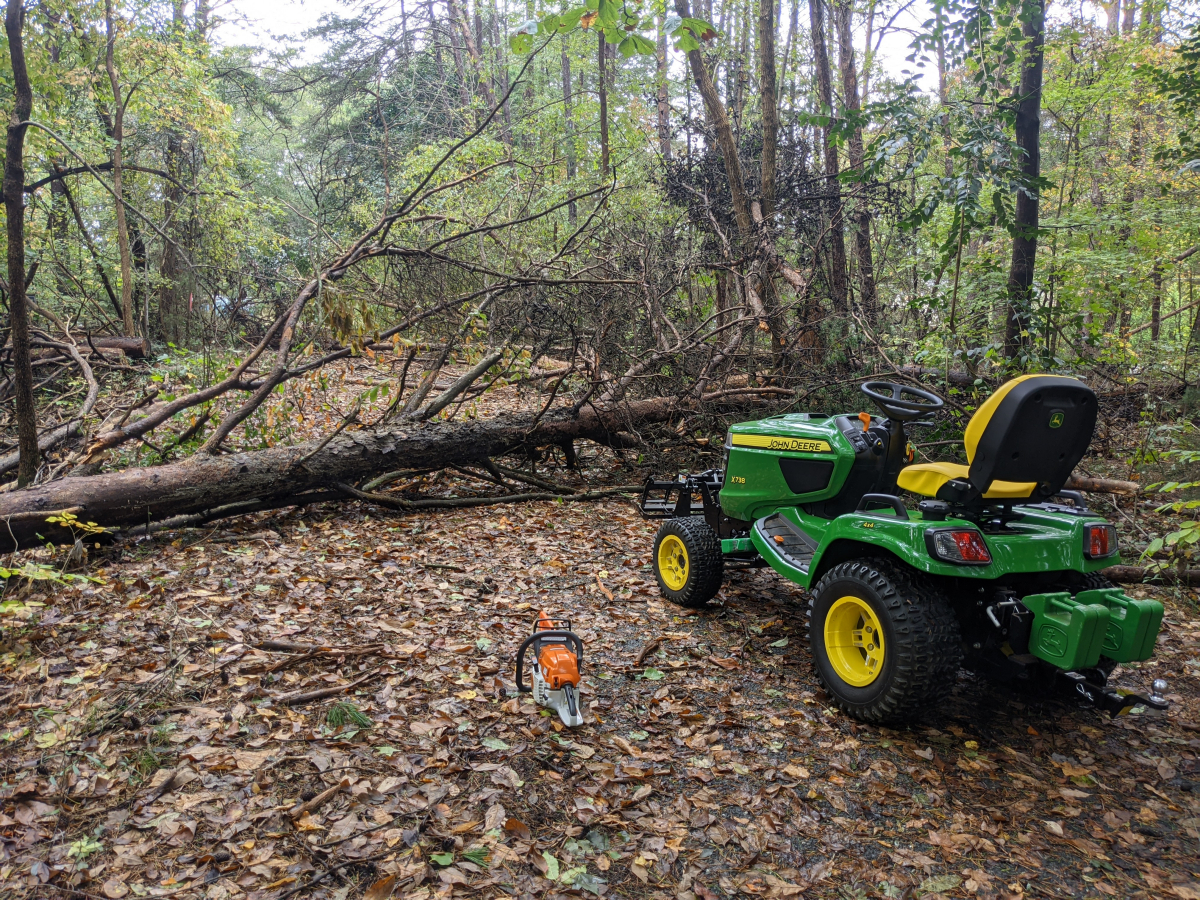
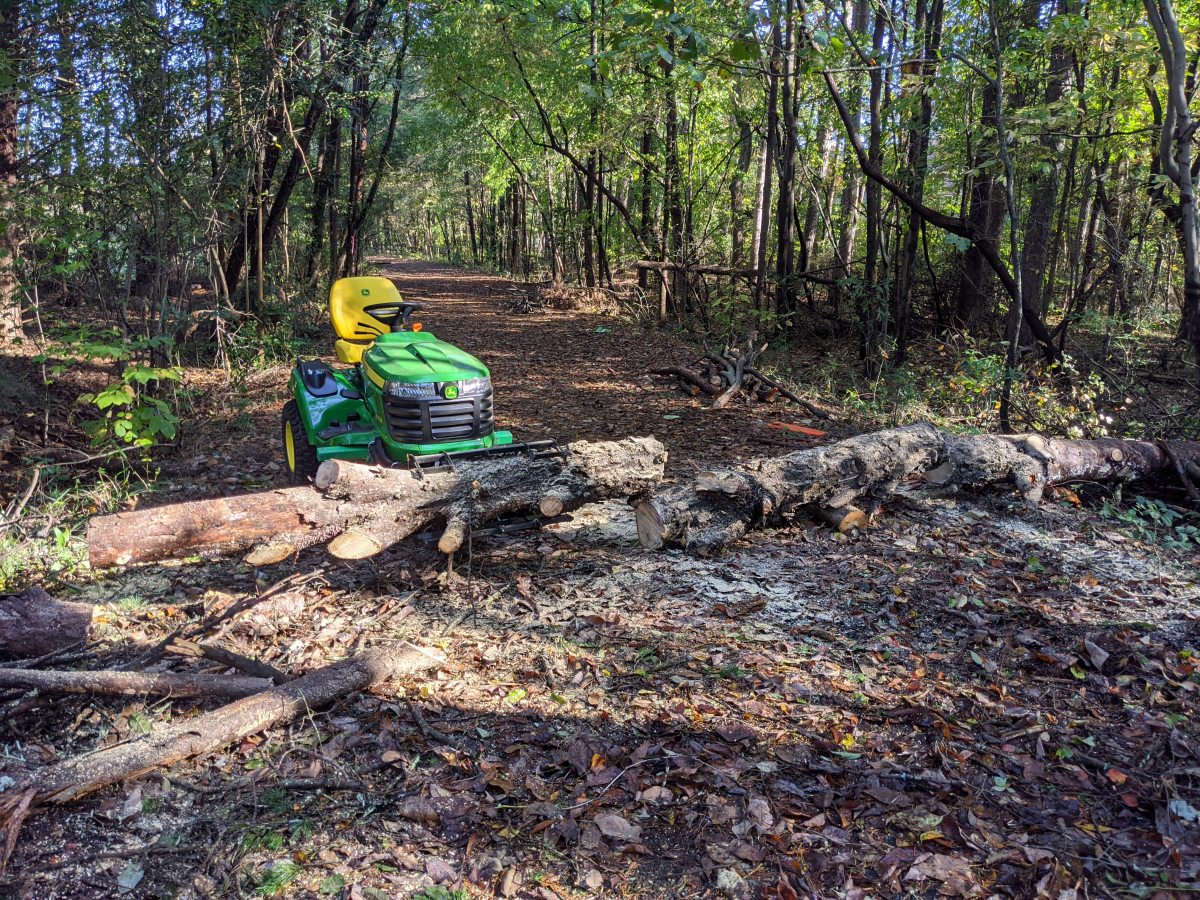
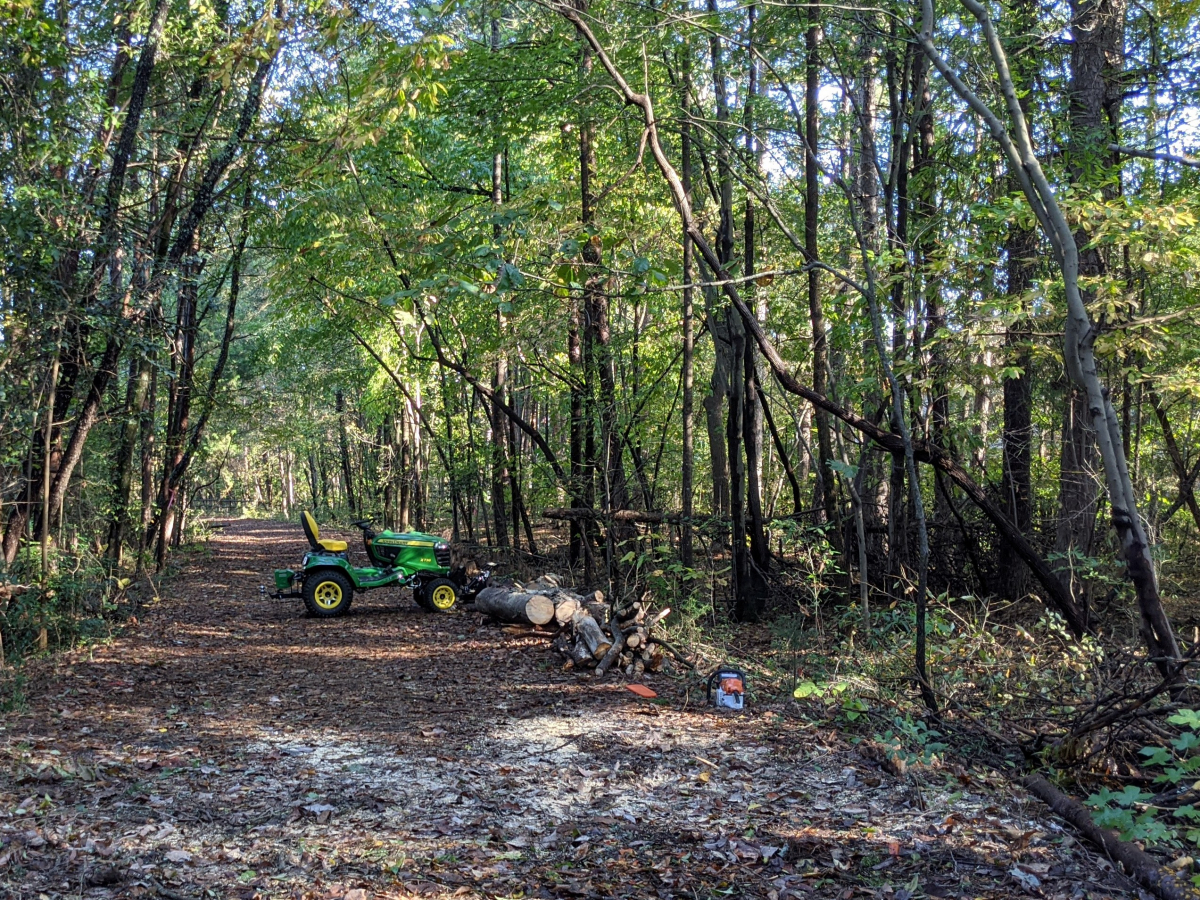
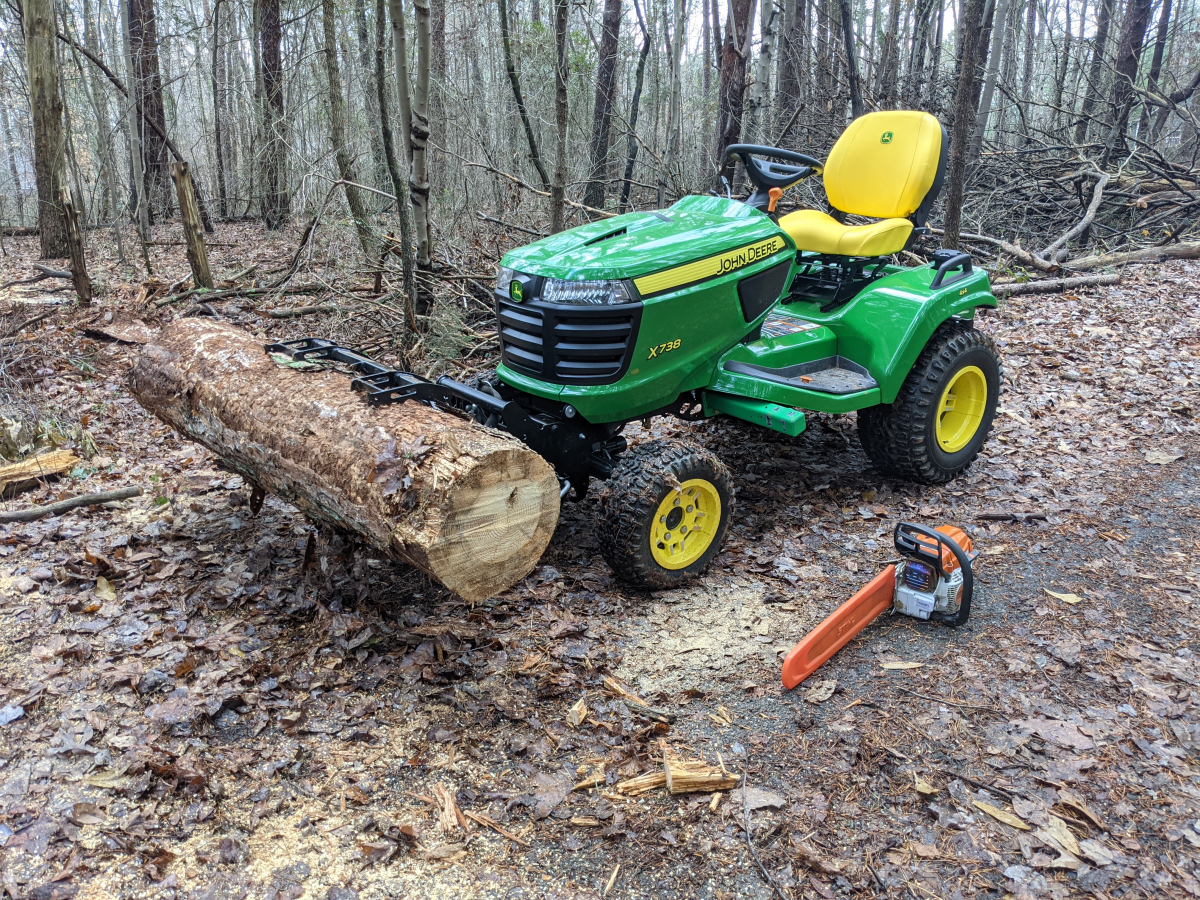
Sunday some downed tree cleanup work on the old abandoned road that runs behind our neighborhood. Like to keep it cleaned as it allows easy access to fence repair work on the back of the property.

I started with some paint protection film on the foot rests since the loader fits so close to them compared to the older X700 series tractors. They made the footrests close to half an inch wider it seems from measurements between the two.
Was actually the first time I installed paint film but have installed headlight protection film before several times and it is very similar. Headlight film actually might be a better choice as it is thicket. You can barely tell it is there besides the faint edges.
Next up was getting the custom loader mounts installed.
Three of the four holes in the brackets are in the frame to begin with. Have to drill the fourth hole. On some other that have had the brackets made have said the fourth hole on the right side of hydraulic side of the tractor has a line in the way. Mine did not have that issue I was able to drill the holes on both sides.
The holes are however very close a cross brace in the middle of the frame as well as the welds that hold it in place get in the way a bit.
I didn't want to grind the welds out of the way so I modified some washers to clear the brace.
Getting all the bolts torqued to spec was also difficult. There was one on each side I was not able to.
Also to install the bottom bolt on the hydraulic side I had to disconnect the top hydraulic control link to get the bolt in.
The wider footrests really put the alignment triangles close.
At last the loader was finally on my X738. I also figured I was done for the day.
Unfortunately not quite. This might have been my own problem for not reading the instructions. I could not get the loader off the tractor bar. When one side was aligned with the alignment triangle the other wide was not. I noticed that the welds on the bottom of the triangle though went past the triangle and I thought that is what it was catching on.
So since I had not read the part of the install procedure where you are supposed to loosen 8 bolts on the loader frame which probably will perfectly line up the loader to the brackets I got out a grinder and cleaned up the welds and also rounded the bottom of the corners a bit to make it come back off easier. These pictures are fairly close to the end state but I did round the corners a little more that I don't have pictures of right now.
Once the brackets were finished the next day I tackled swapping the THRV from the X728 to my X738.
Amazing what an air compressor can clean off.
Found the THRV stuck. Soaking it in some Hyguard for about a half hour while I put the other tractor back together and also working some oil in the top seal from the outside eventually loosened it up.
X728 vs X738. An interesting difference in the HDAP tire over the years.
My little helper outside.
THRV installed on the X738 and no longer stuck. Also, got the shimming done with two .5mm washers.
Got it up to operating temp and tested the pressure. Got to 1300 PSI with the two washers. Was originally only shooting for 1200-1250 so hopefully, I don't ever push it too hard and damage something.
Lastly, unrelated but I had read another post a while back about adjusting your hydraulic lines to fit better by loosening the swivel and then getting things lined up and tighen them back up. Makes a big difference for install.
After, two days of work I loaned my tractor to my neighbor so he could use it with his trailer and take a bunch of neighborhood kids on a Halloween hayride.
Sunday some downed tree cleanup work on the old abandoned road that runs behind our neighborhood. Like to keep it cleaned as it allows easy access to fence repair work on the back of the property.
The following 3 users liked this post by CCColtsicehockey:
11-09-2020, 01:14 PM
#1210
Moderator
Regional Coordinator (Southeast)
Regional Coordinator (Southeast)
Thread Starter
Join Date: Dec 2003
Location: Mooresville, NC
Age: 38
Posts: 43,563
Received 3,763 Likes
on
2,538 Posts
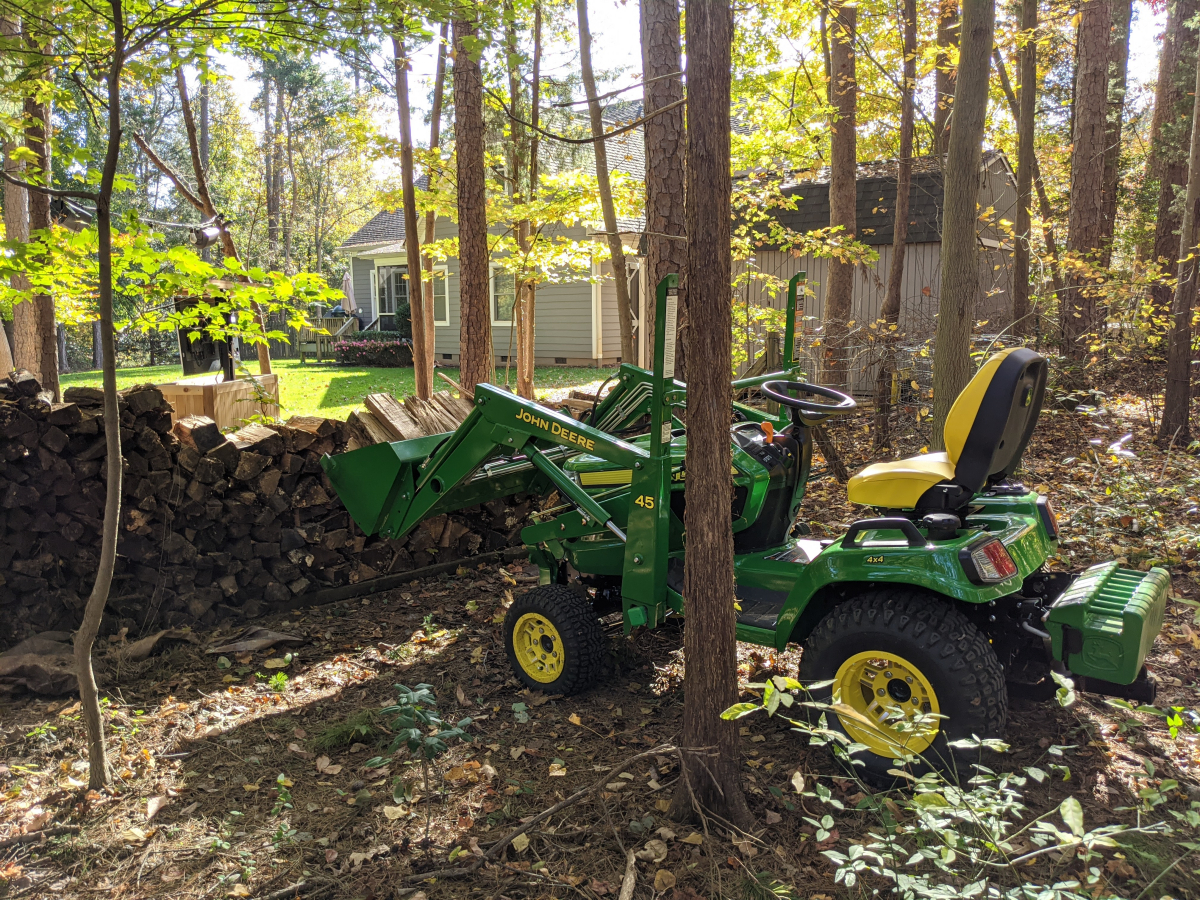
Buddy of mine traded me about 3/4 cord of split oak firewood for a downed pine I had that I made into some log tables and two benches for his new fire pit. As well as some assistance moving the gravel up his hill to the new pit.
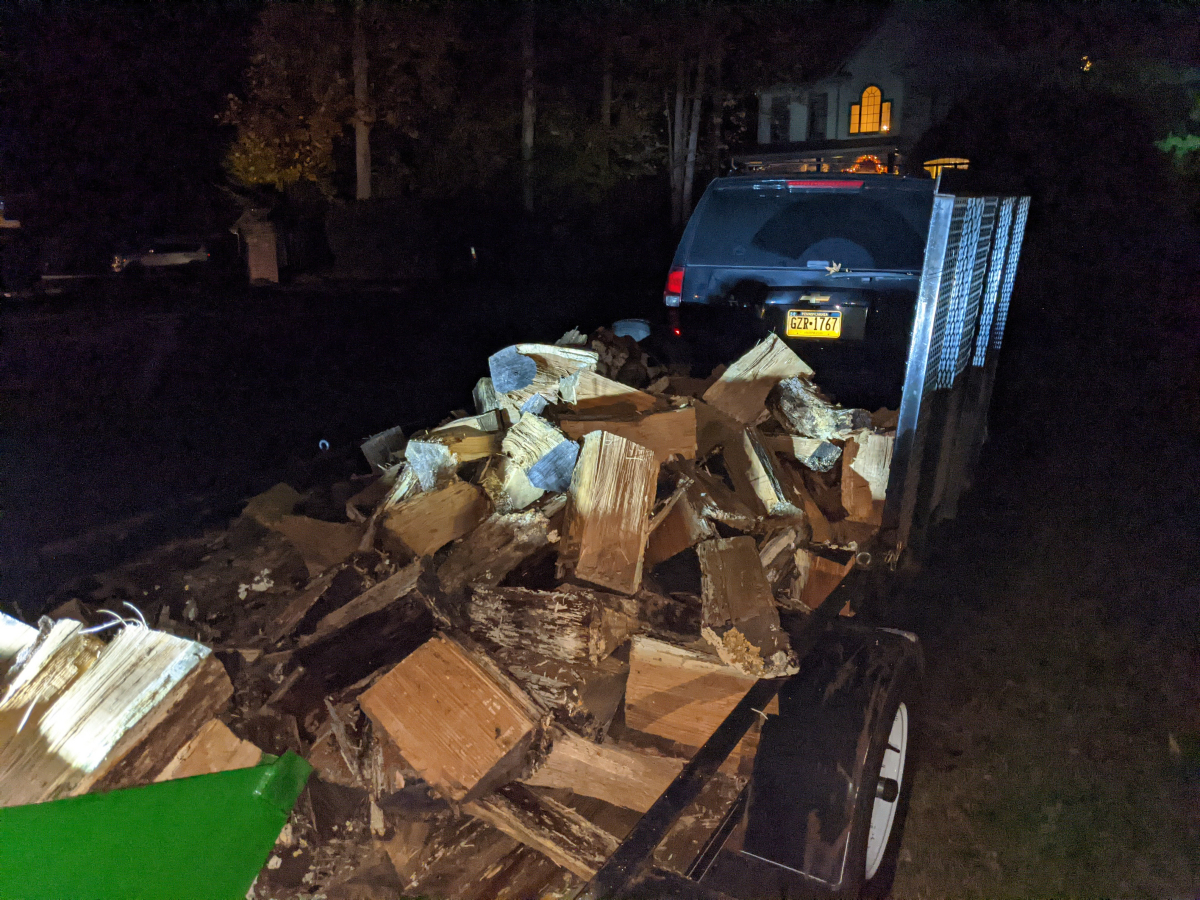
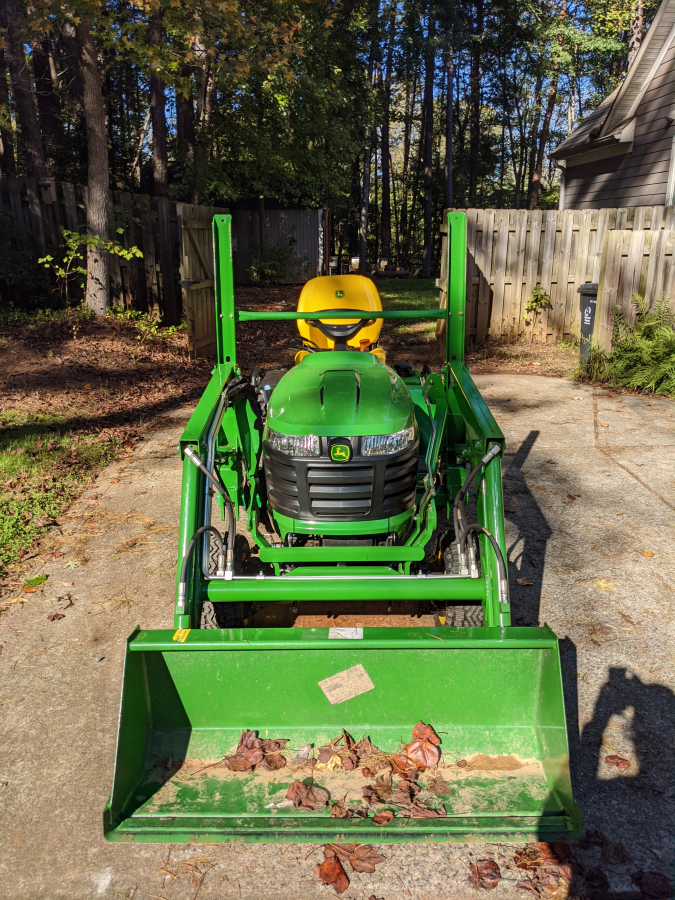
Liked this picture but it showed me I definitely need some upper work lights.
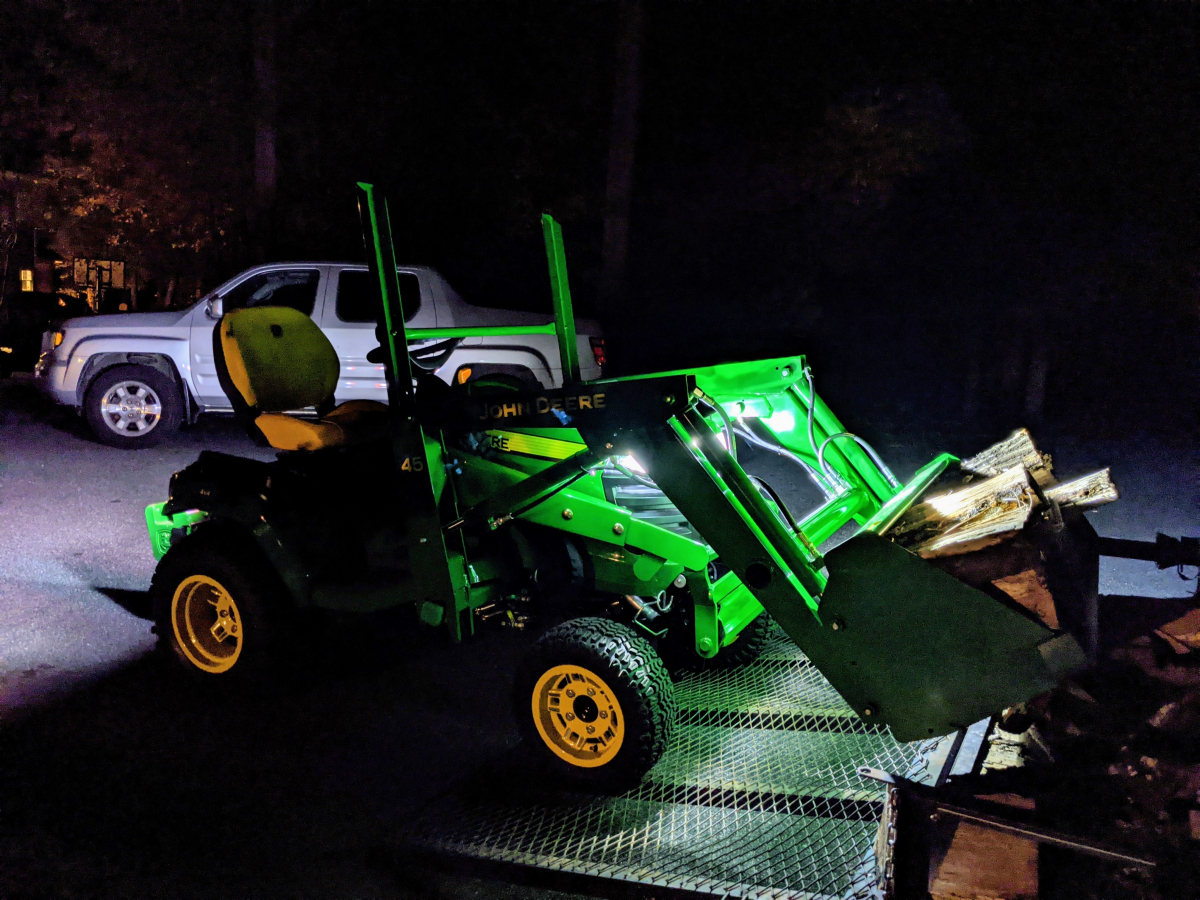
After three loads I gave up in the dark. I hate having to stop work at only 6pm. Started back up the next morning but man the loader is a time saver.
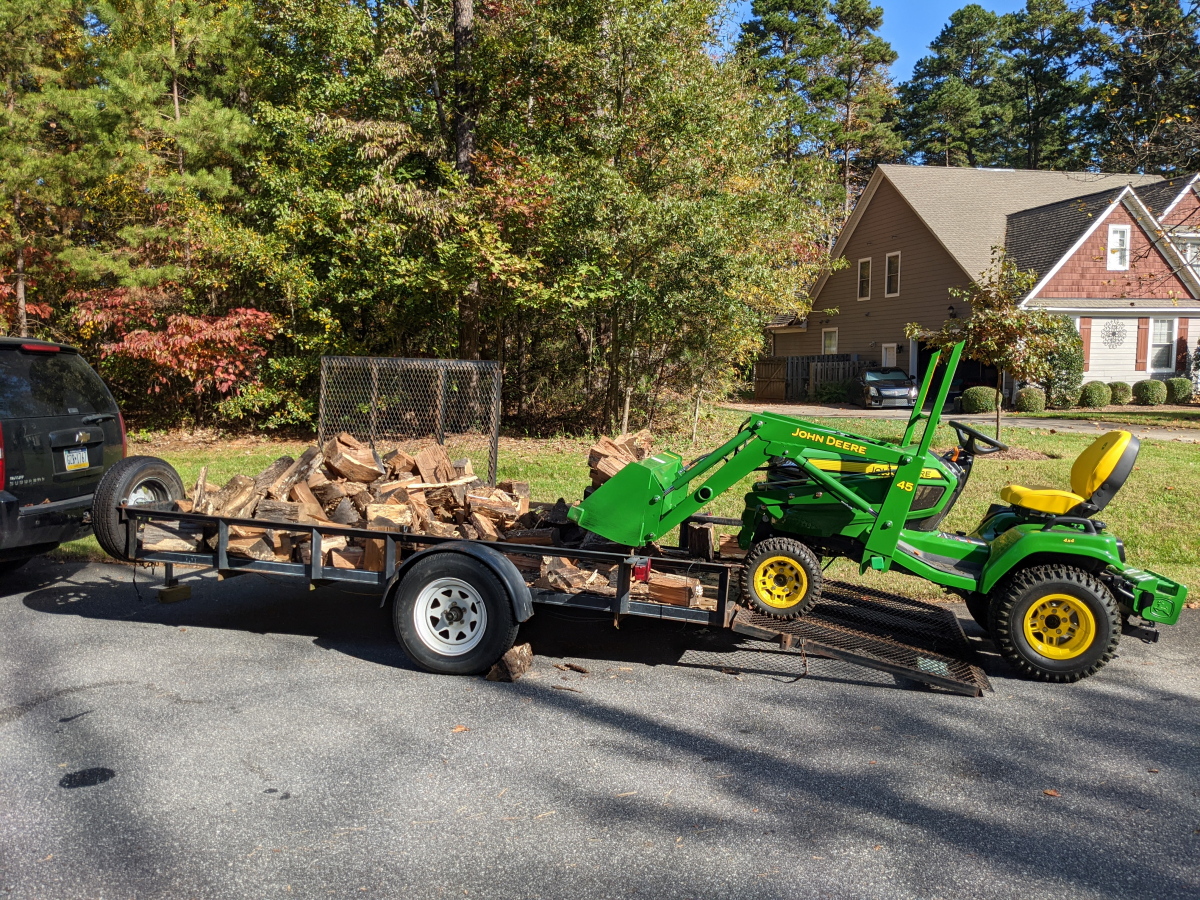
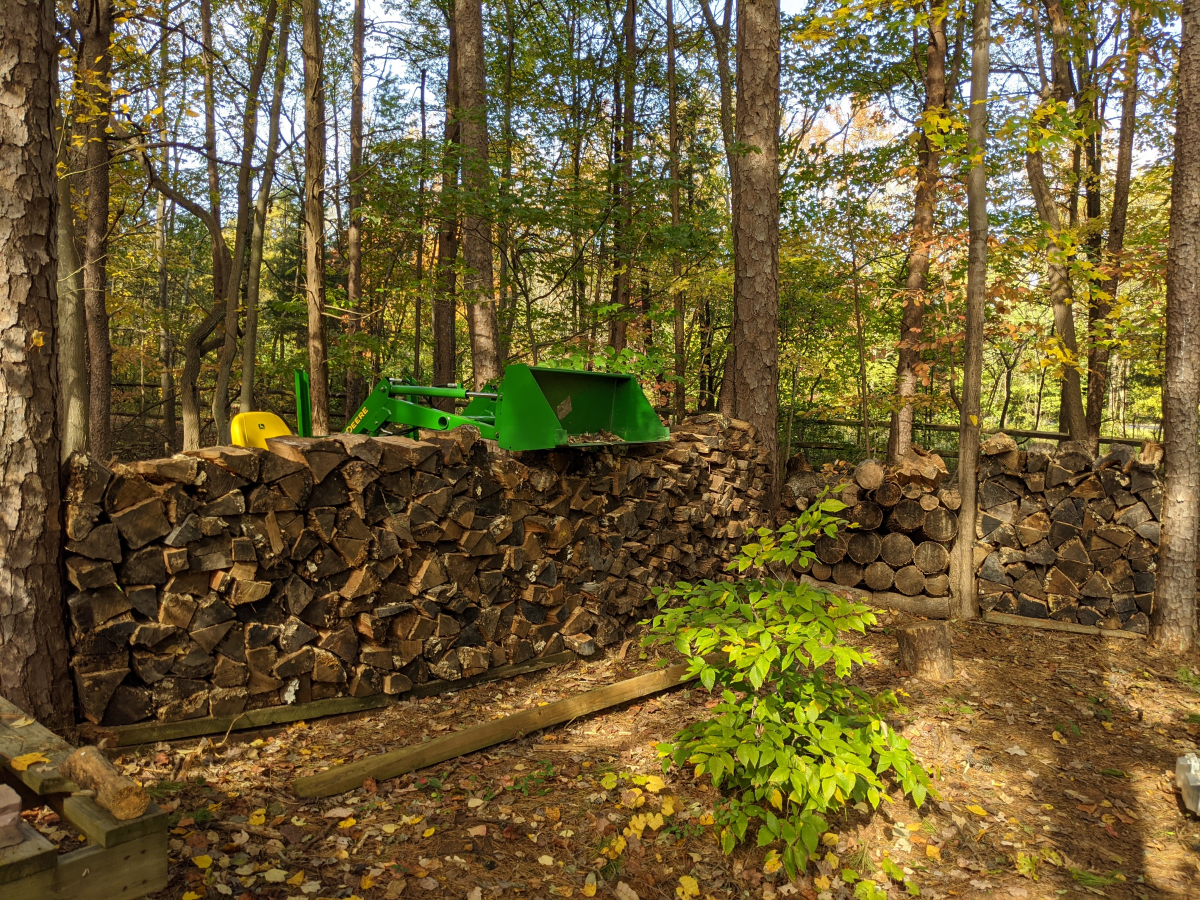
I won't stack higher than 4ft so it doesn't fall over so then moved onto another smaller spot. Thankfully the loader could lift above it and I didn't have to carry it all the way around.
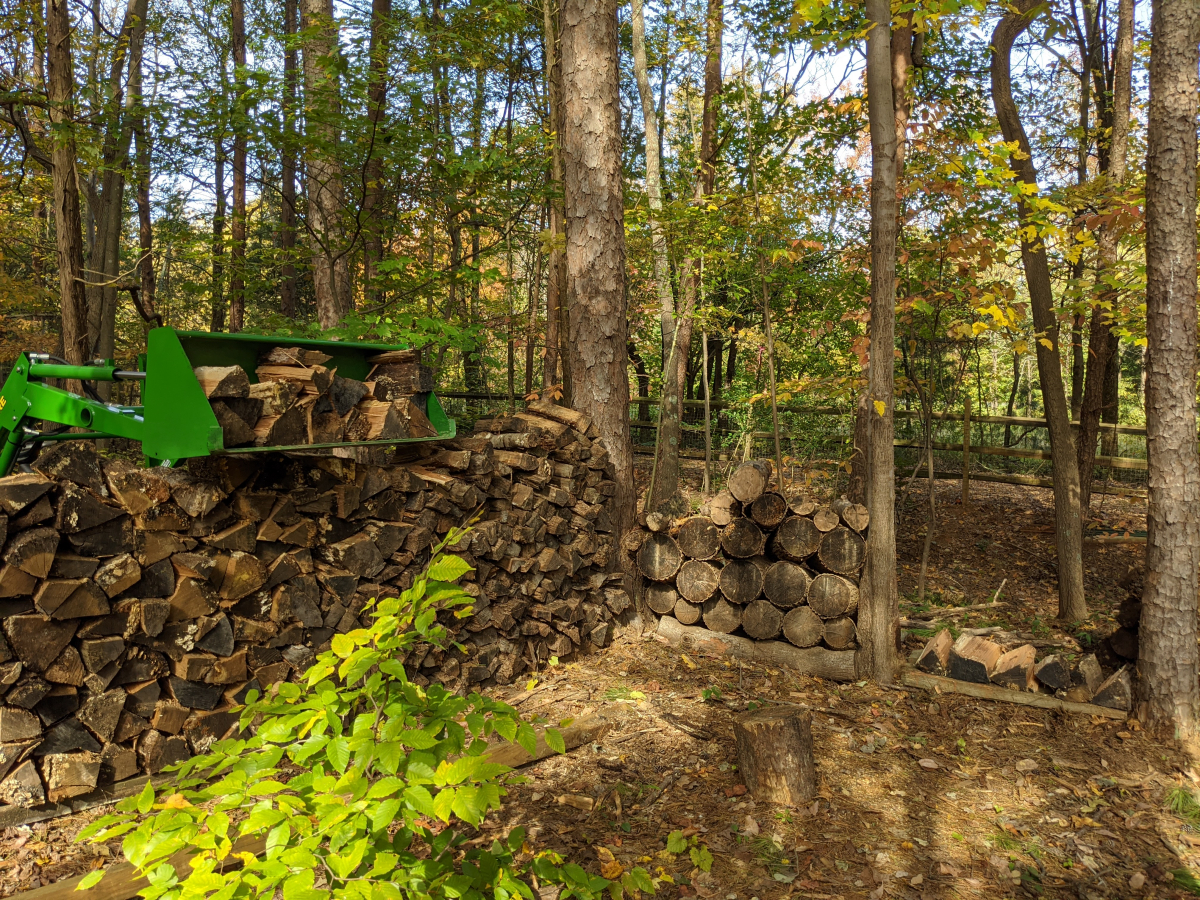
Nice and restocked for some fires this fall/winter outside. Might have him bring me one more trailer.
Then got to go play in the dirt.
Covered the large mud puddles with a tarp.

Was about 2.5 cubic yards. Had it all up in about 14 trips.
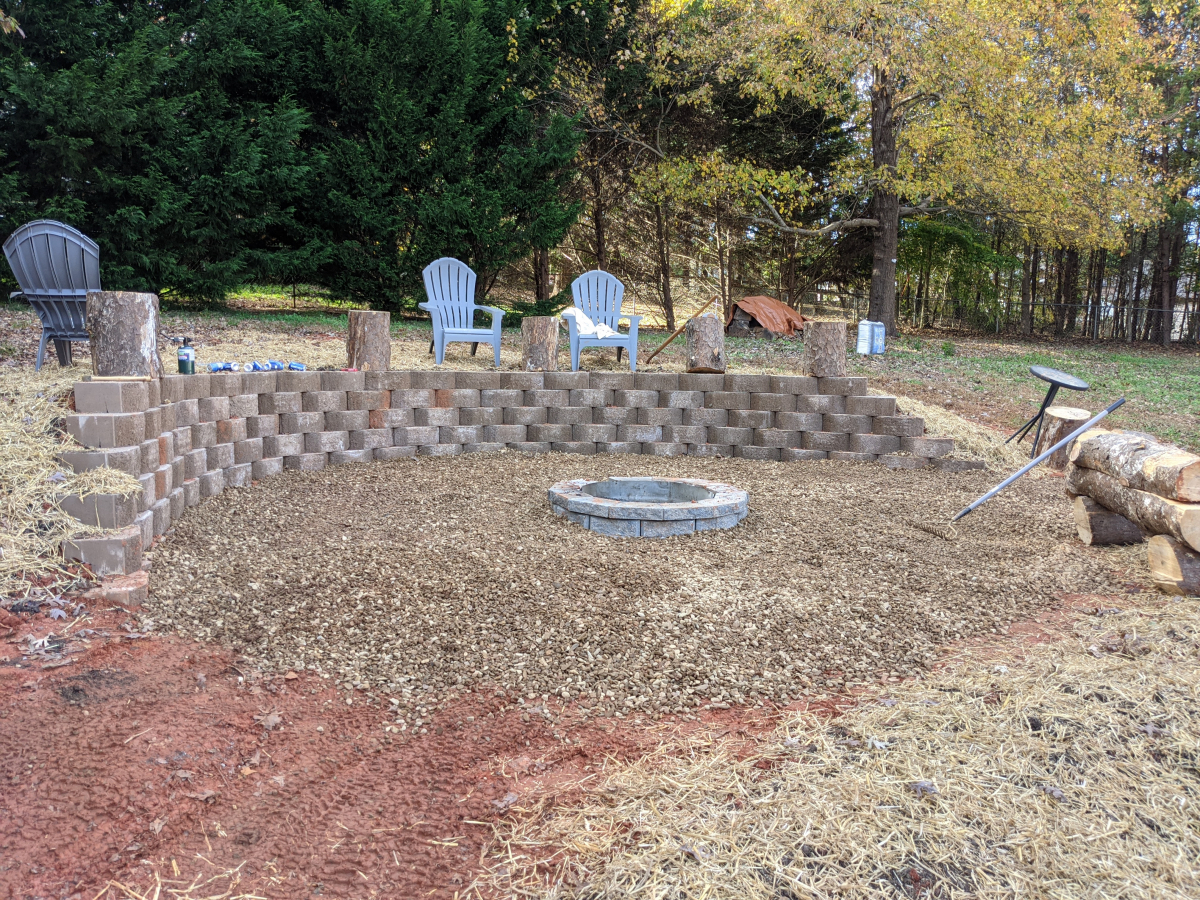
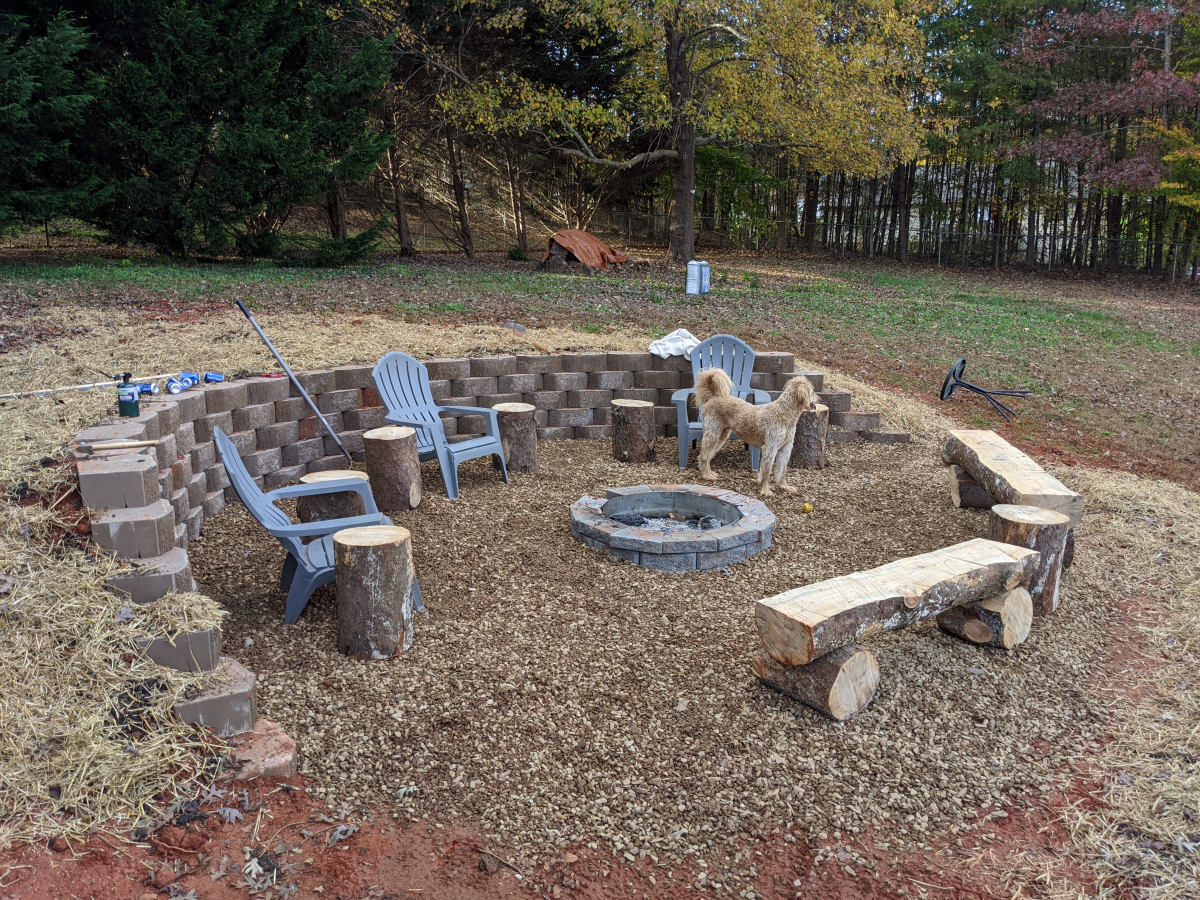
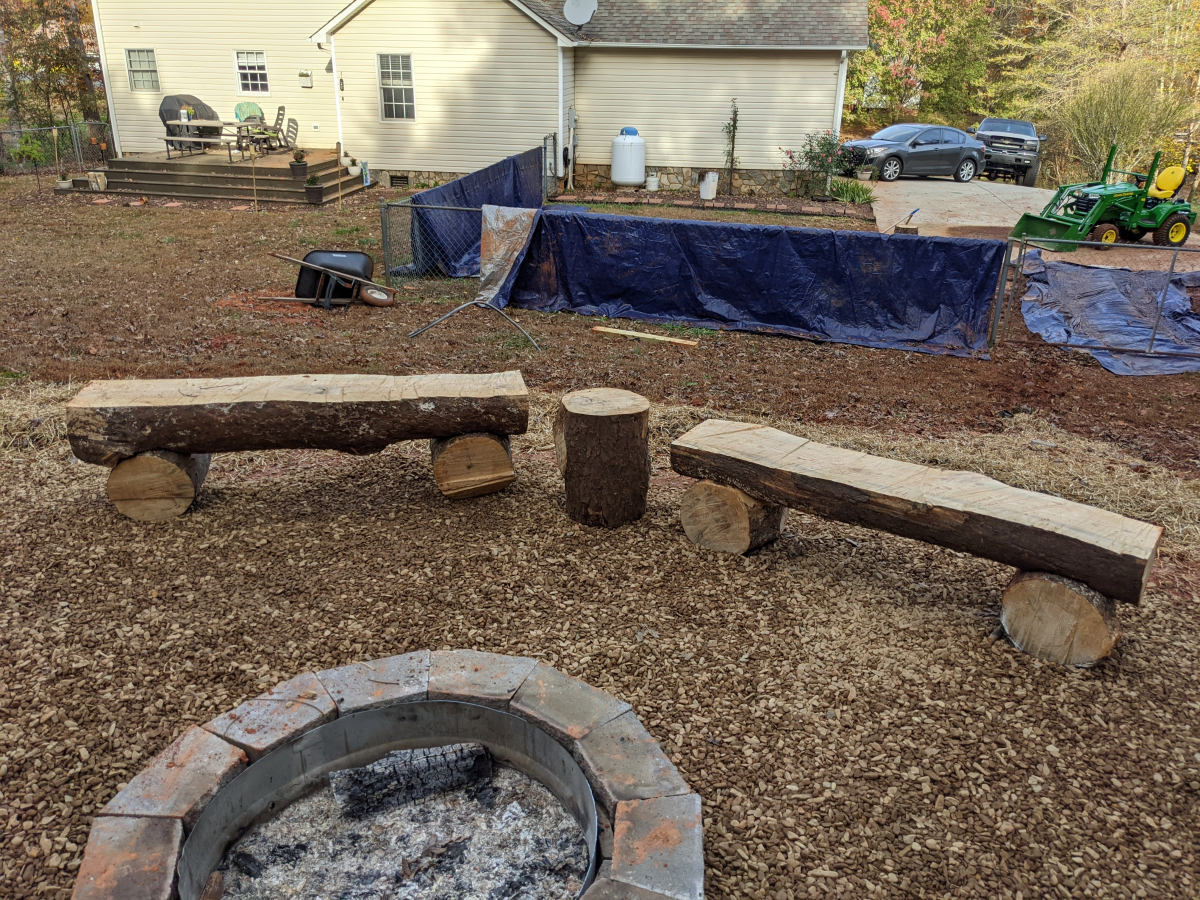
Log benches I cut with a chainsaw for him.
Liked this picture but it showed me I definitely need some upper work lights.
After three loads I gave up in the dark. I hate having to stop work at only 6pm. Started back up the next morning but man the loader is a time saver.
I won't stack higher than 4ft so it doesn't fall over so then moved onto another smaller spot. Thankfully the loader could lift above it and I didn't have to carry it all the way around.
Nice and restocked for some fires this fall/winter outside. Might have him bring me one more trailer.
Then got to go play in the dirt.
Covered the large mud puddles with a tarp.
Was about 2.5 cubic yards. Had it all up in about 14 trips.
Log benches I cut with a chainsaw for him.
The following 4 users liked this post by CCColtsicehockey:
00TL-P3.2 (11-09-2020),
97BlackAckCL (11-09-2020),
civicdrivr (11-10-2020),
rockstar143 (11-11-2020)
The following users liked this post:
CCColtsicehockey (11-12-2020)
11-12-2020, 07:10 AM
#1212
Moderator
Regional Coordinator (Southeast)
Regional Coordinator (Southeast)
Thread Starter
Join Date: Dec 2003
Location: Mooresville, NC
Age: 38
Posts: 43,563
Received 3,763 Likes
on
2,538 Posts
Thanks. I guess it just carried over from how I used to do detailed install threads when those sections of the car forums were actually a thing people used.
11-18-2020, 09:36 AM
#1213
Moderator
Regional Coordinator (Southeast)
Regional Coordinator (Southeast)
Thread Starter
Join Date: Dec 2003
Location: Mooresville, NC
Age: 38
Posts: 43,563
Received 3,763 Likes
on
2,538 Posts
When I first bought my house the previous owners left this Rubbermaid storage cabinet on the side as well as two planter bets that they had used for a small vegetable garden. I left it figuring I might try to start my own at some point but it has been almost 5 years now and I haven't bothered with it. Decided I could use the storage out back to get my extra chairs for my firepit out of my shed. Excuse the overgrown lawn we had a lot of rain lately and was waiting for the grass to be dry enough to use the loader over it to pick this thing up.
At first, I thought if I tied the thing tight enough to the loader I could just pick it up standing up. The plastic design though gives too much to make that work and it just wanted to fall over.
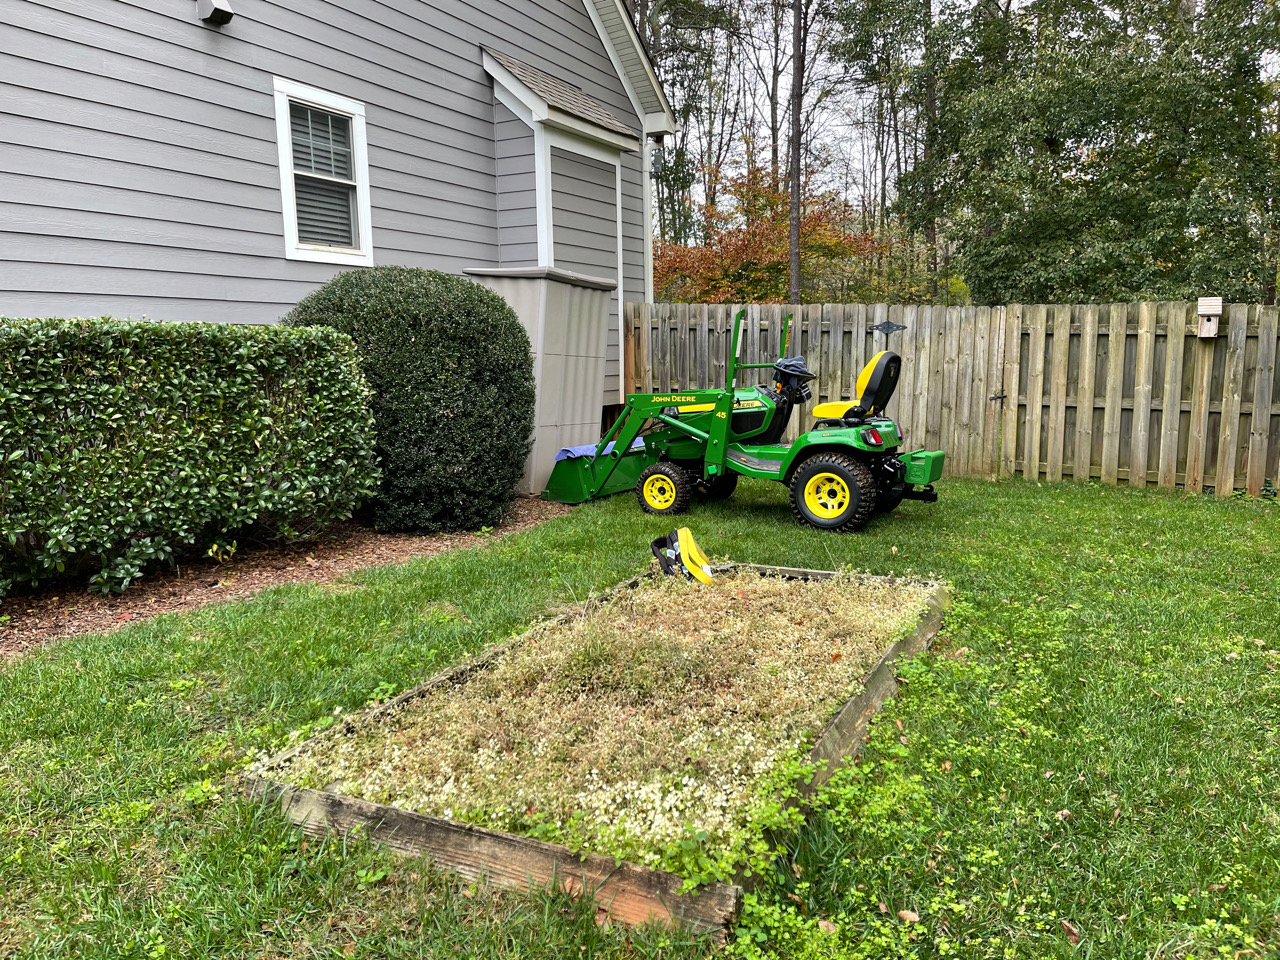
So ended up putting it on its side instead.
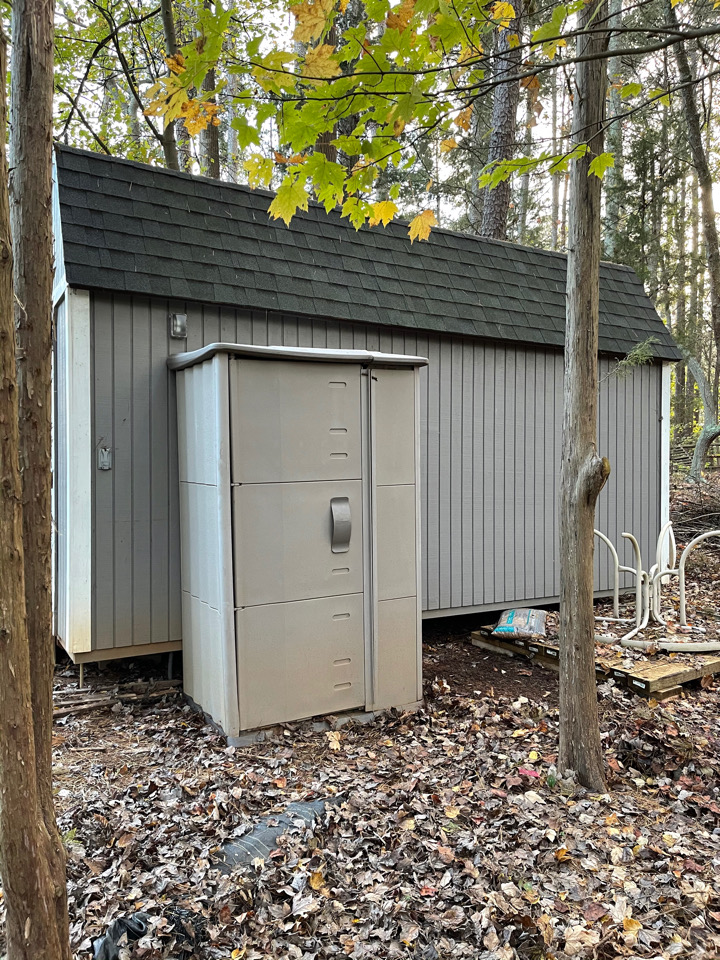
Long term I think I will actually move it to the backside of the shed so I don't have to look at it but I need to clear a path to back there first.
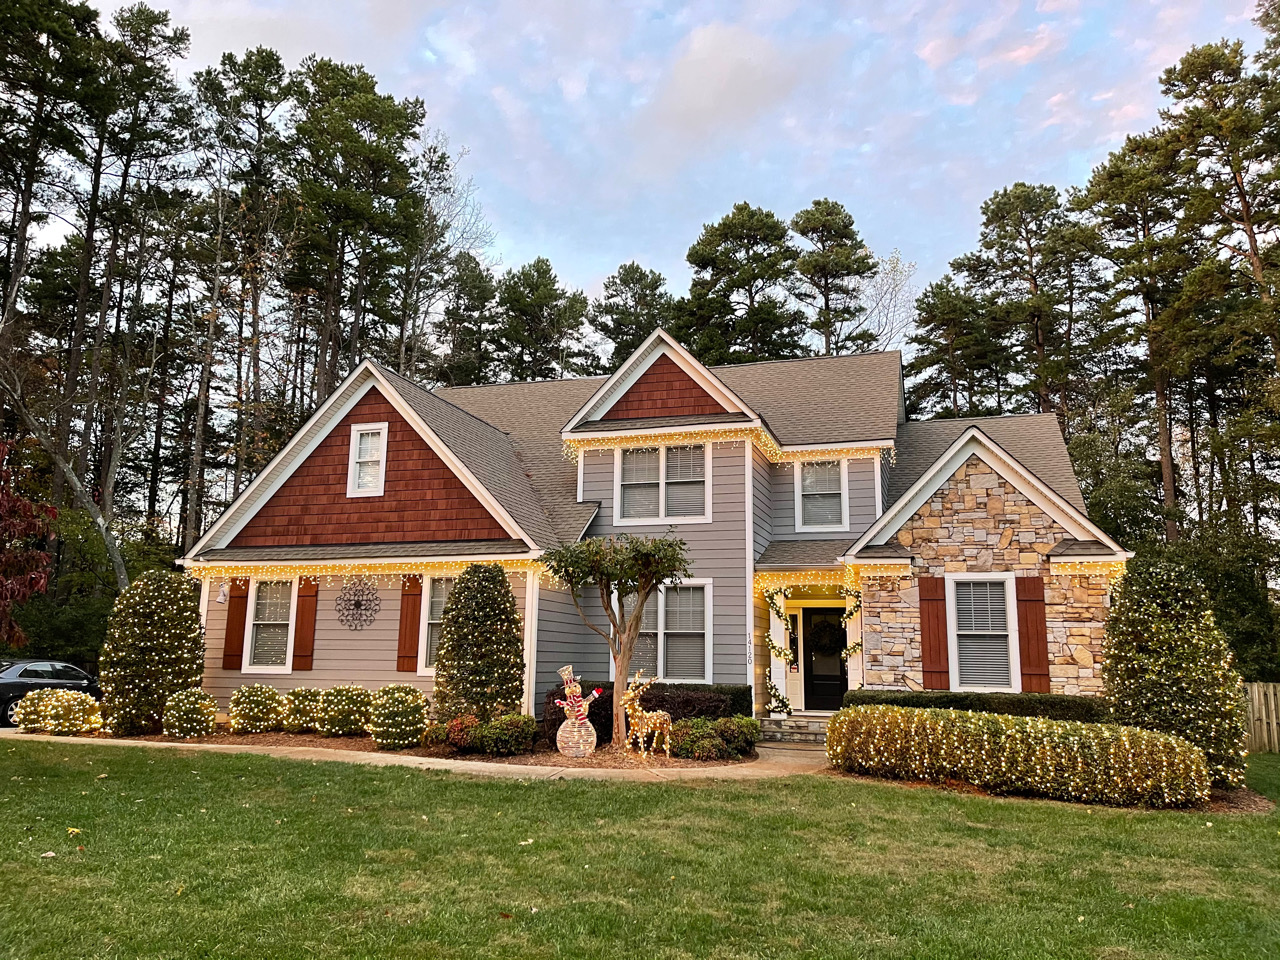
The big project for the weekend was getting all the Christmas lights up.
Love fall when the weeds die and the grass gets strong. You get much better striping when mowing.
At first, I thought if I tied the thing tight enough to the loader I could just pick it up standing up. The plastic design though gives too much to make that work and it just wanted to fall over.
So ended up putting it on its side instead.
Long term I think I will actually move it to the backside of the shed so I don't have to look at it but I need to clear a path to back there first.
The big project for the weekend was getting all the Christmas lights up.
Love fall when the weeds die and the grass gets strong. You get much better striping when mowing.
The following 2 users liked this post by CCColtsicehockey:
00TL-P3.2 (11-18-2020),
civicdrivr (11-23-2020)
11-18-2020, 10:10 AM
#1214
Ex-OEM King

Lol, you're still mowing? We're well past that here, now on to all the weeds are dead because the ground is covered in snow lol.
Though that's changing today as the high is in the 50's.
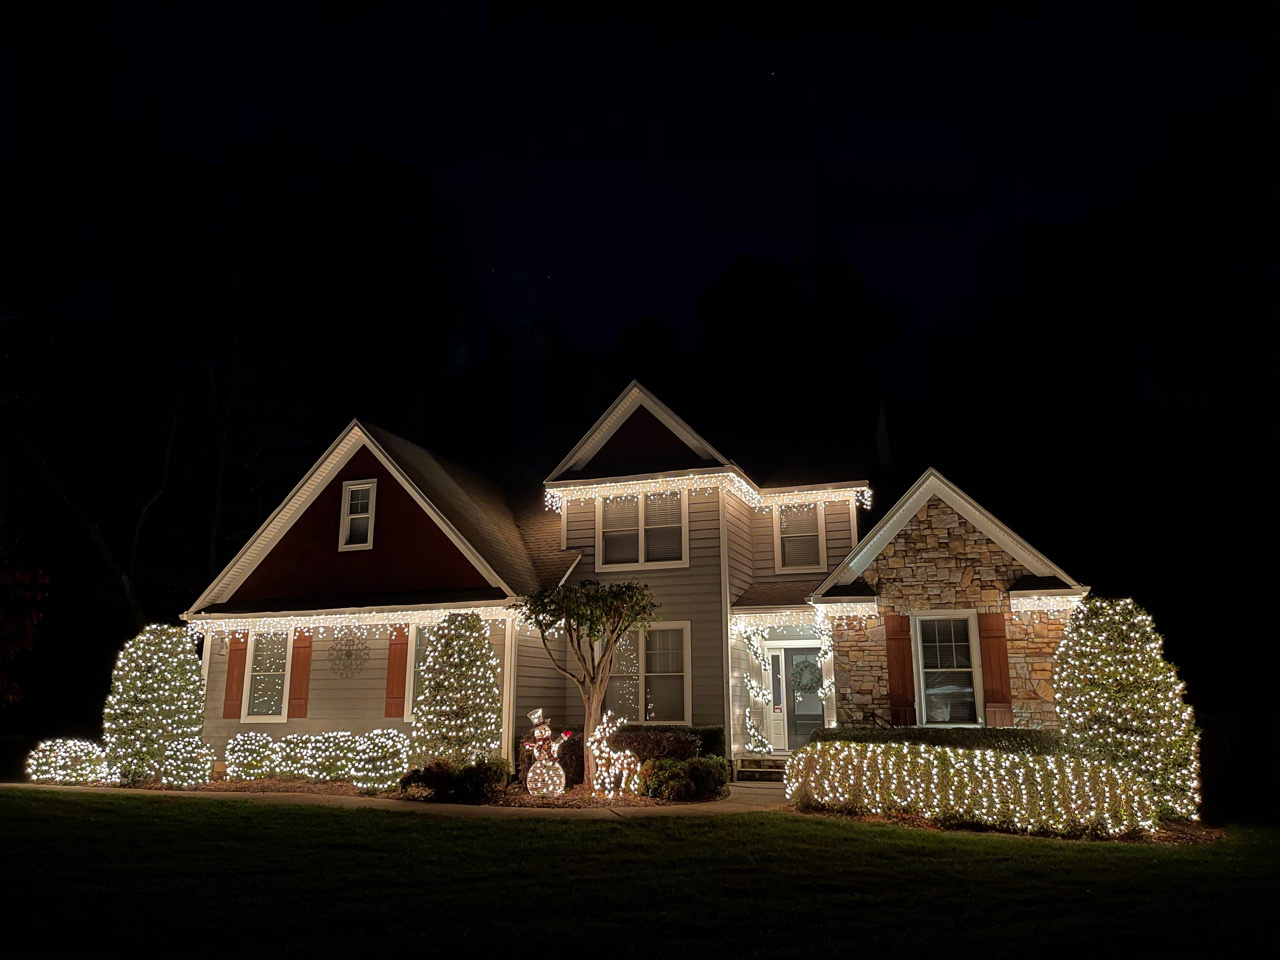
That's one epic light display though, looks awesome!
Though that's changing today as the high is in the 50's.
That's one epic light display though, looks awesome!
The following users liked this post:
CCColtsicehockey (11-18-2020)
11-18-2020, 10:28 AM
#1215
Moderator
Regional Coordinator (Southeast)
Regional Coordinator (Southeast)
Thread Starter
Join Date: Dec 2003
Location: Mooresville, NC
Age: 38
Posts: 43,563
Received 3,763 Likes
on
2,538 Posts
Thanks. Try and make it a little bigger each year. The snowman is new but still thinking of adding some more. Up to 6850 lights right now. Going to have to run an extension cord under the garage door as I need a third circuit to pull from. Figure using one of my 2 - 20amp dedicated workshop circuit is a good place to pull from. Even if I am using it during the day for other things I won't be at night. Going to add a lighted wreath on the garage and some lights on the tree trunk behind the snowman and deer. Have also thought maybe next year doing the peaks of the roof but not sure my extension ladder is long enough for that.
11-18-2020, 10:32 AM
#1216
Senior Moderator
Regional Coordinator
(Mid-Atlantic)
Regional Coordinator
(Mid-Atlantic)
iTrader: (6)
I love the friend's fire pit setup, reminds me of what I built at my last house. And nice use of that outdoor shelter for the chairs, better than just throwing it away.
The following users liked this post:
CCColtsicehockey (11-18-2020)
11-23-2020, 08:11 AM
#1217
Moderator
Regional Coordinator (Southeast)
Regional Coordinator (Southeast)
Thread Starter
Join Date: Dec 2003
Location: Mooresville, NC
Age: 38
Posts: 43,563
Received 3,763 Likes
on
2,538 Posts
So finally did my redesign of the interior of my shed this weekend. I originally thought I could knock it out in a day but it ended up taking two days to get it all completed with some football watching taking place each day as well.
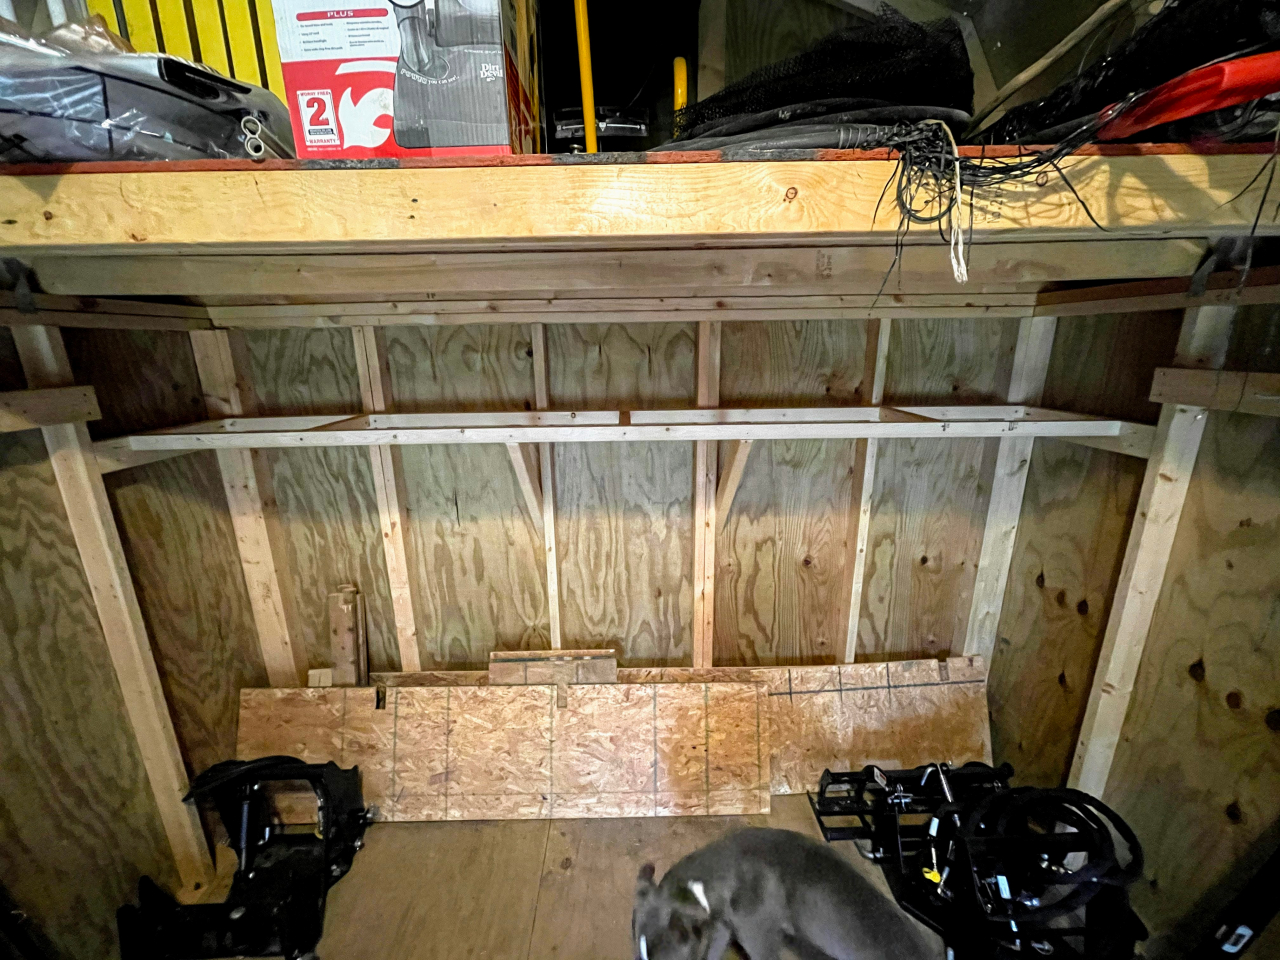
The shed hasn't been this empty since I bought the house.
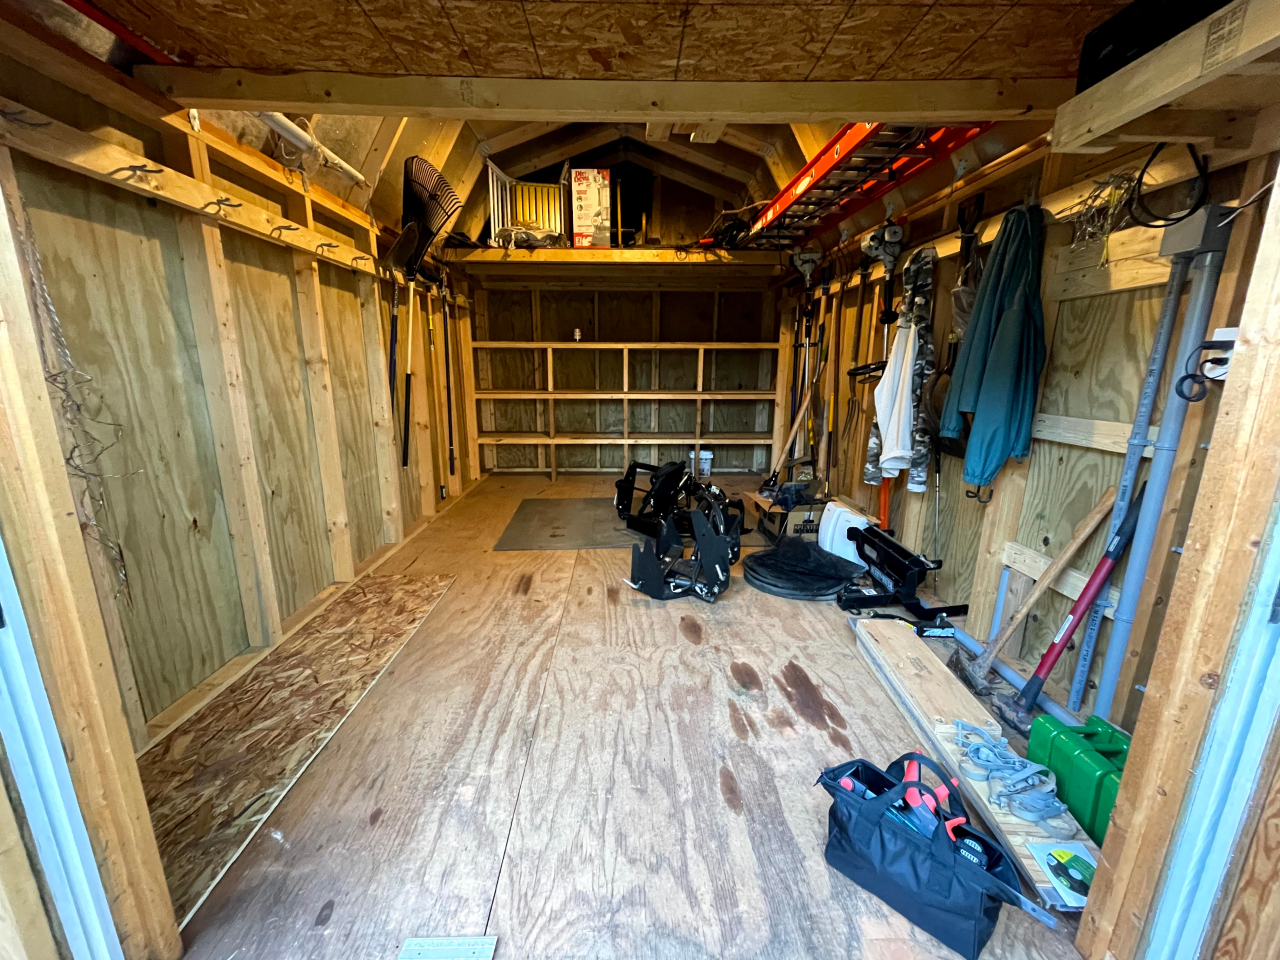
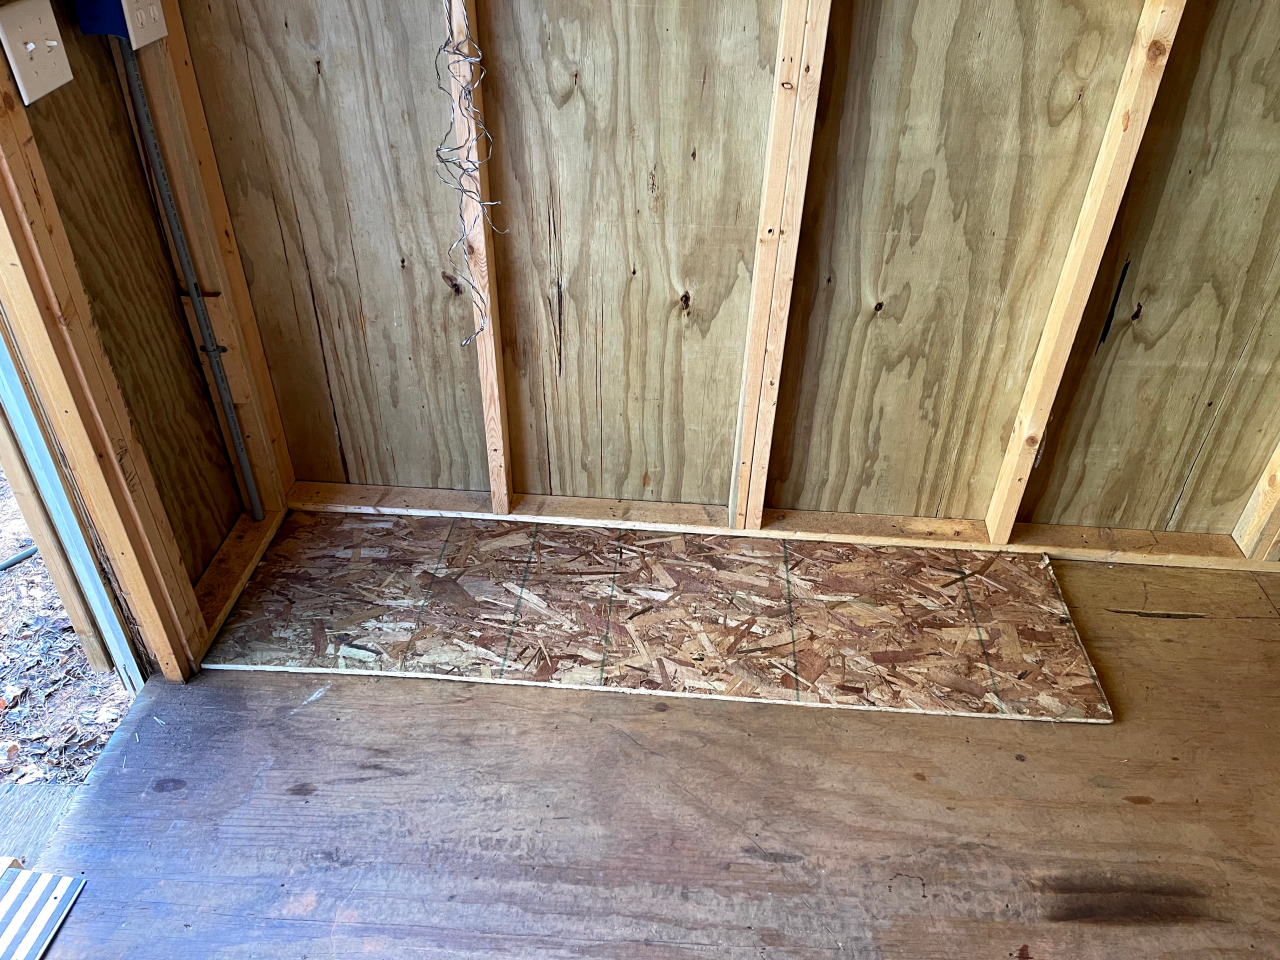
This sheet of plywood was wedge in one of the walls as I guess leftovers from when the previous owner build the shelves. Turned out to be the exact almost to what I was building my new shelves. So it gave me a good last-minute look as to what I would be dealing with footprint wise.
Tear down. The entire thing was built with screws so I was able to reuse everything which was really nice.
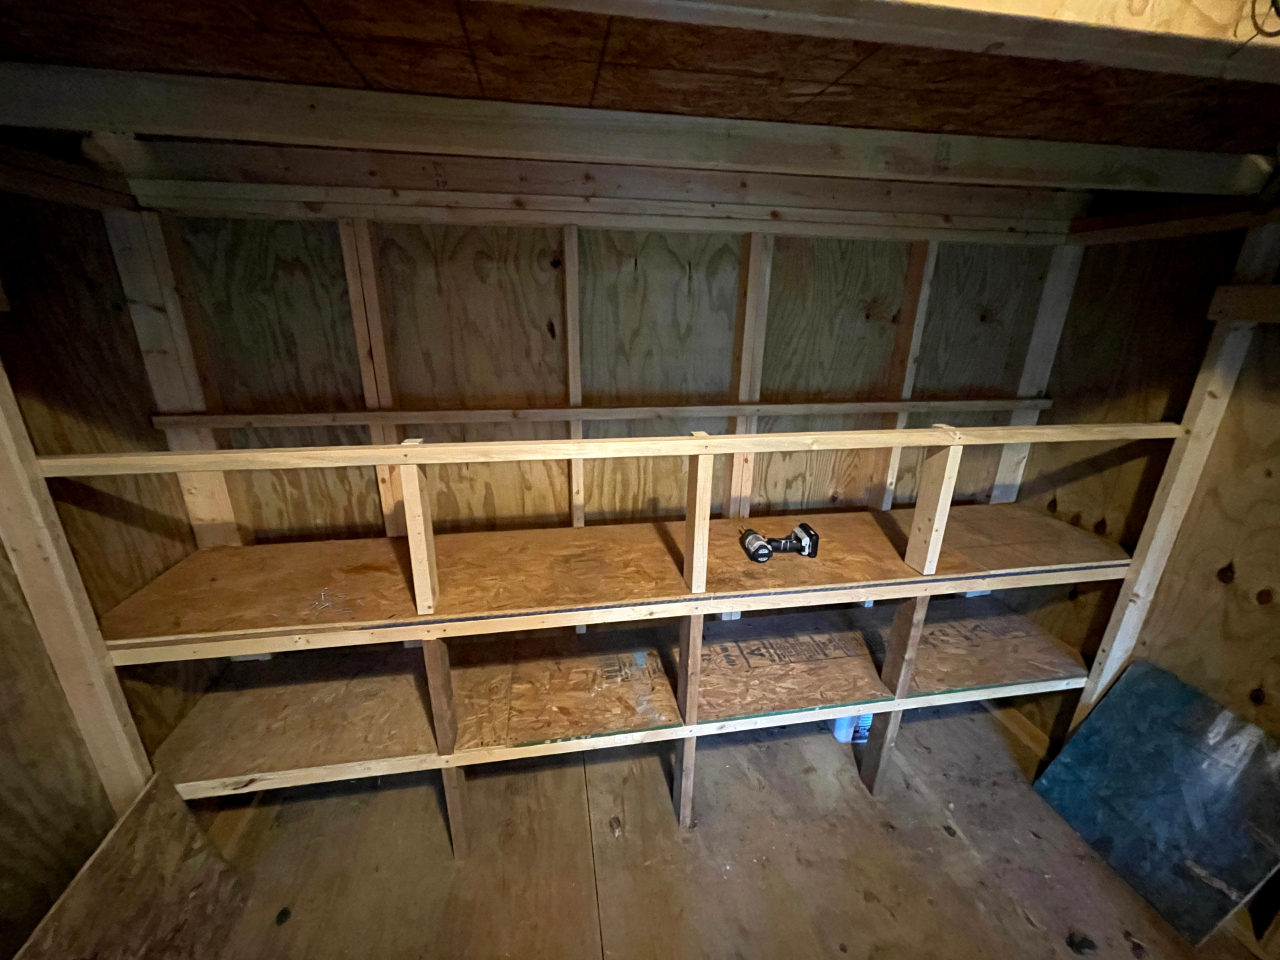
For only being 20in deep shelves it really opened the space up.
This was actually take two of the lower build. I was going to build each layer separate but then realized it left the bottom legs really weak so I made the first two shelves a single support beam.
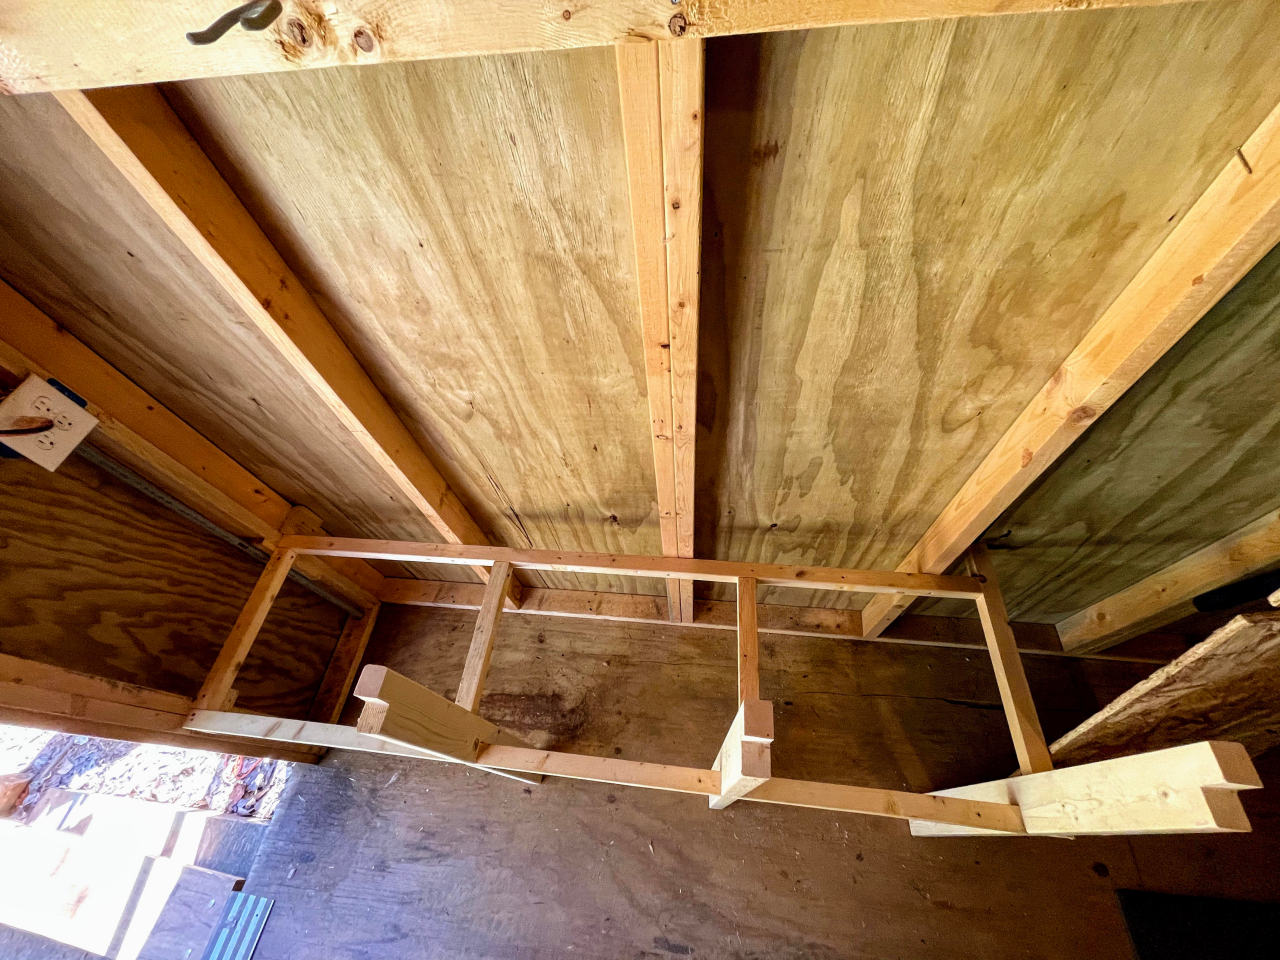
These are so overbuilt at this point I used them to climb up to the loft to retrieve something.
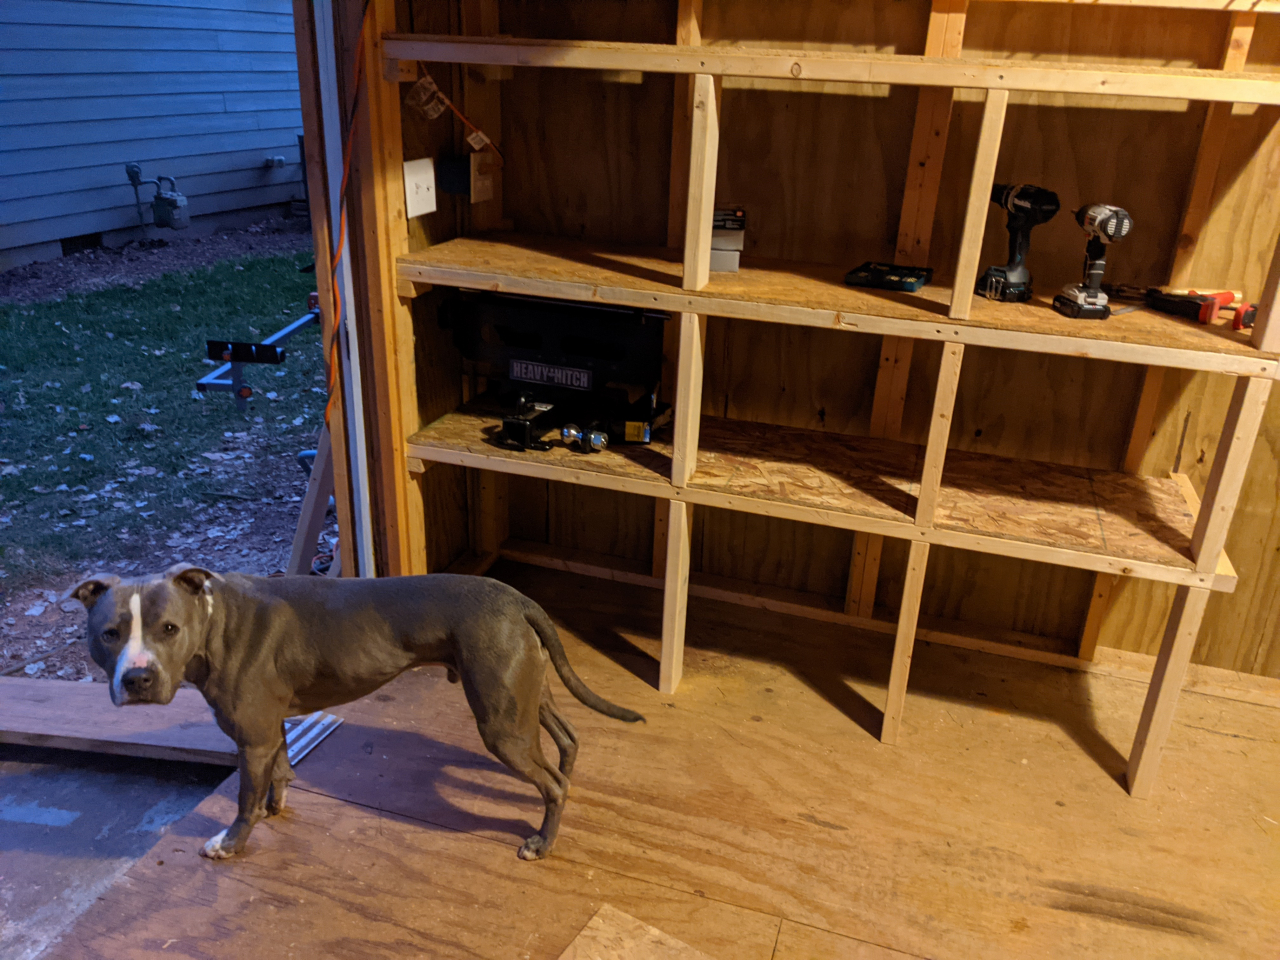
All complete. Enzo approves and also wants me to know it is past his dinner time.
Hadn't really sketched this other shelf up much so had to figure out the exact size that would allow me to fit everything I wanted on it as well as fit the cart on end in the corner.
With the middle supports it should be able to hold a lot more than I will probably ever put on it.
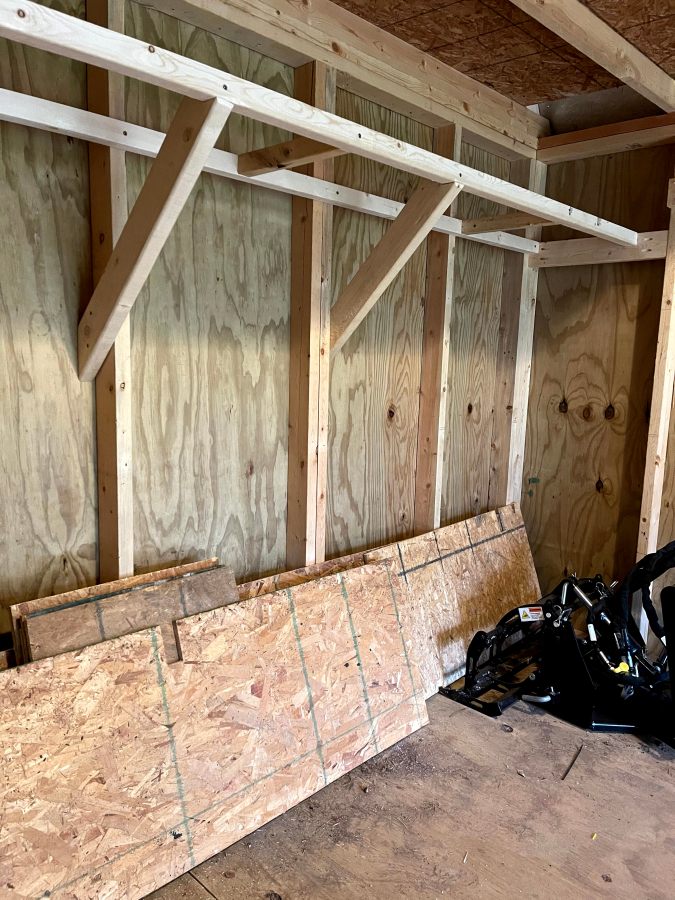
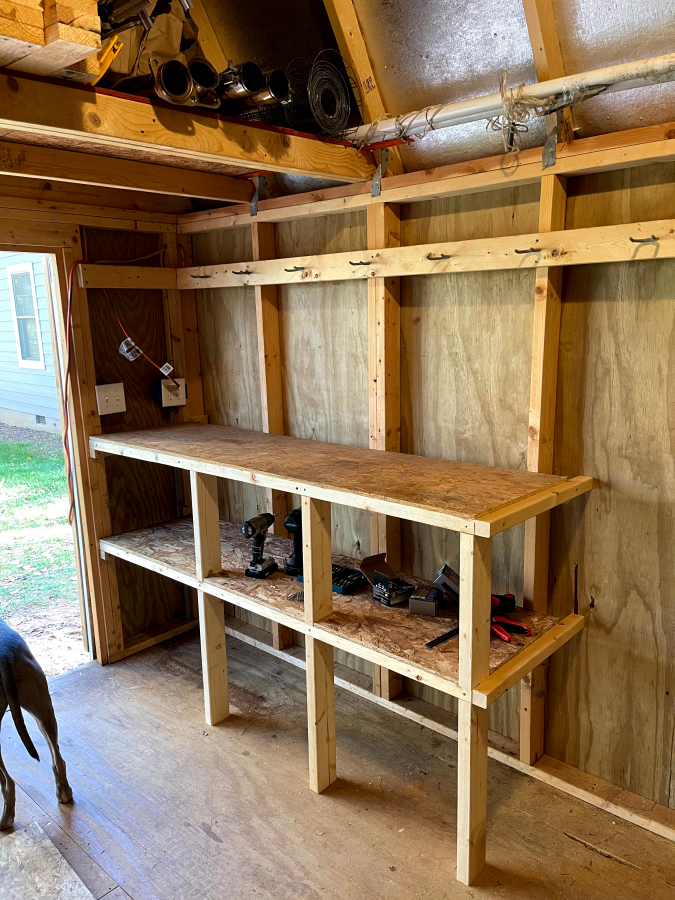
Trying to make the best use of all the space figured a little between loft joists shelf could keep things off the regular shelves.

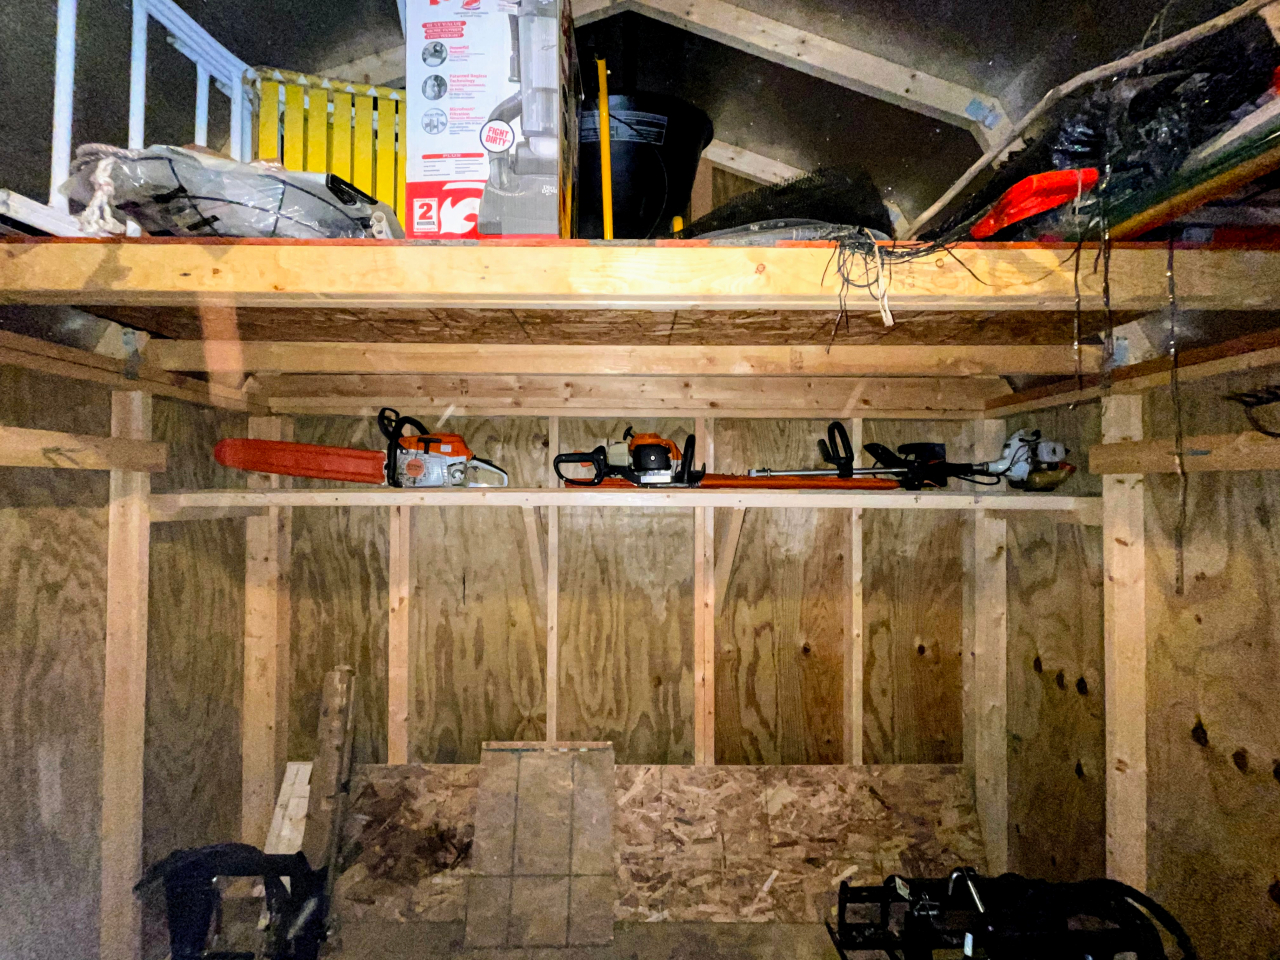
Got everything that was on the original shelves back on the new shelves. Between the two sets, I honestly didn't lose any shelf space as the new ones are 3ft shorter than the old set but by building one on the back wall raised up it makes up for it. Now that they are built though I need to do some serious organizing of the stuff on the shelves.
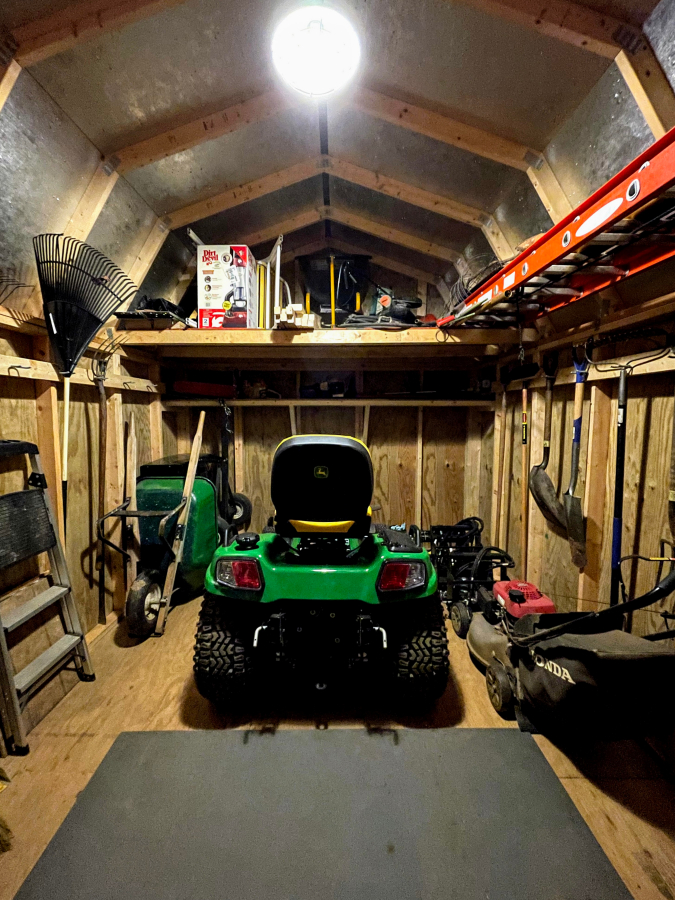
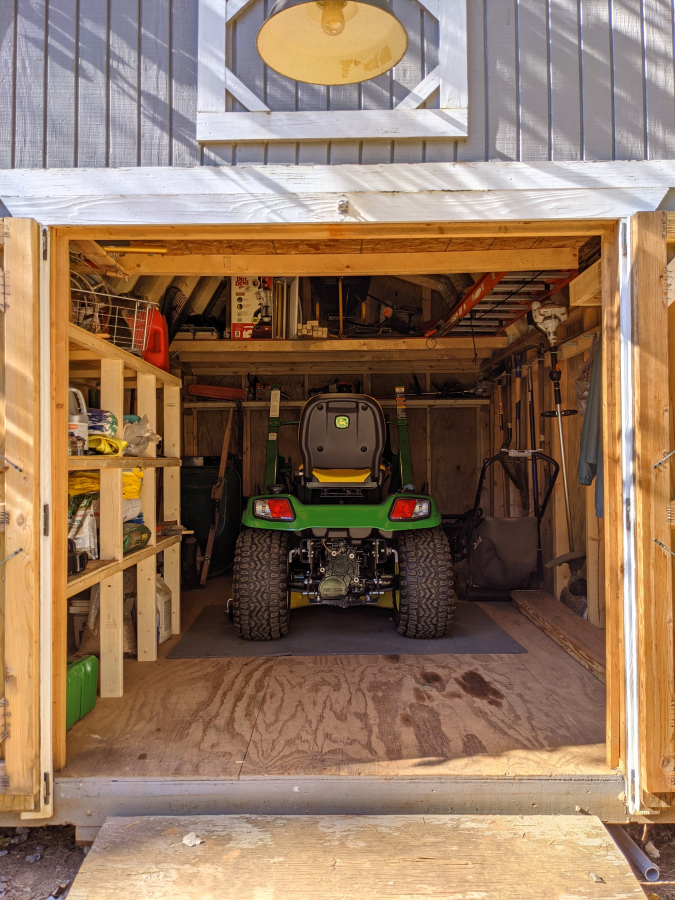
It really did open up the space. This is everything but the loader. It was too dark by the time I cleaned up to both trying to put the loader on at night. Will grab some pictures once it is all in.
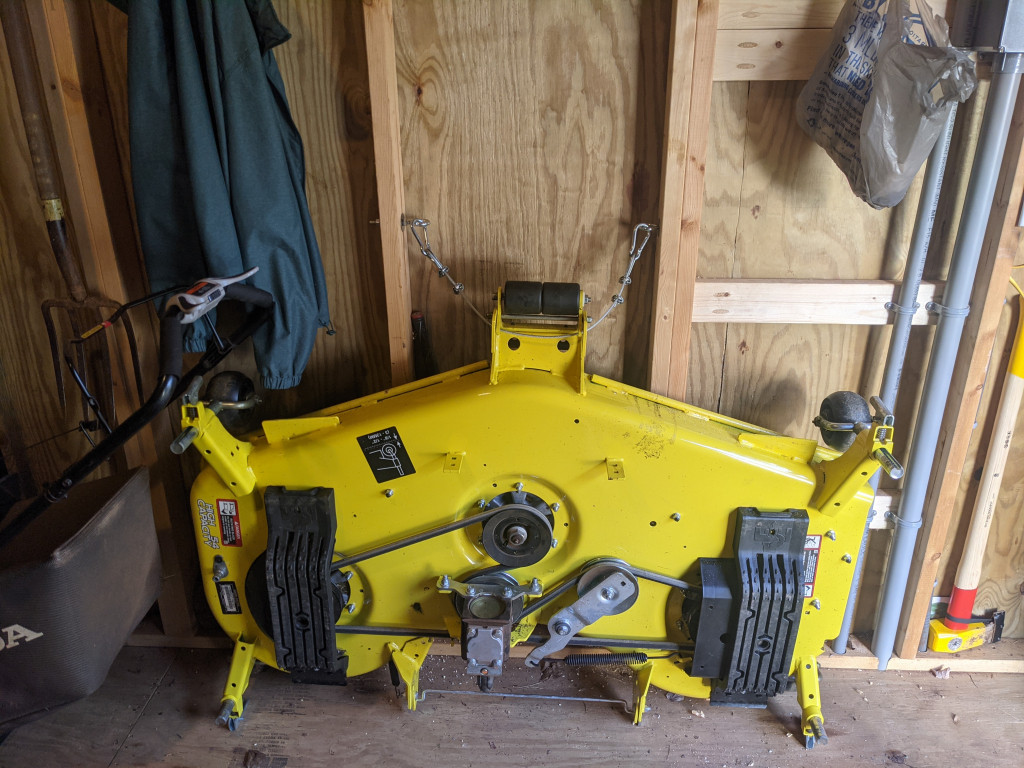
Still need to modify the bottom of the door and build a new longer ramp so I can stop using the ramps I have to take in and out each time and also need to make a steel cable to keep the mower deck from falling over when it is standing up against the side wall when it is off the tractor. Otherwise, I think I can check off this project.
The shed hasn't been this empty since I bought the house.
This sheet of plywood was wedge in one of the walls as I guess leftovers from when the previous owner build the shelves. Turned out to be the exact almost to what I was building my new shelves. So it gave me a good last-minute look as to what I would be dealing with footprint wise.
Tear down. The entire thing was built with screws so I was able to reuse everything which was really nice.
For only being 20in deep shelves it really opened the space up.
This was actually take two of the lower build. I was going to build each layer separate but then realized it left the bottom legs really weak so I made the first two shelves a single support beam.
These are so overbuilt at this point I used them to climb up to the loft to retrieve something.
All complete. Enzo approves and also wants me to know it is past his dinner time.
Hadn't really sketched this other shelf up much so had to figure out the exact size that would allow me to fit everything I wanted on it as well as fit the cart on end in the corner.
With the middle supports it should be able to hold a lot more than I will probably ever put on it.
Trying to make the best use of all the space figured a little between loft joists shelf could keep things off the regular shelves.
Got everything that was on the original shelves back on the new shelves. Between the two sets, I honestly didn't lose any shelf space as the new ones are 3ft shorter than the old set but by building one on the back wall raised up it makes up for it. Now that they are built though I need to do some serious organizing of the stuff on the shelves.
It really did open up the space. This is everything but the loader. It was too dark by the time I cleaned up to both trying to put the loader on at night. Will grab some pictures once it is all in.
Still need to modify the bottom of the door and build a new longer ramp so I can stop using the ramps I have to take in and out each time and also need to make a steel cable to keep the mower deck from falling over when it is standing up against the side wall when it is off the tractor. Otherwise, I think I can check off this project.
The following 3 users liked this post by CCColtsicehockey:
11-24-2020, 07:39 AM
#1218
Moderator
Regional Coordinator (Southeast)
Regional Coordinator (Southeast)
Thread Starter
Join Date: Dec 2003
Location: Mooresville, NC
Age: 38
Posts: 43,563
Received 3,763 Likes
on
2,538 Posts
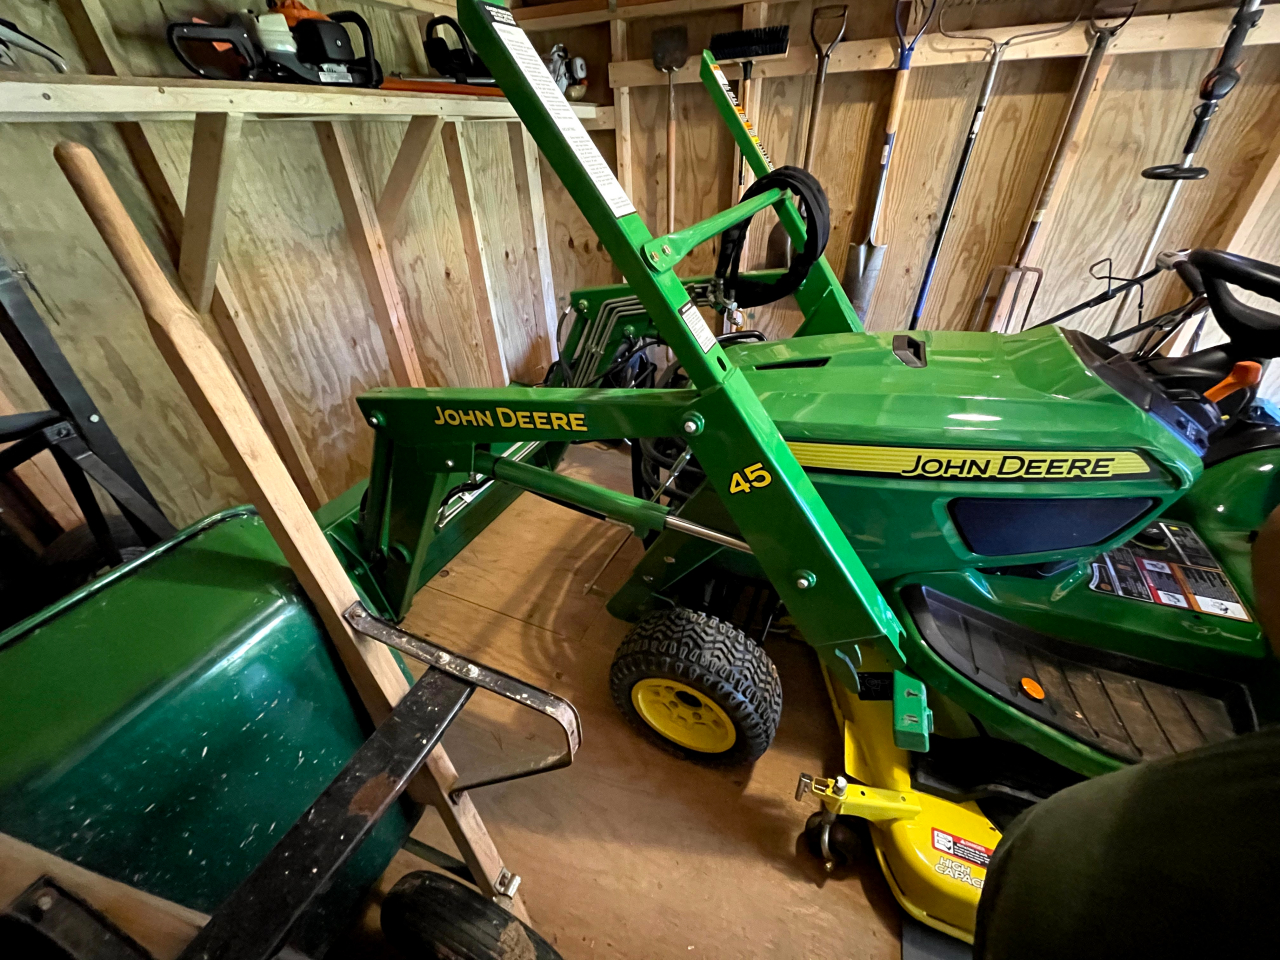
So yesterday over lunch I got the loader mounted and moved into the shed. It fits in there pretty well with everything. A bit cramped at the front but hopefully my organization layout is correct and those are things less used besides the chainsaw. Possible the chainsaw over time will get moved to the shelves inside the door.
The one thing I have yet to test is removing and reinstalling the deck inside the shed. I only have 9ft 4in behind the loader arms and that seems like it will be tight. Don't want to punch a hole in the remounting the deck with one of the arms. It would be nice if I could get the loader to take up even just like 6in less. Going to be getting some dollies to put it on and hope with the raised height I don't have to have the arms extended as far to get over the tires.
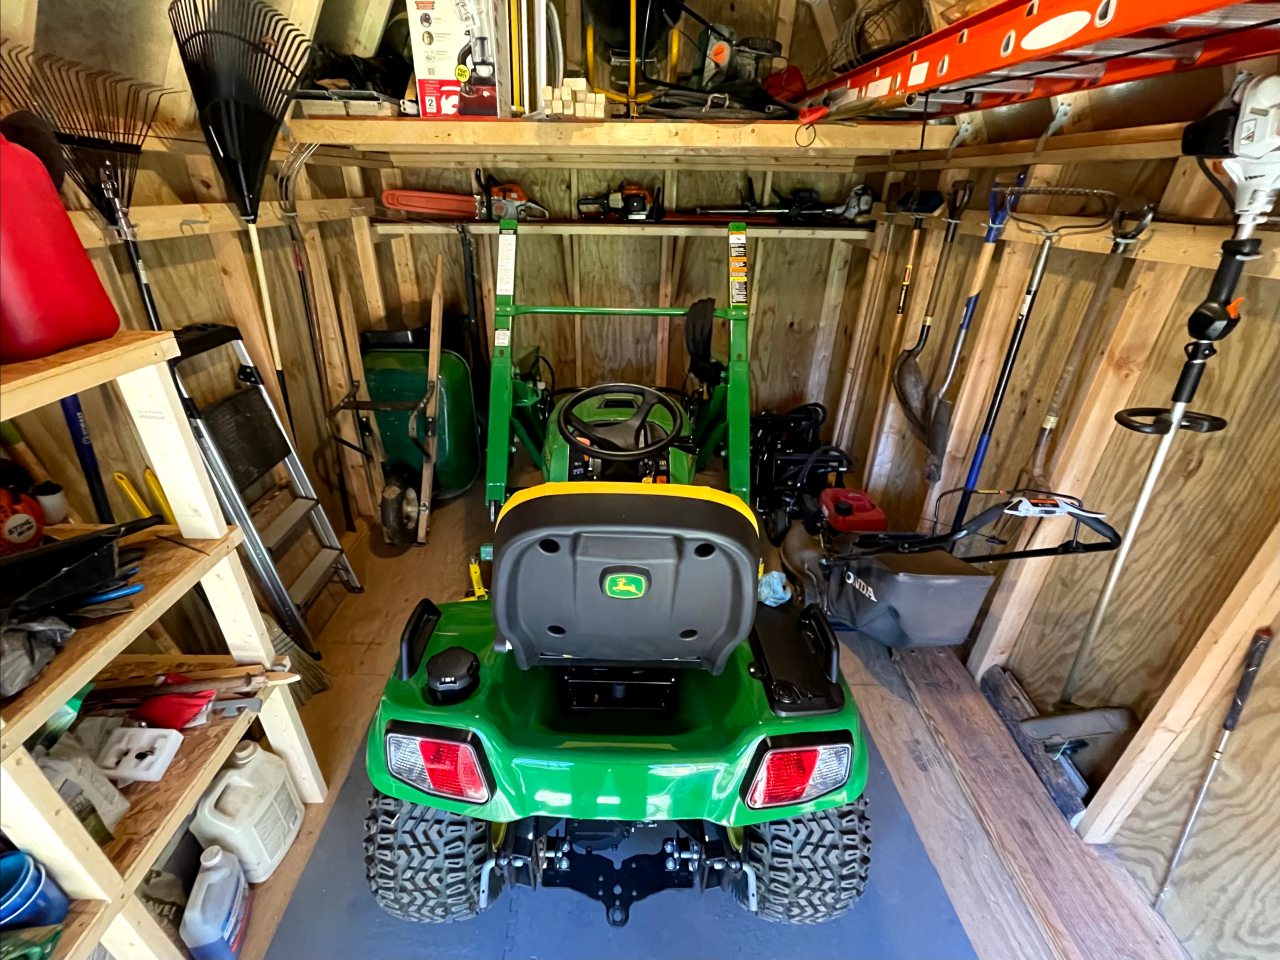

If it doesn't work that I can't get the deck off while in the shed with everything in the place it is I think the next plan is the take off the right end of the rear shelf and since I will be putting the loader on dollies then rotate it so it only sticks out 4ft instead. The grapple on a dolly can slide under it then. If it didn't have the tall verticals I could rotate it as is right now.
The one thing I have yet to test is removing and reinstalling the deck inside the shed. I only have 9ft 4in behind the loader arms and that seems like it will be tight. Don't want to punch a hole in the remounting the deck with one of the arms. It would be nice if I could get the loader to take up even just like 6in less. Going to be getting some dollies to put it on and hope with the raised height I don't have to have the arms extended as far to get over the tires.
If it doesn't work that I can't get the deck off while in the shed with everything in the place it is I think the next plan is the take off the right end of the rear shelf and since I will be putting the loader on dollies then rotate it so it only sticks out 4ft instead. The grapple on a dolly can slide under it then. If it didn't have the tall verticals I could rotate it as is right now.
The following users liked this post:
00TL-P3.2 (11-24-2020)
12-14-2020, 07:18 AM
#1219
Moderator
Regional Coordinator (Southeast)
Regional Coordinator (Southeast)
Thread Starter
Join Date: Dec 2003
Location: Mooresville, NC
Age: 38
Posts: 43,563
Received 3,763 Likes
on
2,538 Posts
So slowly getting rollers built for all the heavier pieces of equipment. The 54in blade I bought some ATV wheel rollers from harbor freight, the loader also is on harbor freight dollies, as well as the grapple and quick hitch. Had to add a middle support to that one.
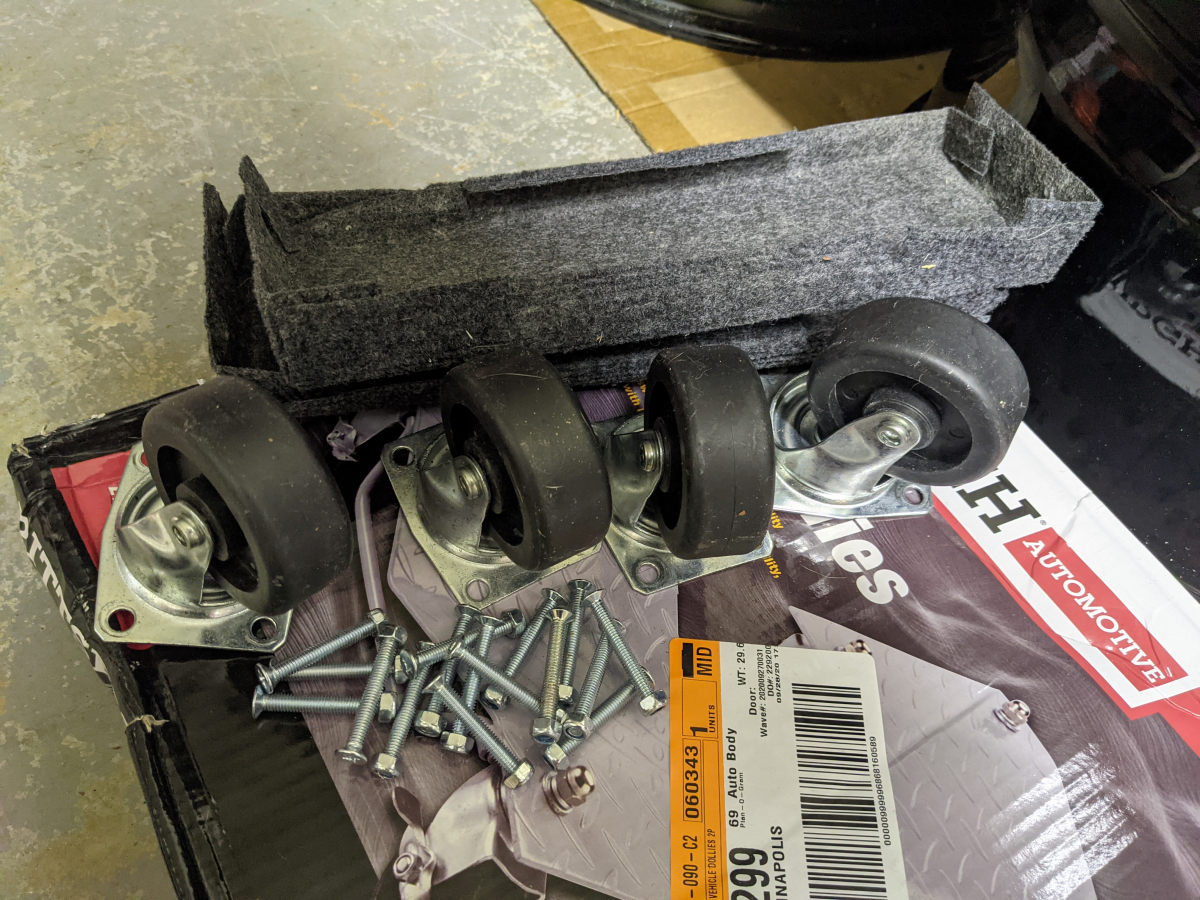
Bought another smaller dolly to tear the wheels off of to build my own box for my tractor weights. You can't buy 4 caster wheels for the price of the small dolly at harbor freight.

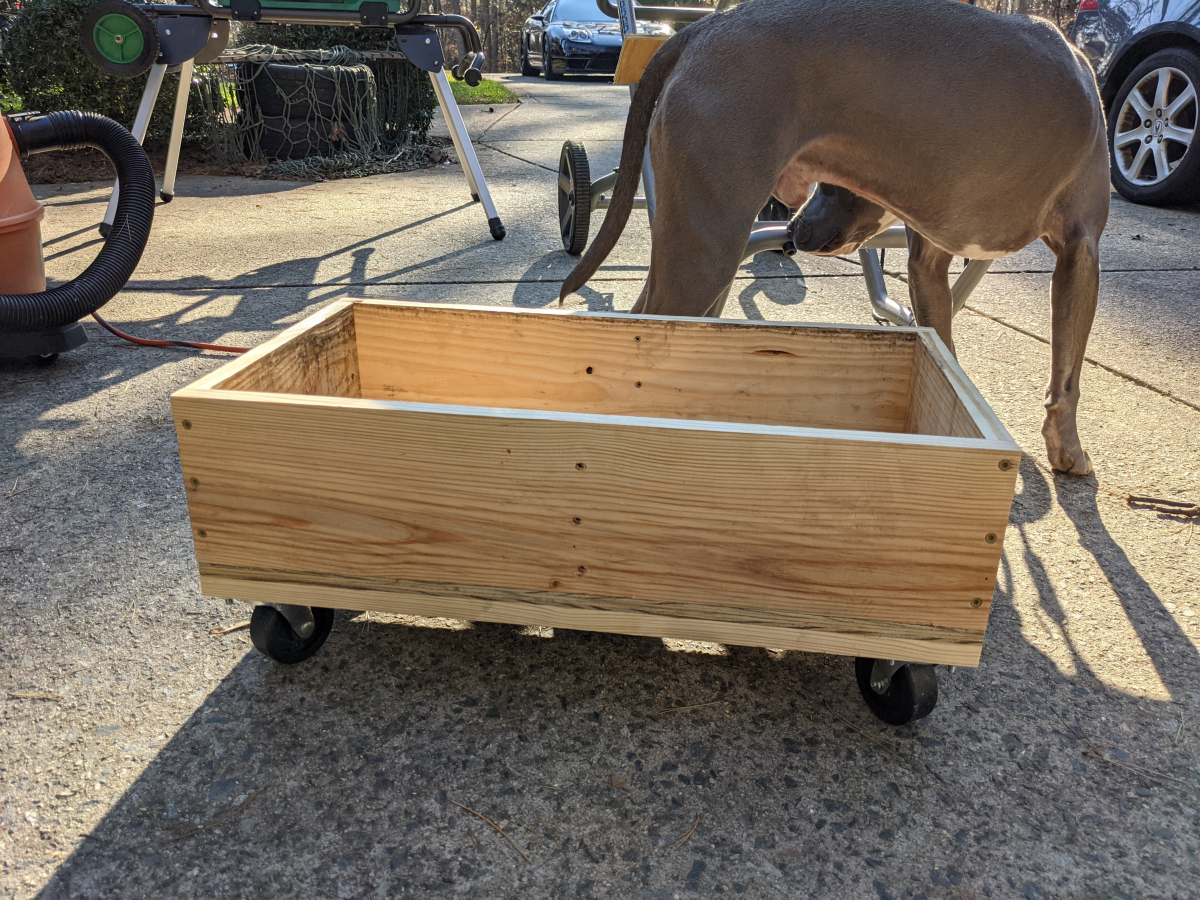
Built my own platform out of 3/8in plywood reinforced with some 1x4 and some pallet wood I had for the sides.
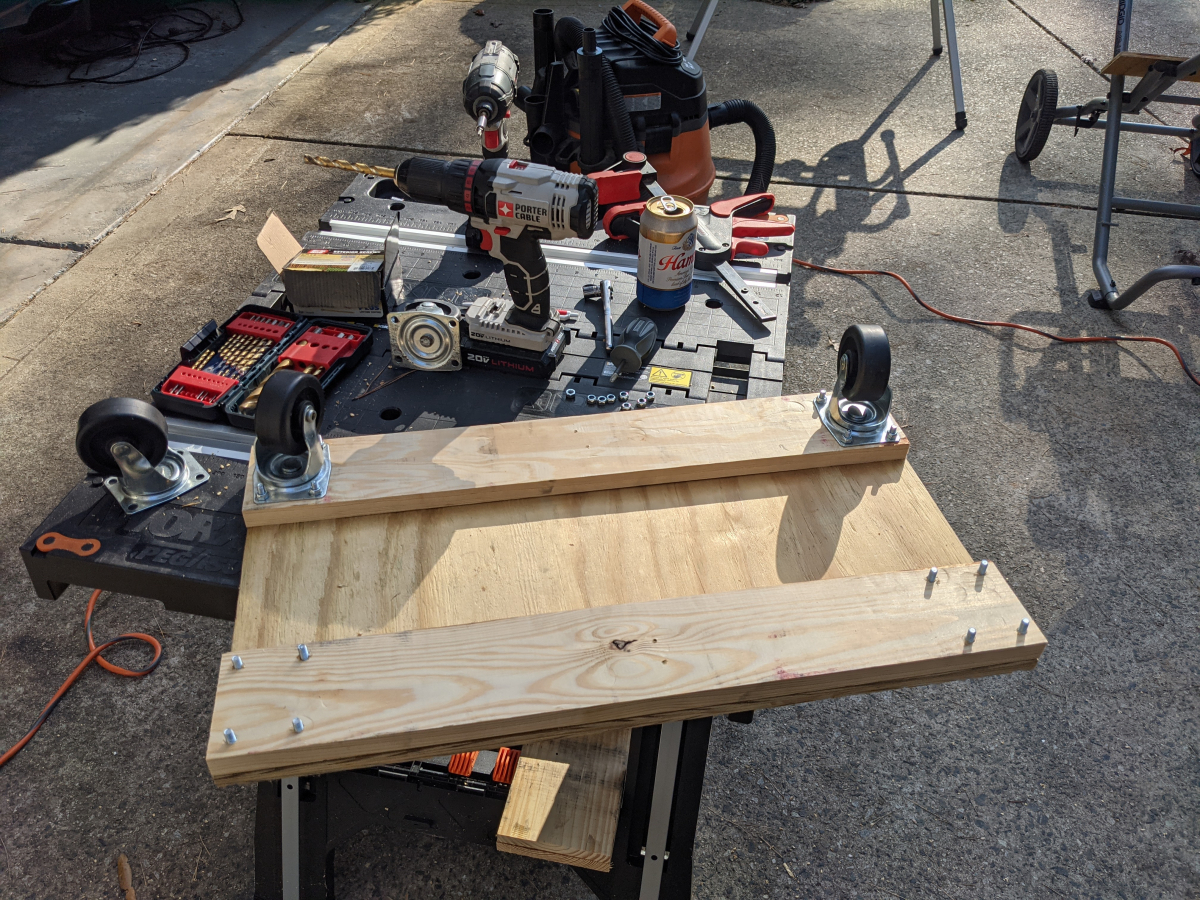
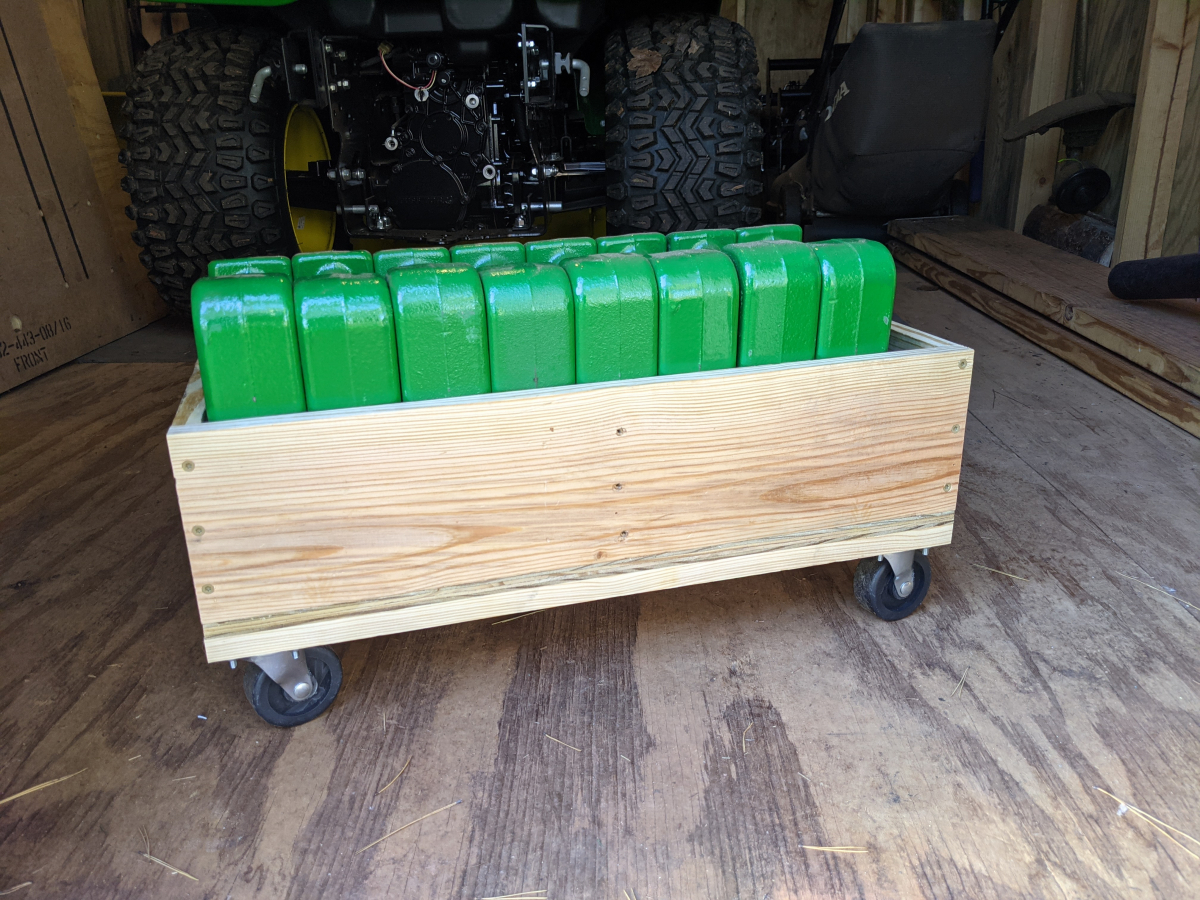
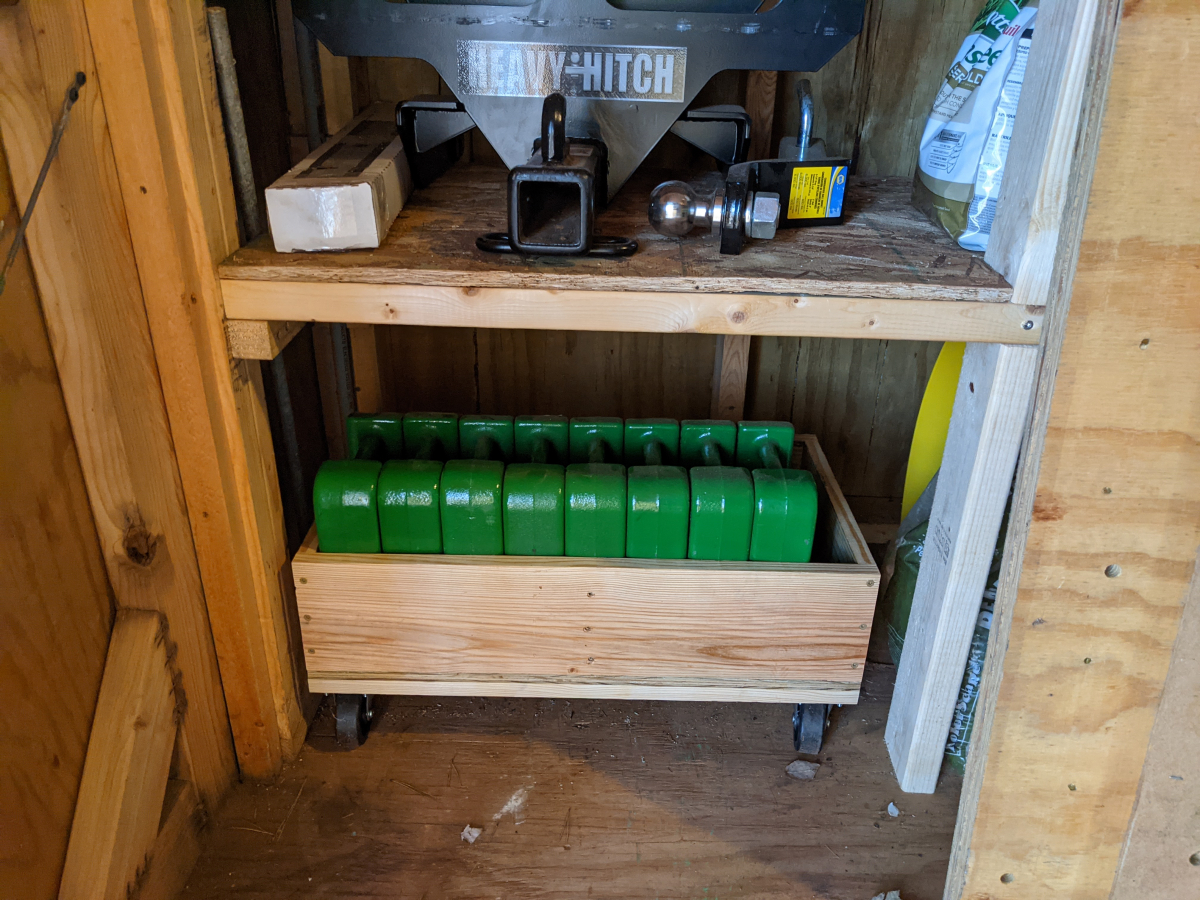
The wheels roll well enough for $10. They don't roll great. You definitely need some force to make them move but it will be better long term than moving the weights by hand every time.
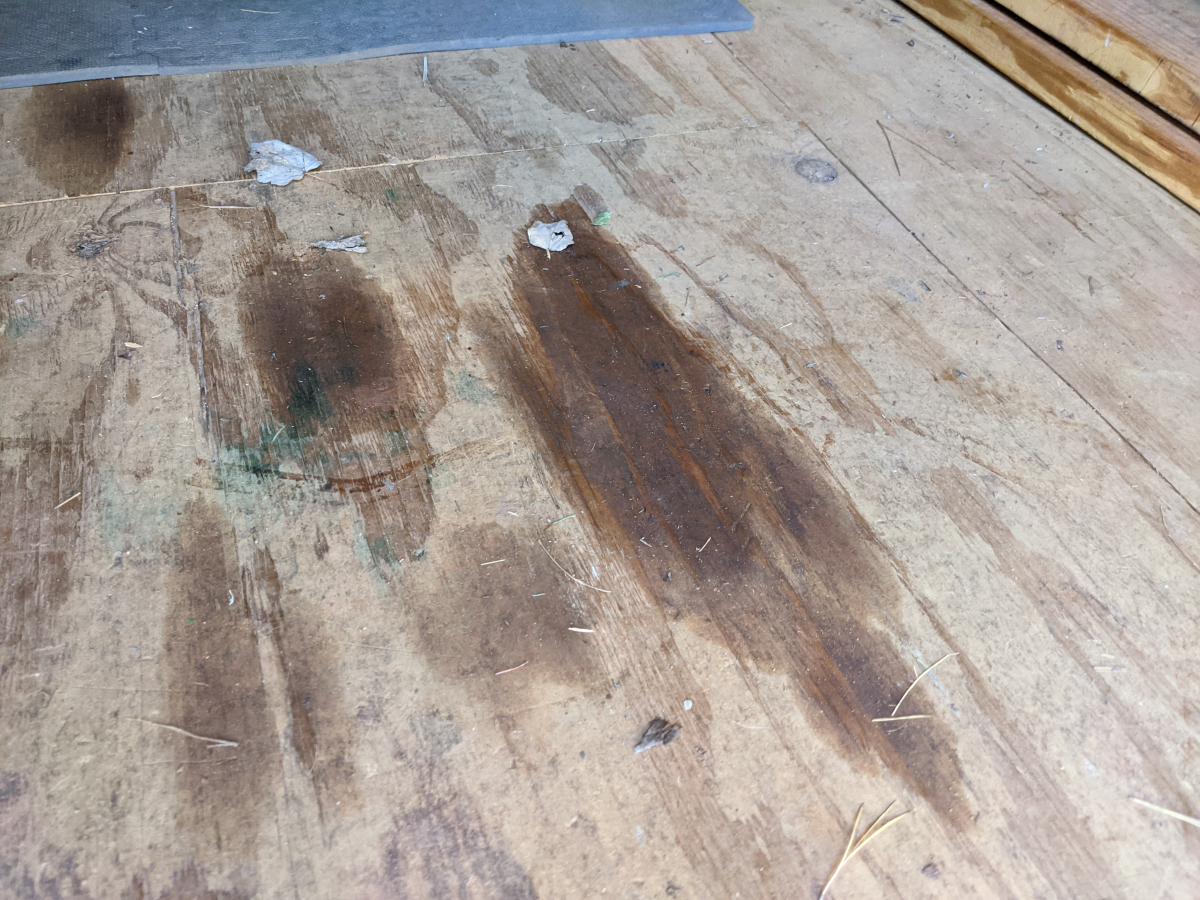
Unfortunately, while moving the dolly around the shed one of the spots I have spilled gas one apparently is a bigger issue than a stain on my shed floor. It seems I had spilled enough that it has weekend the floor. When I rolled the small wheels over the spot it actually cracked the floor so now I need to figure out how to remove that piece of flooring and replace it. Luckily it is a piece of floor that is a smaller section piece that is in 2/3 the door opening. I will need to remove the door trim to do it. Not sure if it means I should get larger wheels for the weight box to distribute the weight better now..
The crack is about 4in long in the middle of the large stain. Not easy to see in the photo.
Bought another smaller dolly to tear the wheels off of to build my own box for my tractor weights. You can't buy 4 caster wheels for the price of the small dolly at harbor freight.
Built my own platform out of 3/8in plywood reinforced with some 1x4 and some pallet wood I had for the sides.
The wheels roll well enough for $10. They don't roll great. You definitely need some force to make them move but it will be better long term than moving the weights by hand every time.
Unfortunately, while moving the dolly around the shed one of the spots I have spilled gas one apparently is a bigger issue than a stain on my shed floor. It seems I had spilled enough that it has weekend the floor. When I rolled the small wheels over the spot it actually cracked the floor so now I need to figure out how to remove that piece of flooring and replace it. Luckily it is a piece of floor that is a smaller section piece that is in 2/3 the door opening. I will need to remove the door trim to do it. Not sure if it means I should get larger wheels for the weight box to distribute the weight better now..
The crack is about 4in long in the middle of the large stain. Not easy to see in the photo.
The following 2 users liked this post by CCColtsicehockey:
00TL-P3.2 (12-15-2020),
rockstar143 (12-14-2020)
12-14-2020, 09:49 AM
#1220
Whats up with RDX owners?
iTrader: (9)
It it tongue and groove or standard ply?
12-14-2020, 10:29 AM
#1221
Moderator
Regional Coordinator (Southeast)
Regional Coordinator (Southeast)
Thread Starter
Join Date: Dec 2003
Location: Mooresville, NC
Age: 38
Posts: 43,563
Received 3,763 Likes
on
2,538 Posts
Standard ply. From the front opening of the shed appears to be close to 1in thick. I would say either 3/4 or 7/8 maybe. Need to measure but I think the section to replace is only like 3x3 so I could get away buying a half sheet to fix it. The hardest part I feel will be getting the current piece removed to replace it. Maybe I am better off just getting bigger wheels to distribute the weight better for that dolly and leaving it in place till it rots through.
12-14-2020, 11:52 AM
#1222
Whats up with RDX owners?
iTrader: (9)
It shouldn't be too difficult. It's basically the same as this you just need a circular saw and to know where the floor joists are:
https://homeguides.sfgate.com/replac...wer-56910.html
https://homeguides.sfgate.com/replac...wer-56910.html
The following users liked this post:
CCColtsicehockey (12-14-2020)
12-14-2020, 01:20 PM
#1223
Ex-OEM King
^ Yup. Or if you don't care to know where the joists are, do a plunge barely more than the depth of the panel and cut it out.
12-16-2020, 07:35 AM
#1224
Moderator
Regional Coordinator (Southeast)
Regional Coordinator (Southeast)
Thread Starter
Join Date: Dec 2003
Location: Mooresville, NC
Age: 38
Posts: 43,563
Received 3,763 Likes
on
2,538 Posts
Yeah, this piece I should be able to just remove and replace the 4x4ft sheet without needing to cut anything out.
I have had some recommendations on the tractor forum that I might want to put down another layer of floor to increase the point strength of the floor. Basically, lay another 1/2in thick layer on top of the 5/8in thick floor currently. Probably going to skip that for now since I would have to rip my shelves back out as I need the bottom shelf to be the exact height it is and couldn't lose any height.
I have had some recommendations on the tractor forum that I might want to put down another layer of floor to increase the point strength of the floor. Basically, lay another 1/2in thick layer on top of the 5/8in thick floor currently. Probably going to skip that for now since I would have to rip my shelves back out as I need the bottom shelf to be the exact height it is and couldn't lose any height.
12-16-2020, 12:12 PM
#1225
Whats up with RDX owners?
iTrader: (9)
Can you get underneath the shed, or is it close to the ground? I'd consider adding some bracing to the floor joists, if possible. Any idea if your current joists are 2x4 or 2x6? 12 OC or 16?
12-16-2020, 01:14 PM
#1226
Moderator
Regional Coordinator (Southeast)
Regional Coordinator (Southeast)
Thread Starter
Join Date: Dec 2003
Location: Mooresville, NC
Age: 38
Posts: 43,563
Received 3,763 Likes
on
2,538 Posts
The underside is fully exposed. It is only sitting on 6 blocks that are shimmed. Honestly, probably a pretty scary setup when you think about the weight I am putting in the shed. It is notched 4x6 with 2x6 joist 16OC.

When you consider the tractor, mower deck, loader, hydraulic quick hitch, blade, and grapple all add up to about 2300lbs not counting anything else in the shed it does raise a little concern with how the bottom is supported.
When you consider the tractor, mower deck, loader, hydraulic quick hitch, blade, and grapple all add up to about 2300lbs not counting anything else in the shed it does raise a little concern with how the bottom is supported.
12-28-2020, 07:56 AM
#1227
Moderator
Regional Coordinator (Southeast)
Regional Coordinator (Southeast)
Thread Starter
Join Date: Dec 2003
Location: Mooresville, NC
Age: 38
Posts: 43,563
Received 3,763 Likes
on
2,538 Posts
I have got some more work on the shed done while I have been off for the holidays.
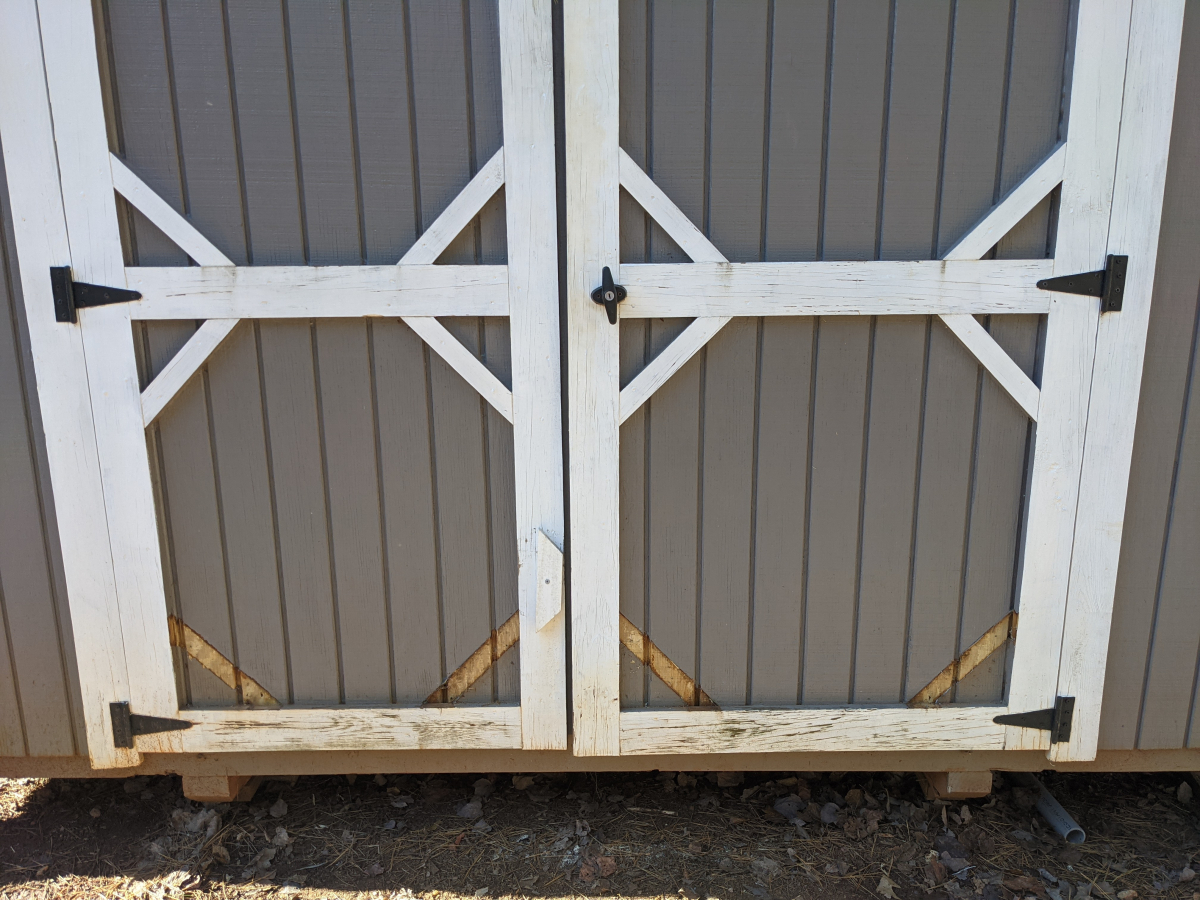
Began with resizing the door overhang to allow for the larger ramp I will be building.
The trim came off easier than I expected.
Enzo not really caring as much what I am doing as just trying to be in the way while I do it.
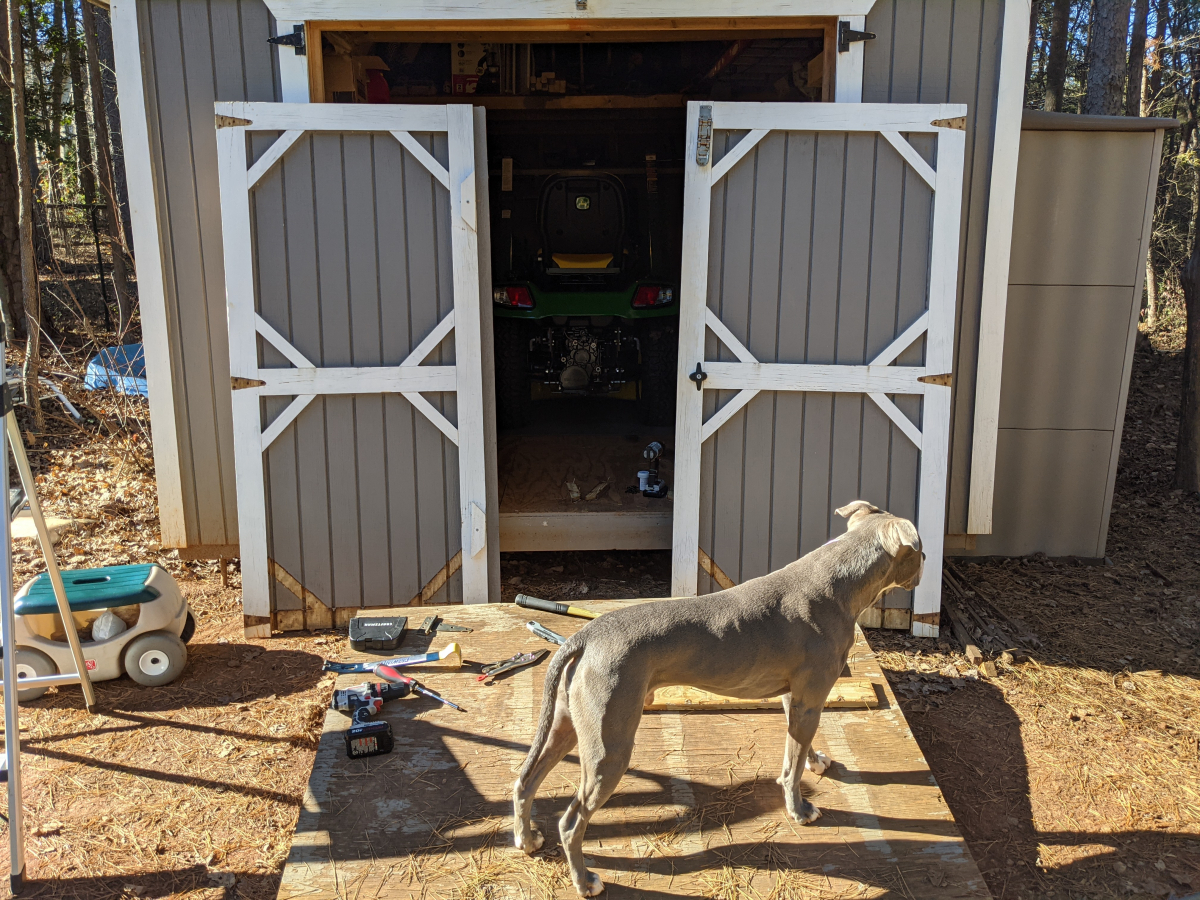
Measure twice, cut once
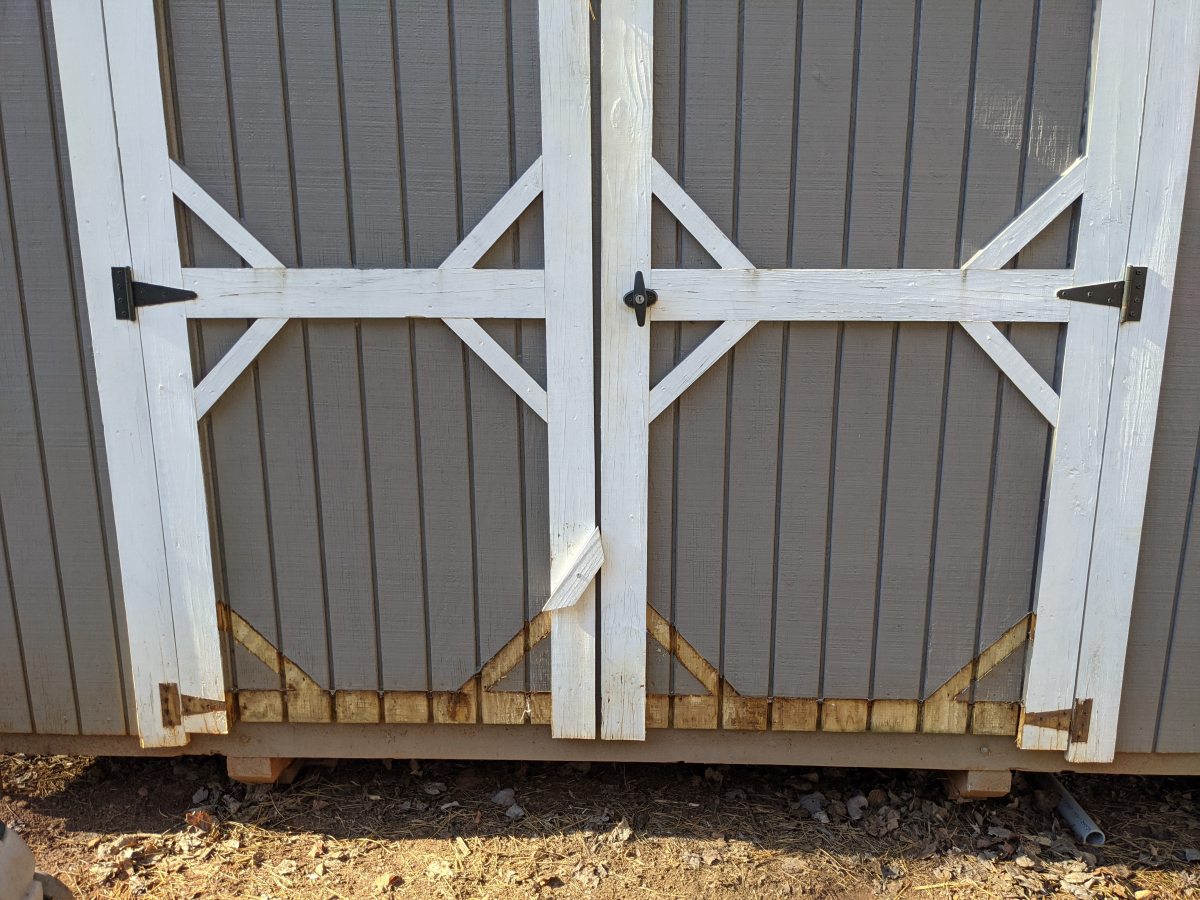
All back together. The newly exposed areas need to be primed and painted but it is too cold for that right now. I am 50/50 on weather I might even need to redo the caulk because of the cold. It is getting up to the mid-50s during the day but then around or slightly below freezing at night.
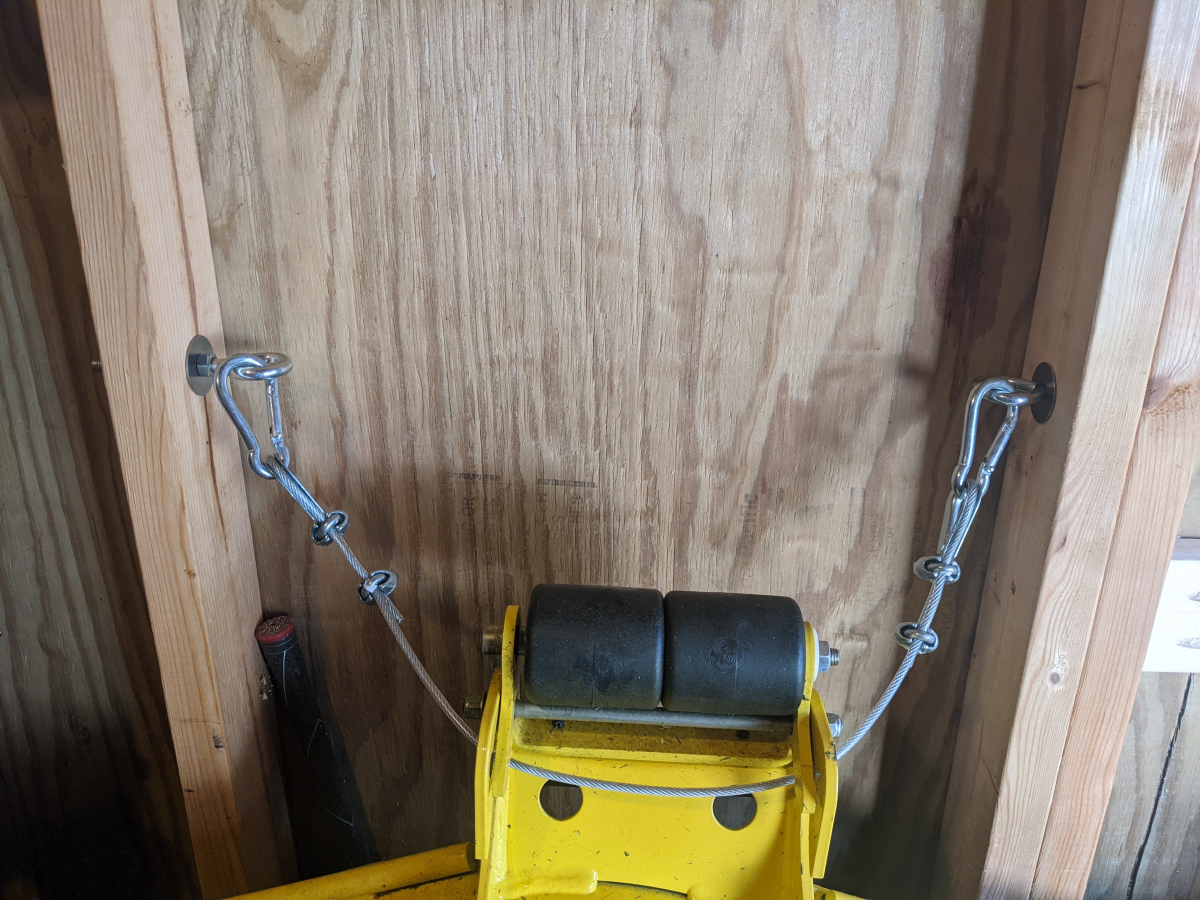
Also got my safety cable constructed for the deck when I stand it up.
Began with resizing the door overhang to allow for the larger ramp I will be building.
The trim came off easier than I expected.
Enzo not really caring as much what I am doing as just trying to be in the way while I do it.
Measure twice, cut once
All back together. The newly exposed areas need to be primed and painted but it is too cold for that right now. I am 50/50 on weather I might even need to redo the caulk because of the cold. It is getting up to the mid-50s during the day but then around or slightly below freezing at night.
Also got my safety cable constructed for the deck when I stand it up.
The following users liked this post:
SamDoe1 (12-28-2020)
12-28-2020, 08:51 AM
#1228
Ex-OEM King
Nice work! Looks like great improvements.
The following users liked this post:
CCColtsicehockey (12-29-2020)
12-29-2020, 08:52 AM
#1229
Moderator
Regional Coordinator (Southeast)
Regional Coordinator (Southeast)
Thread Starter
Join Date: Dec 2003
Location: Mooresville, NC
Age: 38
Posts: 43,563
Received 3,763 Likes
on
2,538 Posts
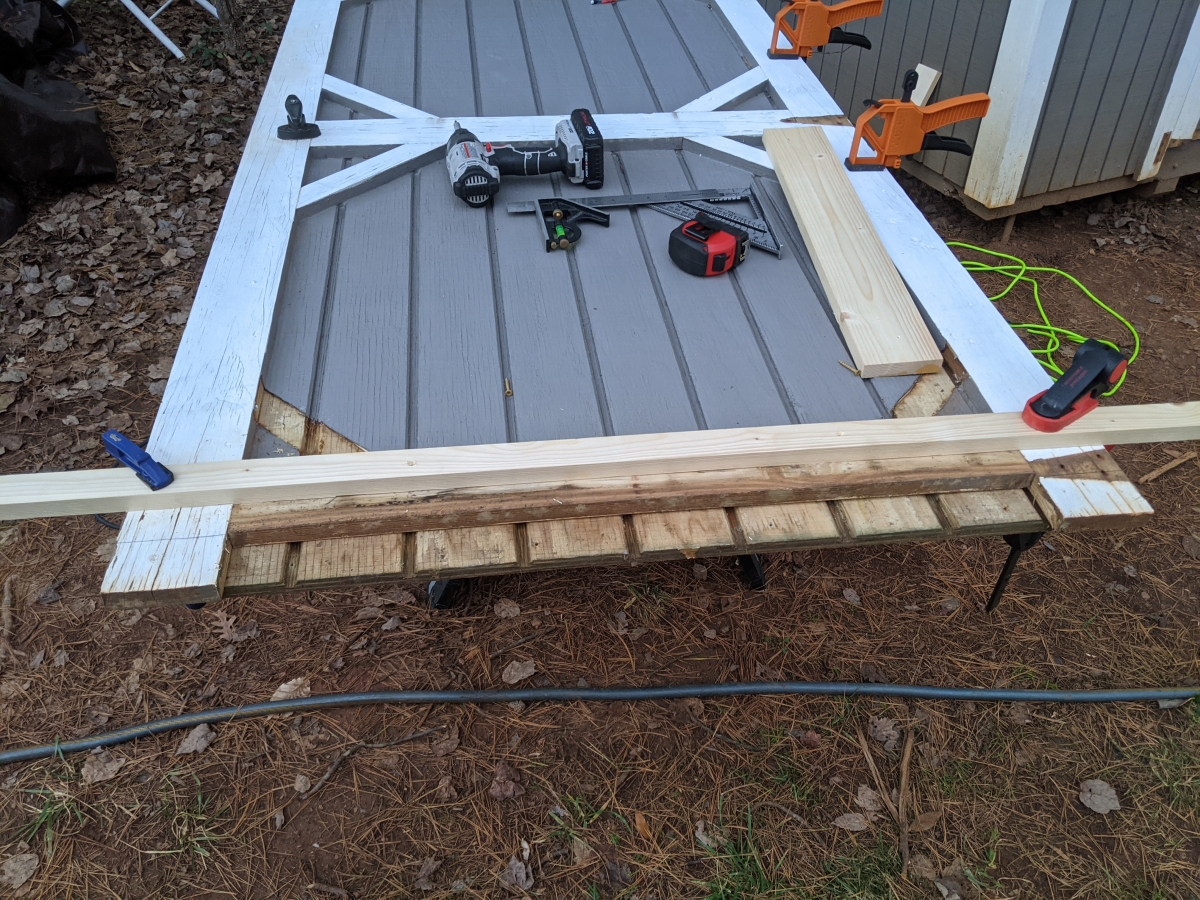
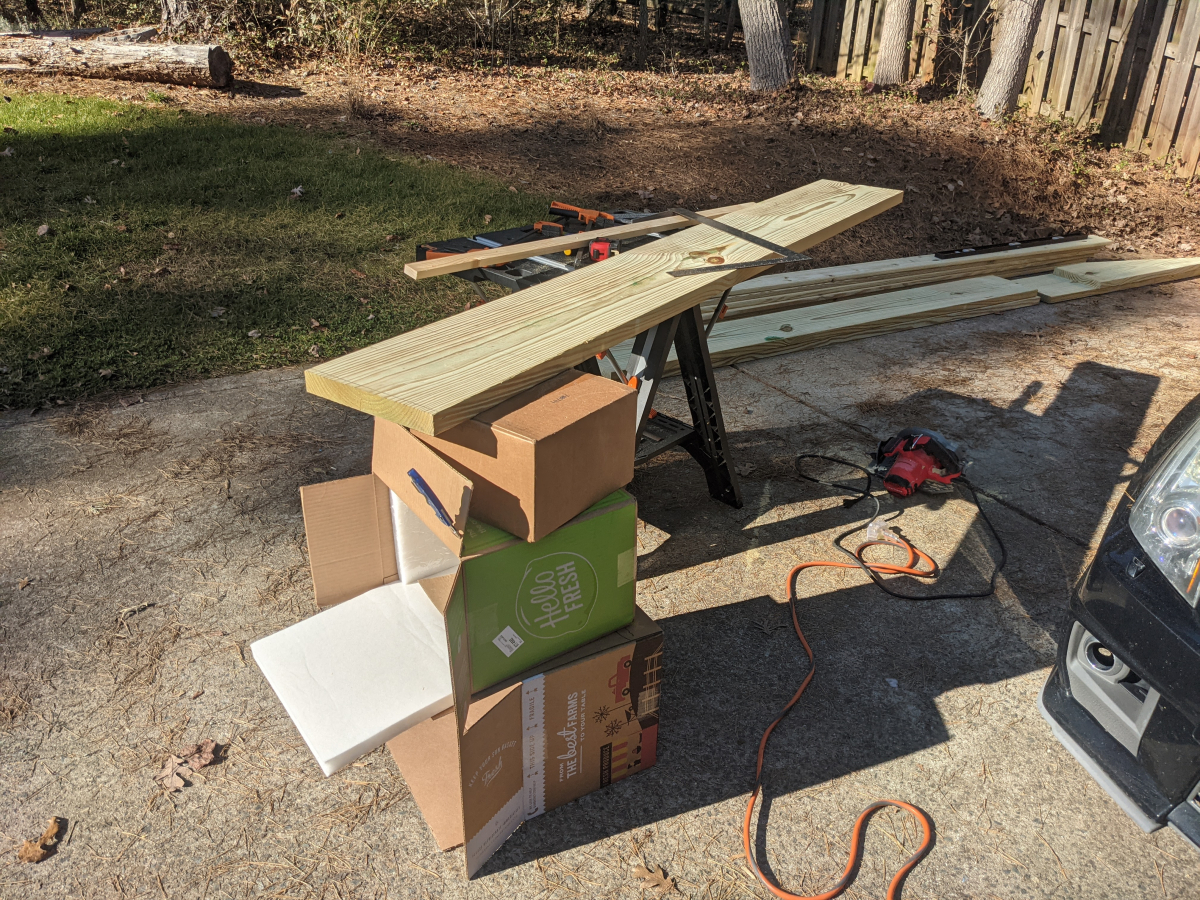
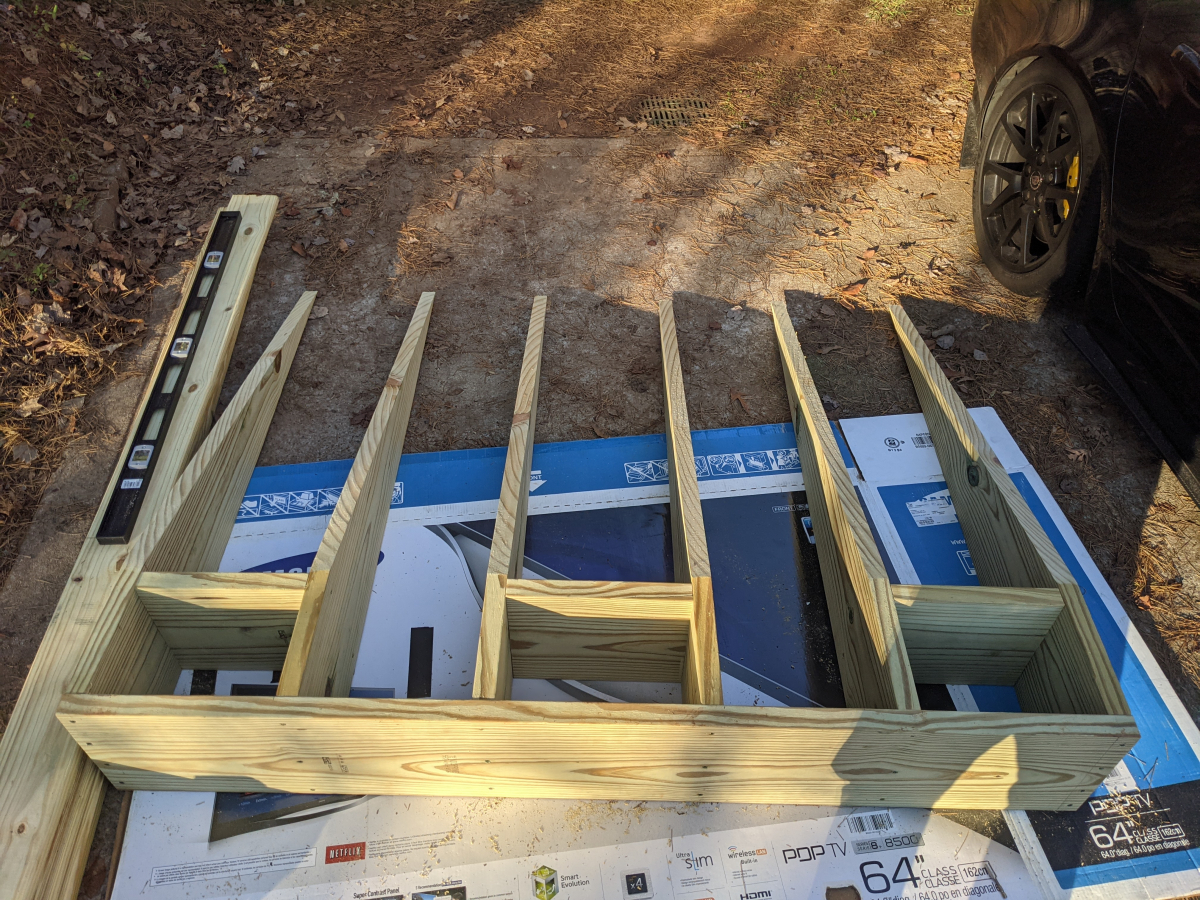
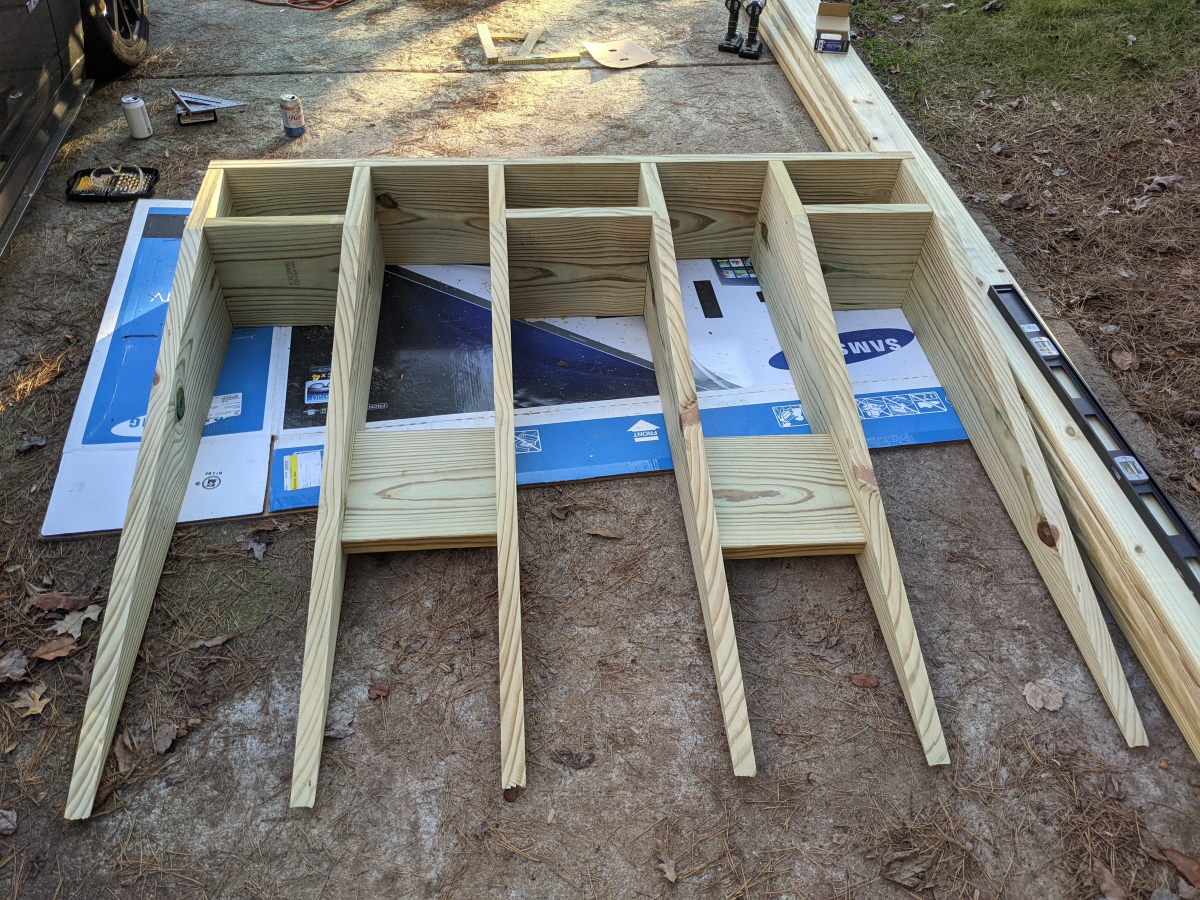
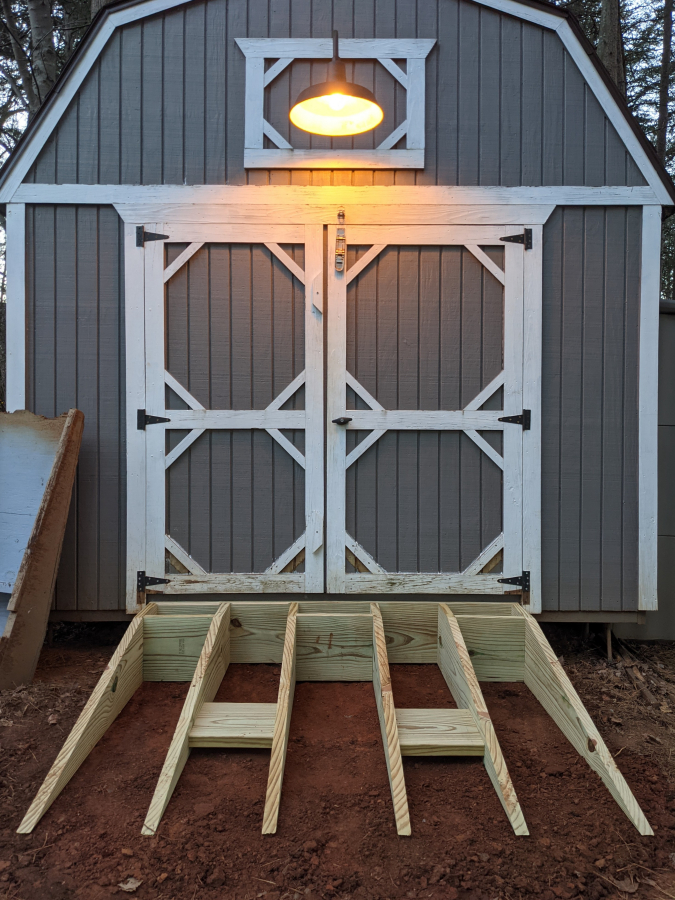
So yesterday got the frame for the new ramp done. That sucker is heavy being made out of fresh pressure treated 2x12s.
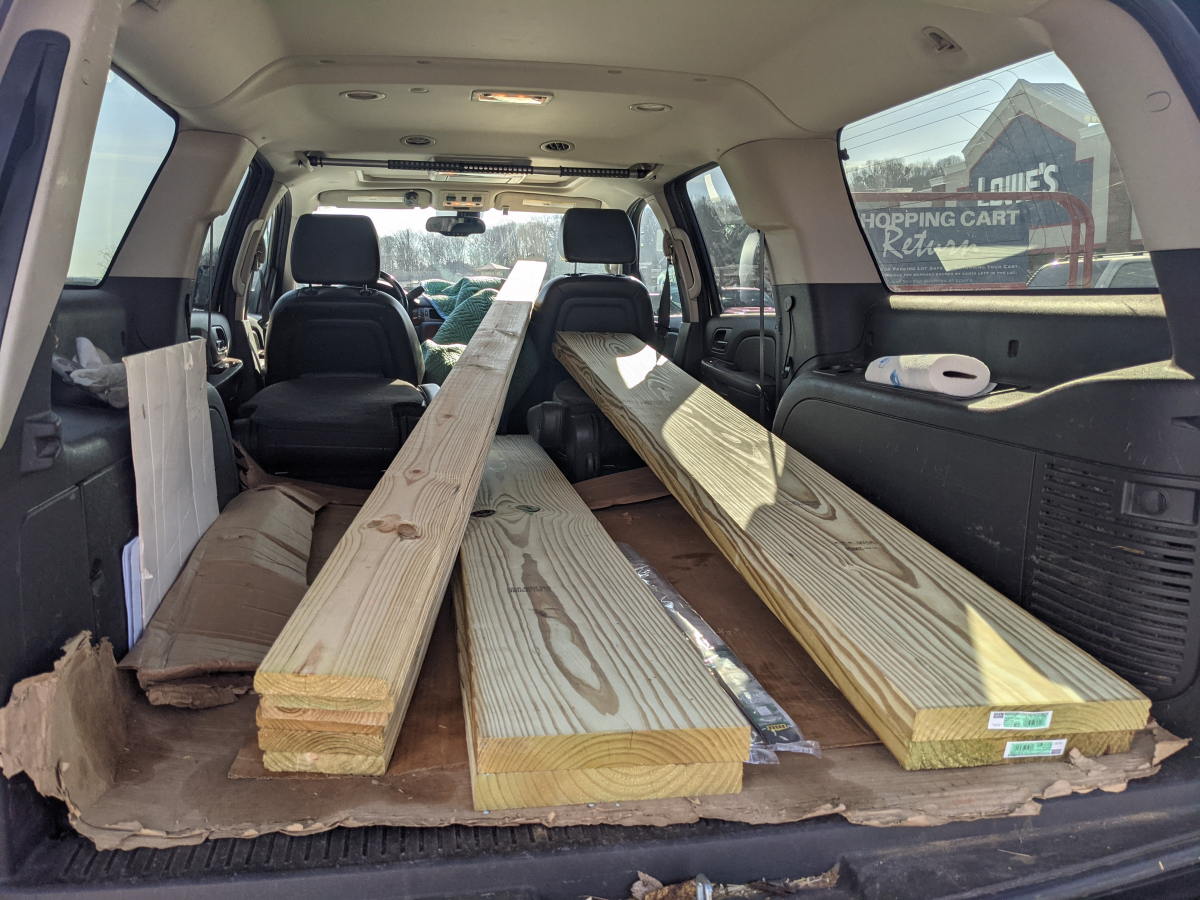
Thankfully the suburban is just long enough to hold 12ft deck boards. Had to have the 16ft 2x12 cut down.
Cutting 48in diagonals wasn't the easiest. They came out fairly close.
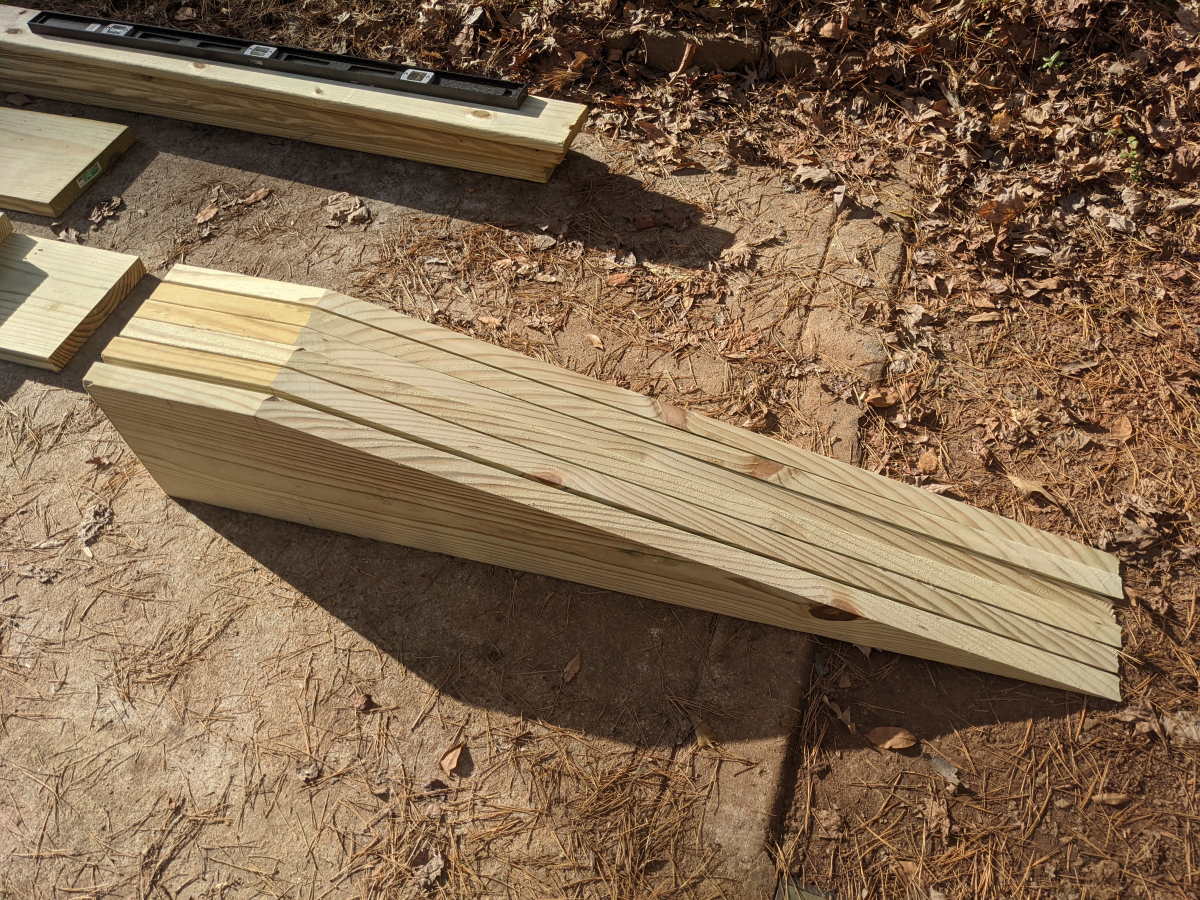
Might be able to drive my truck up this thing when it is finished.
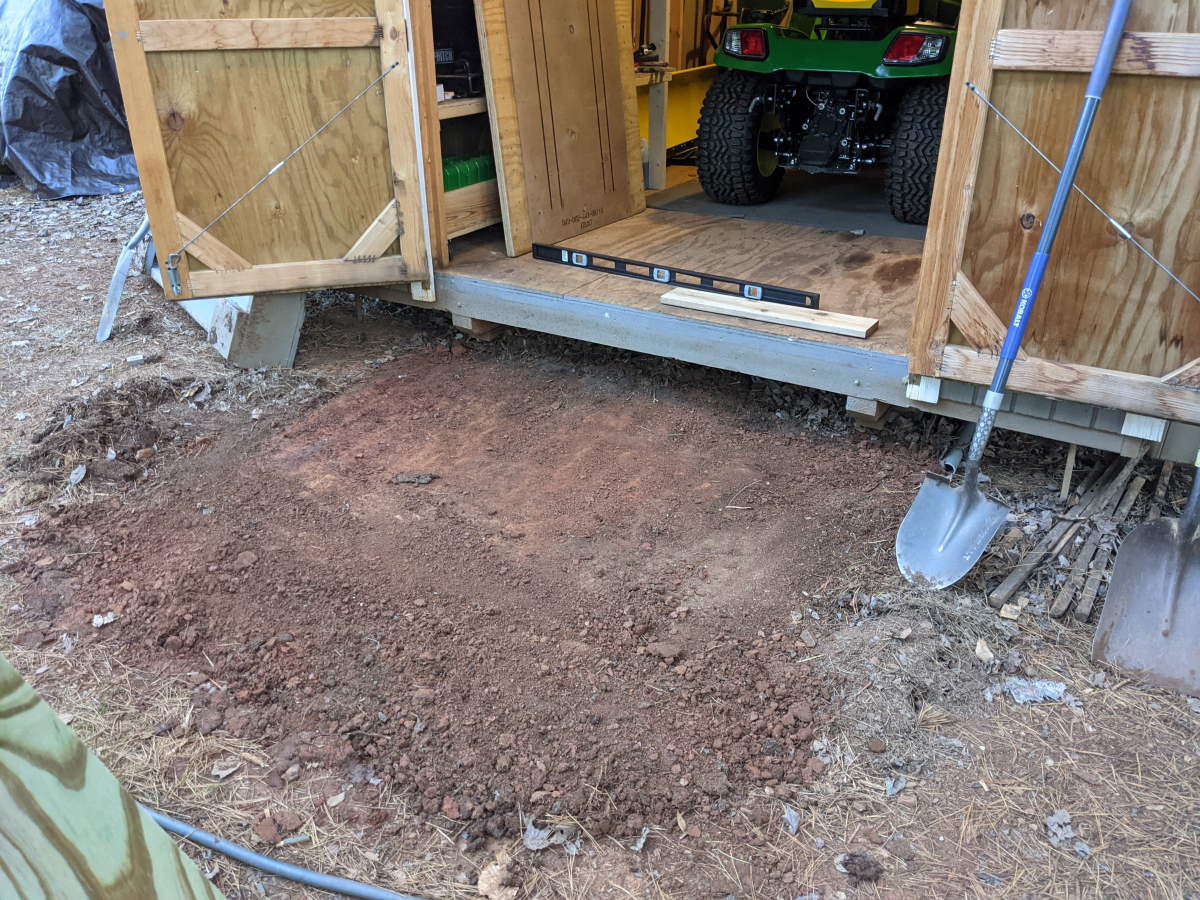
With the new ramp being longer than the old one I am going to need to level the ground out a bit to make it fit right.
After a few tries, I finished with this for the day. Still needs a few low spots filled in.
The last ramp was painted. I don't know if it was painted cause it wasn't pressure treated wood or not. I used pressure treated ground contact grade so I would think it should be fine but still considering eventually painting it but it is way too wet right now to paint. I can feel the moisture in the wood just holding it. Maybe even just painting the contact points with tar or bed liner. The other option would be to dig the ramp location deeper and fill it back in with 2-3in of crushed stone. I would stop before the end of the ramp though cause I do not want to risk getting stones in my lawn. The least favorite reason because of this to be honest.
Going to be a struggle to get it finished as I hurt my shoulder last night afterwords. Getting old sucks. I am stubborn and will probably push through if I can still manage to pick the thing up 2-3 more times I need to level it. Hopefully, I won't make the shoulder worse. Some forks for the loader right now would be supper helpful.
Thankfully the suburban is just long enough to hold 12ft deck boards. Had to have the 16ft 2x12 cut down.
Cutting 48in diagonals wasn't the easiest. They came out fairly close.
Might be able to drive my truck up this thing when it is finished.
With the new ramp being longer than the old one I am going to need to level the ground out a bit to make it fit right.
After a few tries, I finished with this for the day. Still needs a few low spots filled in.
The last ramp was painted. I don't know if it was painted cause it wasn't pressure treated wood or not. I used pressure treated ground contact grade so I would think it should be fine but still considering eventually painting it but it is way too wet right now to paint. I can feel the moisture in the wood just holding it. Maybe even just painting the contact points with tar or bed liner. The other option would be to dig the ramp location deeper and fill it back in with 2-3in of crushed stone. I would stop before the end of the ramp though cause I do not want to risk getting stones in my lawn. The least favorite reason because of this to be honest.
Going to be a struggle to get it finished as I hurt my shoulder last night afterwords. Getting old sucks. I am stubborn and will probably push through if I can still manage to pick the thing up 2-3 more times I need to level it. Hopefully, I won't make the shoulder worse. Some forks for the loader right now would be supper helpful.
12-30-2020, 02:00 PM
#1230
Moderator
Regional Coordinator (Southeast)
Regional Coordinator (Southeast)
Thread Starter
Join Date: Dec 2003
Location: Mooresville, NC
Age: 38
Posts: 43,563
Received 3,763 Likes
on
2,538 Posts
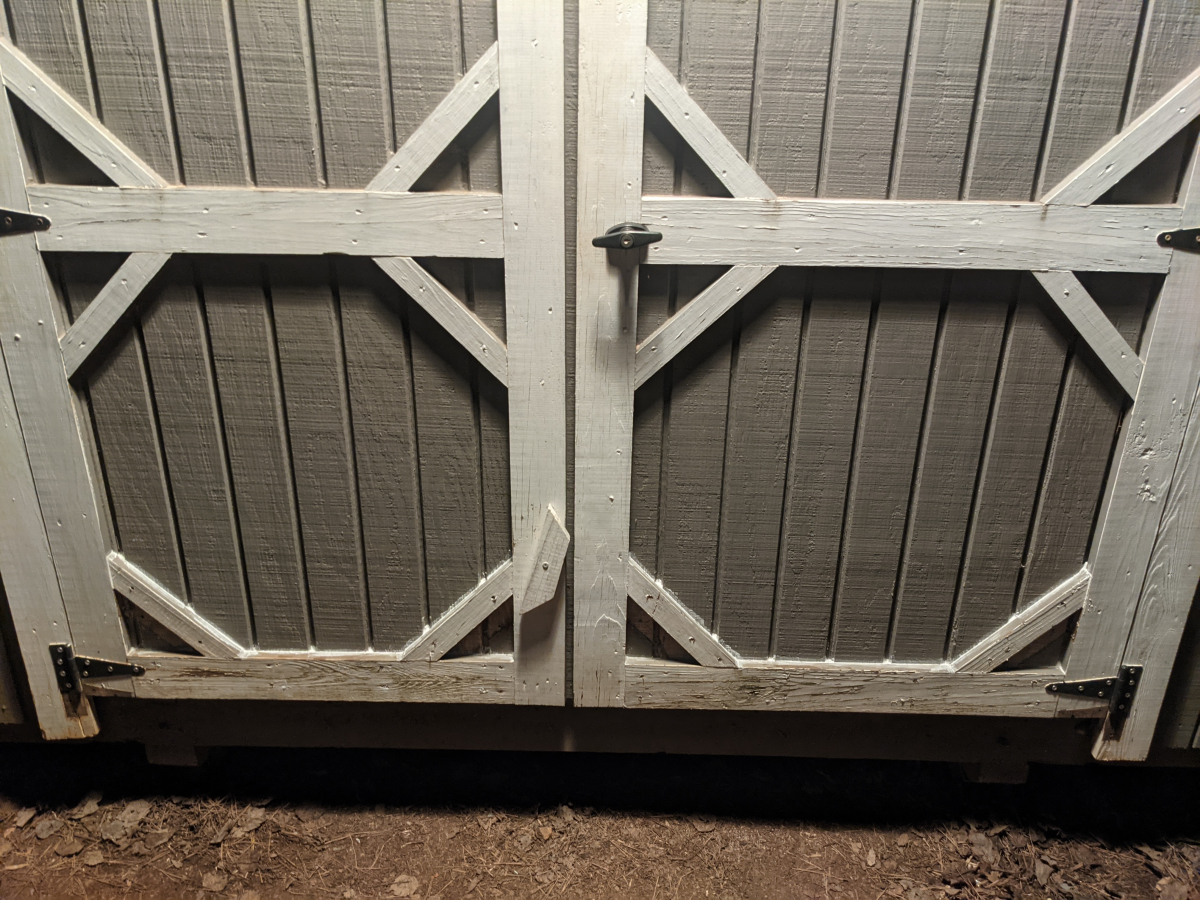
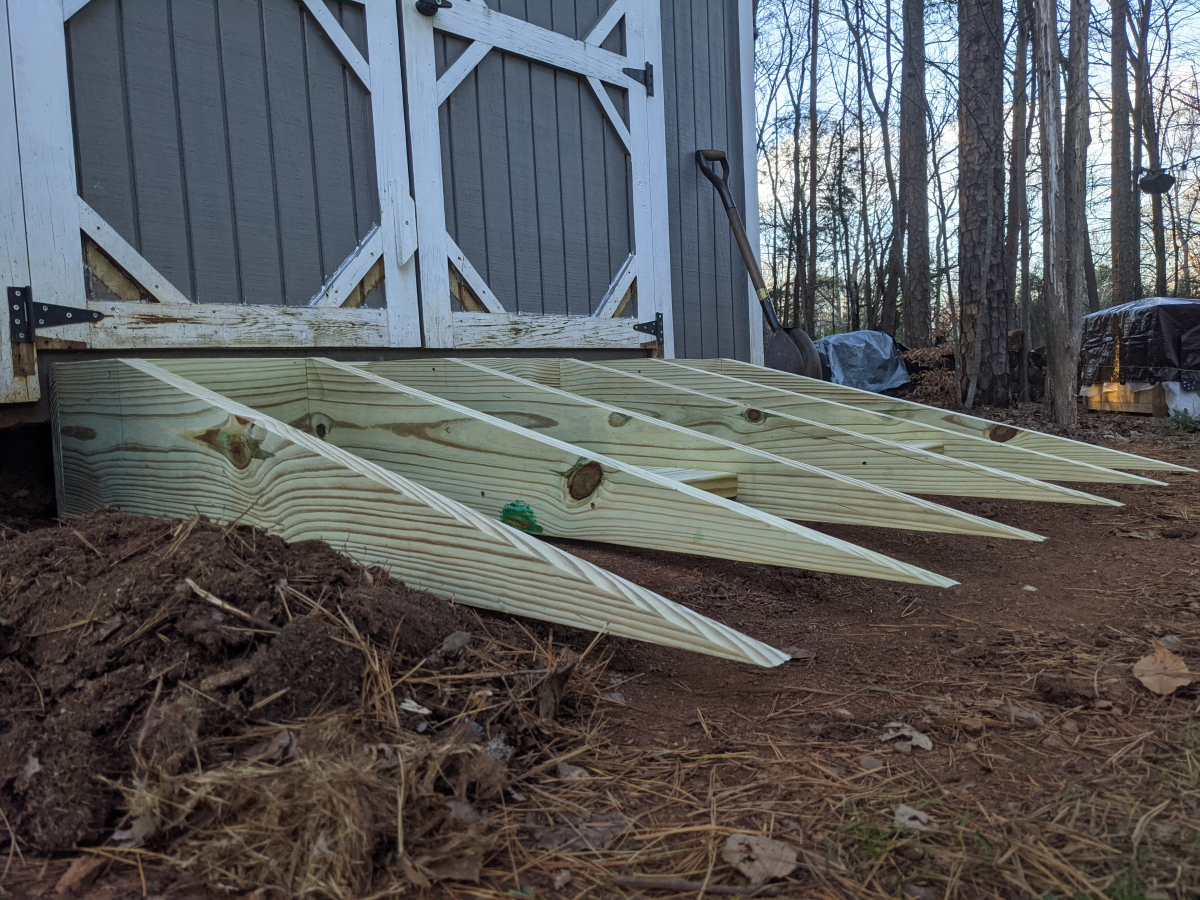
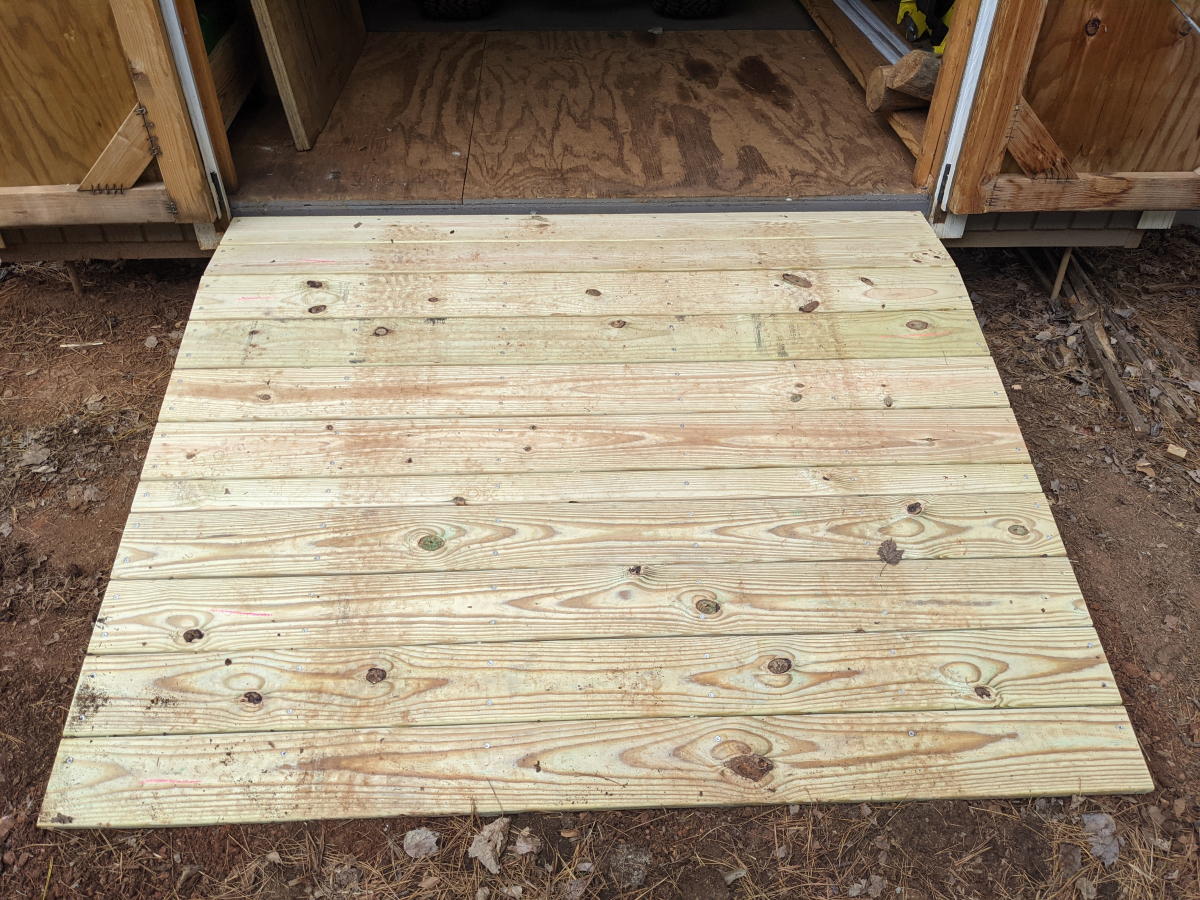
The new ramp is finally complete. Hopefully, The wood won't shink too much as I did use nails to space the boards at just a tiny bit. So much nicer to get the tractor in and out now. Still have not tried it with the mower deck on yet but can't imagine it will be an issue since the transition is only 1 1/4in now.
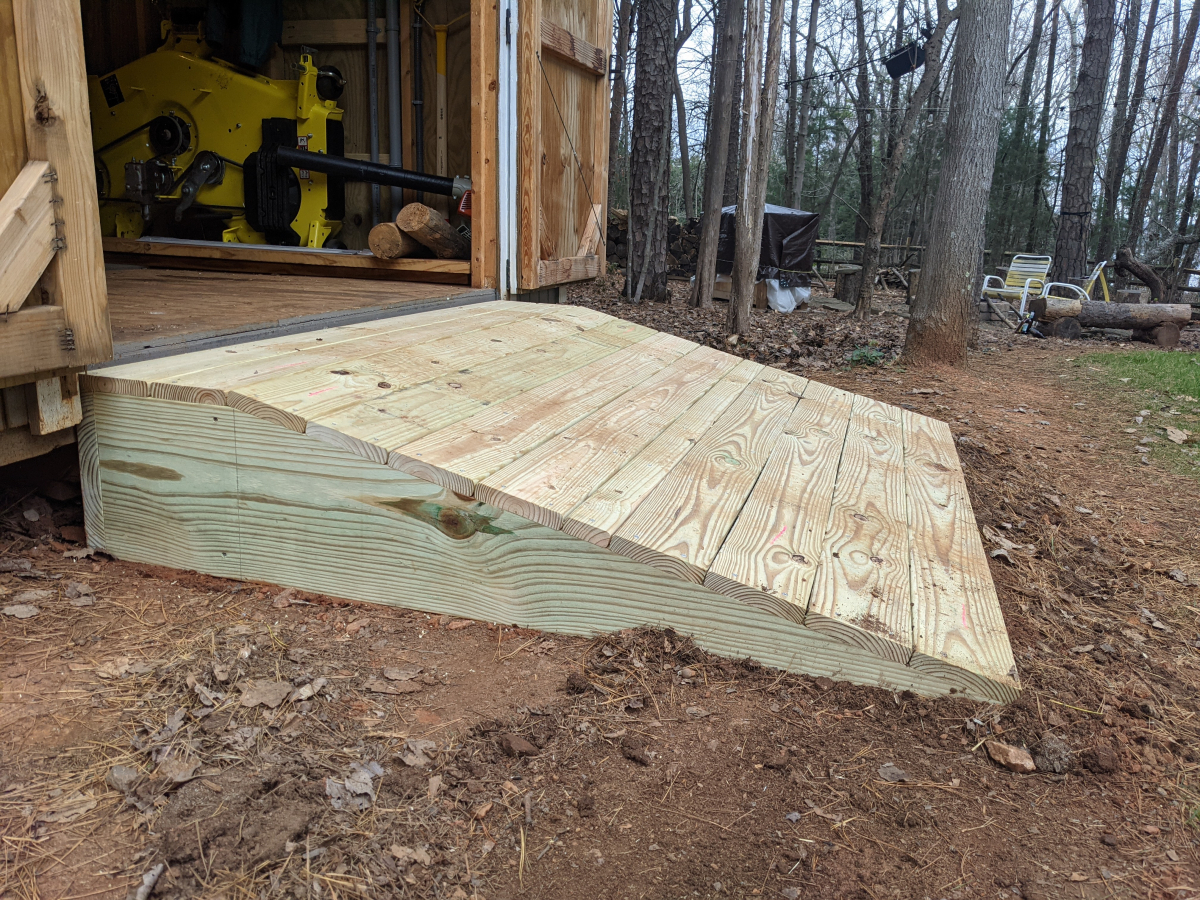
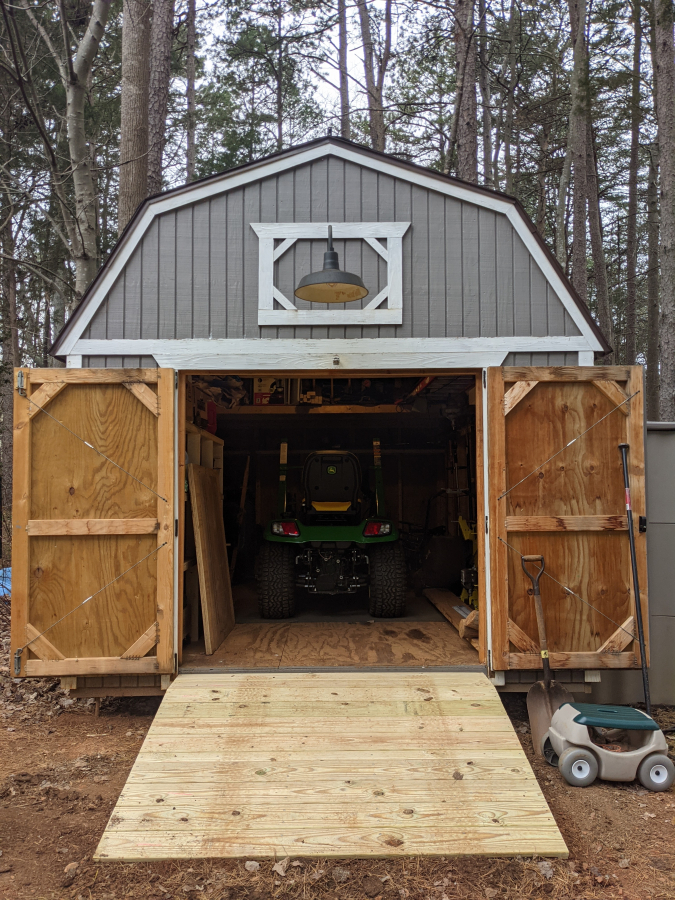
Need to either coat the underside of it or use the loader to dig out under it and fill it with stone. Being red clay that doesn't drain well stone might still leave water puddle so coating it might be the best option. Don't want to ever have to rebuild it.
Need to either coat the underside of it or use the loader to dig out under it and fill it with stone. Being red clay that doesn't drain well stone might still leave water puddle so coating it might be the best option. Don't want to ever have to rebuild it.
The following users liked this post:
civicdrivr (01-04-2021)
12-30-2020, 03:53 PM
#1231
Senior Moderator
That's impressive, Colts... 

The following users liked this post:
CCColtsicehockey (12-31-2020)
The following users liked this post:
CCColtsicehockey (12-31-2020)
01-03-2021, 06:18 PM
#1233
Moderator
Regional Coordinator (Southeast)
Regional Coordinator (Southeast)
Thread Starter
Join Date: Dec 2003
Location: Mooresville, NC
Age: 38
Posts: 43,563
Received 3,763 Likes
on
2,538 Posts
Had a tree come down a couple of weeks ago that I cut up everything but the 8ft that was left at the ground where it broke. Took that down today finally cause I needed a new round to split on top of. Probably 19 or 20in across cause I had to go at it from both sides and my bar is only 18in. Also, put a piece of plywood down on the ground under it raised by 3 strips of 1in plywood from a pallet I took apart. Maybe it will make this round last longer who knows. If not oh well and I had no other uses for that pallet and didn't want to store it.
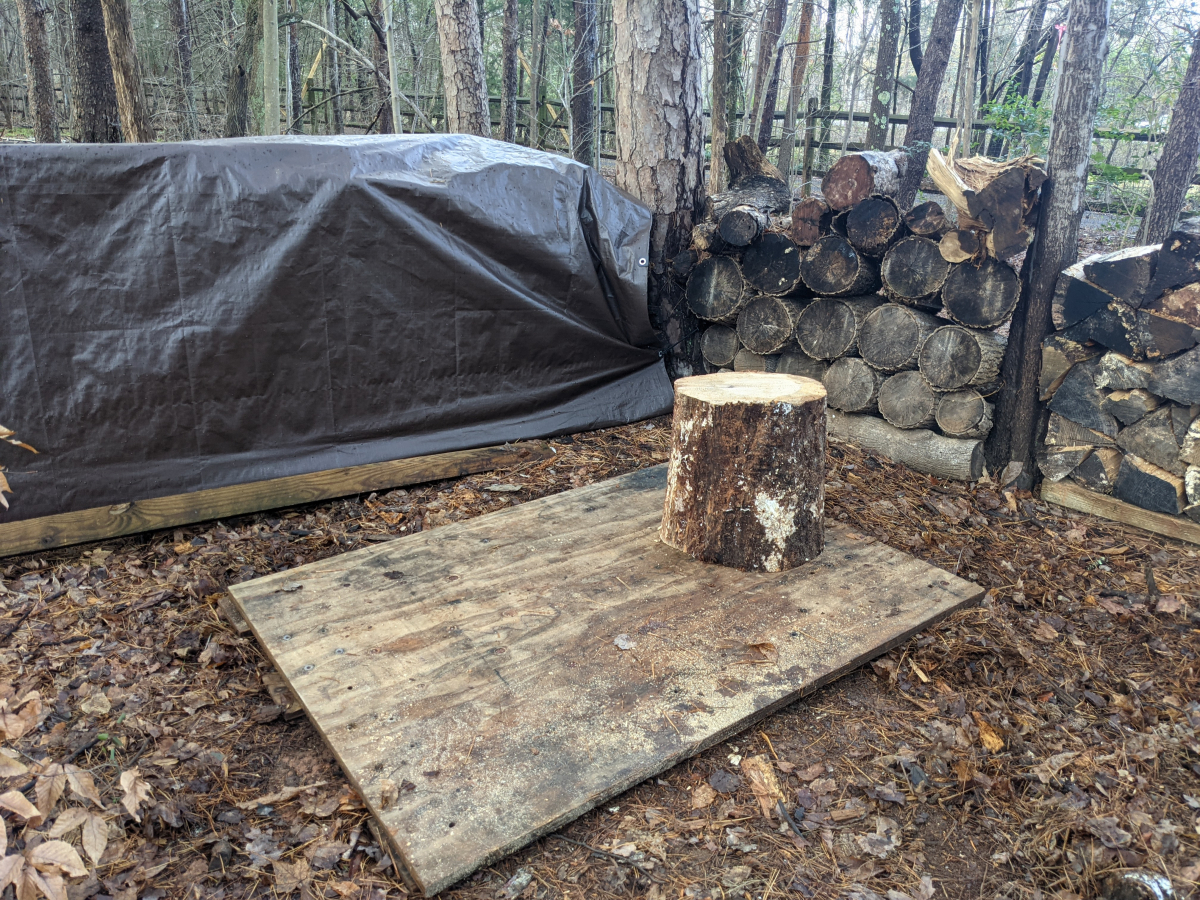
Now if my shoulder would just heal up I could get back to splittling wood.
Now if my shoulder would just heal up I could get back to splittling wood.
The following users liked this post:
1StGenCL (01-06-2021)

The following users liked this post:
CCColtsicehockey (01-04-2021)
01-04-2021, 08:56 AM
#1235
Ex-OEM King
Log that big, I'd find a local sawmill to cut it up and dry it in your shed for a few years. Will make some nice lumber you can make something special out of.
The following users liked this post:
CCColtsicehockey (01-04-2021)
01-04-2021, 05:26 PM
#1236
Moderator
Regional Coordinator (Southeast)
Regional Coordinator (Southeast)
Thread Starter
Join Date: Dec 2003
Location: Mooresville, NC
Age: 38
Posts: 43,563
Received 3,763 Likes
on
2,538 Posts
Unfortunately, it has enough ground rot on the outer 1-2in beside the 4ft I used to make two splitting blocks from of it that it didn't seem worth it. Definitely would be cool though. I do have some large pines that if they ever have to come down I will definitely take a 10ft section to a mill just so I can make something out of a tree from my property. That said I hope they don't die anytime soon.
01-04-2021, 05:32 PM
#1237
Moderator
Regional Coordinator (Southeast)
Regional Coordinator (Southeast)
Thread Starter
Join Date: Dec 2003
Location: Mooresville, NC
Age: 38
Posts: 43,563
Received 3,763 Likes
on
2,538 Posts
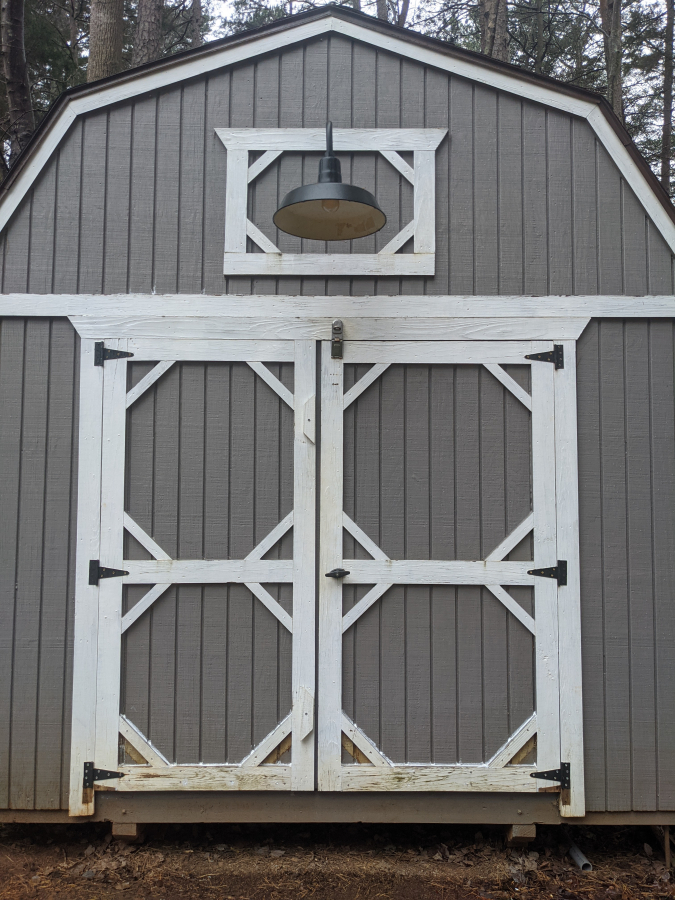
So finally finished up the shed project over the last few days. Besides repainting the trim in the spring when it is warmer and maybe coating the bottom of the ramp in roofing tar I feel I can fully check that off my list now.
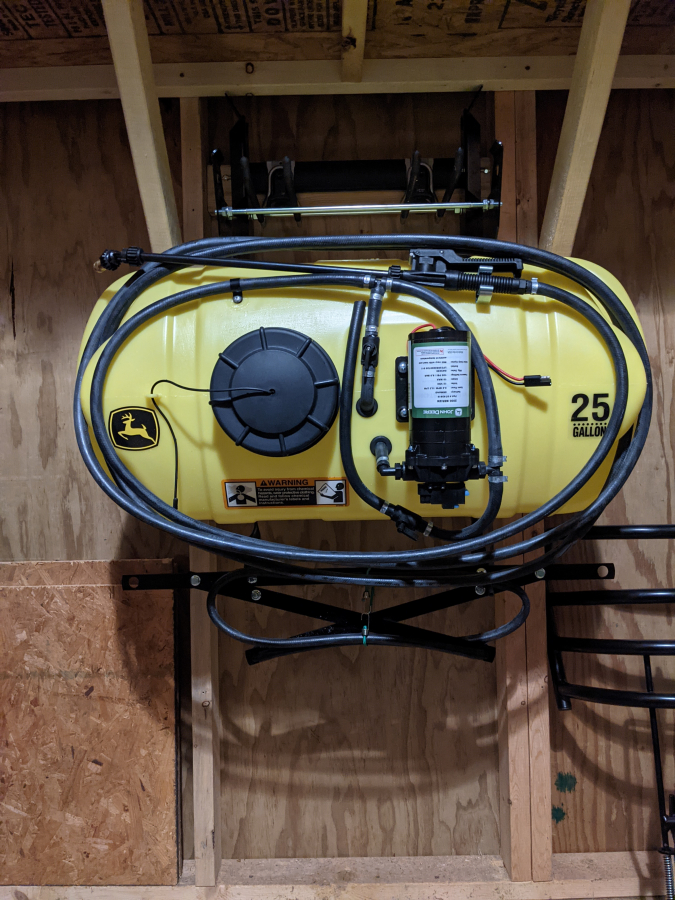
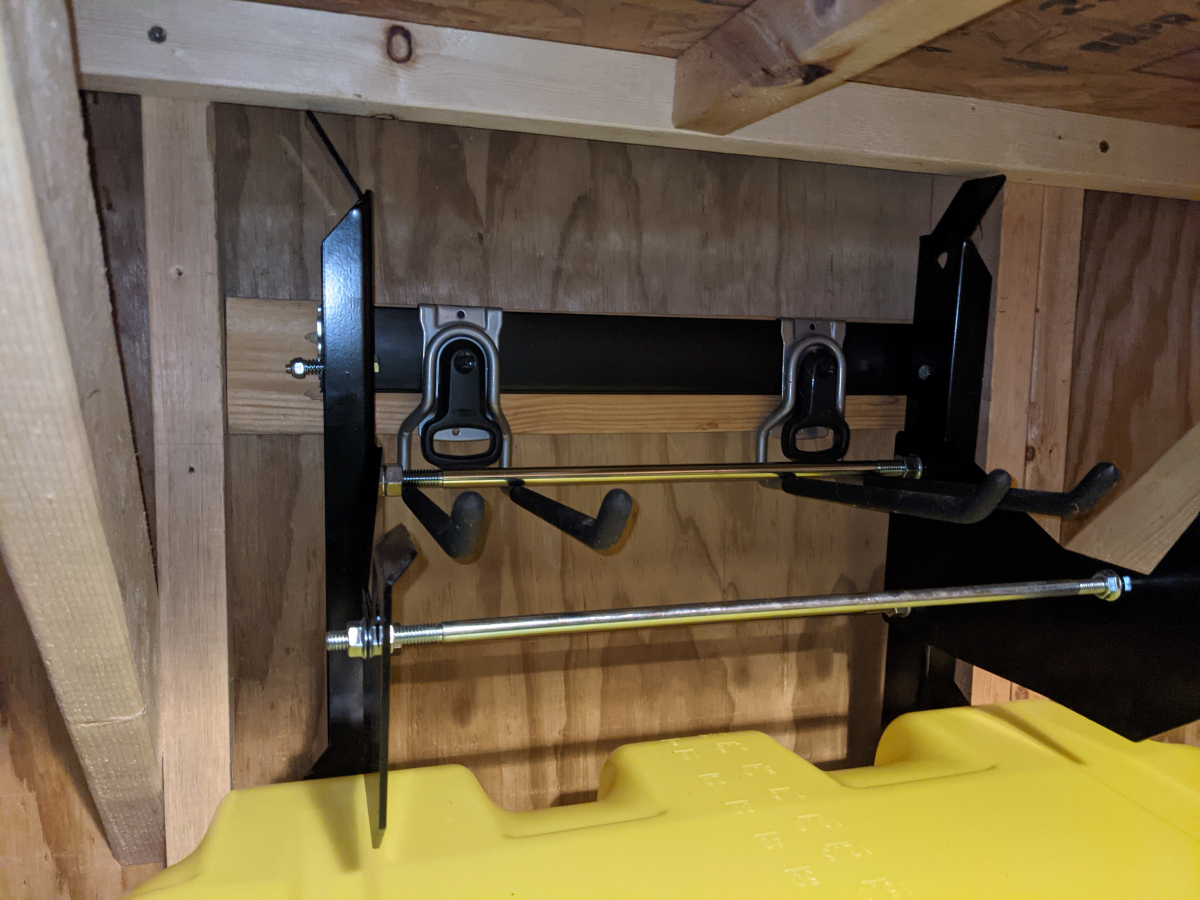
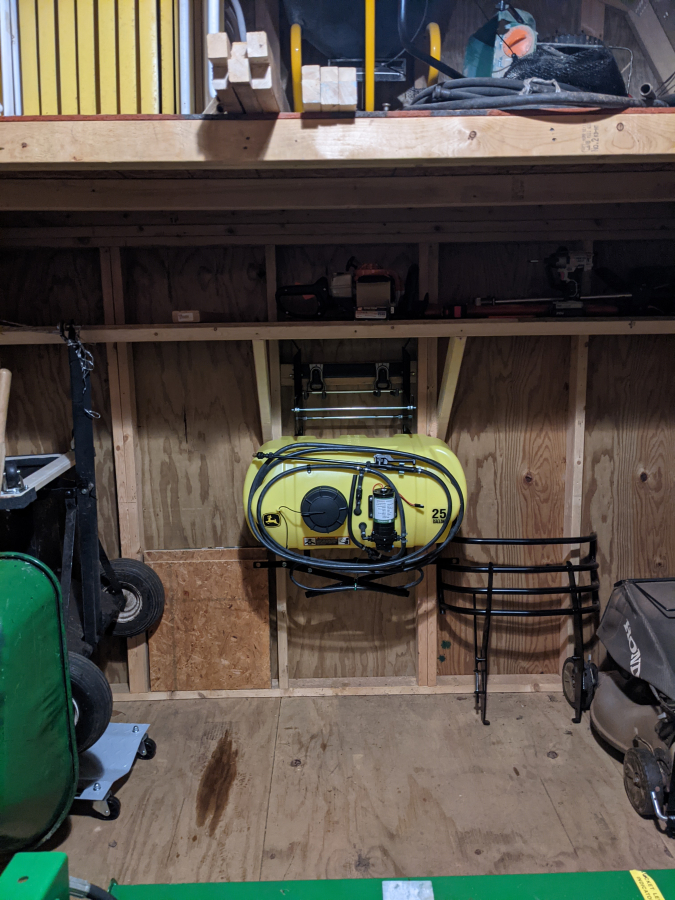
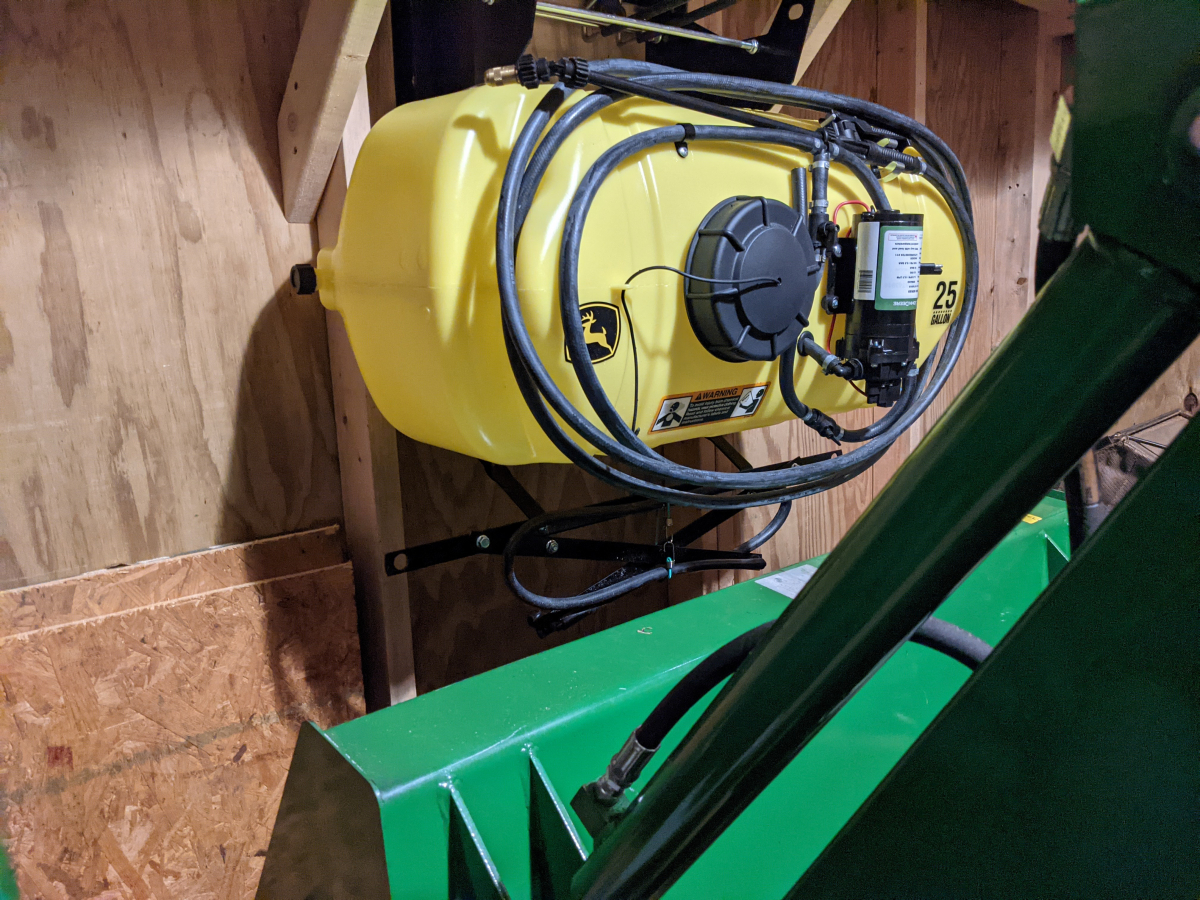
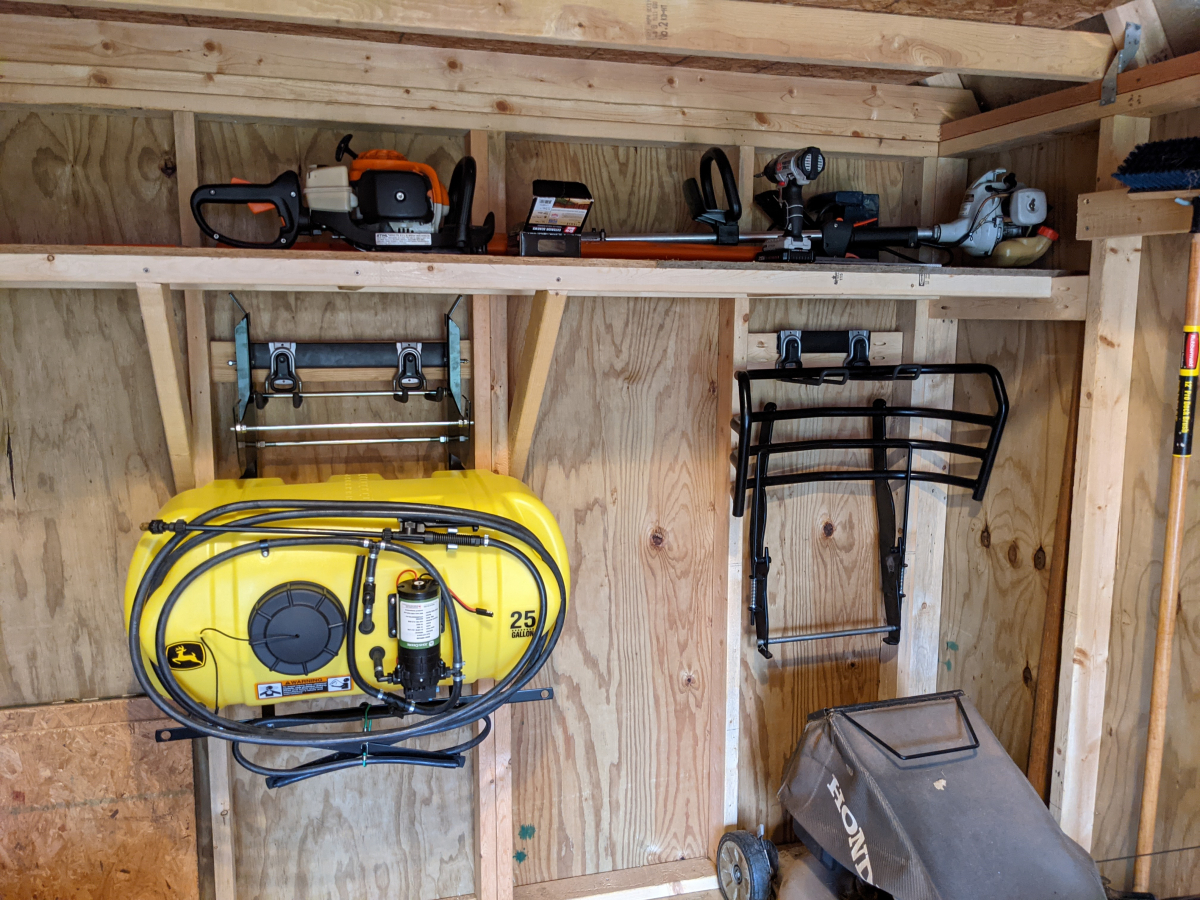
Picked up a 25 gallon sprayer as I plan to start putting down tenacity as pre-emerg and I will need 19 gallons to cover my lawn and I don't want to load a 4 gallon backpack 5 times. So had to create a mount for it. Fits perfect above the loader bucket below my trimmer shelf.
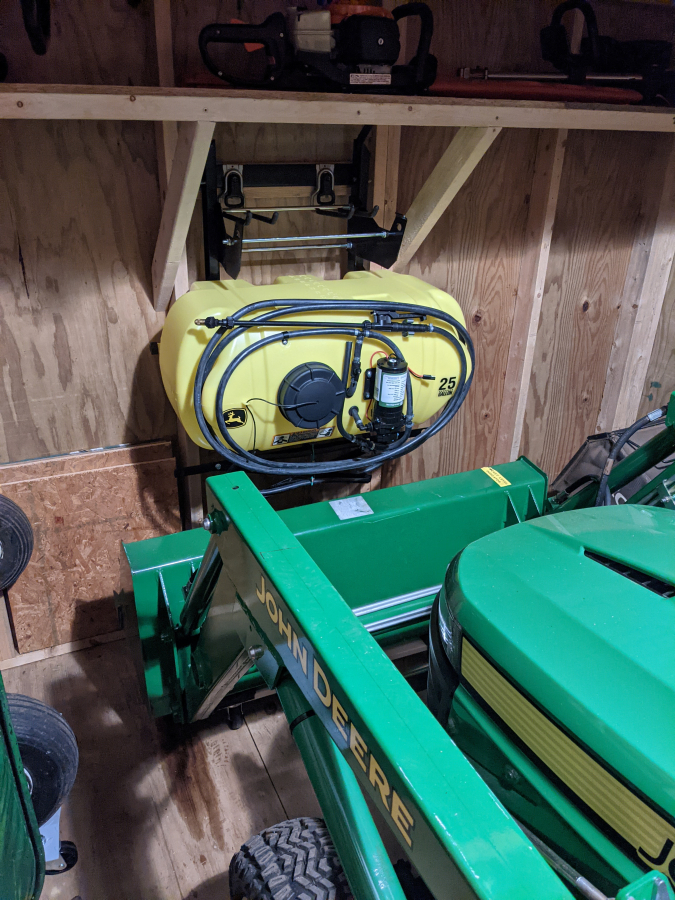
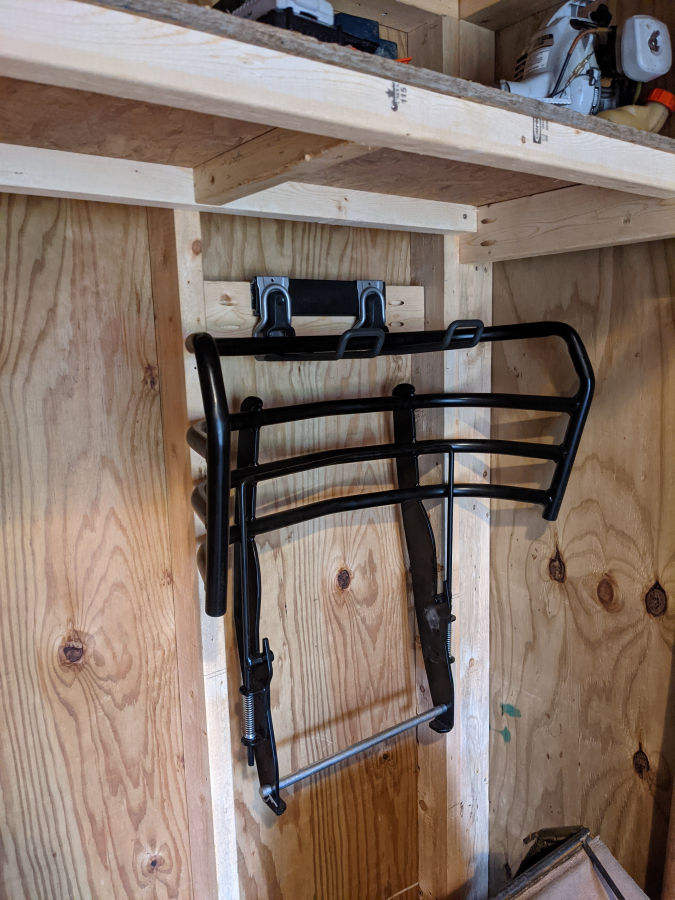
Also got the brush guard mounted so it is out of my way when using the grapple or louder.
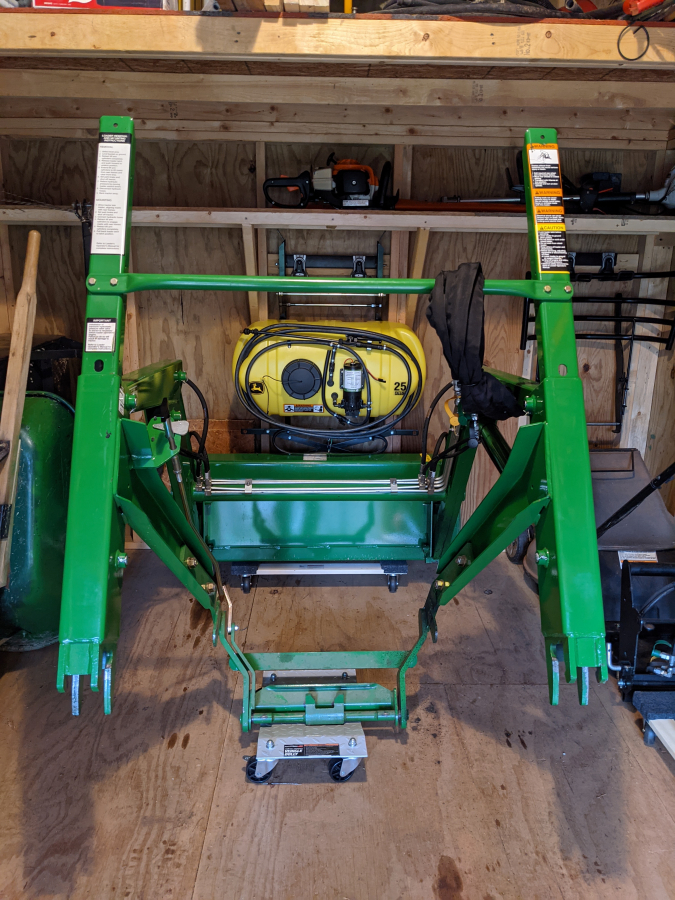
Loader finally on dollys as well. Have mounted the loader and the grapple several times in the past few days and it is so much easier being able to position them by rolling them around.
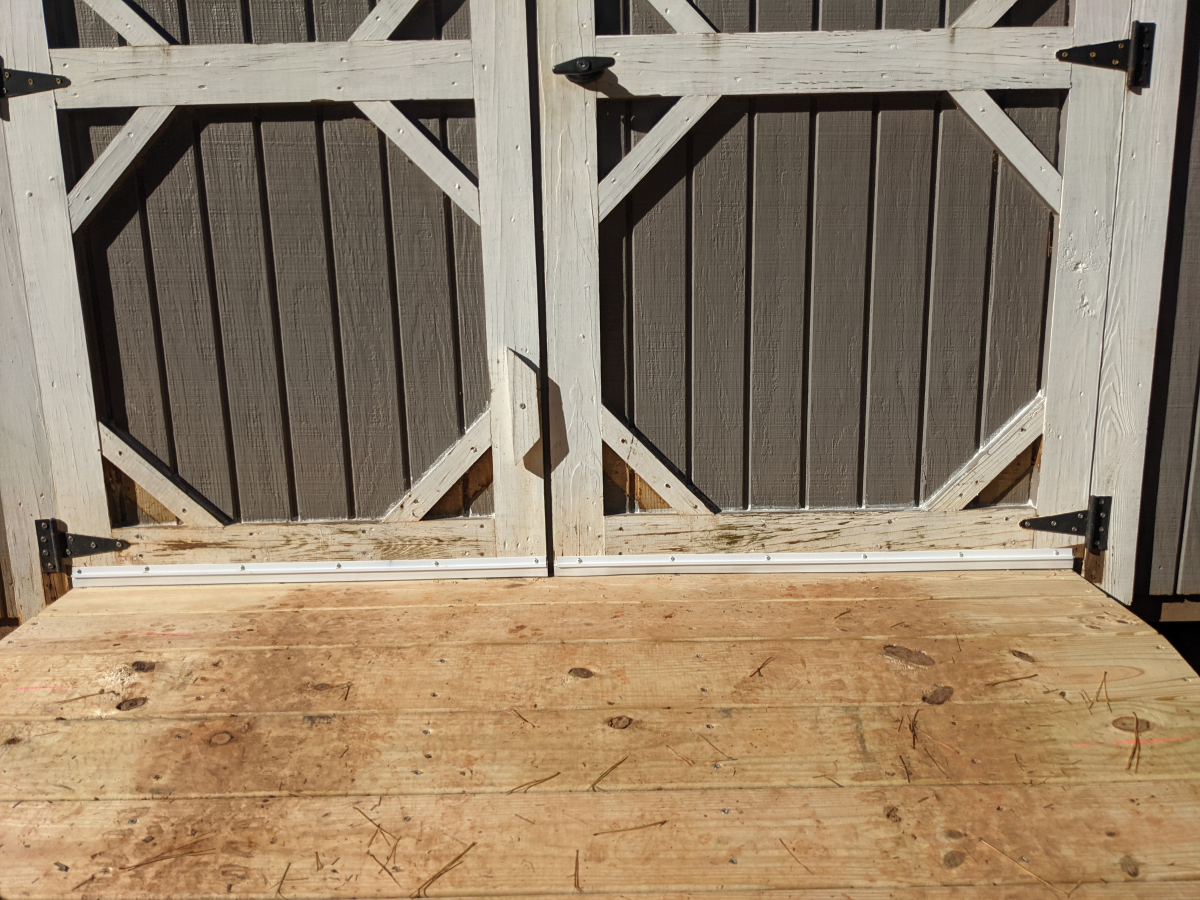
Added a rubber door edge to the bottom to help the water drip off and not roll under the door edge.
Picked up a 25 gallon sprayer as I plan to start putting down tenacity as pre-emerg and I will need 19 gallons to cover my lawn and I don't want to load a 4 gallon backpack 5 times. So had to create a mount for it. Fits perfect above the loader bucket below my trimmer shelf.
Also got the brush guard mounted so it is out of my way when using the grapple or louder.
Loader finally on dollys as well. Have mounted the loader and the grapple several times in the past few days and it is so much easier being able to position them by rolling them around.
Added a rubber door edge to the bottom to help the water drip off and not roll under the door edge.
The following users liked this post:
00TL-P3.2 (01-05-2021)
The following users liked this post:
CCColtsicehockey (01-04-2021)
01-07-2021, 07:03 AM
#1239
Moderator
Regional Coordinator (Southeast)
Regional Coordinator (Southeast)
Thread Starter
Join Date: Dec 2003
Location: Mooresville, NC
Age: 38
Posts: 43,563
Received 3,763 Likes
on
2,538 Posts
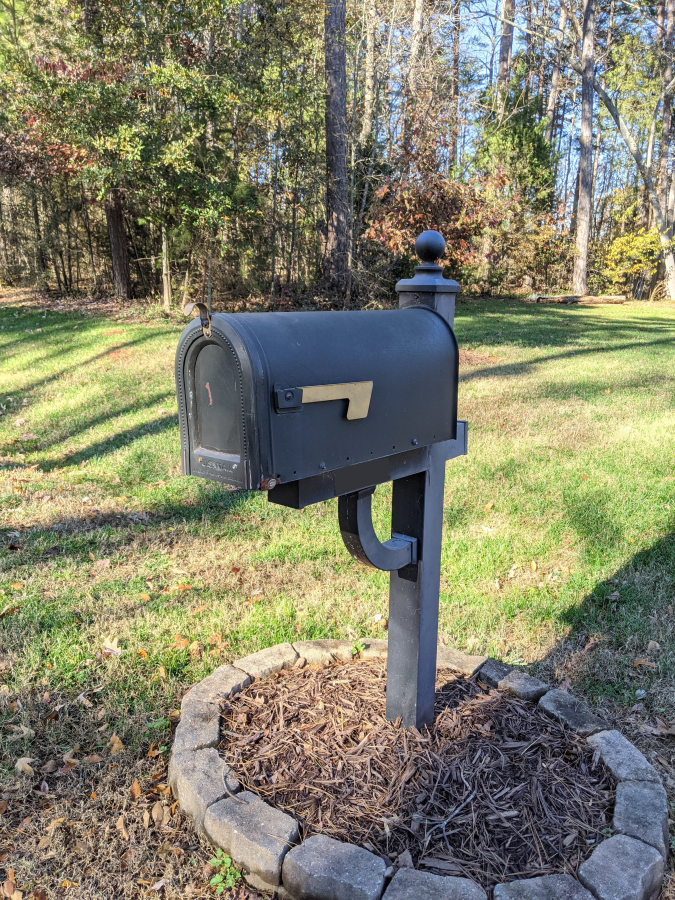
So my mailbox has seen better the past year or two. Hell a service tech working on another house even hit it two years ago. I couldn't find anything at the time that was the same style so didn't take them up on replacing it after that.
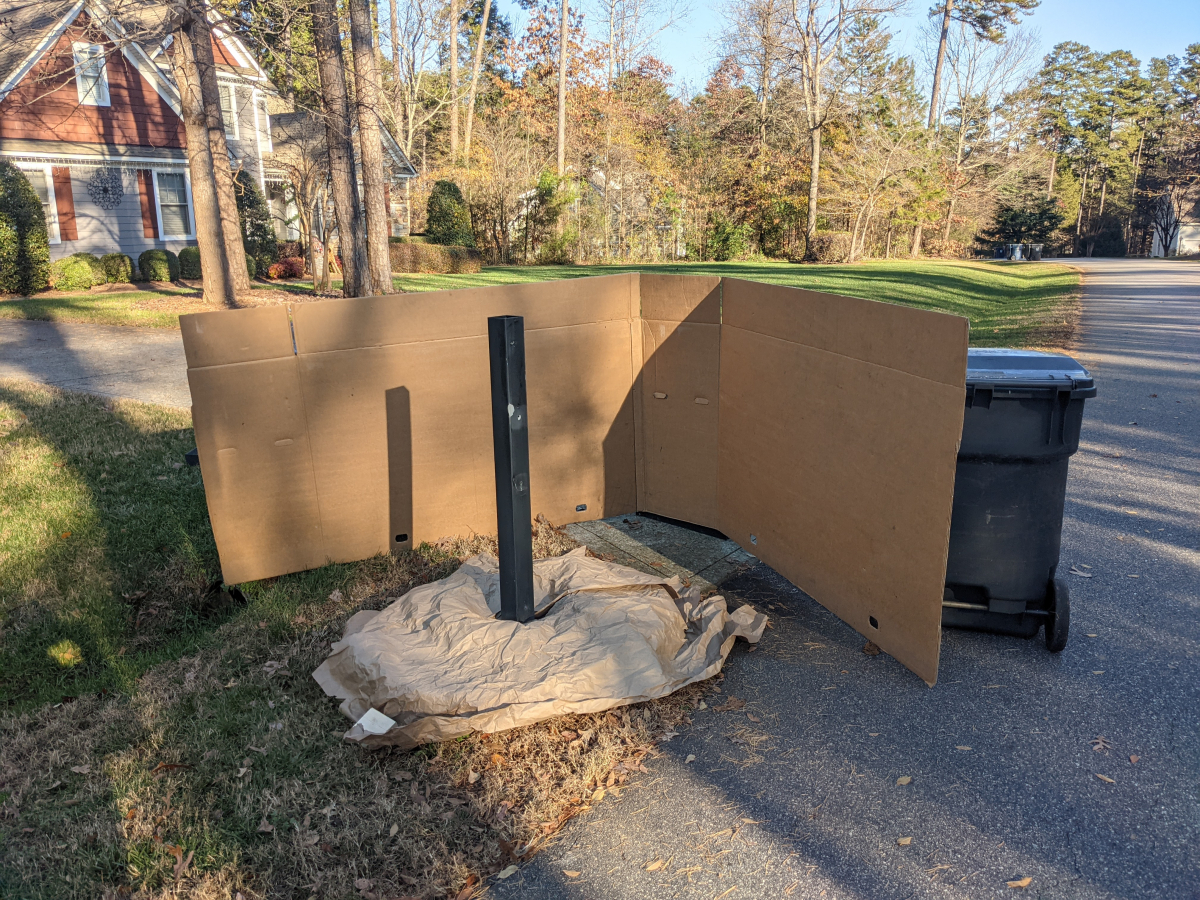
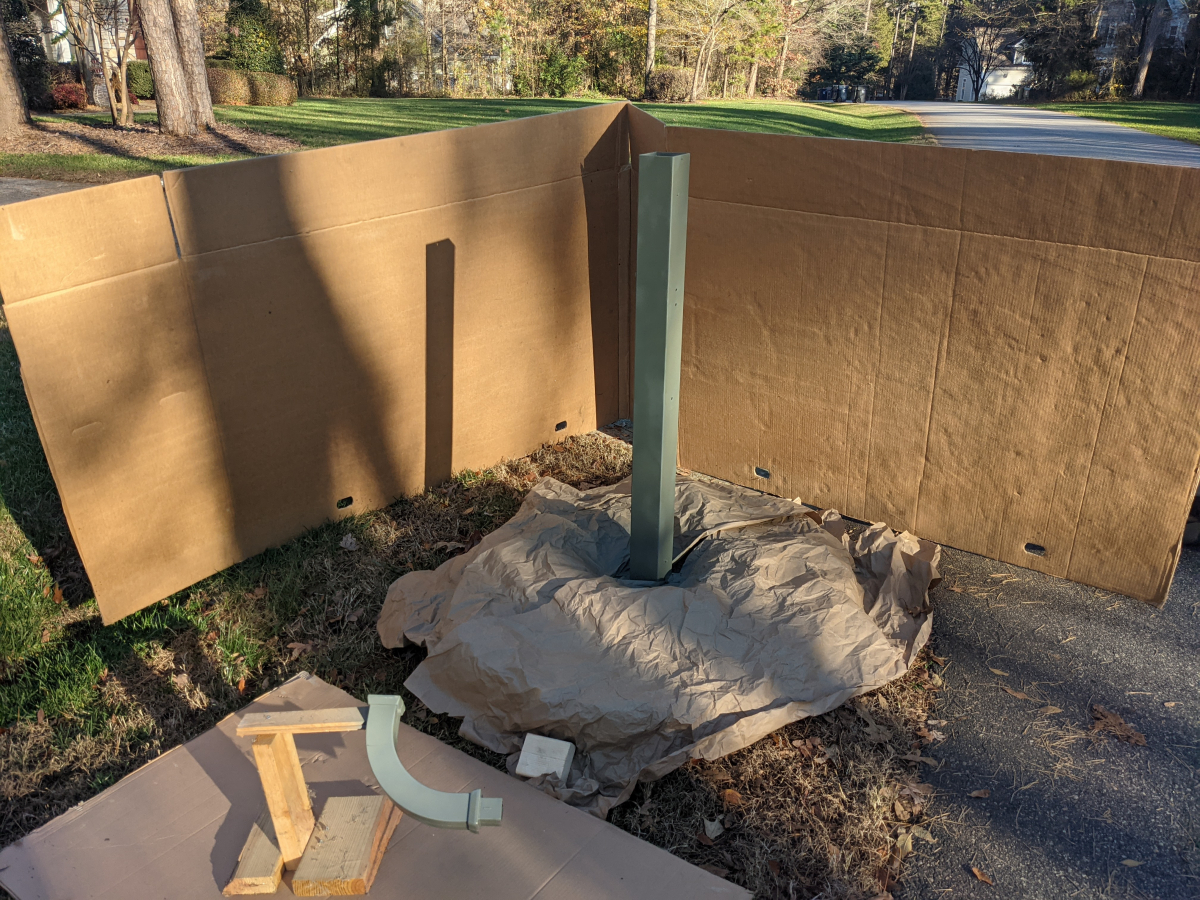
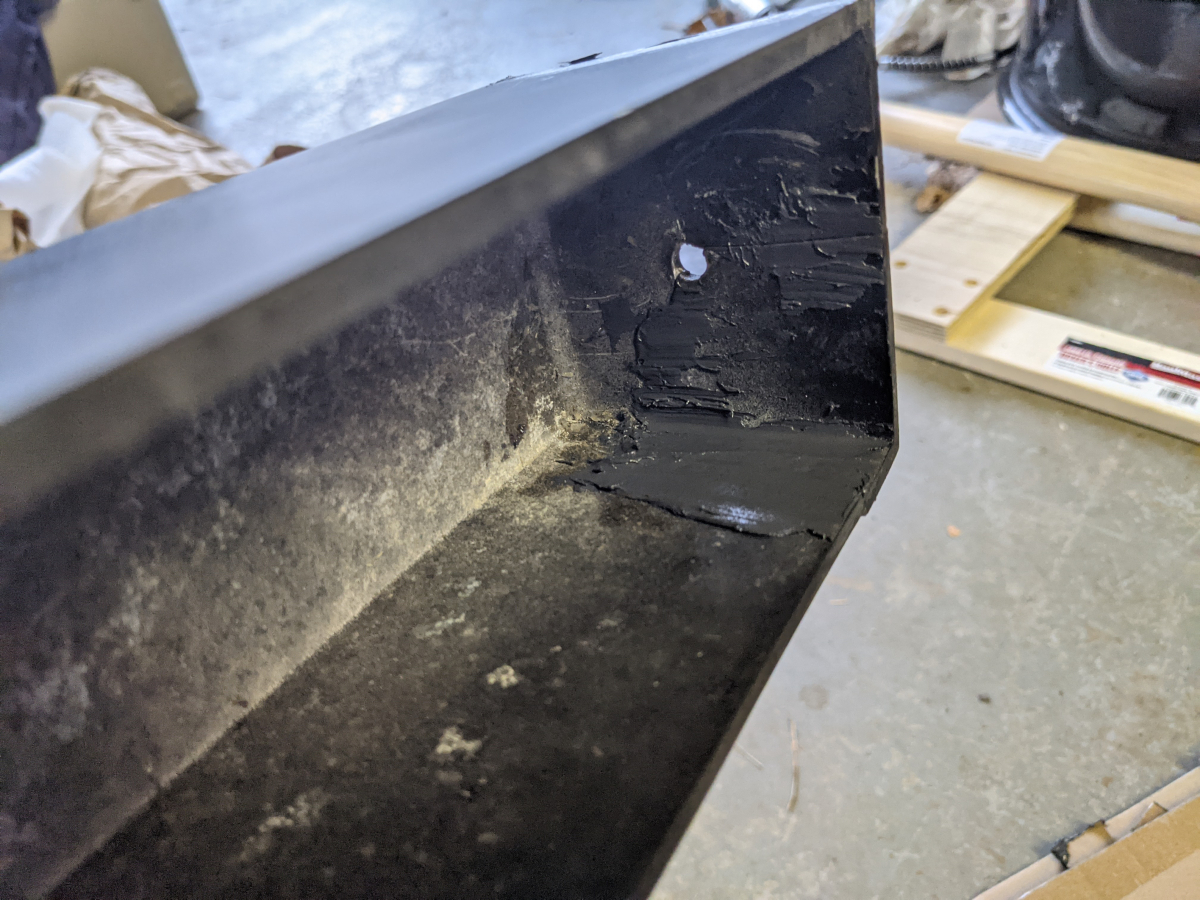
The rivet rusted through a year ago. Replaced it with a smooth body screw replacement for a rivet. That last for another year till this November where the metal of the door actually rusted out. Felt bad for the mailman for dealing with my falling off door and had to do something. Still couldn't find a replacement post exactly like mine so I decided to repair and refinish the post and just get a new mailbox.
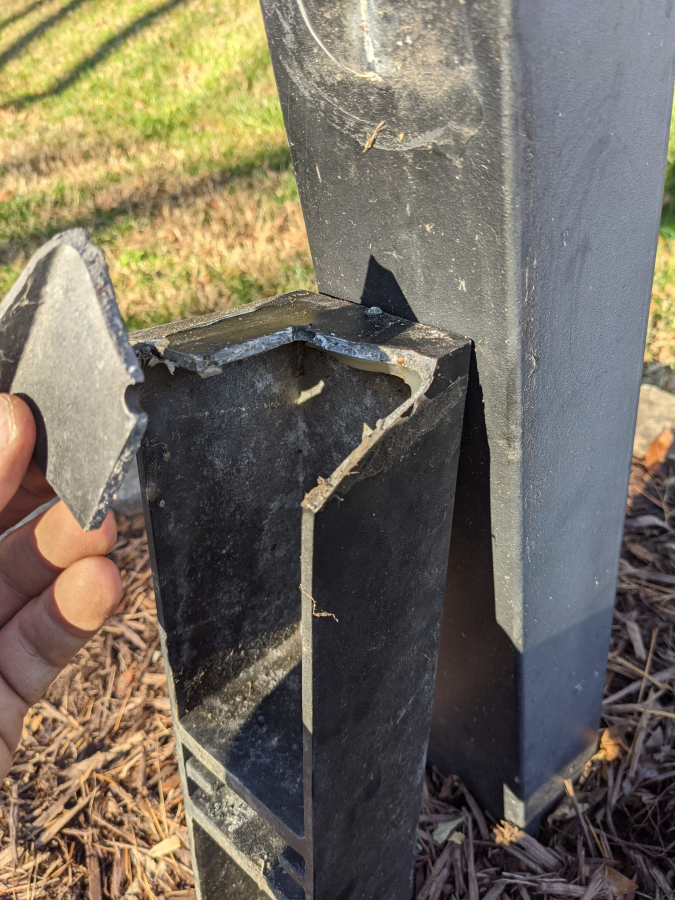
Some of the damage from when it got hit.
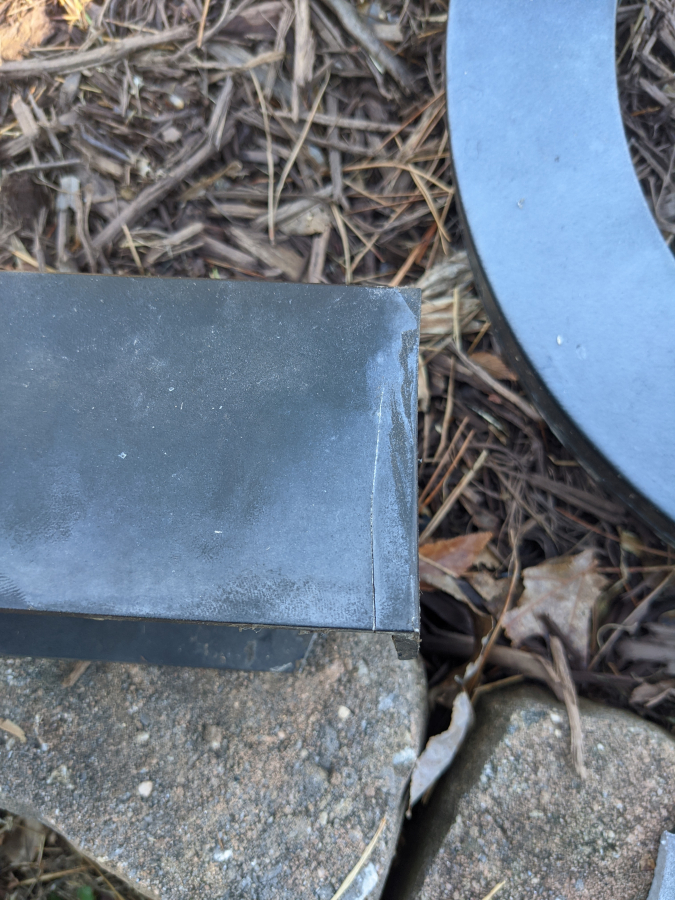
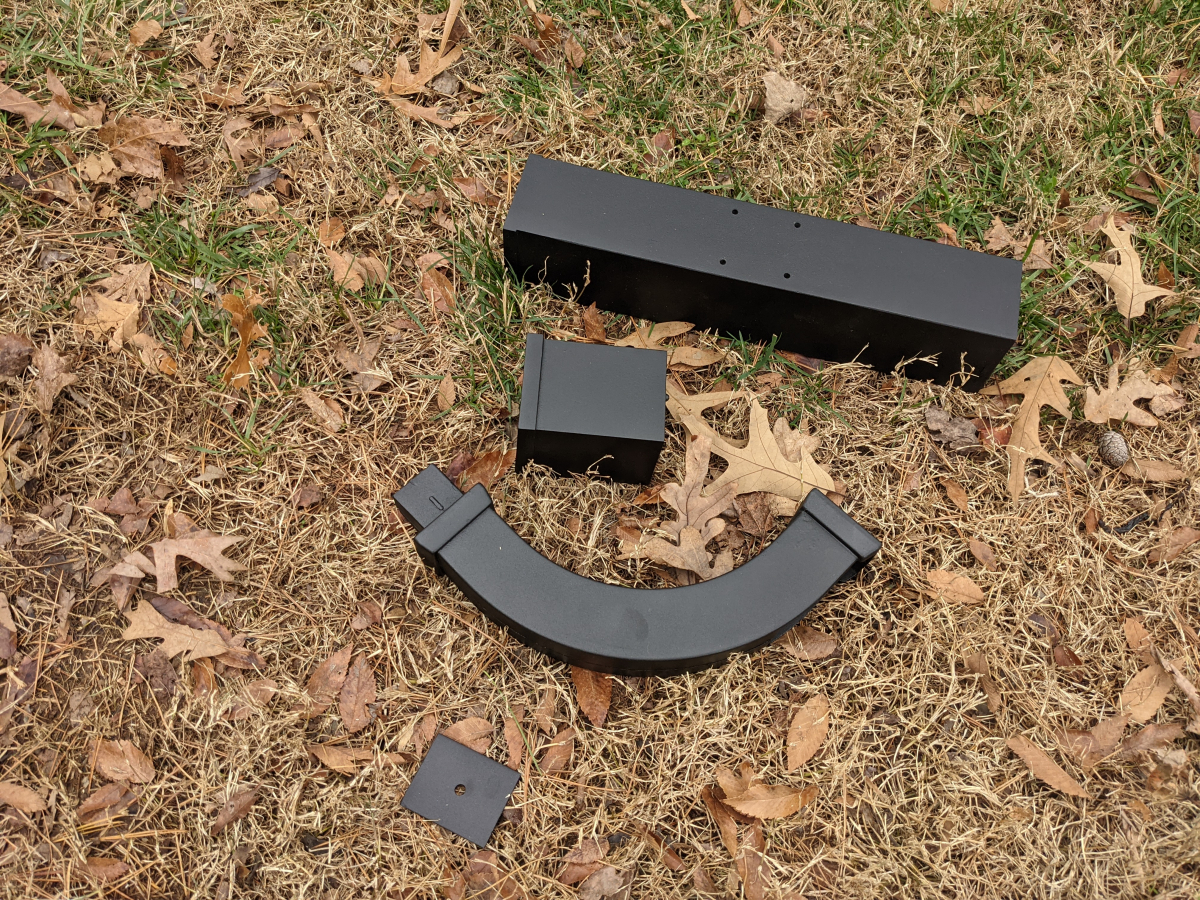
Sanded down and chipped off any flaking paint.
Primered
JB Weld to try and repair the broken middle support
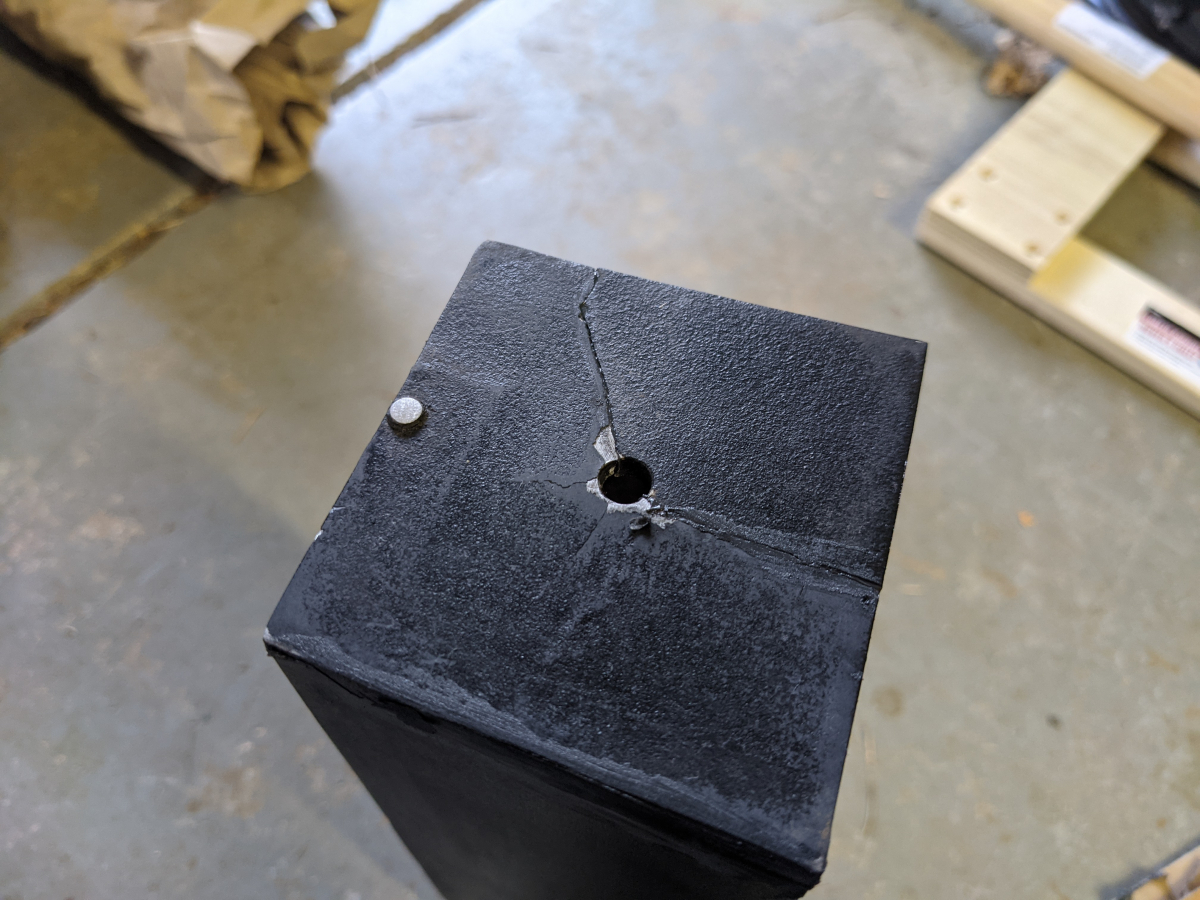
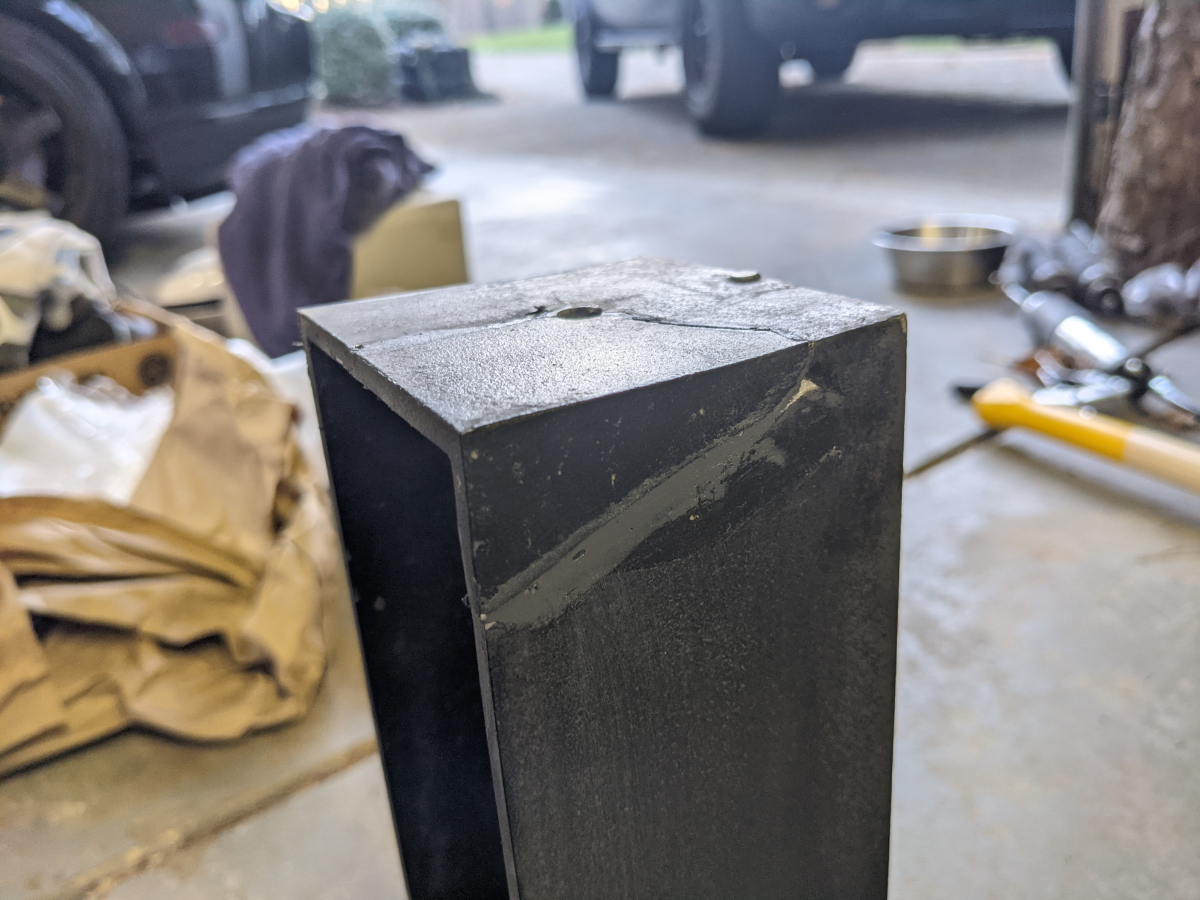
Primered other parts
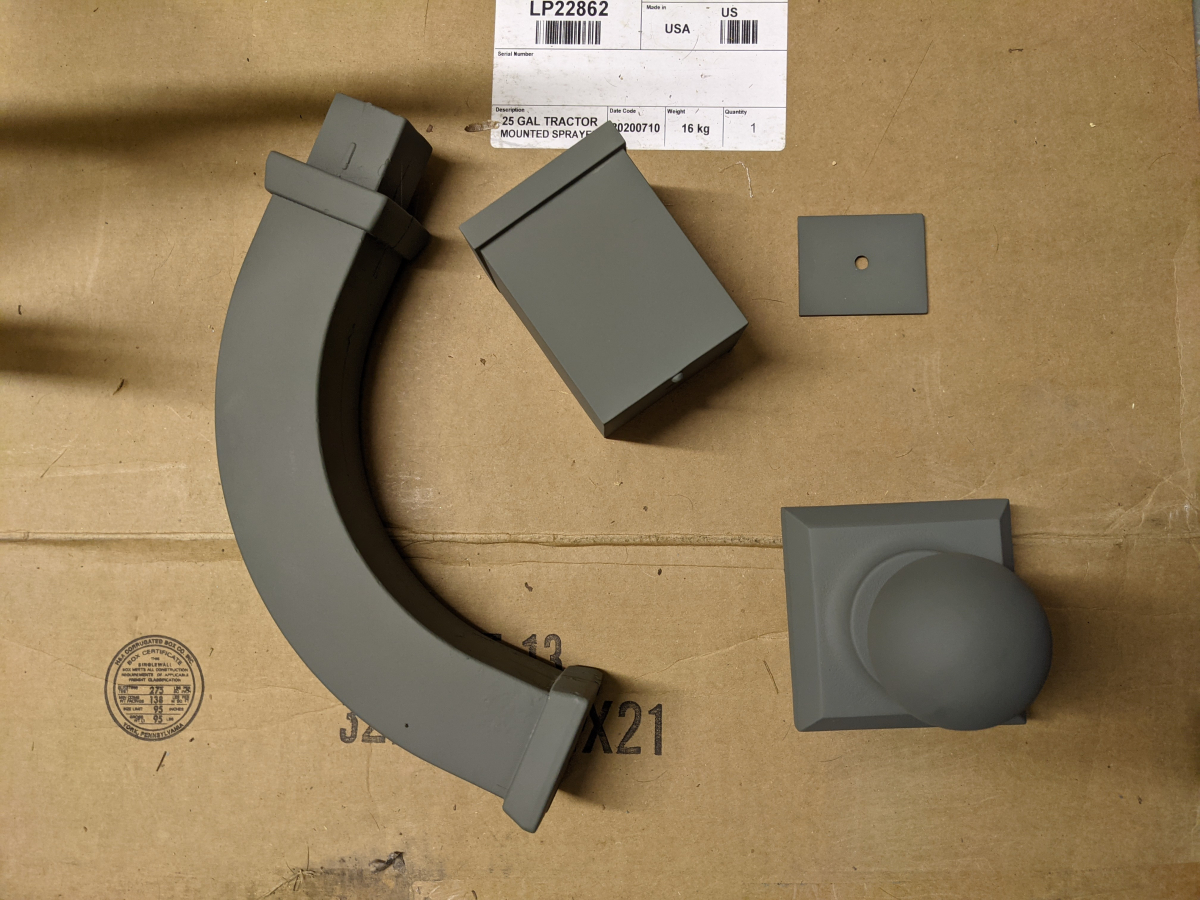
Finally getting the paint started. Went with textured black Rustoleum paint as it was closest to what the post was originally covered in. This shit is super hard to get good cans of. It took 6 cans to get finished with the project and I only made it through 1 complete can and returned all the rest. Most quit working within the first 60 seconds of use no matter how I prepped the cans. They were always kept inside to stay warm between uses. I painted only in 50 degree plus temps.
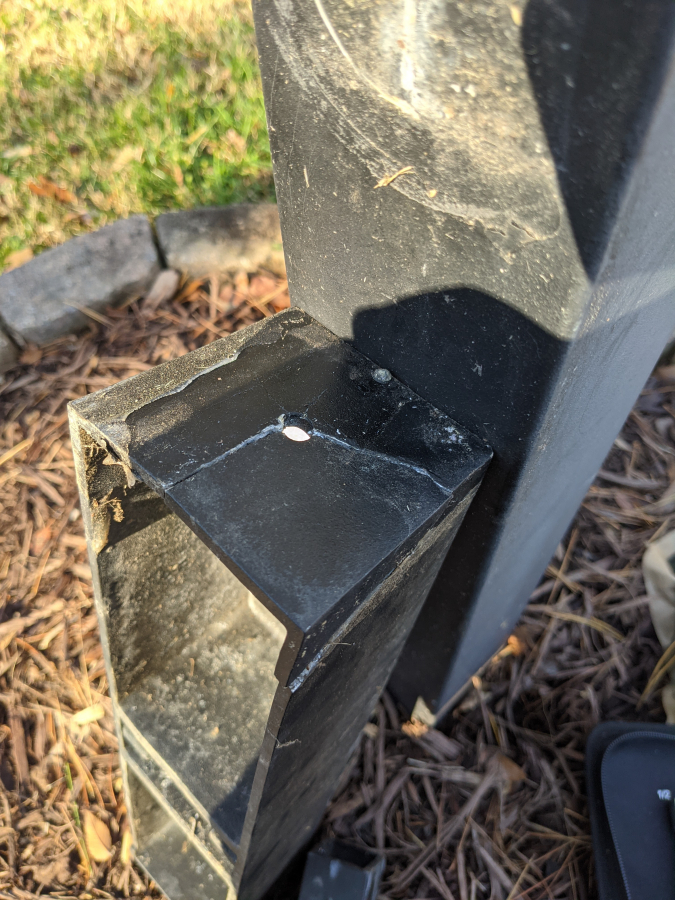
Finished the extra pieces. The square metal plate is going to be the new metal washer where the cracked piece is at the back of the mailbox support. I figured it would distribute the weight better across the cracked piece that is JB Welded in place.
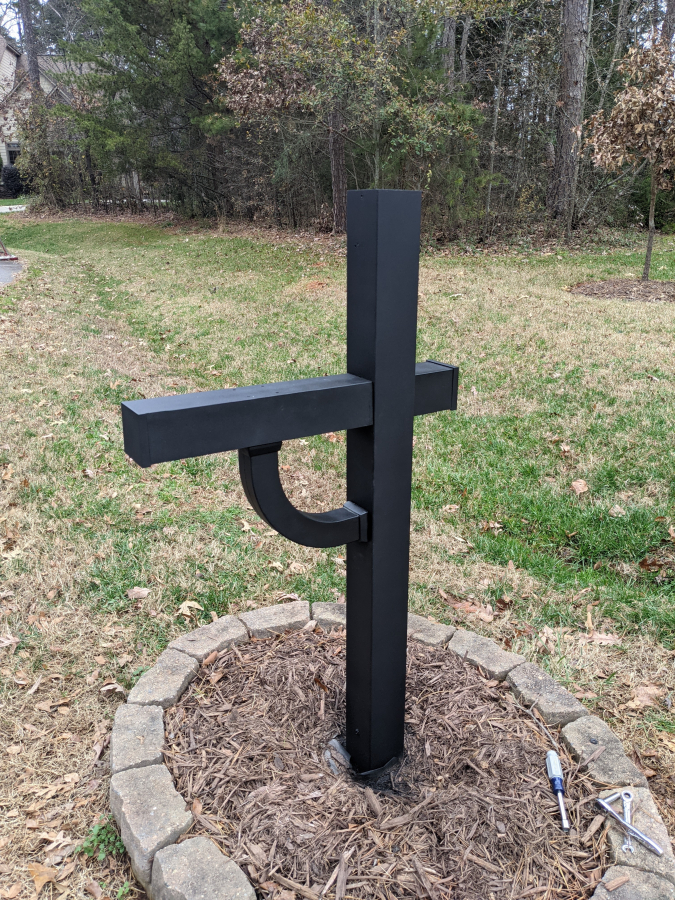
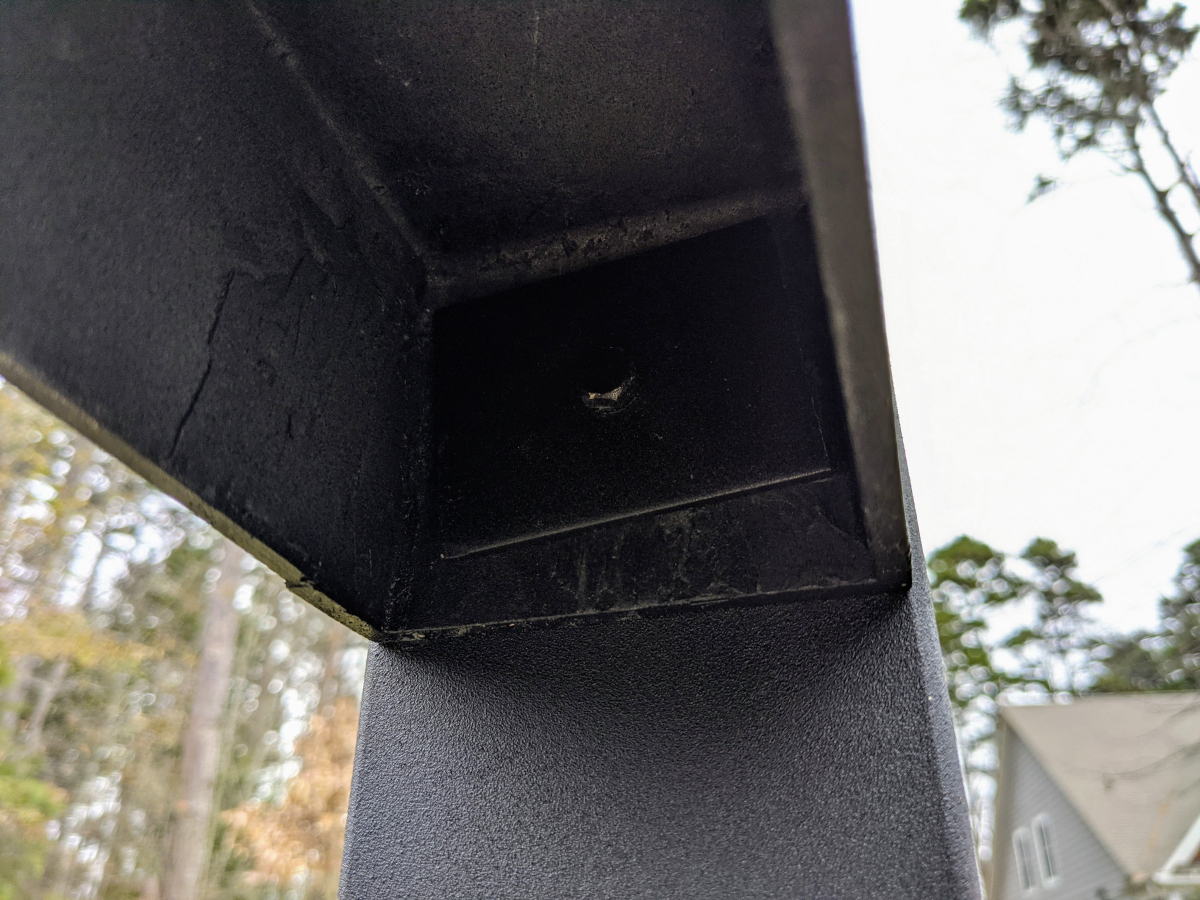
New washer installed
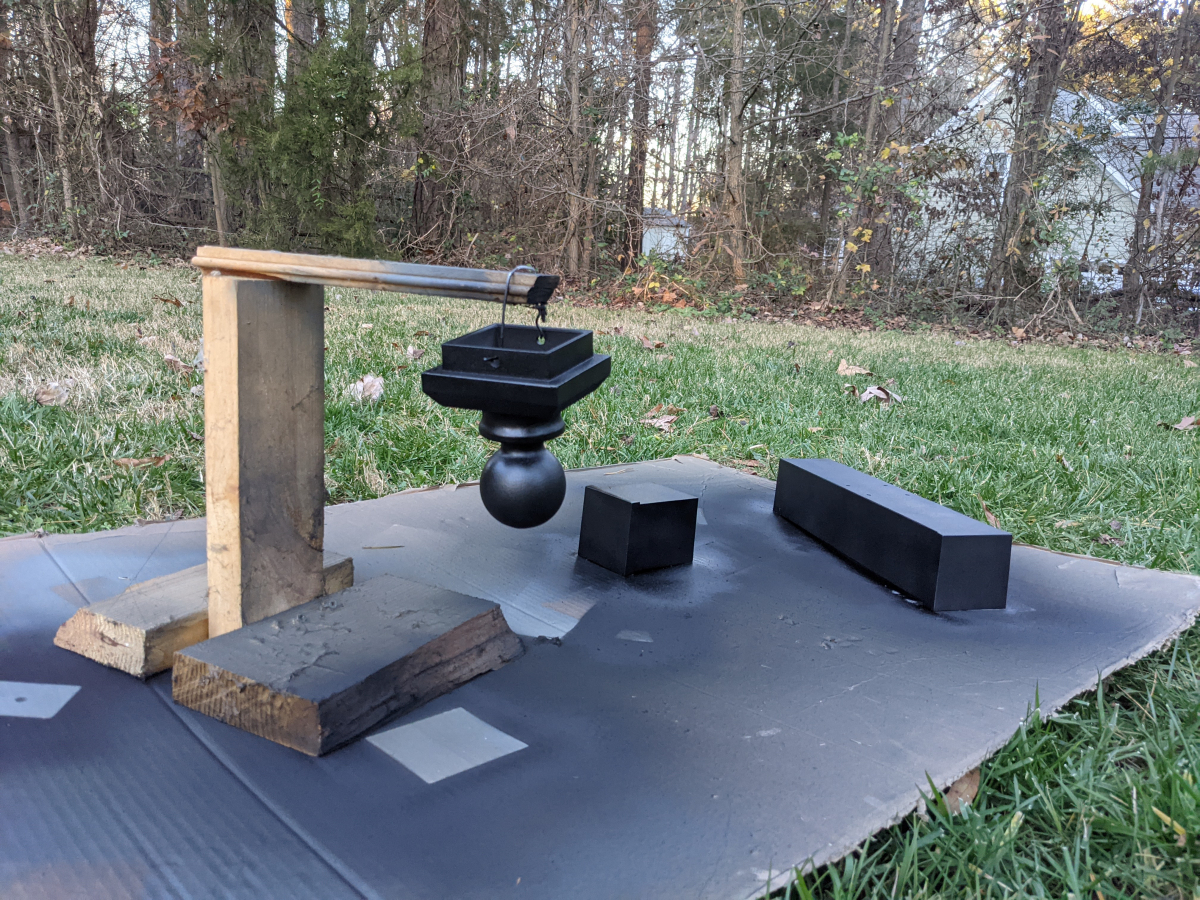
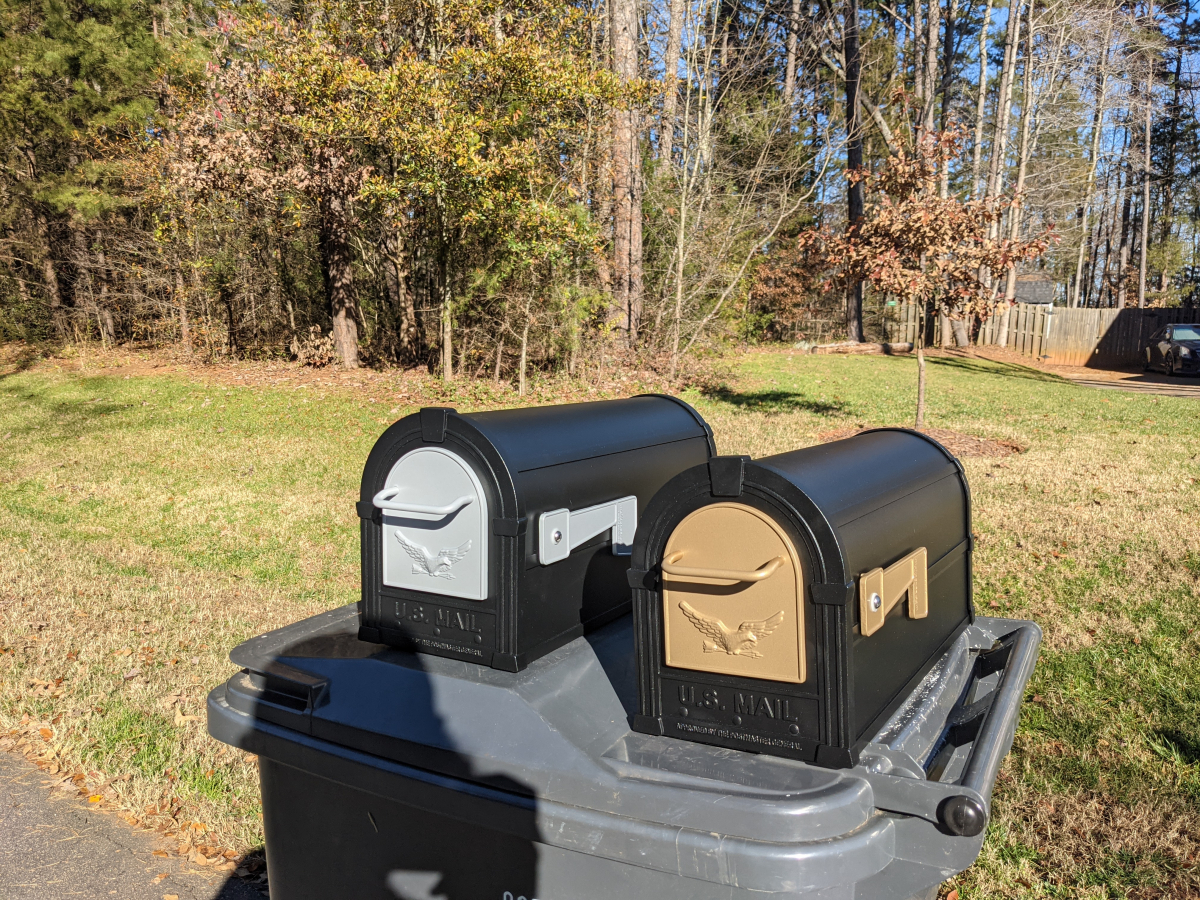
The last mailbox having bronze accents I really liked. I also had nothing bronze on the entire house. I found a mailbox that looked similar online but ordered two colors just in case. Glad I did cause the gold was really bright compared to what I want. I decided to go with silver since my house is grey. The accent color pieces are actually removable with bolts so if I decide I want to I can have those pieces powder coated a different color. Might actually have the silver done in a darker grey cause right now they look almost white in bright direct sun.
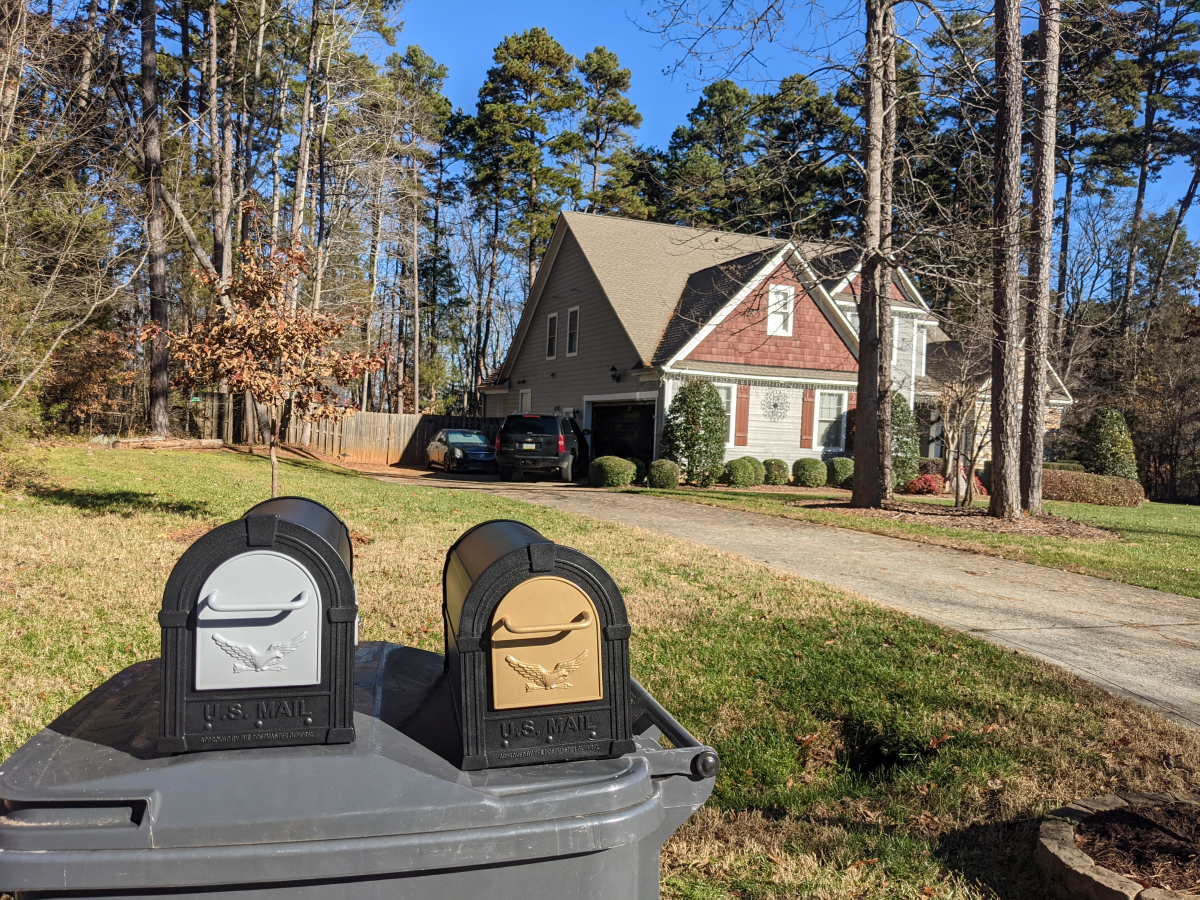
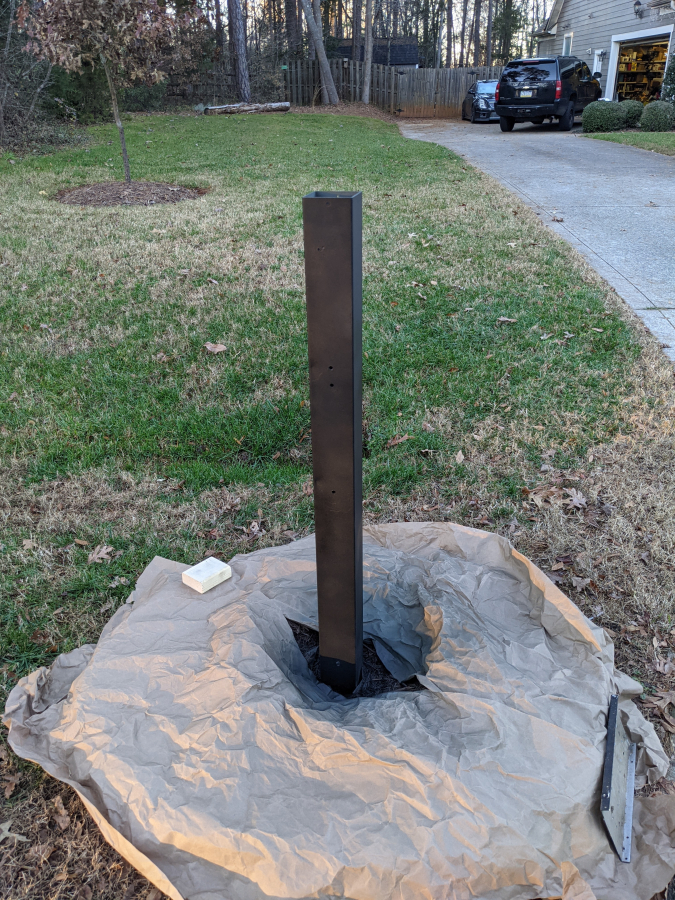
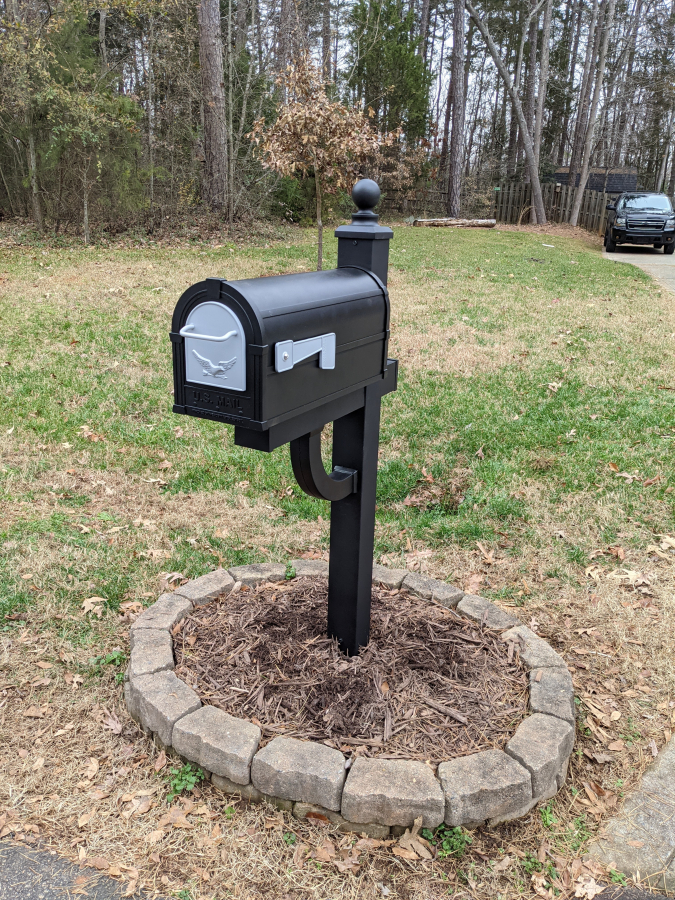
Finished Product

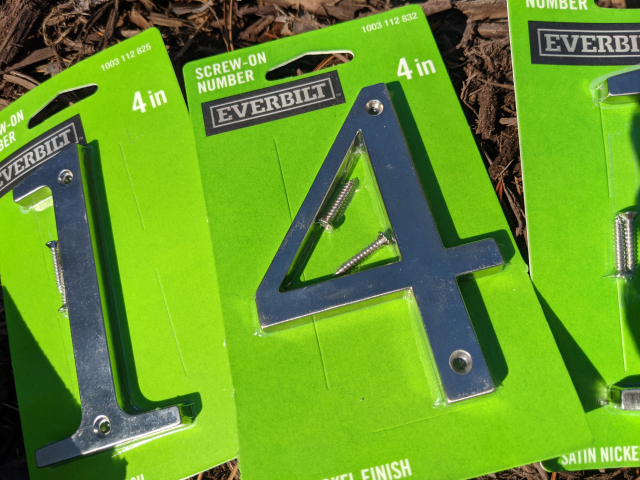
The only thing left to do now is the original mailbox has numbers on the support post under the mailbox. They were just gold stick-on numbers. Not a huge fan of how it looks. I bought some numbers I am considering doing that would give it a more modern look with large numbers going down the main post from the top. I have 5 numbers though in my address number cause the developer thought that would be fun. So the numbers with 1/2in space in between would take up 22in of the post.
The rivet rusted through a year ago. Replaced it with a smooth body screw replacement for a rivet. That last for another year till this November where the metal of the door actually rusted out. Felt bad for the mailman for dealing with my falling off door and had to do something. Still couldn't find a replacement post exactly like mine so I decided to repair and refinish the post and just get a new mailbox.
Some of the damage from when it got hit.
Sanded down and chipped off any flaking paint.
Primered
JB Weld to try and repair the broken middle support
Primered other parts
Finally getting the paint started. Went with textured black Rustoleum paint as it was closest to what the post was originally covered in. This shit is super hard to get good cans of. It took 6 cans to get finished with the project and I only made it through 1 complete can and returned all the rest. Most quit working within the first 60 seconds of use no matter how I prepped the cans. They were always kept inside to stay warm between uses. I painted only in 50 degree plus temps.
Finished the extra pieces. The square metal plate is going to be the new metal washer where the cracked piece is at the back of the mailbox support. I figured it would distribute the weight better across the cracked piece that is JB Welded in place.
New washer installed
The last mailbox having bronze accents I really liked. I also had nothing bronze on the entire house. I found a mailbox that looked similar online but ordered two colors just in case. Glad I did cause the gold was really bright compared to what I want. I decided to go with silver since my house is grey. The accent color pieces are actually removable with bolts so if I decide I want to I can have those pieces powder coated a different color. Might actually have the silver done in a darker grey cause right now they look almost white in bright direct sun.
Finished Product
The only thing left to do now is the original mailbox has numbers on the support post under the mailbox. They were just gold stick-on numbers. Not a huge fan of how it looks. I bought some numbers I am considering doing that would give it a more modern look with large numbers going down the main post from the top. I have 5 numbers though in my address number cause the developer thought that would be fun. So the numbers with 1/2in space in between would take up 22in of the post.
01-07-2021, 09:02 AM
#1240
Ex-OEM King
The only thing left to do now is the original mailbox has numbers on the support post under the mailbox. They were just gold stick-on numbers. Not a huge fan of how it looks. I bought some numbers I am considering doing that would give it a more modern look with large numbers going down the main post from the top. I have 5 numbers though in my address number cause the developer thought that would be fun. So the numbers with 1/2in space in between would take up 22in of the post.

Nice work! Finished product looks awesome.
The following users liked this post:
CCColtsicehockey (01-07-2021)