
rockstar143's '04 NBP progress thread (part deux continues after 6 year hiatus)
 10-10-2011, 09:47 PM
#801

About the vinyl...I'm not 100% I even want to mess with painting the stock brake calipers but I'm thinking about it. If it were reversible, which, obviously it would be since I'd be able to paint it gloss black again if I wanted to. We shall see...supposedly it has to be high temp vinyl but I think you're also supposed to clear over it so it sits under the paint.

I had vinyl stickers on my s2k and never cleared over them, or at least don't remember doing it.
Last edited by sodaks2k; 10-10-2011 at 09:56 PM.

The following users liked this post:
rockstar143 (10-11-2011)
10-10-2011, 09:50 PM
#802
Race Director
iTrader: (8)

The following users liked this post:
rockstar143 (10-11-2011)
10-11-2011, 08:44 AM
#803
^^^yeah j what he said. the front looks out of place without any color.
if you plan to keep it black, plastidip it so it looks fresh to match.
ps, your welcome on the picture. if you still have my email send them away any time, i fuck with pictures for enjoyment so i'm always willing.
pss, go into the sharpen tool area, and use 'clarity' to give that 'light' effect thats in HDR and Gritty filters. found that out on that picture friday.
The following users liked this post:
rockstar143 (10-11-2011)
The following users liked this post:
rockstar143 (10-11-2011)
10-11-2011, 09:40 AM
#805
 Plus, when hood is closed you'd see some of the orange thru the hood crevices.
 I'd probably want it to be a carbon copy of the exact font/size of the OEM brembo's. They should make a high temp coating you could put on and peel off like plasti dip! I hate how permanent painting it would be!
That just sounds wrong!

^^^yeah j what he said. the front looks out of place without any color.
if you plan to keep it black, plastidip it so it looks fresh to match.
ps, your welcome on the picture. if you still have my email send them away any time, i fuck with pictures for enjoyment so i'm always willing.
pss, go into the sharpen tool area, and use 'clarity' to give that 'light' effect thats in HDR and Gritty filters. found that out on that picture friday.
if you plan to keep it black, plastidip it so it looks fresh to match.
ps, your welcome on the picture. if you still have my email send them away any time, i fuck with pictures for enjoyment so i'm always willing.
pss, go into the sharpen tool area, and use 'clarity' to give that 'light' effect thats in HDR and Gritty filters. found that out on that picture friday.
10-11-2011, 09:47 AM
#806
Nexson...I told you I'd be more than happy to come by and give you a hand with all my extra time! See what happens with idle hands!??! They start painting things orange!
I am very interested in painting my calipers this color too...I think, with the Acura logo on it, it'll look great. Or maybe blue to match the lugs.
I am very interested in painting my calipers this color too...I think, with the Acura logo on it, it'll look great. Or maybe blue to match the lugs.
10-11-2011, 09:52 AM
#807
takin care of Business in
iTrader: (5)
Join Date: Jan 2008
Location: Kansas City, MO
Age: 40
Posts: 30,994
Received 4,732 Likes
on
4,064 Posts
^^^ it will have way too many colors then man....
BLACK/BLUE/BRONZE/ETC
keep it clean J
BLACK/BLUE/BRONZE/ETC
keep it clean J
10-11-2011, 03:17 PM
#809

http://cgi.ebay.com/ebaymotors/NEW-B...item3cbcf92f14
Creat your own color!!

http://www.plastidip.com/home_soluti...Your_Color_Kit
Last edited by sodaks2k; 10-11-2011 at 03:20 PM.
10-11-2011, 05:16 PM
#810
LOL...that would be great if I didn't already have brembos! I don't think those would fit over and I probably wouldn't put them on! The last one, though...that has the color I like!
That's good shit! It's too bad you can create your own color in a can!
Dude...that would be AWESOME to dip the ends of your lug nuts to make them color match. Thanks for posting that. and DAMN is that guy annoying!
No, I might add...if you can coat your stool bottoms with them...they MUST be pretty tough and stand up to most things. I wonder about high temperatures. A solution might be to plasti dip and THEN paint it the color you want, and then if you change your mind, you can remove the plastidip down the line!
Last edited by Steven Bell; 10-11-2011 at 07:54 PM. Reason: Merged Posts.
10-16-2011, 11:07 AM
#811
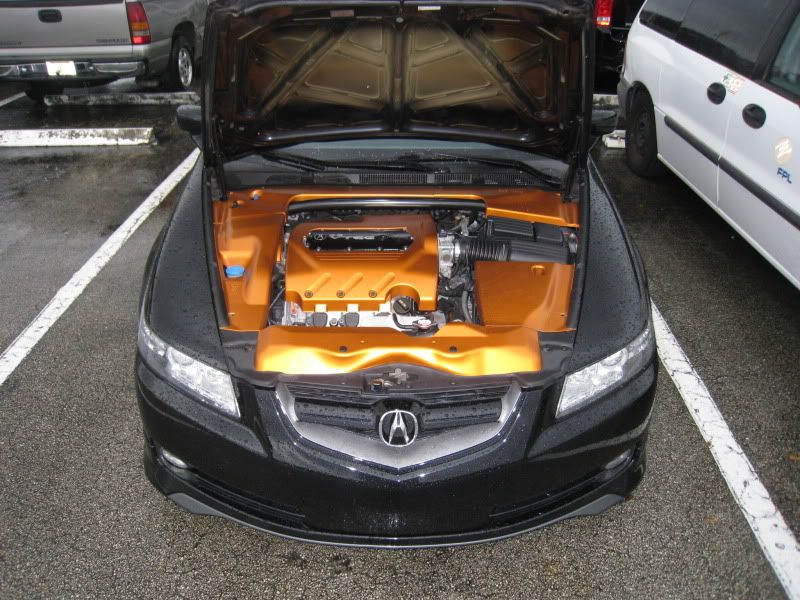
So, after doing the engine plastics...I considered everyone's recommendation to paint the front portion, but once again...decided against it. I don't want it visible when the hood is closed and I don't want to have a piece of engine cover that I CAN'T put back to stock since I have a backup of every other one that I DID paint.
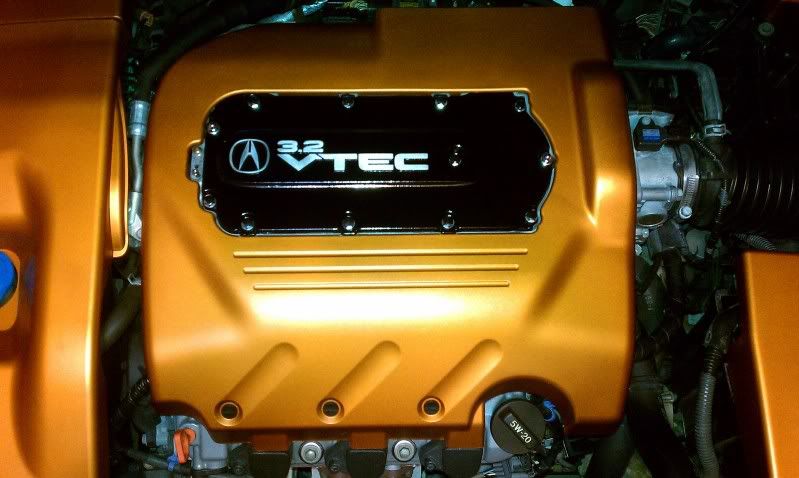
That said, I have been mildly annoyed by the manifold top that has started bubbling and corroding (the silver).
I sanded down the Acura logo, 3.2 VTEC with 80 grit, then 800 to make it look nice and shiny...I then put some bearing grease on the flat portion of all the letters with my finger....spray painted high temp black...then with a razor blade scaped off all the black from the letters and then ran a bit a clear over the entire thing. Looks good...can kinda see the corrosion but didn't have the high temp primer to put on and be able to sand to hide it. Overall, it looks great as is though.
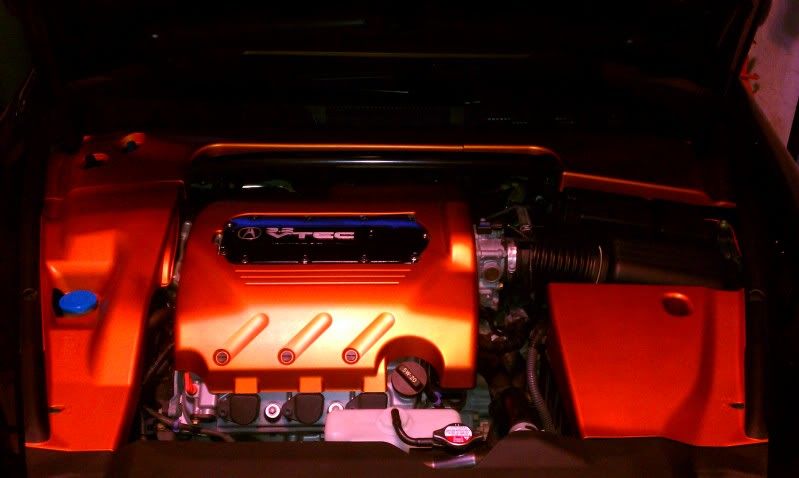
amazing the color changes with flash on or off
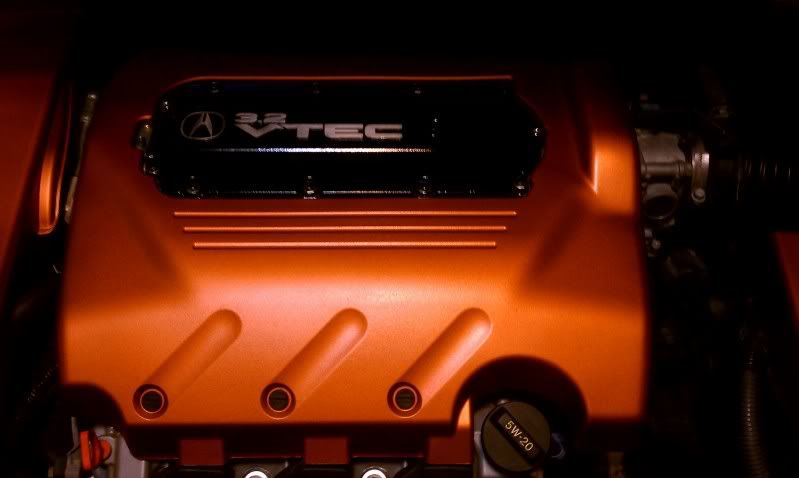
and here is before and after...
That said, I have been mildly annoyed by the manifold top that has started bubbling and corroding (the silver).
I sanded down the Acura logo, 3.2 VTEC with 80 grit, then 800 to make it look nice and shiny...I then put some bearing grease on the flat portion of all the letters with my finger....spray painted high temp black...then with a razor blade scaped off all the black from the letters and then ran a bit a clear over the entire thing. Looks good...can kinda see the corrosion but didn't have the high temp primer to put on and be able to sand to hide it. Overall, it looks great as is though.
amazing the color changes with flash on or off
and here is before and after...
Last edited by rockstar143; 10-16-2011 at 11:10 AM.
10-16-2011, 11:18 AM
#812
Race Director
iTrader: (8)
Damn...
looks so impressive!
looks so impressive!
The following users liked this post:
rockstar143 (10-16-2011)
10-16-2011, 12:16 PM
#814
takin care of Business in
iTrader: (5)
Join Date: Jan 2008
Location: Kansas City, MO
Age: 40
Posts: 30,994
Received 4,732 Likes
on
4,064 Posts
Damn J....that is looking sexy....
Any plans for painting the Throttle Body ? and I would say put some bronze on the lettering, no ?
Any plans for painting the Throttle Body ? and I would say put some bronze on the lettering, no ?
The following users liked this post:
rockstar143 (10-16-2011)
10-16-2011, 12:46 PM
#815
The following users liked this post:
rockstar143 (10-16-2011)
The following users liked this post:
rockstar143 (10-16-2011)
The following users liked this post:
rockstar143 (10-16-2011)
10-16-2011, 07:11 PM
#819
Thanks fellas, yeah, once I was done with it...I was SUPER happy with the outcome. The grease on the raised letters worked like a charm...I swear, made it SO easy to do.
I'm considering doing the front little portion, gotta see how much that part is new so I can have a backup in case I want to put it all back to stock.
I'm considering doing the front little portion, gotta see how much that part is new so I can have a backup in case I want to put it all back to stock.
The following users liked this post:
rockstar143 (10-16-2011)
10-16-2011, 09:12 PM
#822
Moderator
iTrader: (3)
Nicely done sir!
10-17-2011, 07:45 AM
#824
Thanks, friends. Honestly, that top cover, was one of the easiest and best effort/reward. It was easy work and when i scraped off the letters after putting the grease and paint on it and it came out with such clean lines....WOW...immediate satisfaction...then added a few coats of clear and it's nice and glossy and smooth to the touch. i love it.
Looking into getting a backup of the front cover btw too...also thinking about doing spraying some plastidip on part of that front bumper cover part so I can spray it copper to connect the colors. That'll allow me to peel it off if I ever wanted to.
10-17-2011, 09:43 AM
#825
takin care of Business in
iTrader: (5)
Join Date: Jan 2008
Location: Kansas City, MO
Age: 40
Posts: 30,994
Received 4,732 Likes
on
4,064 Posts
^^^ Grease was a great idea....I would have never thought about it....
10-17-2011, 09:59 AM
#826
Thanks Swooshers...I had thought of putting toothpaste or something that's easy to apply but wouldn't let the paint stick and would be easy to scrape off. I swear, I'm looking for any other raised letters on the car to paint. It's awesome.
10-17-2011, 10:09 AM
#827
takin care of Business in
iTrader: (5)
Join Date: Jan 2008
Location: Kansas City, MO
Age: 40
Posts: 30,994
Received 4,732 Likes
on
4,064 Posts
how about some self adhesive putty ? and shape it as you go....
Let it heal for a little bit....sand it off to level it up-top....paint it to the color of your choice....
Let it sit...once completely dry, apply grease, paint the manifold cover black....
Let it dry....remove the grease....apply 2 coats of clear coat....your done
Let it heal for a little bit....sand it off to level it up-top....paint it to the color of your choice....
Let it sit...once completely dry, apply grease, paint the manifold cover black....
Let it dry....remove the grease....apply 2 coats of clear coat....your done
10-17-2011, 10:15 AM
#828
that could work too, but if the wording is already raised and has clear/concise edges, it's not even necessary, I'm telling you, I sanded letters to make them shiny...sanded down entire cover with scratch sponge...then put the grease on the letters by dabbing with index finger...then painted gloss black high temp 2 heavy coats. then, after 30 minutes before teh paint was too dry, i used a fresh new razor blade and litterally just flat scraped the paint off the raised surface. it made PERFECT lines. then I wiped it off and sprayed clear on the whole thing, figuring that'll keep the sanded raised letters from getting dull again.
10-17-2011, 10:18 AM
#829
takin care of Business in
iTrader: (5)
Join Date: Jan 2008
Location: Kansas City, MO
Age: 40
Posts: 30,994
Received 4,732 Likes
on
4,064 Posts
^^^ that's what you did right ?....I thought you wanted to raise the already raised lettering a little more and hence I mentioned the full process with the putty....
10-17-2011, 10:40 AM
#830
Funny...I was thinking..wth is he talking about...
No, the raise part was fine...I was saying I'd like to find other useful raised letter areas to paint like this. Was such a rewarding process...so easy too.
No, the raise part was fine...I was saying I'd like to find other useful raised letter areas to paint like this. Was such a rewarding process...so easy too.
10-19-2011, 09:59 AM
#831
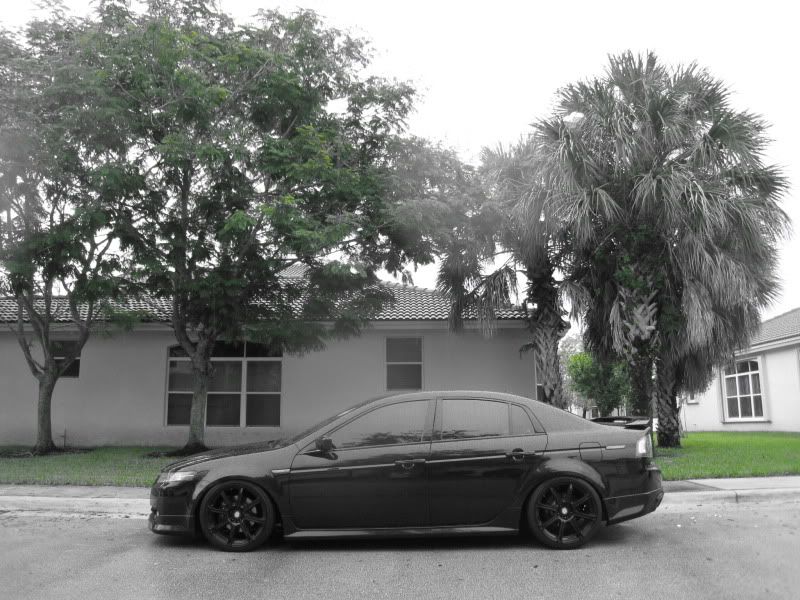
So, even though I thought I had my headlight condensation issues figured out, I just realized I made a mistake when putting my lenses back together last time. I had been prying open and closing the inside edge of the light first. This is fine...until you try and press together the outside edge. It's SUPER difficult and last time didn't go ALL the way back together. So with time, the outisde area, when exposed to sunlight, would soften the butyl stuff and push itself slightly open. Not a lot but enough to let water in. Anyway, Sunday, left my car out of the garage and it rained all day. Sure enough, water got in. Decided Monday it was time to slap my backup set back on the car for a while (cleared). I actually missed them. Had bought em, then sold to a friend, then recently rebought them from him (bzryce). Glad I did. Bought me time to do surgery on my OEM lights...maybe I'll do something different this go around.

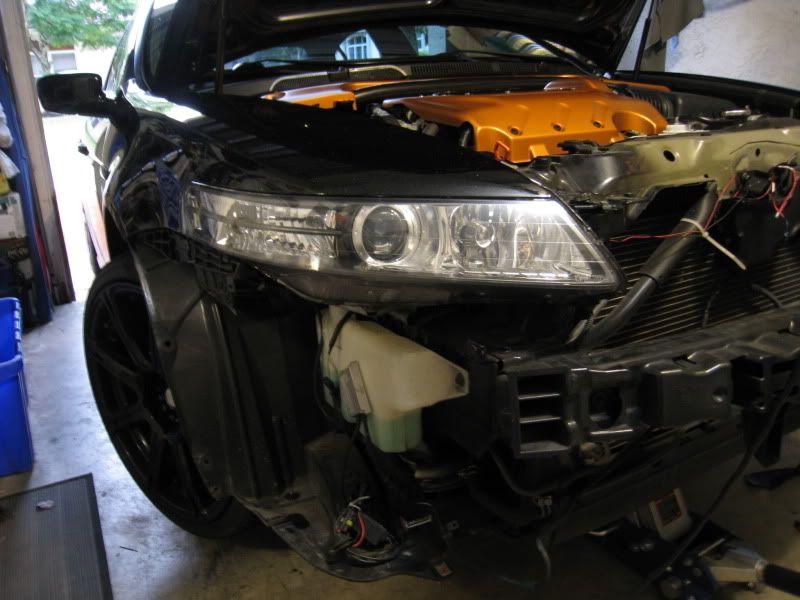
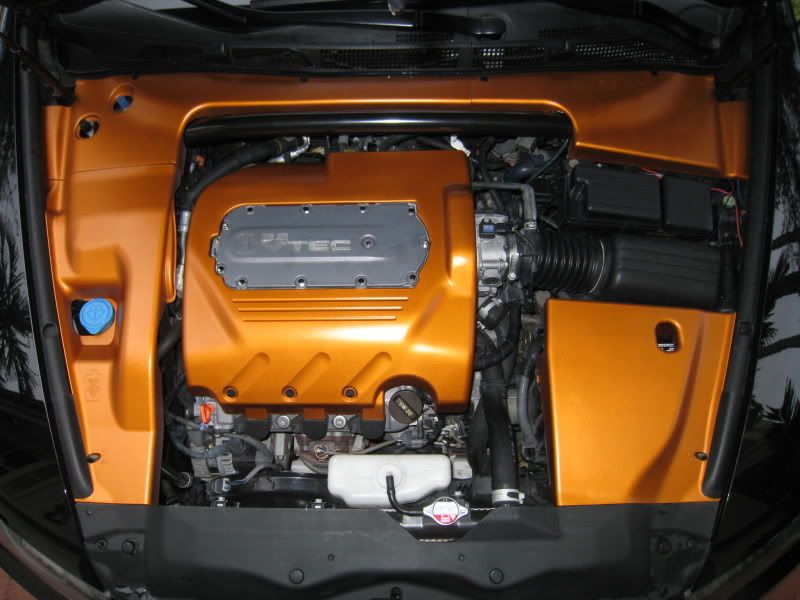
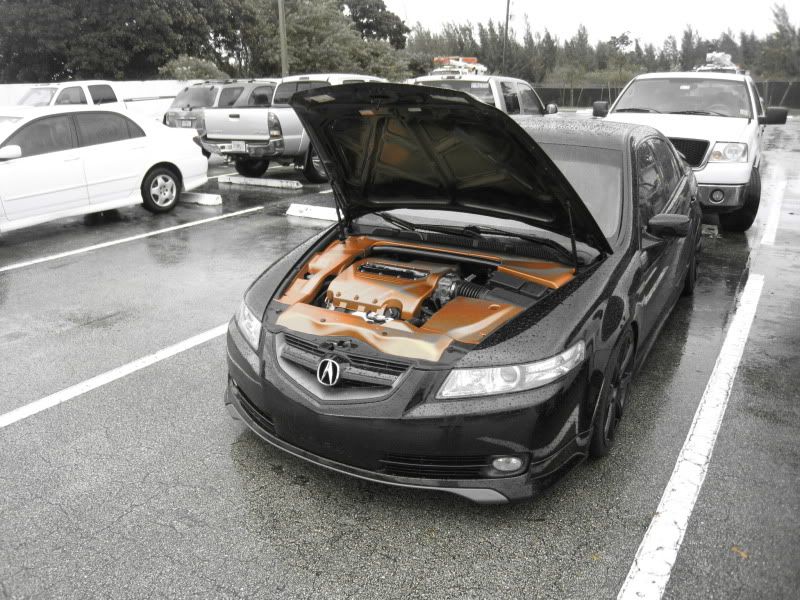
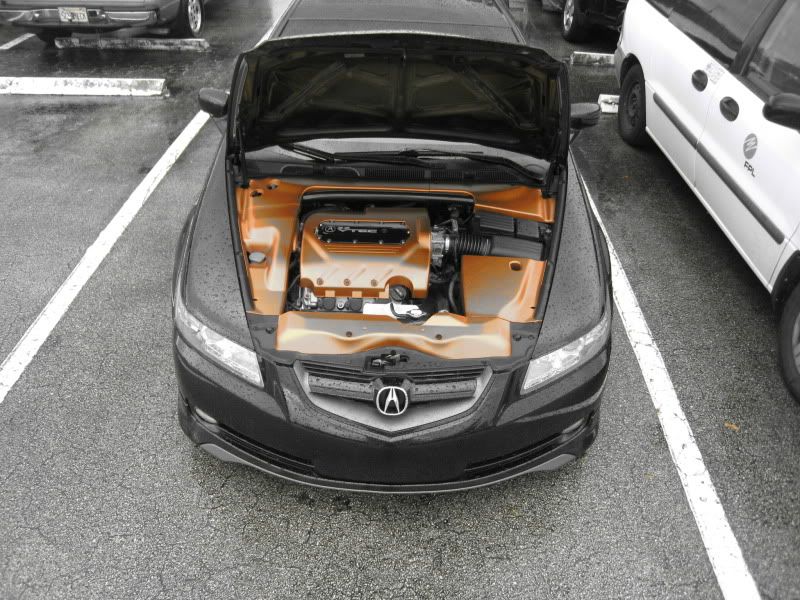
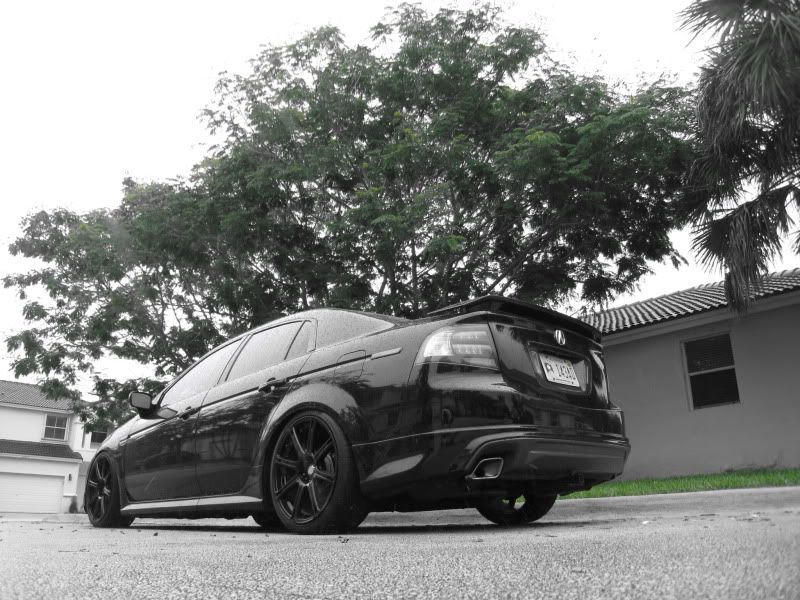
Anyway, in addition to that, I took too everyone's advice and painted a portion of that front engine cover to go with the rest of the bay. I don't have a backup of it, and LIKE the abilbity to go back to stock, so my solution was to paint it with 3 coats of plastidip first...then painted it with the copper color and 2 coats of clear. Taped off and did it...when I pulled tape off though, it kinda pulled some of the edges up because of the plastidip...but, no worries, was able to carefully use a razor and cut a straight line around the whole thing. Not perfect, but came out pretty nicely.
Let me know what you all think!
The following users liked this post:
rockstar143 (10-19-2011)
10-19-2011, 01:03 PM
#836
takin care of Business in
iTrader: (5)
Join Date: Jan 2008
Location: Kansas City, MO
Age: 40
Posts: 30,994
Received 4,732 Likes
on
4,064 Posts
I liked the blacked out ones better 
btw J did you climb a ladder to take those shots ? damn, they came out fine !!!
btw J did you climb a ladder to take those shots ? damn, they came out fine !!!
10-19-2011, 01:52 PM
#837
Thanks brother...no, no ladder...I'm 6'1" and shot them from my point and shoot with my arms up.
I dig both sets of lights...honestly, these chrome corners on the lights match my ghost tails pretty well...I'll end up reselaing the other ones better and put them back on...just no rush now...
MRLAL8...that's funny dude...that's what I have in my oem lights...they are type s diffusers I bought off Ack05tl for a lot of money...and carbon fiber wrap on the amber diffusers and blacked out chrome areas.
10-19-2011, 02:00 PM
#839
well it was exactly how i have my other lights done up!
i like both to be honest, I'll rock these for a while. took me 1.25 hours to take off bumper and swap everything over. I could probably do it in an hour now that I remembered all the little things I have to remember when i do it.
The following users liked this post:
DeathMetal (10-31-2011)