Death Metal's Journey (a DIY'ers Worklog for TL Perfection!)
#481
Haven't been on azine very often because I've been so busy with this thing called LIFE lol. This is one of the few threads I come back to see. Because of your insightful mods. I have spent the past few weeks getting stuff settled as far as my life is concerned, but the mod itch never goes away! Lol I will ne nodding again very soon. I think u r the same way. Any easy cheap mods that pop up will mostly be added to my list as well as yours lol and thanks again for always keeping a diary of your car. My diary for my car has been dead for quite some time. It needs a revival in the next few weeks!! Make sure to pass on by acurazine even while you journey back to the world of school and homework!!
#482
I didn't do a valve adjustment. I have new heads that have been ported and I'm saving up to sup up the valvetrain. Should have it completed and in by next summer.. You know how that goes though ($$$$).
#483
Thread Starter
Fearless DIY Guy
iTrader: (2)
Joined: Jan 2008
Posts: 3,003
Likes: 374
From: Jersey 'Burbs

Thanks for the kind words, all, this has been a great experience and I have certainly enjoyed all the help from the community. I just hope that this thread helps others as much as the forum has helped me!
#488
Thread Starter
Fearless DIY Guy
iTrader: (2)
Joined: Jan 2008
Posts: 3,003
Likes: 374
From: Jersey 'Burbs
Thanks for the kind words, fellas. I am going to do 1 or 2 more things before the year's out, then we're looking at wheels/drop in the spring...of course, I'll be adding a very different twist to the wheels. 
Oh, and the tails...yeah, I'm still not sold on them to this date, BUT...they are just too damn unique...I don't want to give that up!

Oh, and the tails...yeah, I'm still not sold on them to this date, BUT...they are just too damn unique...I don't want to give that up!
#489
Moderator
Chapter Leader (South Florida Region)
Chapter Leader (South Florida Region)
iTrader: (6)
Joined: Sep 2008
Posts: 78,019
Likes: 20,036
Wow, and I got a chubby thinking you had updated something.
Bastid...
Anyway, in looking at those final shots, I'm thinking you MAY have to the route of some custom 19 or 20's in a white powdercoat. I know it'll be a lot of white and a LOT to maintain...BUT I think it will tie your whole theme going on and will draw the line on the correct side of interpretation for your already white modifications.
If you know what I mean
PS, just saw your update...
OK...you are crazy as phuck...those tails are gorgeous. Trust me, look at that pic from the back...what makes them seem like they don't fit is the bronze stockies...a nice aggressive stance and some white wheels, preferably flat faced or concave and not lipped with white accent or all white would bring it all home.
C'mon, I watch HGTV and colorsplash...I know what I'm talking about!
Last edited by rockstar143; 11-17-2010 at 10:38 PM.
#494
So after 13 NICELY done pages I come to this last one and must give MASS props to you sir!
I normally can't read 13 pages COMPLETELY...I tend to just catch the highlights and move on.
1. You are very thourough with your projects / posts.
2. Tails - While a very unique twist - Kinda fail... (IMO)
3. Poeple that stole your subs are low lifes and have no place in society other than under the jail.
4. DON'T do white wheels....Its way to much of a hassle to keep clean!
5. Keep up the DETAILED updates - I enjoyed them.
6. Maybe 2-3 to many LEDs!
7. The carpet job you did made a HUGE Improvement to the interior of your car and I LOVE IT..
8. My opinions are just that - My opinions - No harm or disrespect intended by any statements above!
Thanks for the entertainment!
I normally can't read 13 pages COMPLETELY...I tend to just catch the highlights and move on.
1. You are very thourough with your projects / posts.
2. Tails - While a very unique twist - Kinda fail... (IMO)
3. Poeple that stole your subs are low lifes and have no place in society other than under the jail.
4. DON'T do white wheels....Its way to much of a hassle to keep clean!
5. Keep up the DETAILED updates - I enjoyed them.
6. Maybe 2-3 to many LEDs!

7. The carpet job you did made a HUGE Improvement to the interior of your car and I LOVE IT..
8. My opinions are just that - My opinions - No harm or disrespect intended by any statements above!
Thanks for the entertainment!
#495
Thread Starter
Fearless DIY Guy
iTrader: (2)
Joined: Jan 2008
Posts: 3,003
Likes: 374
From: Jersey 'Burbs
Well, time to brush some dust off this one! Time for some updates, yeah? So, for whatever reason, it would seem as though I am somewhat condemned to keeping my primary working periods during the coldest effing time of year, but so be it. For all of you vinyl fetishists out in the mix, this will be just your ticket to get your rocks off as this was the focal point of the breaks on goings.
The following activities occurred between 12.17 and 12.30 (Enter Law & Order Intro)
To start things off, I wanted to run a middle strip of vinyl down the front of the car. The first attempt was an absolutely miserable solo mission that ended in complete failure. For whatever reason, I thought it would be OK to work section by section, removing the substrate one portion at a time. BZZZZZ, WRONG. You see, the substrate ABSORBS (?!) the water, and fawks the entire piece up!!! WTF.
Enter attempt #2, with wifey by my side.

Yaaaaayyyy, backup! Ok, let's get moving on this...we are using an Orcal 651 Intermediate Economy Gloss Black Vinyl, aka total thin shit that I would not recommend to anyone unless you really enjoy pissing yourself off and need to scrape mustard packets from beneath the vending machines for lunch. YOU CAN'T SPELL 'RAGE' WITHOUT ECONOMY GRADE, AMIRITE?! Well, you can, but you get my point.
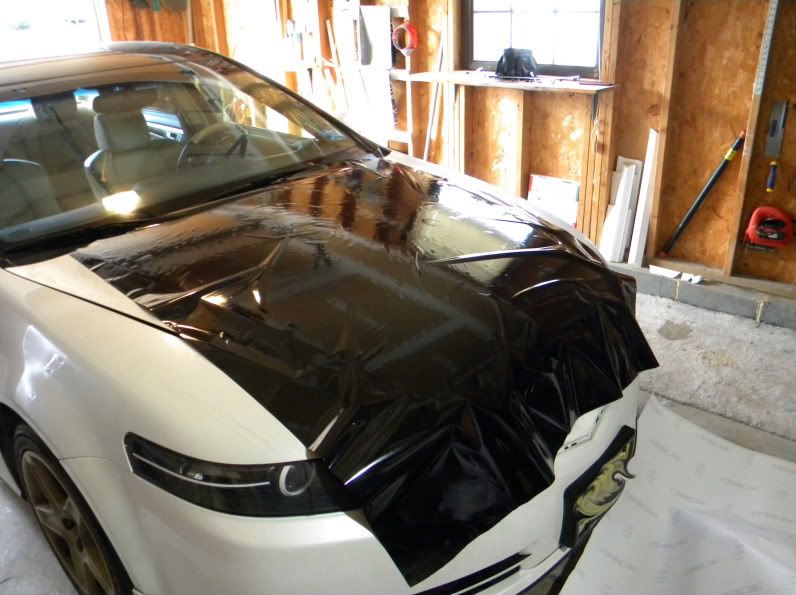
Ok, not bad....

We're getting there...
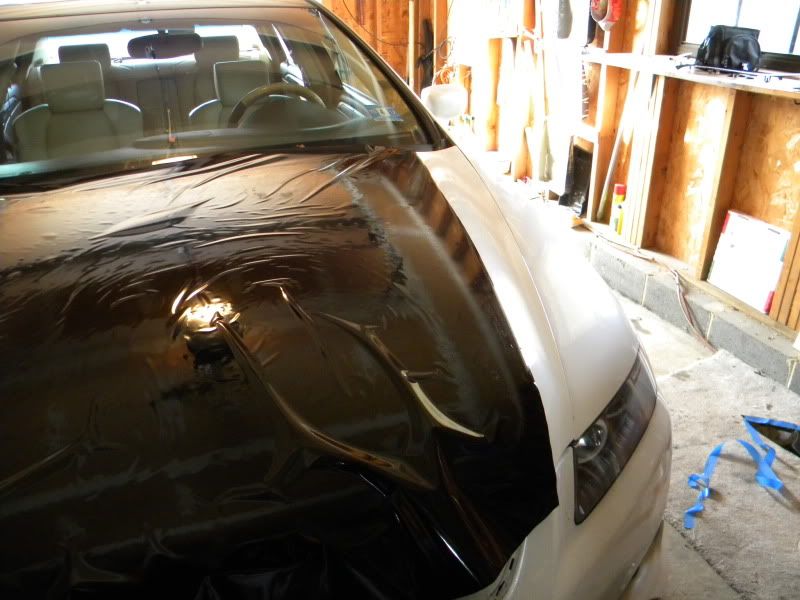
Ok...well...we SEEMED to be going in the right direction until I stressed the vinyl too much and tore it at the front. But modding cars is a learning lesson, yeah? I'll be the first to admit, I make mistaken, a good number of them, but then again I consider myself an honest guy and I hope people learn from my mistakes. Good thing I have 10 yards.
OK, ROUND 2. TEMPERATURE: 14F. Again, enters backup.
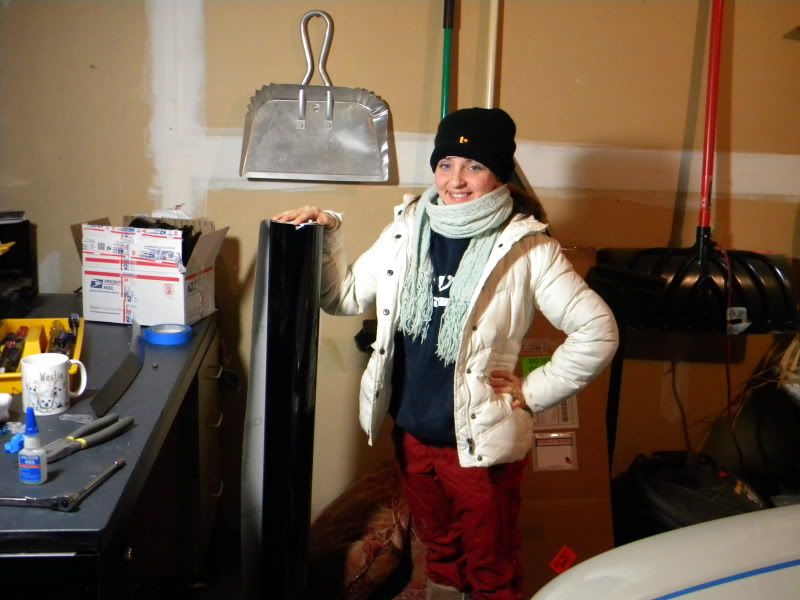
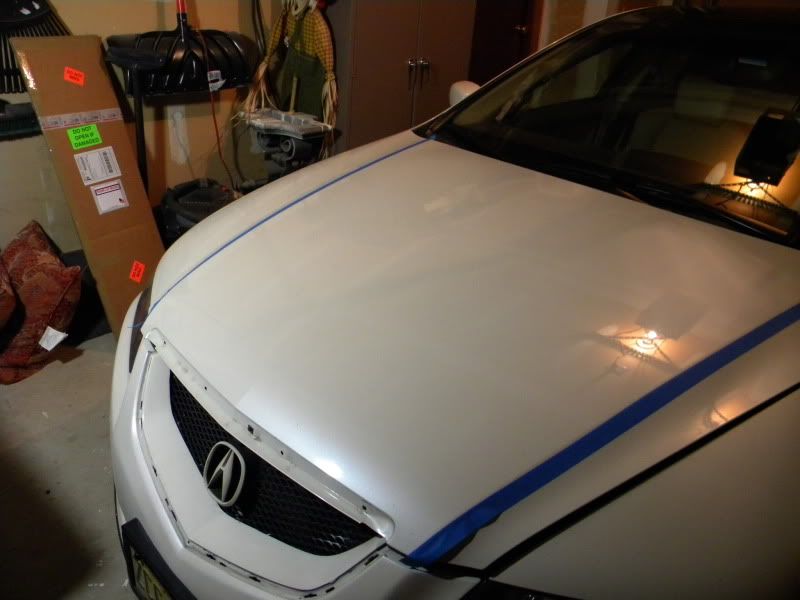
Ok, so I THOUGHT I knew how the fuck to correct my earlier issue, which was starting in the middle, so I started with the FRONT and worked forward. Again, fail. Well, not fail, but just different issues arising in alternative locations. So, wet application ain't happening here, folks.
I made a FOURTH, DRY ATTEMPT, which got me quite close, but again I was defeated by the tricky curves in the front of the car.
SO, what are the lessons learned?
(1) 2 - 3 people should really be doing this
(2) The front is a dastardly dude of daunting dips
(3) Economy grade vinyl aka Orcal 651 really is what it says it is
(4) I could get this - on my 6th or 7th try. BUT...
...I'm giving this up altogether. I took some good looks at things and actually thought this to be a bad idea all said and done. Let's call it an omen that I failed to bring this one to fruition...and you know what? I'm alright with that.
So even though mmade and a few others suggested I not paint but wrap the front elements, nooooo, I HAD TO DO IT MYYYY WAY...I find myself in the pits of a nasty rework loop in which I needed to redo just about everything on the front end that was painted. Whatever.
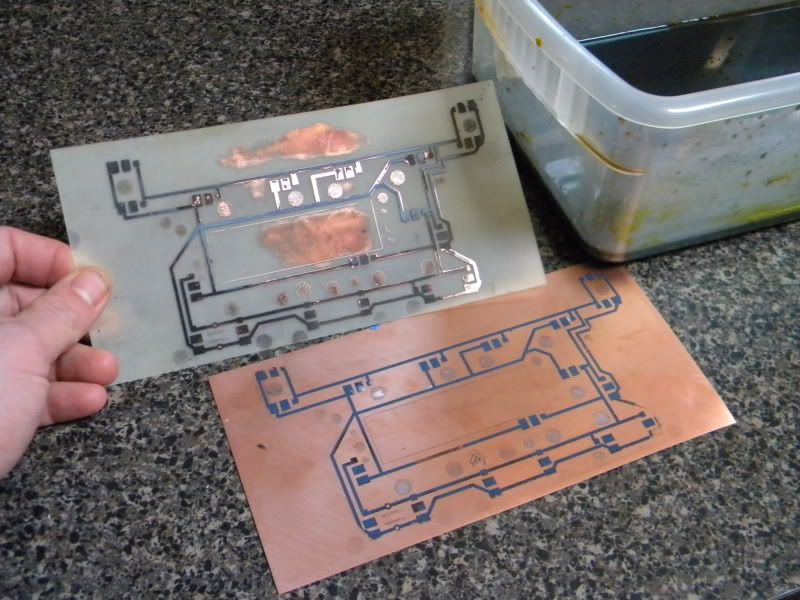
Putting some items of the US Healthcare system to good use:
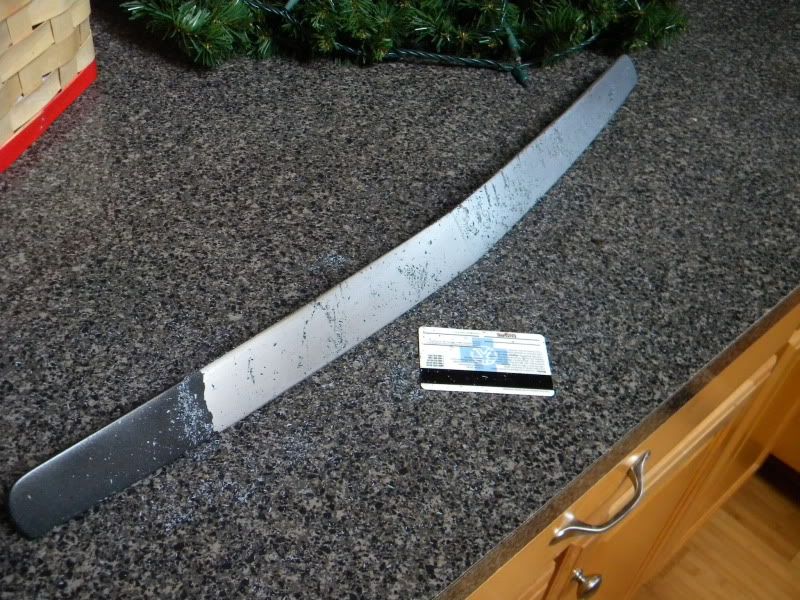
Workin' on some LED stuff for my friends on the 'Zine. Might as well etch while I'm scraping and catch up on American culture aka my buddy Judge Matthis and the barrage of 'SUE SOMEONE NOW' or 'GET CASH NOW' commercials. So, we're moving along...
Now, what you see here is the front lisc. elements...and no, those aren't flaws in my wrap job, but the onslaught of I-295 construction and a daily 100mile commute...it took some damage! The wrap is damn near perfect, what you see are the million pits in the paint. Non-noticeable unless you're up really close, although I'll probably get a replacement frame and wrap that in the future so I don't have to worry about a frame that looks like a 13 year old teenagers face. You also see a very tasty pack of cigarettes that I can't touch anymore.

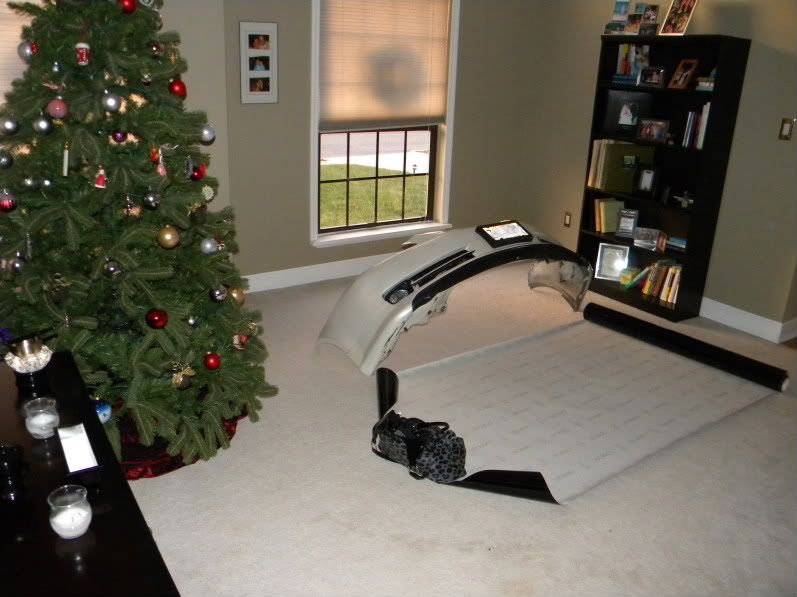
Lastly, a novel way to piss your wife off. Wait until 3 hours before you need to go to a holiday party and sneak this car part inside while she's in the shower, hoping to finish before she gets out. PS - You're not shaved, showered, or even remotely prepared to leave. True story is - I would have been able to, had my dog not grown jealous of the bumper and tried running off with my vinyl. Oh, and I replaced all the grilles with a gloss black powdercoated grille.
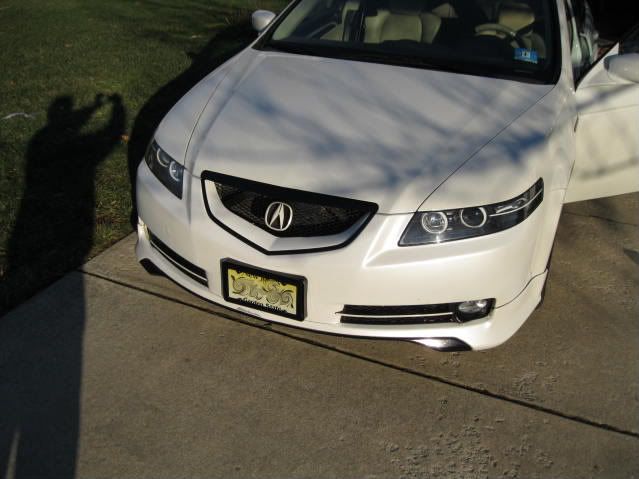
Here's a supremely shiity image of the car, I didn't realize it came out so poorly. Looks much better in person.
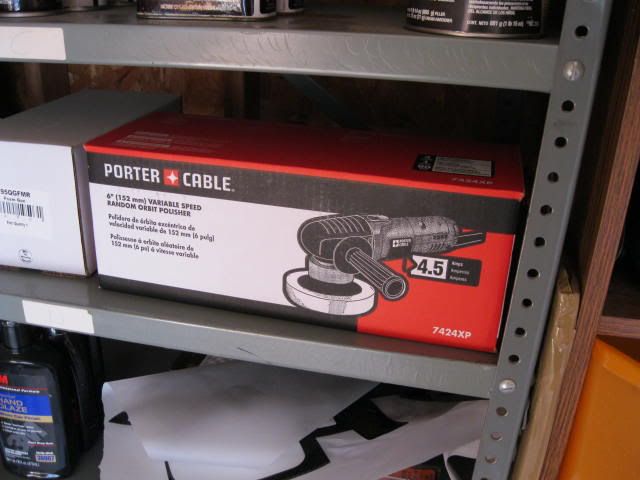
Christmas time came upon us, and I recieved two VERY awesome gifts - see below. I kindly encouraged my wife to read the GD X-Mas offer Detailed Image had here, and encouraged other family members to chip in...yeah, that's me milking a holiday.
While I can't use the XP just yet, I used the foam gun to clean some REALLY nasty salt and grime from the car, and OMG, OMG, OMG, I cannot recommend it enough. FOAMGUNS ARE THE SHIZNIT!

A project I was working on before the X-Mas dinner. I still have to finish the picture boxes, probably do that in Jan/Feb.
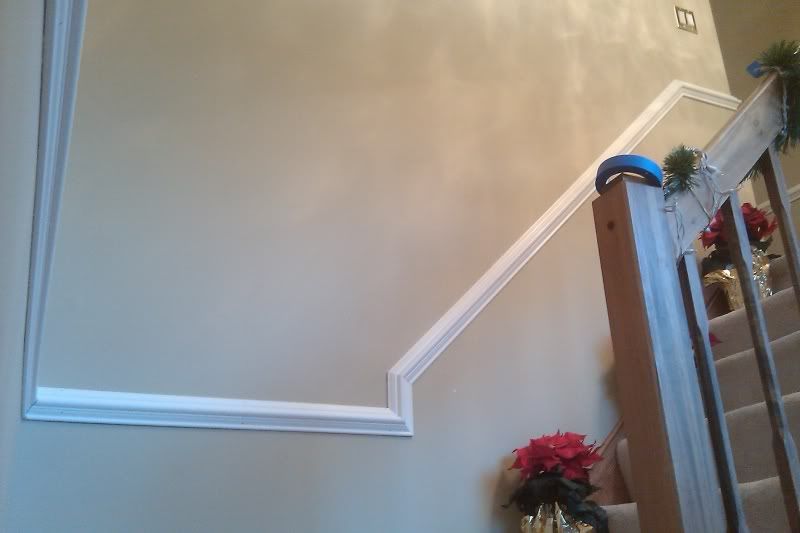
Ok, enough for tonight, more updates tomorrow, hopefully, unless photobucket pisses me off with its laggy ass servers. Teaser.
The following activities occurred between 12.17 and 12.30 (Enter Law & Order Intro)
To start things off, I wanted to run a middle strip of vinyl down the front of the car. The first attempt was an absolutely miserable solo mission that ended in complete failure. For whatever reason, I thought it would be OK to work section by section, removing the substrate one portion at a time. BZZZZZ, WRONG. You see, the substrate ABSORBS (?!) the water, and fawks the entire piece up!!! WTF.
Enter attempt #2, with wifey by my side.

Yaaaaayyyy, backup! Ok, let's get moving on this...we are using an Orcal 651 Intermediate Economy Gloss Black Vinyl, aka total thin shit that I would not recommend to anyone unless you really enjoy pissing yourself off and need to scrape mustard packets from beneath the vending machines for lunch. YOU CAN'T SPELL 'RAGE' WITHOUT ECONOMY GRADE, AMIRITE?! Well, you can, but you get my point.

Ok, not bad....

We're getting there...

Ok...well...we SEEMED to be going in the right direction until I stressed the vinyl too much and tore it at the front. But modding cars is a learning lesson, yeah? I'll be the first to admit, I make mistaken, a good number of them, but then again I consider myself an honest guy and I hope people learn from my mistakes. Good thing I have 10 yards.
OK, ROUND 2. TEMPERATURE: 14F. Again, enters backup.


Ok, so I THOUGHT I knew how the fuck to correct my earlier issue, which was starting in the middle, so I started with the FRONT and worked forward. Again, fail. Well, not fail, but just different issues arising in alternative locations. So, wet application ain't happening here, folks.
I made a FOURTH, DRY ATTEMPT, which got me quite close, but again I was defeated by the tricky curves in the front of the car.
SO, what are the lessons learned?
(1) 2 - 3 people should really be doing this
(2) The front is a dastardly dude of daunting dips
(3) Economy grade vinyl aka Orcal 651 really is what it says it is
(4) I could get this - on my 6th or 7th try. BUT...
...I'm giving this up altogether. I took some good looks at things and actually thought this to be a bad idea all said and done. Let's call it an omen that I failed to bring this one to fruition...and you know what? I'm alright with that.
So even though mmade and a few others suggested I not paint but wrap the front elements, nooooo, I HAD TO DO IT MYYYY WAY...I find myself in the pits of a nasty rework loop in which I needed to redo just about everything on the front end that was painted. Whatever.
Putting some items of the US Healthcare system to good use:

Workin' on some LED stuff for my friends on the 'Zine. Might as well etch while I'm scraping and catch up on American culture aka my buddy Judge Matthis and the barrage of 'SUE SOMEONE NOW' or 'GET CASH NOW' commercials. So, we're moving along...

Now, what you see here is the front lisc. elements...and no, those aren't flaws in my wrap job, but the onslaught of I-295 construction and a daily 100mile commute...it took some damage! The wrap is damn near perfect, what you see are the million pits in the paint. Non-noticeable unless you're up really close, although I'll probably get a replacement frame and wrap that in the future so I don't have to worry about a frame that looks like a 13 year old teenagers face. You also see a very tasty pack of cigarettes that I can't touch anymore.

Lastly, a novel way to piss your wife off. Wait until 3 hours before you need to go to a holiday party and sneak this car part inside while she's in the shower, hoping to finish before she gets out. PS - You're not shaved, showered, or even remotely prepared to leave. True story is - I would have been able to, had my dog not grown jealous of the bumper and tried running off with my vinyl. Oh, and I replaced all the grilles with a gloss black powdercoated grille.

Here's a supremely shiity image of the car, I didn't realize it came out so poorly. Looks much better in person.

Christmas time came upon us, and I recieved two VERY awesome gifts - see below. I kindly encouraged my wife to read the GD X-Mas offer Detailed Image had here, and encouraged other family members to chip in...yeah, that's me milking a holiday.
While I can't use the XP just yet, I used the foam gun to clean some REALLY nasty salt and grime from the car, and OMG, OMG, OMG, I cannot recommend it enough. FOAMGUNS ARE THE SHIZNIT!


A project I was working on before the X-Mas dinner. I still have to finish the picture boxes, probably do that in Jan/Feb.

Ok, enough for tonight, more updates tomorrow, hopefully, unless photobucket pisses me off with its laggy ass servers. Teaser.

#498
 as always.
Props for sharing your failures as well as your successes. Shows you're a humble man, and if anything makes us feel closer to you and the car

Love the commentary!
#500
I've said it before---the family that mods together, stays together.
The wife is a cutey and a great sport for helping out. She also could get a PT job as one of Barker's Beauties, the way she is showing of that vinyl wrap!
Nice update, Dan! Check your PMs.
The wife is a cutey and a great sport for helping out. She also could get a PT job as one of Barker's Beauties, the way she is showing of that vinyl wrap!
Nice update, Dan! Check your PMs.
#502
Thread Starter
Fearless DIY Guy
iTrader: (2)
Joined: Jan 2008
Posts: 3,003
Likes: 374
From: Jersey 'Burbs
If you insist! 
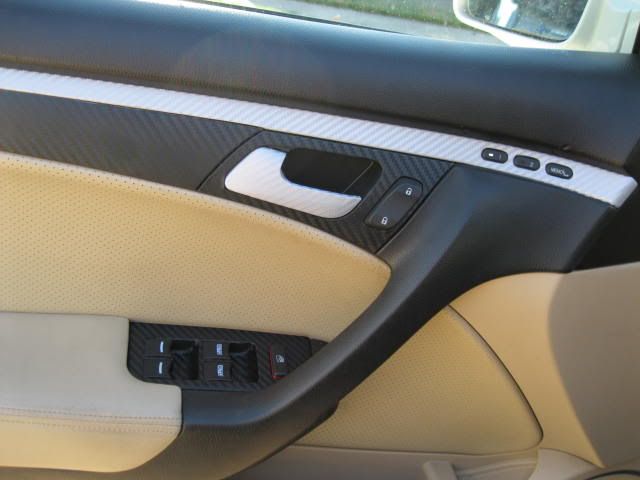
So, after seeing a fair number of Di-noc threads, and doing what I ALWAYS do (slave over a ton of research), I decided to pull the trigger and change things up on the interior a bit. I did not, however, go with the flavor of the month Di-Noc and instead went with Metro Restyling's M-500 vinyl as it was a bit shinier than the Di-Noc and claims to hold up to the elements better, which is a good thing because Lord knows there's plenty of shitstorms thundering in my car when teh 'Garden State's Finest' decide to hit the road and elect to text over drive.
Of course, we're doing this with a twist, and you'll see what I mean. Just as with my tails, I am doing something DIFFERENT here - take it or leave it. So let's do this.
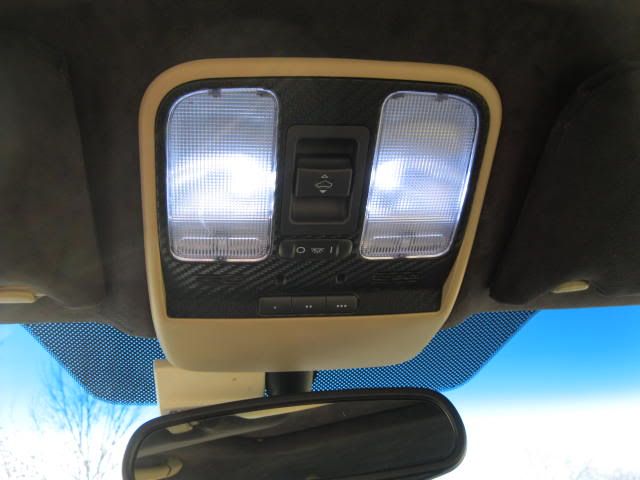
For whatever reason, I decided to do this part first, probably due to the fact that it's the easiest part to get to. I'll probably do this one over and add some silver to one of the switches, as it's not absolutely flawless...but it gets the jeorb done.
Just another random pic
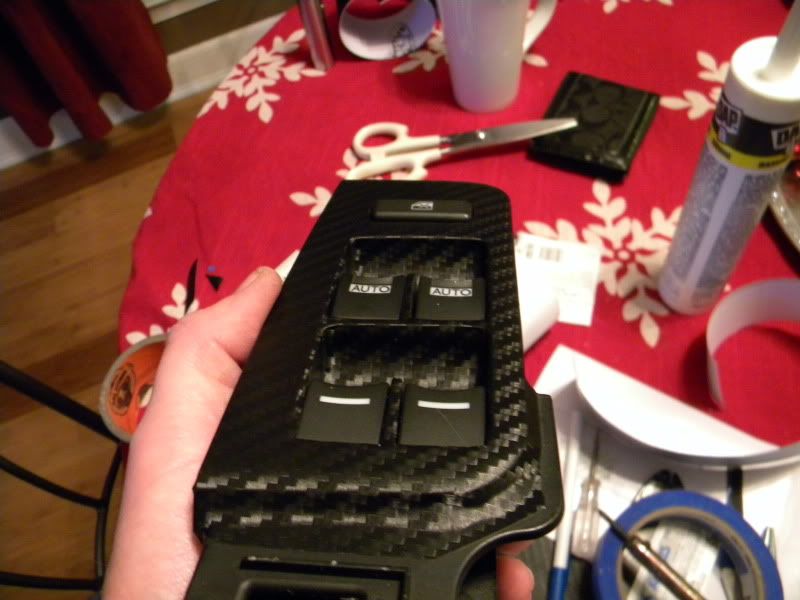
So, since we can play around, I decided to try something different with the radio knobs for shits and giggles. While the end product is nice, it did not quite flow as I had wished, so we'll have some shots of this down the road...
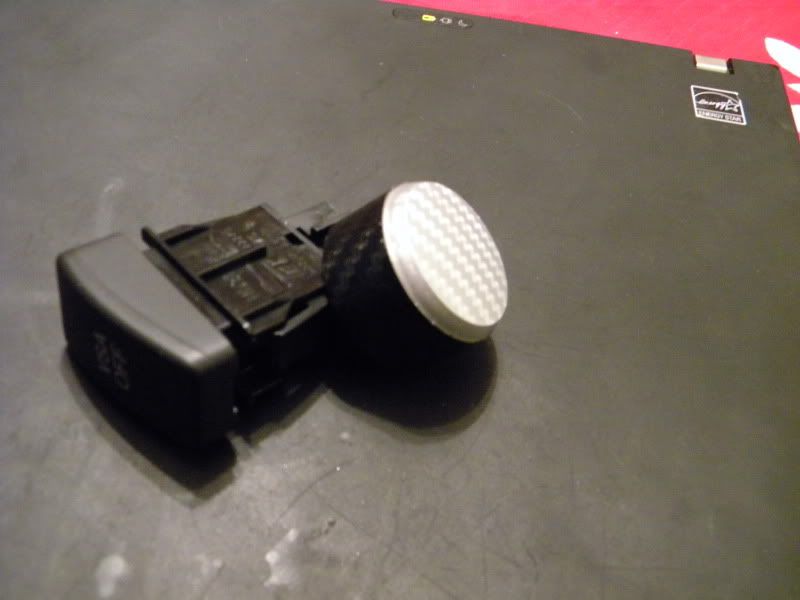
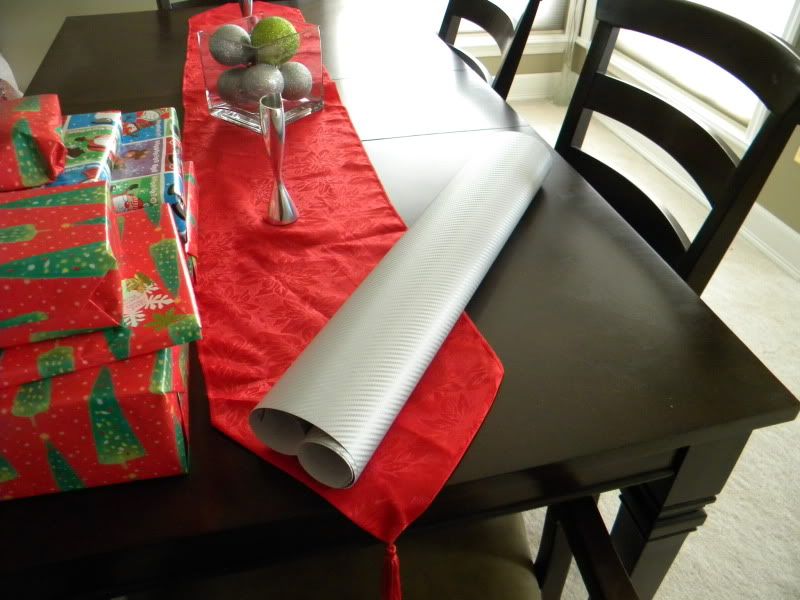
You know what happens when you combine wrapping presents, a curious dog, and vinyl? If you read the last post, you'd know. Again, BAD THINGS. So I spent about an hour looking for the stupid silver garnish on one of the storage doors when I accepted defeat and needed to look for alternative solutions. Enter the toothpick.
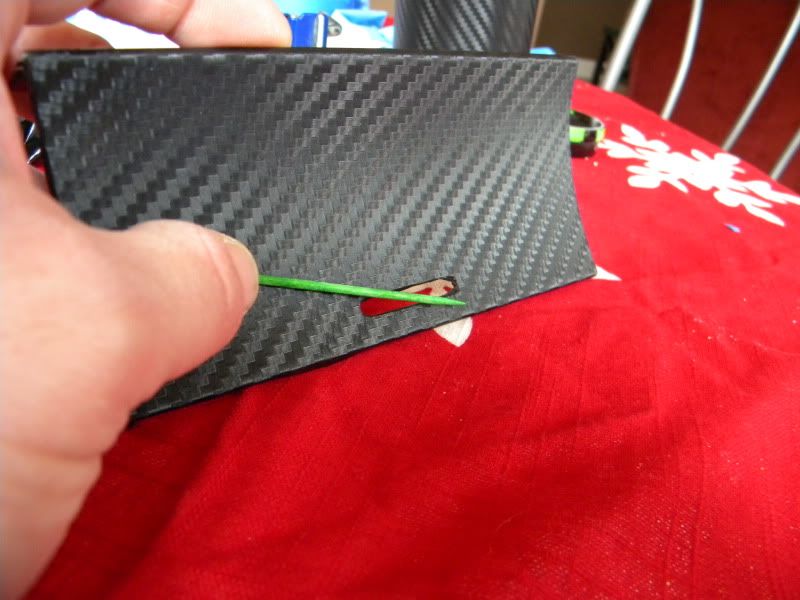
Hmmm...I'll bet I could make this fit...
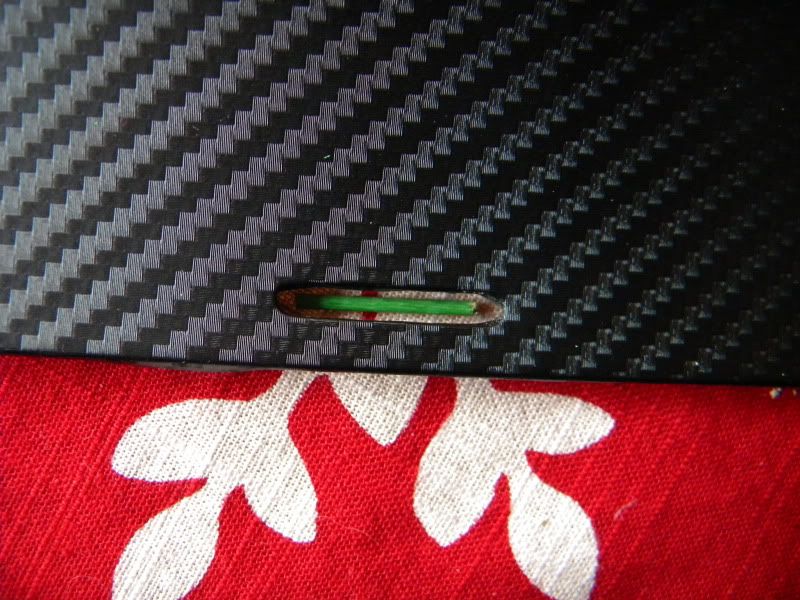
This looks promising...
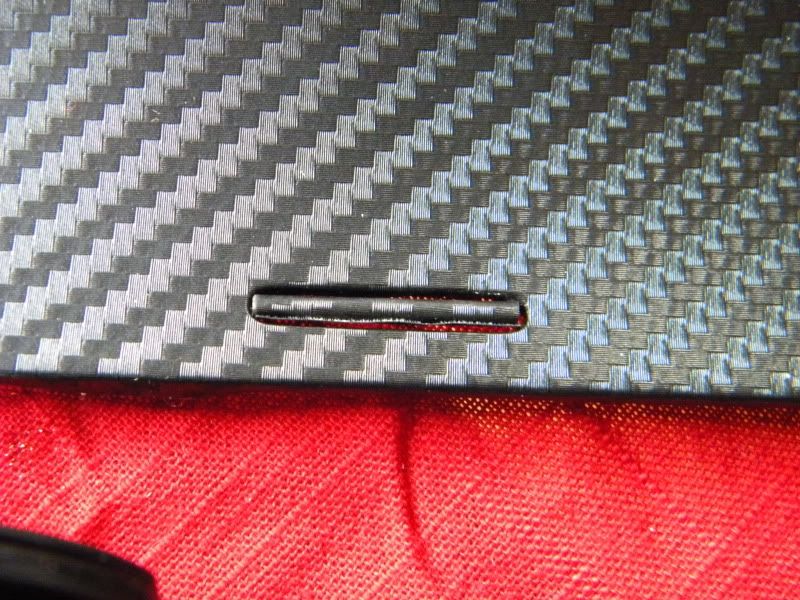
Yep, got it.
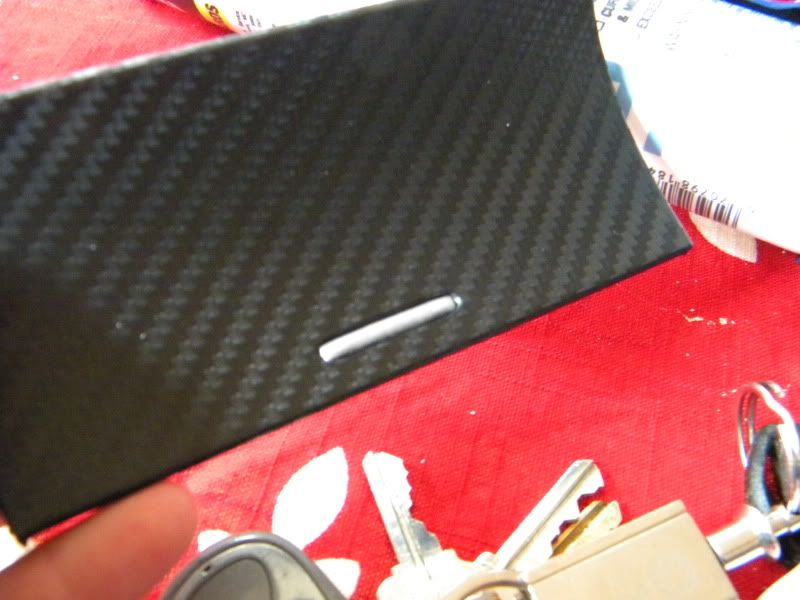
...and there you have it. That's how a toothpick becomes a modded TL component. So if someone asks what did I do to my car, I can honestly respond, "Just added some sticks and stuff." Ironically, it fills the gap better than the OE part!!!
I did not take many pics of the wrapping as all you would see is a ton of disassembly, trimming, heat gunning, and the like. For me, each door took about 3 to 4 hours from removal to install. I stripped all components from the door to REALLY get the vinyl in there well and to make sure even the CF weave was continuous from part to part (probably the second hardest part, hardest being the silver/black seam). Overall, though, the single most PITA part was the long silver garnish on the console - this bitch has some crazy curves and gets wider in a very subtle way that turns a straight forward install a tortuous tantrum fest.
...but it's done. To all my friends on the 'Zine, sorry if I have not replied yet (to PMs as well), I'll be sure to tend to this tonight/tomorrow.
Enjoy, and keep on modding!


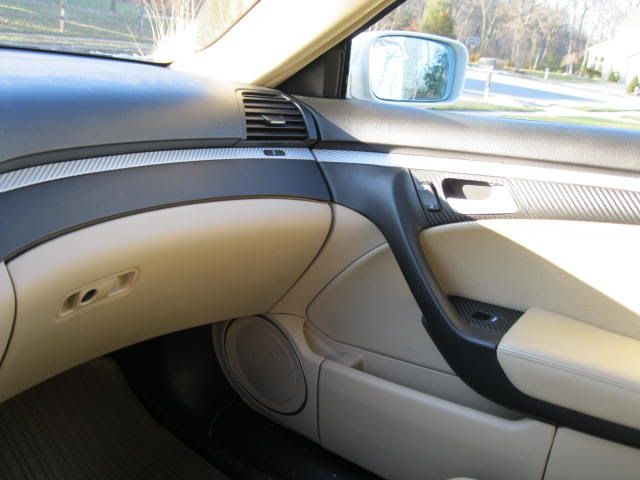
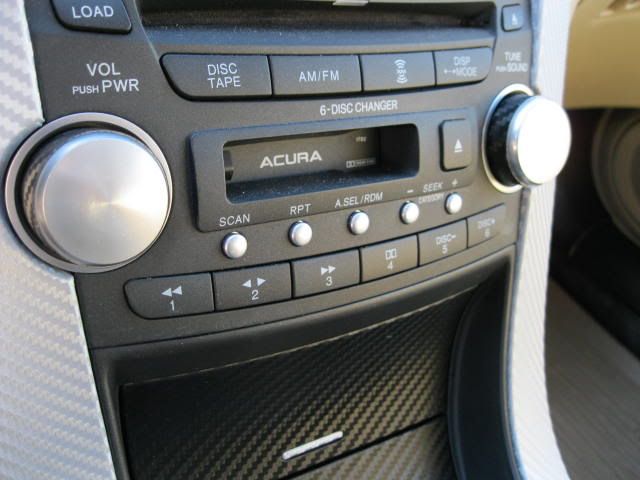
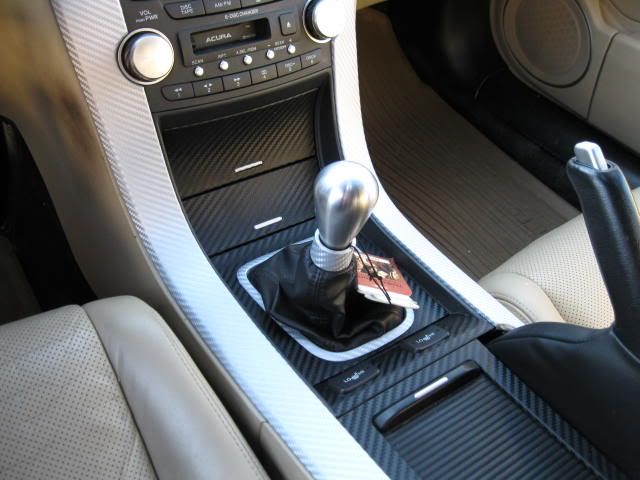
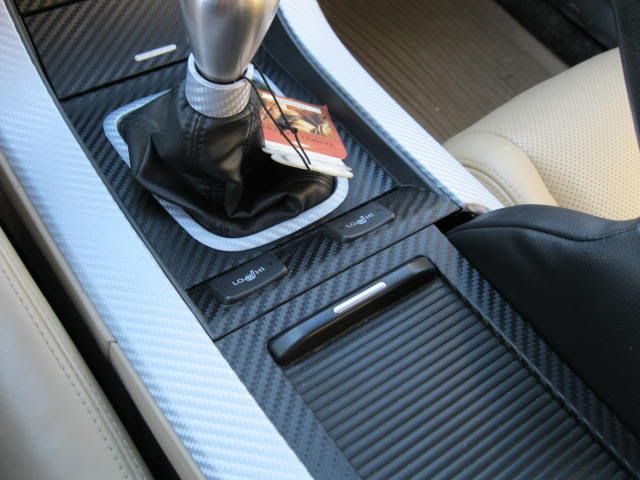
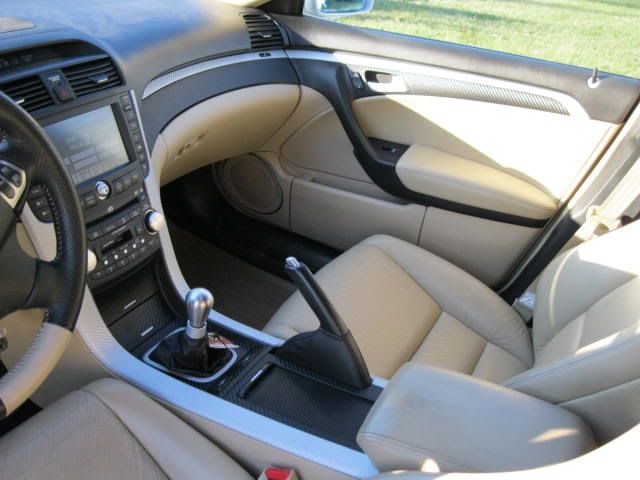

So, after seeing a fair number of Di-noc threads, and doing what I ALWAYS do (slave over a ton of research), I decided to pull the trigger and change things up on the interior a bit. I did not, however, go with the flavor of the month Di-Noc and instead went with Metro Restyling's M-500 vinyl as it was a bit shinier than the Di-Noc and claims to hold up to the elements better, which is a good thing because Lord knows there's plenty of shitstorms thundering in my car when teh 'Garden State's Finest' decide to hit the road and elect to text over drive.
Of course, we're doing this with a twist, and you'll see what I mean. Just as with my tails, I am doing something DIFFERENT here - take it or leave it. So let's do this.
For whatever reason, I decided to do this part first, probably due to the fact that it's the easiest part to get to. I'll probably do this one over and add some silver to one of the switches, as it's not absolutely flawless...but it gets the jeorb done.

Just another random pic

So, since we can play around, I decided to try something different with the radio knobs for shits and giggles. While the end product is nice, it did not quite flow as I had wished, so we'll have some shots of this down the road...

You know what happens when you combine wrapping presents, a curious dog, and vinyl? If you read the last post, you'd know. Again, BAD THINGS. So I spent about an hour looking for the stupid silver garnish on one of the storage doors when I accepted defeat and needed to look for alternative solutions. Enter the toothpick.

Hmmm...I'll bet I could make this fit...

This looks promising...

Yep, got it.

...and there you have it. That's how a toothpick becomes a modded TL component. So if someone asks what did I do to my car, I can honestly respond, "Just added some sticks and stuff."
 Ironically, it fills the gap better than the OE part!!!
 I did not take many pics of the wrapping as all you would see is a ton of disassembly, trimming, heat gunning, and the like. For me, each door took about 3 to 4 hours from removal to install. I stripped all components from the door to REALLY get the vinyl in there well and to make sure even the CF weave was continuous from part to part (probably the second hardest part, hardest being the silver/black seam). Overall, though, the single most PITA part was the long silver garnish on the console - this bitch has some crazy curves and gets wider in a very subtle way that turns a straight forward install a tortuous tantrum fest.
...but it's done. To all my friends on the 'Zine, sorry if I have not replied yet (to PMs as well), I'll be sure to tend to this tonight/tomorrow.
Enjoy, and keep on modding!


#503
the attention to detail is very impressive. matching the patterns across different parts = priceless. this di noc movement is off to a pretty good start. nice twist on the contrasting between the silver and black. GL and keep the progess coming.. more..more..
#504
Rev High; Drive Happy
iTrader: (2)
Joined: Feb 2008
Posts: 4,076
Likes: 398
From: Scarborough, Ontario
Nice. Attention to detail is definitely there as always.
Near-exact matching REVERSE pattern! I love reverse patterned [especially on CF hoods].
I even noticed your door handles' silver-cf-vinyl matched up with the silver-cf-vinyl'd-door-garnish. I took a random straight edge and tried to see how exact it was.. and it was near-exact!
o____o even the window-switch-area is matched to the door-garnishes!
I like the look but to be honest I think black leather would help it flow much better.
Last edited by o4Komodo; 01-04-2011 at 10:02 PM.
#507
Moderator
Chapter Leader (South Florida Region)
Chapter Leader (South Florida Region)
iTrader: (6)
Joined: Sep 2008
Posts: 78,019
Likes: 20,036
That shit looks absolutely fucking amazing dude...amazing.
Great job...I will eventually wrap my side garnish as it's all dented up etc...and COSTS a lot for what it is. I am waiting to see if I eventually go with a touchscreen aftermarket unit...in which case I likely will end up creating a backing for the knob holes (oh yeah...) and then wrap the whole thing!
Great job...I will eventually wrap my side garnish as it's all dented up etc...and COSTS a lot for what it is. I am waiting to see if I eventually go with a touchscreen aftermarket unit...in which case I likely will end up creating a backing for the knob holes (oh yeah...) and then wrap the whole thing!
#508
Looks great man! I was wondering if/when you were gonna do the Di-NOC. I'm a little disappointed that you didn't do the sunroof switch or the inside of the door handles. But then again the sunroof switch took me about an hour to put back together (stupid effing little components!) and inside the door handles didn't turn out the best. The center console looks AWESOME though, and I hope to tackle that myself when I have some free time....whatever that is. Keep up the good work!
#509
DI-NOC = SICK NOC! I love it man! Very tastfull with the black/silver weave and glad you didnt just slap on the vinyl in the same direction....looks classier.
Sick car though man. I might PM you with tips and tricks about the vinyl roof overlay, and the DI-NOC instal (i'm lazy so i guess i really just want to know if its worth it) I'd rather not spend so much time putting a "vinyl sticker" all over my dash if it wasnt worth it.
Sick car though man. I might PM you with tips and tricks about the vinyl roof overlay, and the DI-NOC instal (i'm lazy so i guess i really just want to know if its worth it) I'd rather not spend so much time putting a "vinyl sticker" all over my dash if it wasnt worth it.
#515
Thread Starter
Fearless DIY Guy
iTrader: (2)
Joined: Jan 2008
Posts: 3,003
Likes: 374
From: Jersey 'Burbs
God, no, not at all...just adventurous!
Thanks for the kind words, Dave...she seldom helps, but it's her patience that makes all of this possible - she has grown accustomed to car parts in the kitchen on a Sunday afternooon, haha!
#517
Thread Starter
Fearless DIY Guy
iTrader: (2)
Joined: Jan 2008
Posts: 3,003
Likes: 374
From: Jersey 'Burbs
You're probably right!


That shit looks absolutely fucking amazing dude...amazing.
Great job...I will eventually wrap my side garnish as it's all dented up etc...and COSTS a lot for what it is. I am waiting to see if I eventually go with a touchscreen aftermarket unit...in which case I likely will end up creating a backing for the knob holes (oh yeah...) and then wrap the whole thing!
Great job...I will eventually wrap my side garnish as it's all dented up etc...and COSTS a lot for what it is. I am waiting to see if I eventually go with a touchscreen aftermarket unit...in which case I likely will end up creating a backing for the knob holes (oh yeah...) and then wrap the whole thing!

#518
Thread Starter
Fearless DIY Guy
iTrader: (2)
Joined: Jan 2008
Posts: 3,003
Likes: 374
From: Jersey 'Burbs
MOD LIST AS OF 01/2011
~ 84K miles
EXTERIOR
A-Spec Front Lip
A-Spec Sideskirts
Type-S Rear Lip
Trunk Lip
DIY Fiberglassed Front w/ Powdercoated Grille
Vinyl Roof
Vinyl Bumper, Lip Elements
Debadged
Painted Rear Panel
Custom Painted Handles
Accord Foglights
Custom Headlights
Rear Window Tints
EXTERIOR LIGHTING
CCFL License Plate Lights
HID Back-up Lights
Tinted Sidemarkers
LED Front Turn Signals
27W PIAA Rear Turn Signal
HID Foglights
ZKW-r Projectors
2008 Headlights
ICE
Dom's TV-and-Nav-to-Go
Arc Audio 2500-XXK - STOLEN
2 x Alumapro Alchemy RX (DVC SQ) - STOLEN
Conversion of OE Circuit Lighting to LED - First FULL conversion on AZINE!
Interior Courtesy Lighting w/ LEDs
'RL Door Handle LED' Mod
Accessory LED in Door Courtesy Pockets
Boyo VTK350 Backup Camera
Optima Red Top Battery
Infinity 1031t Tweeters
JBL P662S Woofers
Footwell Lighting
INTERIOR
80sqft.Second Skin Audio Damplifier
30sqft. Second Skin Audio Overkill Pro
Ultrasuede Headliner
500M Metrorestyling Black CF
600M Metrorestyling Silver CF
Custom Two-Tone Steering wheel @ +1/8" Thickness
DIY Dyed Floor
DIY Dyed Interior Panels
Custom Aluminum Switchpanel
Myron-Davis 3/4-din DVD Player
STOPPING POWAH
Hawk Ceramic Pads
Power Slot Slotted Rotors (Front)
Power Slot Blanks (Rear)
Painted Rear Calipers
SS Brake Lines
AMSOIL Synthetic Brake Fluid (full system flush)
Propah bed-in of brakes
BREATHE EASY
Mid Muffler Delete
Aero 25 Resonator
Type-S Exhaust
Powdercoated Tips
DIY Funnel Intake
ROWING MACHINE
Corsport Shifter Bushings
Aluminum Shifter Base Bushings
Comptech Short Throw Shifter
Maven Shift Knob
AMSOIL Gear Fluid
Updates to occur within the March to June timeframe
UPDATE I: Drop, Tires, IB Sub, amp
UPDATE II: 100k Service
UPDATE III: Wheels? (we'll see how well my bonus pans out)
~ 84K miles
EXTERIOR
A-Spec Front Lip
A-Spec Sideskirts
Type-S Rear Lip
Trunk Lip
DIY Fiberglassed Front w/ Powdercoated Grille
Vinyl Roof
Vinyl Bumper, Lip Elements
Debadged
Painted Rear Panel
Custom Painted Handles
Accord Foglights
Custom Headlights
Rear Window Tints
EXTERIOR LIGHTING
CCFL License Plate Lights
HID Back-up Lights
Tinted Sidemarkers
LED Front Turn Signals
27W PIAA Rear Turn Signal
HID Foglights
ZKW-r Projectors
2008 Headlights
ICE
Dom's TV-and-Nav-to-Go
Arc Audio 2500-XXK - STOLEN
2 x Alumapro Alchemy RX (DVC SQ) - STOLEN
Conversion of OE Circuit Lighting to LED - First FULL conversion on AZINE!

Interior Courtesy Lighting w/ LEDs
'RL Door Handle LED' Mod
Accessory LED in Door Courtesy Pockets
Boyo VTK350 Backup Camera
Optima Red Top Battery
Infinity 1031t Tweeters
JBL P662S Woofers
Footwell Lighting
INTERIOR
80sqft.Second Skin Audio Damplifier
30sqft. Second Skin Audio Overkill Pro
Ultrasuede Headliner
500M Metrorestyling Black CF
600M Metrorestyling Silver CF
Custom Two-Tone Steering wheel @ +1/8" Thickness
DIY Dyed Floor
DIY Dyed Interior Panels
Custom Aluminum Switchpanel
Myron-Davis 3/4-din DVD Player
STOPPING POWAH
Hawk Ceramic Pads
Power Slot Slotted Rotors (Front)
Power Slot Blanks (Rear)
Painted Rear Calipers
SS Brake Lines
AMSOIL Synthetic Brake Fluid (full system flush)
Propah bed-in of brakes
BREATHE EASY
Mid Muffler Delete
Aero 25 Resonator
Type-S Exhaust
Powdercoated Tips
DIY Funnel Intake
ROWING MACHINE
Corsport Shifter Bushings
Aluminum Shifter Base Bushings
Comptech Short Throw Shifter
Maven Shift Knob
AMSOIL Gear Fluid
Updates to occur within the March to June timeframe
UPDATE I: Drop, Tires, IB Sub, amp
UPDATE II: 100k Service
UPDATE III: Wheels? (we'll see how well my bonus pans out)
#520
I feel like I just watched the last two years of your life in fast forward. I'm a little exhausted to be honest. I laughed, never cried because men don't do that, but holy hell man. From a simple thread I started you just opened pandora's box of modding inside my fragile mind.
Really amazing work. You made me not hate the two-tone interior as much.
Really amazing work. You made me not hate the two-tone interior as much.


 no update.
 I'll pay for your plane ticket!
