Death Metal's Journey (a DIY'ers Worklog for TL Perfection!)
 02-01-2010, 12:34 PM
#81
Thanks man...Actually...as it stands. I'm much further into my system than I ever planned on being BECAUSE of this amp problem. My factory amp I've taken apart, but did not think to resolder a new ground inside the amp. I DID reground it RIGHT next to the factory location and did sand the bejeezus.
As it stands now...after all my trial and error:
OEM amp for signal to my sub amp (that's all I'm using it for, since the whine isn't picked up in low frequencies)
From behind the headunit I soldered RCA leads that I connected to my shielded twisted pair RCA's back to an Audiobahn rack mount line driver...to my 4 channel hifonics Zues amp (Brutus for subs). I'm ok right now but the buzzing off of the oem amp leaves me having to disconnect the center channel because it's really loud.
Anyway...thanks for the idea...I may give that a whirl. Resoldering a serious ground inside my OEM amp. That's teh tip I was looking for.
Don't want to muddy up your thread any more than I have.
Again, great work and thanks for the pics and updates!
 02-01-2010, 01:49 PM
#82
Fearless DIY Guy
Thread Starter
iTrader: (2)
Thanks, man - we can always explore additional resolutions for this, but give that a whirl, more often then not it has resolve most issues of this nature in my experience.
Shoot me a PM if you need any additional help, I'd certainly like to see this resolved for ya.
Shoot me a PM if you need any additional help, I'd certainly like to see this resolved for ya.
02-01-2010, 08:46 PM
#84
Fearless DIY Guy
Thread Starter
iTrader: (2)
*sigh*...looks like I am going to be one with the compy tonight as I just had a massive project dumped in my lap, so I suppose I will use this as my escape from corporate-rich verbiage I'm steeped in at present.
So, the next undertaking that is on our way is the addition of sound deadening. I used wayyyy too much in my Maxima, so I'm using the lessons learned here to be more cost/time effective in my efforts for a TL modded to my tastes.
The trunk, trunklid, and rear-deck are already done, and TG for that, as deadening those areas are some of the most goddamned uncomfortable areas to hit, requiring a penchant for pain and a deep hatred for rattles. The doors, on the other hand, allow us to work in a far more ergonomic position, so hooray for us. So let's take a look at what Acura gives us.
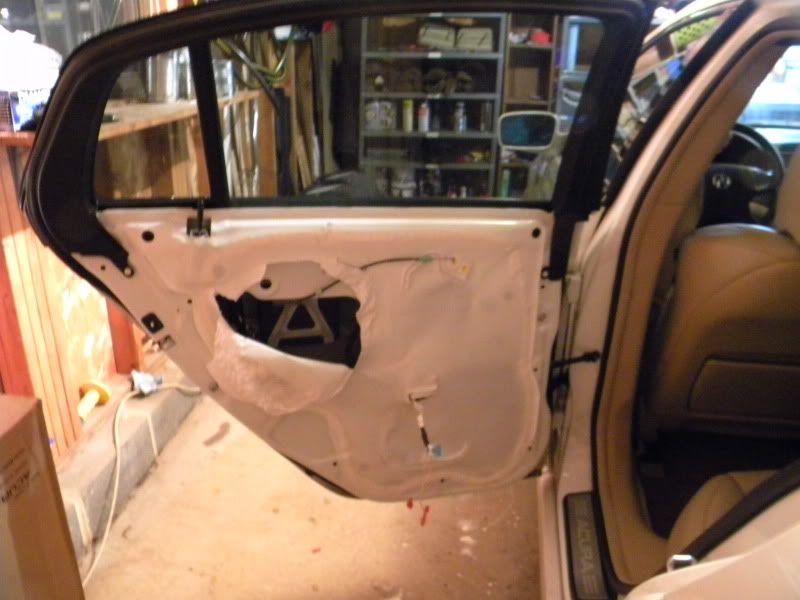
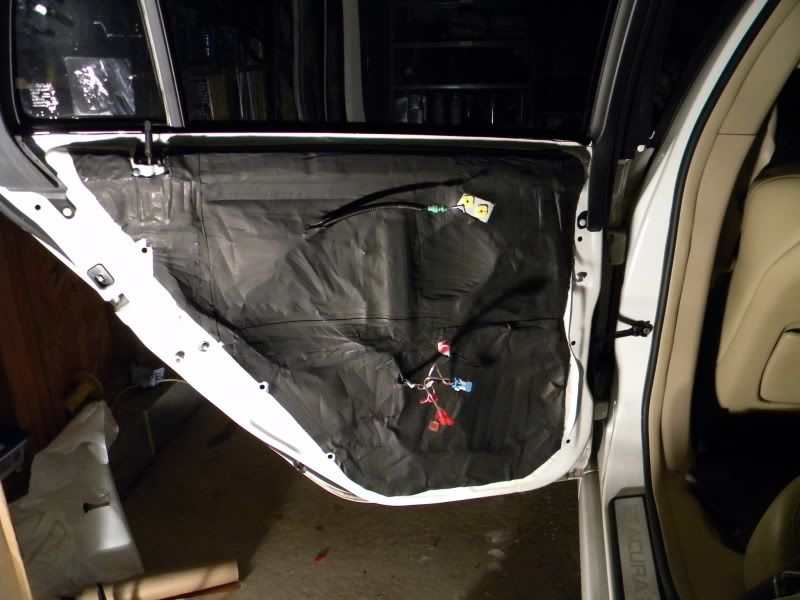
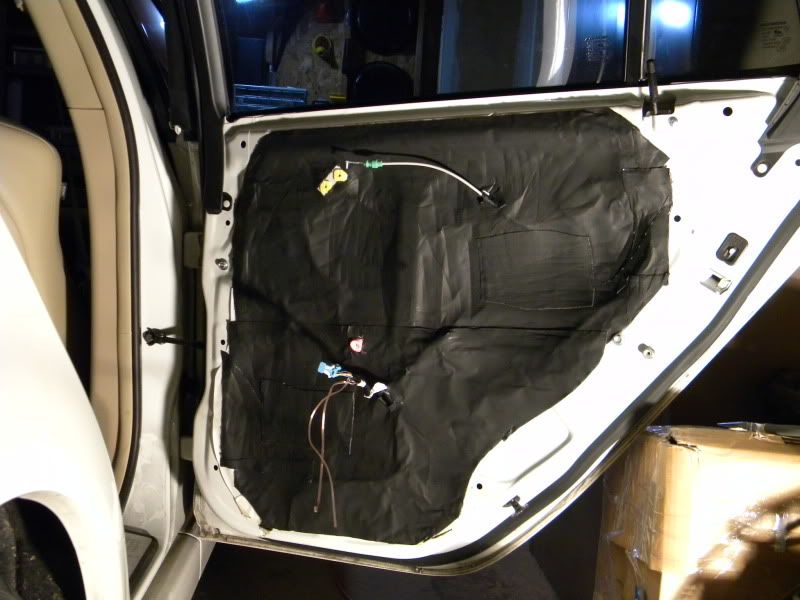
Hmmm. Part vapor barrier, part sound barrier...I guess. Let's apply some deadener here. It will require two sheets for a single layer, I am using Second Skin Damplifier, and one of these days I'll get around to posting my 3-page dissertation on sound deadening, but today won't be that day.
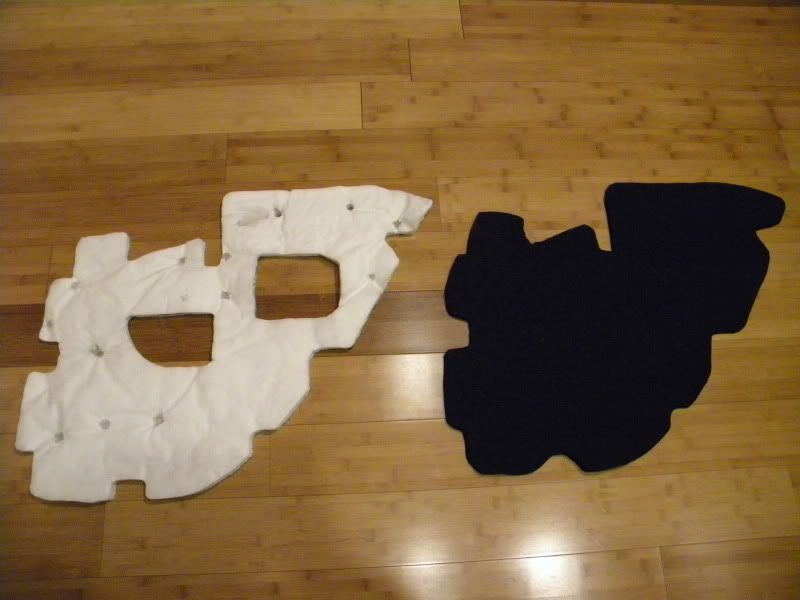
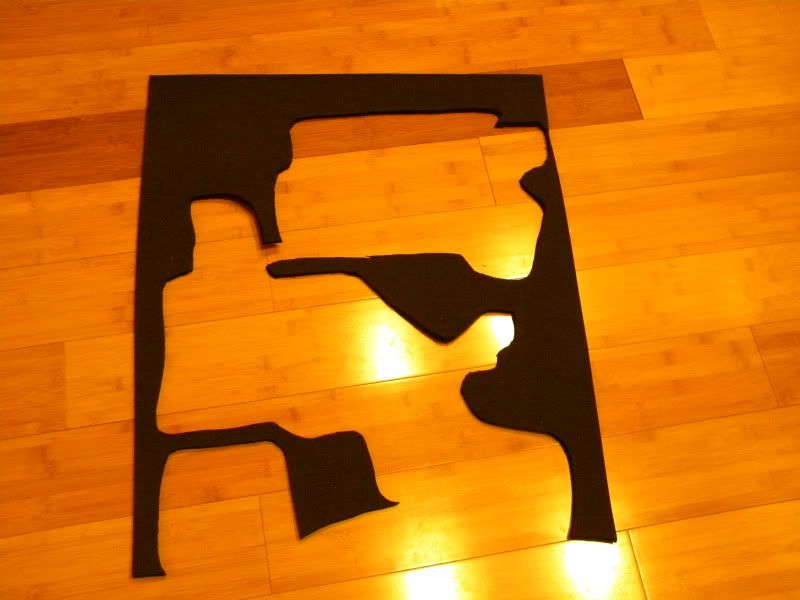
Nice. Ok, so that is only part of the solution. In order to really queit things down, we will need a mass loader and a barrier loader, and for this end we shall be using Second Skin Overkill Pro, a closed barrier foam. Here's a comparison shot of the two:
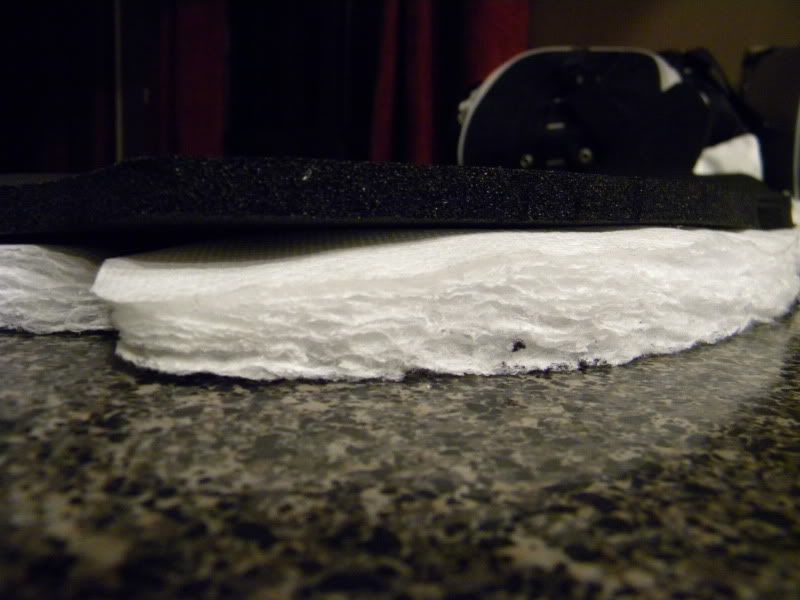
As you can see, the OKP is a nice, dense, closed cell foam whereas the OE mat is more akin to medical gauze baklava that I'll probably use to pick up my dog's love nuggets should his dinner disagree with him. But before that happens, it'll make a nice template for the OKP.

Now, one thing I'll make note of - I removed the foam block which sits in the recessed channel of the white film of the door - behind the film is a steel plate. This serves as a compression point for safety during an accident, and after playing with this foam, I'm pretty sure you could support 10 Rosie O'Donells and have it come out as one solid piece. I'm not too worried as they also have a 2" bar running the length of the door, so this is a trade-off I'll take.

Applied and good to go. Now, being that it's 20F, we'll need to note that this is accomplished by allowing the door, sprayglue, and foam to come to temp inside for about 2 hours, then the foam is run outside, sprayed, then brought right back in. PITA, but it's winter, and again, I'm impatient. Don't forget to cut an 'X' to get the OE harness back in to position (I did for this one, lol)
If you own a home, and have remodeled, you'll appreciate this. If you've ever done so, you will invariably come across many 'WTF did they do?!' moments when you're dealing with wiring, plumbing, and the like. There are many 'buried treasures', and looks like the TL will follow suit. In the process of removing the barrier on the driver side, what did I spy but with a glint in my eye, it's blue, and wondrous, oh my, oh my! Take a look for yourself:
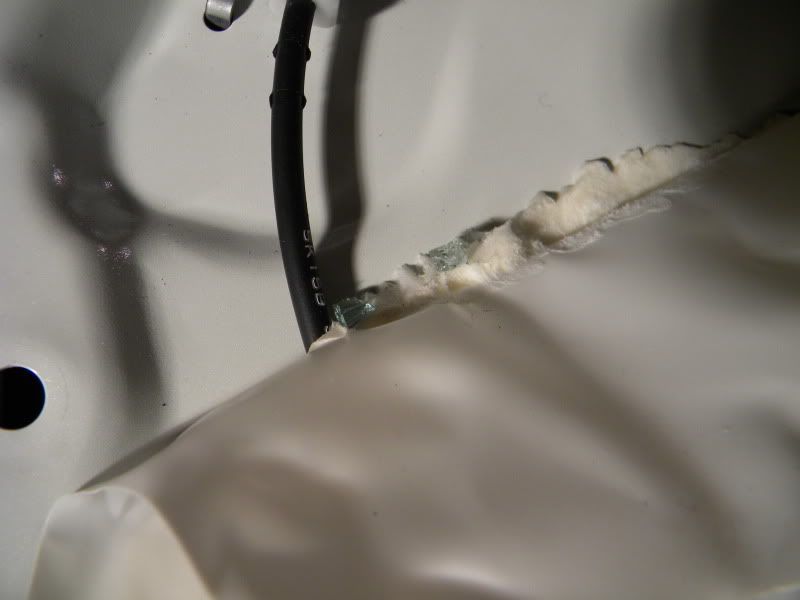
Wanna guess what that is? GLASS. EFFING GLASS. Looks as though the previous owner was less then privy to cover their personal effects whilst parked and there was an itchy-fingered fiend finding fortune in the laziness of another. Again, I HATE Smithtown Acura.
In any SQ-driven system you will find one commonality: MDF rings. These rings create a great baffle for the speakers and serve to improve SQ, particularly if sealed with caulk. Well, I am not in the mood for a full system install yet, so I did the next best thing to seal them...
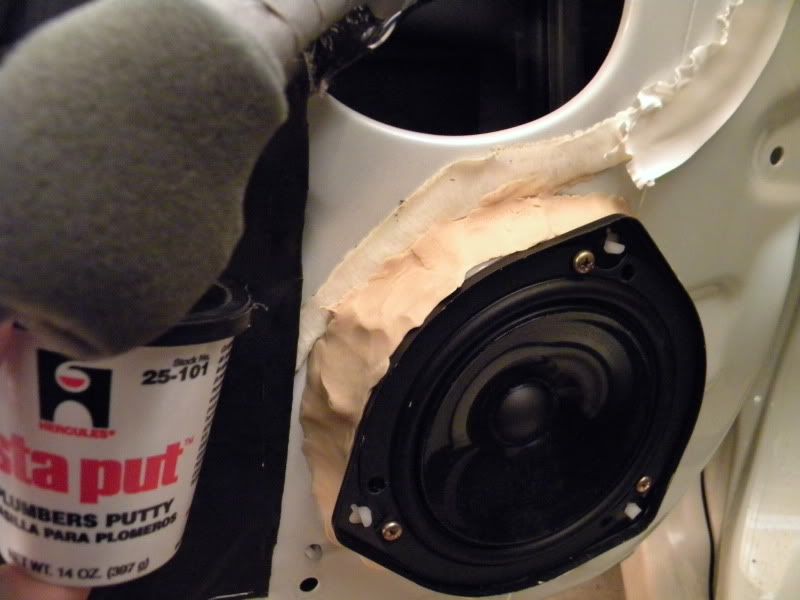
Ahhhh, good ole plumbers putty! Removeable, yet solid. This should serve as a nice means of ensuring the OE speaker remains sealed, which should provide me with at least a marginal improvement in the OE speakers. Time for some deadening...
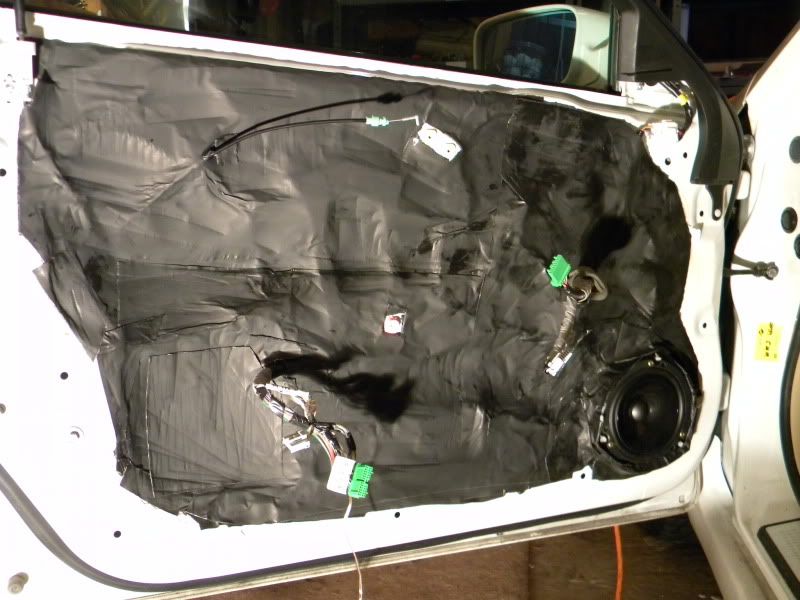
Three sheets to the wind, or, for the wind, I should say, and don't forget to wrap the speaker...

Lather, rinse, repeat for the front foam, which is a 3-peice deal
Shot of the other rear door...
...and none of the passenger side, as I did not have enough time for that.
More updates to come, back to corporate jargon.
So, the next undertaking that is on our way is the addition of sound deadening. I used wayyyy too much in my Maxima, so I'm using the lessons learned here to be more cost/time effective in my efforts for a TL modded to my tastes.
The trunk, trunklid, and rear-deck are already done, and TG for that, as deadening those areas are some of the most goddamned uncomfortable areas to hit, requiring a penchant for pain and a deep hatred for rattles. The doors, on the other hand, allow us to work in a far more ergonomic position, so hooray for us. So let's take a look at what Acura gives us.
Hmmm. Part vapor barrier, part sound barrier...I guess. Let's apply some deadener here. It will require two sheets for a single layer, I am using Second Skin Damplifier, and one of these days I'll get around to posting my 3-page dissertation on sound deadening, but today won't be that day.
Nice. Ok, so that is only part of the solution. In order to really queit things down, we will need a mass loader and a barrier loader, and for this end we shall be using Second Skin Overkill Pro, a closed barrier foam. Here's a comparison shot of the two:
As you can see, the OKP is a nice, dense, closed cell foam whereas the OE mat is more akin to medical gauze baklava that I'll probably use to pick up my dog's love nuggets should his dinner disagree with him. But before that happens, it'll make a nice template for the OKP.
Now, one thing I'll make note of - I removed the foam block which sits in the recessed channel of the white film of the door - behind the film is a steel plate. This serves as a compression point for safety during an accident, and after playing with this foam, I'm pretty sure you could support 10 Rosie O'Donells and have it come out as one solid piece. I'm not too worried as they also have a 2" bar running the length of the door, so this is a trade-off I'll take.
Applied and good to go. Now, being that it's 20F, we'll need to note that this is accomplished by allowing the door, sprayglue, and foam to come to temp inside for about 2 hours, then the foam is run outside, sprayed, then brought right back in. PITA, but it's winter, and again, I'm impatient. Don't forget to cut an 'X' to get the OE harness back in to position (I did for this one, lol)
If you own a home, and have remodeled, you'll appreciate this. If you've ever done so, you will invariably come across many 'WTF did they do?!' moments when you're dealing with wiring, plumbing, and the like. There are many 'buried treasures', and looks like the TL will follow suit. In the process of removing the barrier on the driver side, what did I spy but with a glint in my eye, it's blue, and wondrous, oh my, oh my! Take a look for yourself:
Wanna guess what that is? GLASS. EFFING GLASS. Looks as though the previous owner was less then privy to cover their personal effects whilst parked and there was an itchy-fingered fiend finding fortune in the laziness of another. Again, I HATE Smithtown Acura.
In any SQ-driven system you will find one commonality: MDF rings. These rings create a great baffle for the speakers and serve to improve SQ, particularly if sealed with caulk. Well, I am not in the mood for a full system install yet, so I did the next best thing to seal them...
Ahhhh, good ole plumbers putty! Removeable, yet solid. This should serve as a nice means of ensuring the OE speaker remains sealed, which should provide me with at least a marginal improvement in the OE speakers. Time for some deadening...
Three sheets to the wind, or, for the wind, I should say, and don't forget to wrap the speaker...
Lather, rinse, repeat for the front foam, which is a 3-peice deal
Shot of the other rear door...
...and none of the passenger side, as I did not have enough time for that.
More updates to come, back to corporate jargon.
02-03-2010, 10:18 PM
#86
Fearless DIY Guy
Thread Starter
iTrader: (2)
Haha, thanks, man! While I have never worked for an audio shop, this is my second install...but in all reality, I gained a TON of great info/advice over on Maxima.org, the forum for my last car. Therein lies a little gem...the audio forum there is home to some of the most well-versed and experienced audiophiles I have come across on just about ANY car forum, and I mean that in all sincerity. A good number of those guys are running active 3-way and WOOOOW does it sound incredible. Wrapping the speaker came from Don, owner of an audio shop, and the mod of the forum...so I can't claim credit for the idea, but I will take credit for the Plumber's Putty idea.
 02-03-2010, 10:42 PM
#87
Fearless DIY Guy
Thread Starter
iTrader: (2)
Ok, final update and we're fully up to snuff. As you may or may not know, I have had many misfortunes in my meanderings, and, of course, why would this NOT spill over in to my beloved LEDs? Yes, the LEDs. The whites I have installed have been fighting for dear life, and, one by one, have been flickering their very last flicker and dying out. Bear in mind, this has been for whites ONLY. So, it's time to go back...and upgrade the resistor to a 1k-ohm resistor. If this doesn't work, I am going to go all-blue, which I am hoping is not necessary as the current two-tone light scheme is like nothing else...but that's my opinion, and I, of course, am biased.
Here's some random pics...
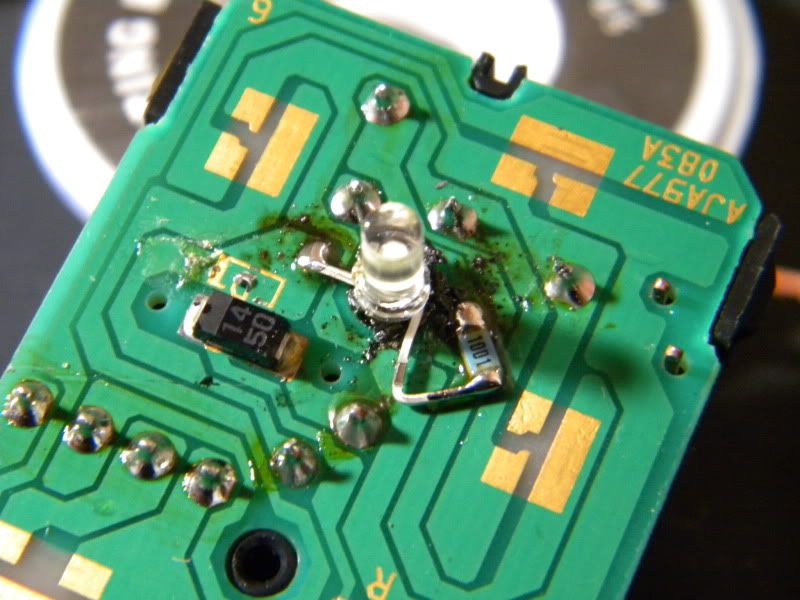
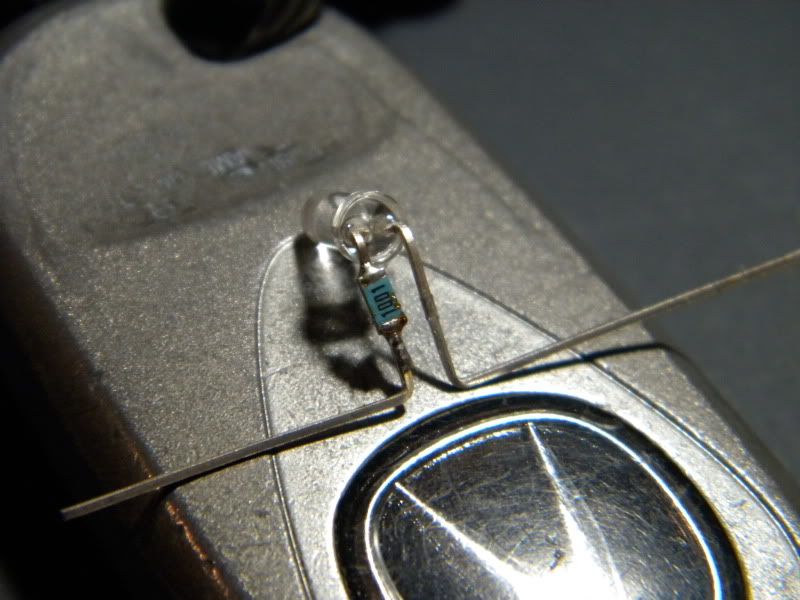
Now, the funny thing is, like anything, the second time you do this, WOW is it ever faster. I'll start with what I considered to be the hardest, now featuring a thick-film LED...originally this took me about 2 hours for the LED ALONE given the crazy ass tolerances of the part...THIS TIME...30 minutes...including removal and installation!!!!
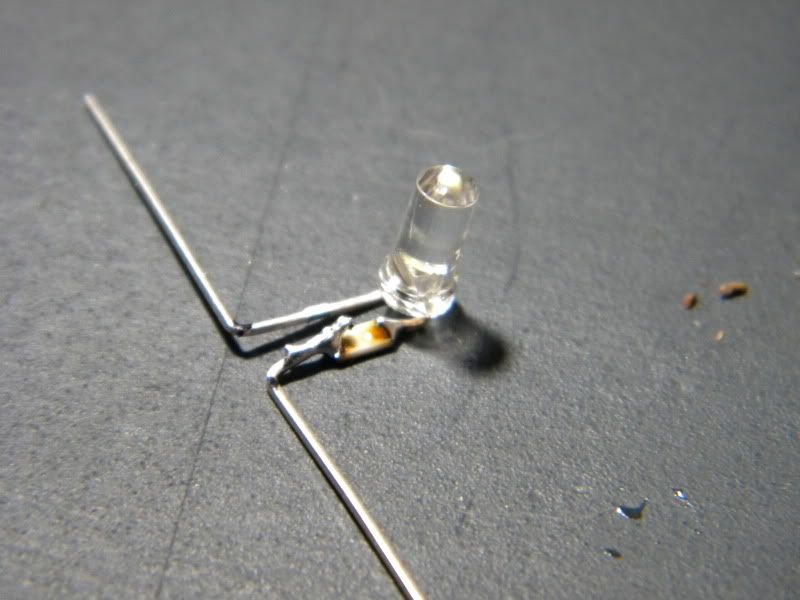
Now, just how small are these things? TINY. FRIGGIN TINY. Here's a comparison shot we can all relate to before it's placed in to the map-light thingie...but again, it makes installation a BREEZE.

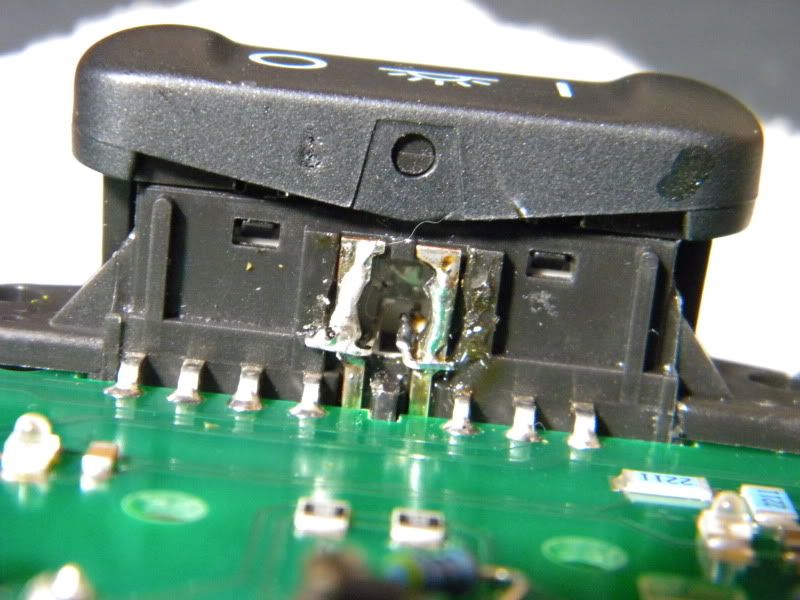
Let's not forget that ALL whites burn out, so we have to hit EVERYTHING, including the MEM buttons...
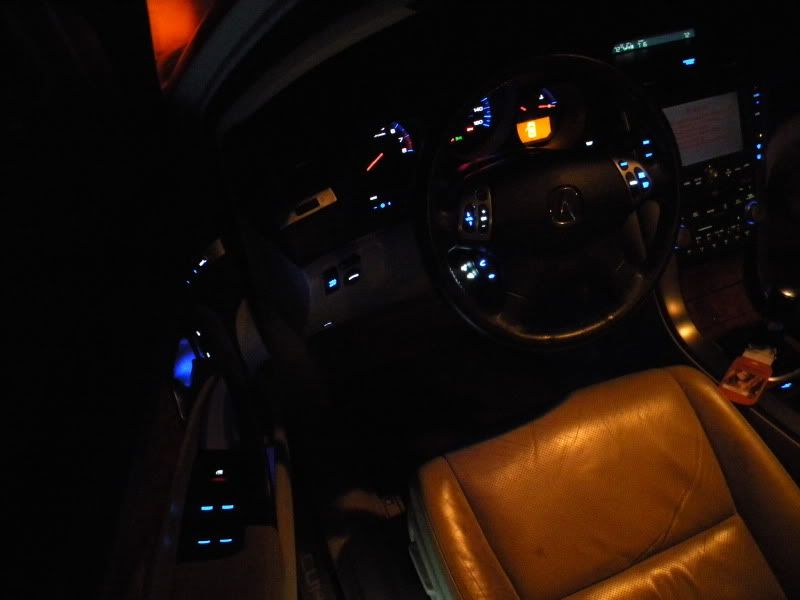
So did I say that the MIRROR button was the hardest? I lied. It's the stupid heater buttons, if you're anal like me an insist on having a zero-tolerance policy against hotspots (although the steering wheel and nav/radio might cause me to violate said policy), but DAMN, is it ever hard positing and aiming these LEDs. All said and done, it was WELL worth it...you be the judge. You'll also notice I've completely abandoned the practice of using the bayonet housings...honestly, it's faster and easier just to perform a direct solder.
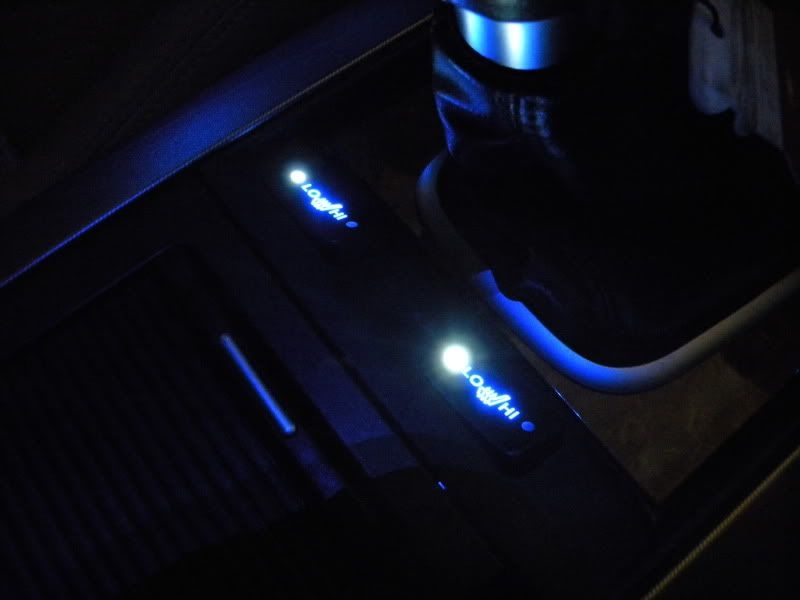
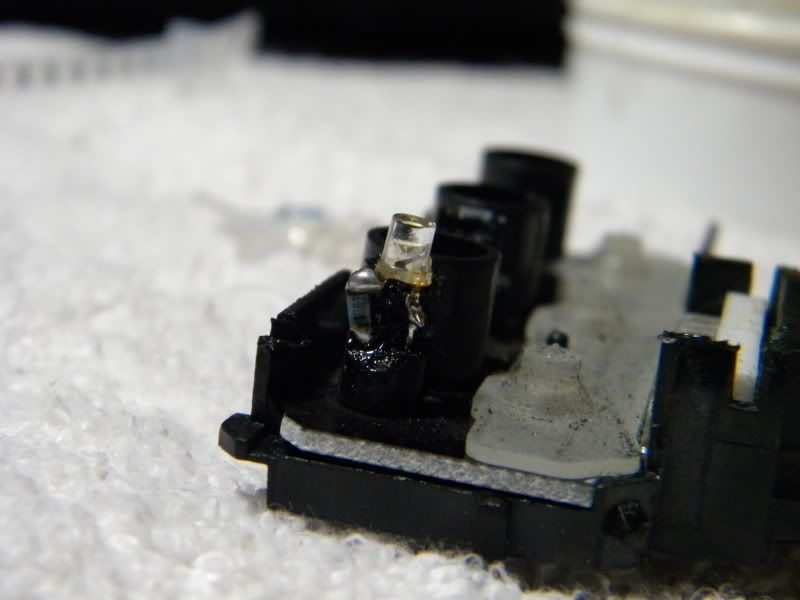
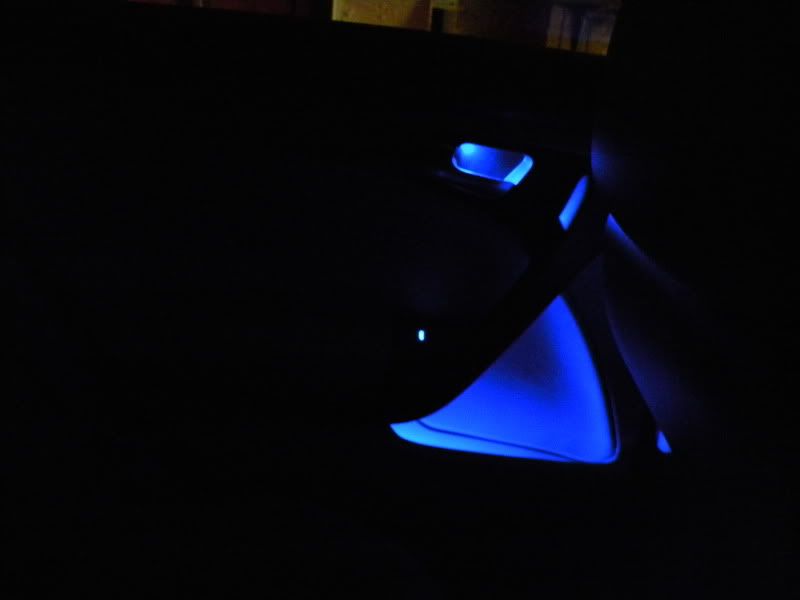
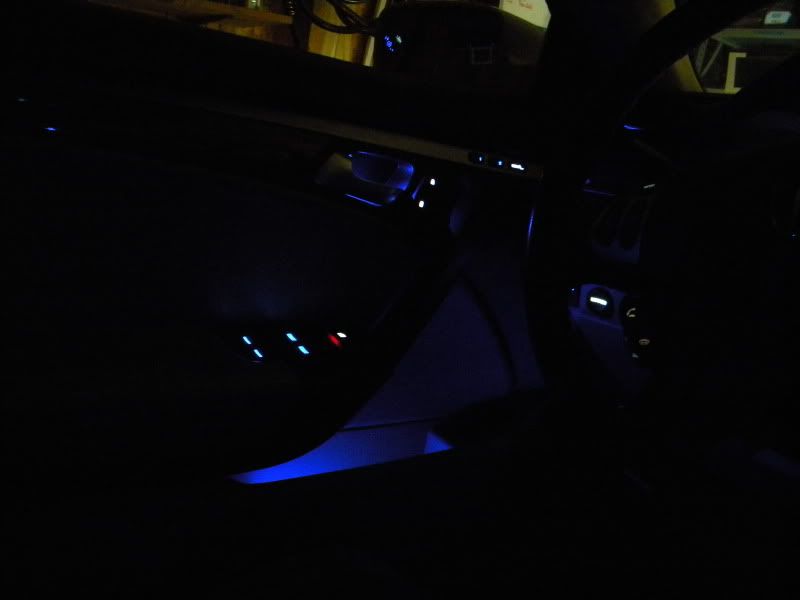
Lastly, some NEW leds...in the door pocket. These feature a whopping 3.3k resistor and are MUCH DIMMER THEN THE PICTURES DEPICT...this creates a much more subtle, pleasant glow that doesn't blind or distract, that will someday be accurately captured when I don't have such a crappy camera.
Here's some random pics...
Now, the funny thing is, like anything, the second time you do this, WOW is it ever faster. I'll start with what I considered to be the hardest, now featuring a thick-film LED...originally this took me about 2 hours for the LED ALONE given the crazy ass tolerances of the part...THIS TIME...30 minutes...including removal and installation!!!!
Now, just how small are these things? TINY. FRIGGIN TINY. Here's a comparison shot we can all relate to before it's placed in to the map-light thingie...but again, it makes installation a BREEZE.
Let's not forget that ALL whites burn out, so we have to hit EVERYTHING, including the MEM buttons...
So did I say that the MIRROR button was the hardest? I lied. It's the stupid heater buttons, if you're anal like me an insist on having a zero-tolerance policy against hotspots (although the steering wheel and nav/radio might cause me to violate said policy), but DAMN, is it ever hard positing and aiming these LEDs. All said and done, it was WELL worth it...you be the judge. You'll also notice I've completely abandoned the practice of using the bayonet housings...honestly, it's faster and easier just to perform a direct solder.
Lastly, some NEW leds...in the door pocket. These feature a whopping 3.3k resistor and are MUCH DIMMER THEN THE PICTURES DEPICT...this creates a much more subtle, pleasant glow that doesn't blind or distract, that will someday be accurately captured when I don't have such a crappy camera.
02-03-2010, 10:45 PM
#88
Fearless DIY Guy
Thread Starter
iTrader: (2)
That's the sum of the updates for now...left to do is...
Deaden the passenger door and add the new LED
Steering wheel LEDs
...that will conclude this worklog. Once that's done, I am going to open a new thread in the pictures gallery as we're FAR from finished.
STEERING WHEEL LED DIY 3.1 COMING THIS WEEKEND!!!
Deaden the passenger door and add the new LED
Steering wheel LEDs
...that will conclude this worklog. Once that's done, I am going to open a new thread in the pictures gallery as we're FAR from finished.
STEERING WHEEL LED DIY 3.1 COMING THIS WEEKEND!!!
02-04-2010, 09:24 AM
#89
Your 2nd install?
Wow...I think moreso than just soaking up knowledge I'd venture to guess you're just a very meticulous and detail oriented person. You do a great job...at posting, at documenting, at modding, at sound systems. You just made my first attempt at Sound deadening my front doors a huge joke!
Wow...I think moreso than just soaking up knowledge I'd venture to guess you're just a very meticulous and detail oriented person. You do a great job...at posting, at documenting, at modding, at sound systems. You just made my first attempt at Sound deadening my front doors a huge joke!
 02-07-2010, 07:33 PM
#91
Fearless DIY Guy
Thread Starter
iTrader: (2)
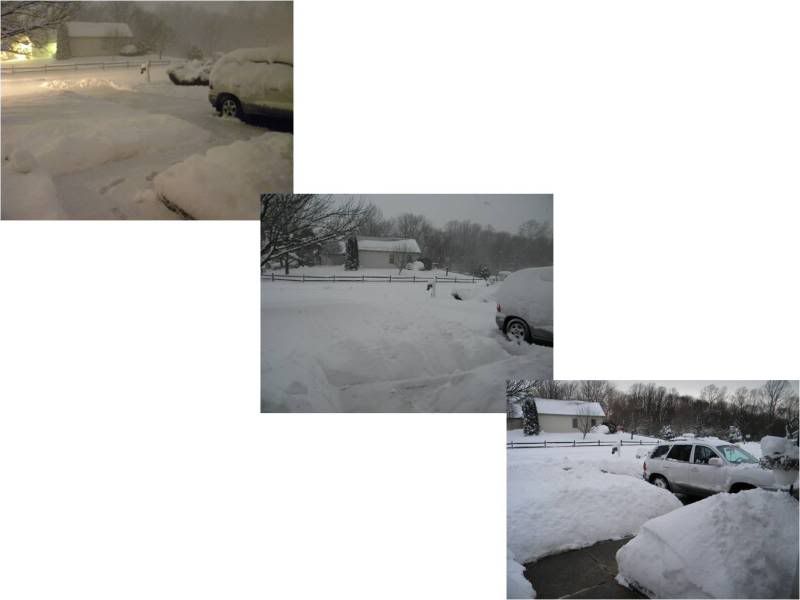
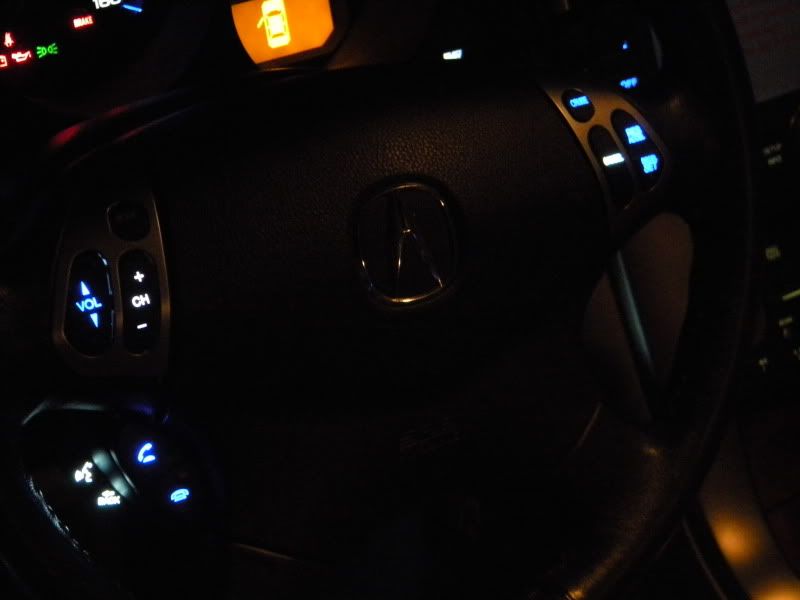
Alright, time for an update. This weekend was nothing short of hell on earth and featured what was UNDOUBTEDLY the single toughest LED conversion I have had to deal with, trumping even some of the things I did on the Maxima. If one was wondering if devils roam the earth, they do, and they design the lighting circuits and positions of OE bulbs for the Acura steering wheels. To make matters worse, we got SLAMMED with another wonderful dumping of snow, making it the second largest snow-fall on record and a royal pain in the d*ck. Anyway, let's get started.
So work was kind enough to let us go early on Friday, giving me time to prep for the big steering wheel LED conversion. I am going to write a proper HOW-TO, but in all honesty, I don't even know if there's much value in doing so considering how goddamn difficult it is to properly perform the retrofit. Anyway, here's some pics of the snow, followed by the results.
In addition to the overall design of the circuits, other things that surfaced that managed to piss me off something feirce included...
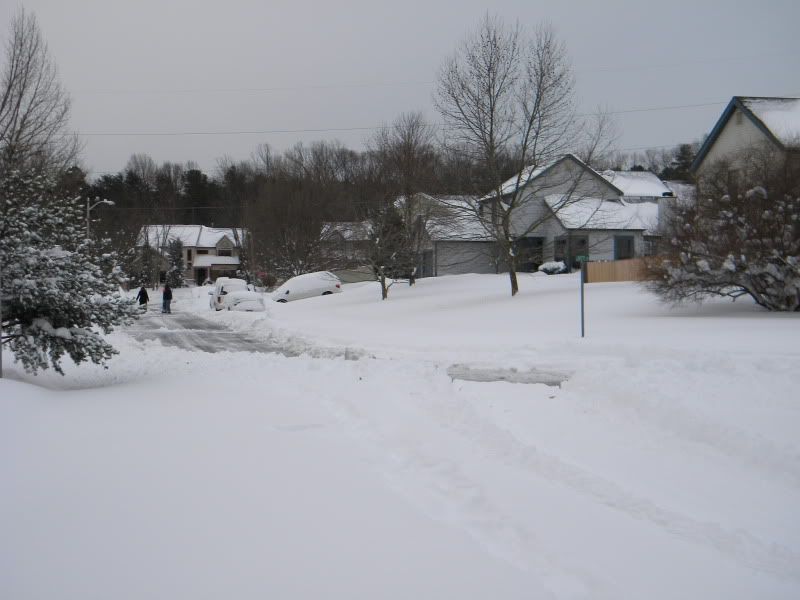
WTF. So they plow the ENTIRE development with the exception of my cul-de-sac. While this might not irk most, I had been rationing my last Tassimo T-Disc, cigs, and coffee creamer around the assumption I'd be able to procure said supplied by sundown. THIS DID NOT HAPPEN. They finally plowed at the early hour of 10pm, allowing me to return to a normal human being.
I finally got everything together and discovered one of my bulbs is out, lol. No biggie, now that I know how to do this, and seeing that thankfully this is an EASY bulb to fix, I'll have it done before week's end. Enjoy!
REMAINING PROJECTS FOR WINTER WORKLOG:
-Passenger door deadening
-Relocation of cupholder LED
-DVD player install
-Radio/Nav LED conversion
-Subwoofer install
So work was kind enough to let us go early on Friday, giving me time to prep for the big steering wheel LED conversion. I am going to write a proper HOW-TO, but in all honesty, I don't even know if there's much value in doing so considering how goddamn difficult it is to properly perform the retrofit. Anyway, here's some pics of the snow, followed by the results.
In addition to the overall design of the circuits, other things that surfaced that managed to piss me off something feirce included...
WTF. So they plow the ENTIRE development with the exception of my cul-de-sac. While this might not irk most, I had been rationing my last Tassimo T-Disc, cigs, and coffee creamer around the assumption I'd be able to procure said supplied by sundown. THIS DID NOT HAPPEN. They finally plowed at the early hour of 10pm, allowing me to return to a normal human being.
I finally got everything together and discovered one of my bulbs is out, lol. No biggie, now that I know how to do this, and seeing that thankfully this is an EASY bulb to fix, I'll have it done before week's end. Enjoy!
REMAINING PROJECTS FOR WINTER WORKLOG:
-Passenger door deadening
-Relocation of cupholder LED
-DVD player install
-Radio/Nav LED conversion
-Subwoofer install

 02-11-2010, 12:06 PM
#96
Fearless DIY Guy
Thread Starter
iTrader: (2)
Ahhhhh, the battle never ends. So, if you've been following any LED-related articles I've written, you'll recall I am still facing issues with white LEDs, and white LEDs only. I don't know why. By all scholastic means, my 1k-ohm resistors SHOULD have solved the issue...but it did not. Which leads me to believe the following hypothesis to be true: THE COMMON BULB-OUT ISSUES ARE A RESULT OF IMPROPER VOLTAGE MANAGEMENT IN THE TL.
...ok. so what does that mean? It means that the LEDs are received too high a voltage jolt and burning out. Awesome. Well, fortunately I have a solution to this, although I was really hoping it would not come down to having to execute said fix. Chris (madsiick), Dave (dwb993), and I are on the cusp of finishing up the radio/nav install with DIY, but I have pulled back the reins on my end until I know for certain why white LEDs keeping going out. (Chris has finished this, btw). Dave might finish before me, but we're shooting for a zero hotspot design that will look killer, but I'm not doing this if whitey keeps crapping out.
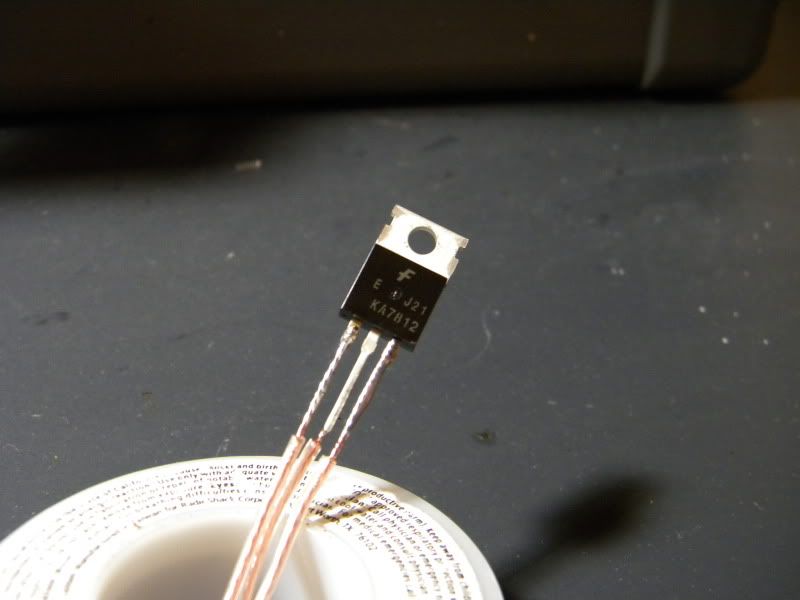
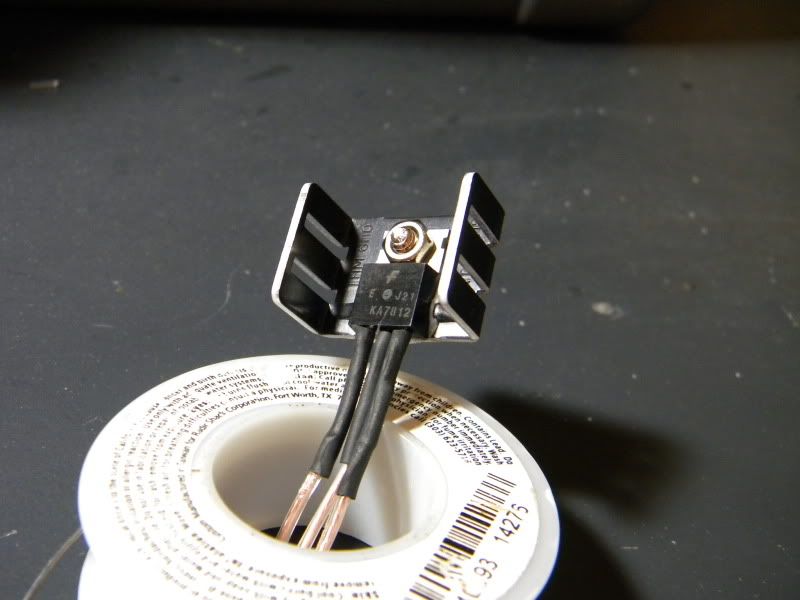
SO, here's what we're doing...behold the Fiarchild Regulator, aka a TO-220. This little guy regulates output voltage to a constant +12V, which should completely resolve my bulb-out issues. Just to put things in to perspective, I already have a bulb on the way out in the steering wheel...this was finished days ago!
Here's prepping of the regulator, along with installation of a heatsink

It kinda goes as follows:
OE LEAD AT HARNESS--> TO-220 INPUT -->X TO-220 X --> OE LEAD --> HARNESS --> DEVICE
The middle leg goes to ground, which allows for excess current to return thereby regulating the mess.
Now, I have an FSM, but it sucks BALLS as I cannot perform a word search, so basically I use an LED to pin-out the leads. Rather inefficient, BUT it does work.
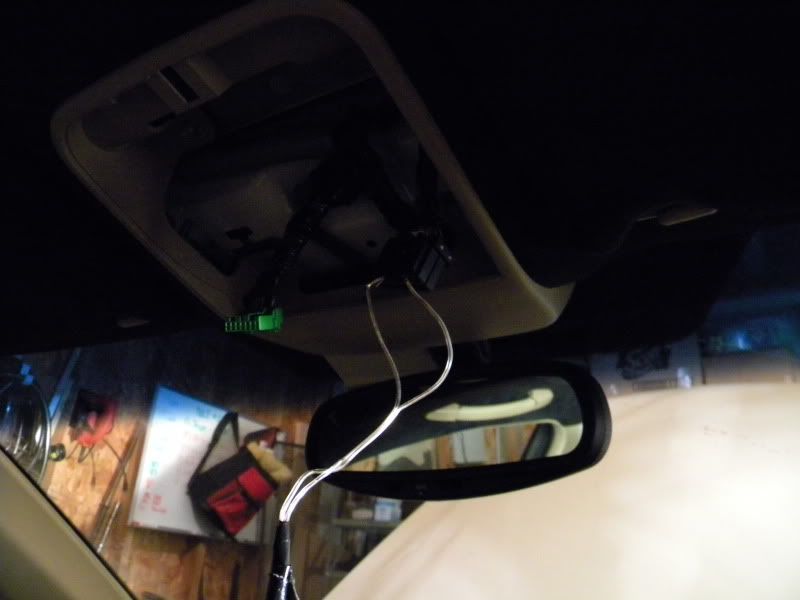
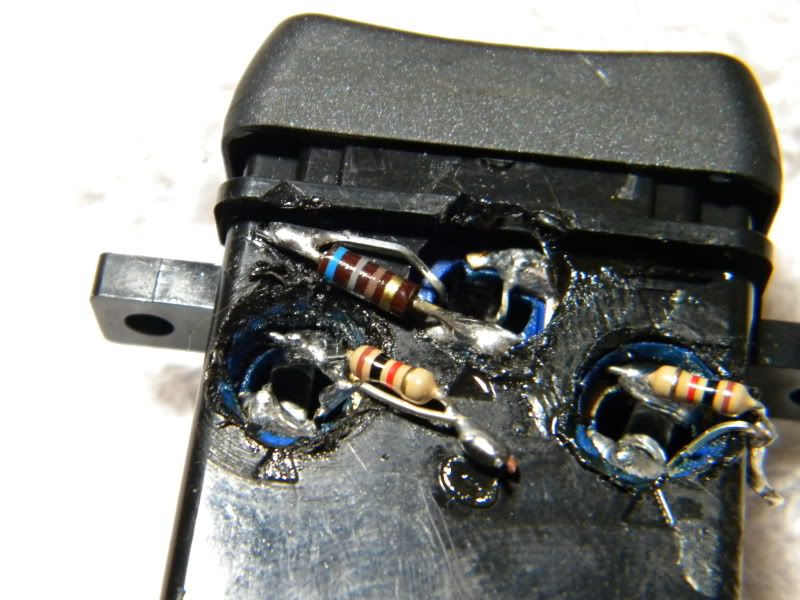
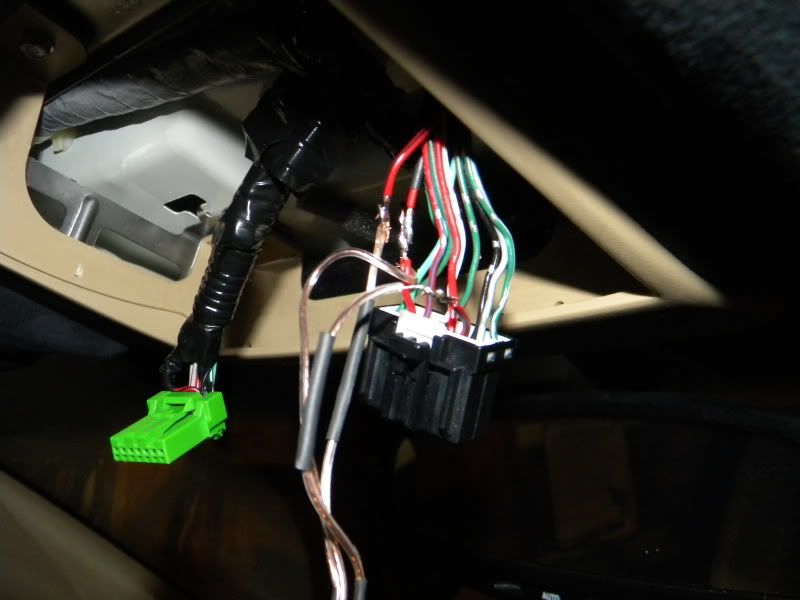
Cutting and splicing of the OE leads...
...and done. Keep it CLEAN. I need to have my HFL replaced under warranty, so I don't want the techs to think anything funny is happening here. Even if they try and argue, I can cite the ol Magnuson-Moss case and all lighting is tied to a 7.5A lead on fuse #6 from the multi-junction harness; this is independent of the HFL circuit.
SO NOW WHAT?
Nothing...for now. I am going to wait about 2 weeks before I do anything else LED-related as I am growing a bit weary of replacing white LEDs. There are 4 immediate spots I know have burn-out with whites, and I am going to at least do this for the steering wheel as well to ensure this is the fix before moving forward. So things may be quiet from the DM camp for awhile, or at least until my amp returns from Arc Audio.
...ok. so what does that mean? It means that the LEDs are received too high a voltage jolt and burning out. Awesome. Well, fortunately I have a solution to this, although I was really hoping it would not come down to having to execute said fix. Chris (madsiick), Dave (dwb993), and I are on the cusp of finishing up the radio/nav install with DIY, but I have pulled back the reins on my end until I know for certain why white LEDs keeping going out. (Chris has finished this, btw). Dave might finish before me, but we're shooting for a zero hotspot design that will look killer, but I'm not doing this if whitey keeps crapping out.
SO, here's what we're doing...behold the Fiarchild Regulator, aka a TO-220. This little guy regulates output voltage to a constant +12V, which should completely resolve my bulb-out issues. Just to put things in to perspective, I already have a bulb on the way out in the steering wheel...this was finished days ago!
Here's prepping of the regulator, along with installation of a heatsink
It kinda goes as follows:
OE LEAD AT HARNESS--> TO-220 INPUT -->X TO-220 X --> OE LEAD --> HARNESS --> DEVICE
The middle leg goes to ground, which allows for excess current to return thereby regulating the mess.
Now, I have an FSM, but it sucks BALLS as I cannot perform a word search, so basically I use an LED to pin-out the leads. Rather inefficient, BUT it does work.
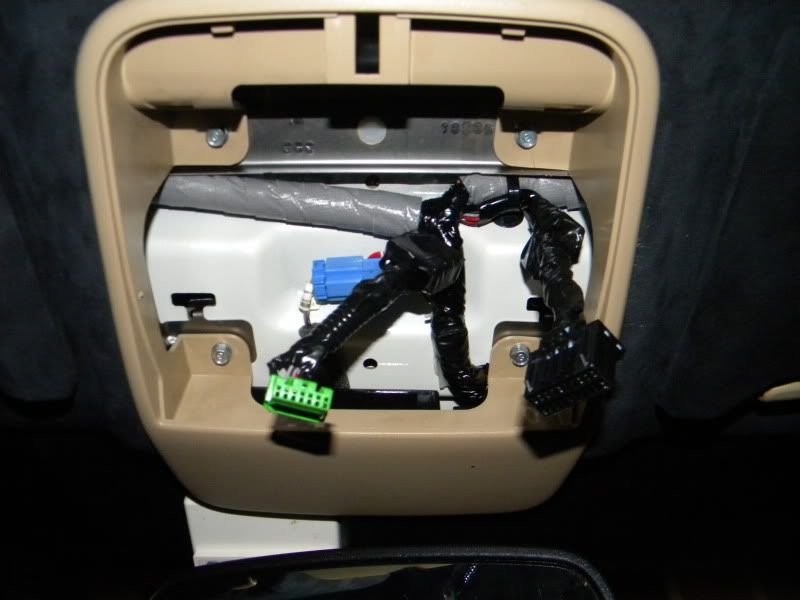
Cutting and splicing of the OE leads...
...and done. Keep it CLEAN. I need to have my HFL replaced under warranty, so I don't want the techs to think anything funny is happening here. Even if they try and argue, I can cite the ol Magnuson-Moss case and all lighting is tied to a 7.5A lead on fuse #6 from the multi-junction harness; this is independent of the HFL circuit.
SO NOW WHAT?
Nothing...for now. I am going to wait about 2 weeks before I do anything else LED-related as I am growing a bit weary of replacing white LEDs. There are 4 immediate spots I know have burn-out with whites, and I am going to at least do this for the steering wheel as well to ensure this is the fix before moving forward. So things may be quiet from the DM camp for awhile, or at least until my amp returns from Arc Audio.
02-11-2010, 03:11 PM
#97
Oderint dum metuant.
Join Date: Mar 2005
Location: Lake Wylie
Age: 46
Posts: 12,496
Likes: 0
Received 534 Likes
on
446 Posts
I absolutely love reading your posts, they're so entertaining and detailed. So I'm all excited as I just found this thread and I figure there should be lots of reading and lots of pics...perfect to fill the time while some reports are running. Then it happens, I get boned because the pics are blocked at work  . Of course, I had to stop reading since there's not much point with out the pics. I'll make an attempt to remember to look for this thread when I'm at home (rarely on AZ at home, though).
On a side note, how the the CC show? Death metal's great stuff. I've grown to accept more softer music over the years, but I still love some good ol' death metal. I was floored when I found out the radio station I listen to plays it from 11 to 12 on Saturday nights (random discovery as I don't usually listen to the radio then).
. Of course, I had to stop reading since there's not much point with out the pics. I'll make an attempt to remember to look for this thread when I'm at home (rarely on AZ at home, though). On a side note, how the the CC show? Death metal's great stuff. I've grown to accept more softer music over the years, but I still love some good ol' death metal. I was floored when I found out the radio station I listen to plays it from 11 to 12 on Saturday nights (random discovery as I don't usually listen to the radio then).
02-11-2010, 03:17 PM
#98
Team Owner
iTrader: (2)
Join Date: Jan 2008
Location: Kansas City, MO (Overland Park, KS)
Posts: 36,545
Received 6,470 Likes
on
5,162 Posts
Dude, electricity and I don't even speak the same language. Kudos to you for the work you're doing. When you're done, come over and do the LED stuff on my Type S!!!
02-11-2010, 04:27 PM
#99
Fearless DIY Guy
Thread Starter
iTrader: (2)
On a side note, how the the CC show? Death metal's great stuff. I've grown to accept more softer music over the years, but I still love some good ol' death metal. I was floored when I found out the radio station I listen to plays it from 11 to 12 on Saturday nights (random discovery as I don't usually listen to the radio then).
02-11-2010, 11:39 PM
#101
Team Owner
iTrader: (2)
Join Date: Jan 2008
Location: Kansas City, MO (Overland Park, KS)
Posts: 36,545
Received 6,470 Likes
on
5,162 Posts
02-15-2010, 05:53 PM
#102
Oderint dum metuant.
Join Date: Mar 2005
Location: Lake Wylie
Age: 46
Posts: 12,496
Likes: 0
Received 534 Likes
on
446 Posts
Thanks for the compliment, man! Yeah, I've been listening to DM for about 16 years now, since I was about 12/13. I thought I would soften up with my listening taste as I grew older, but it's been anything but, lol. People scroll through my iPod to find Baroque era classical, heavy techno, and DM...and little else, lol. The CC show was cancelled due to inclement weather, so both they and effing Hate Eternal backed out, leaving just Hatebreed to lead the show, so I just said screw it to the show. The Mayhem Festival is looking to suck this year, so I'm holding out that Ozzfest will bring the DM. Did you go last year? Slayer was AWESOME!
I don't remember if Ozzfest even came through here last year, but if they did, I know Slayer wasn't with them then. A lot of bands join Ozzfest after they play here. Slayer has only played Ozzfest in Charlotte once...back when I was in college. In fact, the only times I remember Slayer coming here was when I was in college (came twice). Now they only go to Atlanta. Missed them a couple of years ago because the show was Thanksgiving day. Was going to go earlier this month until the show was canceled due to Tom Araya's surgery. I plan on going when it's rescheduled.
Well, off to read this thread.
02-20-2010, 06:23 PM
#105
Fearless DIY Guy
Thread Starter
iTrader: (2)
Thanks, man! DUDE, THE NEW NILE ALBUM IS ABSOLUTELY DISGUSTING!!! Seriously, it's awesome, give it a listen, I recommend the track Utterances of the Crawling Dead (click for linky), all hell breaks loose before the solo around 3:09, it's simply ORGASMIC. Just when I thought that song couldn't get any better, I realized they are adding a 1/32 mute in between the palm-muted trills, MAN, I loves me some metal.
Sombahdy brang da amber lamps
UPDATES COMING
i was gunna say something about needing a voltage regulator. i use one on all the LED guages i make. good job!
UPDATES COMING
02-20-2010, 06:43 PM
#106
Fearless DIY Guy
Thread Starter
iTrader: (2)
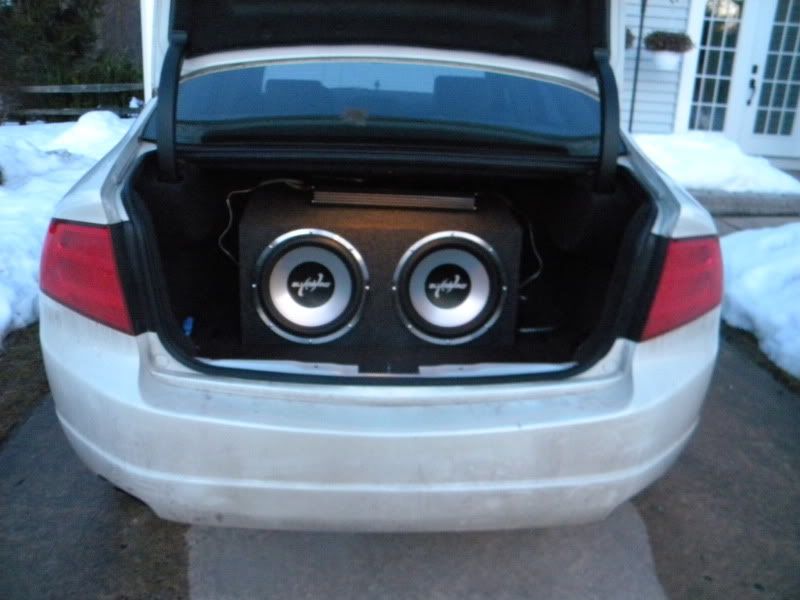
Update time, although this one will be relatively short. So the boys in brown presented me with a much-anticipated gift on Thursday, that being my repaired amp. Something went awry with the RCA jacks, but $75 later we're in business. A few hours of troubleshooting some LOCs later, I haz subz. By all means I consider myself an audiophile, and it's only in due time I do a full changeover for the TL, but at the least I want to get my low-end moving once again. Featured below is a hair-raising Alumapro Alchemy RX DVC 4-ohm SQ sub (yeah, it's a mouthful), wired for 2-ohm each receiving a CLEAN 550W line of juice courtesy of Arc Audio's 2500-XXK class A circuitry. To give you an idea of what this system is capable of, my LOC is at 20%, amp gains at about 25%, and db boost at +2...and the system POUNDS. The gains had to be turned way the eff down because you literally cannot hear yourself think at higher levels, but that's what you get with $1600 worth of gear for your subs. I might go fully-active 3-way for the fronts later, but probably just passive 3-way.
Anywho, here's a quick pic, I will be fabricating a beauty panel and mounting the amp elsewhere at a later point in time.
Now that we have that completed, it's on to the next project, which will be DIY illuminated door sills. I am waiting for some parts, and would be working on the rest of the LED mods, but recall we're still in the testing phase of the regulators. So far so good, but the TL likes to f*ck with Ohm's law and my head in general, so I'm waiting only with baited breath.
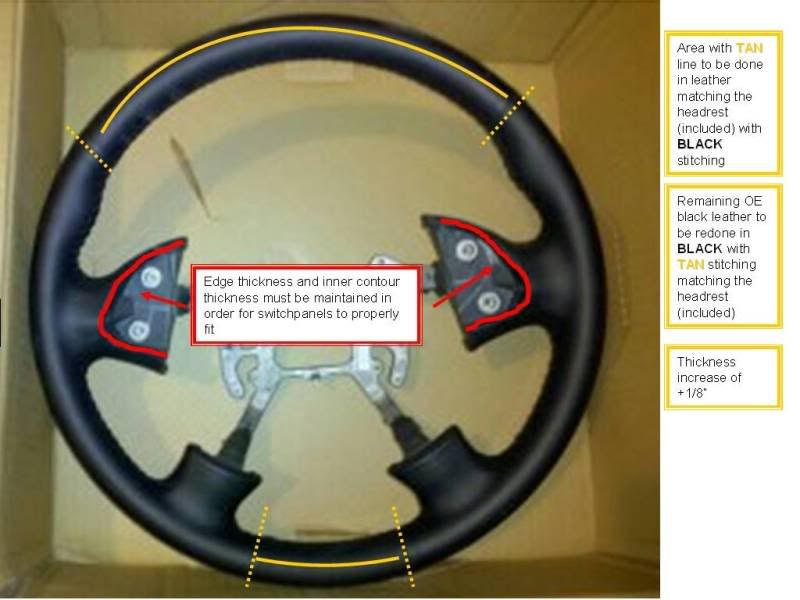
Next week, though, we should see the arrival of what will agruably be one of my best upgrades ever, and that's the steering wheel. I have a wheel being two-toned, with two-tone stitching...and...get this...A FULL +1/8" THICKNESS being added to the steering wheel. For $350, Acura can suck my butt...if I'm rolling out that kind of dough, I'm going to do it MY way. Here's the specs we're working with:
Should be pretty sweet when it's all said and done. That's all from DM's camp for now. The next 2-3 weeks are going to be a little slower then normal as I had to drop a little more bank then I hoped for Tiesto tickets, but gotta pay to play. The dog is still having stomach issues, so I'm off to try and resolve his attempt to turn my white rug in the MBR in to a faux snow leopard hide.
Anywho, here's a quick pic, I will be fabricating a beauty panel and mounting the amp elsewhere at a later point in time.
Now that we have that completed, it's on to the next project, which will be DIY illuminated door sills. I am waiting for some parts, and would be working on the rest of the LED mods, but recall we're still in the testing phase of the regulators. So far so good, but the TL likes to f*ck with Ohm's law and my head in general, so I'm waiting only with baited breath.
Next week, though, we should see the arrival of what will agruably be one of my best upgrades ever, and that's the steering wheel. I have a wheel being two-toned, with two-tone stitching...and...get this...A FULL +1/8" THICKNESS being added to the steering wheel. For $350, Acura can suck my butt...if I'm rolling out that kind of dough, I'm going to do it MY way. Here's the specs we're working with:
Should be pretty sweet when it's all said and done. That's all from DM's camp for now. The next 2-3 weeks are going to be a little slower then normal as I had to drop a little more bank then I hoped for Tiesto tickets, but gotta pay to play. The dog is still having stomach issues, so I'm off to try and resolve his attempt to turn my white rug in the MBR in to a faux snow leopard hide.
02-20-2010, 09:40 PM
#107
Team Owner
iTrader: (2)
Join Date: Jan 2008
Location: Kansas City, MO (Overland Park, KS)
Posts: 36,545
Received 6,470 Likes
on
5,162 Posts
DM, the trunk looks terrific! I bet it sounds great. I'm anxious to see your finished steering wheel.
02-20-2010, 10:20 PM
#108
Fearless DIY Guy
Thread Starter
iTrader: (2)
I am beginning to find, though, that AZine is becoming more and more a dangerous place to be. You and some of the other members keep making me add to my 'mods to do list'. Jerks.
 02-20-2010, 10:27 PM
#109
Team Owner
iTrader: (2)
Join Date: Jan 2008
Location: Kansas City, MO (Overland Park, KS)
Posts: 36,545
Received 6,470 Likes
on
5,162 Posts
I know buddy! And thanks for the Kudos, by the way! Just when I think I'm done with my Type S, I'm considering another mod.
02-21-2010, 08:10 AM
#111
02-21-2010, 12:49 PM
#112
Fearless DIY Guy
Thread Starter
iTrader: (2)
AWESOME. I am really glad to hear that people are walking away with some new info, and hopefully don't make the same mistakes I did!
Thanks, dude! I am hoping we start seeing some temperatures a bit more conducive to painting temps in April, but it looks like it's going to be a May deal...I want to do some painting when I have them cracked open, but it's going to be awhile, it seems. Grrrrr
02-22-2010, 11:18 AM
#113
Oderint dum metuant.
Join Date: Mar 2005
Location: Lake Wylie
Age: 46
Posts: 12,496
Likes: 0
Received 534 Likes
on
446 Posts
Brutal! Reminds me of some old Bolt Thrower or SFU. I think I'll pick that up. They played here supporting that album the other week...couldn't find anyone who wanted to go  . We have a couple of shows/fests with local and/or small bands coming in the next couple of months...bet I get no takers on those either (and one's even on a Saturday).
As for the car, no rest for the wicked, I see. I can only imagine how much those subs hit...I miss those days. The steering wheel sounds interesting (headrests, too). Looking forward to seeing the overall interior when you're finished.
. We have a couple of shows/fests with local and/or small bands coming in the next couple of months...bet I get no takers on those either (and one's even on a Saturday).As for the car, no rest for the wicked, I see. I can only imagine how much those subs hit...I miss those days. The steering wheel sounds interesting (headrests, too). Looking forward to seeing the overall interior when you're finished.
03-05-2010, 11:33 PM
#115
Fearless DIY Guy
Thread Starter
iTrader: (2)
Update time. After what seems to be the longest week of my friggin life, I can finally sit down and relax (although I use that term lightly because working on the TL is my form of relaxation!). In addition to working a +70 work week, I made a trip to visit Efrin, tl2slow, on Monday to pick up some parts he was selling and needed GONE that day. We finished up around midnight, but it resulted in my beat-to-shit front bumper being replaced with a freshly painted bumper, a lovely A-Spec lip painted to match, A-Spec skirts, and, this is total win, a rear bumper with the type-s lip already installed. After finishing up around midnight, I was back there again on Tuesday to swap my crappy seats for his well-conditioned seats, THEN on Wednesday, it was off to northern NJ to pick up my TL-S exhaust. To boot, I made a massive err in judgement with my cutting cycle macronutrient content for the week, leaving me with 295g protein per day and a whopping 42g of fiber, resulting in incessant gas that is even offending me, resulting in 1 cleared office, 1 gagging manager, and a gym patron whom shot me a look that I would like to being caught having relations with her departed grandmother.
Parts are mounting up left and right, what good are they if not installed? Let's start with tonight's work, shall we? While most of the night was spent working on another members steering wheel LEDs, I finally got around to playing with my new steering wheel! This beauty is a custom-made heavyweight, you can check this thread to learn more. Here's the tentative plans for the weekend, with updates likely to occur Sunday:
Replace dead LEDs, install voltage regulator, install new SW (Sat)
Install bumper lip spoiler (Sat)
Install A-Spec sideskirts (Sat or Sun)
Exhaust tip mods (Sun)
Maybe wash my filthy car
Maybe debadge
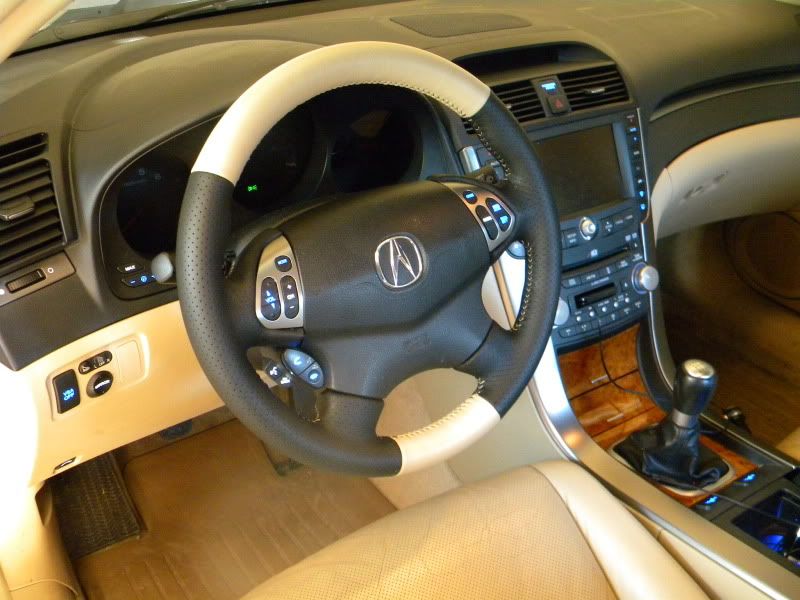
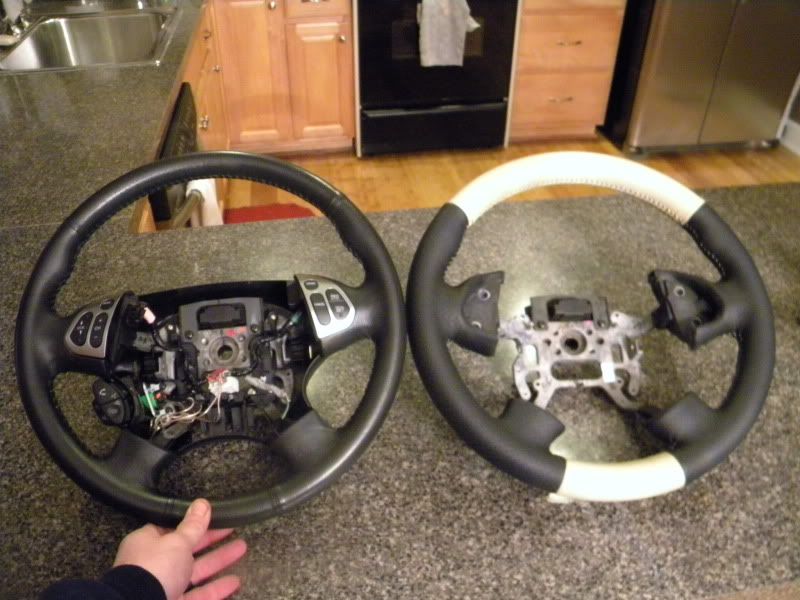
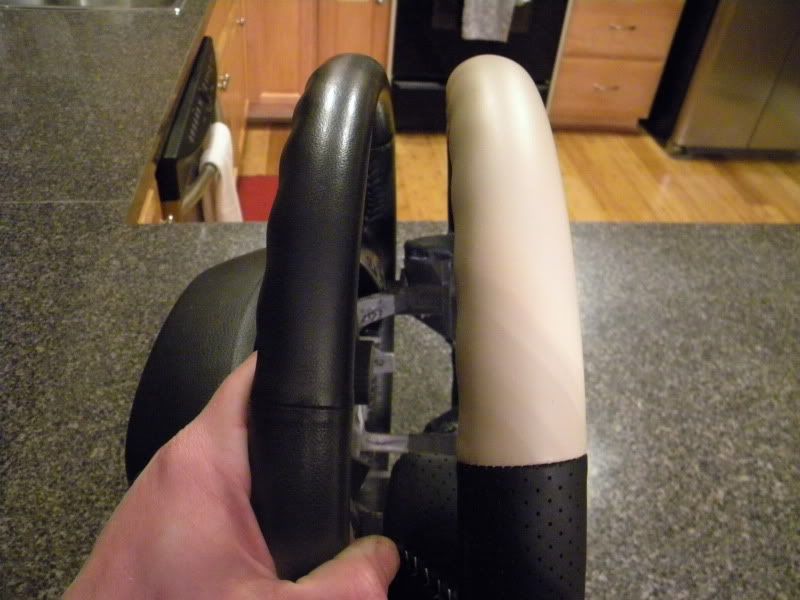
Anyway, here's the pics. As you can see, this gem is NOTICEABLY thicker and after handling it for but a few moments, the OE it like having beef chuck after watching a filet mignon waft by your face. I'll get some better interior pics once it's installed, didn't want to leave you guys hangin' as I loathe those ridiculous "teaser" threads that only serve to pump egos and postcount.
Just a quick FYI: There's MUCH more to be done in terms of two-toning my interior, so for those whom might claim the contrast is a bit much, bear in mind there's more to be done, none of which has been by any other member thus far.
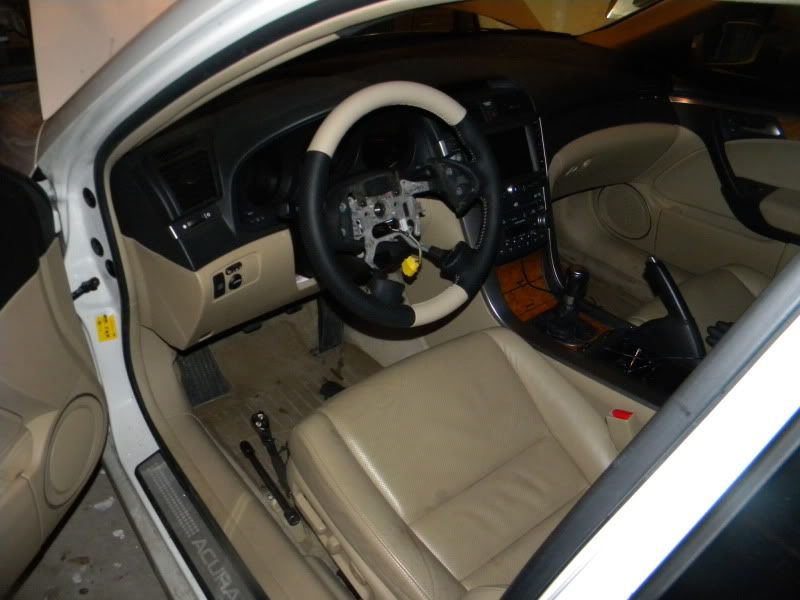
Anyway, enjoy, I'm off to bed as my eyes are even losing the ability to track words in this post.
Parts are mounting up left and right, what good are they if not installed? Let's start with tonight's work, shall we? While most of the night was spent working on another members steering wheel LEDs, I finally got around to playing with my new steering wheel! This beauty is a custom-made heavyweight, you can check this thread to learn more. Here's the tentative plans for the weekend, with updates likely to occur Sunday:
Replace dead LEDs, install voltage regulator, install new SW (Sat)
Install bumper lip spoiler (Sat)
Install A-Spec sideskirts (Sat or Sun)
Exhaust tip mods (Sun)
Maybe wash my filthy car
Maybe debadge
Anyway, here's the pics. As you can see, this gem is NOTICEABLY thicker and after handling it for but a few moments, the OE it like having beef chuck after watching a filet mignon waft by your face. I'll get some better interior pics once it's installed, didn't want to leave you guys hangin' as I loathe those ridiculous "teaser" threads that only serve to pump egos and postcount.
Just a quick FYI: There's MUCH more to be done in terms of two-toning my interior, so for those whom might claim the contrast is a bit much, bear in mind there's more to be done, none of which has been by any other member thus far.
Anyway, enjoy, I'm off to bed as my eyes are even losing the ability to track words in this post.