
Death Metal's Journey (a DIY'ers Worklog for TL Perfection!)

 03-07-2010, 10:00 PM
#122
Fearless DIY Guy
Thread Starter
iTrader: (2)
What's a well-laid plan that actually pans out for me? An impossibility, ugh. So, the TPMS started yelling at me last night and I came to find a slow leak from a nail at work finally decided to give the rubber the last tear it needed to become an issue, so I lost some highly valuable time to having a tire replaced, which doubly sucks due to the fact that I need a tire to get to work, of course, so I had to pay an outrageous amount for some middle-range tire. Grrrrrr....
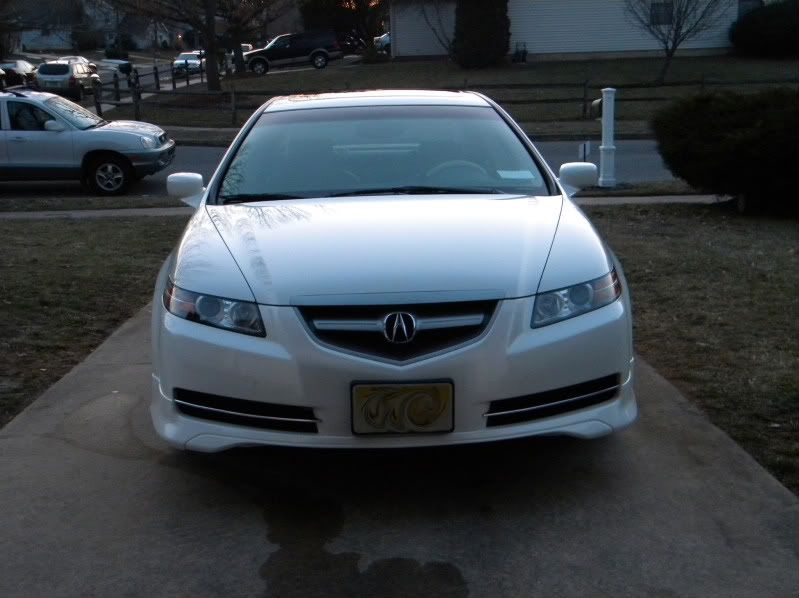
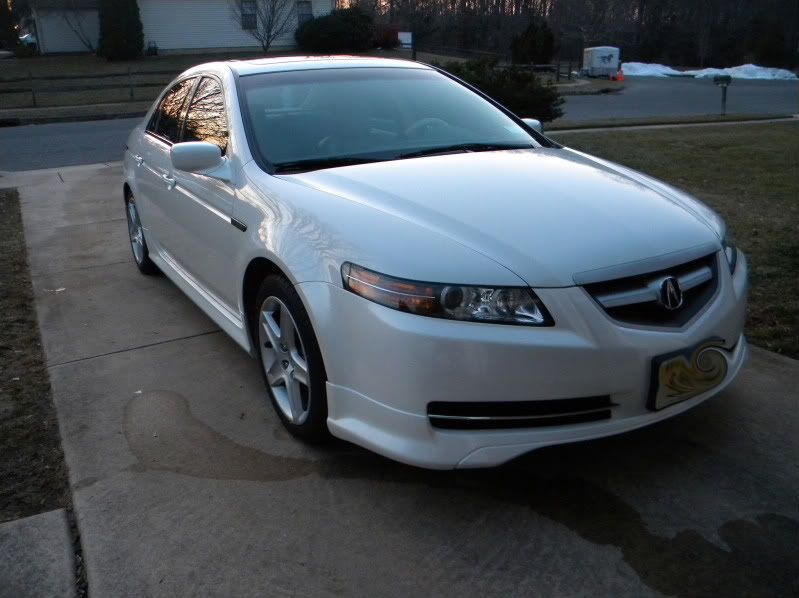
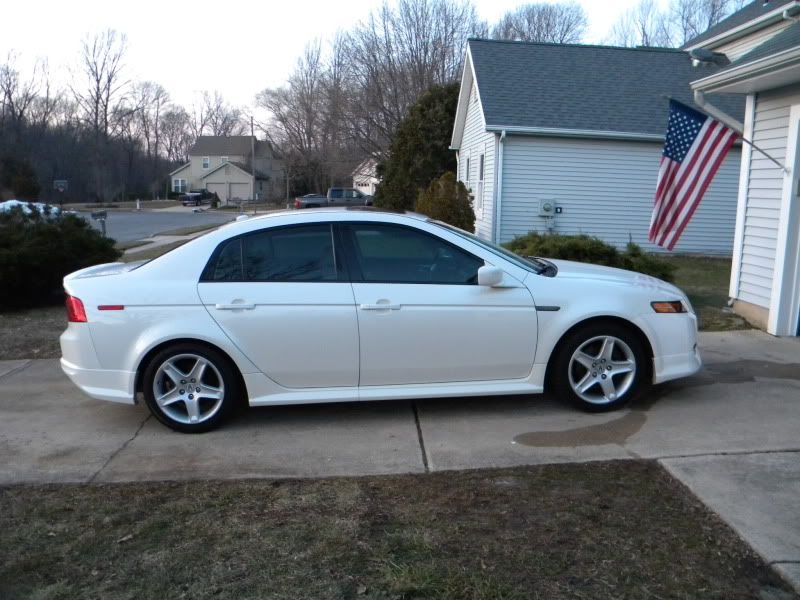
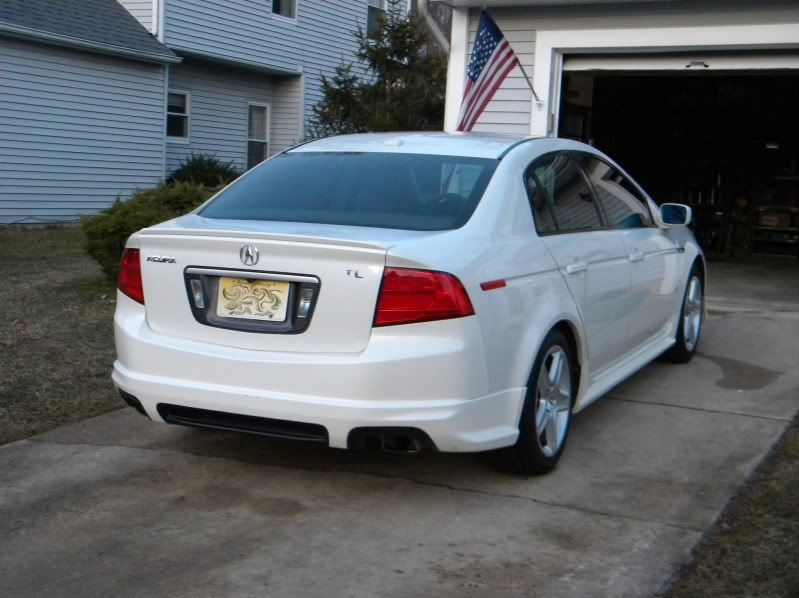
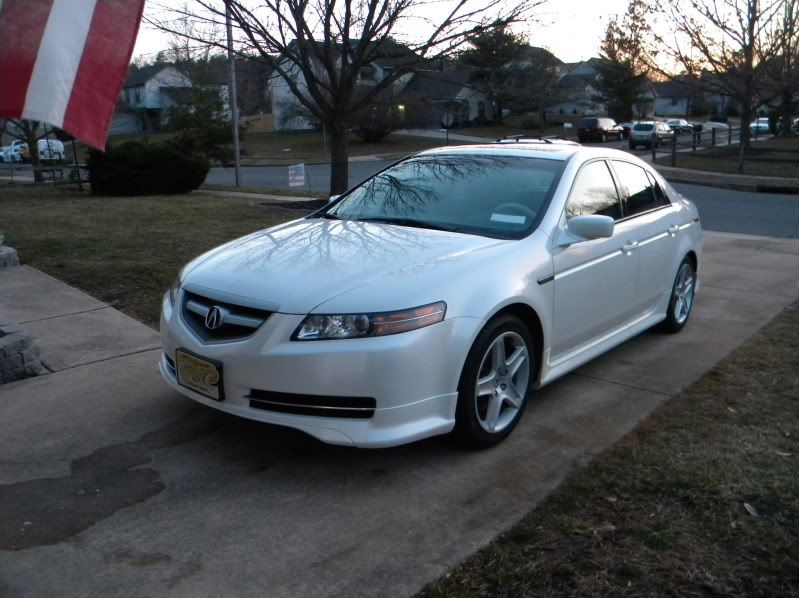
Anwho, the kit is finally installed, along with the trunklid lip! Since the temps are FINALLY workable, I decided to give the ride a MUCH needed bath as it was looking more TDS (Turnpike Dirt & Salt) then WDP. Not bad for 70 minutes, but I really have a buttload of paint correction to work against, I'll add that to the already voluminous list.
Some shots at dusk, as this was when I finally finished up.
03-07-2010, 10:18 PM
#123
Team Owner
iTrader: (2)
Join Date: Jan 2008
Location: Kansas City, MO (Overland Park, KS)
Posts: 36,545
Received 6,470 Likes
on
5,162 Posts
Buddy, that looks awesome. I swear, a WDP just looks so good when they're clean! I didn't realize you got the "insert" piece of the Aspec front lip painted too!
03-07-2010, 10:23 PM
#124
Chapter Leader (Southern Region)
nice.. now drop that baby & clean your tips! lol... 
03-07-2010, 10:36 PM
#125
Fearless DIY Guy
Thread Starter
iTrader: (2)
Drop is a 2011 mod, budget does not allow for it this year. The tip? F--- the tips, I am going to have the type-s mufflers installed VERY soon, they keep calling at me from the garage, and I'm tired of losing sleep to their enchanting drone
 03-07-2010, 10:43 PM
#126
Chapter Leader (Southern Region)
 on both fronts..
 I'm not so sure the mufflers will give you any real appreciable sound difference, most stock ua7's are pretty quiet, but stage 3/4 would be an inexpensive mod yet a vast improvement to the exhaust tone..
03-07-2010, 10:49 PM
#127
Fearless DIY Guy
Thread Starter
iTrader: (2)
Thanks for the tip, I'll look in to it.

Alright, time for some caesin, natty PB, liver tabs, and SLEEP
03-07-2010, 11:06 PM
#128
Chapter Leader (Southern Region)
 03-10-2010, 05:33 PM
#130
Fearless DIY Guy
Thread Starter
iTrader: (2)
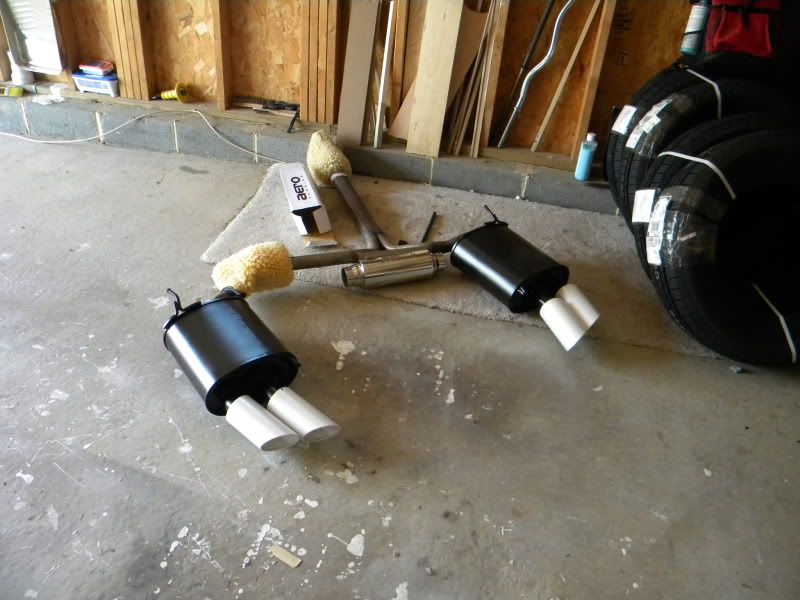
Quick update: Tonight's drive home took a small detour to drop the TL-S exhaust off for some work...we'll have them back in a week! Stay Tuned! During the interim, they'll be here:

03-11-2010, 06:47 AM
#133
boost owns
I'm really impressed with this thread start to finish. I also enjoy working out, nutrition, death metal and trance. I might be the CT version of you...
ps The Acacia Strain owns, listen to them if you haven't!
ps The Acacia Strain owns, listen to them if you haven't!
03-11-2010, 08:46 AM
#134
Fearless DIY Guy
Thread Starter
iTrader: (2)
I’ll have to check that out when I get home, right now I am so F*CKING psyched for Tiesto, even though it’s the second time I have seen him in 3 months, haha. One for you – check out the DJ Nitrous Oxide when you get a chance, he’s finally releasing his first solo CD through Anjunabeats on the 29th, although some of my favored songs from him will not be featured on the disc, but there’s a lot of unreleased tracks on there as well.
OK, in other TL news, the company bonuses were approved, SOOOO…looks like this will be active thread through May/June. I am going to be ordering the CF kit tonight, for starters. After that, I will have to lie dormant for awhile due to budgetary constraints.
 03-27-2010, 09:44 AM
#135
Fearless DIY Guy
Thread Starter
iTrader: (2)
Death Metal's Journey (a DIY'ers Worklog for TL Perfection!)
How-de ho, AZiners! Being that the seemingly endless barrage of snow has final made what I hope to be it's final appearance, and the nocturnal chirping of crickets and early morn birds of song giving way, I think it's safe to assume we're now in SPRING, which means I can segue from my original worklog thread (FOUND HERE), and begin the next season of modding. I want to personally thank a few members for inspiring me to keep modding, namely jptl04 and bzyrice, for having two of the nicest WDPs out there and keeping me motivated to continue the mods. Also, props to Steven Bell and rockyfeller for their silent contributions as well.
Anyway, let's start with the obvious, and that's the list of MODS COMPLETED:
EXTERIOR
A-Spec Front Lip
A-Spec Sideskirts
Type-S Rear Lip
Trunk Lip
EXTERIOR LIGHTING
CCFL License Plate Lights
HID Back-up Lights
ICE
Dom's TV-and-Nav-to-Go
Arc Audio 2500-XXK
2 x Alumapro Alchemy RX (DVC SQ)
LED Door lights
OE Conversion of interior lighting (80% complete)
'RL Door Handle LED' Mod
Accessory LED in Door Courtesy Pockets
Boyo VTK350 Backup Camera
Optima Red Top Battery
Infinity 1031t Tweeters
JBL P662S Woofers
INTERIOR
80sqft.Second Skin Audio Damplifier
30sqft. Second Skin Audio Overkill Pro
Ultrasuede Headliner
Custom Two-Tone Steering wheel @ +1/8" Thickness
Ok, so, with that being said, let's get to modding!!!

 03-27-2010, 09:55 AM
#138
Fearless DIY Guy
Thread Starter
iTrader: (2)
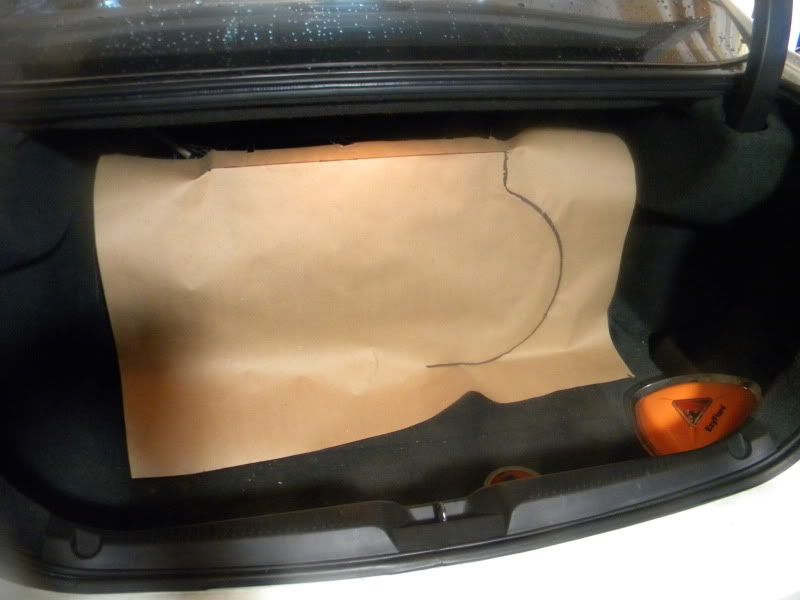
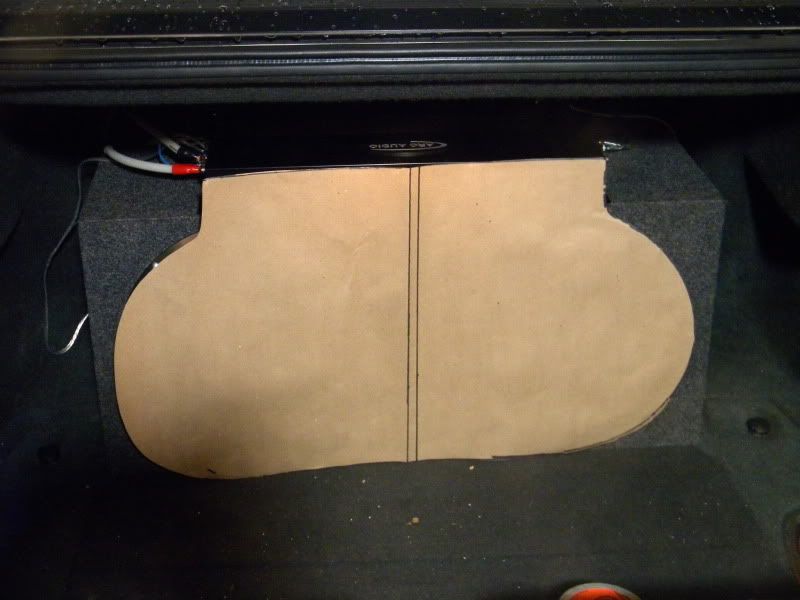
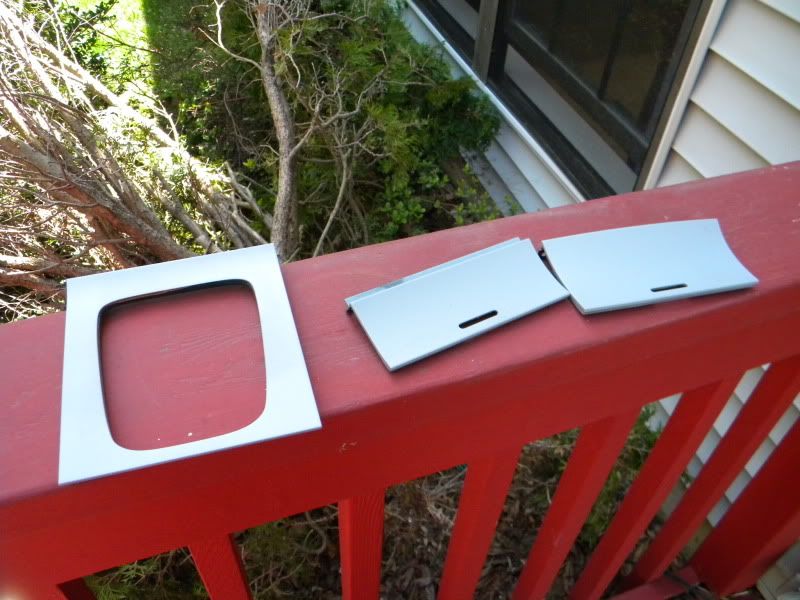
So last weekend presented me with some profusely shitty weather, and not wanting to waste idle time, I decided to tackle a pretty basic, albeit necessary task, and that was fabbing a beauty panel for the trunk. Now, some guys go apeshit on the trunk, and more power to you, but I am going to be doing a very basic, and 'precise to the point where I don't drive myself crazy because I have ammeter tools' point.
Now, bear in mind I have never done this, so I am sure there are better/more precise ways to do this, so, don't be toooo harsh.
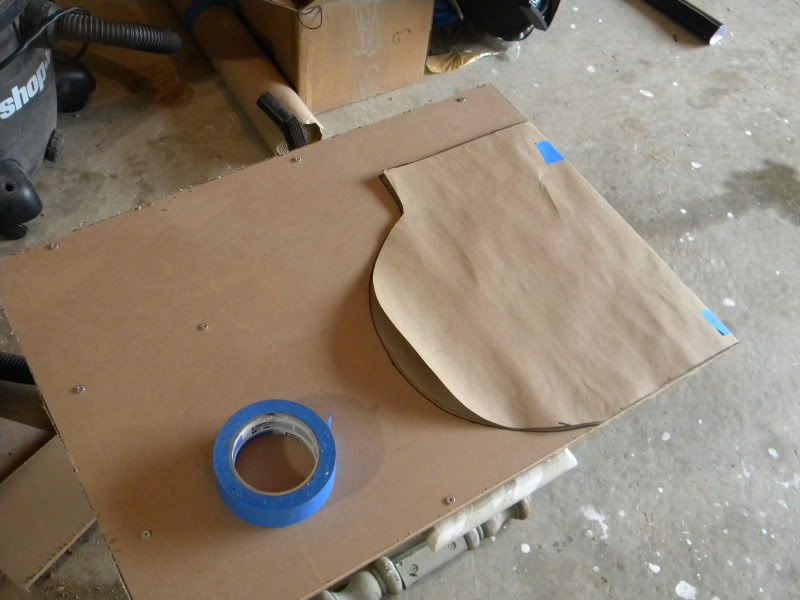
I started out by tracing a paper template to give me the cutout of the amp/subs. If I have a table router, I'd have done this differently, but wtf, it's just a trunk.
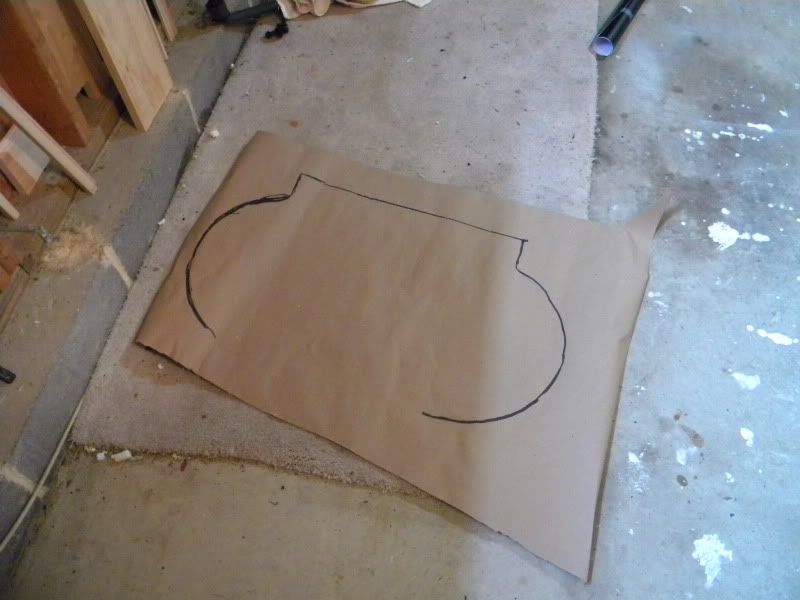
Ok, looks like that should work...I hope. I am operating under the assumption that if I do this about a centerline and double everything up, I should be able to preserve the symmetry well enough to only have to make a single series of cuts, rather then multiple cuts. I screwed the two peices together to prevent the lower board from walking, which will more then likley happen as my blade is dull enough to make more smoke then cuts, but I don't feel like running out to HD again. Deep breath...

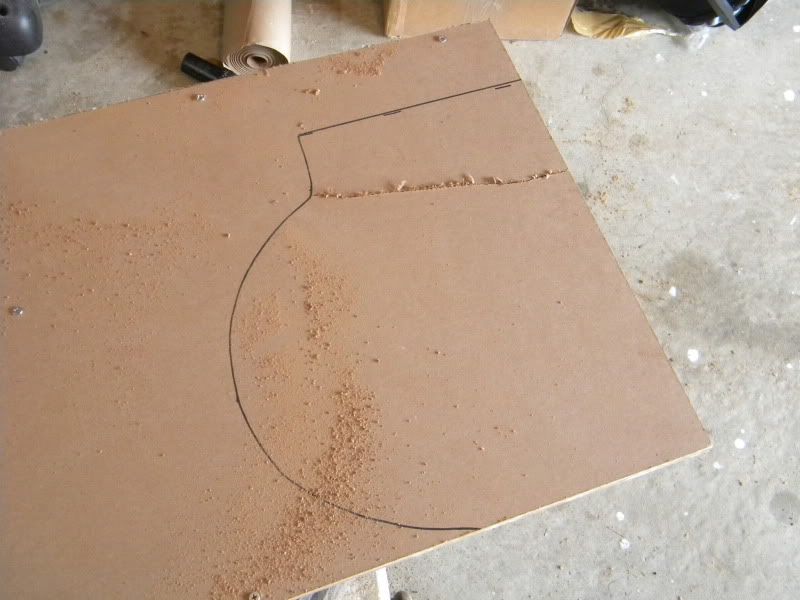
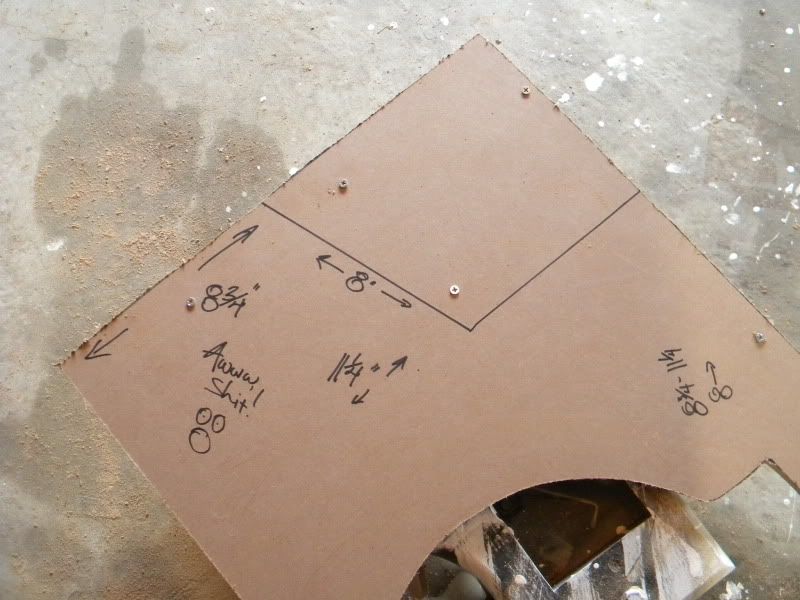
Ok, so far so good, I hope. Now, it's time to remove the sections for the trunk arms, which is a total crapshoot of measurement I am guestimating using the good old rise/run calculation
Time for a test fit.
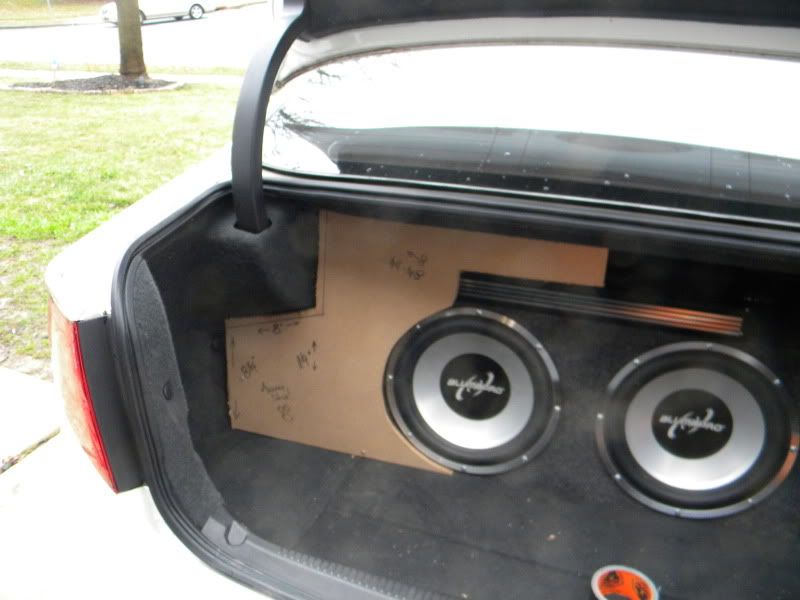
FAWKING SWEET, IT WORKED!!!!
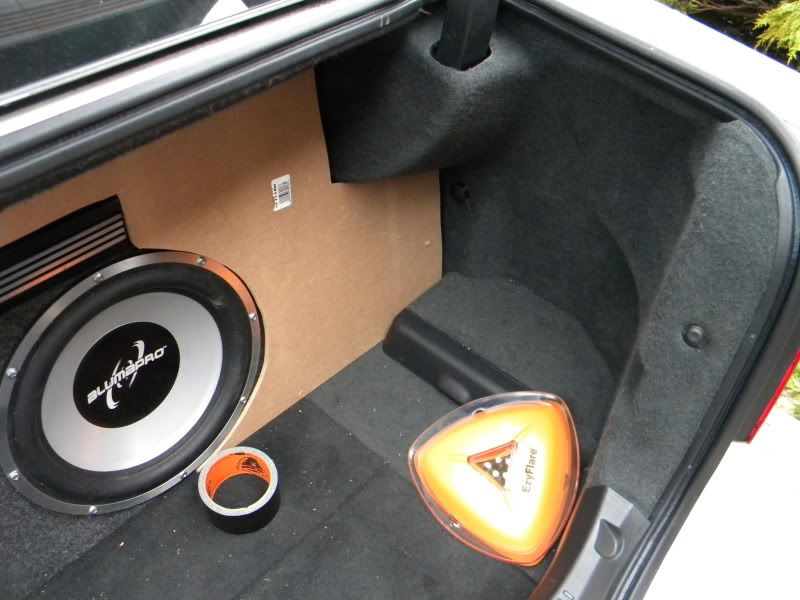
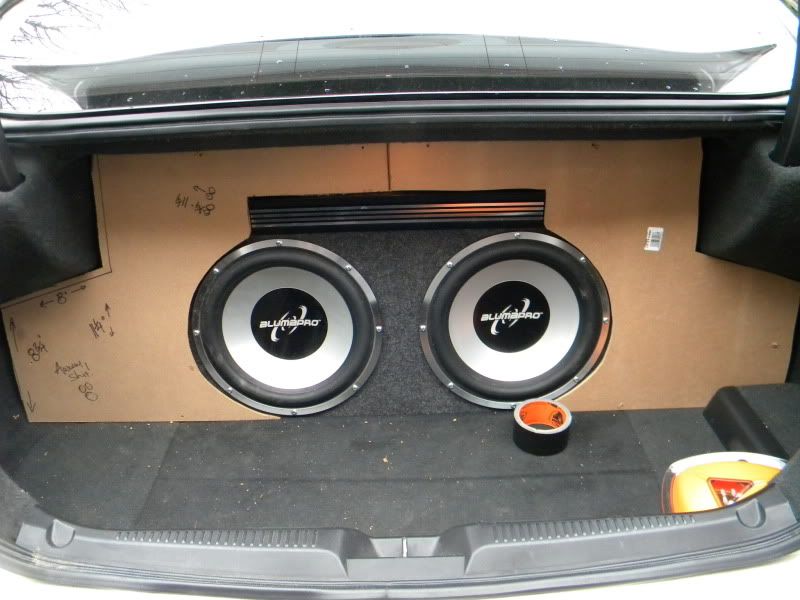
Not bad for a first run. Now I just need to get some carpet and finish this, lol. I might sand the ports for the subs a bit, it's not 100% perfect, but I am DAMN happy with the results.
Now, bear in mind I have never done this, so I am sure there are better/more precise ways to do this, so, don't be toooo harsh.
I started out by tracing a paper template to give me the cutout of the amp/subs. If I have a table router, I'd have done this differently, but wtf, it's just a trunk.
Ok, looks like that should work...I hope. I am operating under the assumption that if I do this about a centerline and double everything up, I should be able to preserve the symmetry well enough to only have to make a single series of cuts, rather then multiple cuts. I screwed the two peices together to prevent the lower board from walking, which will more then likley happen as my blade is dull enough to make more smoke then cuts, but I don't feel like running out to HD again. Deep breath...
Ok, so far so good, I hope. Now, it's time to remove the sections for the trunk arms, which is a total crapshoot of measurement I am guestimating using the good old rise/run calculation
Time for a test fit.
FAWKING SWEET, IT WORKED!!!!
Not bad for a first run. Now I just need to get some carpet and finish this, lol. I might sand the ports for the subs a bit, it's not 100% perfect, but I am DAMN happy with the results.
03-27-2010, 10:02 AM
#140
Fearless DIY Guy
Thread Starter
iTrader: (2)
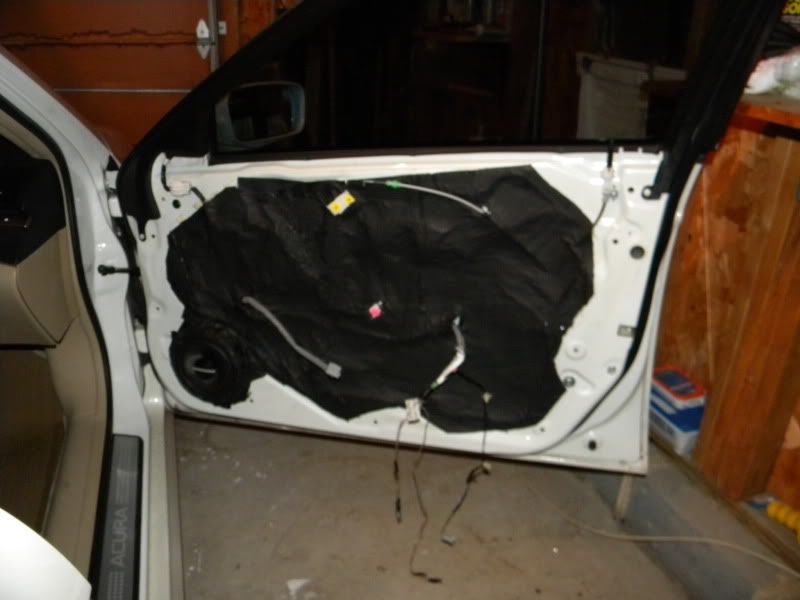
Next up, time for a little audio upgrade. I didn't take any pics of this as I kind of bull rushed the project. The woofers provided a decent improvement over stock sound, but the tweeters, HOLY SHIT. WHAT A DIFFERENCE. The woofers are much clearer, and I have lost some 'low-end', but is of no ill consequence as the subs cover that arena. The system sound so much CLEARER now, and I absolutely love it, and would recommend it to anyone.
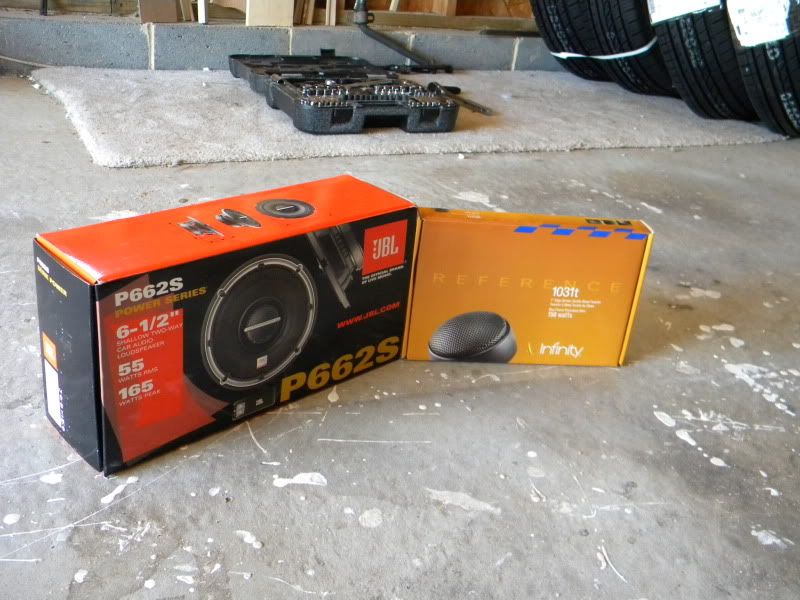
I am using a 1" red oak spacer ring, namley because it's easier to cut, folllowed by plumbers putty for a semi-permanent seal with the door.
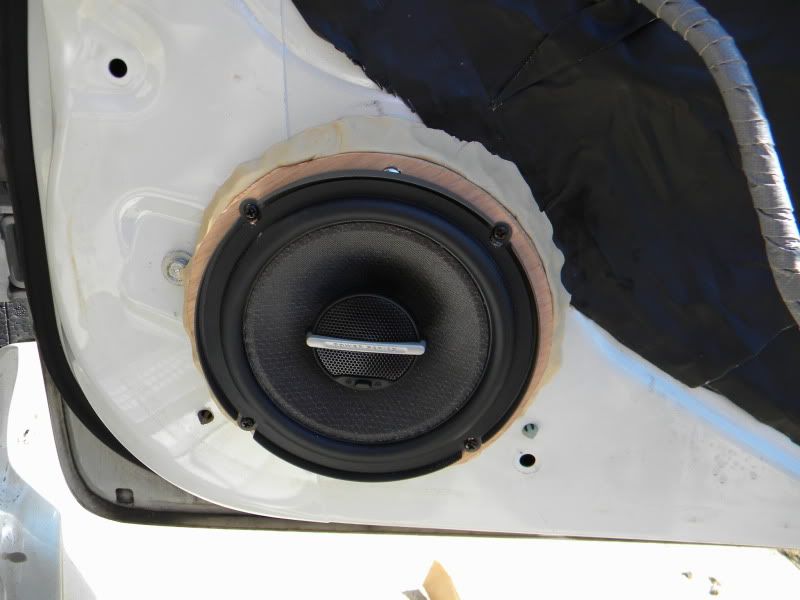
Adding the OKP for sound deadening
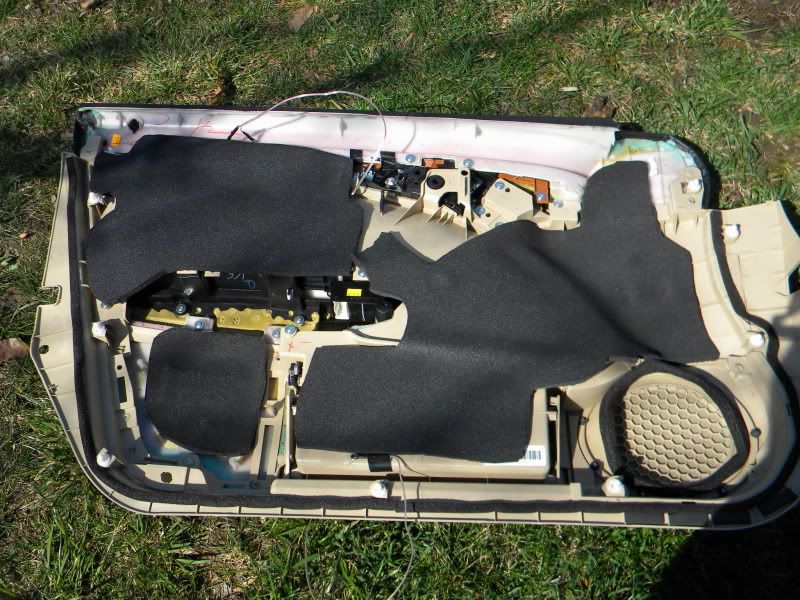
...and done, fully sealed. The extra leads are for the LEDs.
I am using a 1" red oak spacer ring, namley because it's easier to cut, folllowed by plumbers putty for a semi-permanent seal with the door.
Adding the OKP for sound deadening
...and done, fully sealed. The extra leads are for the LEDs.
03-27-2010, 10:14 AM
#141
Fearless DIY Guy
Thread Starter
iTrader: (2)
Last but not least, let's not forget to keep our interiors clean, no? I see no piont in putting mass amounts of money towards mods when detailing/general maintenance is not placed at the top of the list, so let's get to work!
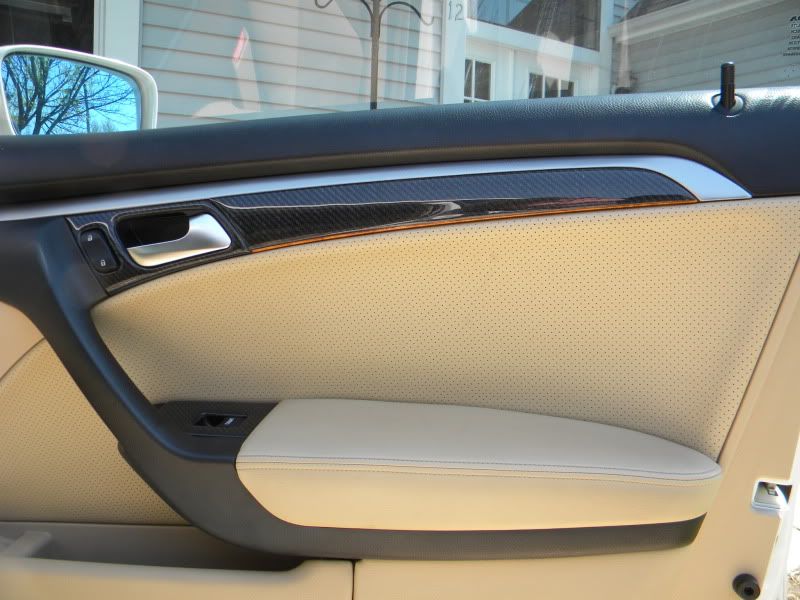
I decided to go with Poorboy's World as my choice of detailing supplies as their customer service was quick, direct, and answered my questions with a personal touch...and boy am I happy with what I have used thus far. The Leather Stuff smells AWESOME and the results are pretty darn good, IMHO. You be the judge.
BEFORE
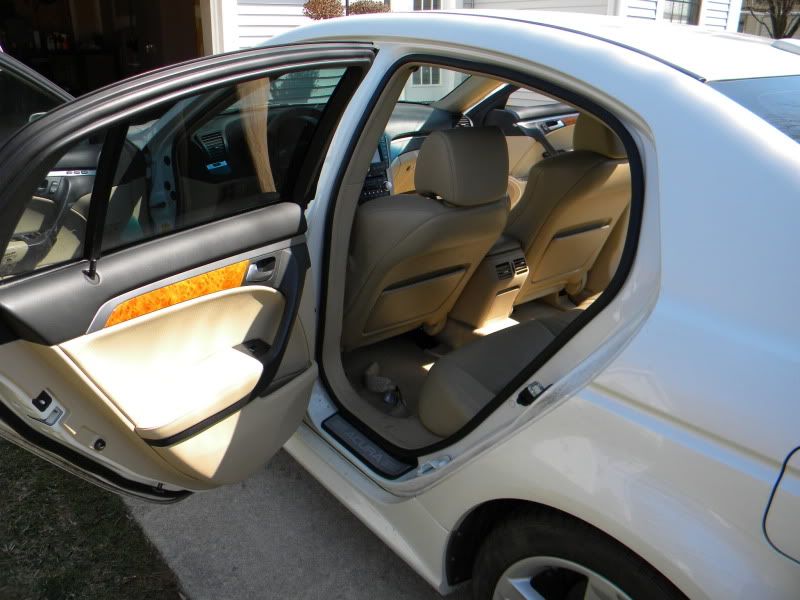
AFTER
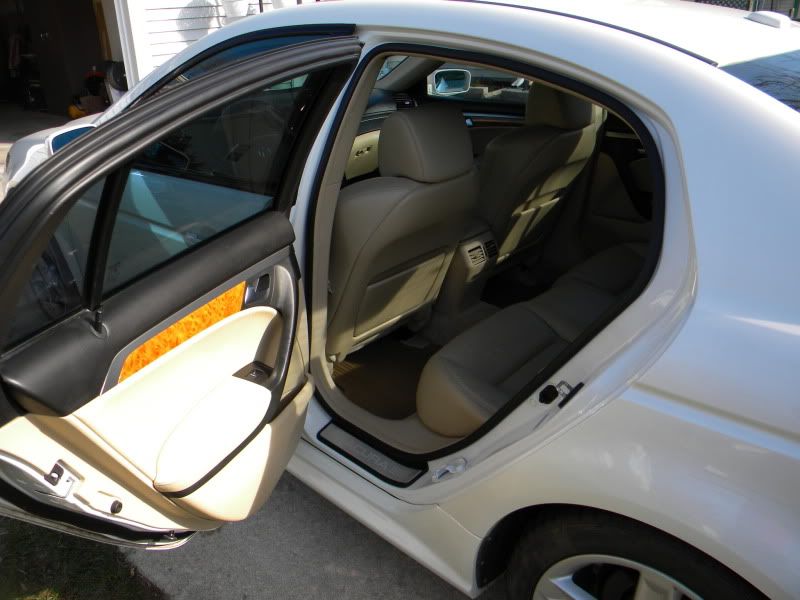
BEFORE

AFTER
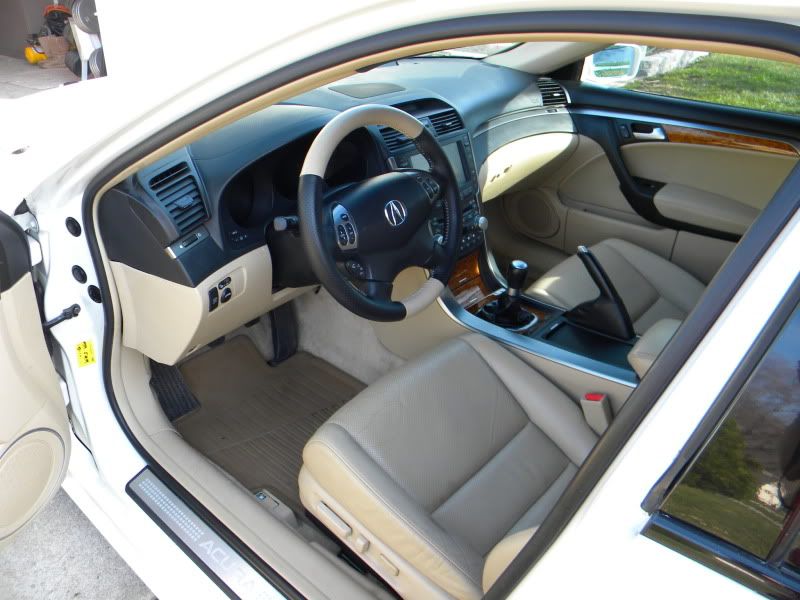
Bear in mind, I don't consider this a 'true' detailing as I only had 2 hours...next go will be MUCH more involved.
I decided to go with Poorboy's World as my choice of detailing supplies as their customer service was quick, direct, and answered my questions with a personal touch...and boy am I happy with what I have used thus far. The Leather Stuff smells AWESOME and the results are pretty darn good, IMHO. You be the judge.
BEFORE
AFTER
BEFORE
AFTER
Bear in mind, I don't consider this a 'true' detailing as I only had 2 hours...next go will be MUCH more involved.
03-27-2010, 10:19 AM
#142
Fearless DIY Guy
Thread Starter
iTrader: (2)
Ok, so that brings us up to speed. Not bad for about 7 months of ownership. Here's the pending schedule of mods:
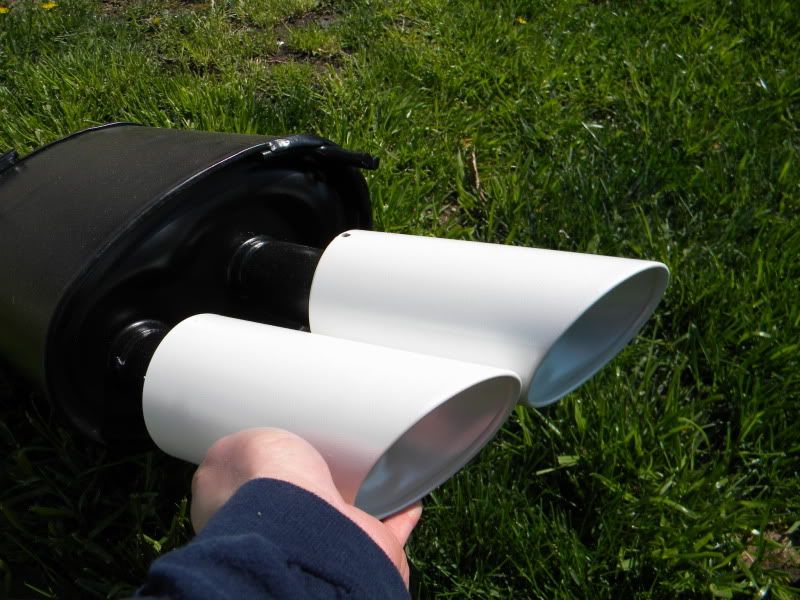
(1) Installation of Type-S exhaust w/ powdercoated tips
(2) Aero AR-25 Resonator Install
(3) Mid-Muffler Delete
(4) Major AMSOIL fluid changeover/60k maintenance
(5) See below
(6) Finish Trunk
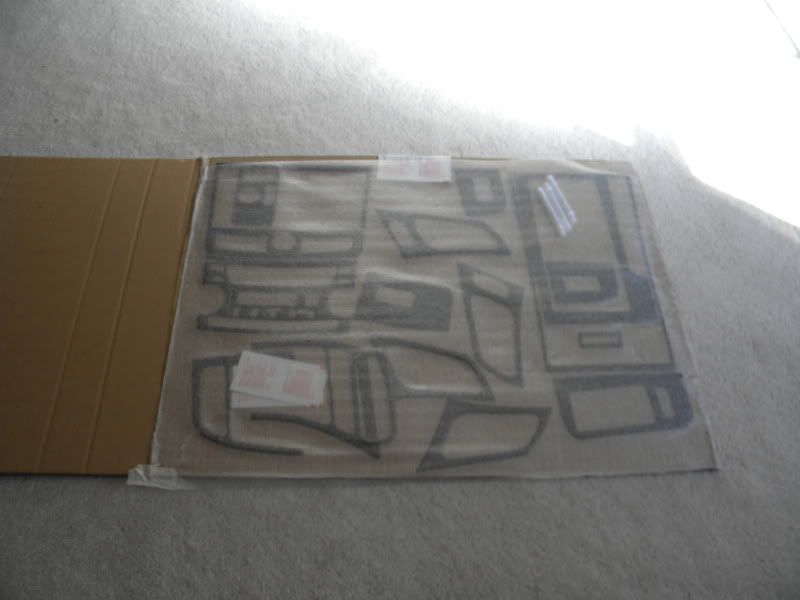
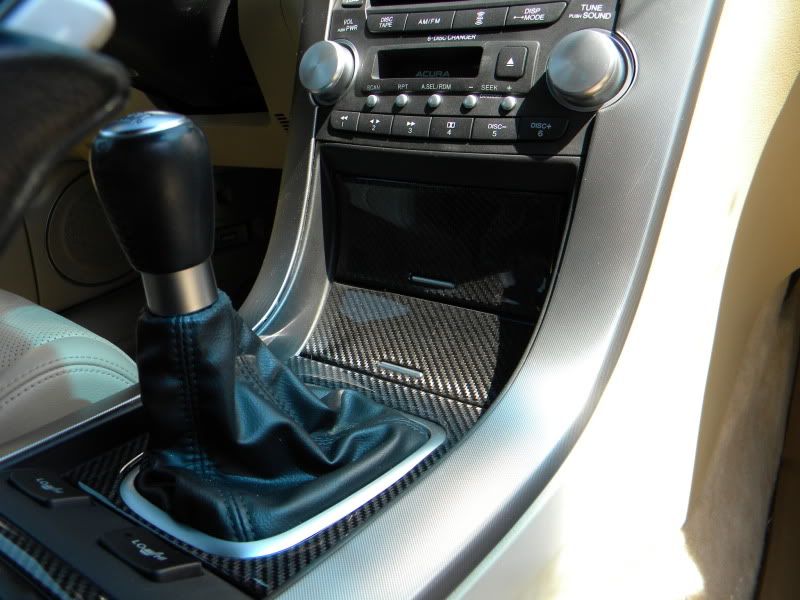
Oh, shitballs, forgot about this...I am also going to be installing a REAL CARBON FIBER dash kit, to replace the wood. This is not the fake shit, guys.
Comments, harassment, praise, and other ramblings always welcome. Love the AZine, and everyday I fall more in love with this car. That's all for now, time to pack for AC.
(1) Installation of Type-S exhaust w/ powdercoated tips
(2) Aero AR-25 Resonator Install
(3) Mid-Muffler Delete
(4) Major AMSOIL fluid changeover/60k maintenance
(5) See below
(6) Finish Trunk
Oh, shitballs, forgot about this...I am also going to be installing a REAL CARBON FIBER dash kit, to replace the wood. This is not the fake shit, guys.
Comments, harassment, praise, and other ramblings always welcome. Love the AZine, and everyday I fall more in love with this car. That's all for now, time to pack for AC.
03-27-2010, 10:31 AM
#143
Fearless DIY Guy
Thread Starter
iTrader: (2)
 03-27-2010, 10:57 AM
#145
nice bro! the beauty panel came out decent. i used a different method. but that worked pretty good for you. the system is gonna be nice. what are you doing for the tweets? youre running new speaker wire for the upgraded speakers right?
the CF trim kit is awesome. same one i have. its pricey. but worth it cuz its the real thing. and looks dope. i however didnt use all the pieces. not even close. i just didnt want to over-do it. take your time when installing it. once it makes contact with any surface it really sticks.
im glad to hear my mods have inspired you to take your car to the next level. now its your turn inspire me! im running out of ideas! lol! keep it up bro. you're doing great!
03-27-2010, 12:39 PM
#148
Fearless DIY Guy
Thread Starter
iTrader: (2)
the CF trim kit is awesome. same one i have. its pricey. but worth it cuz its the real thing. and looks dope. i however didnt use all the pieces. not even close. i just didnt want to over-do it. take your time when installing it. once it makes contact with any surface it really sticks.
im glad to hear my mods have inspired you to take your car to the next level. now its your turn inspire me! im running out of ideas! lol! keep it up bro. you're doing great!
Thanks, man!
Purchased from carid.com. It's a molded, real CF kit. It's actually 2 kits, the OE overlays and then some extra stuff. I think all said and told it came to $225 or thereabouts.
03-27-2010, 01:00 PM
#149
Burning Brakes
Join Date: Feb 2008
Location: Ottawa, Canaduh!
Age: 56
Posts: 1,107
Likes: 0
Received 4 Likes
on
4 Posts
Looking good, brotha! Love your attention to detail!
Following your example, I now have my modded steering wheel on the way from Don @ DCSW....can't wait!!!
Following your example, I now have my modded steering wheel on the way from Don @ DCSW....can't wait!!!
03-27-2010, 02:58 PM
#151
Team Owner
iTrader: (2)
Join Date: Jan 2008
Location: Kansas City, MO (Overland Park, KS)
Posts: 36,545
Received 6,470 Likes
on
5,162 Posts
DM, thanks for the kudos-great job on the audio portion. I can't wait to see the Carbon Fiber kit installed. That one looks much better than mine, so use all of it and shoot pictures ASAP !!!!
03-28-2010, 11:54 AM
#153
Moderator
iTrader: (3)
Damn you've been hard at work Dan. I'm really really looking forward to seeing everything come together on your car, especially that wall in the trunk
May I ask where you bought the new speaker components? I'm started to look around to upgrade my speakers as well.
May I ask where you bought the new speaker components? I'm started to look around to upgrade my speakers as well.
04-17-2010, 10:50 PM
#155
Fearless DIY Guy
Thread Starter
iTrader: (2)
Ahhhhh...long time, no see, eh? Well, as the old avatar notes, I'm in the midst of making a run for an engineering management position at work, and busy fending off the competition while keeping both predators and prey close at hand...sooooo, in turn, the beloved TL has to wait for me to tend to other matters. To boot, I'm in week 10 of a loooong ass cutting cycle, so diet/training has been bumped up a level in priority. On a positive note, I'm not 20lbs. lighter, and hit a personal best this month, benching 315x2, deadlifting 455x2 (raw lift, no straps or belt), and weighted dipped with 145x7. Hooray for protein! Progress on the TL has been quite slow as of late, but we're getting there!
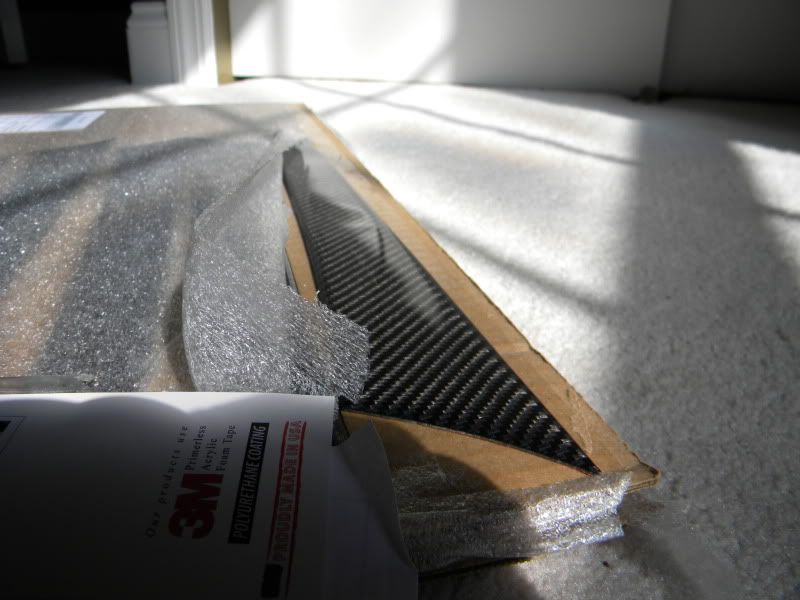
First things first, I was quite elated to procure the real CF kit, until I discovered, lo, no matter where the damn piece is placed, the engineers failed to account for a required overage in tolerance, so while the pieces fit well enough, they are not 100%, leaving me with a slight gap in coverage. While this might do well for most, I'm the kind of guy that has to arrange his TV remotes at a 45-degree angle before I can go to bed. SO, that means we need to prime and paint all overlay portions before performing the overlay. Here's how it turned out:
Yeahhh, gonna has some REAL fun getting the already laid door sections redone.
The PC'ed exhaust is done, which I am sure will look awesome on the car, once it passes inspection...which I still have not done since purchasing the car, lol. Since swapping my seats, the airbag light has been on, and I am going to try and have Acura reset it when they replace my CA bushings and HFL next week. THEN I will pass inspection, THEN I will have it installed. Until that moment, wantons and desires will remain just that.
Ahhh, ok, so, what else? We're juuust about done with the LED mods, leaving us with two beasts left to tackle, those being the nav unit, and the radio. I know what evils lurk behind formed plastic and steel of the nav unit, and I'd sooner conquer the radio then go back to the nav, can't be that hard, RIGHT?!
So, after cracking her open, I found a wonderful easter egg, and that is that the Acura engineers left a diffuser behind EACH button! AWESOME. This means we can load a PLCC-2 LED behind each button with ease, eliminating the woes of hotspots.
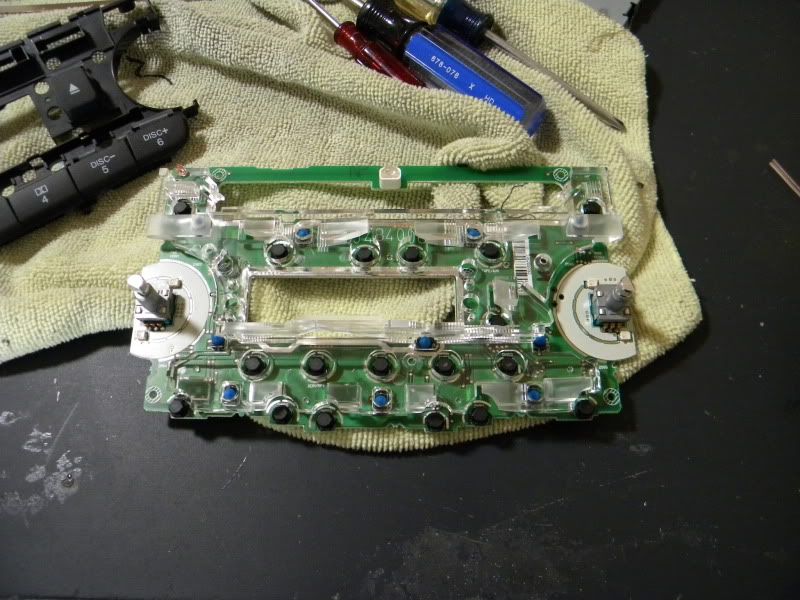
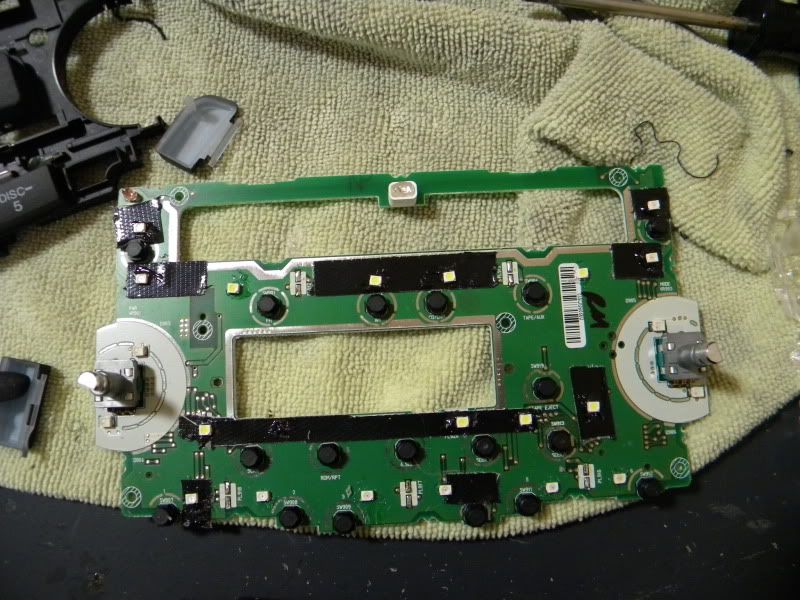
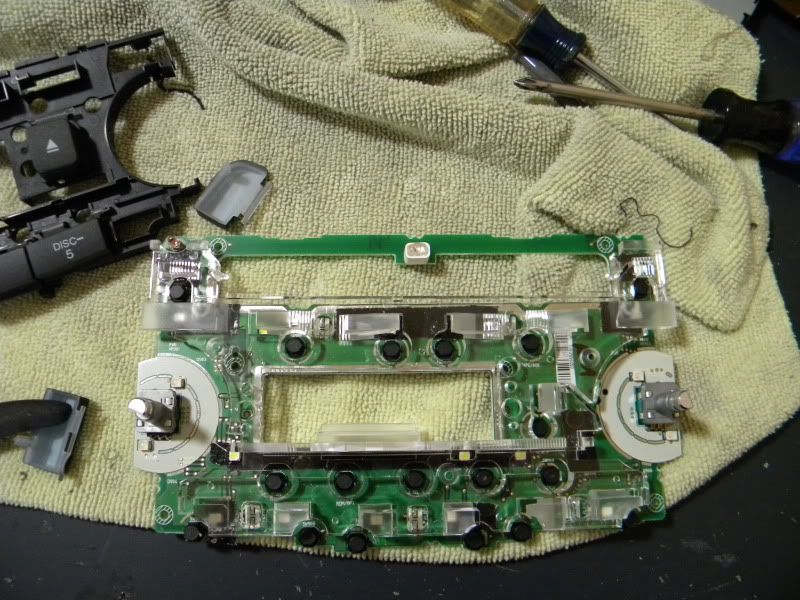
One minor problem was discovered during this trial...it's fawking HARD AS HELL to solder the LEDs without having the adhesive melt OR the spring potential provided by the wire pull the LED off. So after an insanley furstraing afternoon, I was left with on option...
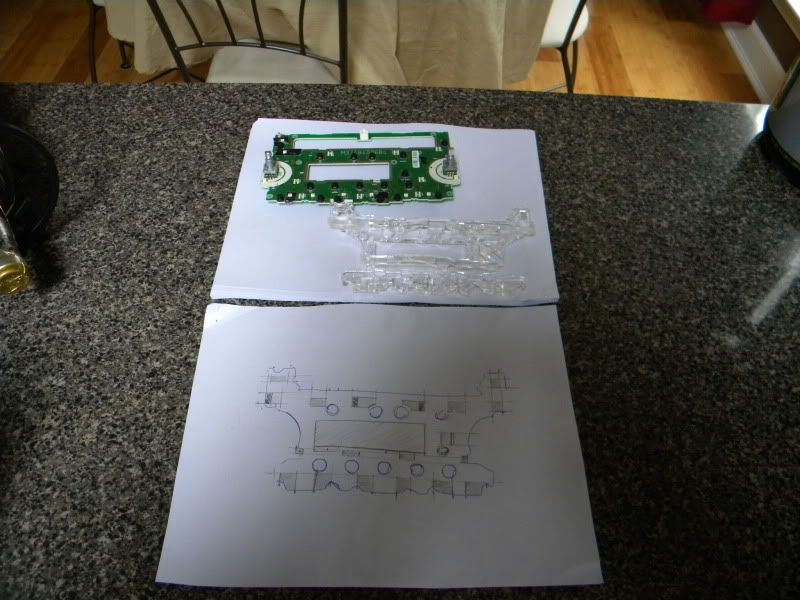
...if you guessing doodling, you were wrong. I am going to be fabricating a custom circuit board to load the LEDs and resistor on to lie atop the OE circuit panel. I am going to scan the sketch, and draw the leads from that point forward. Then we're off to transfer, etch, and solder. I've done this before, so it's nothing new, but still a PITA. At least I can sell some of these, should anyone be as batshit crazy as I.
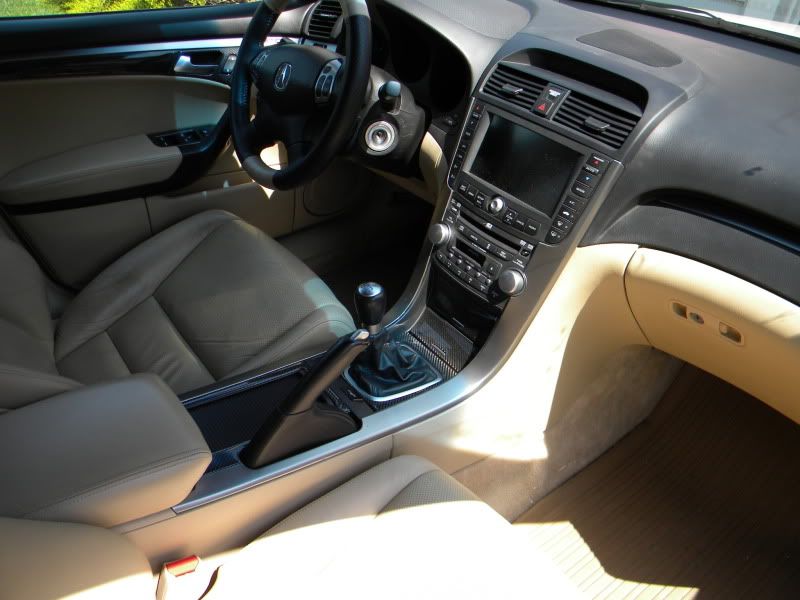
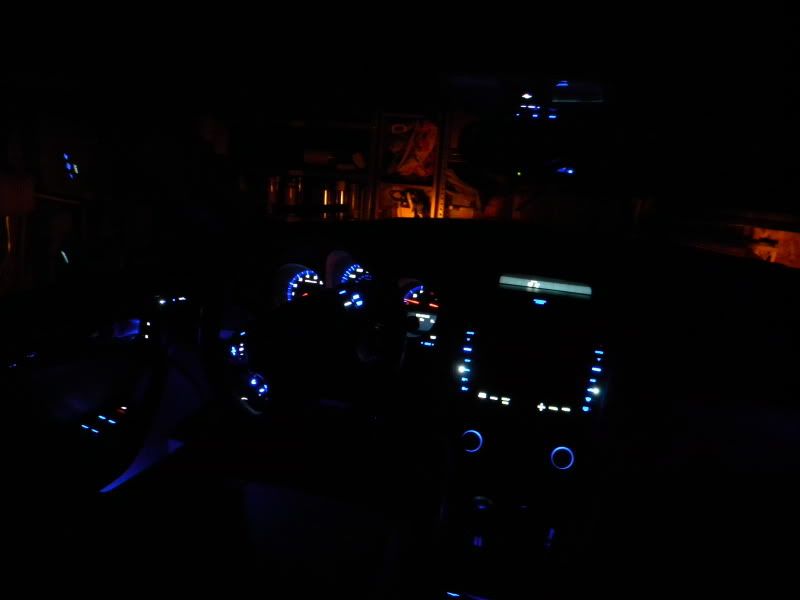
Quick shot of the interior, finished the NAV today. Nice, eh?
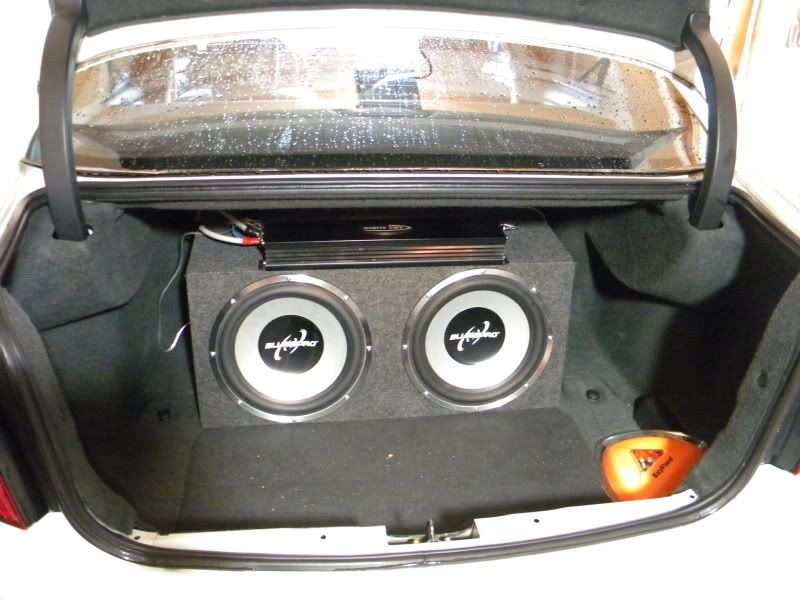
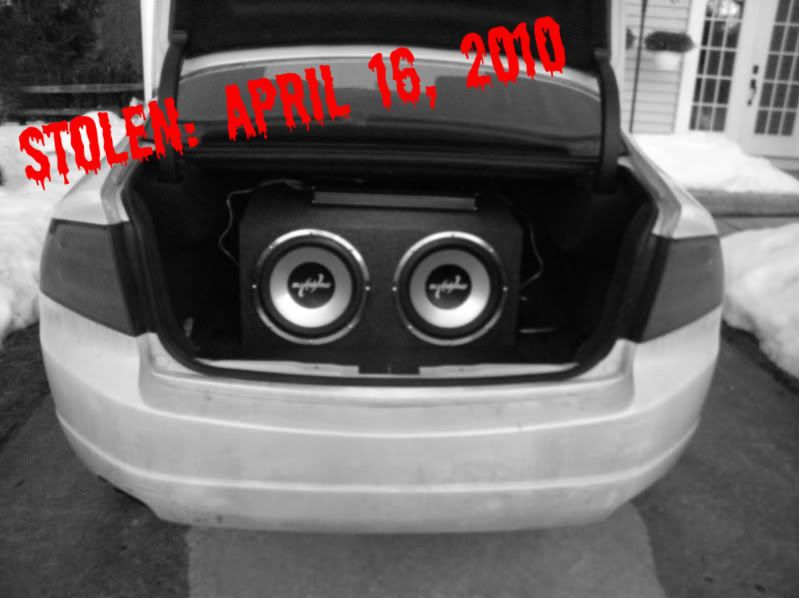
And lastly, some very sad news. My BELOVED...EXPENSIVE...WONDERFULLY ACCURATE subs and amp have been ripped from the warm confines of my trunk. My car was apparantley watched, and, in a moment of absolute exhaustion from the aforementioned reasons, in which I forgot to lock the trunk, provided a 5 hour window needed to haul some +50lbs of gear from my trunk in one fell swoop. They were after the gear, and gear only. My wallet, laptop, exhaust parts, and brownies baked for my team remained. wtf, right?
So that's it for now, folks. Sorry progress has been slow, lots more planned, only so much time to perform it.
First things first, I was quite elated to procure the real CF kit, until I discovered, lo, no matter where the damn piece is placed, the engineers failed to account for a required overage in tolerance, so while the pieces fit well enough, they are not 100%, leaving me with a slight gap in coverage. While this might do well for most, I'm the kind of guy that has to arrange his TV remotes at a 45-degree angle before I can go to bed. SO, that means we need to prime and paint all overlay portions before performing the overlay. Here's how it turned out:
Yeahhh, gonna has some REAL fun getting the already laid door sections redone.
The PC'ed exhaust is done, which I am sure will look awesome on the car, once it passes inspection...which I still have not done since purchasing the car, lol. Since swapping my seats, the airbag light has been on, and I am going to try and have Acura reset it when they replace my CA bushings and HFL next week. THEN I will pass inspection, THEN I will have it installed. Until that moment, wantons and desires will remain just that.
Ahhh, ok, so, what else? We're juuust about done with the LED mods, leaving us with two beasts left to tackle, those being the nav unit, and the radio. I know what evils lurk behind formed plastic and steel of the nav unit, and I'd sooner conquer the radio then go back to the nav, can't be that hard, RIGHT?!
So, after cracking her open, I found a wonderful easter egg, and that is that the Acura engineers left a diffuser behind EACH button! AWESOME. This means we can load a PLCC-2 LED behind each button with ease, eliminating the woes of hotspots.
One minor problem was discovered during this trial...it's fawking HARD AS HELL to solder the LEDs without having the adhesive melt OR the spring potential provided by the wire pull the LED off. So after an insanley furstraing afternoon, I was left with on option...
...if you guessing doodling, you were wrong. I am going to be fabricating a custom circuit board to load the LEDs and resistor on to lie atop the OE circuit panel. I am going to scan the sketch, and draw the leads from that point forward. Then we're off to transfer, etch, and solder. I've done this before, so it's nothing new, but still a PITA. At least I can sell some of these, should anyone be as batshit crazy as I.
Quick shot of the interior, finished the NAV today. Nice, eh?
And lastly, some very sad news. My BELOVED...EXPENSIVE...WONDERFULLY ACCURATE subs and amp have been ripped from the warm confines of my trunk. My car was apparantley watched, and, in a moment of absolute exhaustion from the aforementioned reasons, in which I forgot to lock the trunk, provided a 5 hour window needed to haul some +50lbs of gear from my trunk in one fell swoop. They were after the gear, and gear only. My wallet, laptop, exhaust parts, and brownies baked for my team
remained. wtf, right?So that's it for now, folks. Sorry progress has been slow, lots more planned, only so much time to perform it.
04-17-2010, 10:55 PM
#156
Fearless DIY Guy
Thread Starter
iTrader: (2)
EXTERIOR
A-Spec Front Lip
A-Spec Sideskirts
Type-S Rear Lip
Trunk Lip
Debadged
EXTERIOR LIGHTING
CCFL License Plate Lights
HID Back-up Lights
ICE
Dom's TV-and-Nav-to-Go
Arc Audio 2500-XXK - STOLEN
2 x Alumapro Alchemy RX (DVC SQ) - STOLEN
LED Door lights
OE Conversion of interior lighting (90% complete)
'RL Door Handle LED' Mod
Accessory LED in Door Courtesy Pockets
Boyo VTK350 Backup Camera
Optima Red Top Battery
Infinity 1031t Tweeters
JBL P662S Woofers
INTERIOR
80sqft.Second Skin Audio Damplifier
30sqft. Second Skin Audio Overkill Pro
Ultrasuede Headliner
Real CF Overlay Kit
Custom Two-Tone Steering wheel @ +1/8" Thickness
04-17-2010, 11:39 PM
#159
Rev High; Drive Happy
iTrader: (2)
Join Date: Feb 2008
Location: Scarborough, Ontario
Age: 34
Posts: 4,076
Received 398 Likes
on
332 Posts
The info about your missing sound system is suspicious...
If they went specifically after your system than that could potentially mean that someone is watching you...
Don't want to say it, but could be someone from Azine [as a guest or a member]...
Or someone in your neighboorhood.
Nonetheless, holy hot dang! That's a lovely interior!
Great progress!
Edit: Bring any info to O.T and the guys there can probably solve your mystery...