
Yungone501's- Excessive infatuation with the J-series

 10-22-2013, 08:16 AM
#882
Senior Moderator

 10-22-2013, 10:07 PM
#884
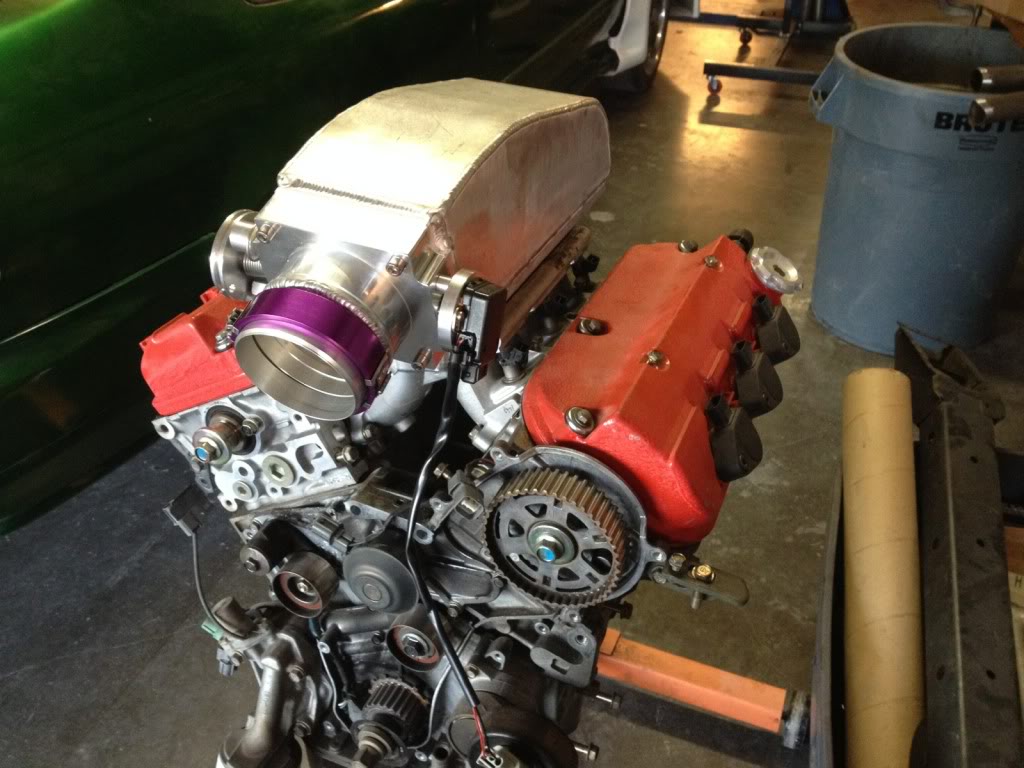
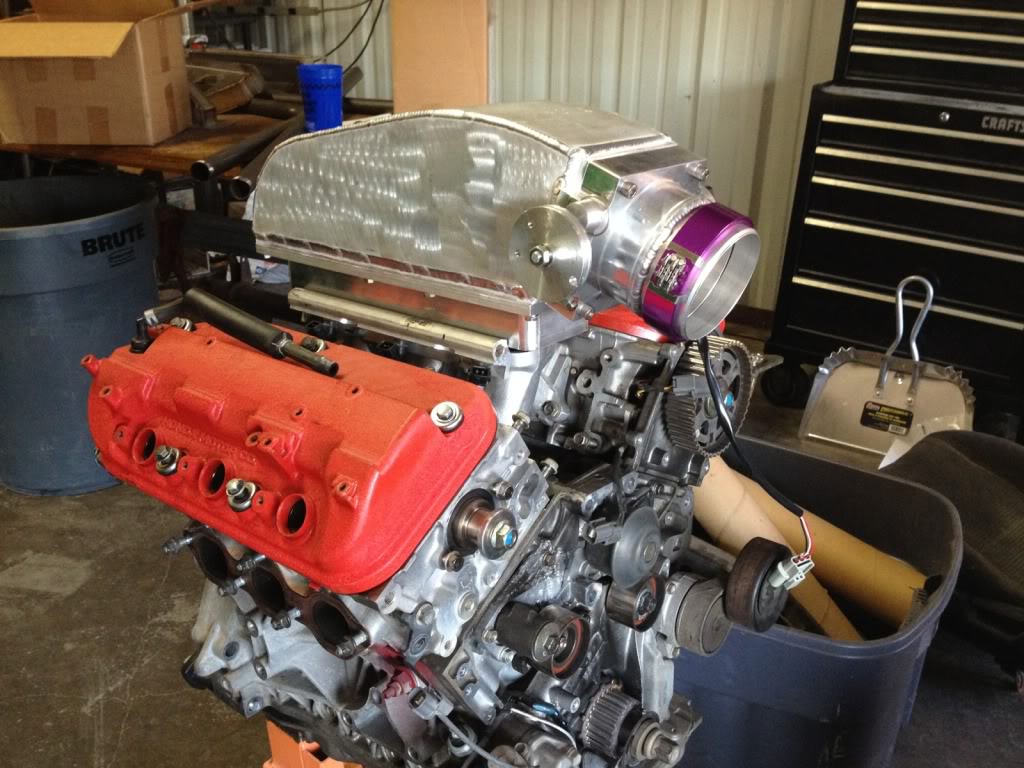
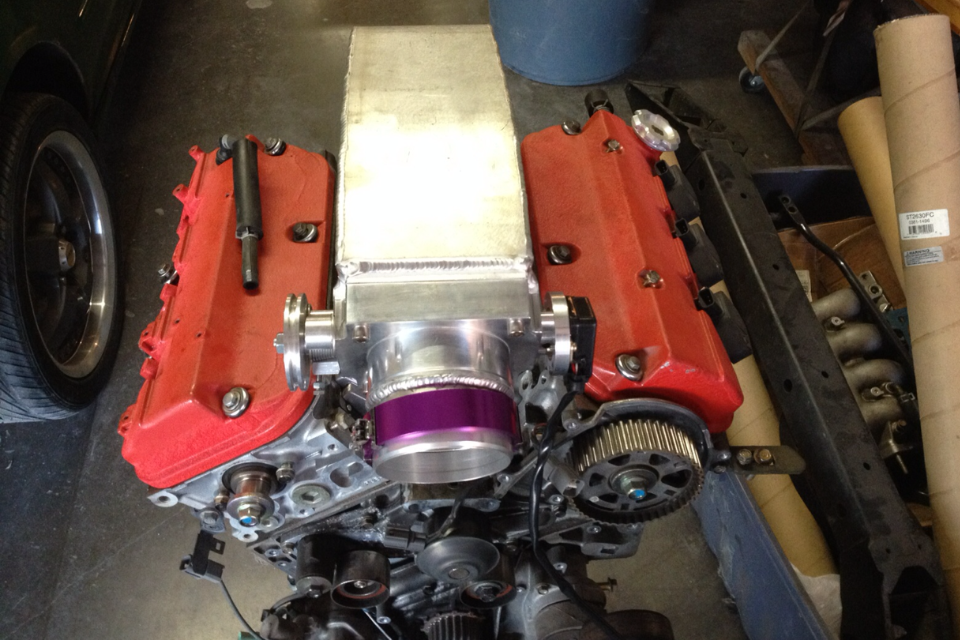
I stayed until 8:30pm tonight at the shop after work just to get some work done on the beast. She's nearly complete on the motor. Have the upper timing covers, valve covers, water neck, injectors and intake manifold....mostly the larger easy things. After the motor though is where the real fun begins. For those of you who have actually seen what it looks like in person, only you guys understand the density of the misc hoses lines, turbo system, wiring, etc I still have. And I love it, don't get me wrong. It's just doing a dash of work here and a dash of work there is something I generally don't do. But I had to learn to put my toys last and business first. This was hard because of my enormous passion for cars PERSONALLY but I'm learning.
I will be satisfied if I complete the work by the end of this week but I never know. My wife has agreed to give me additional time after work to try and complete the car sooner but I know it bothers her. We will see.
Btw, the pictures I posted up are just a glimpse of what's to come this time around. Can't wait to show you guys. And with Hickam around, it may get even more interesting. Matt is one of those guys you love and hate. Making such pretty toys....
The following 2 users liked this post by yungone501:
97BlackAckCL (11-05-2013),
Atlas.46 (10-23-2013)
10-23-2013, 04:23 AM
#888
10-23-2013, 07:07 AM
#889
Senior Moderator
I wished i lived closer
10-23-2013, 07:07 AM
#890
Senior Moderator
 10-23-2013, 06:41 PM
#892
Here's a fresh update pic of the engine compartment as of tonight. As you can see, minimal things left. I'm paying special attention to (you guessed it) heat proofing things. I've also taken extra time to paint more things here and there. Btw, the VHT makes an extremely tough and beautiful high heat paint that's gloss black. Although originally for brake calipers, their Caliper Paint is awesome on under hood parts. If you look at the oil pan in the second pic, you can see the outcome. Even after dinging the subframe a few times 30 min after it was painted, it still held up perfectly with no chips.
I have hit somewhat of a obstacle though as I needed more (you guessed it) heat shield material and it may take a few days to get it. I went a little further also and ordered something called Kaowool which is a 100% ceramic fiber which is made by Morgan Thermal and is probably the most superior product (in the industry) when it comes to this type of material. It's about $250 for a 20 square foot roll so it BETTER work!
It's good to be back into this car again and can't wait to hit some boost in the new setup.
10-23-2013, 08:16 PM
#893
Senior Moderator
Awesome.
Oh, and i let it-er rip a few times today.
Oh, and i let it-er rip a few times today.
10-23-2013, 08:19 PM
#894
Senior Moderator
10-23-2013, 08:26 PM
#895
I mean...I wouldn't know if you hit the rev limiter...maybe that's what it was.
10-23-2013, 10:07 PM
#896
Senior Moderator
Huh? It didnt change gears, its manual. I rolled into the throttle in 2nd then about 40mph i floored it and the tires broke loose. When it got to red line thats when i let off and pushed the clutch in and stopped the recording.
10-23-2013, 10:14 PM
#897
guess next video will be on summer tires that can hold it together...
10-24-2013, 06:53 AM
#899
Senior Moderator
10-24-2013, 06:54 AM
#900
Senior Moderator
Lol.... no thats ok. I understand you are busy. I probably should have called you. I think i figured it out though..
 10-24-2013, 07:37 AM
#902
Senior Moderator
Yea, but its still not right. Voltage is a little on the high side wot but its not triggering a cel/fuel cut like before and shows about 96% open wot. Closed is around 10-14% with voltage a little high as well and i think part of my drivability issues. Cruising under very light throttle it kinda surges and feels like its missing ever so slightly. If i drop the voltage on the tps any lower then wot only shows 89-90% wot and 8-9% ct 
I think i need bigger injectors too.
I think i need bigger injectors too.
10-24-2013, 01:55 PM
#905
takin care of Business in
iTrader: (5)
Join Date: Jan 2008
Location: Kansas City, MO
Age: 40
Posts: 30,994
Received 4,732 Likes
on
4,064 Posts
the pix look SICK Robert....in for more updates....
The following users liked this post:
Marcelechka (10-24-2013)
10-24-2013, 09:10 PM
#907
Where are the vids!?
Speaking of vids; I couldn't help myself after work today...
http://www.magisto.com/video/NwdBOwhaHiEsThxiCzE
I'll post the unedited version in my thread
Now back to you >
Speaking of vids; I couldn't help myself after work today...
http://www.magisto.com/video/NwdBOwhaHiEsThxiCzE
I'll post the unedited version in my thread
Now back to you >


 10-25-2013, 08:43 PM
#917
As told, I still have much work to do with the car. I have the complete turbo/exhaust tubing matrix to install that requires algebraic formulas to complete successfully, wiring that will need to be sorted through and properly routed and shielded, then it's all the various other hoses and lines for the intricate setups I'm running....this thing is like an engineering nightmare. Especially with all the added systems I've sewn in.
10-27-2013, 01:21 AM
#918
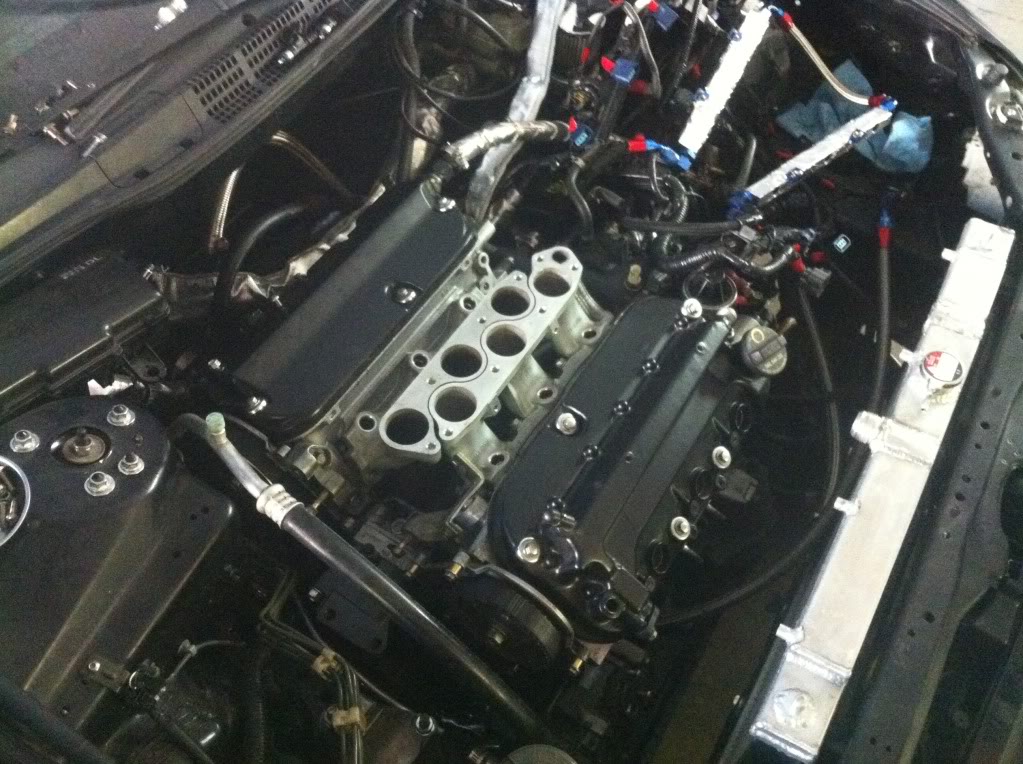
Snapped a few pictures in the engine compartment before leaving out after work today. I get a lot of requests for various engine pictures and how what fits where, etc...
I tried to get some shots with clarity showing and showing most of the details. It also gives a better perception on how much has to be done AFTER completing the engine install/reassembly.
Here they be...
View of the cooling fans that were mounted in front of the radiator and condenser, yet above the intercooler, so that I had more room in the engine compartment for turbo manifold heat shielding.
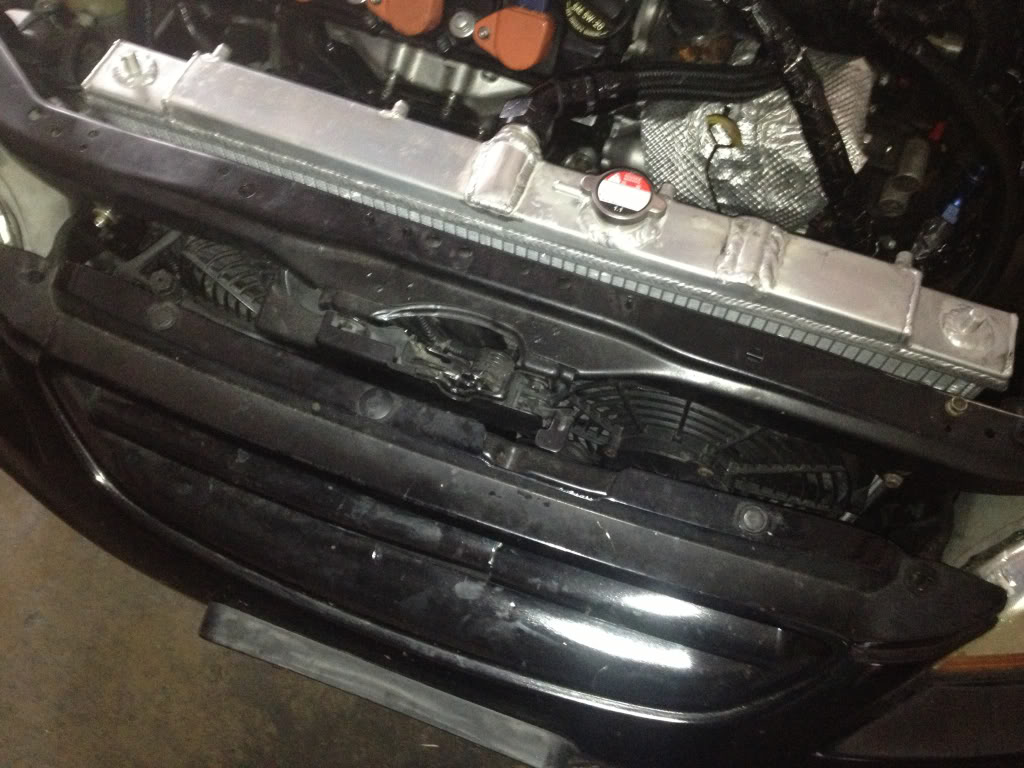
A view showing the distance between the radiator and the front cylinder head. Right now it may look like a large space but when the manifolds are installed, that changes.
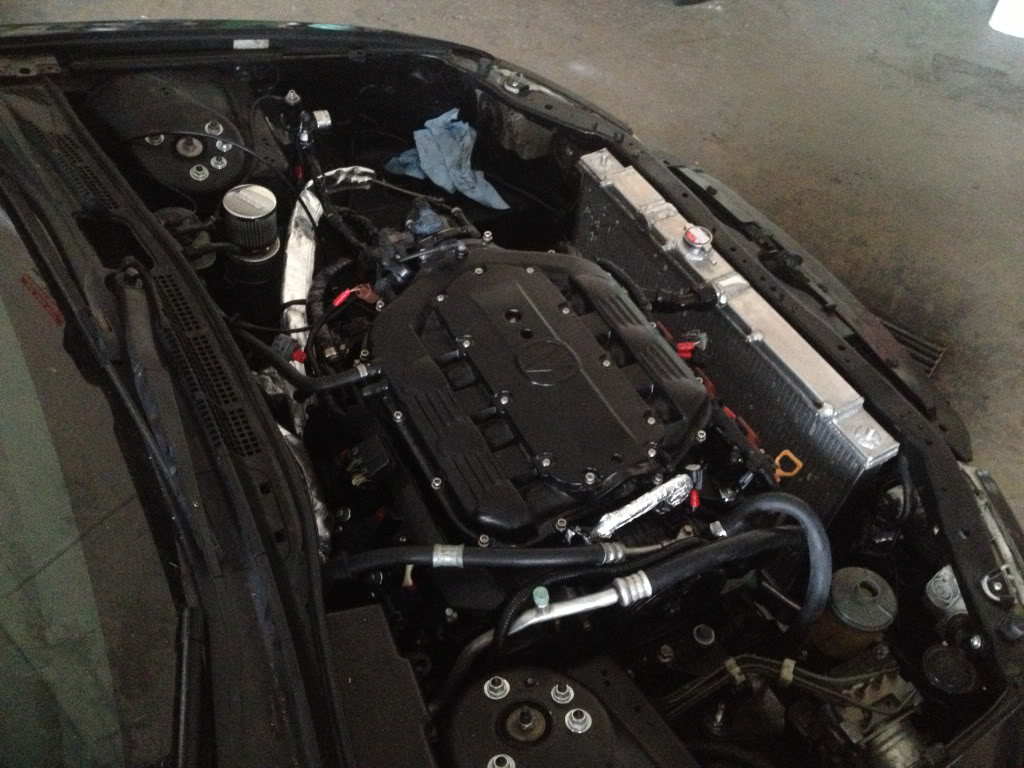
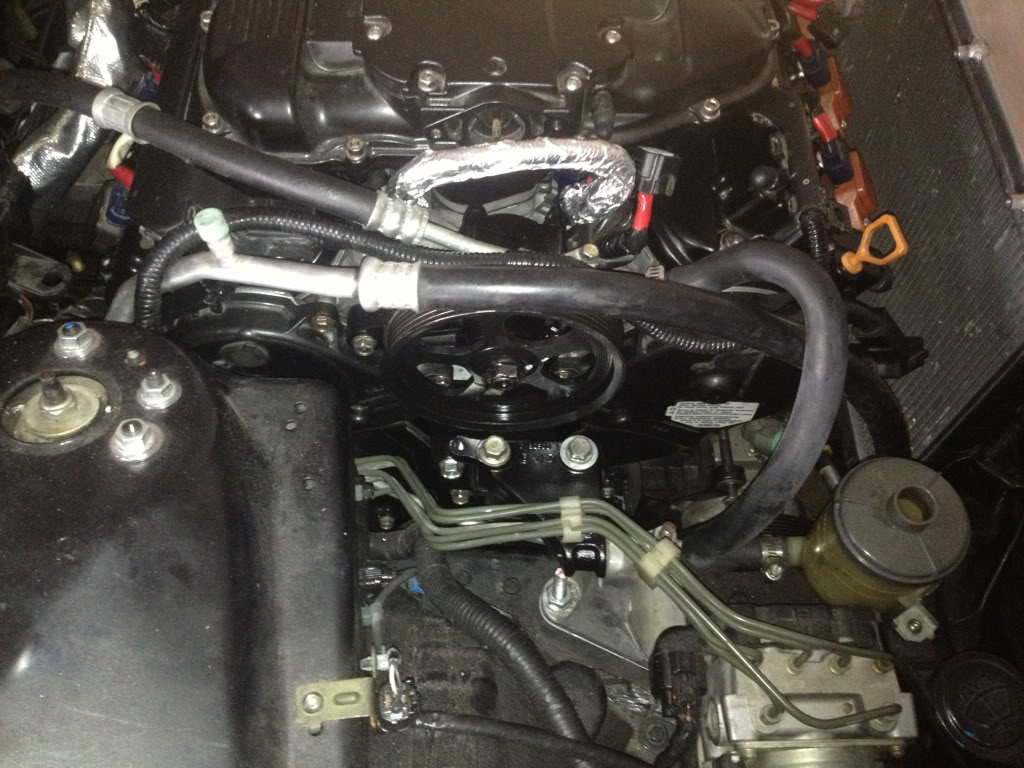
This shot is, again, between the engine and radiator but from the top. The large downpipe is routed through the lower half of this area and is eventual turned downwards between the oil drain hose and the engine mount. There's just barely enough room for it. And yes, that's an AC compressor sitting on this beast.
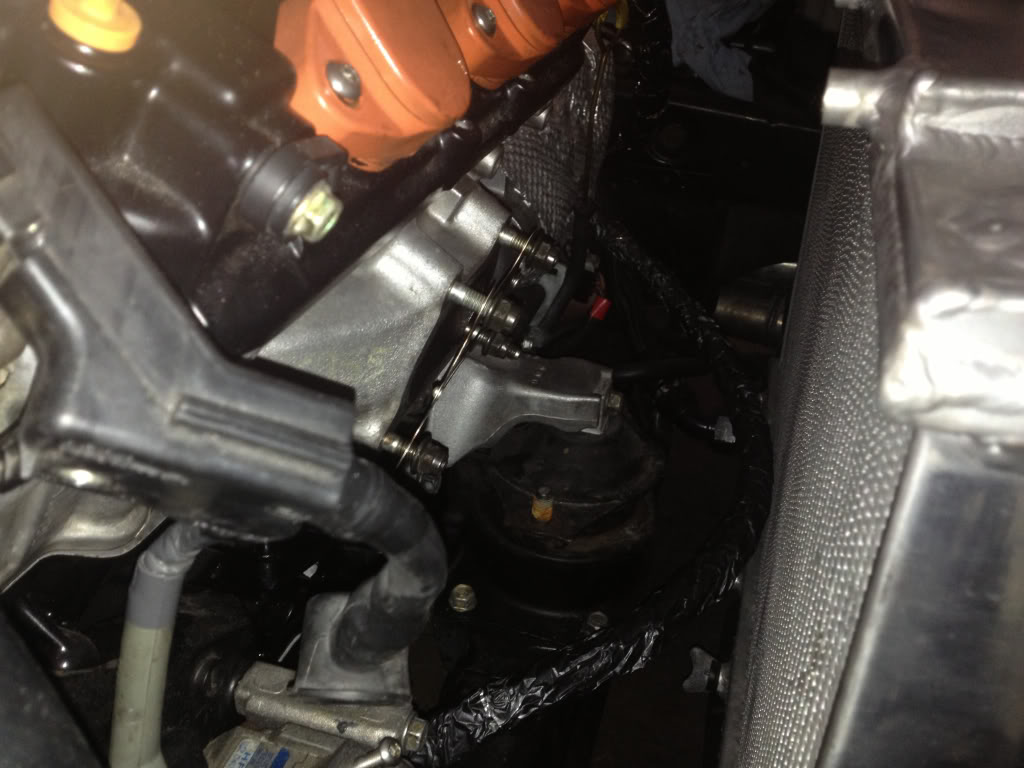
Although this one came out blurrier than I wanted, it does give an idea of how the side upper mount was setup and as you can see it is a solid mount as is the two transmission upper/lower mounts. Under torque, the powertrain barely moves at all.
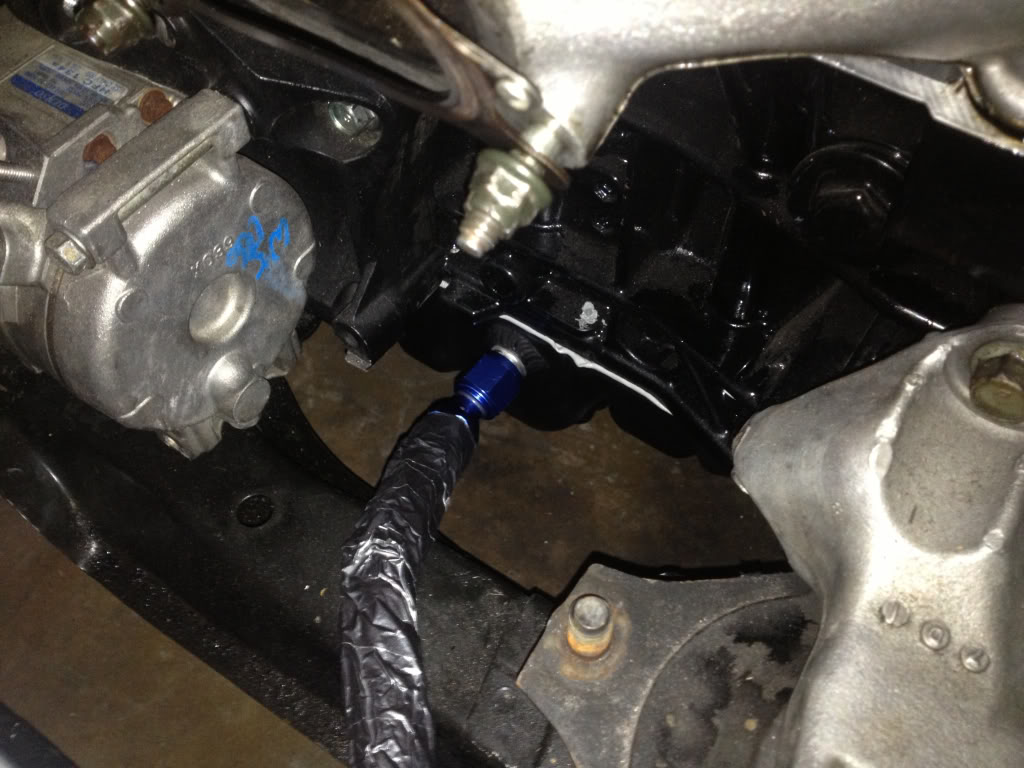
Again, mount is visible and you can also see where I wrapped the fuel lines with aluminum foil tape. I also used the same type of tape on the stainless steel catch can hoses as well as the oil drain tube from the turbo shown earlier. All hoses except the fuel lines were painted with ceramic paint after being wrapped for added heat protection.

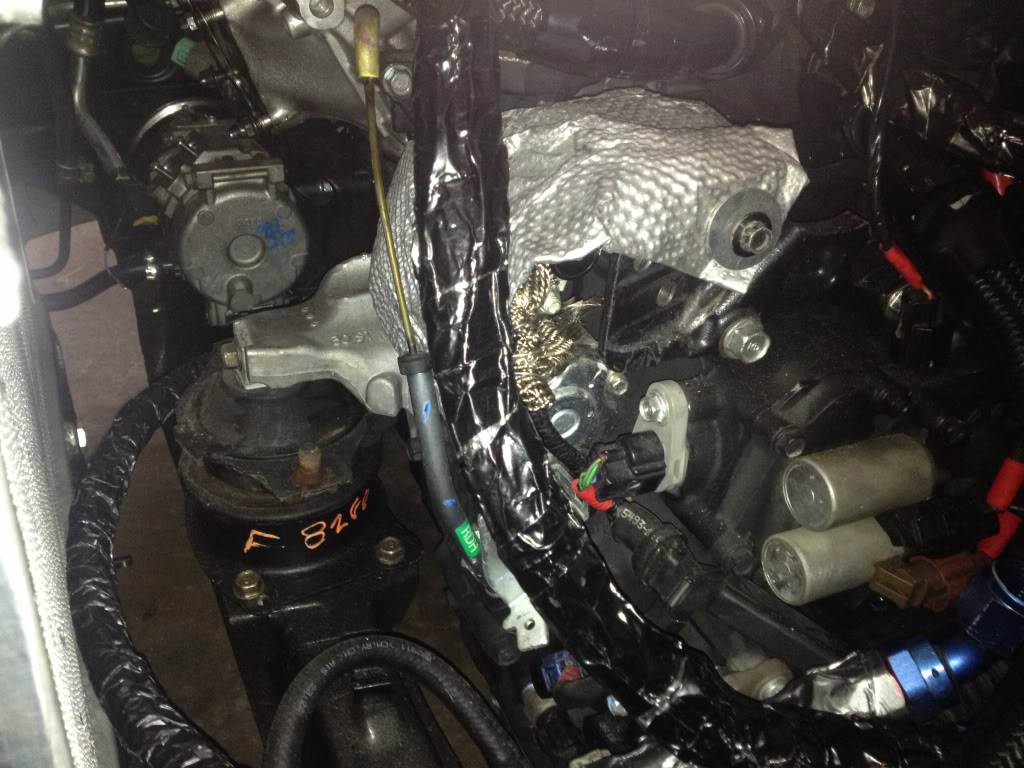
And here's that "matrix" I spoke of on my last post. This isn't even half of what is to be dealt with and sorted out but gives an understanding of the complexity of what's been done and added to the engine for running boost correctly. You can see one of the wrapped fuel lines going to the runners and also a heat shield that was added to cover the starter from the intense heat that seemed to be hitting it last time around. I don't think exhaust heat will be an issue anymore. At the far right is the upper solid trans mount I had mentioned. That's a massive piece of angled steel that is literally part of an old vintage engine hoist I had and made for a perfect fit....so I painted it black and used it. That's what you call "innovative".

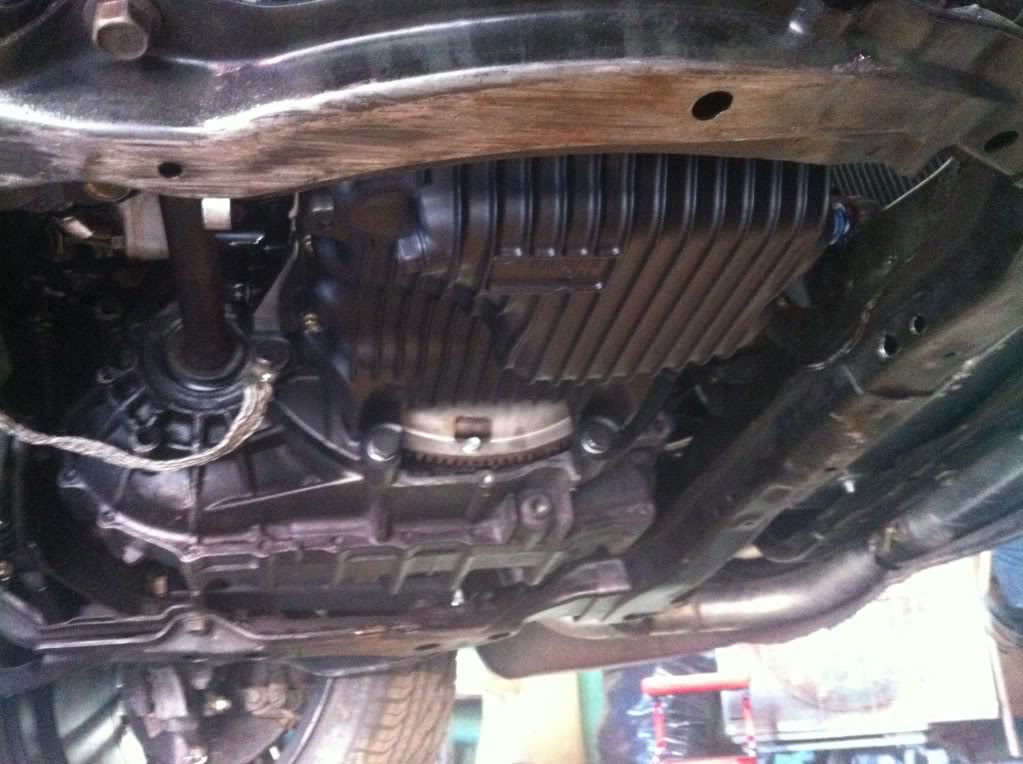
Believe it or not, there's actually a transmission behind all of that crap. Is that a NICE heat shield or what?
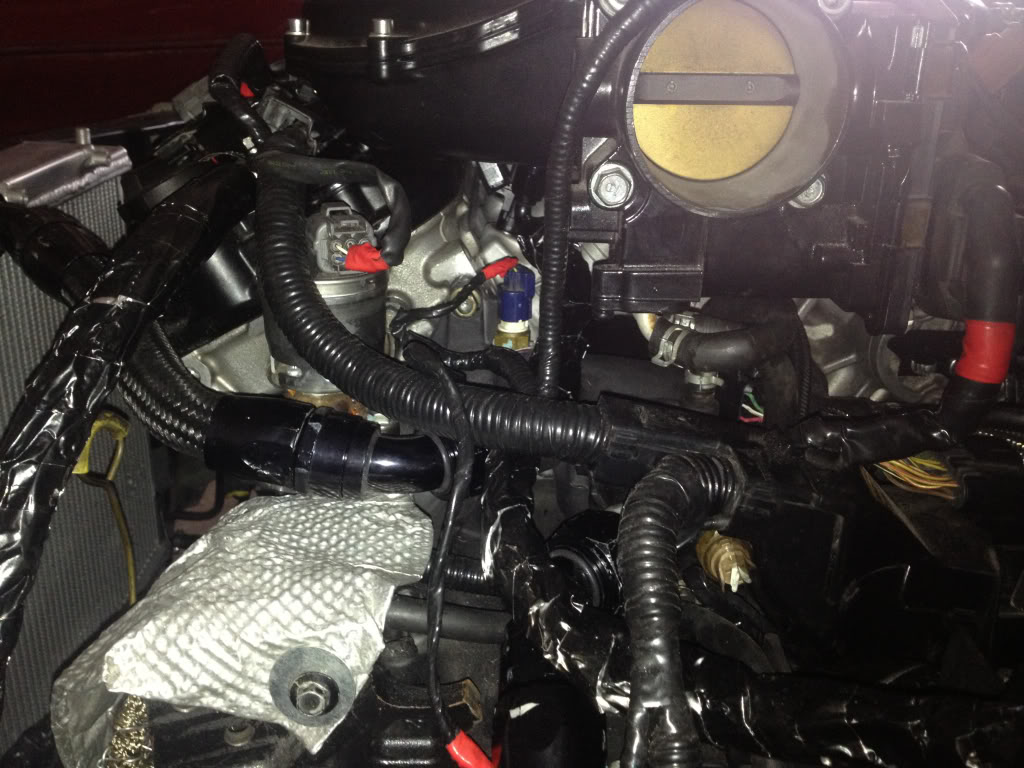
Another view of the matrix. I noticed that the TB mouth looks quite large in the picture but that's actually the stock j35a8 one. I totally realized that upon taking this picture. I was going to buy it but then I thought "what for, more power?" Pshhhhh.
I tried to get some shots with clarity showing and showing most of the details. It also gives a better perception on how much has to be done AFTER completing the engine install/reassembly.
Here they be...
View of the cooling fans that were mounted in front of the radiator and condenser, yet above the intercooler, so that I had more room in the engine compartment for turbo manifold heat shielding.
A view showing the distance between the radiator and the front cylinder head. Right now it may look like a large space but when the manifolds are installed, that changes.
This shot is, again, between the engine and radiator but from the top. The large downpipe is routed through the lower half of this area and is eventual turned downwards between the oil drain hose and the engine mount. There's just barely enough room for it. And yes, that's an AC compressor sitting on this beast.
Although this one came out blurrier than I wanted, it does give an idea of how the side upper mount was setup and as you can see it is a solid mount as is the two transmission upper/lower mounts. Under torque, the powertrain barely moves at all.
Again, mount is visible and you can also see where I wrapped the fuel lines with aluminum foil tape. I also used the same type of tape on the stainless steel catch can hoses as well as the oil drain tube from the turbo shown earlier. All hoses except the fuel lines were painted with ceramic paint after being wrapped for added heat protection.
And here's that "matrix" I spoke of on my last post. This isn't even half of what is to be dealt with and sorted out but gives an understanding of the complexity of what's been done and added to the engine for running boost correctly. You can see one of the wrapped fuel lines going to the runners and also a heat shield that was added to cover the starter from the intense heat that seemed to be hitting it last time around. I don't think exhaust heat will be an issue anymore. At the far right is the upper solid trans mount I had mentioned. That's a massive piece of angled steel that is literally part of an old vintage engine hoist I had and made for a perfect fit....so I painted it black and used it. That's what you call "innovative".
Believe it or not, there's actually a transmission behind all of that crap. Is that a NICE heat shield or what?
Another view of the matrix. I noticed that the TB mouth looks quite large in the picture but that's actually the stock j35a8 one. I totally realized that upon taking this picture. I was going to buy it but then I thought "what for, more power?" Pshhhhh.
10-27-2013, 07:12 PM
#919
Senior Moderator