
SamDoe1's Home Improvement Thread


Thread Starter
Ex-OEM King


Joined: Dec 2013
Posts: 17,880
Likes: 7,027
From: Minnesnowta
SamDoe1's Home Improvement Thread
Everyone else has one...so I want one too. 
Anyway, here's some documentation of my home improvement work so far and going forward.
Most recent project, Operation - Refinish Deck
Our deck had seen better days and looked like it was straight out of the 80's (because it was...). It was a pressure treated (PT) wood deck that had layers of thick white paint applied to it so even pressure washing was going to be a huge challenge. Instead of repainting it yet again, we decided to replace with composite. We (or I, the wife supervised) installed Trex Transcend decking with Trex Select railing. Decking was installed with hidden fasteners. Kept the main structure of the deck as it was sound, just replaced decking and railing.
Step 1: Tear apart old deck
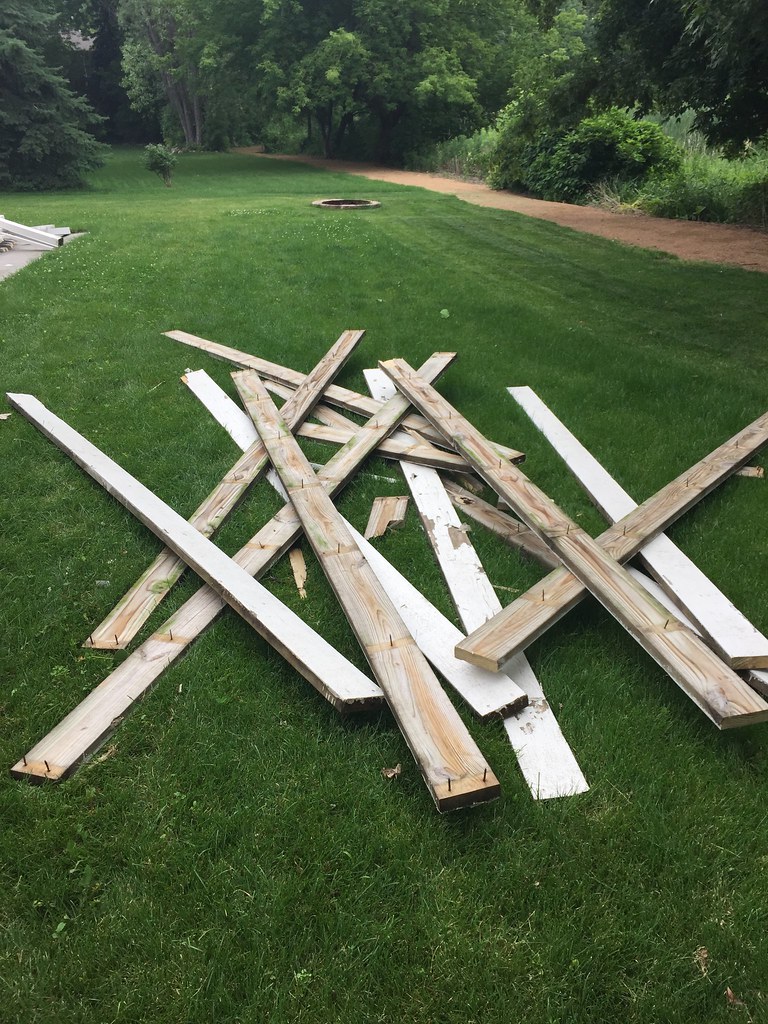 2015-07-11 14.21.32 by SameerPai, on Flickr
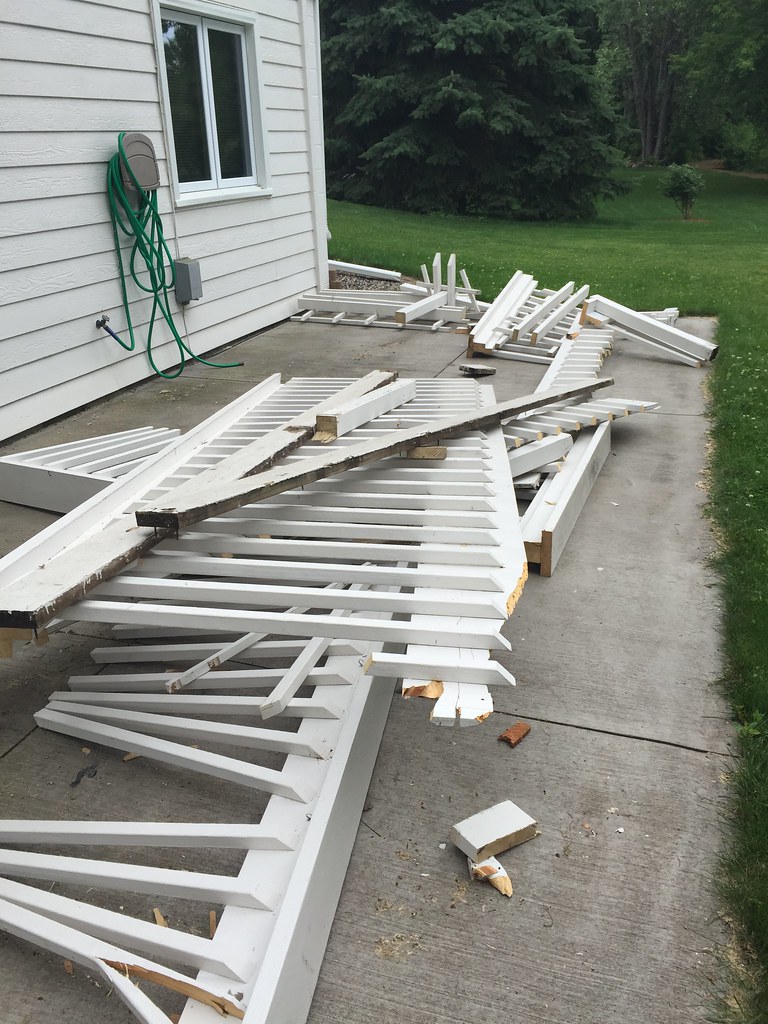 2015-07-11 14.21.44 by SameerPai, on Flickr
It was at this point I realized that the joist spacing for the deck was 24" because it was wood. The max spacing for the composite was 16". Fvck. Back to HD to get some more joists for the underside and install for 12" spacing. No pics of this because I was too pissed off to deal with it.
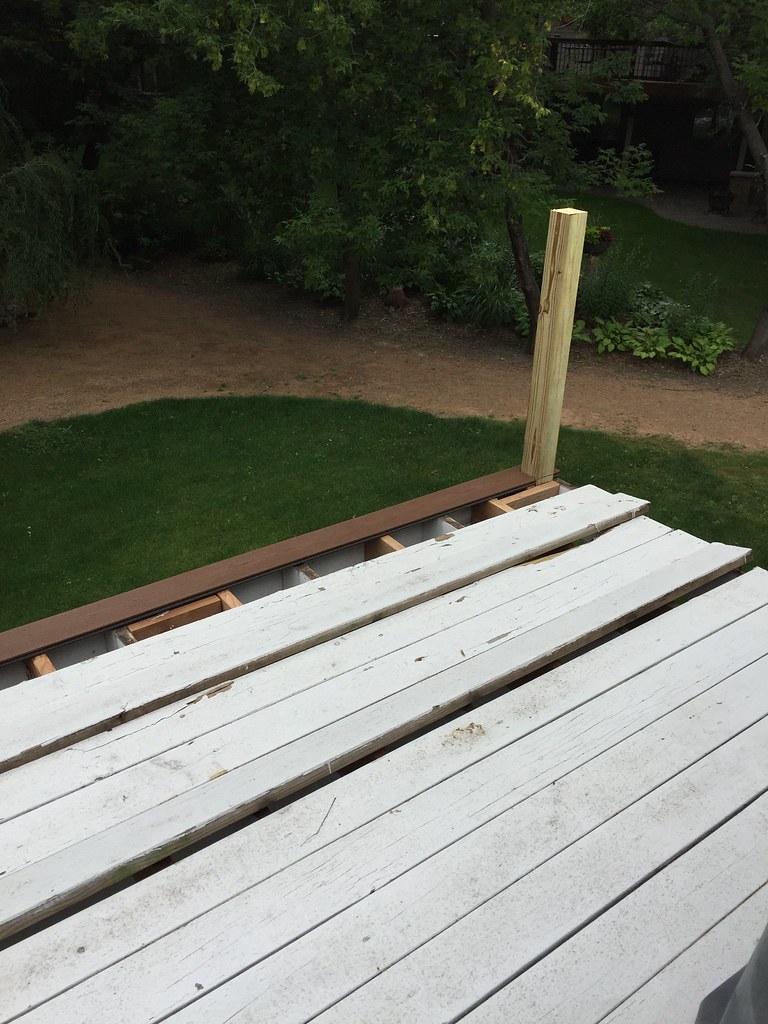
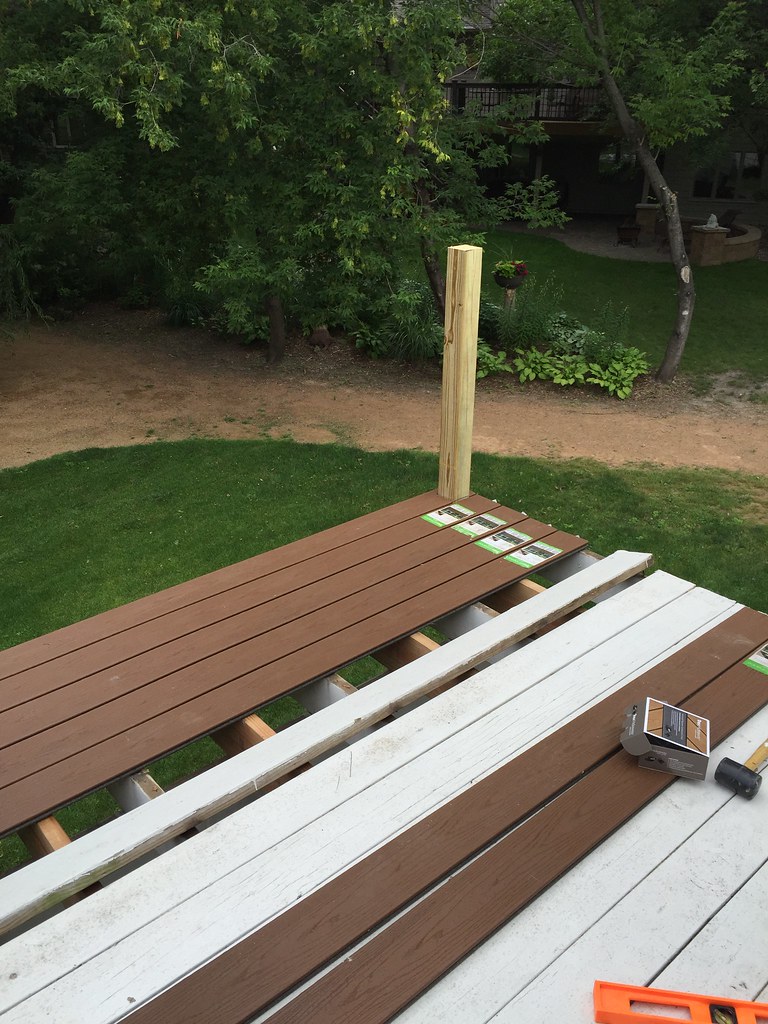
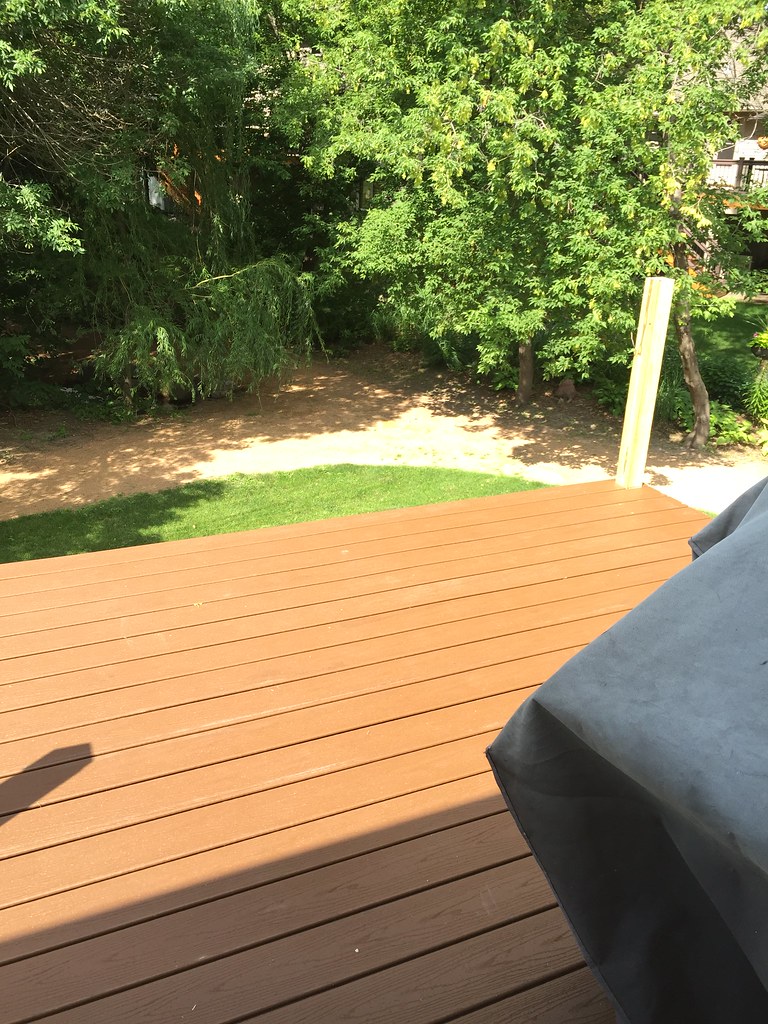
New railing posts are installed (you can see them in a few of these pics) and new decking starts going on:
 2015-07-11 10.12.13 by SameerPai, on Flickr
 2015-07-11 14.23.40 by SameerPai, on Flickr
 2015-07-11 11.14.56 by SameerPai, on Flickr
The grill in this picture met its demise shortly after. Because of the lack of a railing, it was pushed off the edge of the deck and fell down during a pretty bad storm. Luckily there was no damage to the gas tank. It wasn't an expensive grill so a replacement was bought, pics when it arrives this Thursday.
Anyway, decking complete:
 2015-07-12 16.14.49 by SameerPai, on Flickr
Next up was the railing:
 2015-07-20 18.55.42 by SameerPai, on Flickr
And the railing finished:
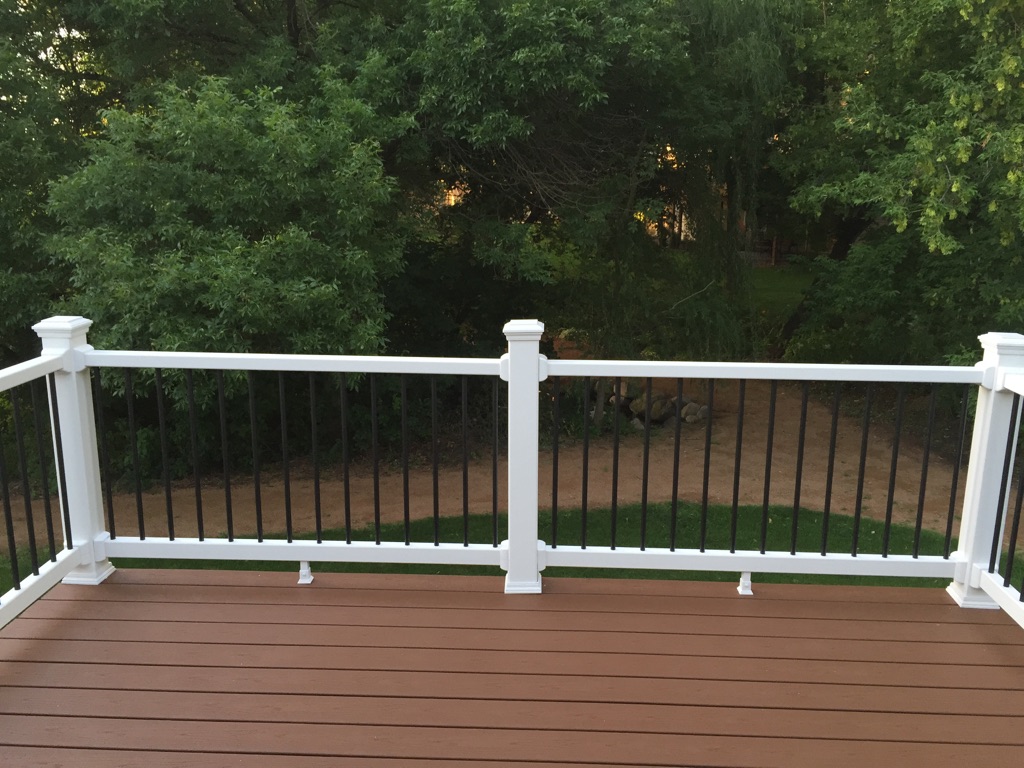 download_20150802_215628 by SameerPai, on Flickr
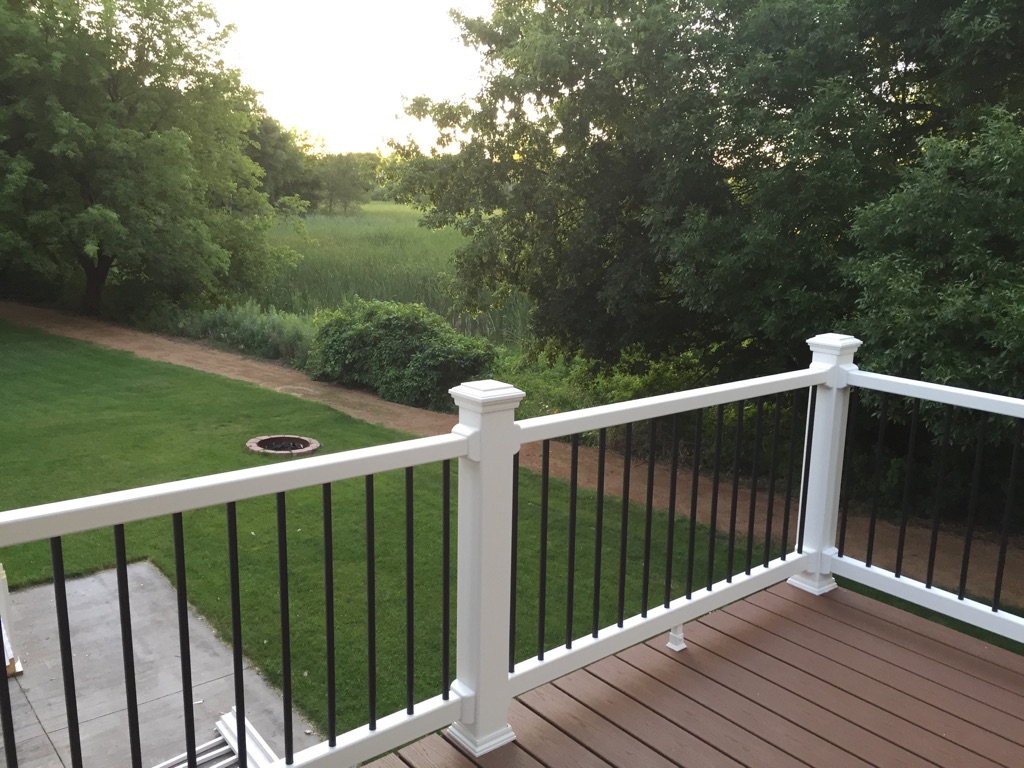 download_20150802_215623 by SameerPai, on Flickr
During the course of this project, the wife bought some new furniture for the deck:
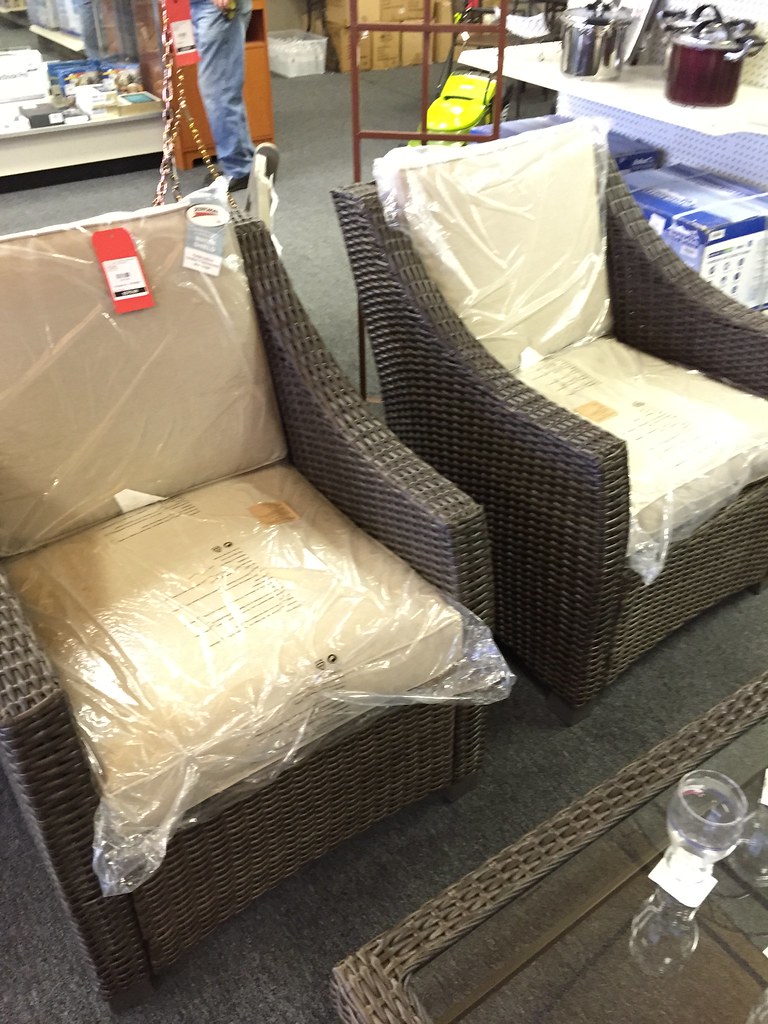 2015-07-16 17.09.42 by SameerPai, on Flickr
 2015-07-16 17.09.46 by SameerPai, on Flickr
Going to be put out there soon!
That's it for project #1, will post up some of my older stuff soon!
Anyway, here's some documentation of my home improvement work so far and going forward.
Most recent project, Operation - Refinish Deck
Our deck had seen better days and looked like it was straight out of the 80's (because it was...). It was a pressure treated (PT) wood deck that had layers of thick white paint applied to it so even pressure washing was going to be a huge challenge. Instead of repainting it yet again, we decided to replace with composite. We (or I, the wife supervised) installed Trex Transcend decking with Trex Select railing. Decking was installed with hidden fasteners. Kept the main structure of the deck as it was sound, just replaced decking and railing.
Step 1: Tear apart old deck
2015-07-11 14.21.32 by SameerPai, on Flickr2015-07-11 14.21.44 by SameerPai, on FlickrIt was at this point I realized that the joist spacing for the deck was 24" because it was wood. The max spacing for the composite was 16". Fvck. Back to HD to get some more joists for the underside and install for 12" spacing. No pics of this because I was too pissed off to deal with it.
New railing posts are installed (you can see them in a few of these pics) and new decking starts going on:
2015-07-11 10.12.13 by SameerPai, on Flickr2015-07-11 14.23.40 by SameerPai, on Flickr2015-07-11 11.14.56 by SameerPai, on FlickrThe grill in this picture met its demise shortly after. Because of the lack of a railing, it was pushed off the edge of the deck and fell down during a pretty bad storm. Luckily there was no damage to the gas tank. It wasn't an expensive grill so a replacement was bought, pics when it arrives this Thursday.
Anyway, decking complete:
2015-07-12 16.14.49 by SameerPai, on FlickrNext up was the railing:
2015-07-20 18.55.42 by SameerPai, on FlickrAnd the railing finished:
download_20150802_215628 by SameerPai, on Flickrdownload_20150802_215623 by SameerPai, on FlickrDuring the course of this project, the wife bought some new furniture for the deck:
2015-07-16 17.09.42 by SameerPai, on Flickr2015-07-16 17.09.46 by SameerPai, on FlickrGoing to be put out there soon!
That's it for project #1, will post up some of my older stuff soon!


Pro
Joined: Jan 2014
Posts: 676
Likes: 228
From: Bucks County, PA
New decking looks great! I have to do the same at one point as well because ours is shot. Same as yours it appears and I was considering trying the Behr deck-over paint or the Rustoleum Deck Restore for quick fix since there are other projects that need attending to first, but the paint can be really expensive and results are mixed at best.
Was it crazy expensive? The structure of ours is good too, so I'd be doing something similar with just swapping out the boards and changing the railing.
Was it crazy expensive? The structure of ours is good too, so I'd be doing something similar with just swapping out the boards and changing the railing.
Thread Starter
Ex-OEM King
Joined: Dec 2013
Posts: 17,880
Likes: 7,027
From: Minnesnowta
New decking looks great! I have to do the same at one point as well because ours is shot. Same as yours it appears and I was considering trying the Behr deck-over paint or the Rustoleum Deck Restore for quick fix since there are other projects that need attending to first, but the paint can be really expensive and results are mixed at best.
Was it crazy expensive? The structure of ours is good too, so I'd be doing something similar with just swapping out the boards and changing the railing.
Was it crazy expensive? The structure of ours is good too, so I'd be doing something similar with just swapping out the boards and changing the railing.
You almost HAVE to have a helper when doing some of it but overall it's not hard. It's like a giant Ikea assembly project. You can make it as complicated or simple as you want which is kind of the beauty of it.
 Yeah, I plan to tackle that myself along with my dad next Spring. I really like how yours came out - so I'll look into those materials you mentioned.
Trending Topics
Thread Starter
Ex-OEM King
Joined: Dec 2013
Posts: 17,880
Likes: 7,027
From: Minnesnowta
What's the fresh strip of dirt that runs along the back of everyone's property? New gas line put it in or something?
Good pick on the Trex stuff.
To DarkTower: Avoid those deck-over and deck restore products. They do not adhere well, get hot, and eat up more stain/paint than they should so it get's expensive. I researched those products extensively last year and ended up not going that direction. Either sand down what you have and do a proper stain or replace entirely. IMO. Also when you compare the price of new lumber + stain the composite stuff is not that much more expensive. So if you're in a home you intend to stay in, go the direction the OP did.
Thread Starter
Ex-OEM King
Joined: Dec 2013
Posts: 17,880
Likes: 7,027
From: Minnesnowta
It's a neighborhood path that goes around the entire neighborhood. Doesn't connect to any city trails and is generally only used for people who live in the area. Goes through the woods and stuff, pretty nice to stroll through.
Pro
Joined: Jan 2014
Posts: 676
Likes: 228
From: Bucks County, PA
What's the fresh strip of dirt that runs along the back of everyone's property? New gas line put it in or something?
Good pick on the Trex stuff.
To DarkTower: Avoid those deck-over and deck restore products. They do not adhere well, get hot, and eat up more stain/paint than they should so it get's expensive. I researched those products extensively last year and ended up not going that direction. Either sand down what you have and do a proper stain or replace entirely. IMO. Also when you compare the price of new lumber + stain the composite stuff is not that much more expensive. So if you're in a home you intend to stay in, go the direction the OP did.
Good pick on the Trex stuff.
To DarkTower: Avoid those deck-over and deck restore products. They do not adhere well, get hot, and eat up more stain/paint than they should so it get's expensive. I researched those products extensively last year and ended up not going that direction. Either sand down what you have and do a proper stain or replace entirely. IMO. Also when you compare the price of new lumber + stain the composite stuff is not that much more expensive. So if you're in a home you intend to stay in, go the direction the OP did.


Thread Starter
Ex-OEM King
Joined: Dec 2013
Posts: 17,880
Likes: 7,027
From: Minnesnowta
That reminds me I need to clean out the firepit this year...

Needs a 930
Joined: Feb 2012
Posts: 5,146
Likes: 759
From: Texas

Thread Starter
Ex-OEM King
Joined: Dec 2013
Posts: 17,880
Likes: 7,027
From: Minnesnowta

Thread Starter
Ex-OEM King
Joined: Dec 2013
Posts: 17,880
Likes: 7,027
From: Minnesnowta
^ Thanks!
Fun story about all the lumber removed from the old deck. Posted it up on CL as "free, come get it" and we had 9 replies within 10 minutes. Some guy came and took it all two hours later. Didn't even have to help load it up.
Better than getting a dumpster...
Fun story about all the lumber removed from the old deck. Posted it up on CL as "free, come get it" and we had 9 replies within 10 minutes. Some guy came and took it all two hours later. Didn't even have to help load it up.
Better than getting a dumpster...
I should post a picture of my back yard. You'd feel much better. I'd take anything green at this point. 
I've gotten rid of fencing and rock this way. It's awesome.
I've gotten rid of fencing and rock this way. It's awesome.
Thread Starter
Ex-OEM King
Joined: Dec 2013
Posts: 17,880
Likes: 7,027
From: Minnesnowta
Another small project completed this year, Operation vegetable garden.
This one was done prior to deck and in some pics you can see what the old one looked like. The whole thing was made with 2x4 cedar lumber to prevent any chemicals from leeching into the food. The design (custom) is an 8x10 bed with two 4x4 raised sections that contain plants that tend to spread a lot. It was then filled with top soil and the wife planted all her stuff in it.
Currently growing in there:
1x Beefsteak tomato plant
9x Sweet potato plants
4x Corn
7x Bell pepper
1x Zuchini
2x Cucumber
~10x Romaine lettuce
The place it'll go:
 2015-05-21 18.54.40 by SameerPai, on Flickr
All marked off for sod removal (sorry for blurry pic):
 2015-05-21 20.02.33 by SameerPai, on Flickr
Sod removed:
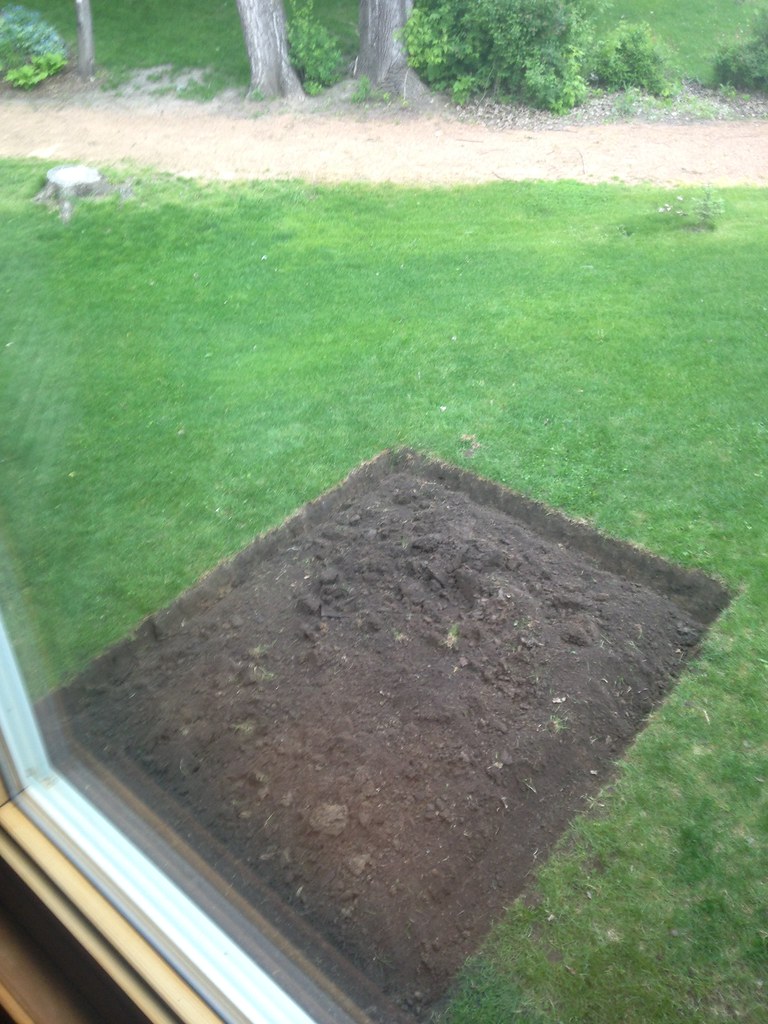 2015-05-23 18.58.32 by SameerPai, on Flickr
Raised bed installed, sorry no construction pics. I didn't even think to take them. Facepalm.
 2015-05-25 17.14.19 by SameerPai, on Flickr
It was then filled with dirt and plants were put in.
I'll snag a pic of what it looks like today when I get home.
This one was done prior to deck and in some pics you can see what the old one looked like. The whole thing was made with 2x4 cedar lumber to prevent any chemicals from leeching into the food. The design (custom) is an 8x10 bed with two 4x4 raised sections that contain plants that tend to spread a lot. It was then filled with top soil and the wife planted all her stuff in it.
Currently growing in there:
1x Beefsteak tomato plant
9x Sweet potato plants
4x Corn
7x Bell pepper
1x Zuchini
2x Cucumber
~10x Romaine lettuce
The place it'll go:
2015-05-21 18.54.40 by SameerPai, on FlickrAll marked off for sod removal (sorry for blurry pic):
2015-05-21 20.02.33 by SameerPai, on FlickrSod removed:
2015-05-23 18.58.32 by SameerPai, on FlickrRaised bed installed, sorry no construction pics. I didn't even think to take them. Facepalm.
2015-05-25 17.14.19 by SameerPai, on FlickrIt was then filled with dirt and plants were put in.
I'll snag a pic of what it looks like today when I get home.
Thread Starter
Ex-OEM King
Joined: Dec 2013
Posts: 17,880
Likes: 7,027
From: Minnesnowta
One more project that was done last fall, Operation Update Small Bathroom
Our half bath upstairs was dated and crappy looking. It wasn't too expensive to do a handful of small updates that really made a big impact. I would peg the overall cost at ~$500 for a pretty big improvement.
Here we go, how it looked before (sorry for strange angles, bathroom isn't big enough to stand in and take pics at the same time):
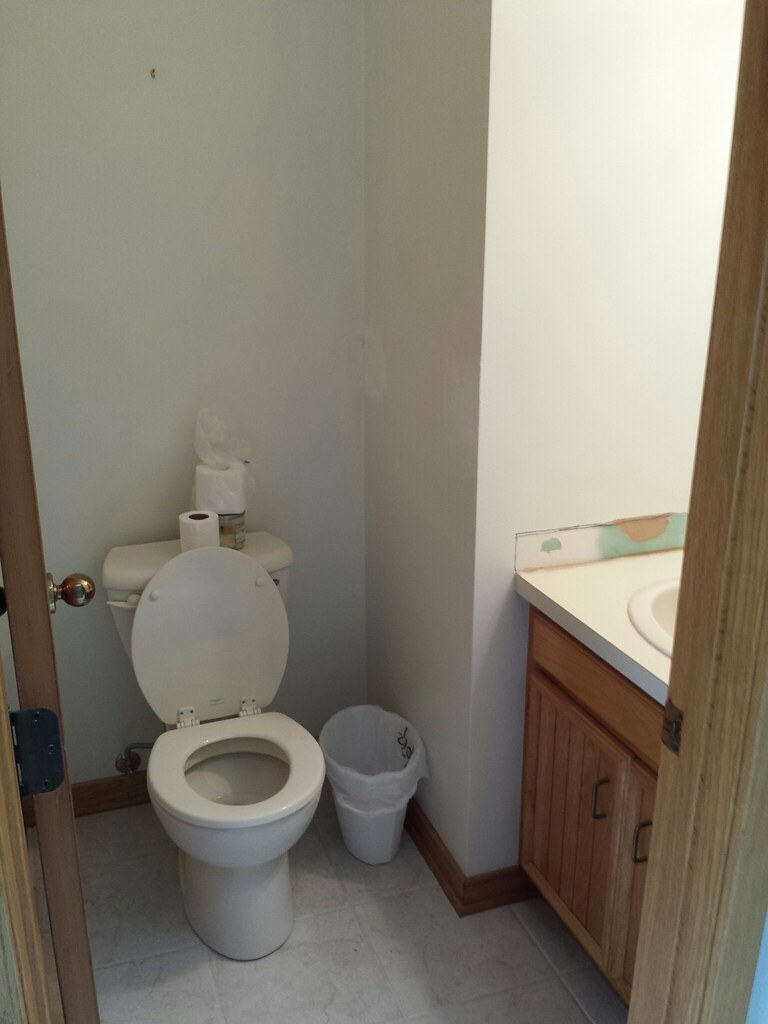 2014-06-22 12.17.31 by SameerPai, on Flickr
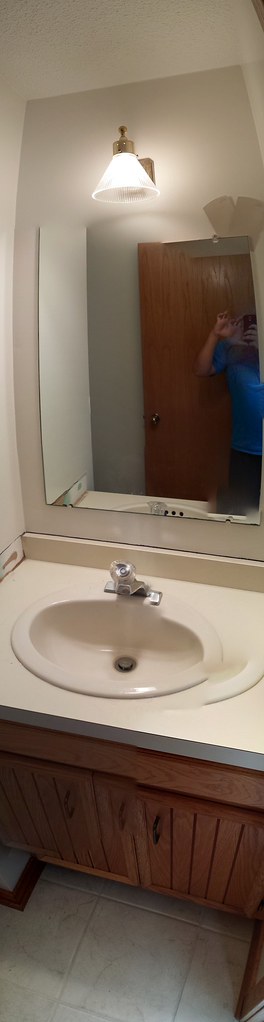 2014-06-22 12.19.25 by SameerPai, on Flickr
Old countertop, sink, and faucet removed and replaced with tan brown granite top, undermount sink, and new faucet:
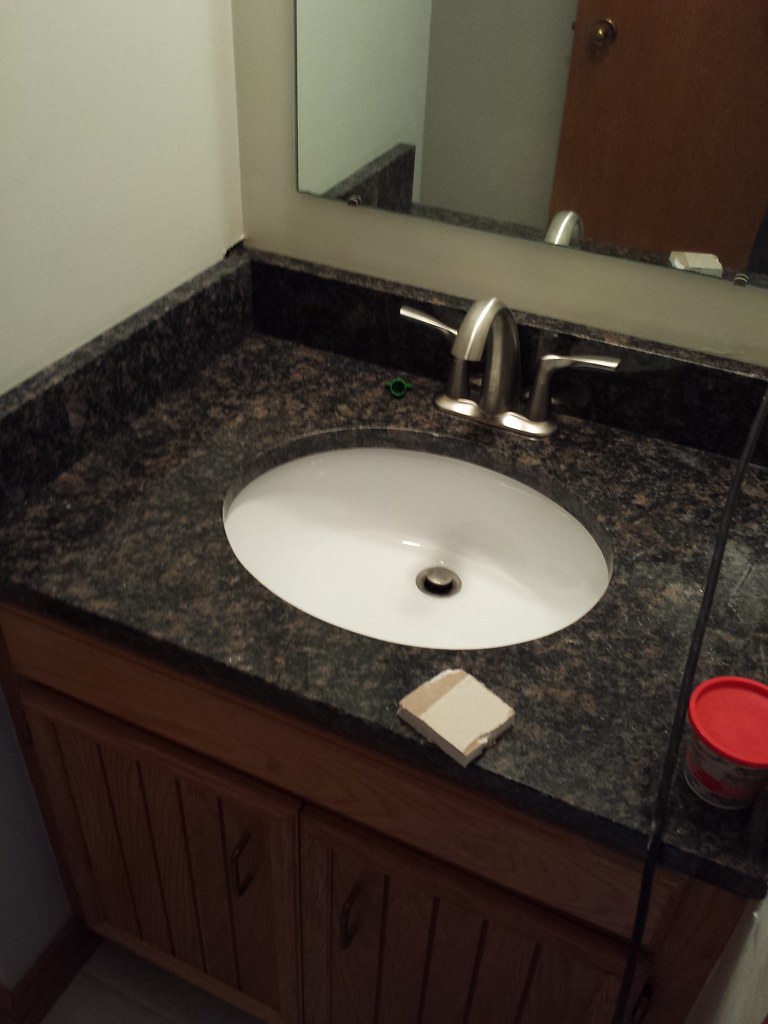 2014-06-22 17.11.30 by SameerPai, on Flickr
Decided to do a cool feature in the bathroom so installed a vertical glass tile backsplash from top to ceiling. This is the start:
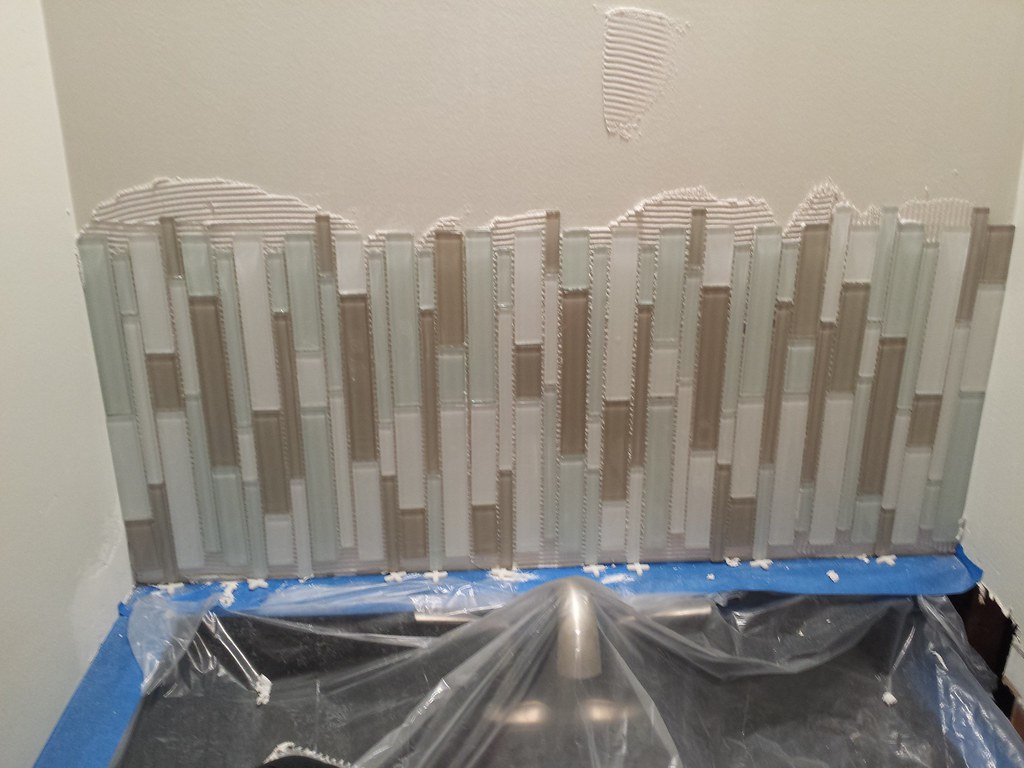 2014-07-12 12.40.24 by SameerPai, on Flickr
Tile complete:
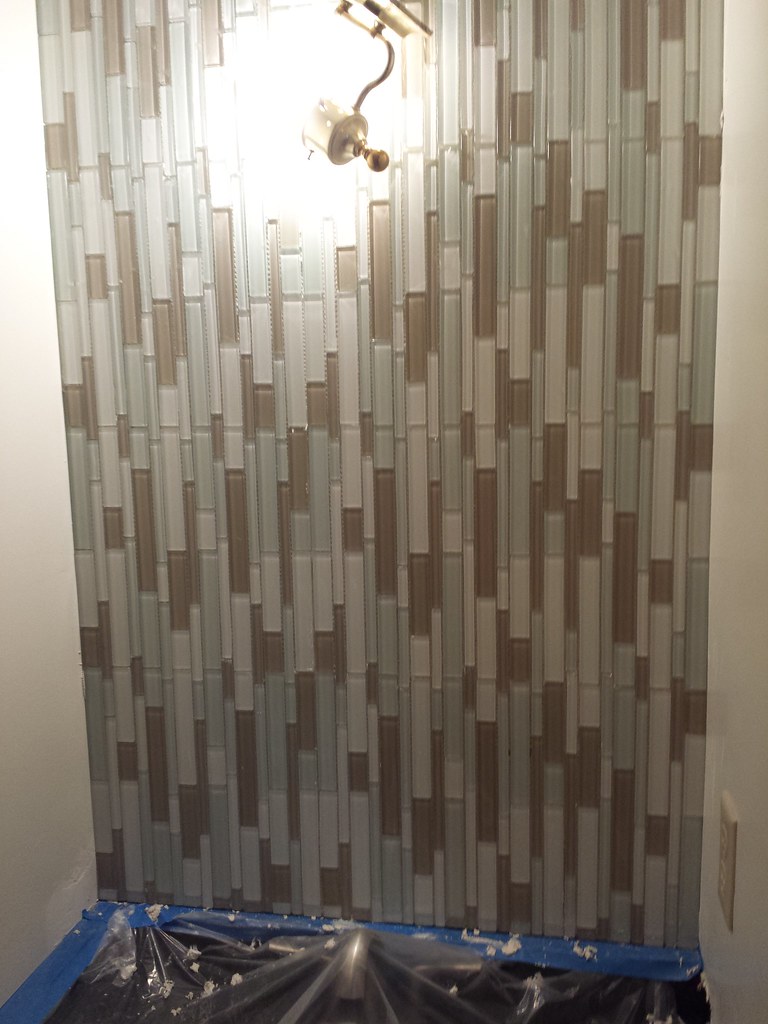 2014-07-12 15.05.44 by SameerPai, on Flickr
Finishing steps of new framed mirror with new light fixture and bathroom fixtures installed:
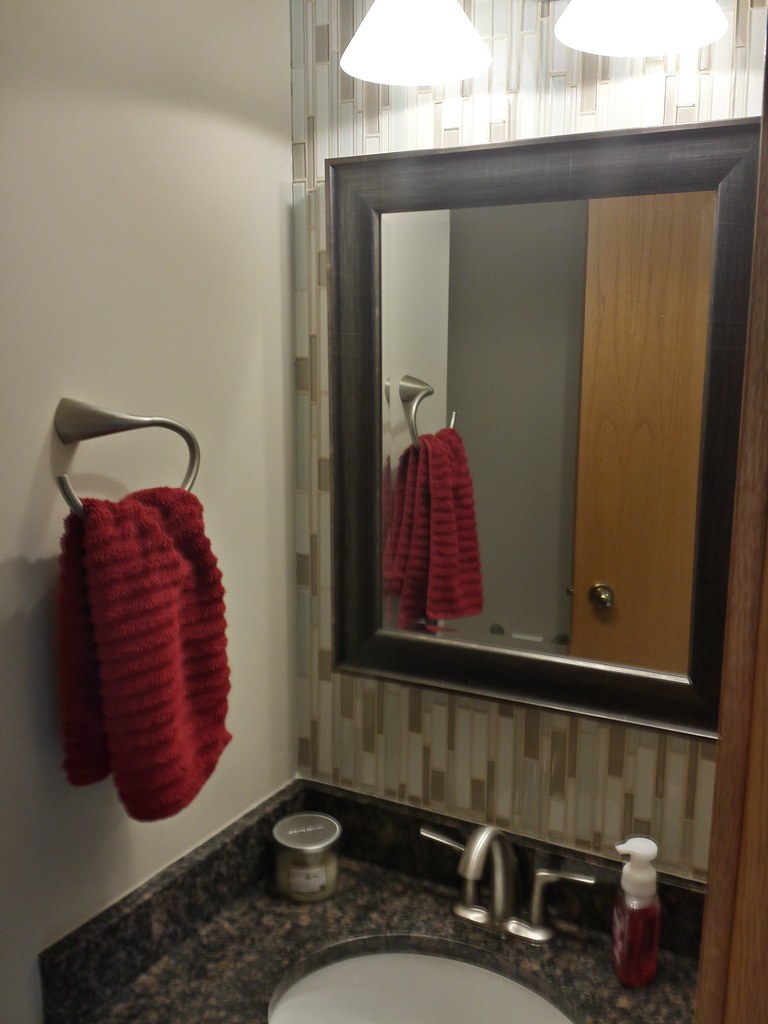 2015-08-26 12.33.43 by SameerPai, on Flickr
Project complete. We'd like to do a different toilet and new handle pulls in the future but those can wait. We are going to do the kitchen next spring and want all the pulls to match.
Our half bath upstairs was dated and crappy looking. It wasn't too expensive to do a handful of small updates that really made a big impact. I would peg the overall cost at ~$500 for a pretty big improvement.
Here we go, how it looked before (sorry for strange angles, bathroom isn't big enough to stand in and take pics at the same time):
2014-06-22 12.17.31 by SameerPai, on Flickr2014-06-22 12.19.25 by SameerPai, on FlickrOld countertop, sink, and faucet removed and replaced with tan brown granite top, undermount sink, and new faucet:
2014-06-22 17.11.30 by SameerPai, on FlickrDecided to do a cool feature in the bathroom so installed a vertical glass tile backsplash from top to ceiling. This is the start:
2014-07-12 12.40.24 by SameerPai, on FlickrTile complete:
2014-07-12 15.05.44 by SameerPai, on FlickrFinishing steps of new framed mirror with new light fixture and bathroom fixtures installed:
2015-08-26 12.33.43 by SameerPai, on FlickrProject complete. We'd like to do a different toilet and new handle pulls in the future but those can wait. We are going to do the kitchen next spring and want all the pulls to match.
 </p>
</p>
Thread Starter
Ex-OEM King
Joined: Dec 2013
Posts: 17,880
Likes: 7,027
From: Minnesnowta
Next home project completed in the early spring time.
Laundry room remodel.
Our washer and dryer that came with the house were about to take a huge sh1t and so we needed new ones. The way our laundry room was laid out made the space too small to even stand in, let alone bring in front load machines. Wife was fed up with it so it was time to grab the sawzall and get to work.
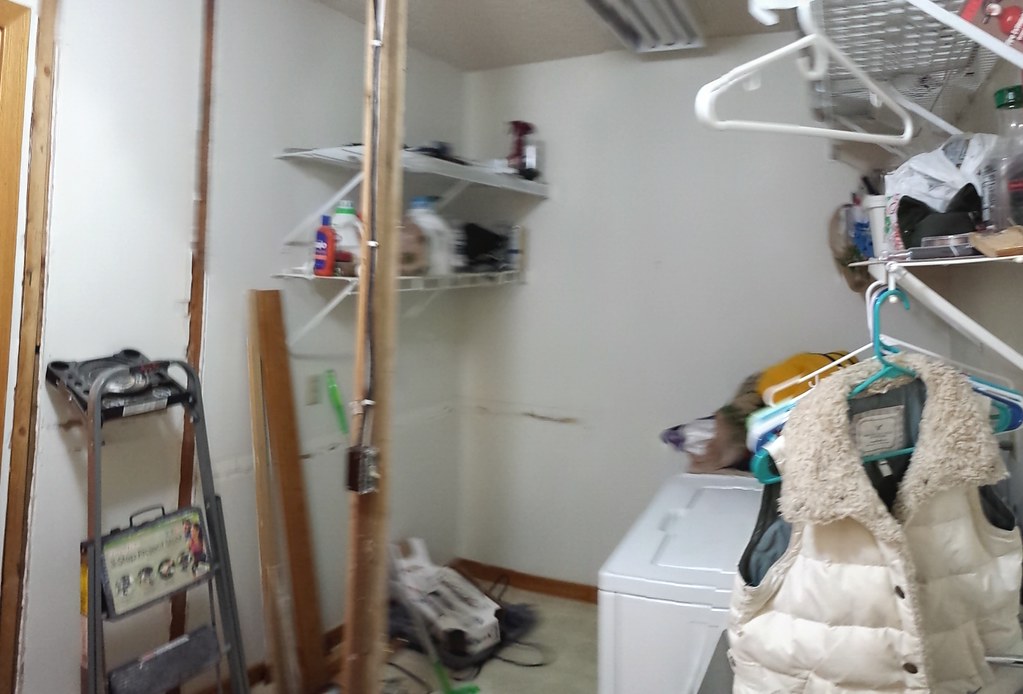
The before:
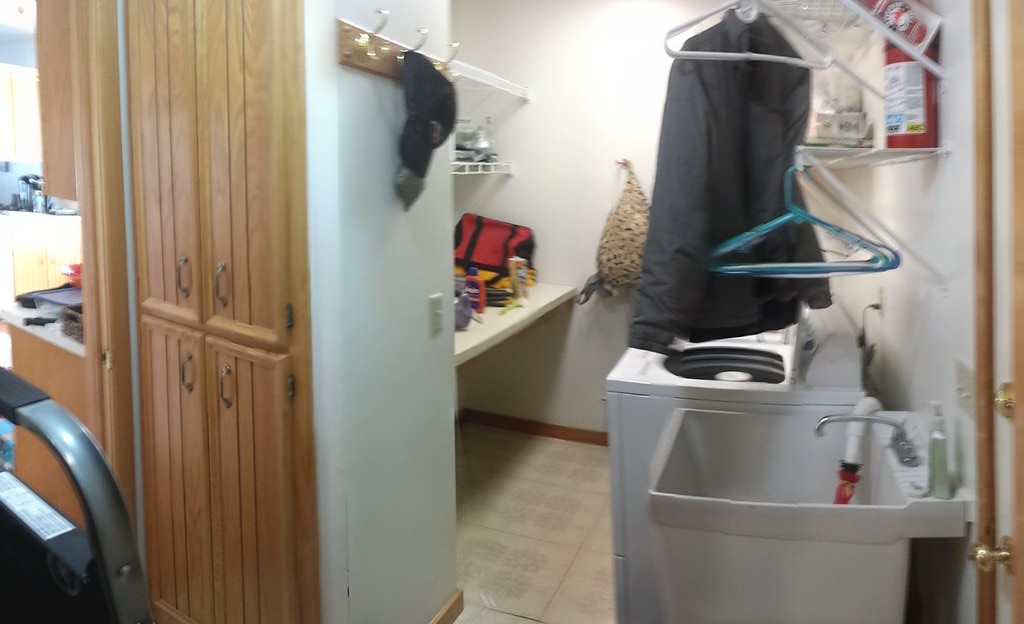 2014-03-08 10.06.39 by SameerPai, on Flickr
You can see how crowded and cramped it is with that big pantry in the way and the "folding table" (as it was sold to us) just takes up even more space. FWIW, it was never used to fold a damn thing.
Anyway, the tear down begins! Folding table removed and bought a 10 pack of sawzall blades and went to town on the pantry.
 2014-03-08 12.30.08 by SameerPai, on Flickr
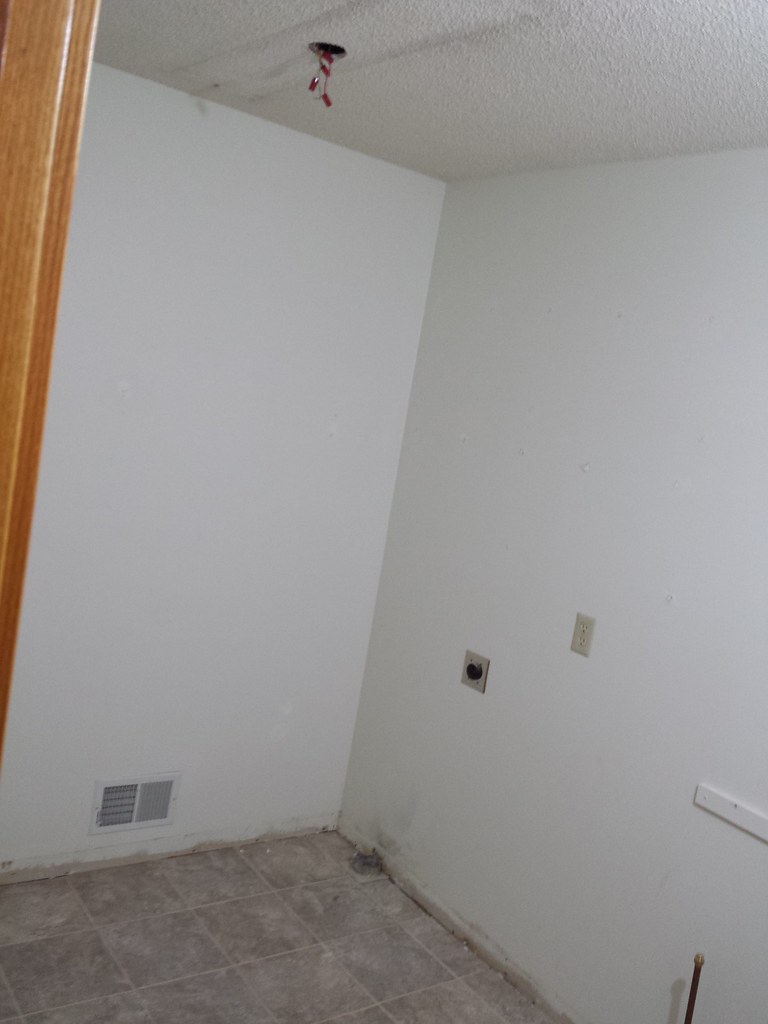
And all removed, except for one piece of framing because it holds the electrical for the light in the room. You can see how much more space was opened up just by removing this one thing. (apologies for the crappy sort of panorama but that's the best my phone could do)
 2014-03-08 22.25.52 by SameerPai, on Flickr
I relocated that wiring to the wall that was staying and removed that last piece of framing.
Next up was time to get rid of the nasty yellow and old linoleum floor. Thankfully the builders installed the vinyl on top of a 3/4" plywood base over top of the subfloor. My buddy at work said that his house was the same thing and that base was just nailed/stapled to the subfloor so to just pry it out.
I was all psyched up to do this, stuck the pry bar under the plywood and pulled...and pulled...and pulled.
It was all screwed down. Fuck.
So then I used a magnet and marked all the screw locations and took the circular saw (set to depth in order to not damage subfloor) and cut all the shit out.
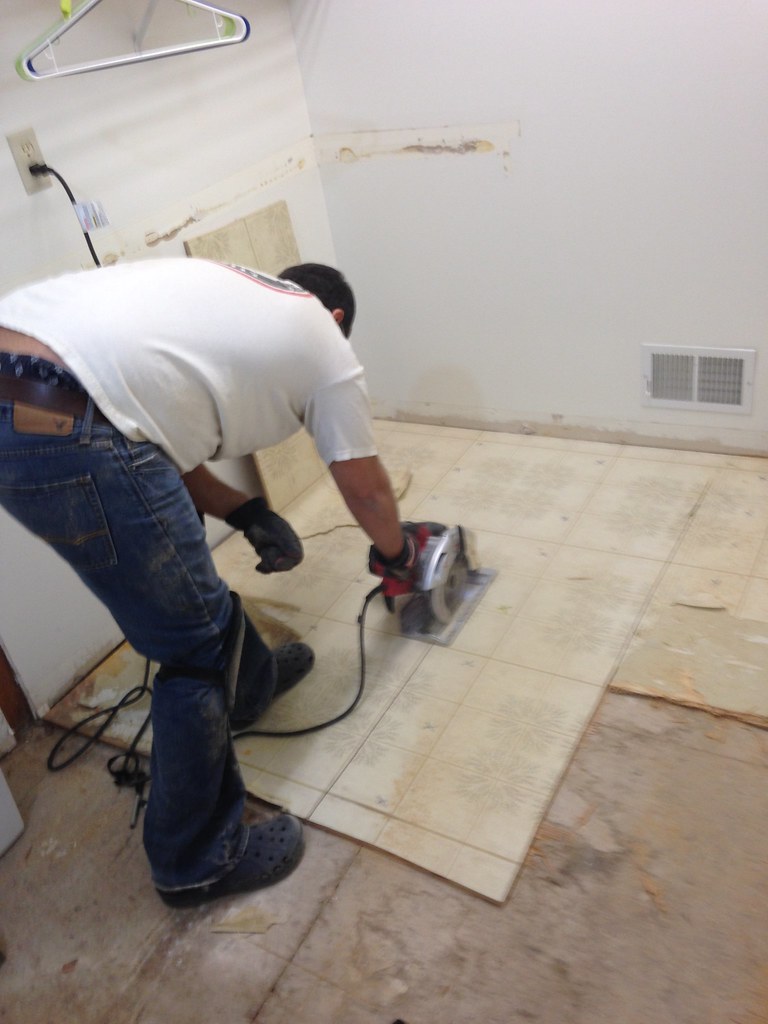 2014-03-11 21.10.04 by SameerPai, on Flickr
NOTE: Dust masks are useful. I was coughing up sawdust for a week.
Next up was to put down the backer board for the tile:
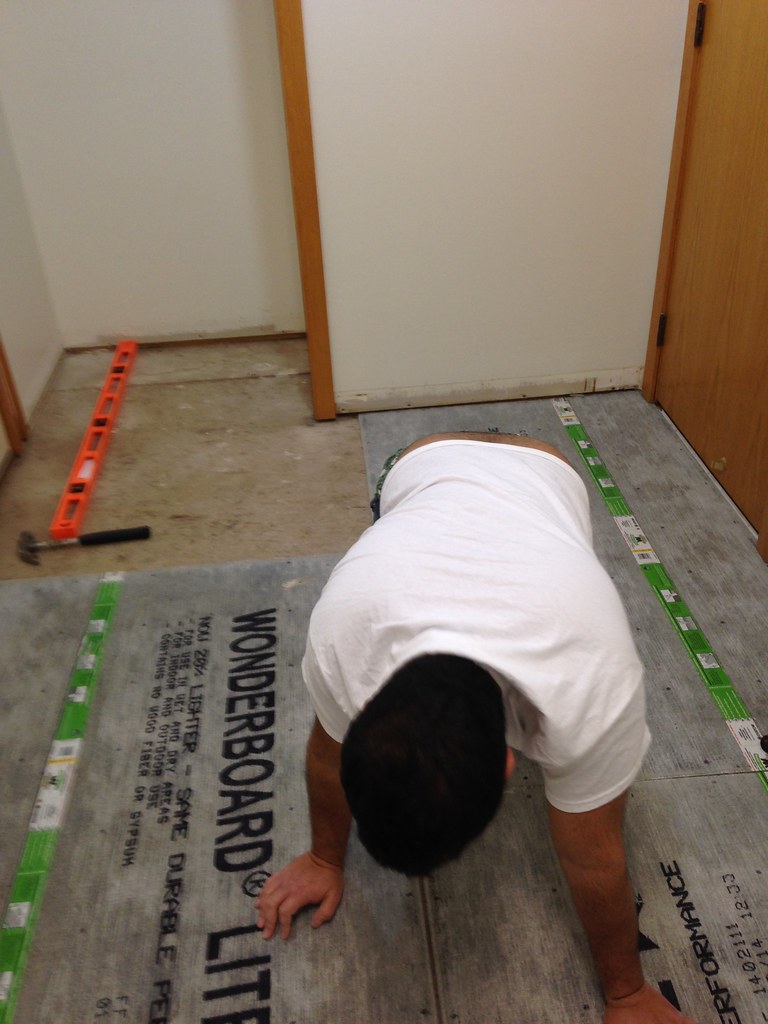 2014-03-13 20.45.16 by SameerPai, on Flickr
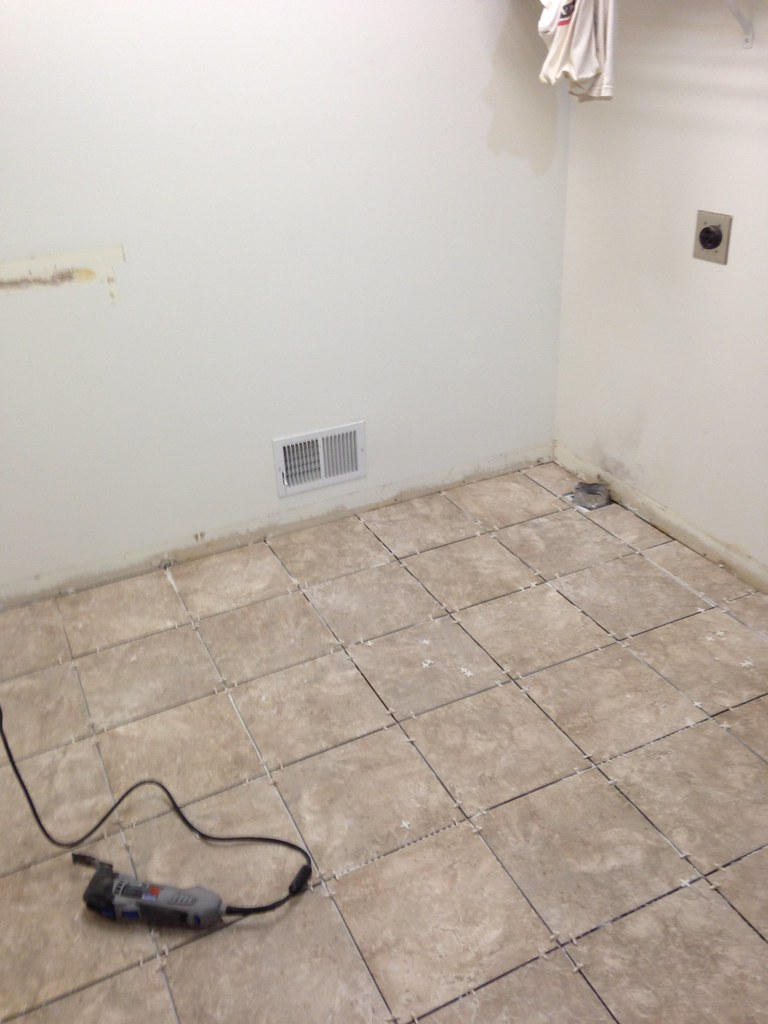
And then the tile itself.
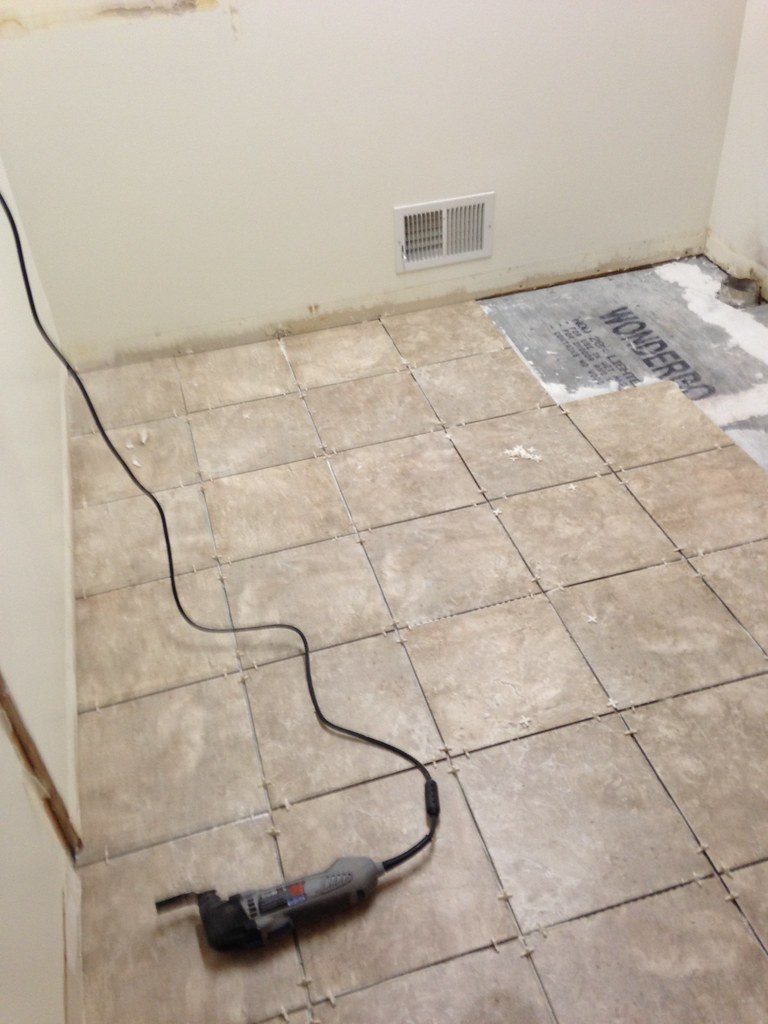 2014-03-15 16.30.32 by SameerPai, on Flickr
(Dremel there in case some things need a little encouraging to fit)
Fun Fact: I got this job quoted out to a tile installer, they quoted $1200 not including tile or demo to finish the 6.5'x10' rectangular space. I'm in the wrong line of work.
Another fun fact: Laying floor tile fvcking sucks. Get the best knee pads and elbow pads you can find.
Tile complete:
 2014-03-15 22.07.59 by SameerPai, on Flickr
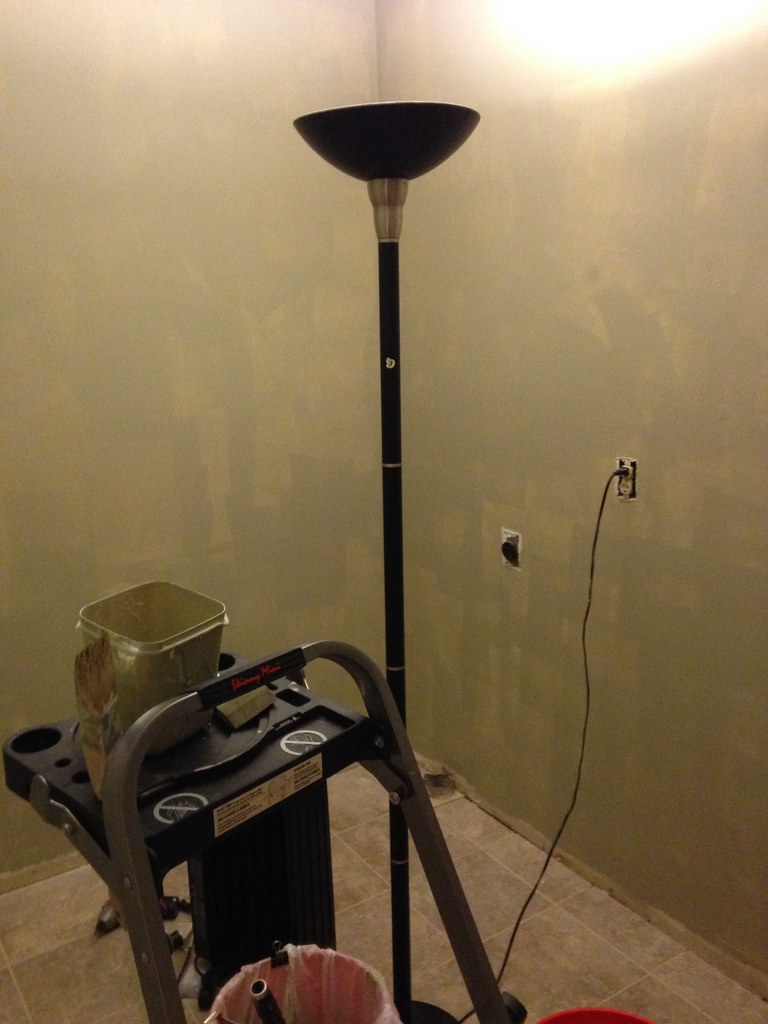
Paint testing begins:
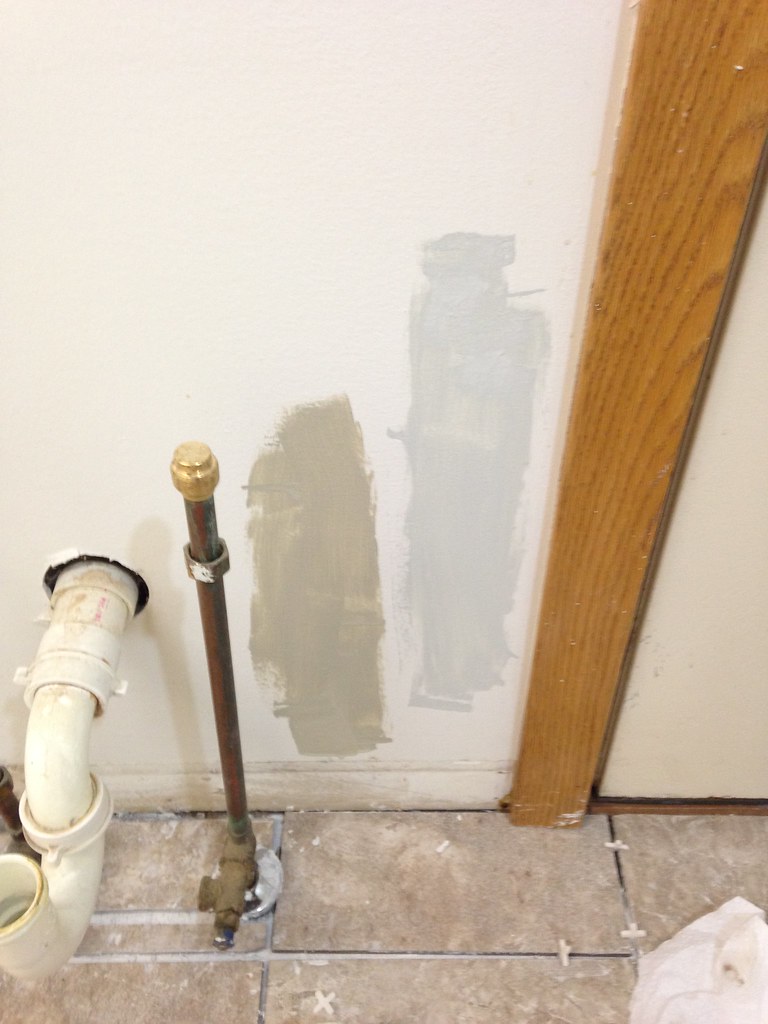 2014-03-16 21.16.25 by SameerPai, on Flickr
(the large gaps in those tiles was fixed. Most of it gets hidden anyway)
Grout complete:
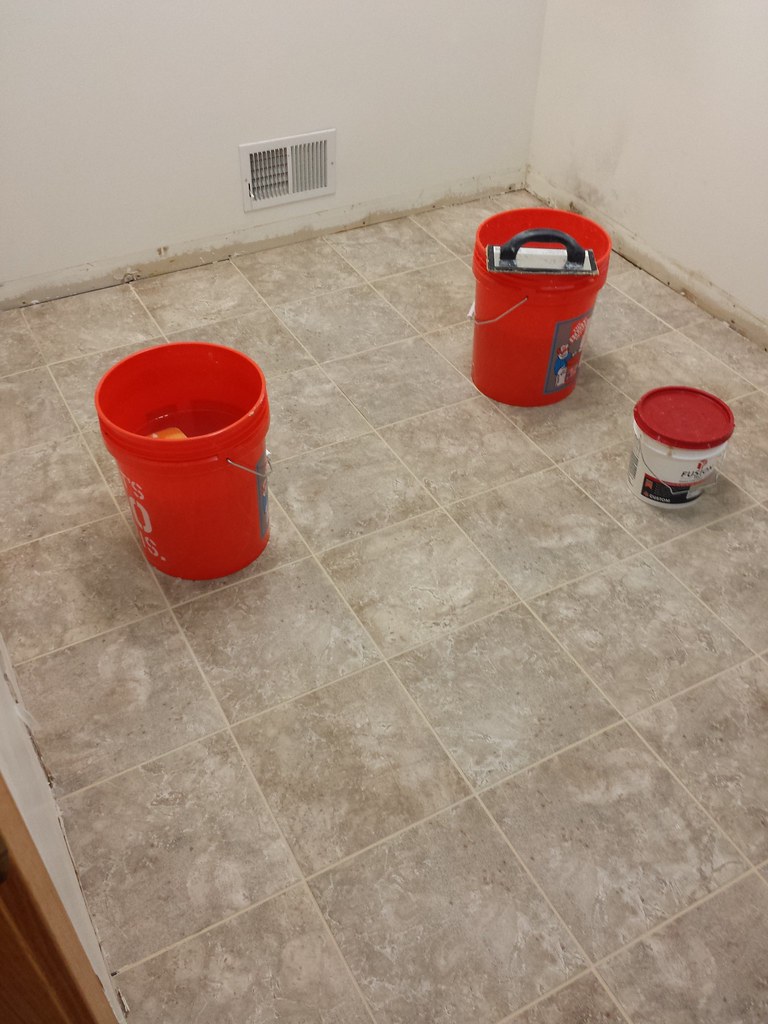 2014-03-17 21.42.31 by SameerPai, on Flickr
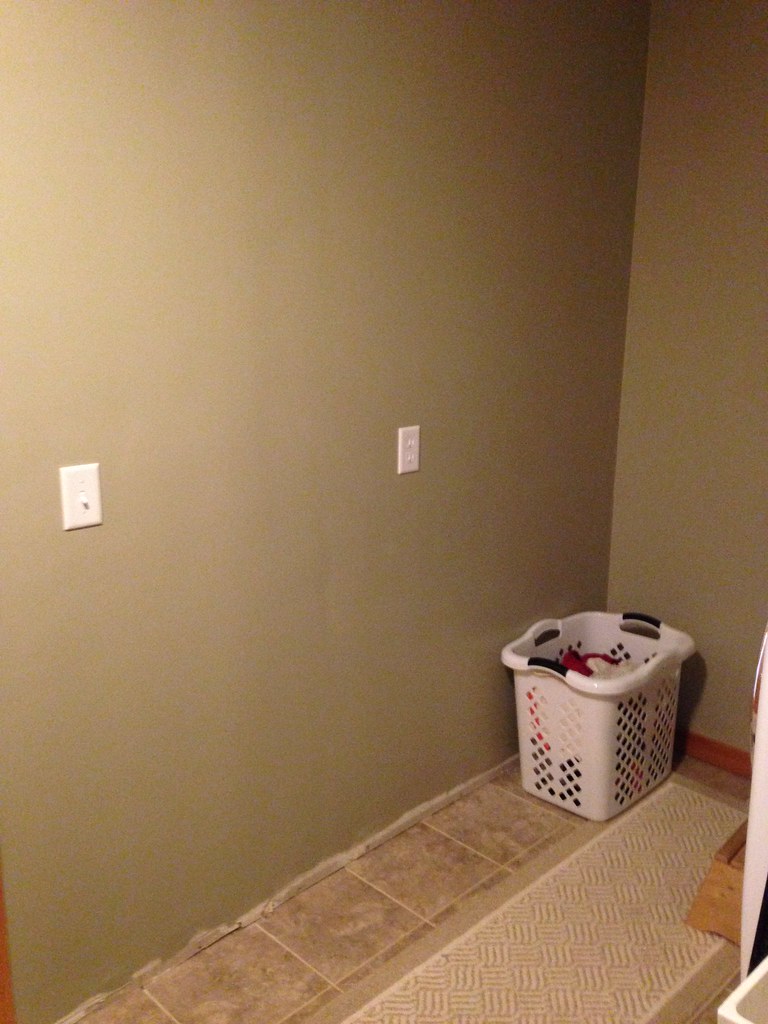
Wall shelving removed, this really opened the room up.
 2014-03-19 21.53.16 by SameerPai, on Flickr
Painting (this is the wife's job)
 2014-03-21 19.04.51 by SameerPai, on Flickr
New washer and dryer delivered. The utility sink next to them was reinstalled literally minutes before they arrived.
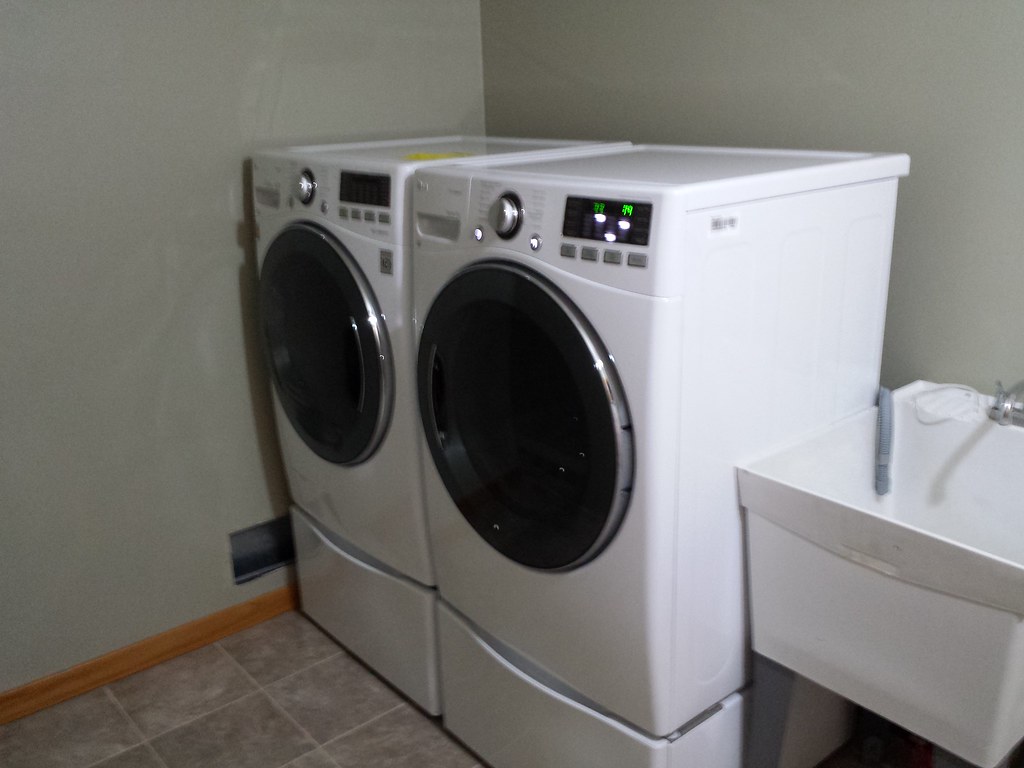 2014-03-22 11.39.35 by SameerPai, on Flickr
Electrical finished up and trim going back on
 2014-03-24 18.50.49 by SameerPai, on Flickr
I hate this light fixture the wife picked. Need to find a way to convince her to replace it with something better.
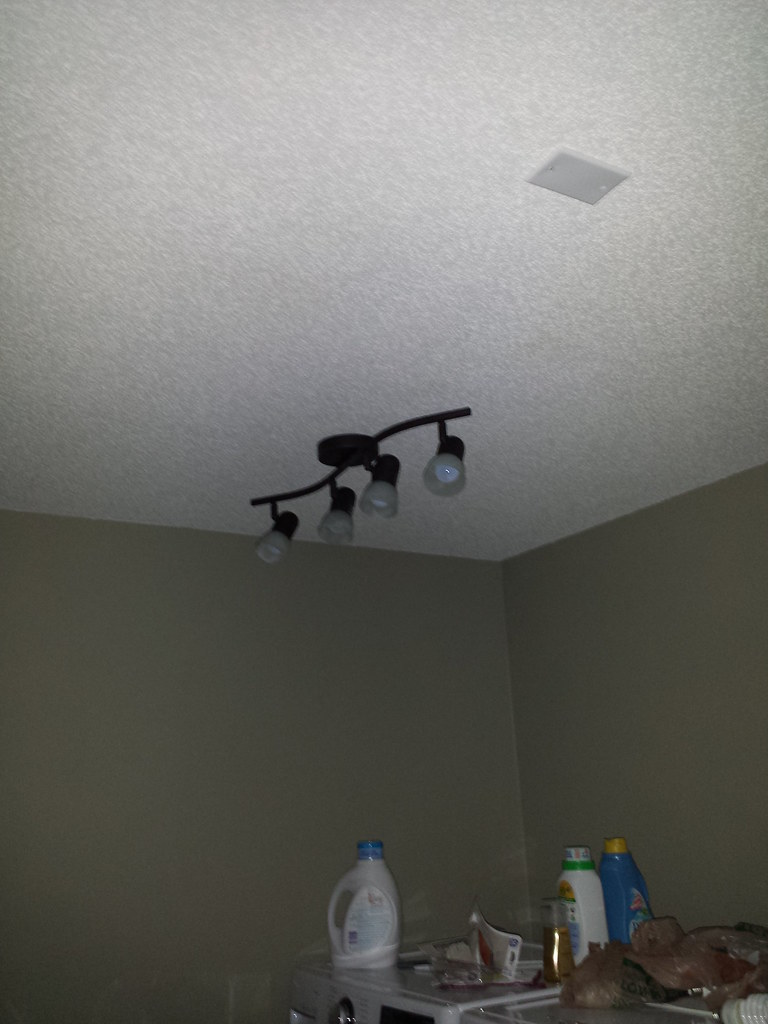 2014-03-24 19.01.13 by SameerPai, on Flickr
Last step is to install the cabinets above the washer and dryer. They are maple cabinets but painted white because that's what the boss wanted.
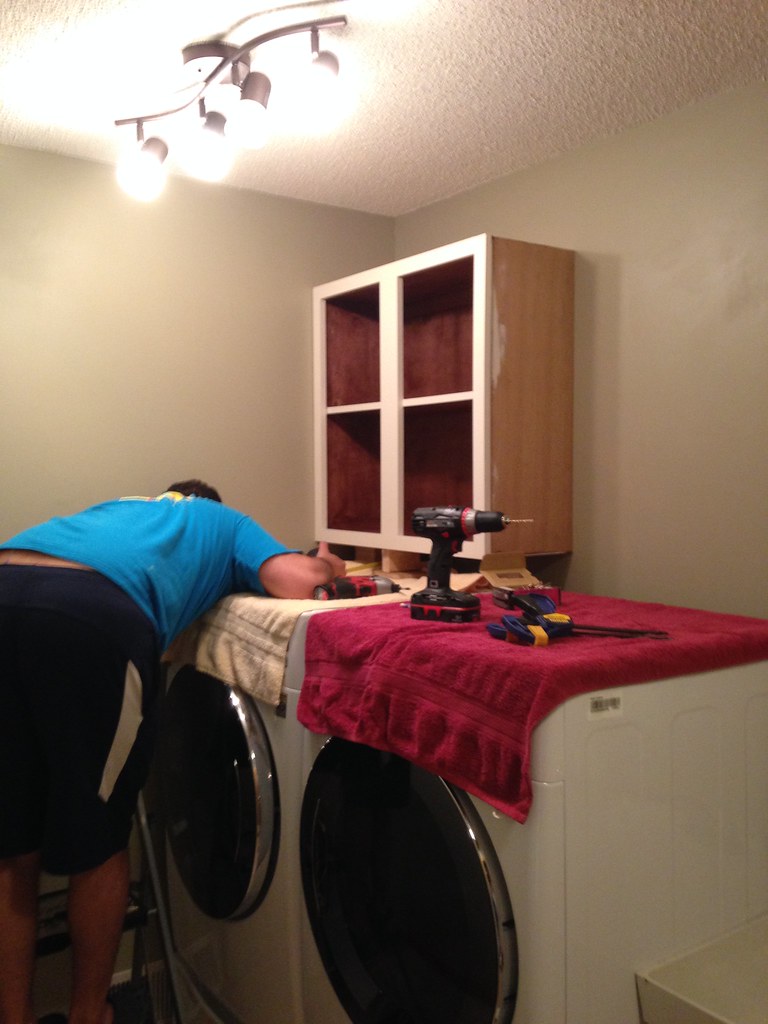 2014-06-01 14.07.08 by SameerPai, on Flickr
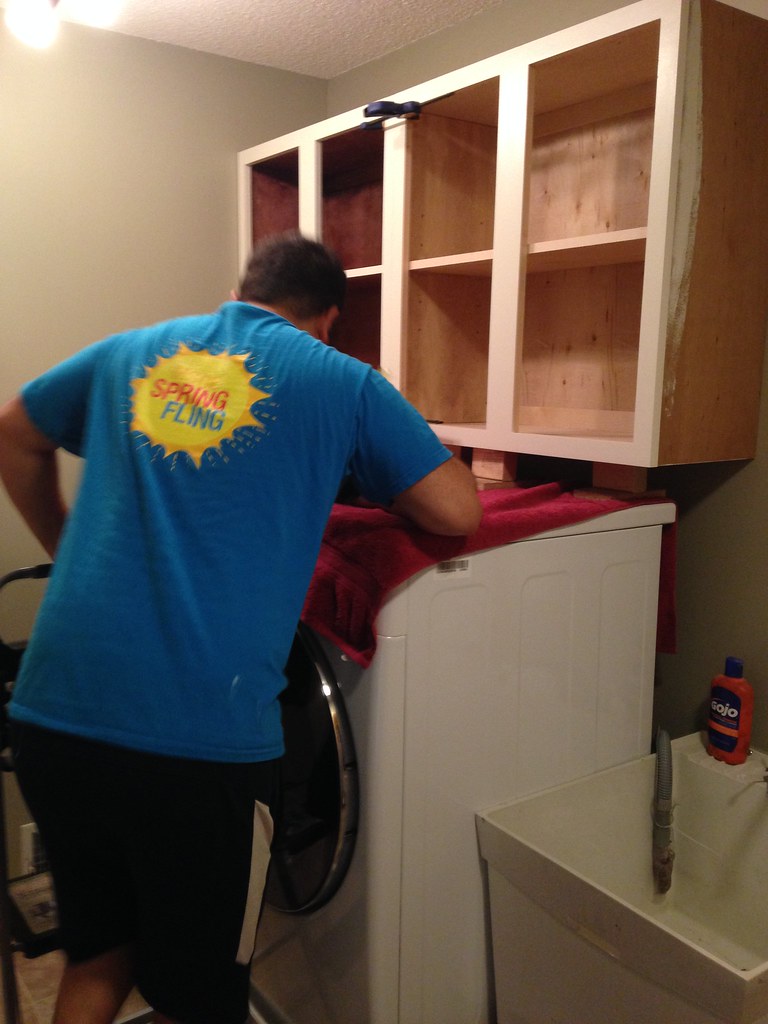 2014-06-01 14.17.26 by SameerPai, on Flickr
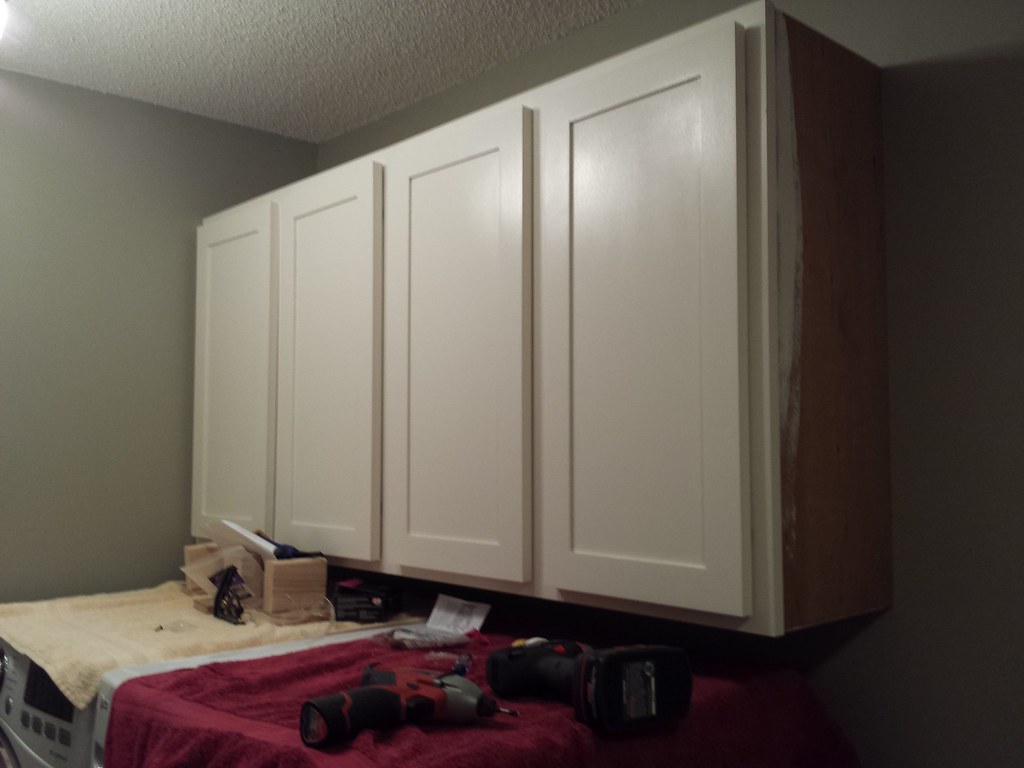 2014-06-07 16.32.54 by SameerPai, on Flickr
They have handles now and the side panel is finished but no pics were taken of those things.
That's it! We are really happy with how it turned out and the project was ~$700 including tools (not including washer/dryer) to finish it up. The space is much more useful and easy to work in. Thanks for reading!
Laundry room remodel.
Our washer and dryer that came with the house were about to take a huge sh1t and so we needed new ones. The way our laundry room was laid out made the space too small to even stand in, let alone bring in front load machines. Wife was fed up with it so it was time to grab the sawzall and get to work.
The before:
2014-03-08 10.06.39 by SameerPai, on FlickrYou can see how crowded and cramped it is with that big pantry in the way and the "folding table" (as it was sold to us) just takes up even more space. FWIW, it was never used to fold a damn thing.
Anyway, the tear down begins! Folding table removed and bought a 10 pack of sawzall blades and went to town on the pantry.
2014-03-08 12.30.08 by SameerPai, on FlickrAnd all removed, except for one piece of framing because it holds the electrical for the light in the room. You can see how much more space was opened up just by removing this one thing. (apologies for the crappy sort of panorama but that's the best my phone could do)
2014-03-08 22.25.52 by SameerPai, on FlickrI relocated that wiring to the wall that was staying and removed that last piece of framing.
Next up was time to get rid of the nasty yellow and old linoleum floor. Thankfully the builders installed the vinyl on top of a 3/4" plywood base over top of the subfloor. My buddy at work said that his house was the same thing and that base was just nailed/stapled to the subfloor so to just pry it out.
I was all psyched up to do this, stuck the pry bar under the plywood and pulled...and pulled...and pulled.
It was all screwed down. Fuck.
So then I used a magnet and marked all the screw locations and took the circular saw (set to depth in order to not damage subfloor) and cut all the shit out.
2014-03-11 21.10.04 by SameerPai, on FlickrNOTE: Dust masks are useful. I was coughing up sawdust for a week.
Next up was to put down the backer board for the tile:
2014-03-13 20.45.16 by SameerPai, on FlickrAnd then the tile itself.
2014-03-15 16.30.32 by SameerPai, on Flickr(Dremel there in case some things need a little encouraging to fit)
Fun Fact: I got this job quoted out to a tile installer, they quoted $1200 not including tile or demo to finish the 6.5'x10' rectangular space. I'm in the wrong line of work.
Another fun fact: Laying floor tile fvcking sucks. Get the best knee pads and elbow pads you can find.
Tile complete:
2014-03-15 22.07.59 by SameerPai, on FlickrPaint testing begins:
2014-03-16 21.16.25 by SameerPai, on Flickr(the large gaps in those tiles was fixed. Most of it gets hidden anyway)
Grout complete:
2014-03-17 21.42.31 by SameerPai, on FlickrWall shelving removed, this really opened the room up.
2014-03-19 21.53.16 by SameerPai, on FlickrPainting (this is the wife's job)
2014-03-21 19.04.51 by SameerPai, on FlickrNew washer and dryer delivered. The utility sink next to them was reinstalled literally minutes before they arrived.
2014-03-22 11.39.35 by SameerPai, on FlickrElectrical finished up and trim going back on
2014-03-24 18.50.49 by SameerPai, on FlickrI hate this light fixture the wife picked. Need to find a way to convince her to replace it with something better.
2014-03-24 19.01.13 by SameerPai, on FlickrLast step is to install the cabinets above the washer and dryer. They are maple cabinets but painted white because that's what the boss wanted.
2014-06-01 14.07.08 by SameerPai, on Flickr2014-06-01 14.17.26 by SameerPai, on Flickr2014-06-07 16.32.54 by SameerPai, on FlickrThey have handles now and the side panel is finished but no pics were taken of those things.
That's it! We are really happy with how it turned out and the project was ~$700 including tools (not including washer/dryer) to finish it up. The space is much more useful and easy to work in. Thanks for reading!

Thread Starter
Ex-OEM King
Joined: Dec 2013
Posts: 17,880
Likes: 7,027
From: Minnesnowta
Nothing huge but the water softener took a shit over the weekend. Something got clogged up inside and tripped the pressure release valve. The whole thing was on its last leg and needed a new top unit and resin so we just sprung for a new one.
Got a GE 40k grain model from the Depot for ~$430 and installed it in an hour. Super easy if anyone is thinking about replacing theirs.
Got a GE 40k grain model from the Depot for ~$430 and installed it in an hour. Super easy if anyone is thinking about replacing theirs.