
CCColtsicehockey's Home Projects Thread

Thread Starter
Moderator
Regional Coordinator (Southeast)
Regional Coordinator (Southeast)


Joined: Dec 2003
Posts: 44,123
Likes: 4,434
From: Mooresville, NC
I didn't even think of the changing seasons, shit...
stupid question or maybe idea but have you considered building an even bigger structure over it?
So there's a roof to take the brunt of the elements and protect your work of art? Maybe even big
enough to hang some all weather marine speakers and or provide shelter for a couple of chairs to be scooted
close to the TV in case you're in the middle of watching a game and the rain starts coming down?
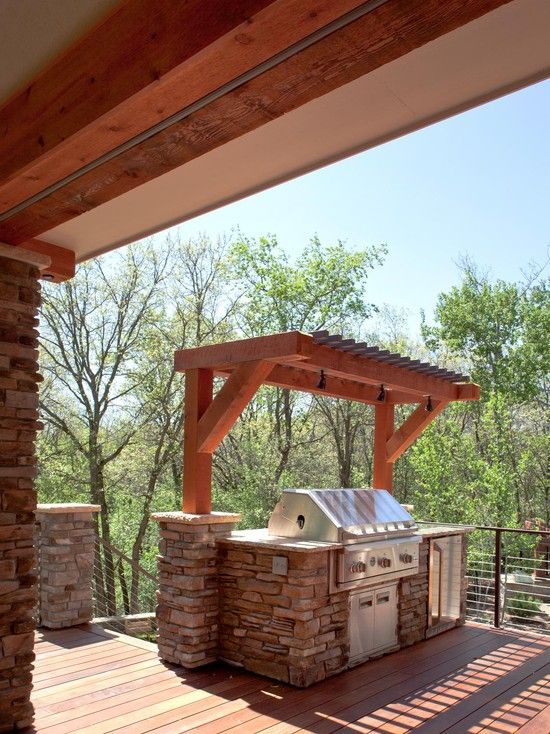
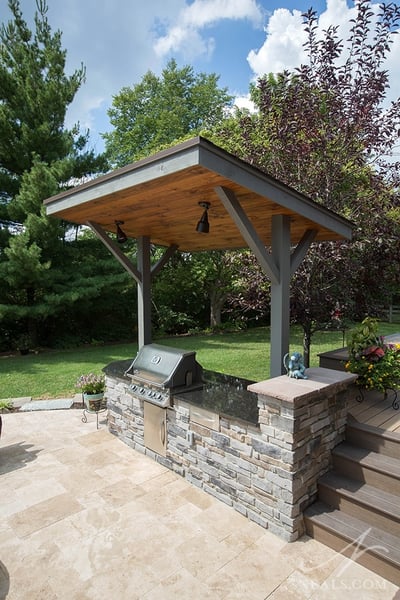
I do plan to eventually build a small roof structure directly over it that might provide a little protection but might be more astetic and a place to mount the speakers. The trees on either side of the cabinet are either dead or on their last leg. The upper half of them is already dead and doesn't have any green leaves but the lower half still does each year. Need to cut the tops off safely if I can to try and save them. I don't want a roof over the entire area though cause I still want the open out door feel of sitting in a tree canopy which is the feel it has right now. The roof honestly though will mostly provide a good permanent two posts to mount my lights from and also give me better sound from the existing speakers since they will have a solid surface then for the base radiator to reflect off of.
Would be something like this most likely in the next 1-3 years.


Thread Starter
Moderator
Regional Coordinator (Southeast)
Regional Coordinator (Southeast)
Joined: Dec 2003
Posts: 44,123
Likes: 4,434
From: Mooresville, NC
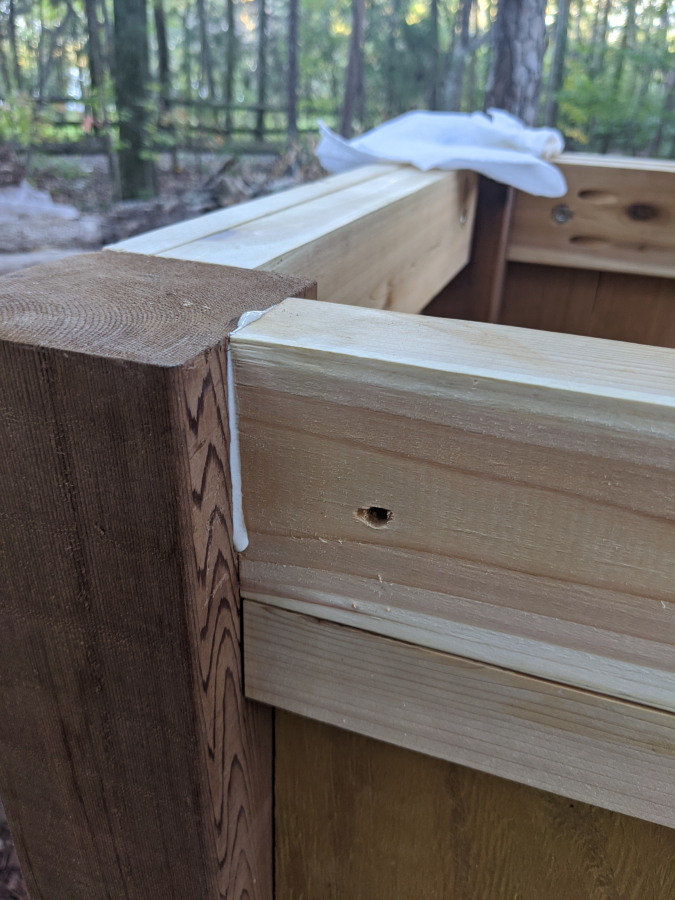
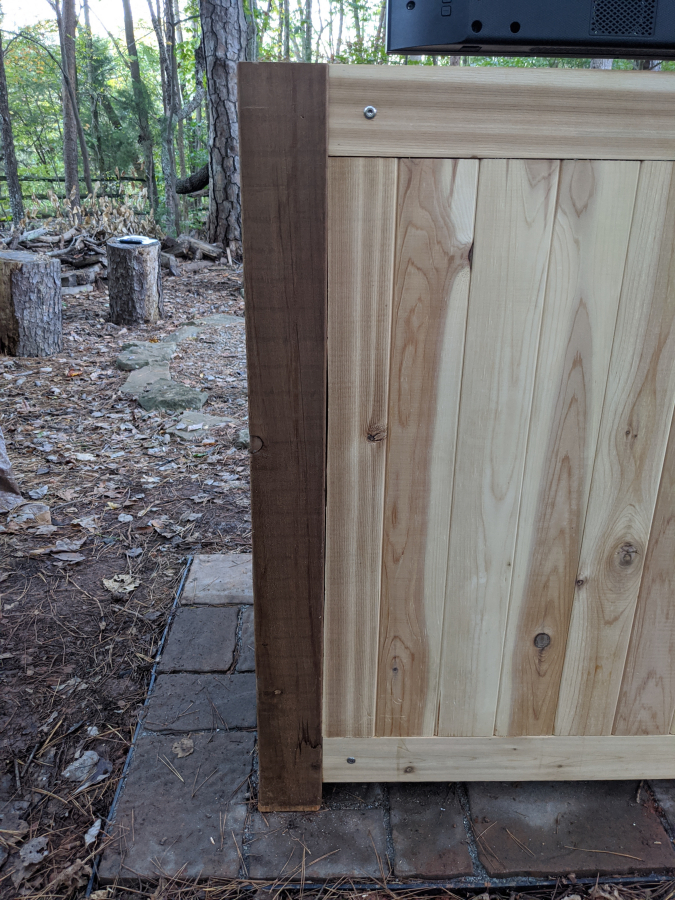
Well, moisture movement finally got the best of me with the cabinet getting wet so often due to the lack of a proper cover.
Took the temporary plastic and tarp two layer cover off the other weekend to find this wood separation.
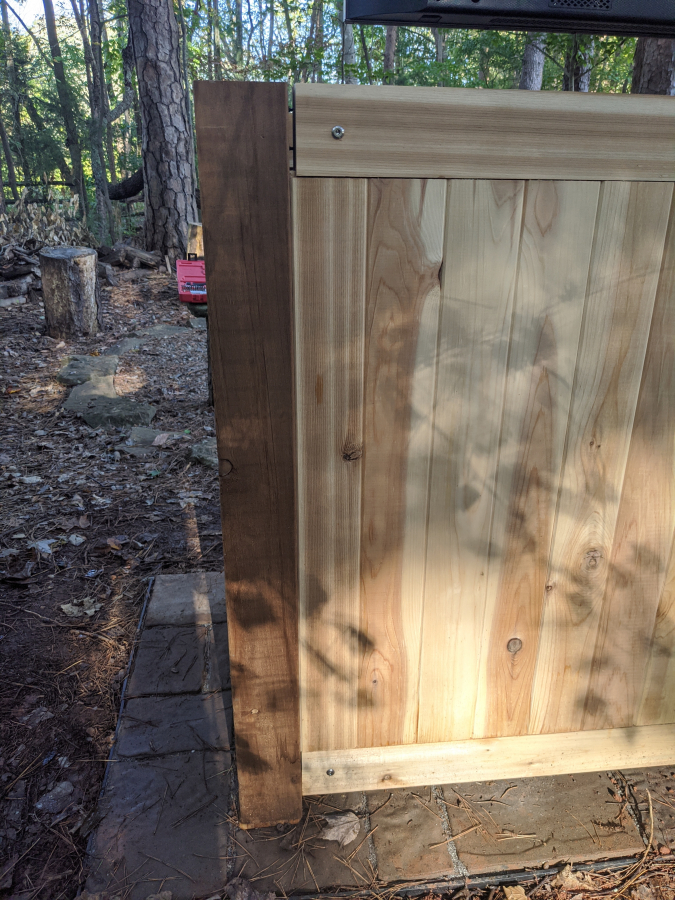
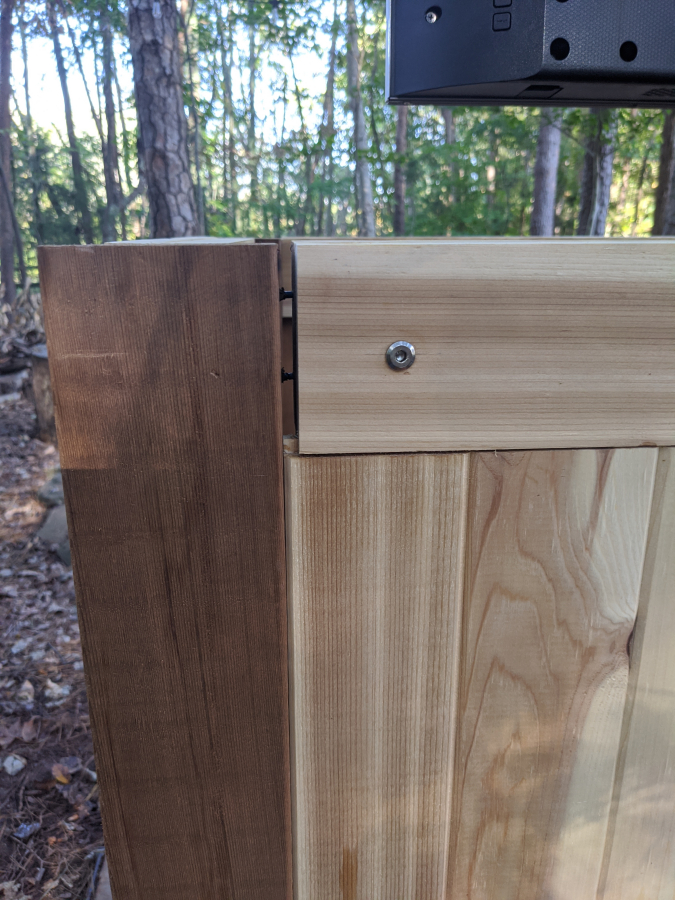
The boards had all expand and push about 3/16 out the side
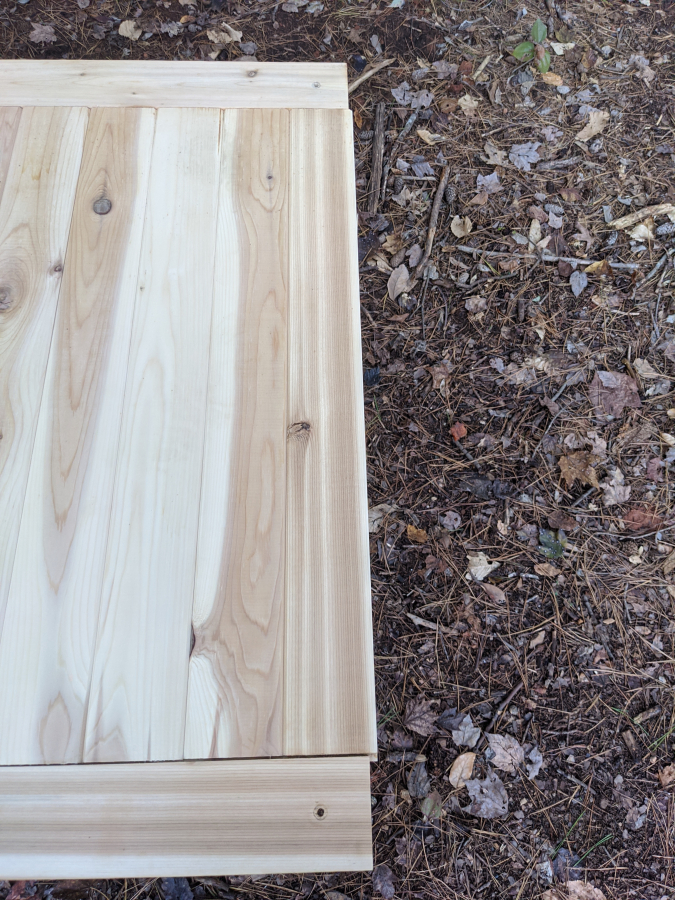
I reglued and added some additional screws to hold the top rail in place
I used my jigsaw and a straight edge to cut off the wood that expanded off the one end. Had to do some additional sanding and then tap it back in place. I am sure it eventually will shrink and leave a gap but will just have to deal with that.
I have also had a little bit of separation on the lid trim. It isn't a lot so I plan to just fill the gap with some wood glue and leftover cedar saw dust.
Took the temporary plastic and tarp two layer cover off the other weekend to find this wood separation.
The boards had all expand and push about 3/16 out the side
I reglued and added some additional screws to hold the top rail in place
I used my jigsaw and a straight edge to cut off the wood that expanded off the one end. Had to do some additional sanding and then tap it back in place. I am sure it eventually will shrink and leave a gap but will just have to deal with that.
I have also had a little bit of separation on the lid trim. It isn't a lot so I plan to just fill the gap with some wood glue and leftover cedar saw dust.

You used tongue and groove board for the vertical panels, right? Did you leave a little bit of space between each board (like 1/16", so the tongue is still engaged in the groove but not bottomed out)? I think allowing those panels to float would be much better compared to adding more screws - that could potentially cause the vertical panels to split/buckle if they swell too much (and 3/16" can certainly do that).


Ex-OEM King


Joined: Dec 2013
Posts: 17,880
Likes: 7,027
From: Minnesnowta
You used tongue and groove board for the vertical panels, right? Did you leave a little bit of space between each board (like 1/16", so the tongue is still engaged in the groove but not bottomed out)? I think allowing those panels to float would be much better compared to adding more screws - that could potentially cause the vertical panels to split/buckle if they swell too much (and 3/16" can certainly do that).
CC, you really should start looking into dowel joinery. It'll be an awesome step up for you over pocket holes.

Last edited by civicdrivr; Nov 8, 2019 at 10:35 AM.
Needs more Lemon Pledge
Joined: Mar 2005
Posts: 52,768
Likes: 2,000
From: Phoenix, AZ
I know nothing about wood working, but could you also router out a 3/16" channel in the 4x4 end post the same length as the last board to give that board somewhere to expand into and then contract from?
Ex-OEM King
Joined: Dec 2013
Posts: 17,880
Likes: 7,027
From: Minnesnowta
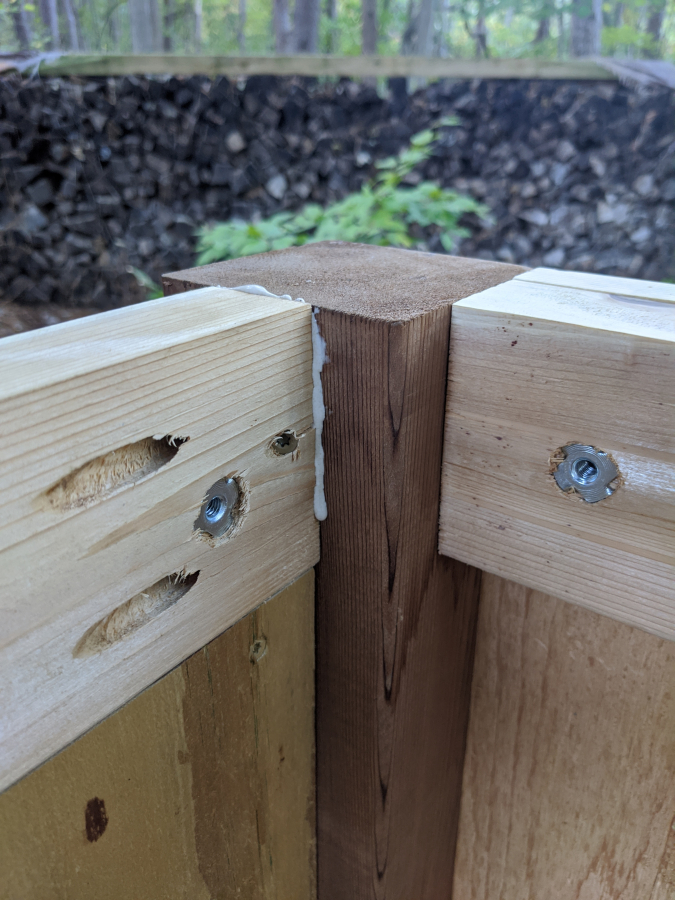
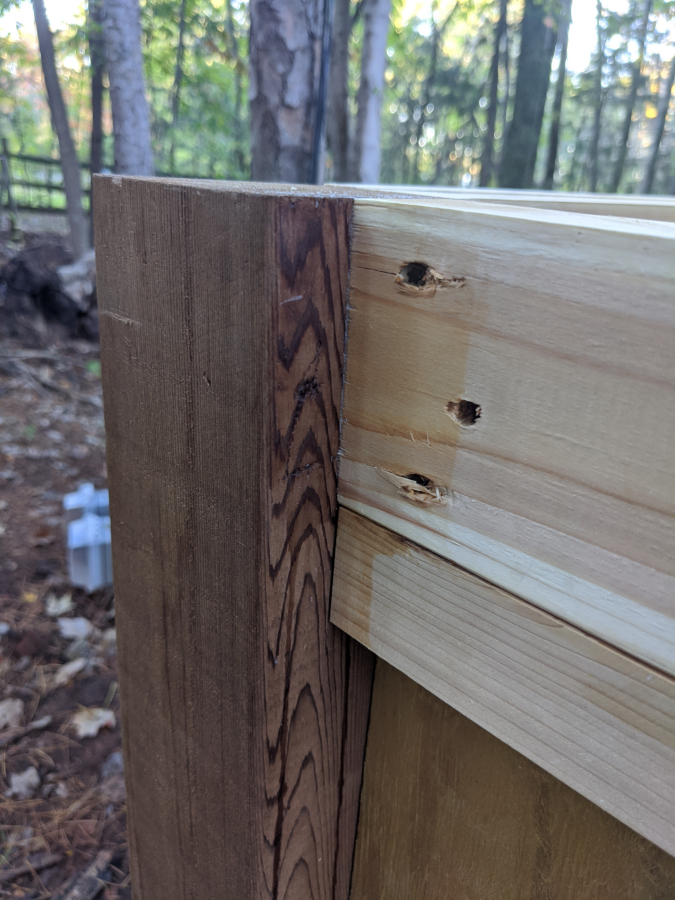
Right, which is why I was focusing on the t&g board - that is what expanded. If they were bottomed out and joined tightly upon initial construction, that's what caused the separation (circled in blue). Floating them (and maybe I'm not using the right term here) would allow them to expand and contract without causing that separation. Obviously, the horizontal ends would need to be sized appropriately as well.
Yup, but you'd want to pre-set it into that groove to some degree to prevent it from not sliding in when it needs to expand into that space...otherwise it makes it much worse lol.

Team Owner
Joined: Oct 2003
Posts: 37,707
Likes: 3,905
From: Chicago
You have essentially built a raised panel without floating the panel at all. You need to allow the rails’ stiles, and panel to expand and contract. The panel should be glued up to keep it tight, and there should be a groove that it floats in on all four sides.
You might be able to find some kind of compressible rubber pieces that you can put in the grooves to keep the panel centered and prevent rattles while still allowing movement.
Think of the construction of a cabinet door— that is what you want but on a larger scale. There is a product called Space Balls that keep the panel from rattling in a cabinet door. I am not sure you can get them large enough for this project.
Thread Starter
Moderator
Regional Coordinator (Southeast)
Regional Coordinator (Southeast)
Joined: Dec 2003
Posts: 44,123
Likes: 4,434
From: Mooresville, NC
You used tongue and groove board for the vertical panels, right? Did you leave a little bit of space between each board (like 1/16", so the tongue is still engaged in the groove but not bottomed out)? I think allowing those panels to float would be much better compared to adding more screws - that could potentially cause the vertical panels to split/buckle if they swell too much (and 3/16" can certainly do that).
Ah sorry, misread your post then. The pieces are floating, meaning the tongue is not glued into the groove, only the middle one is glued in place to provide some structure. If you left a gap, it would mitigate the issue but it would leave a gap and he wanted it to be somewhat water resistant. I wouldn't be worried about the vertical expansion of the top/bottom pieces, that's not enough to cause a problem with a piece that size.
Yup, but you'd want to pre-set it into that groove to some degree to prevent it from not sliding in when it needs to expand into that space...otherwise it makes it much worse lol.
Yup, but you'd want to pre-set it into that groove to some degree to prevent it from not sliding in when it needs to expand into that space...otherwise it makes it much worse lol.
Thread Starter
Moderator
Regional Coordinator (Southeast)
Regional Coordinator (Southeast)
Joined: Dec 2003
Posts: 44,123
Likes: 4,434
From: Mooresville, NC
Wood really only expands and contracts in the direction perpendicular to the grain direction so there's going to be very minimal dimensional movement up and down for that panel.
CC, you really should start looking into dowel joinery. It'll be an awesome step up for you over pocket holes.
CC, you really should start looking into dowel joinery. It'll be an awesome step up for you over pocket holes.
Thread Starter
Moderator
Regional Coordinator (Southeast)
Regional Coordinator (Southeast)
Joined: Dec 2003
Posts: 44,123
Likes: 4,434
From: Mooresville, NC
You have essentially built a raised panel without floating the panel at all. You need to allow the rails� stiles, and panel to expand and contract. The panel should be glued up to keep it tight, and there should be a groove that it floats in on all four sides.
You might be able to find some kind of compressible rubber pieces that you can put in the grooves to keep the panel centered and prevent rattles while still allowing movement.
Think of the construction of a cabinet door� that is what you want but on a larger scale. There is a product called Space Balls that keep the panel from rattling in a cabinet door. I am not sure you can get them large enough for this project.
The original point of the removable panels was so that it would make any issues with the inner electronics easy to repair.
Ex-OEM King
Joined: Dec 2013
Posts: 17,880
Likes: 7,027
From: Minnesnowta
You have essentially built a raised panel without floating the panel at all. You need to allow the rails� stiles, and panel to expand and contract. The panel should be glued up to keep it tight, and there should be a groove that it floats in on all four sides.
You might be able to find some kind of compressible rubber pieces that you can put in the grooves to keep the panel centered and prevent rattles while still allowing movement.
Think of the construction of a cabinet door� that is what you want but on a larger scale. There is a product called Space Balls that keep the panel from rattling in a cabinet door. I am not sure you can get them large enough for this project.
You might be able to find some kind of compressible rubber pieces that you can put in the grooves to keep the panel centered and prevent rattles while still allowing movement.
Think of the construction of a cabinet door� that is what you want but on a larger scale. There is a product called Space Balls that keep the panel from rattling in a cabinet door. I am not sure you can get them large enough for this project.
Team Owner
Joined: Oct 2003
Posts: 37,707
Likes: 3,905
From: Chicago
Having only the middle board glued in serves this same purpose no? All of the slats are floating except for the middle one which allows for the rest of them to float while being contained by the end posts on either side. I think if you constrained on all four sides, this would have been much worse because of the amount of wood movement in the panel as a whole.
Last edited by svtmike; Nov 12, 2019 at 09:34 AM.
Senior Moderator

Joined: Apr 2010
Posts: 48,312
Likes: 9,177
From: SoCal, CA

Moderator


Joined: Aug 2010
Posts: 29,723
Likes: 6,528
From: Spring, TX
Was gifted a saw stand (fixed, no wheels). Attempted to re-mount the saw to the clamps, holes on the saw are offset & don't line up to the slots on the clamps 
Had to fab up a piece of plywood to mount the saw on & mount that to the clamps. But, can't beat free.
Had to fab up a piece of plywood to mount the saw on & mount that to the clamps. But, can't beat free.
Thread Starter
Moderator
Regional Coordinator (Southeast)
Regional Coordinator (Southeast)
Joined: Dec 2003
Posts: 44,123
Likes: 4,434
From: Mooresville, NC
Joined: Sep 2008
Posts: 78,249
Likes: 20,202
am I a barbarian for still kneeling down on the ground and cutting it on the ground in the grass outside the house?
I use the sawdust like fertilizer for the grass!
I use the sawdust like fertilizer for the grass!

Ex-OEM King
Joined: Dec 2013
Posts: 17,880
Likes: 7,027
From: Minnesnowta

I cut shit on the grass with my cordless circular saw all the time. Less clean up.
Senior Moderator
Joined: Apr 2010
Posts: 48,312
Likes: 9,177
From: SoCal, CA

Joined: Sep 2008
Posts: 78,249
Likes: 20,202

Ex-OEM King
Joined: Dec 2013
Posts: 17,880
Likes: 7,027
From: Minnesnowta
Thread Starter
Moderator
Regional Coordinator (Southeast)
Regional Coordinator (Southeast)
Joined: Dec 2003
Posts: 44,123
Likes: 4,434
From: Mooresville, NC
No I did this for years when doing smaller projects. I did this for my entire kegorator build as well. That was my first bigger build with many more cuts and when I decided I needed something else as for all that it was killing my back. Also easier when cutting larger pieces with the support arms the stand has. Again not completely needed but definitely helps for speed, consistency, and back saving.
Thread Starter
Moderator
Regional Coordinator (Southeast)
Regional Coordinator (Southeast)
Joined: Dec 2003
Posts: 44,123
Likes: 4,434
From: Mooresville, NC
This year made sure to get work on the yard done on time and actually get weed and feed down as well as tried out for the first time the Milogranite that @stogie1020 has been using with great success on his lawn. Weed and feed was put down three weeks ago and the Milogranite was put down a week ago. Looking pretty good so far. There are some weeds that didn't die that I need to deal with. Hoping maybe the overseeding plus the Milogranite strengthing everything might force them out as some of the reviews I read of that stuff indicated people had success with weed patches just not surviving with frequent mowings after that was put down. Overall looking as good as it ever has since I moved in.
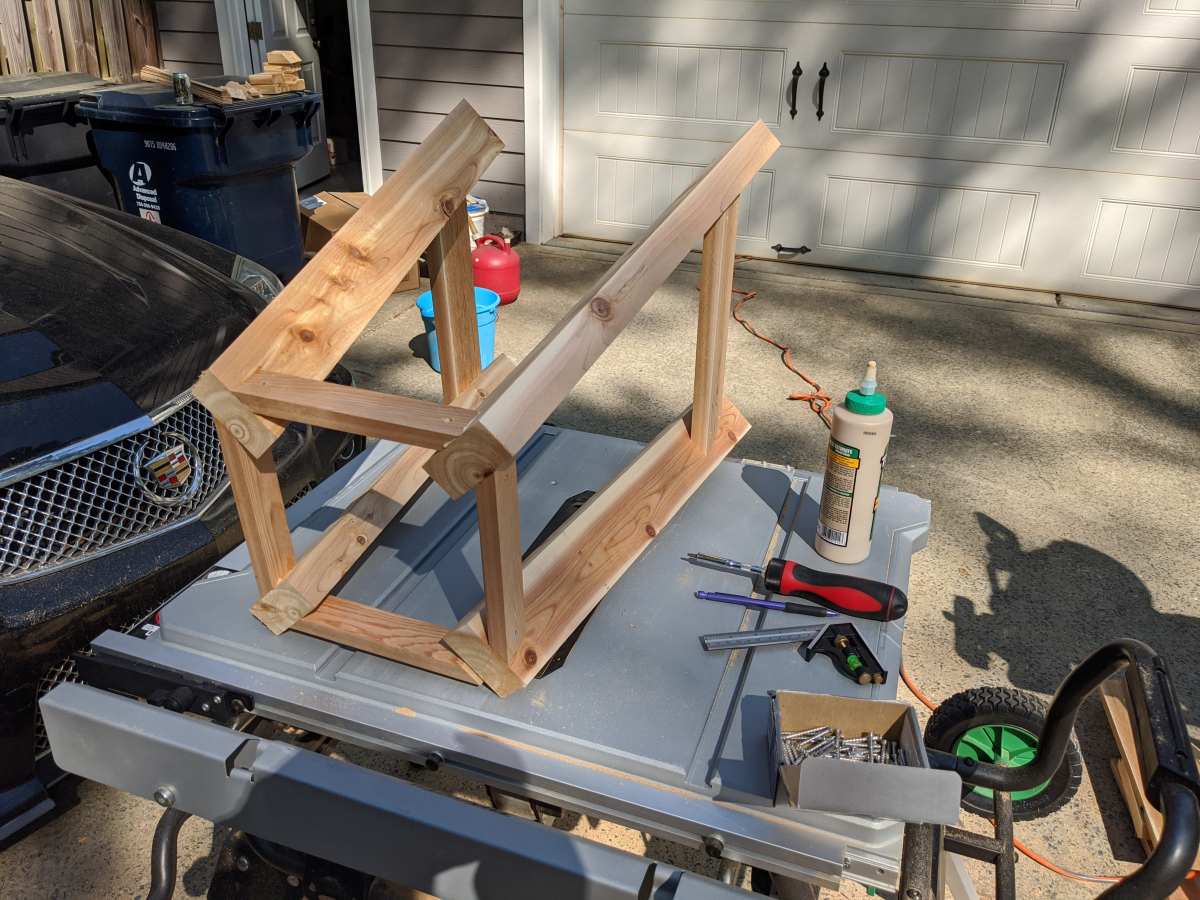
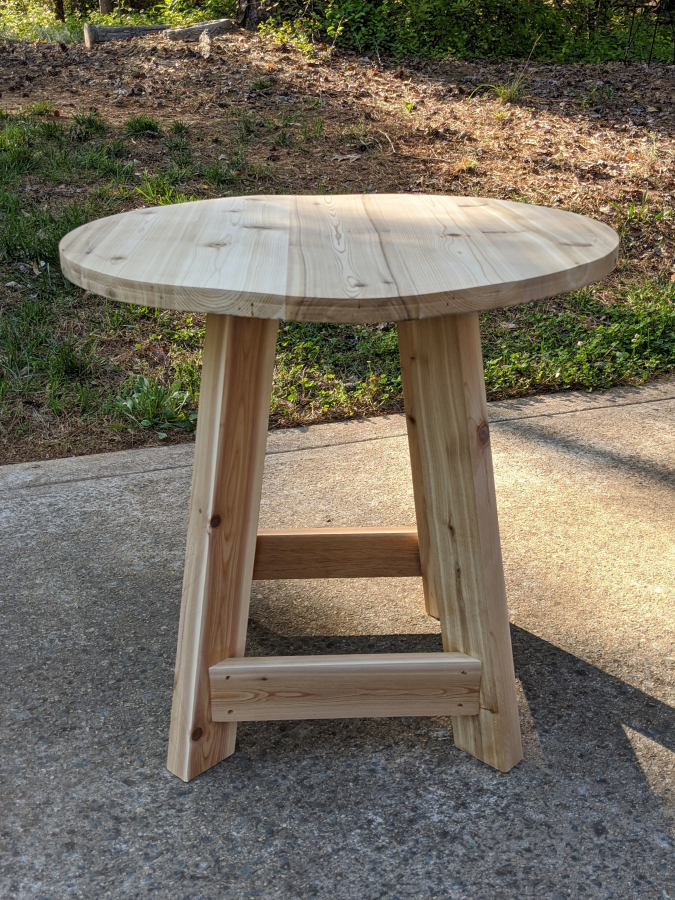
So been a while since I did a wood project and had one that wasn't too much work I wanted to get finished. I had the center piece I cut out of my egg table a while back that I figured would make a great small patio table. The original plan for the table was to build it to look like this table with tripod legs. However, once I got under way I quickly realized I didn't have an easy way to cut a 60 degree angle on the braces between legs. So I changed the design to be four legs and only needing 45 degree cuts which I could do easy.
This was my inspiration

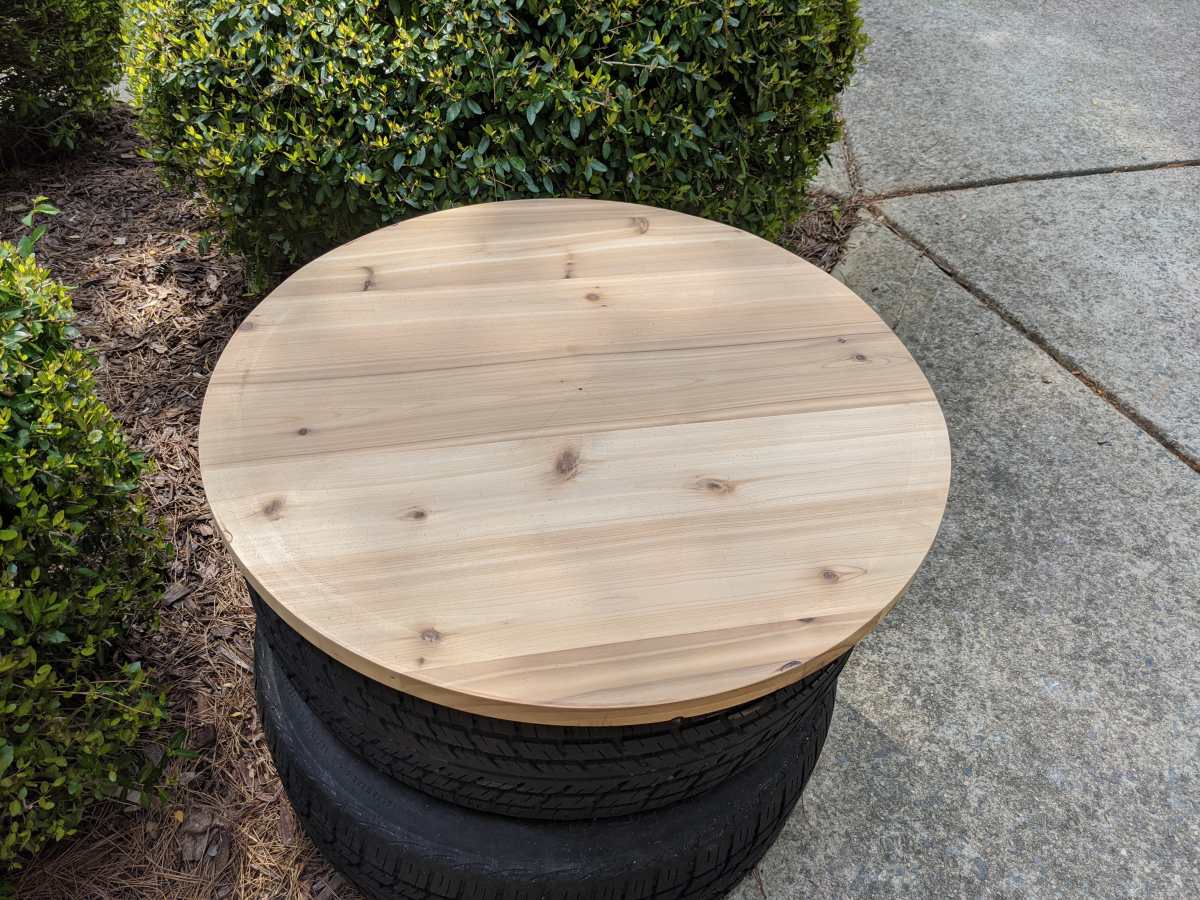
Circle top I had leftover. It has unfortunately warped a bit sitting in the garage over a year.
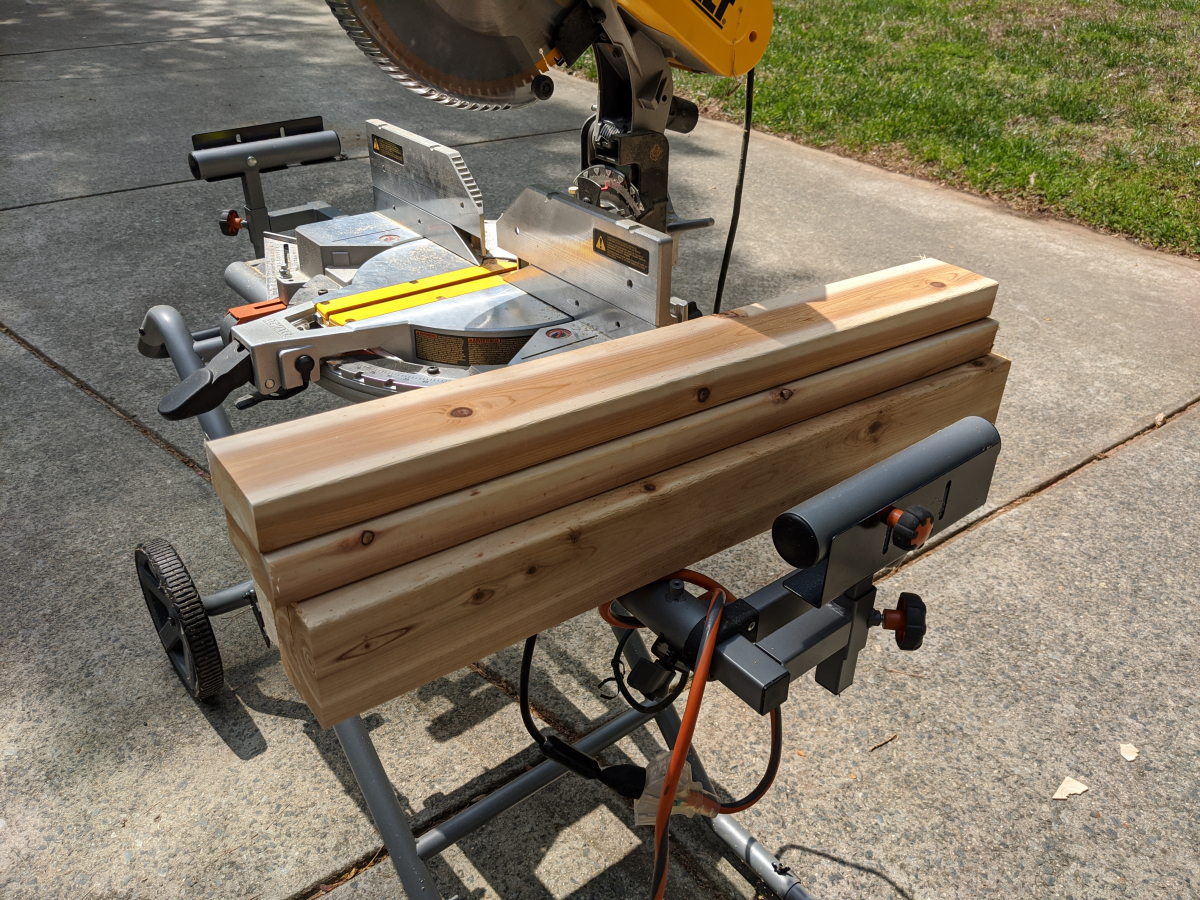
Picked up two cedar 2x4s and cut them up into 30in sections. Then I ripped them on the table saw down to 3in wide to square them off.
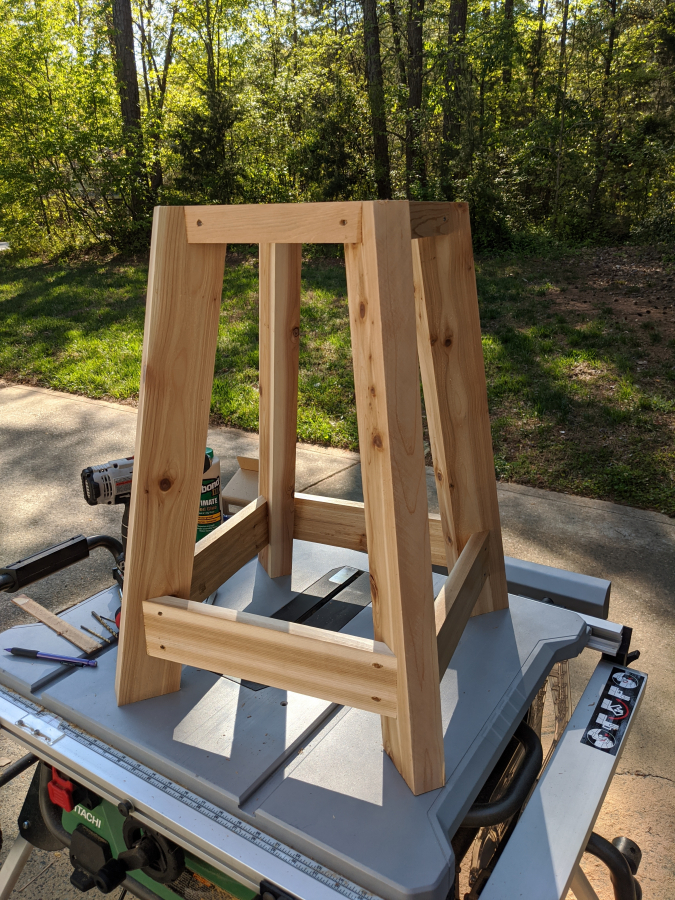
Working on putting the base together.
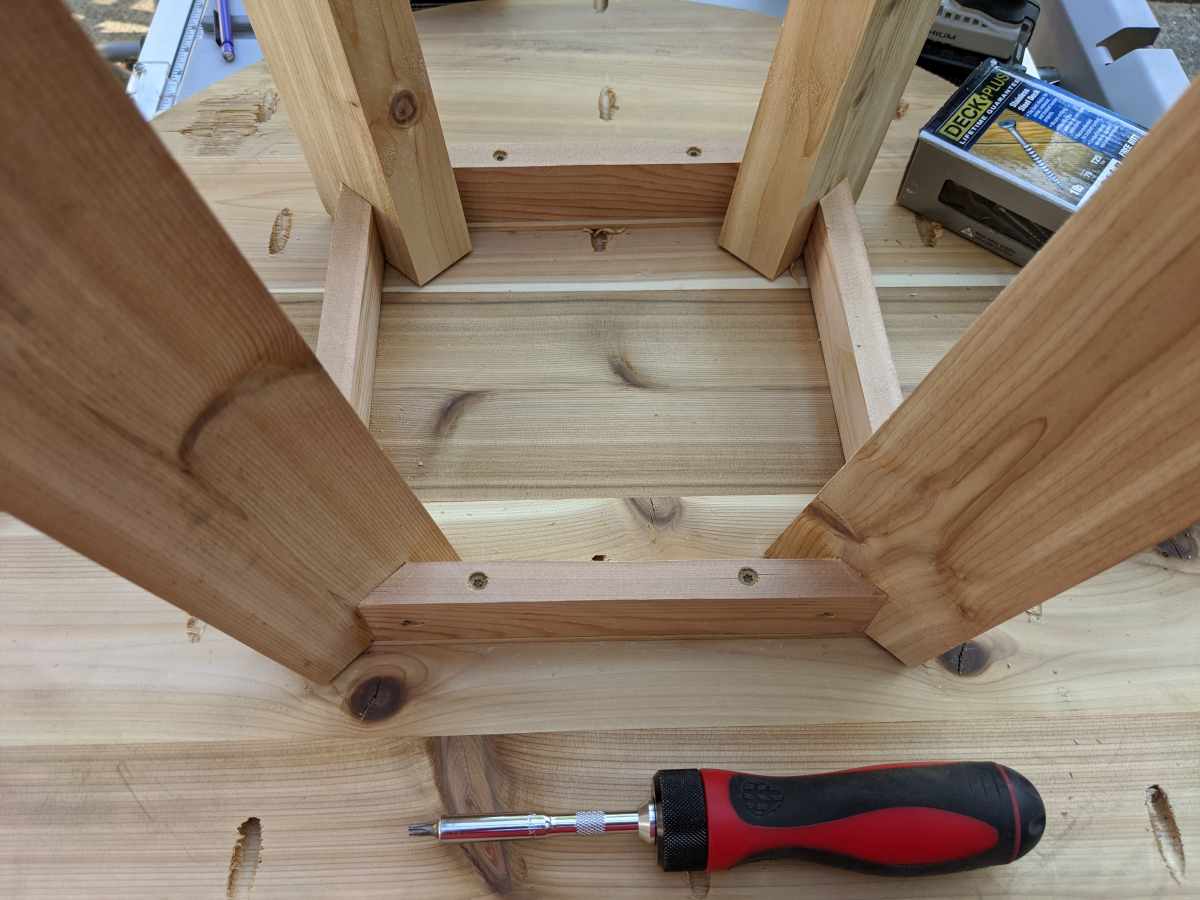
I screwed the top on like this and later realized my this was a really poor choice cause I let no room for moisture expansion. I will be taking it back apart and using four figure-eight fasteners to attach the top tonight. You can also see the shims I had to use to make the top sit flat since it is warped. Will be interesting to make this work with the figure-eight fasteners work with them.
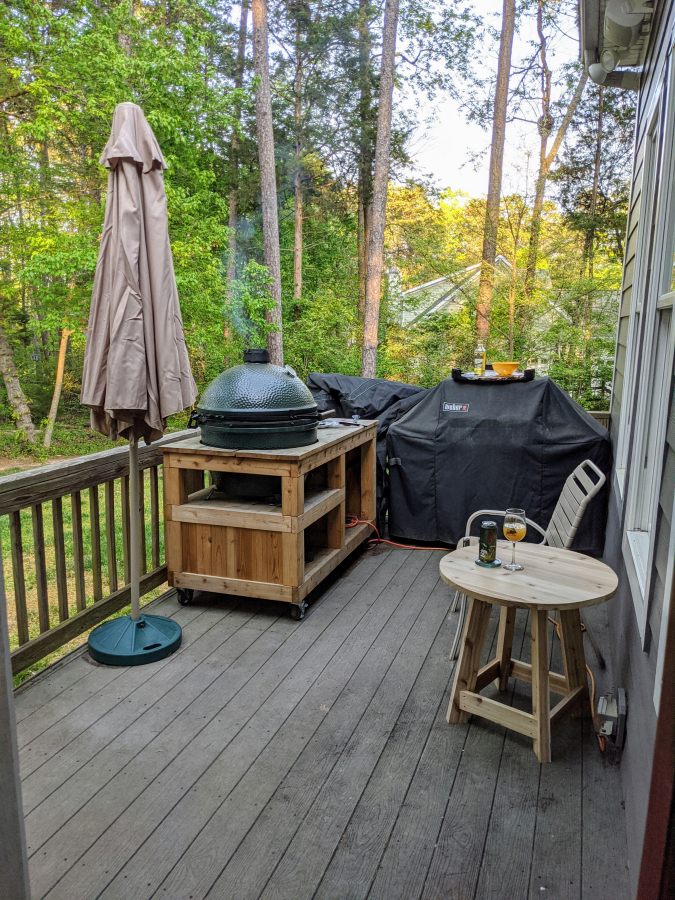
Finished patio table
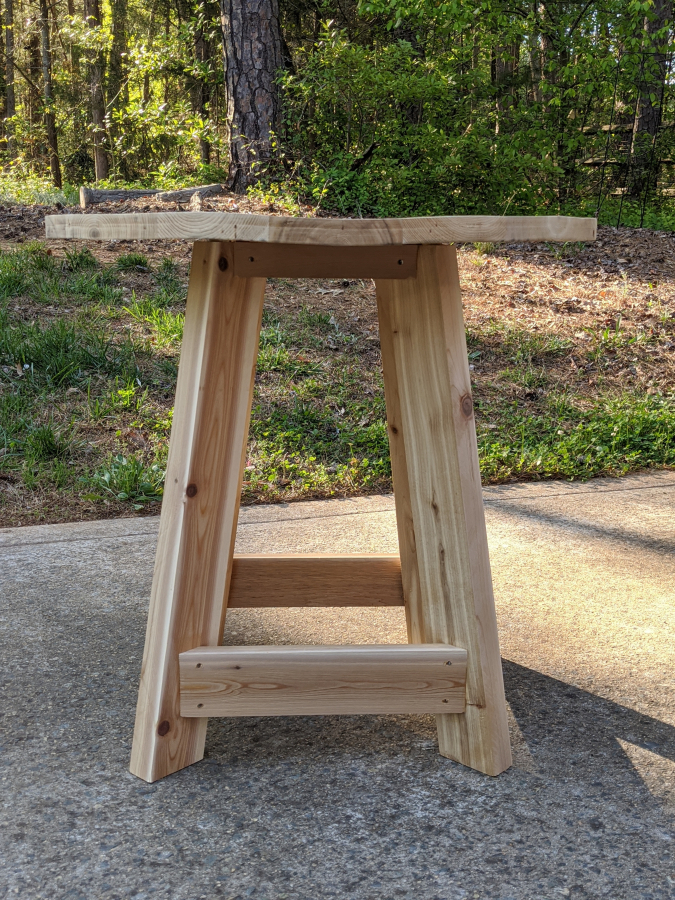
My deck feels much less cluttered with this table now since I got rid of the full 4 person table I had on the deck before.
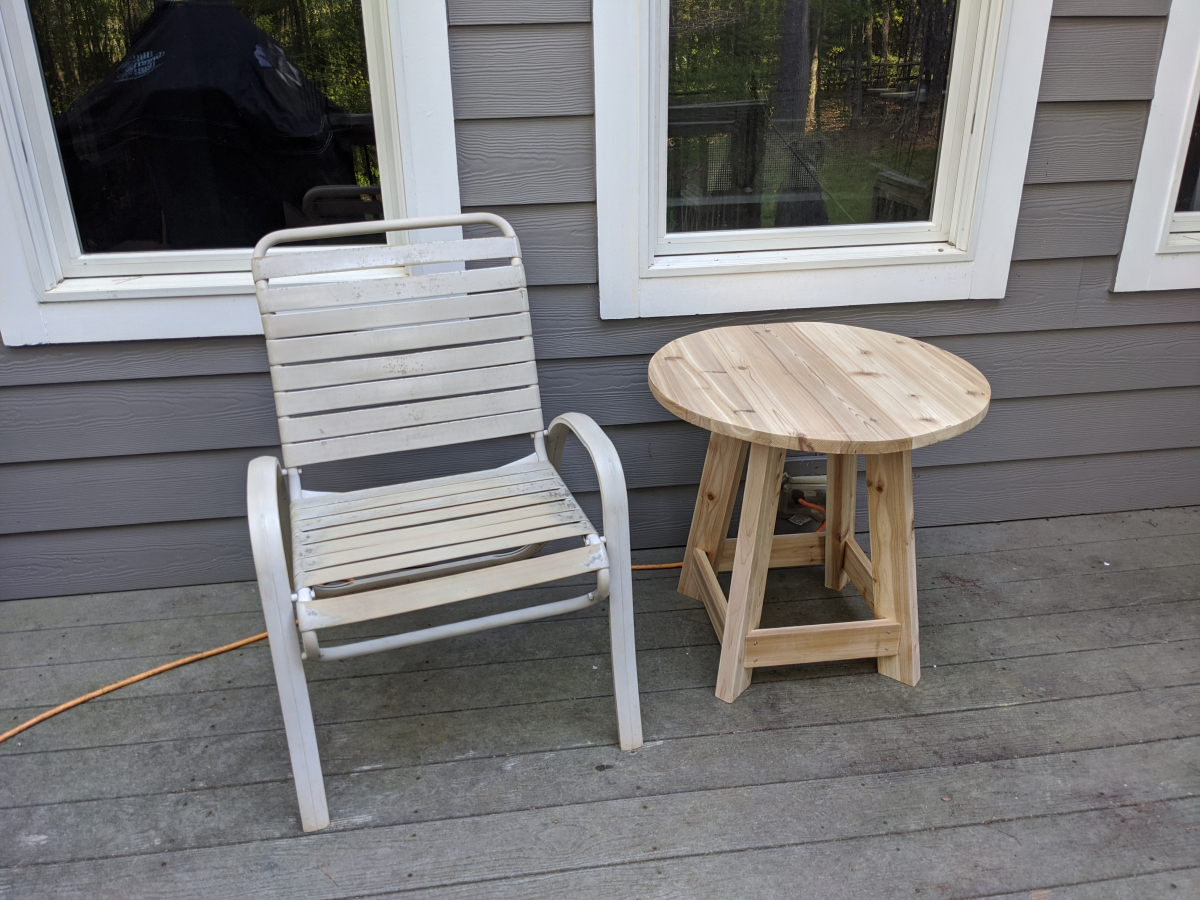
I was going to let it gray naturally as well with the rest of my cedar things but I think after thinking last night I will at least stain the top so that I don't need to use coasters to prevent water rings. Might just stain the top and let the bottom naturally weather or maybe stain the pieces two separate colors to give a two-tone look that way.
So been a while since I did a wood project and had one that wasn't too much work I wanted to get finished. I had the center piece I cut out of my egg table a while back that I figured would make a great small patio table. The original plan for the table was to build it to look like this table with tripod legs. However, once I got under way I quickly realized I didn't have an easy way to cut a 60 degree angle on the braces between legs. So I changed the design to be four legs and only needing 45 degree cuts which I could do easy.
This was my inspiration
Circle top I had leftover. It has unfortunately warped a bit sitting in the garage over a year.
Picked up two cedar 2x4s and cut them up into 30in sections. Then I ripped them on the table saw down to 3in wide to square them off.
Working on putting the base together.
I screwed the top on like this and later realized my this was a really poor choice cause I let no room for moisture expansion. I will be taking it back apart and using four figure-eight fasteners to attach the top tonight. You can also see the shims I had to use to make the top sit flat since it is warped. Will be interesting to make this work with the figure-eight fasteners work with them.
Finished patio table
My deck feels much less cluttered with this table now since I got rid of the full 4 person table I had on the deck before.
I was going to let it gray naturally as well with the rest of my cedar things but I think after thinking last night I will at least stain the top so that I don't need to use coasters to prevent water rings. Might just stain the top and let the bottom naturally weather or maybe stain the pieces two separate colors to give a two-tone look that way.
Ex-OEM King
Joined: Dec 2013
Posts: 17,880
Likes: 7,027
From: Minnesnowta
Table looks awesome man! One tip for how to cut a 60deg joint is either use a miter gauge on a table saw or set your table saw blade to 30deg and run the board through vertically (on a jig) so that the angle it cuts is 60deg.
Also, I'd just glue those shims on and install the figure 8's to those directly.
Nice work though! Love the design.
Also, I'd just glue those shims on and install the figure 8's to those directly.
Nice work though! Love the design.
Thread Starter
Moderator
Regional Coordinator (Southeast)
Regional Coordinator (Southeast)
Joined: Dec 2003
Posts: 44,123
Likes: 4,434
From: Mooresville, NC
Table looks awesome man! One tip for how to cut a 60deg joint is either use a miter gauge on a table saw or set your table saw blade to 30deg and run the board through vertically (on a jig) so that the angle it cuts is 60deg.
Also, I'd just glue those shims on and install the figure 8's to those directly.
Nice work though! Love the design.
Also, I'd just glue those shims on and install the figure 8's to those directly.
Nice work though! Love the design.
Dang never thought of that. I did find a how-to for using my miter saw to do it but didn't trust the limited amount of support that you get while making the cut. The table saw way looks much better.
The only thing making me hesitant about gluing the shims on is if I even build a new top for the table. Might just brad nail them on. Although, if I build a new top someday might as well build a new table I guess.