
CCColtsicehockey's Home Projects Thread

Thread Starter
Moderator
Regional Coordinator (Southeast)
Regional Coordinator (Southeast)


Joined: Dec 2003
Posts: 44,123
Likes: 4,434
From: Mooresville, NC
Thread Starter
Moderator
Regional Coordinator (Southeast)
Regional Coordinator (Southeast)
Joined: Dec 2003
Posts: 44,123
Likes: 4,434
From: Mooresville, NC
Finally settled on a lift company. There are many different options from super cheap to insanely expensive. Kind of settled on somewhere in the middle. It is also one of only two brands that make a design that allows you to mount the cabinet lid to the lift itself instead of having to use a hinged lid. I worried a hinged lid design would allow for water to get into the cabinet instead of a full lift lit that allowed me to have a lip that hung lower than the top of the cabinet and also allowed for the lid to come down on the top of the cabinet and be used as weight on top of a rubber seal to keep water out as well. This lift also has a swivel mount on it so you can angle the TV. I probably could use their lift that doesn't have the swivel on it and install my own for less but I worried about impacting my warranty then.
Swivel
https://www.touchstonehomeproducts.c...nt=35396679233
Top Mount Lid Bracket
https://www.touchstonehomeproducts.c...nt=35396684097
Swivel
https://www.touchstonehomeproducts.c...nt=35396679233
Top Mount Lid Bracket
https://www.touchstonehomeproducts.c...nt=35396684097


 The wood guru speaketh!
Thread Starter
Moderator
Regional Coordinator (Southeast)
Regional Coordinator (Southeast)
Joined: Dec 2003
Posts: 44,123
Likes: 4,434
From: Mooresville, NC
No worries Sam. Whenever you have time a moment. The build won't start for probably 2 weeks so I can let the wood acclimate in the garage unless that is overkill. It is all going to be inside already at Lowe's when I buy it so maybe not as important as when coming from an outdoor lumber yard. I still have to finish the design layout for the paver pad the cabinet will sit on and the conduit runs to electric and sound as well.

Ex-OEM King


Joined: Dec 2013
Posts: 17,880
Likes: 7,027
From: Minnesnowta
Alright here goes...
If you want to keep that design and do without T/G then I'd screw and glue the center one in and just screw, no glue, all the other ones. That should allow for some amount of movement. Cedar is fairly soft so it should be ok. I think you'd have issues if you glued them all in. If it's not a structural joint and you intentionally want it to move then just screws may do the trick, not sure though.
Did you glue and screw the boards on your egg table? If you just used screws then that explains it. Otherwise it could just be luck or a matter of time, not sure.
I think just gluing up the outer frame and the center board would be plenty strong. This doesn't need to carry a huge load. Even with that strategy, I bet you could easily get a couple hookers dancing on it no problem.
You'd be fine without doing rabbets for the top, just the question about leaks comes into play. You could add more glue or filler if you find a leak path though.
When talking about wood movement, we're talking about incredibly small distances but huge forces. The figure 8 fasteners would allow for movement but I'm not sure you'd be able to tell that there's a pronounced lip on the edge. That said, I'd change up the design to allow the frame to go inside the main box and just have the slats on the top rest on the top of the main box. I think that would just look cleaner IMO.
I'd imagine just a few inches of space, especially on pavers, on the bottom would be plenty to ventilate the box...
Thread Starter
Moderator
Regional Coordinator (Southeast)
Regional Coordinator (Southeast)
Joined: Dec 2003
Posts: 44,123
Likes: 4,434
From: Mooresville, NC
Alright here goes...
If you want to keep that design and do without T/G then I'd screw and glue the center one in and just screw, no glue, all the other ones. That should allow for some amount of movement. Cedar is fairly soft so it should be ok. I think you'd have issues if you glued them all in. If it's not a structural joint and you intentionally want it to move then just screws may do the trick, not sure though.
I will need to get larger clamps if I am going to try the T/G route. I don't currently have anything even close to capable of holding something 38in together while it dries. That is honestly one of the reasons I do the screw joints is so I can use screws to hold things together while they dry with glue.
Did you glue and screw the boards on your egg table? If you just used screws then that explains it. Otherwise it could just be luck or a matter of time, not sure.
That is probably what is allowing for movement. I only screwed in the boards on the egg table. They have 2 deck screws at each end holding them in place.
I think just gluing up the outer frame and the center board would be plenty strong. This doesn't need to carry a huge load. Even with that strategy, I bet you could easily get a couple hookers dancing on it no problem.
Ok sounds good
You'd be fine without doing rabbets for the top, just the question about leaks comes into play. You could add more glue or filler if you find a leak path though.
I don't have a problem doing the rabbits for the top unless you don't think I can do rabbits along with the kreg jig for my screws holes. Like I mentioned before the max clamp width I currently own is 24in and for that matter, I only have two of them so correctly gluing things up I don't have a way to get a lot of force all along the joint currently without using screws.
When talking about wood movement, we're talking about incredibly small distances but huge forces. The figure 8 fasteners would allow for movement but I'm not sure you'd be able to tell that there's a pronounced lip on the edge. That said, I'd change up the design to allow the frame to go inside the main box and just have the slats on the top rest on the top of the main box. I think that would just look cleaner IMO.
I am open to this idea but not sure it will work. I will be putting a rubber weather seal on the underside of the lid. When the lift is lowered back down this will press against the top of the cabinet frame to help create a waterproof seal for the lid. If I move the lid frame inside of the main box then you will see the gap the rubber seal creates between the lid and the main box. If you have another idea for a seal that I won't see then I am open to whatever gives the best look for sure while still being functional.
I'd imagine just a few inches of space, especially on pavers, on the bottom would be plenty to ventilate the box...
Then the floor definitely seems like a better location then as it is shielded from the rain and also makes the box look much cleaner.
Couple additional question. If I am getting all my wood from Lowe's which means it is already inside how long do you think I should wait before working with it? Or do you think I don't need to wait? I hope to not end up with another split 4x4 this time around. Last do you see any reason to go with all cedar compared to using pressure-treated pine in areas that will not be visible? Definitely using pressure-treated plywood for the floor but also considering using pressure treated 2x4 as well for the lower part of the frame.
Ex-OEM King
Joined: Dec 2013
Posts: 17,880
Likes: 7,027
From: Minnesnowta
Get some pipe clamps. They are cheap and easy to get in whatever length you want. Some 36" pipes and clamps will go a long way and they are strong AF. I think I misunderstood your design intent for the top, do it your way but still do the figure 8 fasteners. You should be able to put the seal right over the top of them.
Thread Starter
Moderator
Regional Coordinator (Southeast)
Regional Coordinator (Southeast)
Joined: Dec 2003
Posts: 44,123
Likes: 4,434
From: Mooresville, NC
Good to know about the pipe clamps as I didn't even know they existed. They look much better than the cheap lightweight 36in I beam clamps at Lowe's. I will look into doing the seal over the figure 8 attachments.
Thread Starter
Moderator
Regional Coordinator (Southeast)
Regional Coordinator (Southeast)
Joined: Dec 2003
Posts: 44,123
Likes: 4,434
From: Mooresville, NC
So been busy over the past two days on finally getting this project underway. The TV lift arrived on Thursday. Very impressed with its construction and function. Picked up a Harmony Hub to use with the setup and the TV lift also has can be controlled by an IR signal so I will be able to create a SmartThings automation to turn on the TV, change receiver input, and lift up the TV. Spent Friday getting most of what I needed for the first two phases of the project.
First I picked up the paver for the TV cabinet to sit on along with the base layer sand, edge retainer, and using foam board base layer instead of doing a base layer and set sand. Took a helper with me. Surprised she was ok with riding on top the pavers while I pushed.
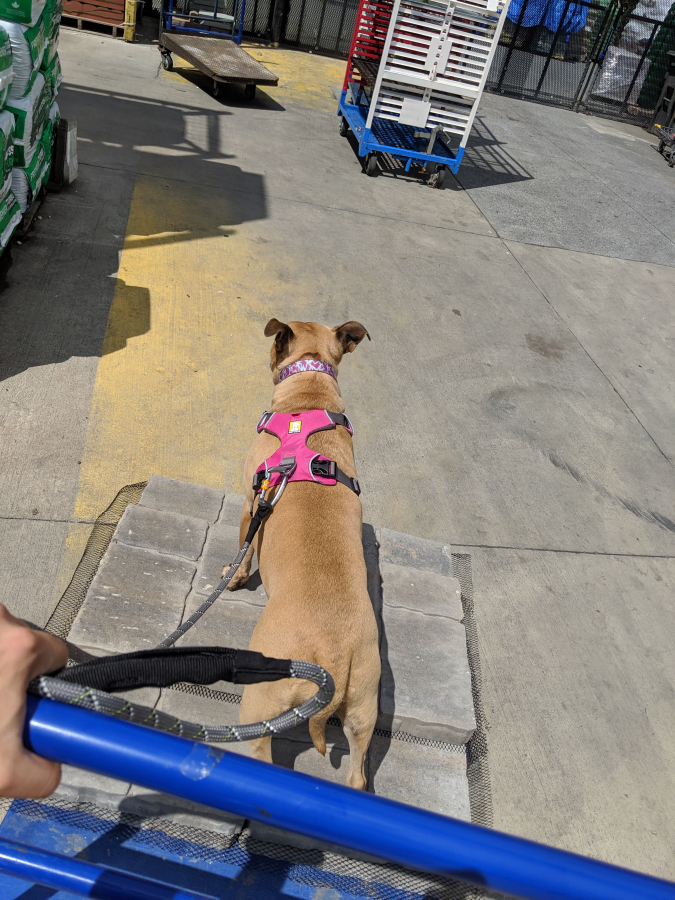
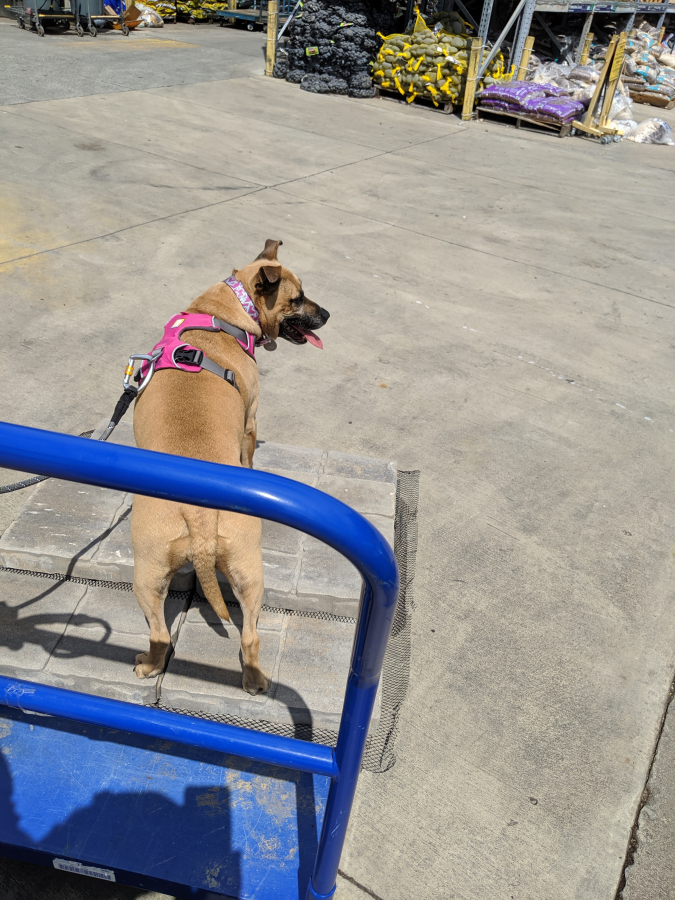
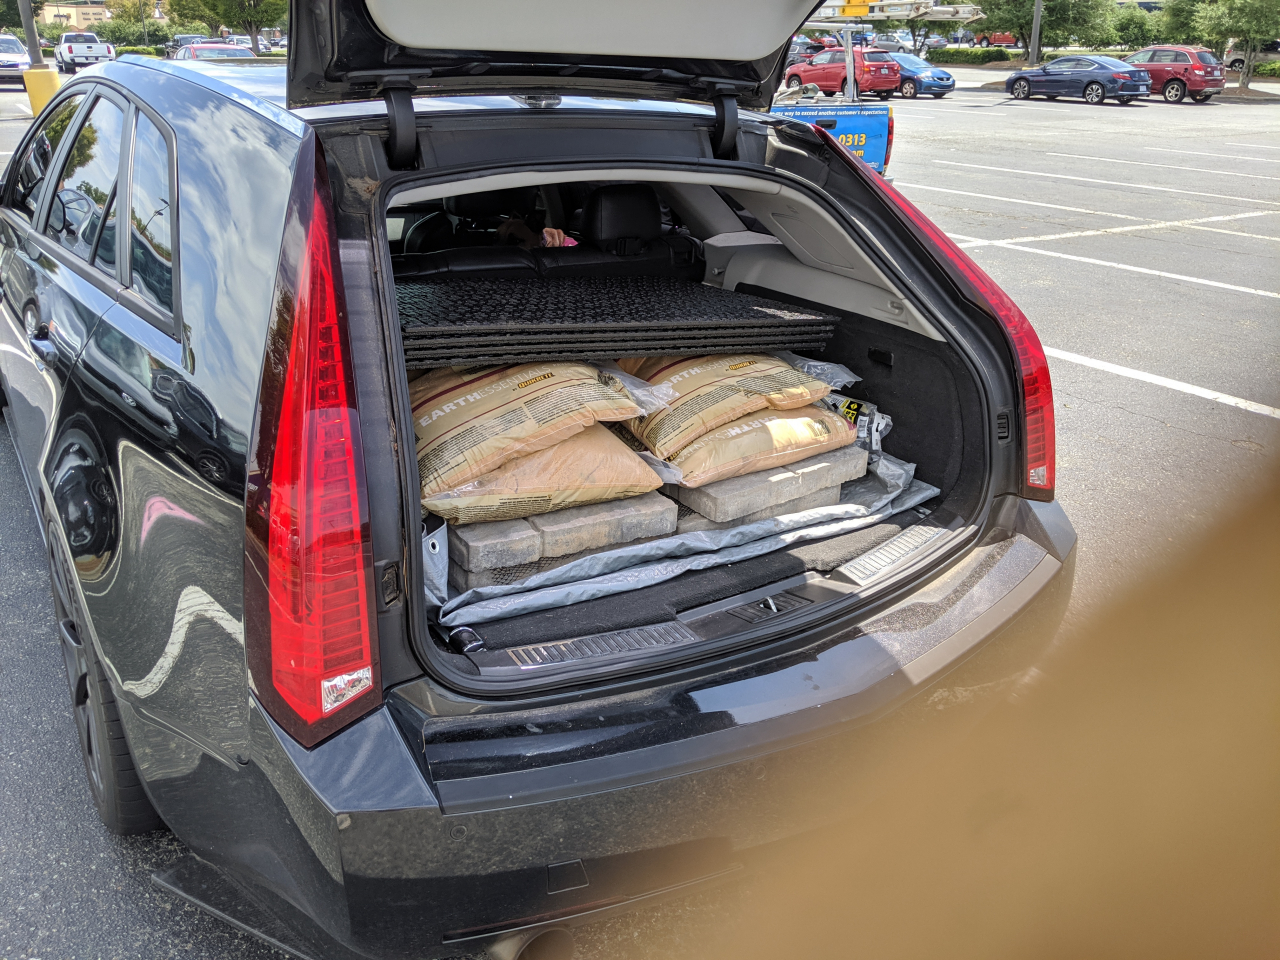
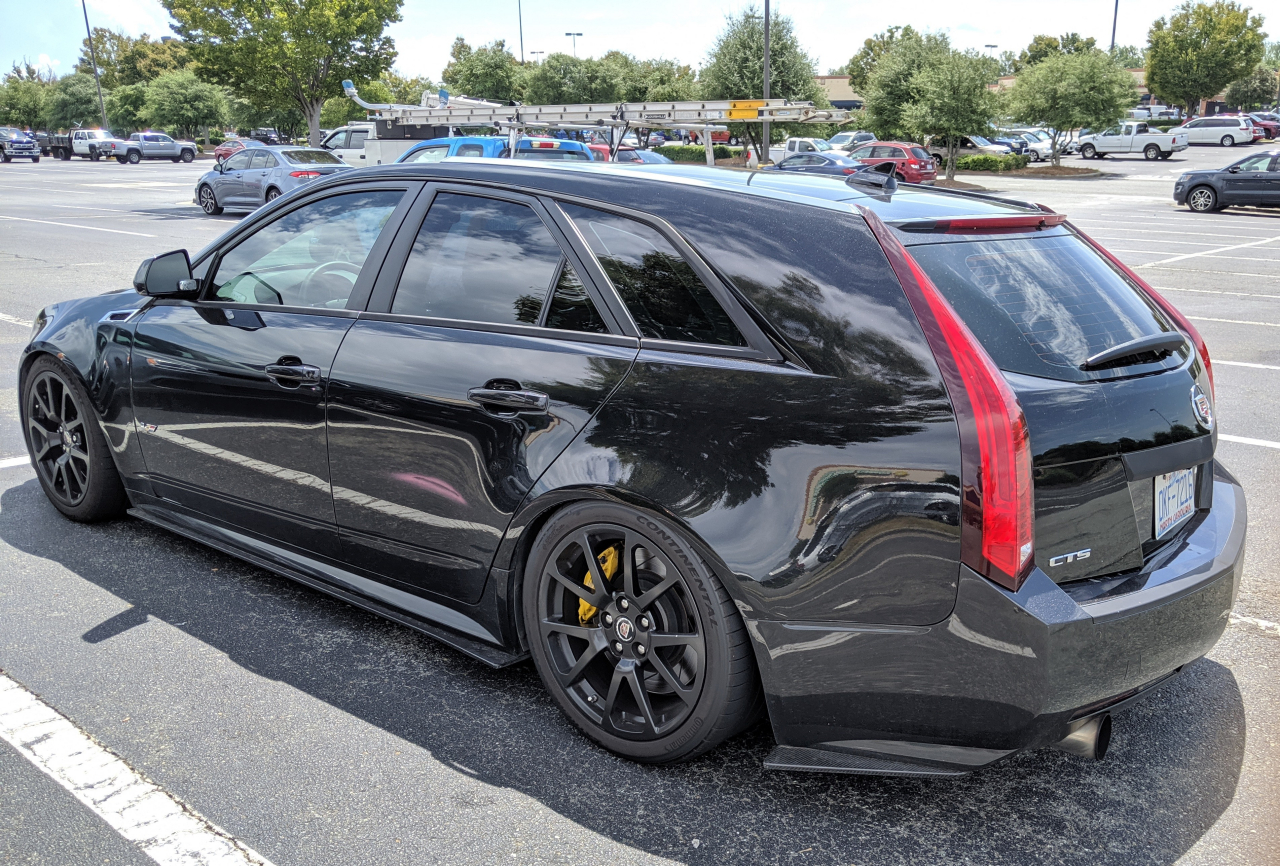
Putting the Vagon to work. 380lbs worth of pavers plus six bags of sand is the limit for a lowered Vagon. Rubbed off a good bit of rubber on the 4.6 mile drive home. Won't be doing that again.
Turns out the grey pavers that I thought would look good looked terrible
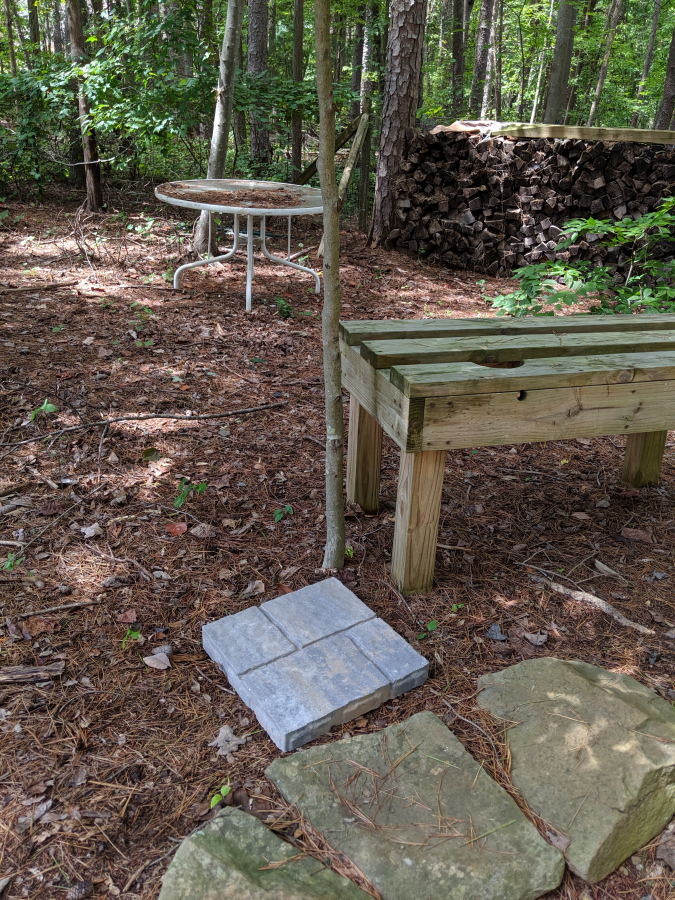
Didn't match the firepit at all
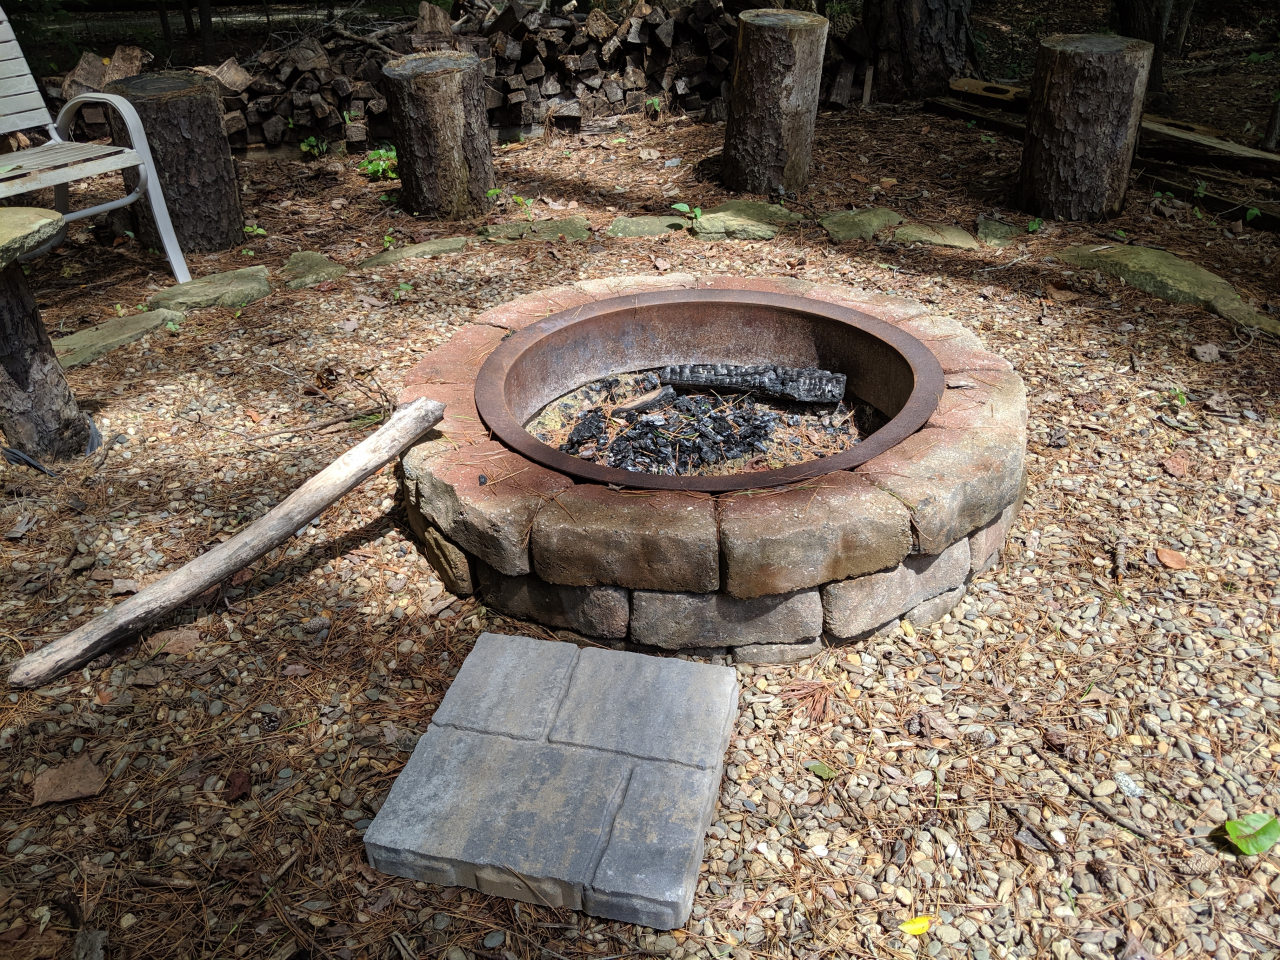
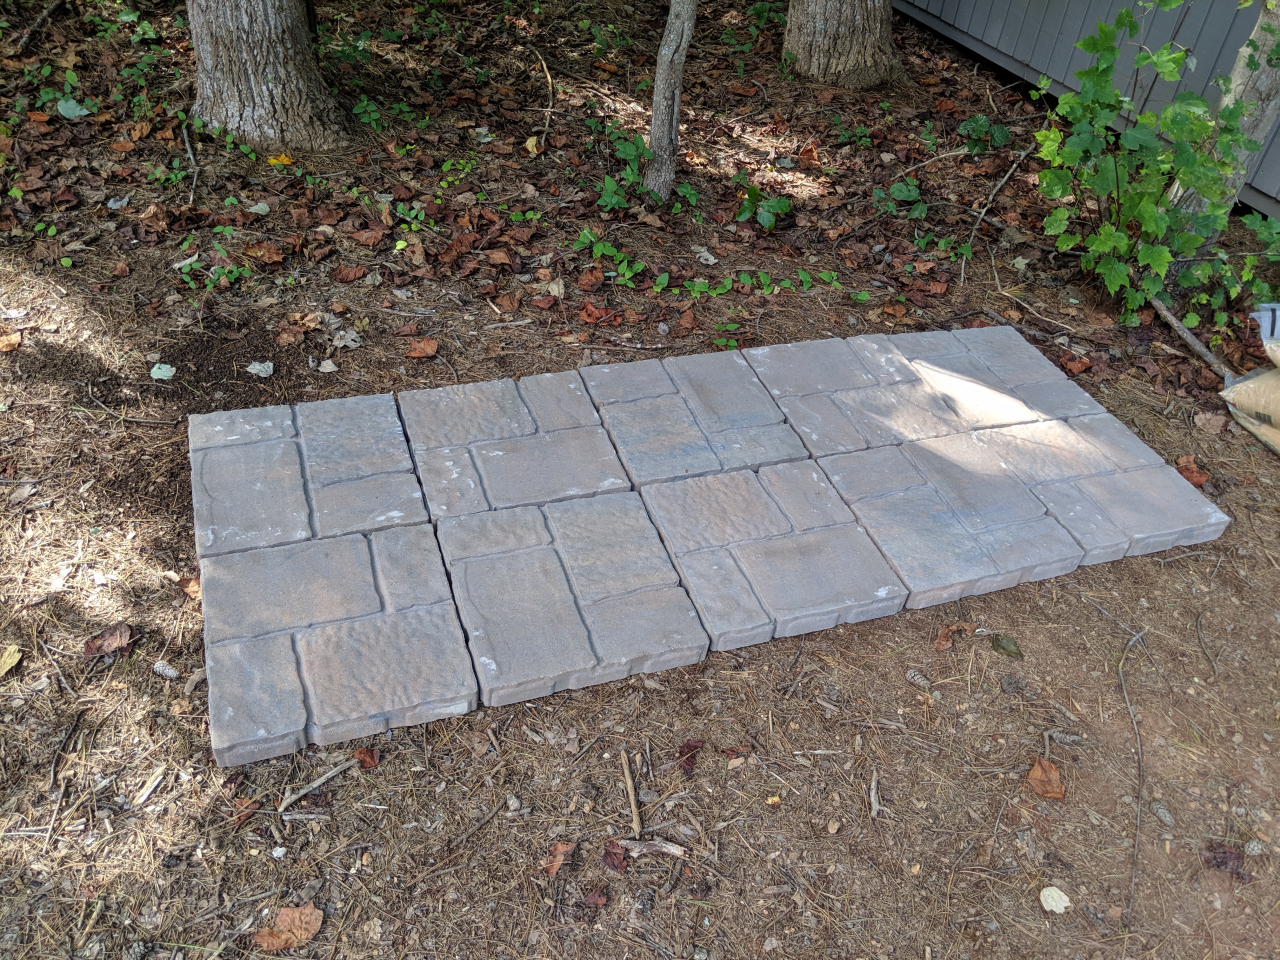
Back to Lowe's I went. I was worried the far left was too red. There was half a pallet of the red ones that looked like they didn't put enough red in the mix. They looked perfect for what I was going for.
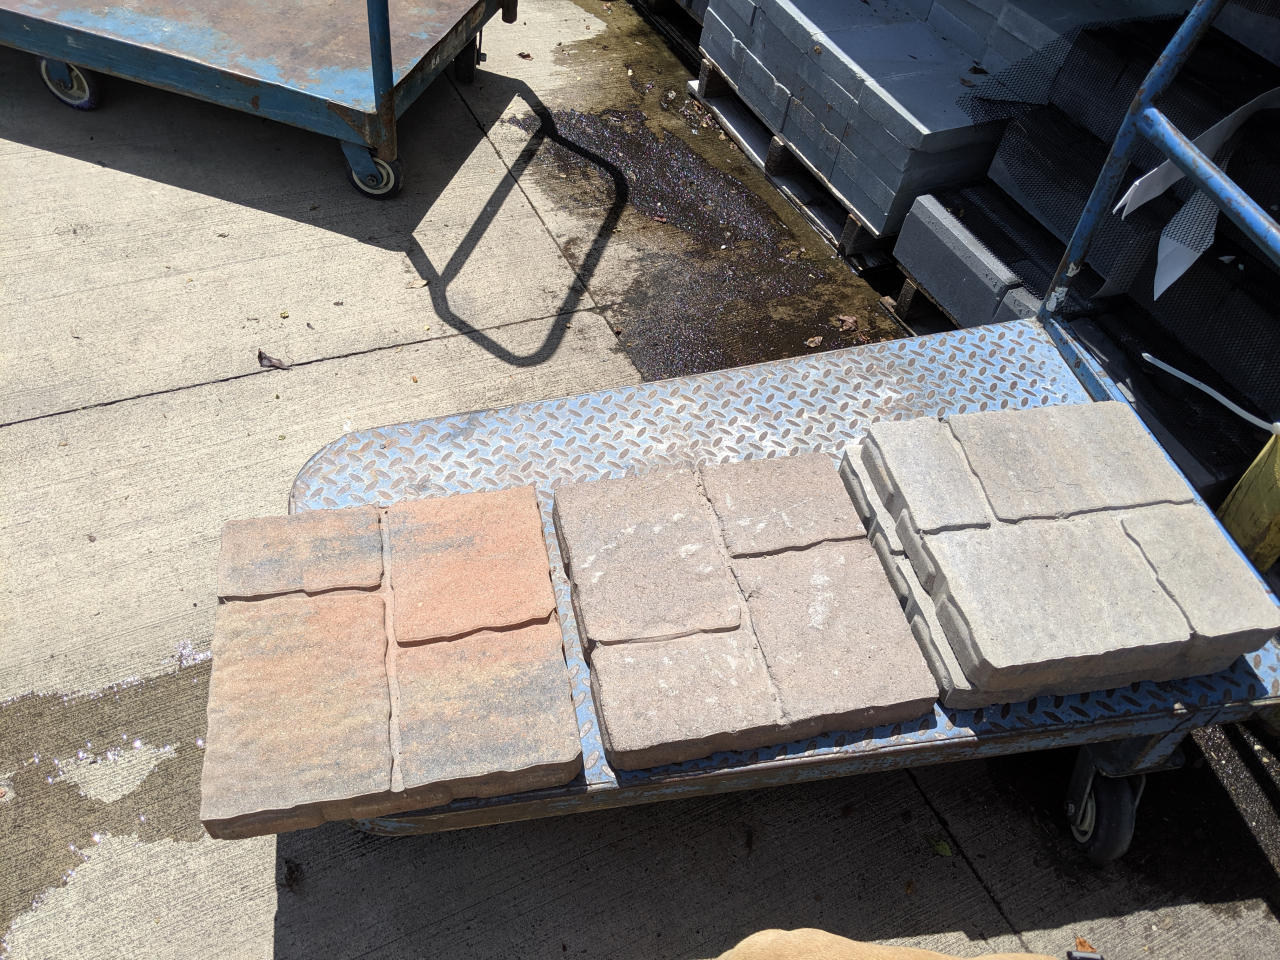
So I took one home this time like I should have done the first time to verify the color against the firepit. Much better.
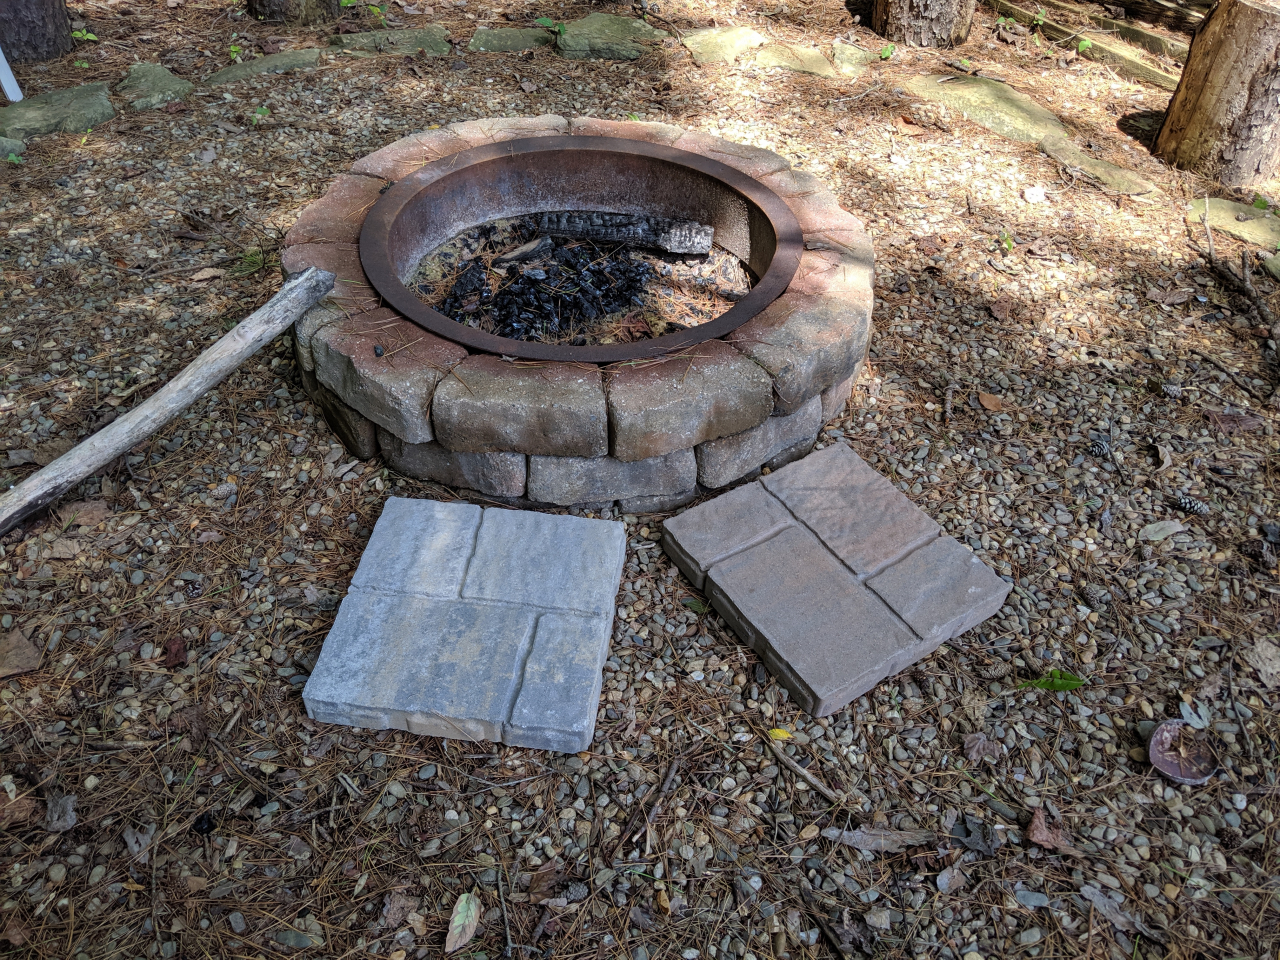
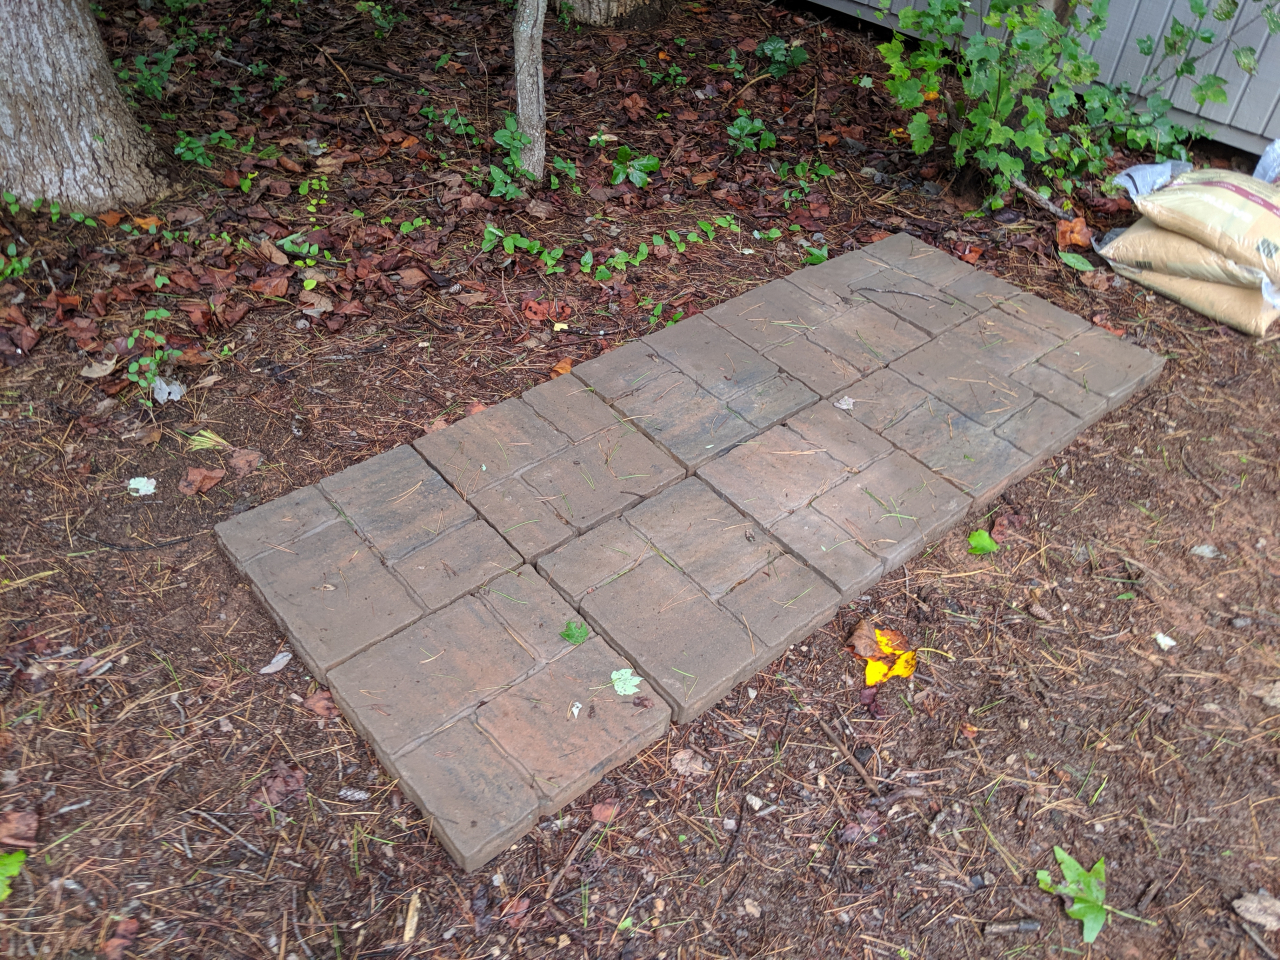
Took back all the other pavers and picked up the rest of the other color. Here is what the end result will look like once installed by the firepit.
It rained that evening so this morning I got to see what they look like wet.
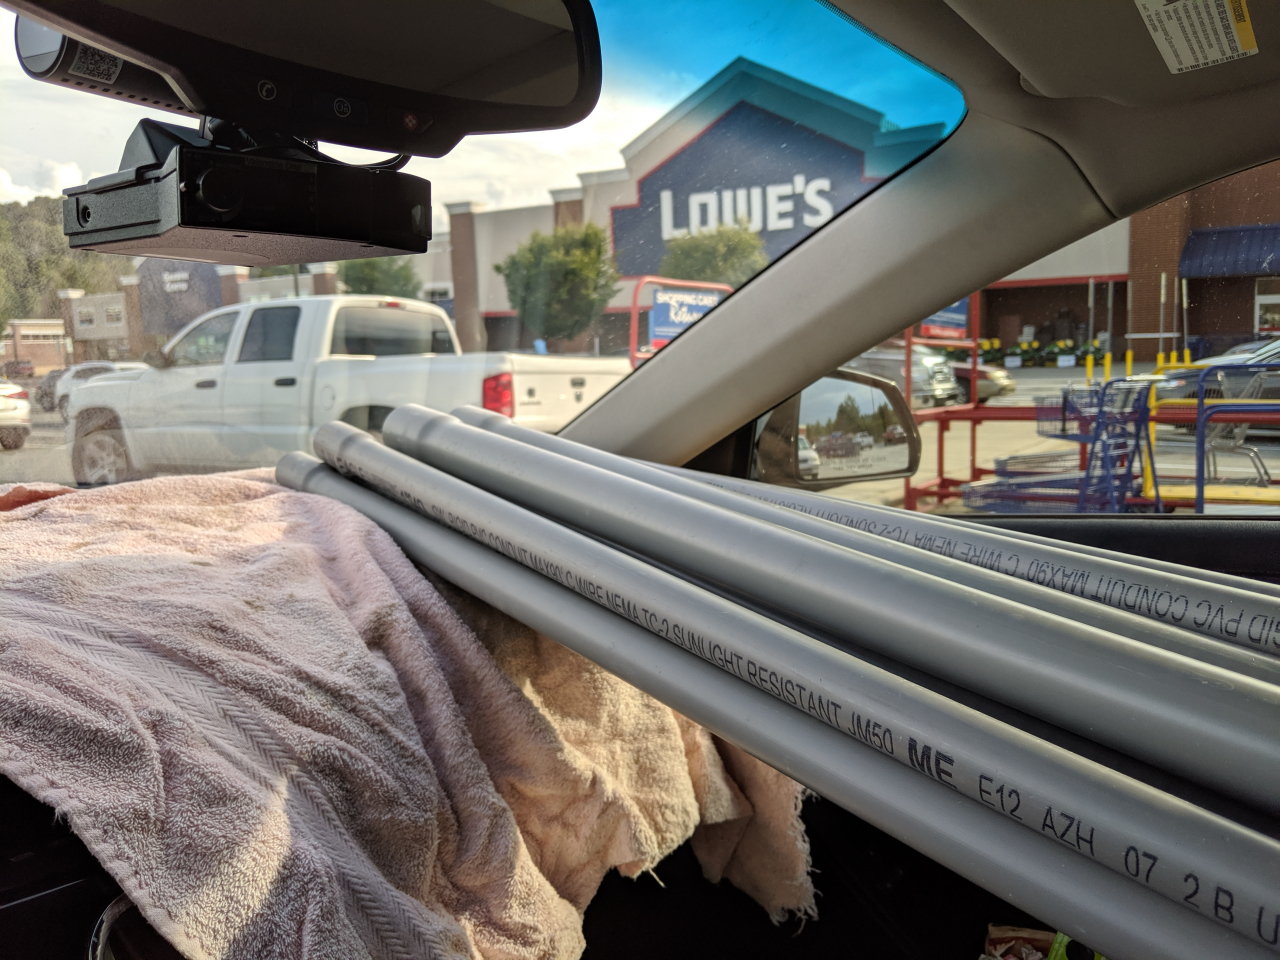
Putting the Vagon to work again picking up the various conduits to run the all the wires. There will be 3 different conduit runs for this installation.
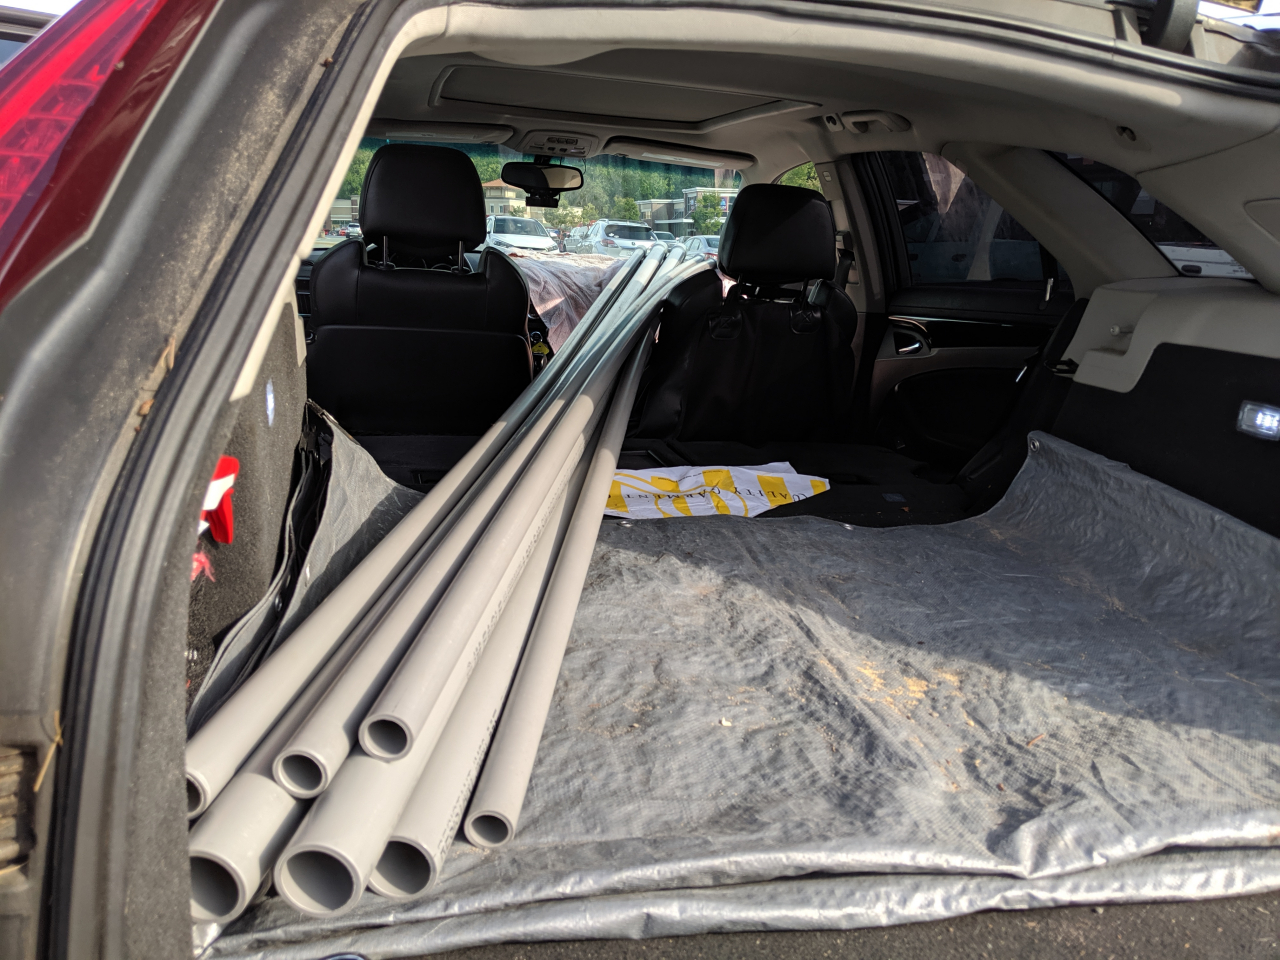
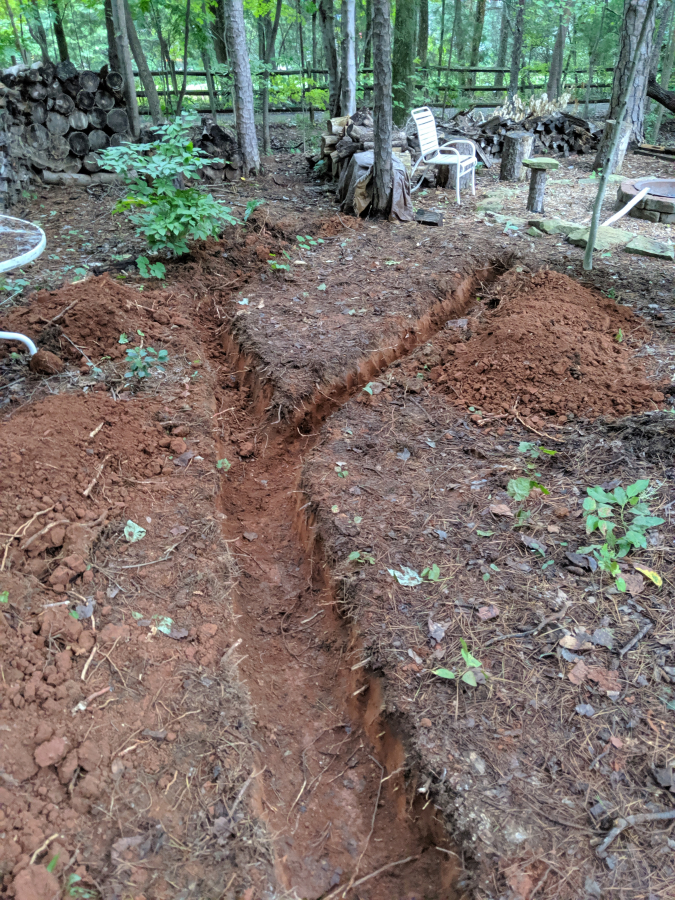
Laying out the conduit to see where I needed to dig the trenches.
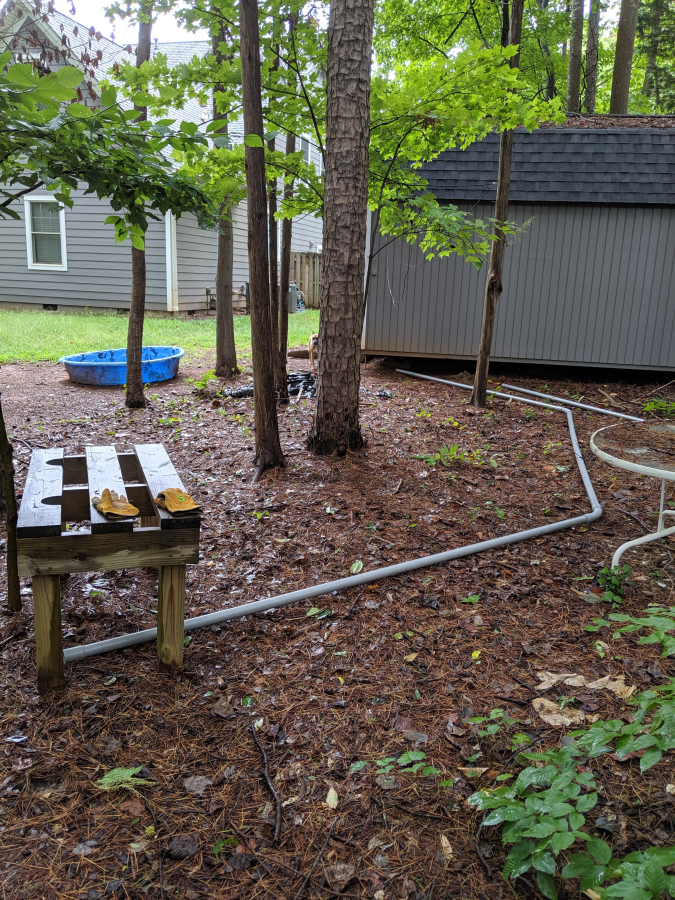
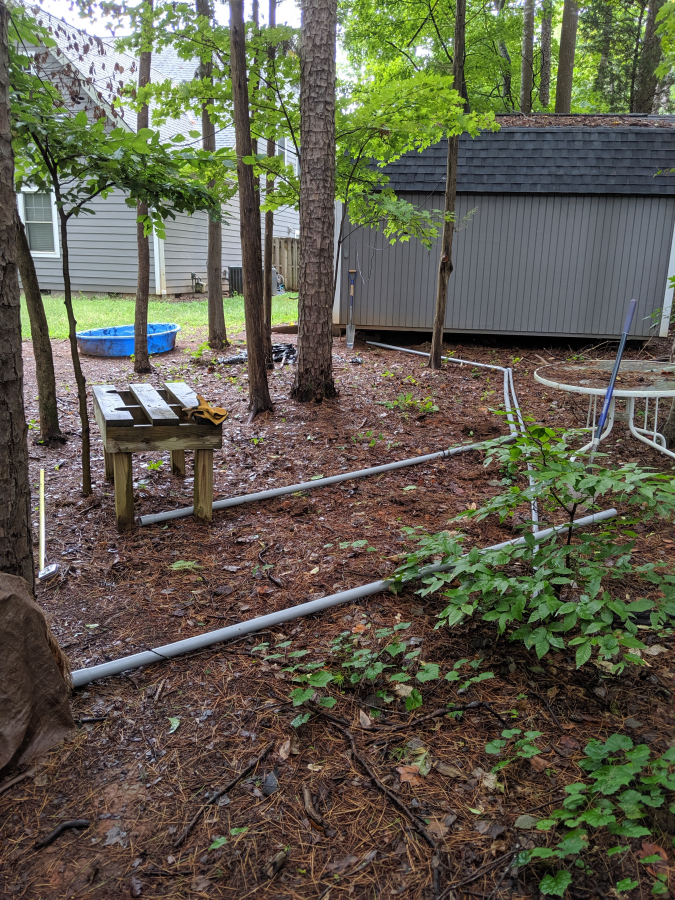
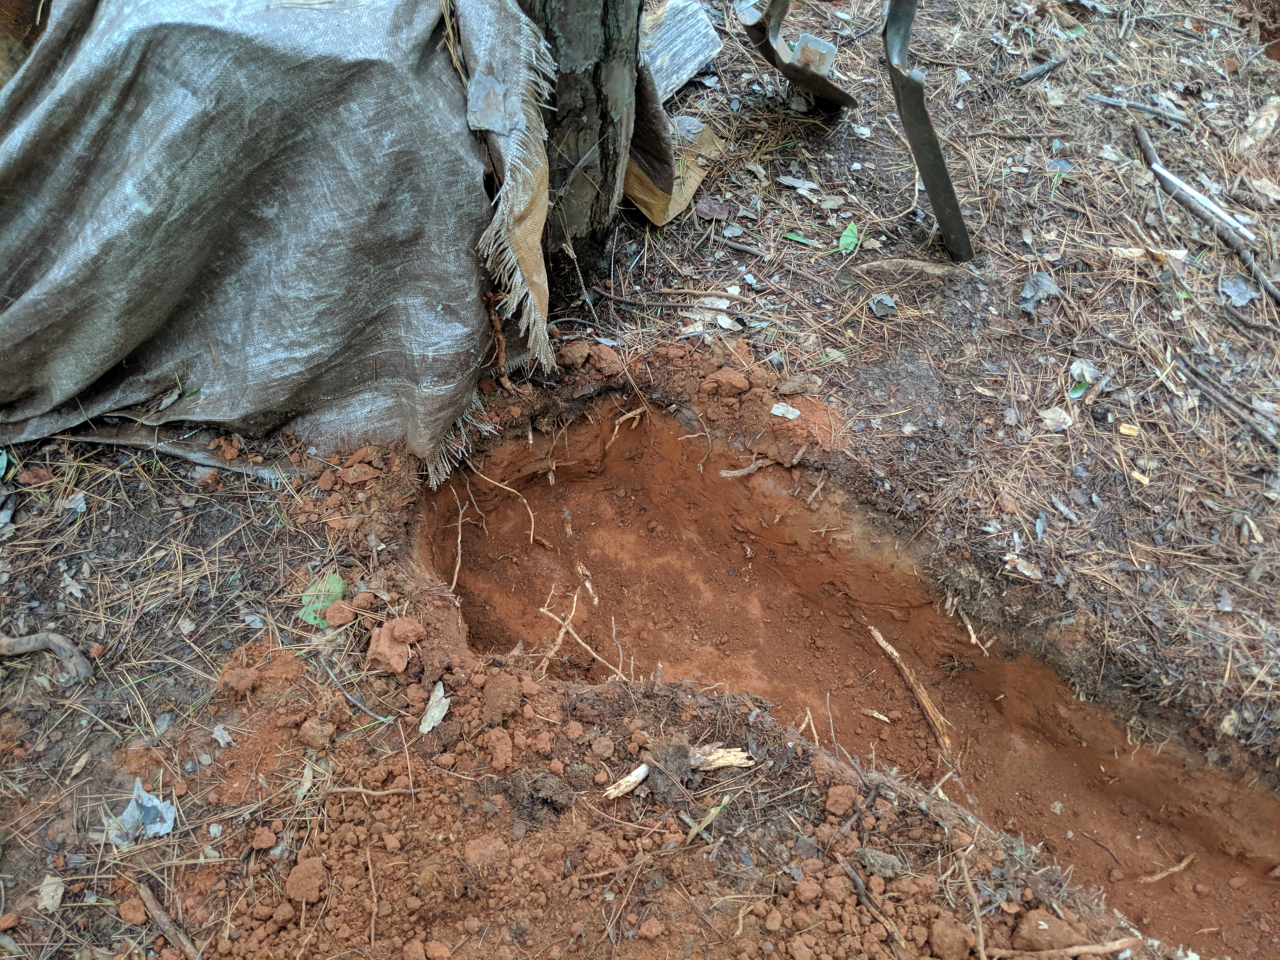
Started on the trench Saturday afternoon. I was about to give up after the first 3ft. I had to take out 3 roots golf ball/tennis ball size. Thankfully it ended up getting easier from there on.
Got it almost all complete after about 5.5hrs of digging but was just physically drained and couldn't complete the last 12ft or so.
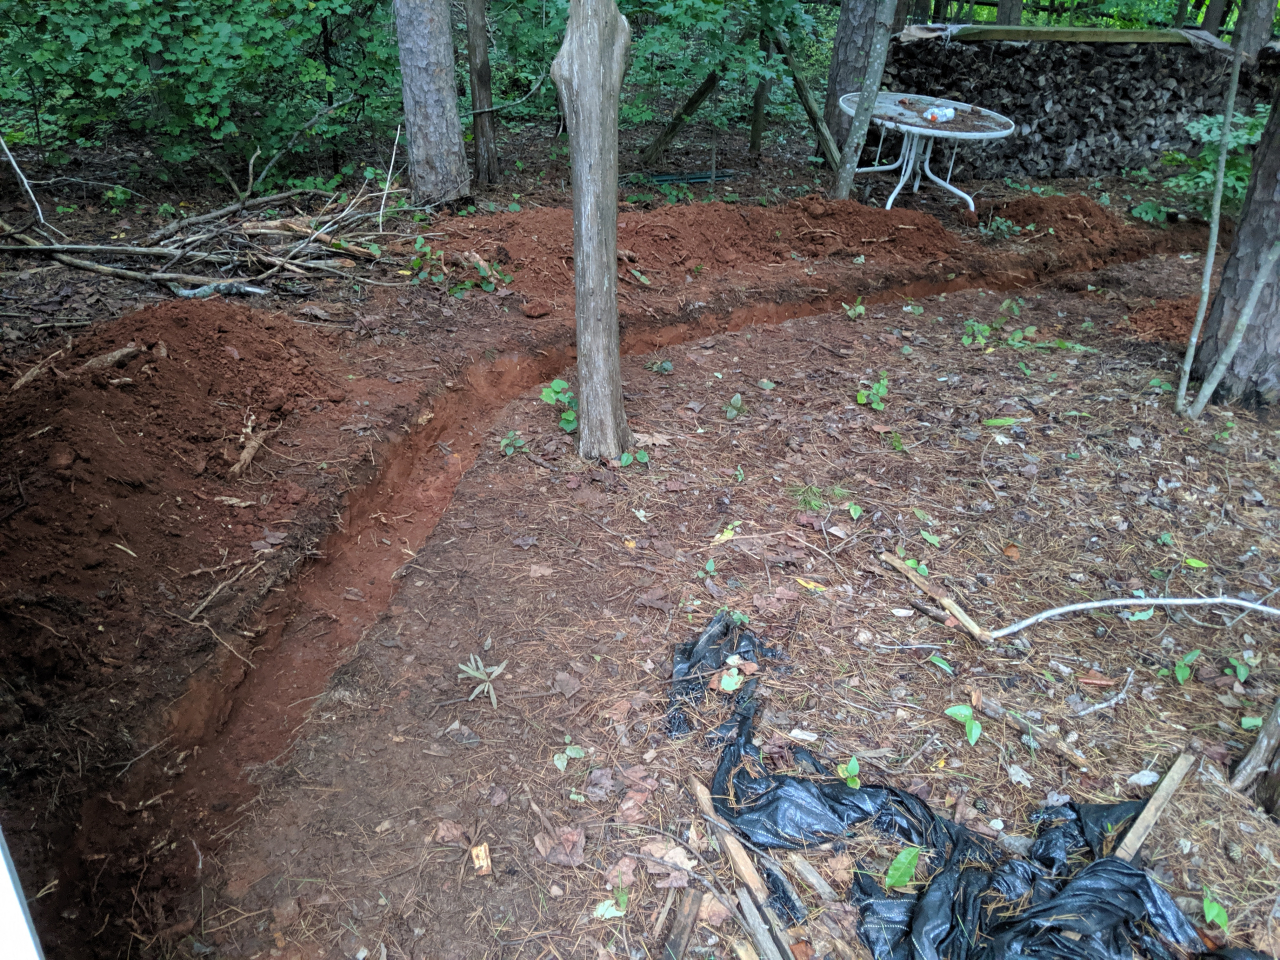
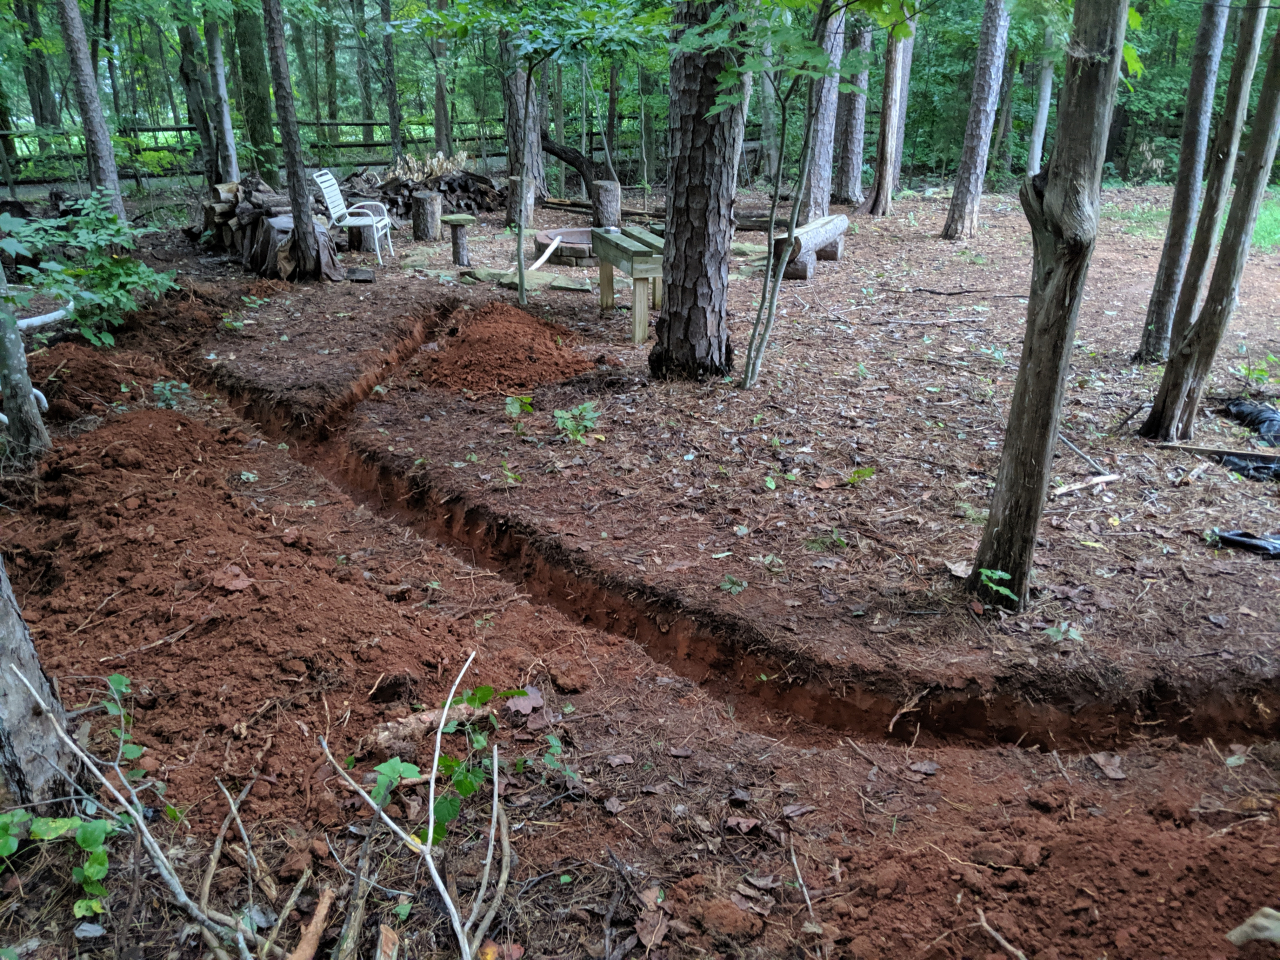
Trying to keep the trench about 1ft deep.
First I picked up the paver for the TV cabinet to sit on along with the base layer sand, edge retainer, and using foam board base layer instead of doing a base layer and set sand. Took a helper with me. Surprised she was ok with riding on top the pavers while I pushed.
Putting the Vagon to work. 380lbs worth of pavers plus six bags of sand is the limit for a lowered Vagon. Rubbed off a good bit of rubber on the 4.6 mile drive home. Won't be doing that again.
Turns out the grey pavers that I thought would look good looked terrible
Didn't match the firepit at all
Back to Lowe's I went. I was worried the far left was too red. There was half a pallet of the red ones that looked like they didn't put enough red in the mix. They looked perfect for what I was going for.
So I took one home this time like I should have done the first time to verify the color against the firepit. Much better.
Took back all the other pavers and picked up the rest of the other color. Here is what the end result will look like once installed by the firepit.
It rained that evening so this morning I got to see what they look like wet.
Putting the Vagon to work again picking up the various conduits to run the all the wires. There will be 3 different conduit runs for this installation.
Laying out the conduit to see where I needed to dig the trenches.
Started on the trench Saturday afternoon. I was about to give up after the first 3ft. I had to take out 3 roots golf ball/tennis ball size. Thankfully it ended up getting easier from there on.
Got it almost all complete after about 5.5hrs of digging but was just physically drained and couldn't complete the last 12ft or so.
Trying to keep the trench about 1ft deep.
Last edited by 97BlackAckCL; Aug 26, 2019 at 08:17 AM.


Thread Starter
Moderator
Regional Coordinator (Southeast)
Regional Coordinator (Southeast)
Joined: Dec 2003
Posts: 44,123
Likes: 4,434
From: Mooresville, NC
They definitely have looked at me and watched me a bit while I have been digging it.Hey now I am keeping that all to myself :thief:
Thread Starter
Moderator
Regional Coordinator (Southeast)
Regional Coordinator (Southeast)
Joined: Dec 2003
Posts: 44,123
Likes: 4,434
From: Mooresville, NC
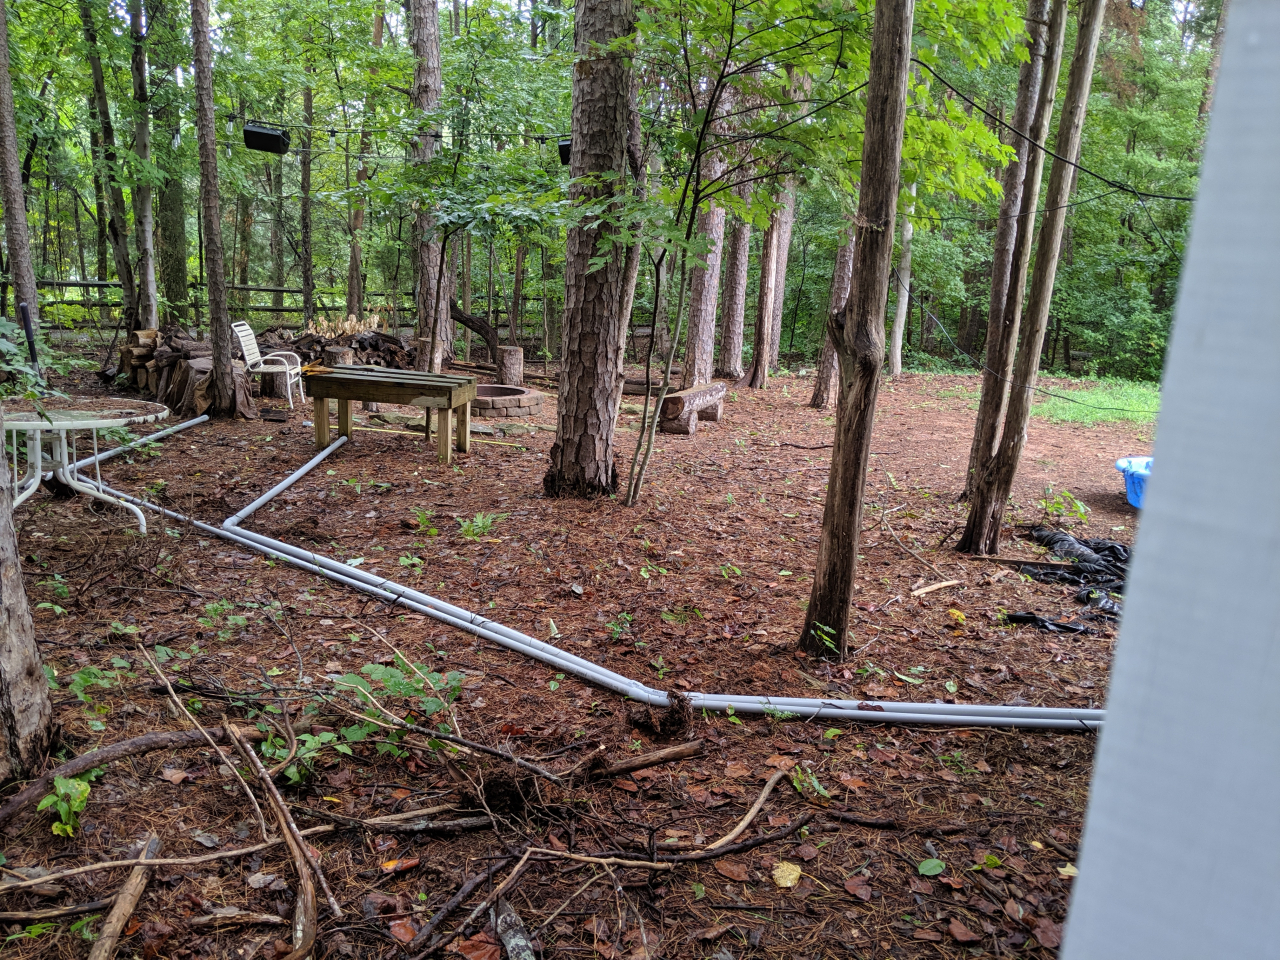
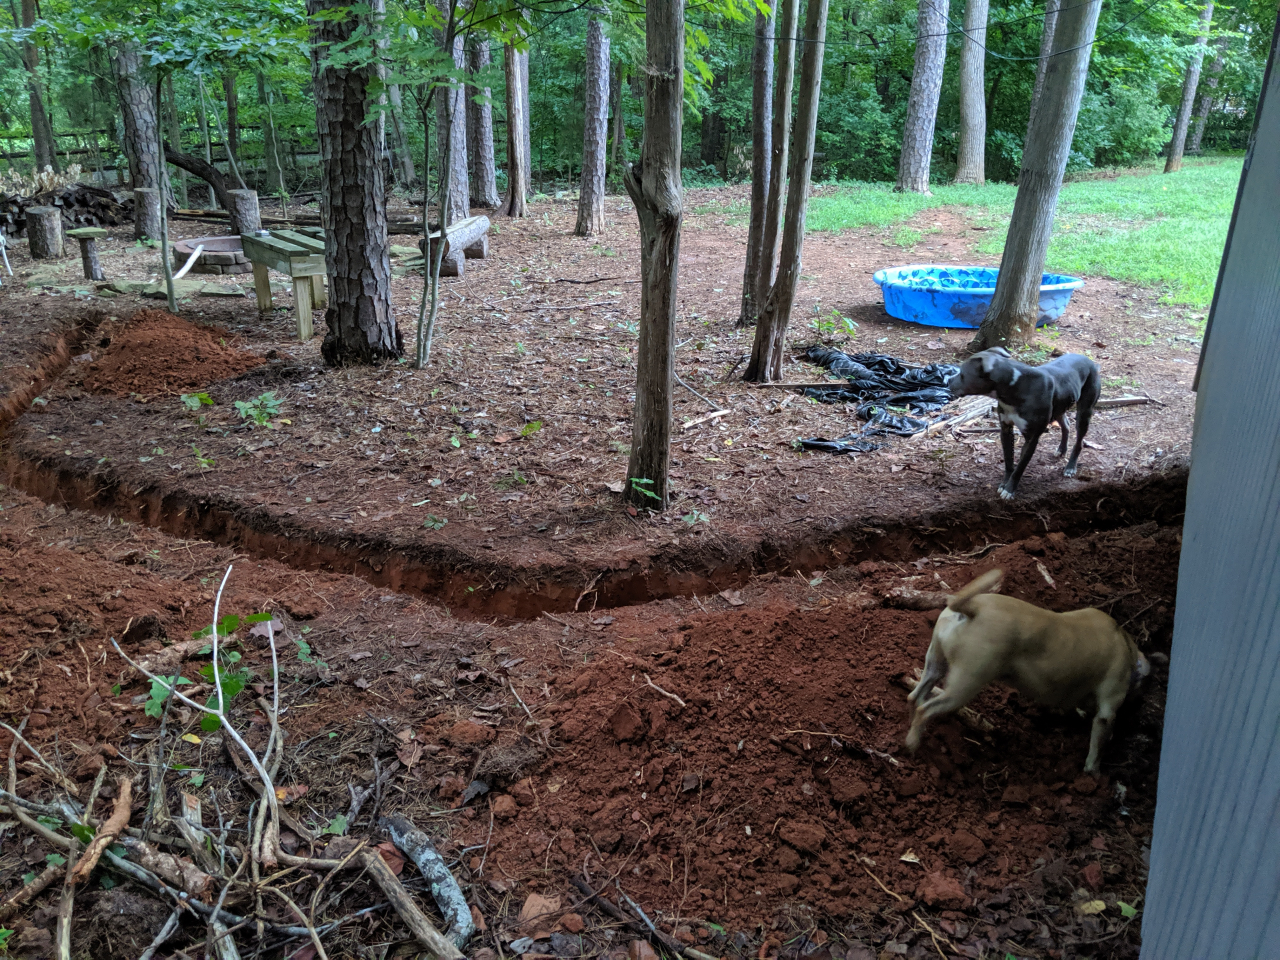
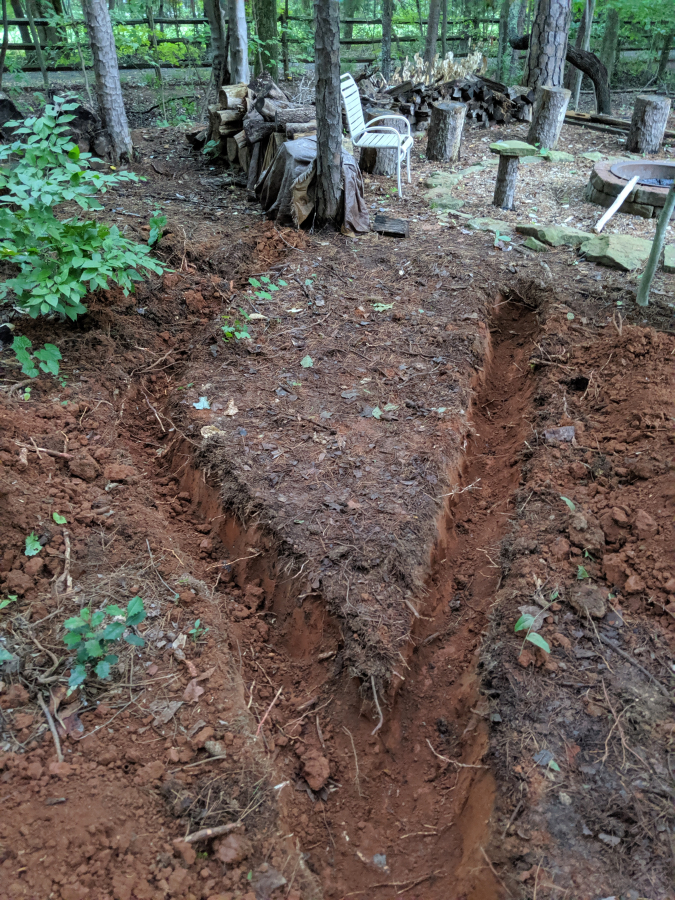
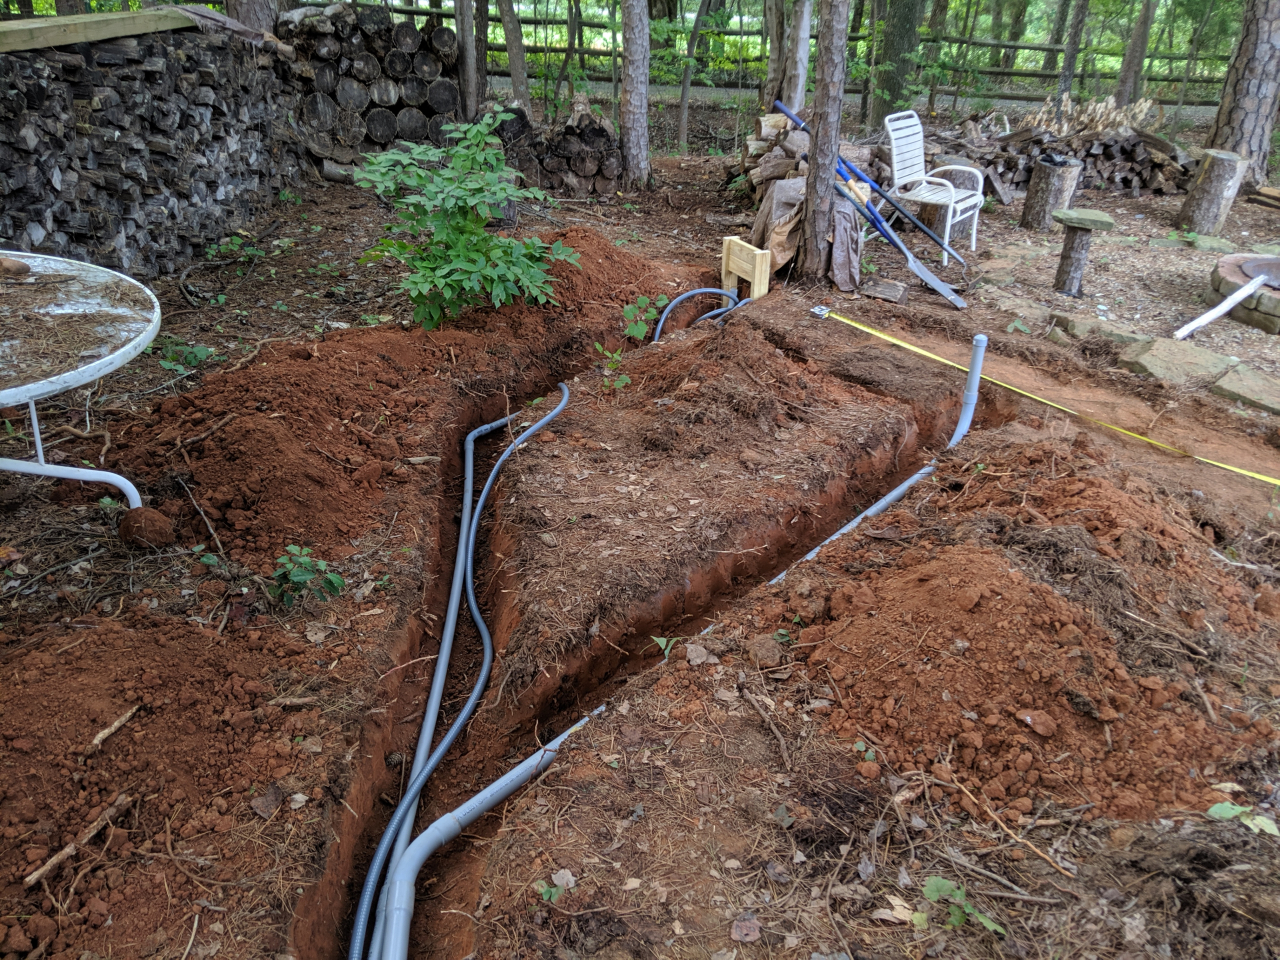
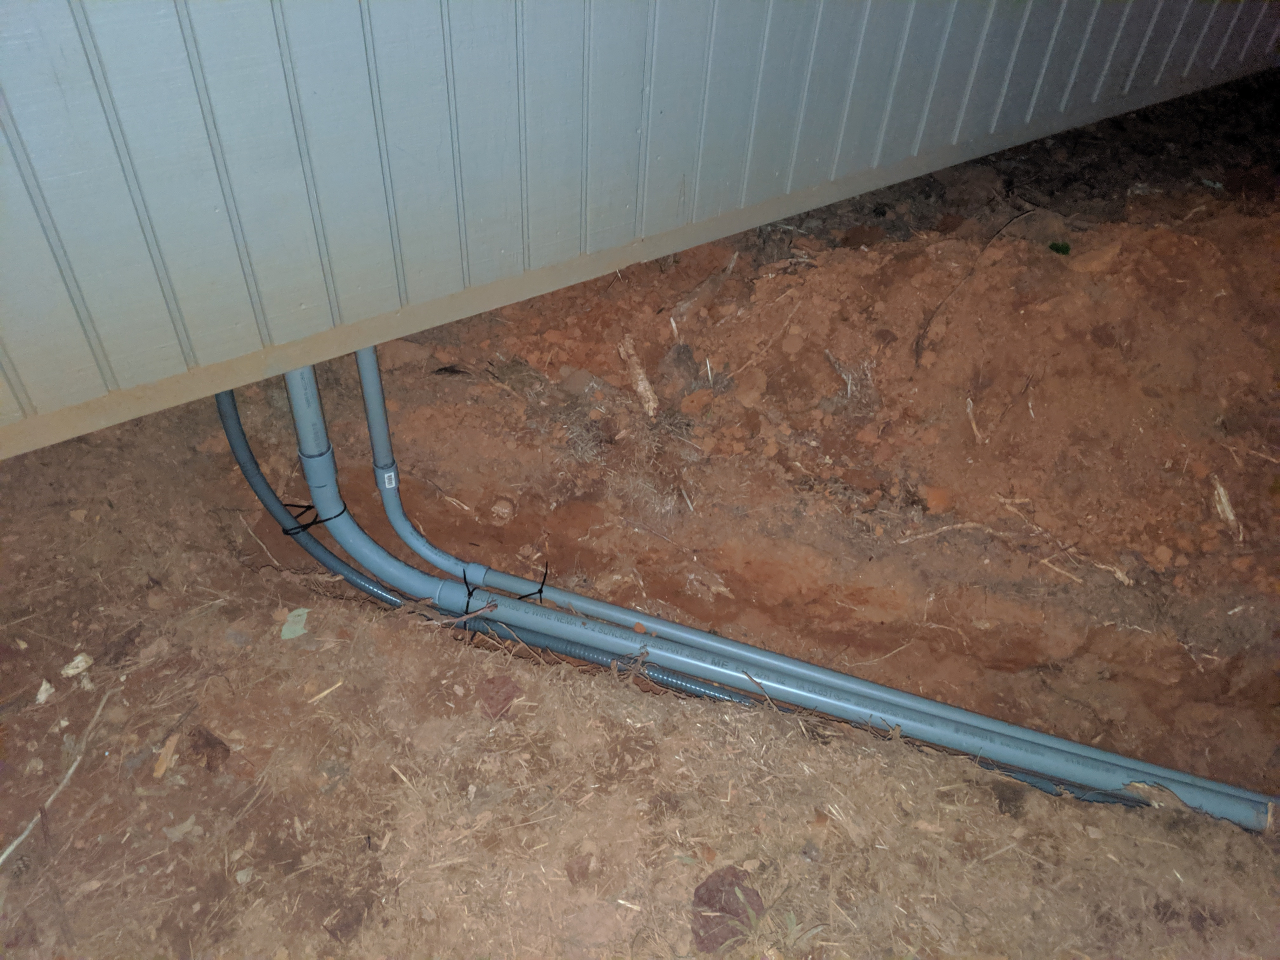
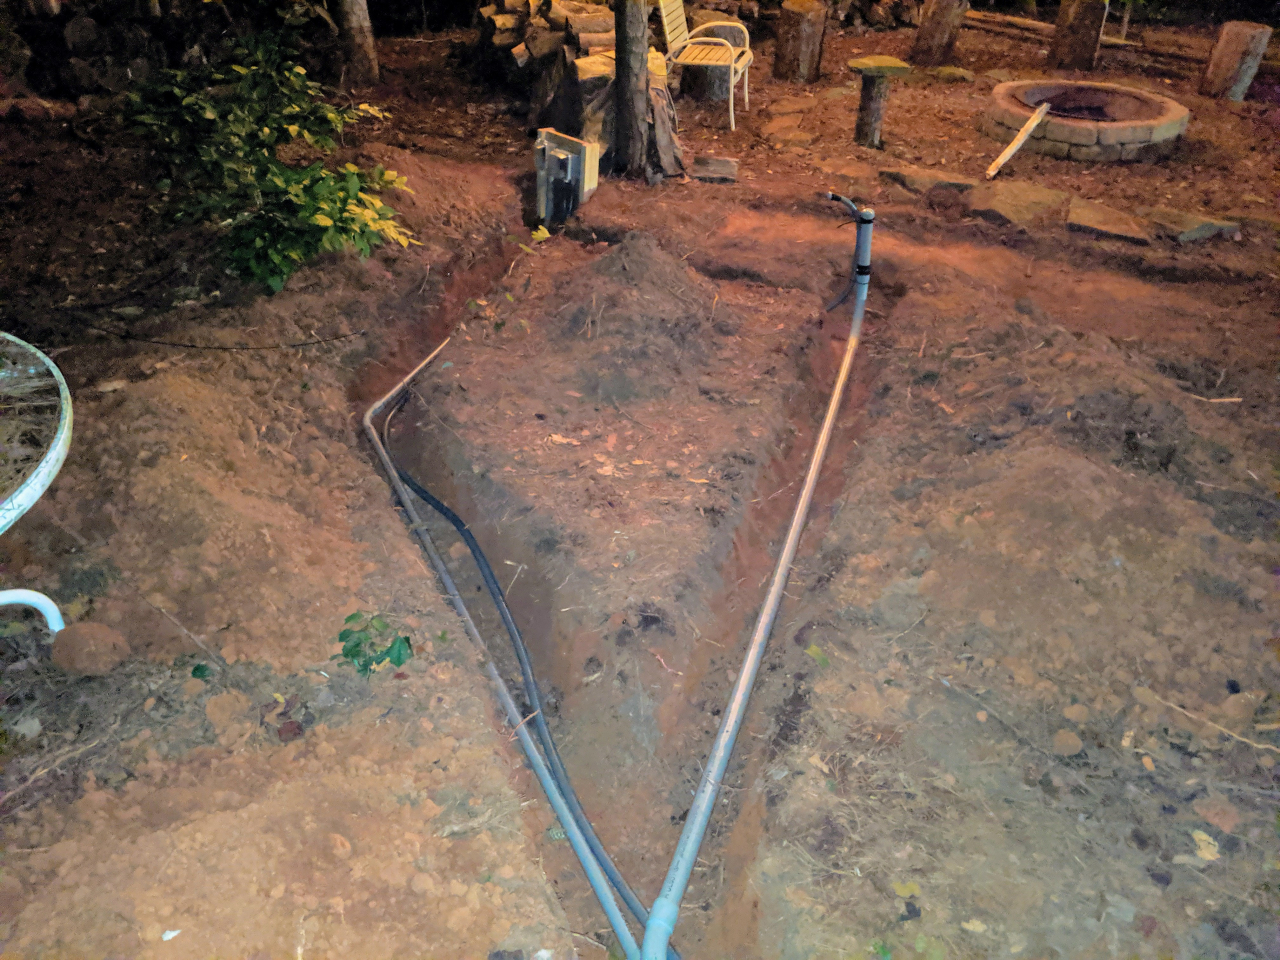
So got up and finished the trench this morning. Also made a connection trench between the two to reduce the distance to travel for power for the TV cabinet from the first outlet on the series.
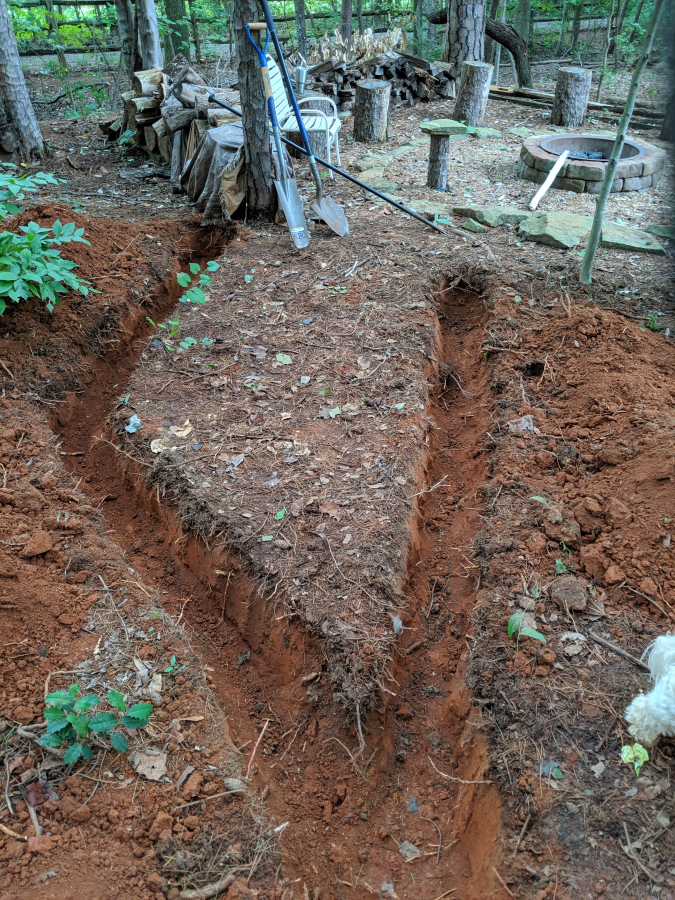
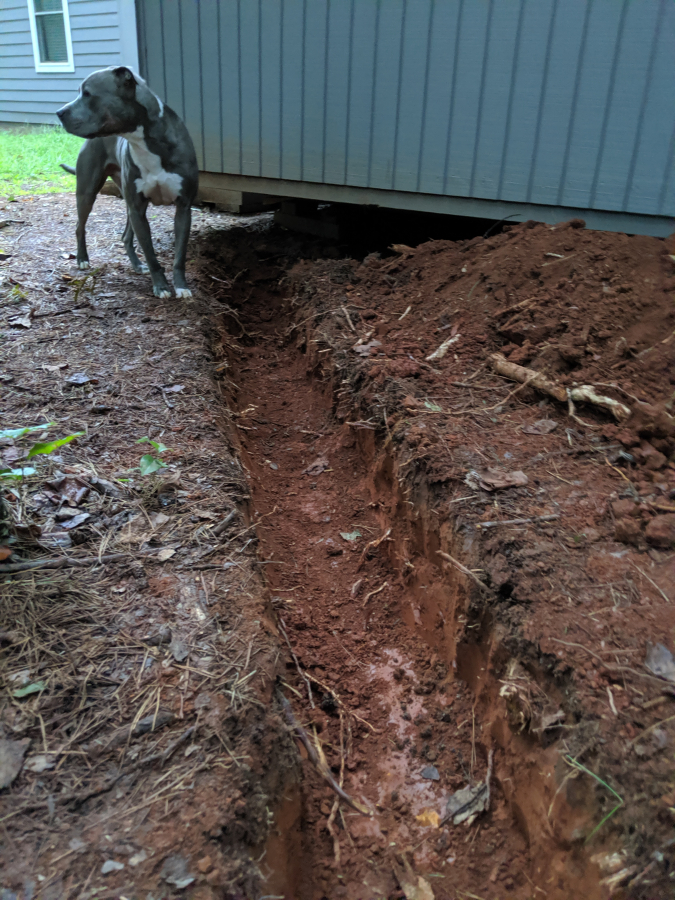
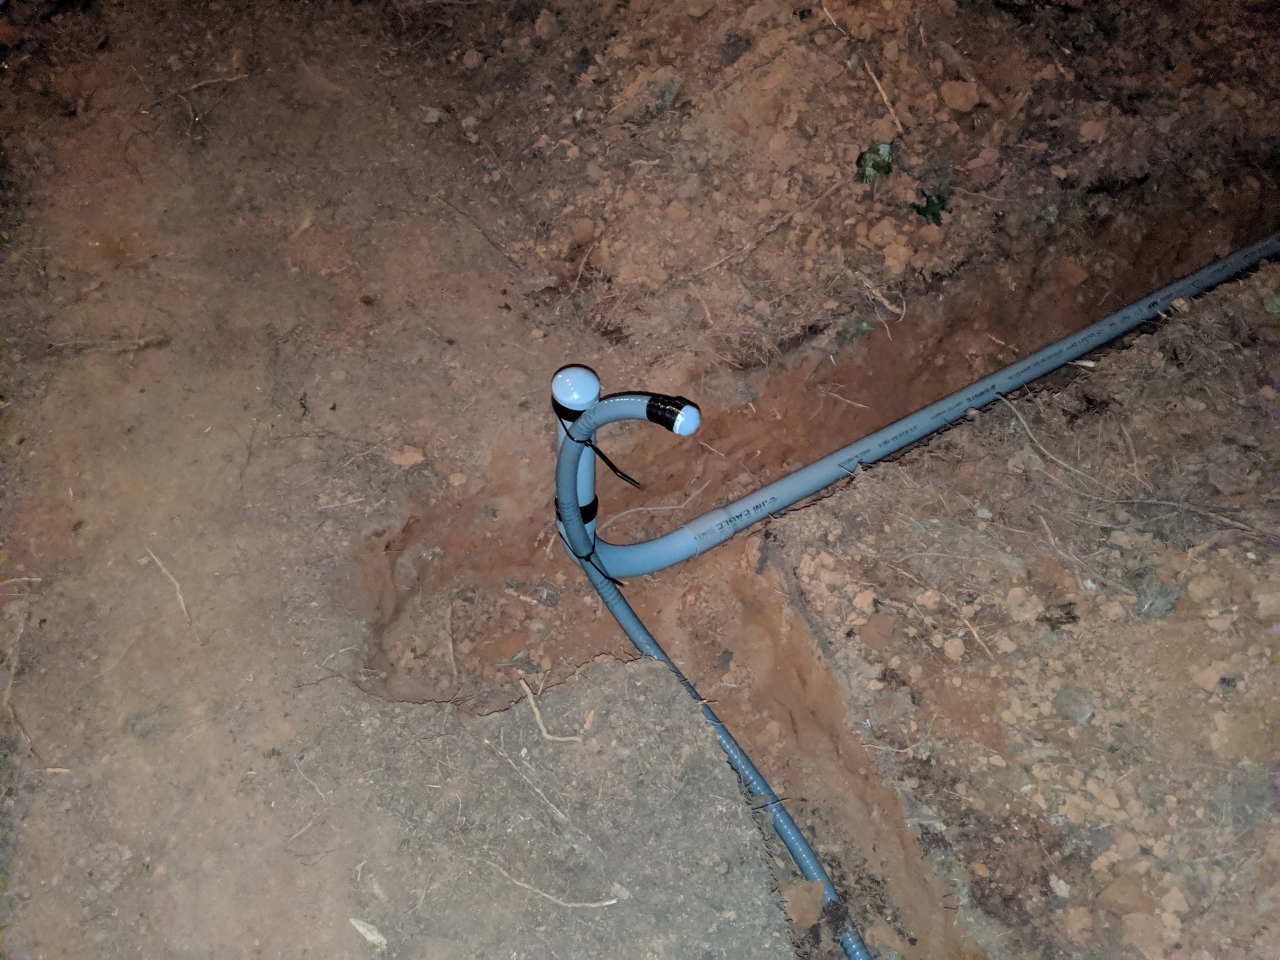
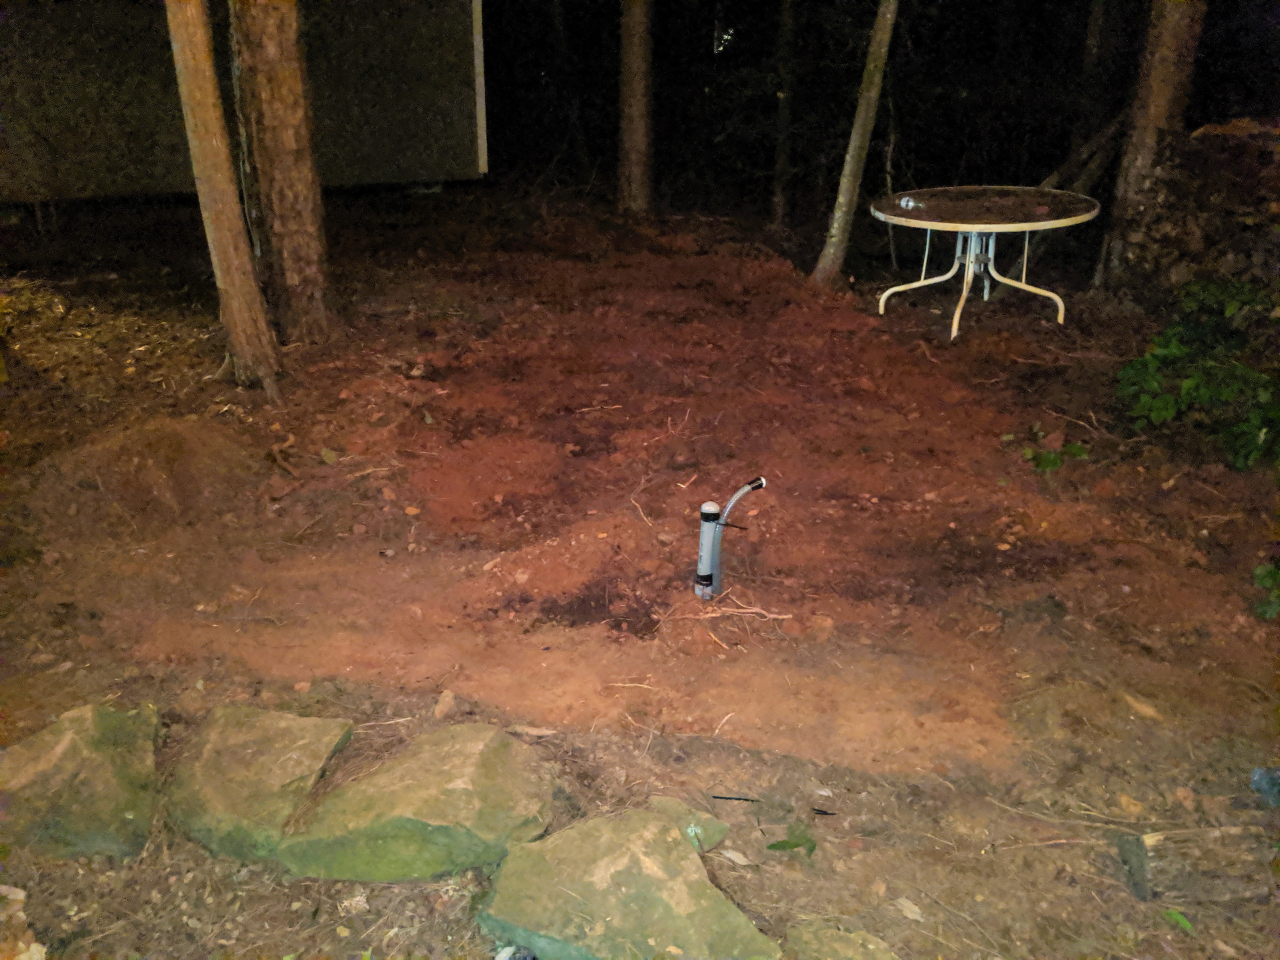
Widened the end of the one trench where the power and speaker connections will terminate before traveling up the side of the tree to the cable line the lights and speakers hang from.
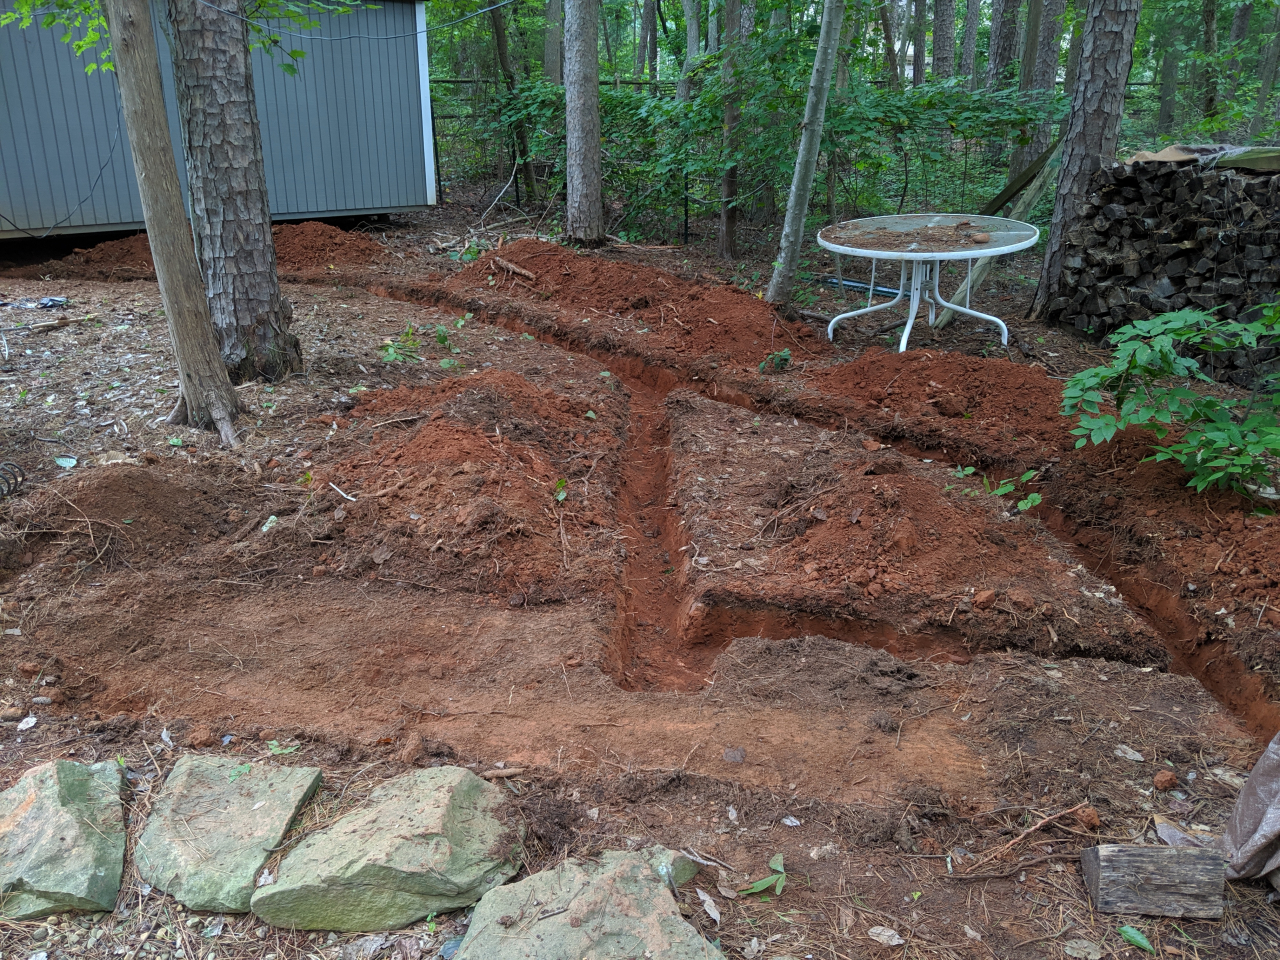
Overview
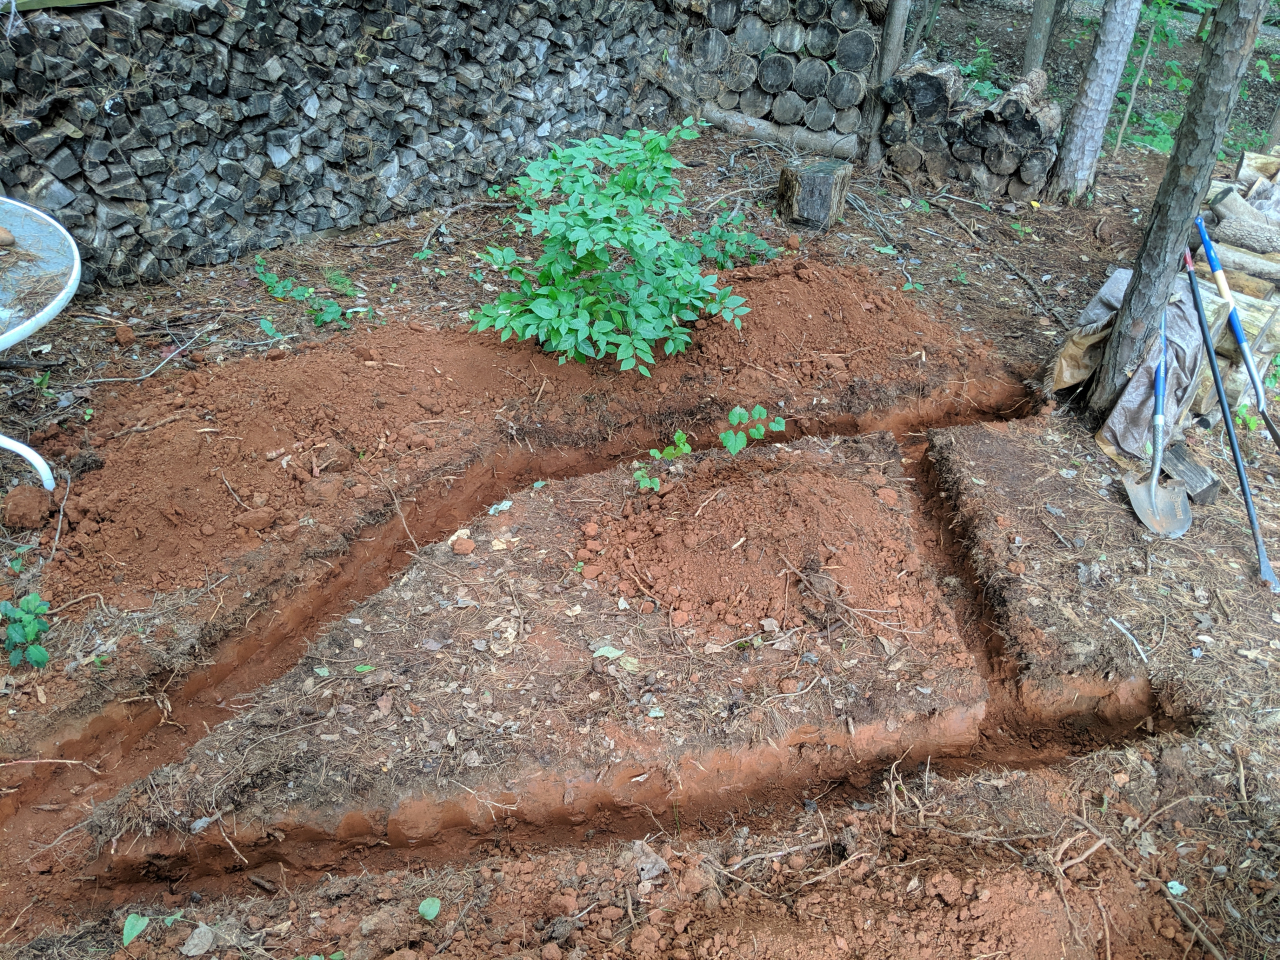
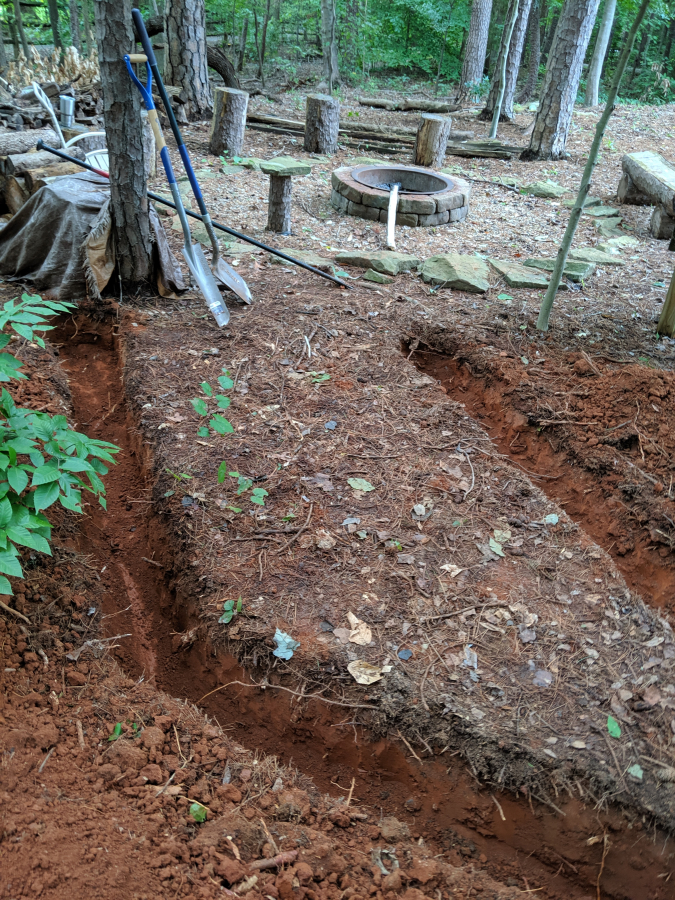
Full trench
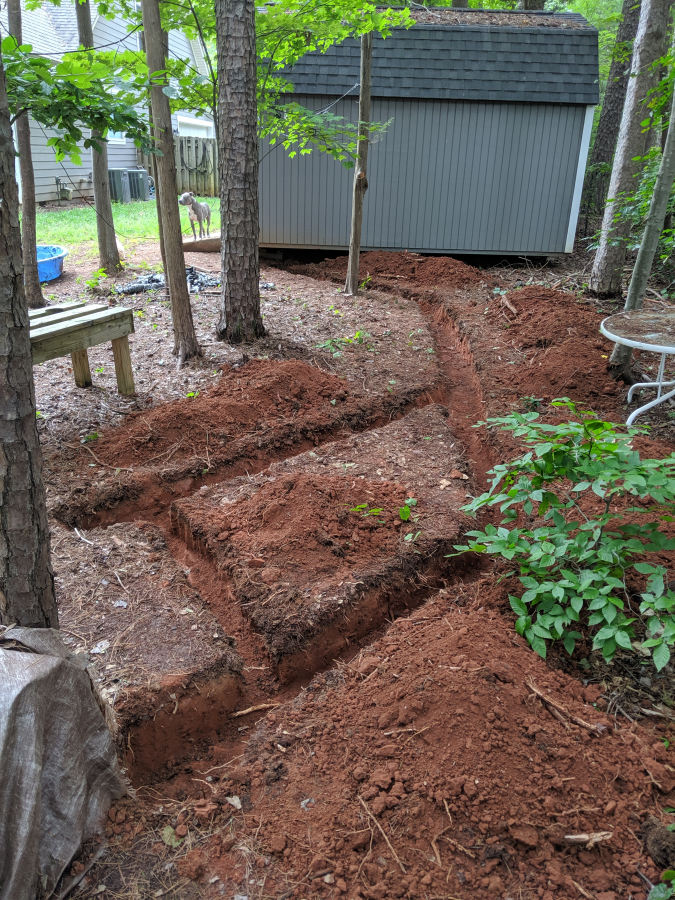
Also began to clear off the area where I will lay the pavers for the cabinet to sit on. Wanted to get some of it cleared off ahead of time while the trenches were open.
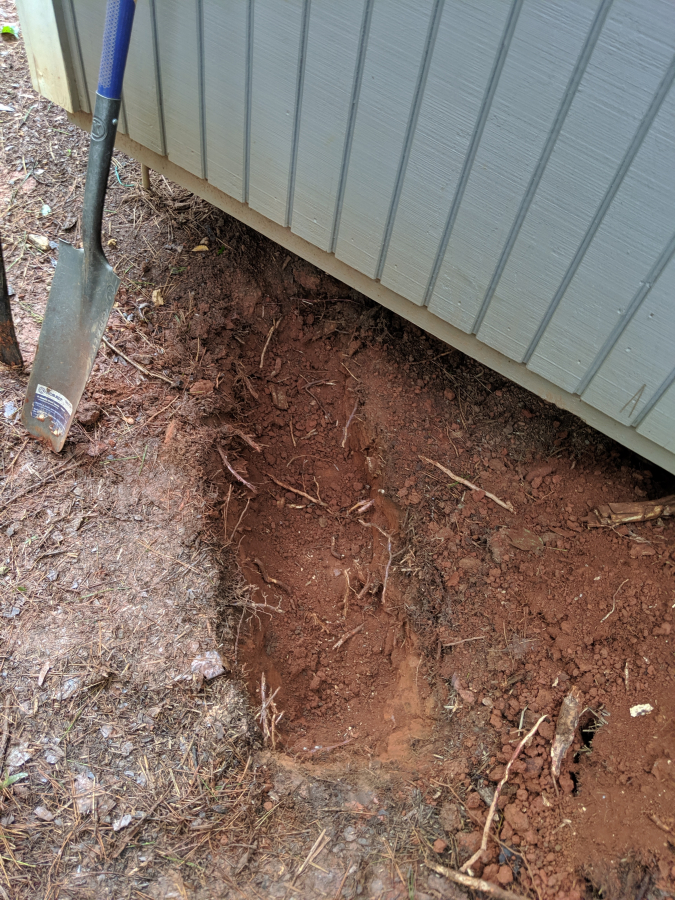
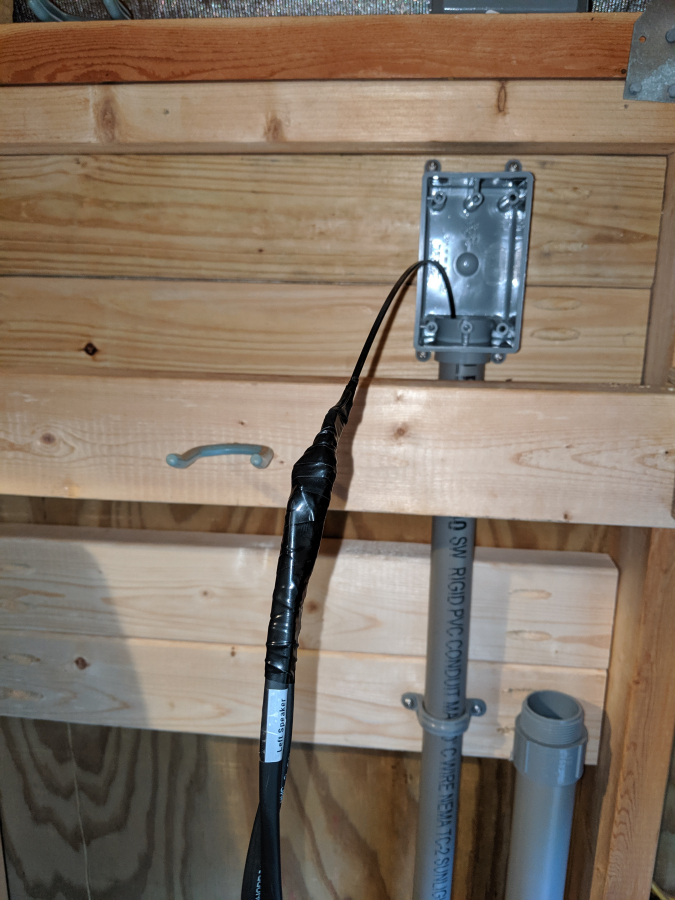
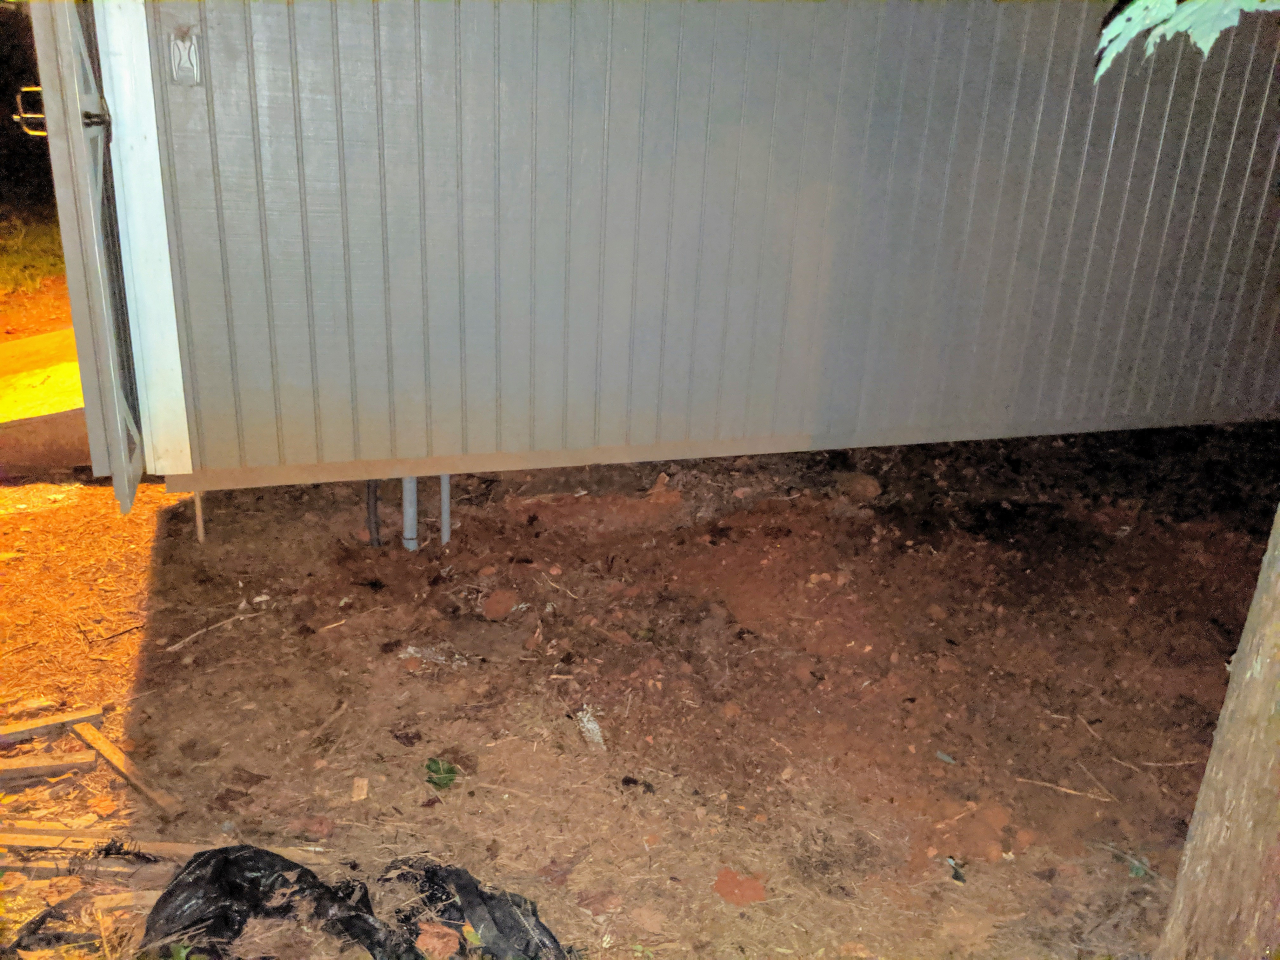
Next, it was on to finally getting the conduit into the shed. The connections will come in here.
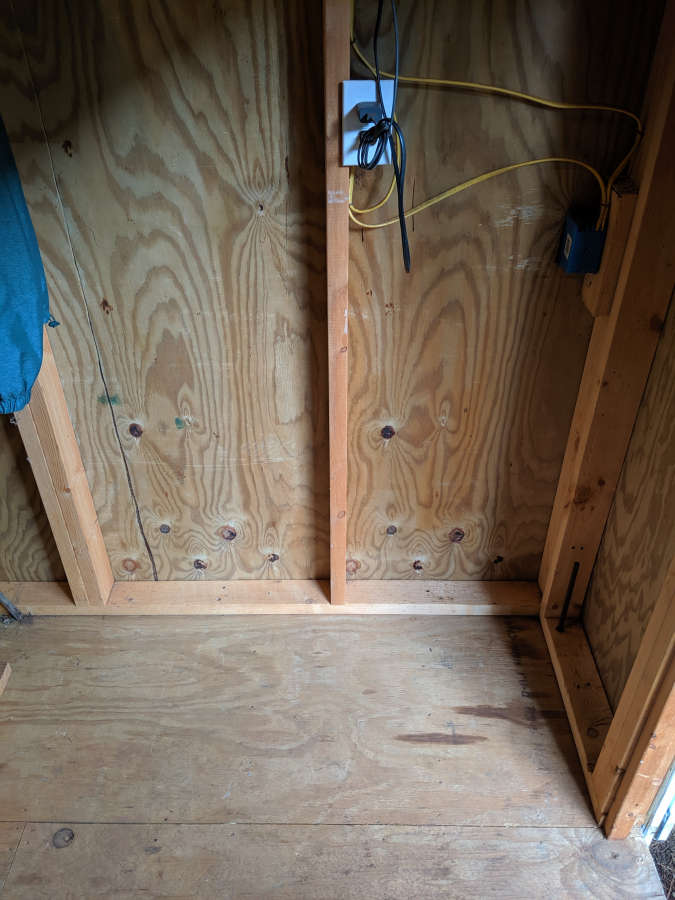
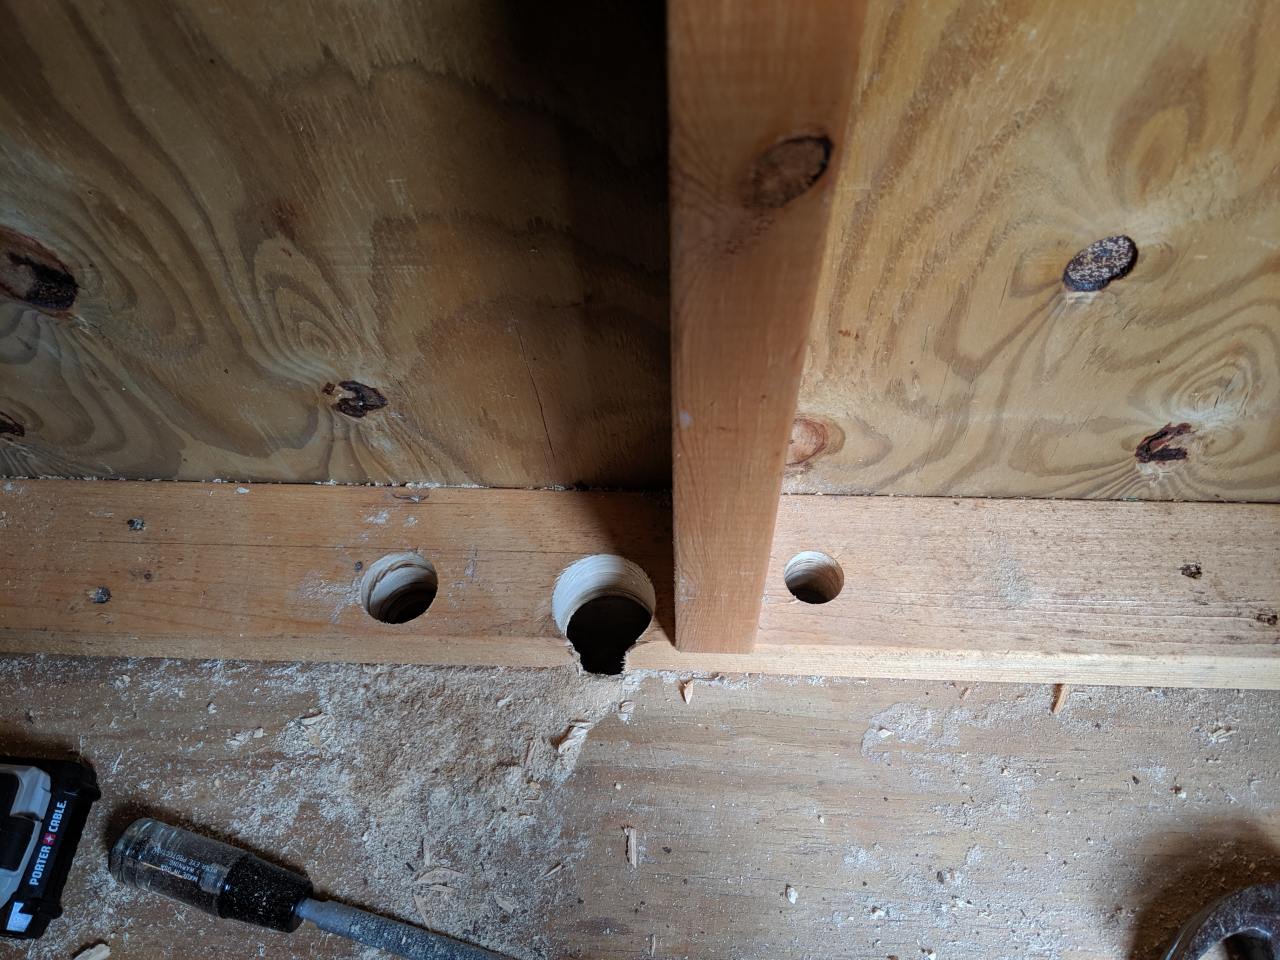
Three holes for the various conduit. One for the speaker wire, one for the audio connection and IR extender to control the receiver, and one for the power for the lights and everything in the TV cabinet.
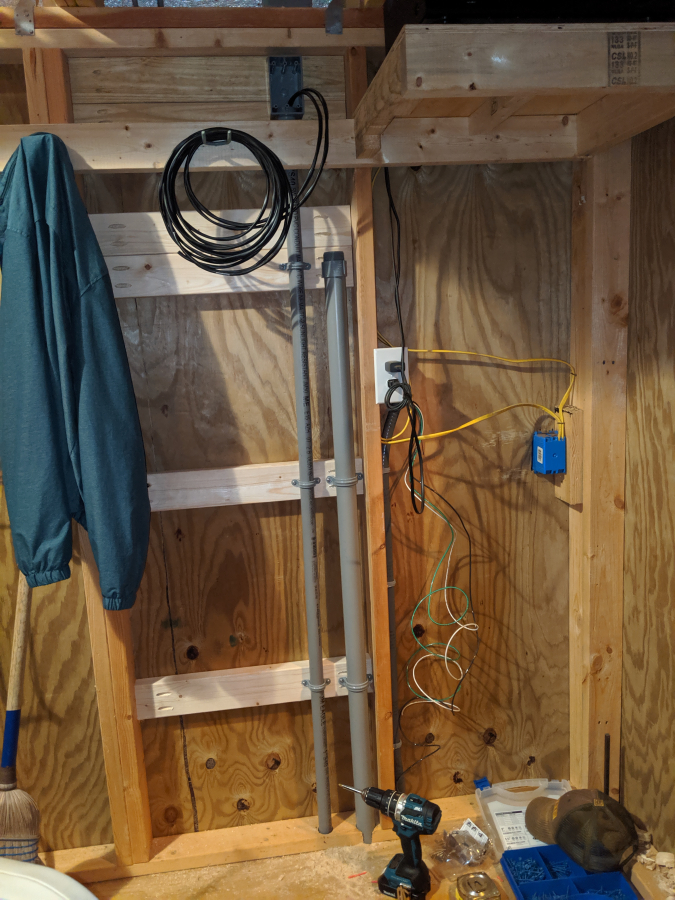
Support boards installed for the boxes and conduit securing braces installed as well as test fist of the vertical conduit lines.
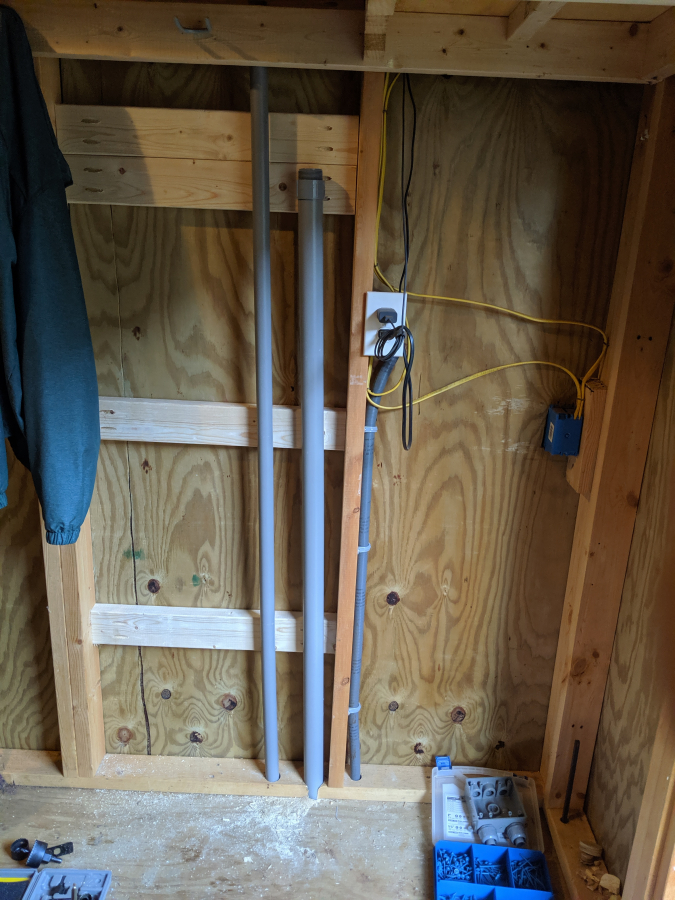
Two hard conduits and one flexible. Honestly, at this point, I wish I would have just gone with all hard conduit.
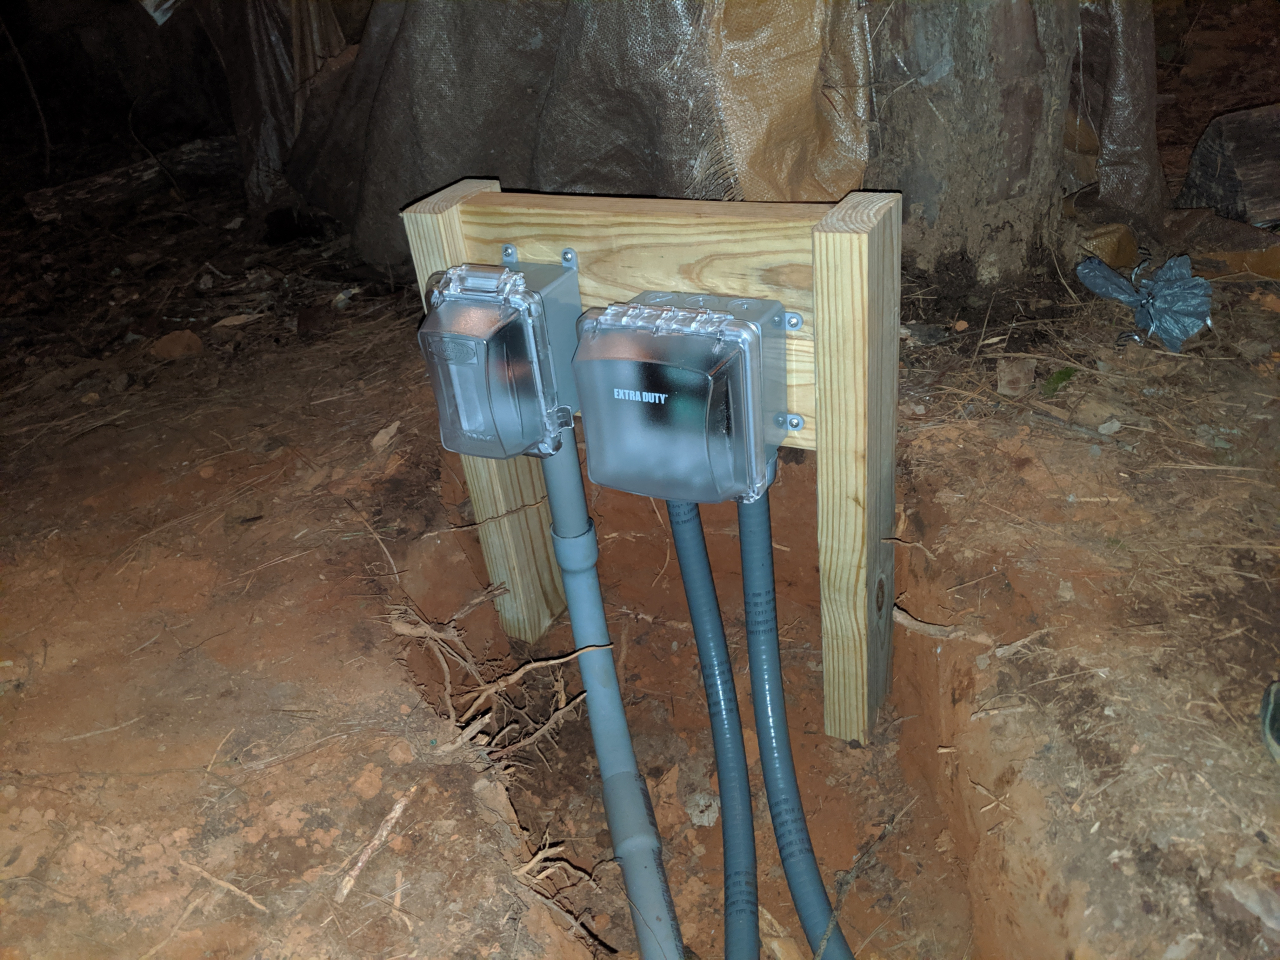
Box support that will hold the out junction box and speaker terminal box at the base of the tree. Will finally allow me to get rid of the speaker wire and extension cord that has been coming from the shed through trees for the past two years.
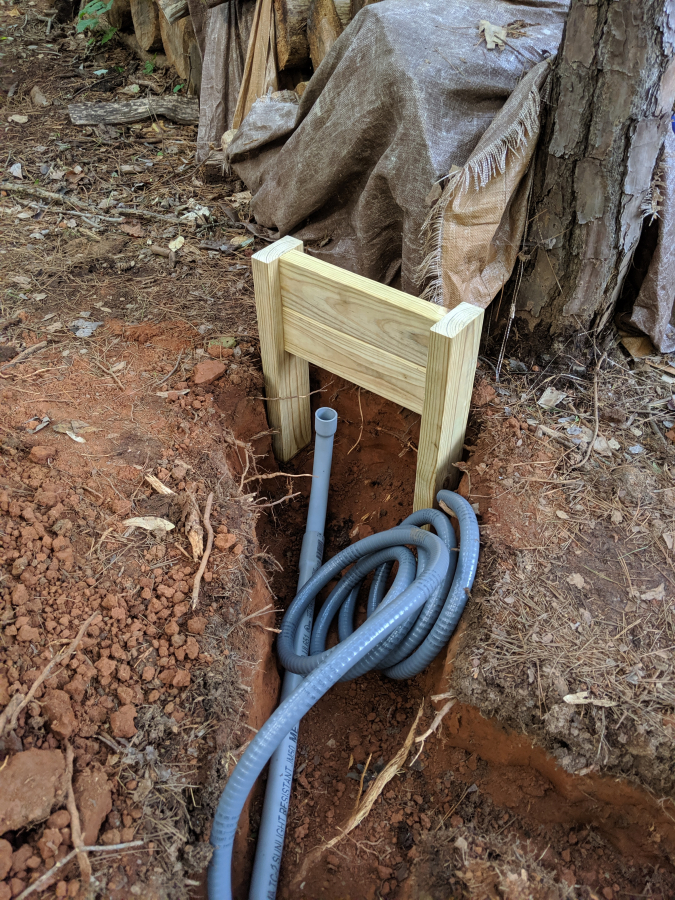
I had planned to get a lot further than this today but a good friend of mine stopped by for a bit and we had a few beers and well everything went downhill from there for the rest of the day.
Widened the end of the one trench where the power and speaker connections will terminate before traveling up the side of the tree to the cable line the lights and speakers hang from.
Overview
Full trench
Also began to clear off the area where I will lay the pavers for the cabinet to sit on. Wanted to get some of it cleared off ahead of time while the trenches were open.
Next, it was on to finally getting the conduit into the shed. The connections will come in here.
Three holes for the various conduit. One for the speaker wire, one for the audio connection and IR extender to control the receiver, and one for the power for the lights and everything in the TV cabinet.
Support boards installed for the boxes and conduit securing braces installed as well as test fist of the vertical conduit lines.
Two hard conduits and one flexible. Honestly, at this point, I wish I would have just gone with all hard conduit.
Box support that will hold the out junction box and speaker terminal box at the base of the tree. Will finally allow me to get rid of the speaker wire and extension cord that has been coming from the shed through trees for the past two years.
I had planned to get a lot further than this today but a good friend of mine stopped by for a bit and we had a few beers and well everything went downhill from there for the rest of the day.

Thread Starter
Moderator
Regional Coordinator (Southeast)
Regional Coordinator (Southeast)
Joined: Dec 2003
Posts: 44,123
Likes: 4,434
From: Mooresville, NC
Only one way to do it always.
What else was I going to do? Even getting a small bob cat back in there would have been difficult.
Ex-OEM King
Joined: Dec 2013
Posts: 17,880
Likes: 7,027
From: Minnesnowta
They make small trenchers just for this purpose lol. I think you can rent them from HD.

 that clay man...I wish!
Thread Starter
Moderator
Regional Coordinator (Southeast)
Regional Coordinator (Southeast)
Joined: Dec 2003
Posts: 44,123
Likes: 4,434
From: Mooresville, NC
 Fuck. I had no idea they made small ones. Shit would have been $86 a day from Home Depot. For the guy that believes in having the right tools to do a job always, I would absolutely have done that. Oh well.
Joined: Sep 2008
Posts: 78,249
Likes: 20,202
Instead, you got a free workout.
People pay a ton of money to crossfit gyms for workouts like this.
You did it yourself and ended up with electric run. Good Job!
So you got a workout and saved $186 (rental + crossfit monthly fee).
People pay a ton of money to crossfit gyms for workouts like this.
You did it yourself and ended up with electric run. Good Job!
So you got a workout and saved $186 (rental + crossfit monthly fee).
 My co-worker calls it 'dad-lympics'
Ex-OEM King
Joined: Dec 2013
Posts: 17,880
Likes: 7,027
From: Minnesnowta
Joined: Jan 2005
Posts: 92,773
Likes: 4,687
From: ShitsBurgh
Thread Starter
Moderator
Regional Coordinator (Southeast)
Regional Coordinator (Southeast)
Joined: Dec 2003
Posts: 44,123
Likes: 4,434
From: Mooresville, NC
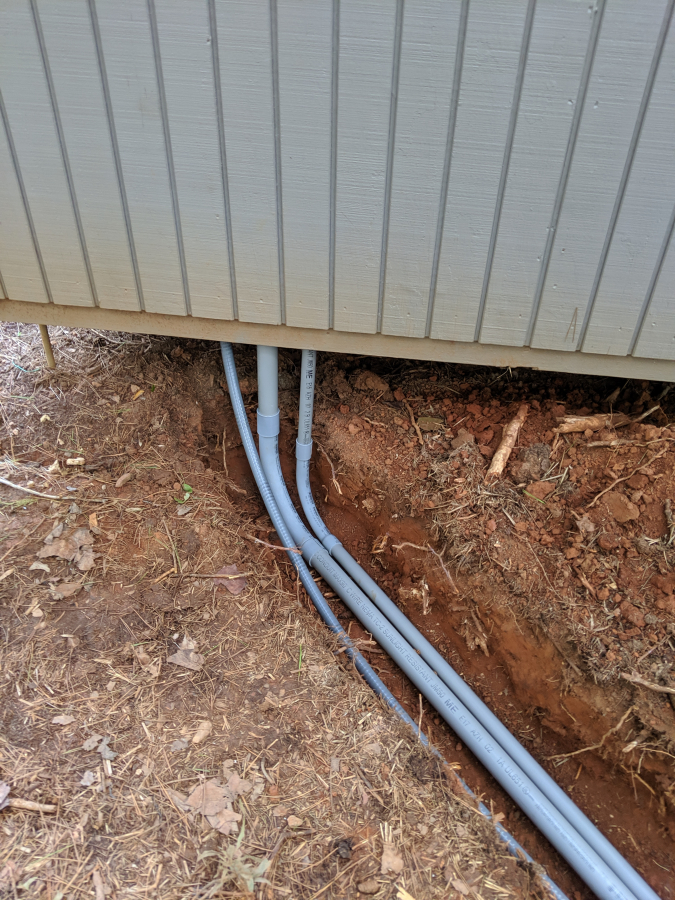
So had to rush to finish everything last night as we are supposed to get rain for the next two days and I didn't want the trenches filling with water. So last night after work I finalized and glued all the conduit together and pulled the 2 runs of 12awg speaker wire through the 1in conduit and the line, neatural, and ground thhn through the 3/4in flex conduit. I will never use flex conduit again. Pulling through the 1in solid conduit was easy. Even with there being more wire in that conduit size wise as compared to in the 3/4 with the power lines the 3/4 flex was a nightmare. Ended up having to pull it out of the trench and putting the fish tape through with it laying completely straight. You would have thought the flex with not couplers would have been easier to pull but I think there is much more friction inside it as compared to the the solid. It was only a 41ft run as well so not all that long really.
I started with the 12awq speaker wire. Figured I only needed 50ft but cut two 60ft pieces just in case. Then labled both ends so I know what cable is what.
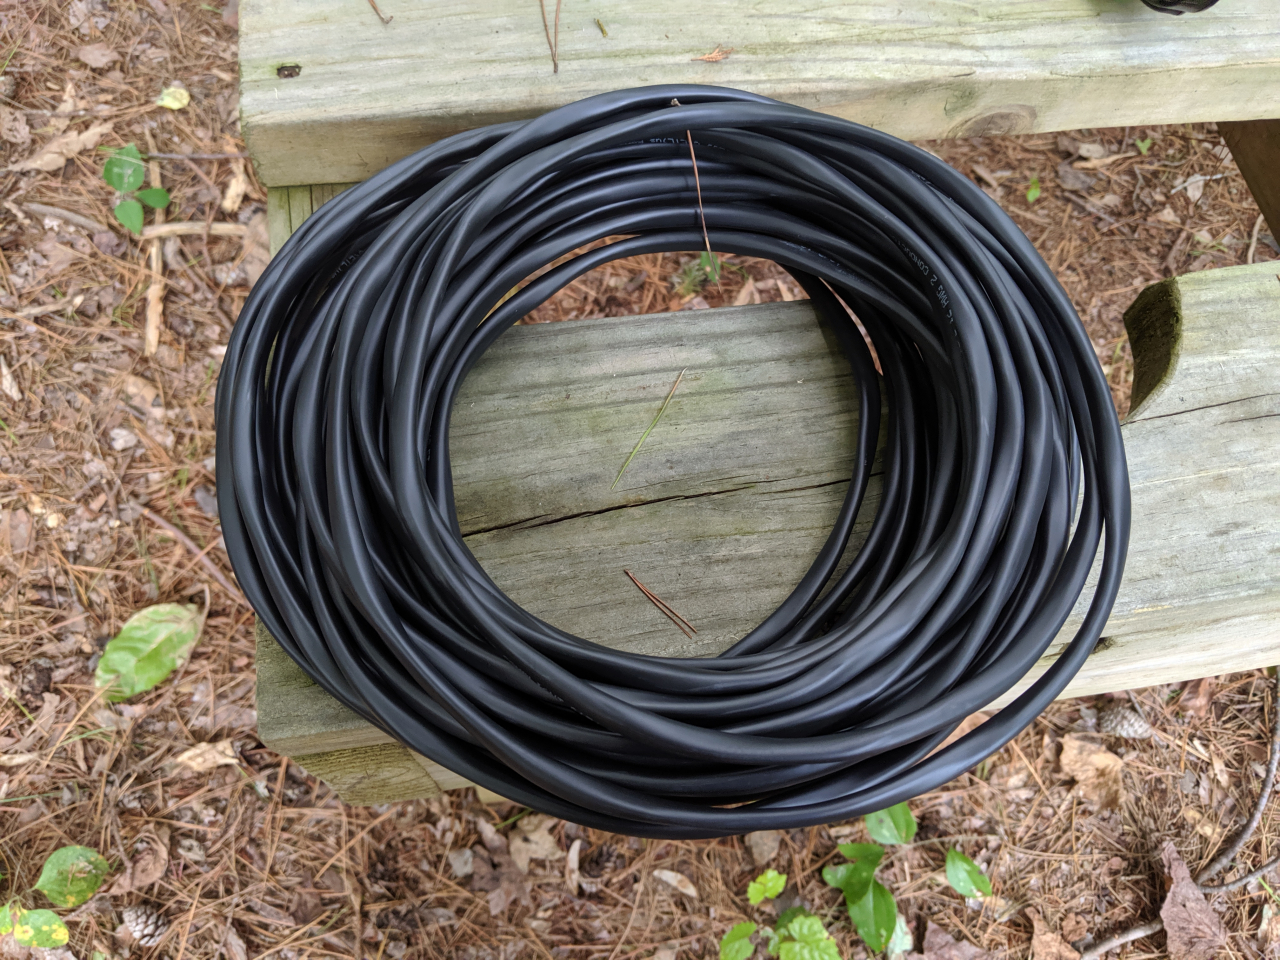
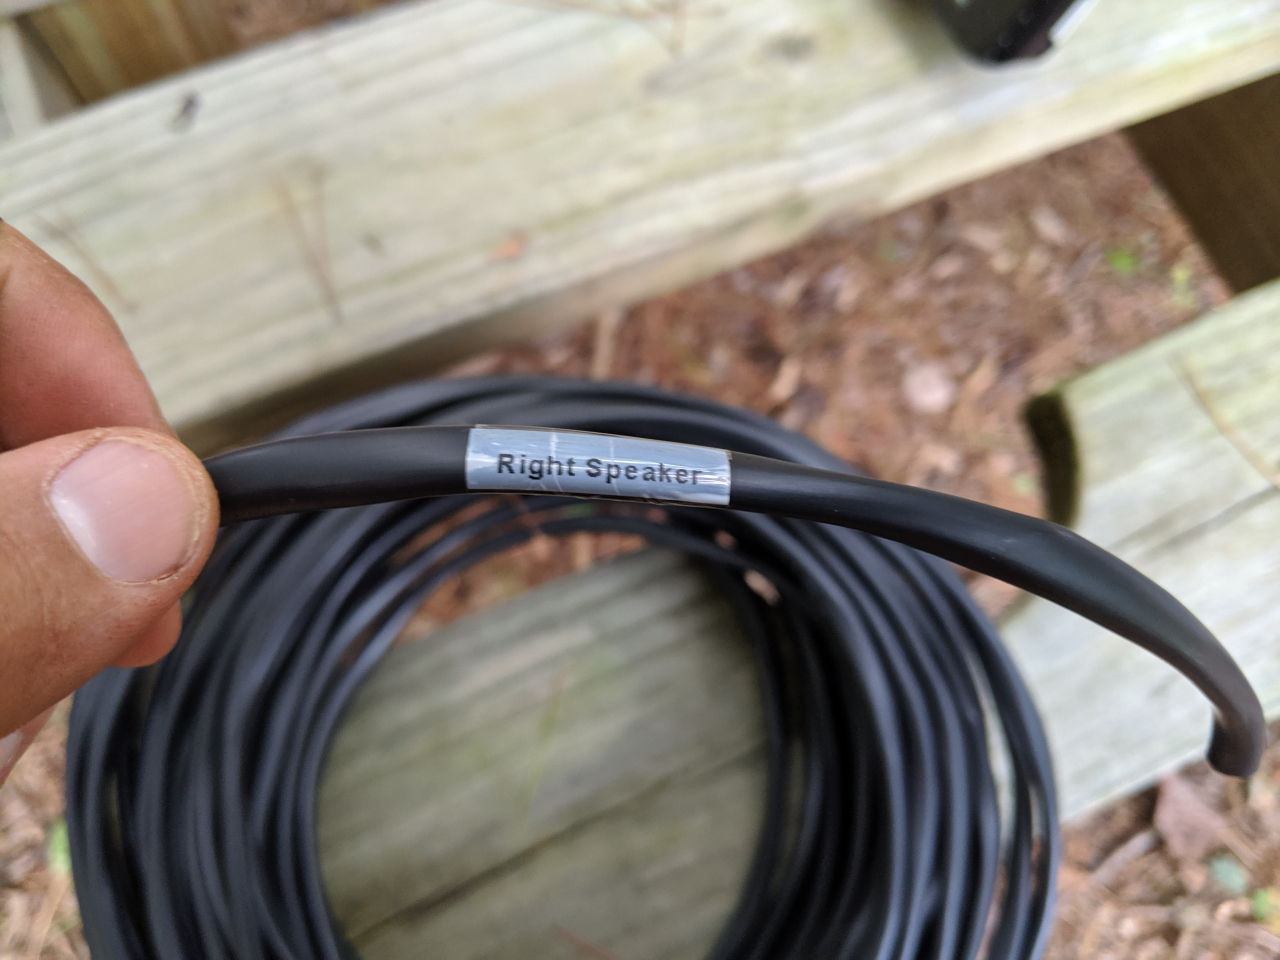
Taped to the fish tape and ready to go
With the pulling of the power being so frustrating I pretty much took no other pictures until complete.
I didn't glue the top vertical pipe because it is only temporay to keep water out. I did tape all the joints that were not glued. They will get glued when the final install is done with the cabinet. I also did not glue the connection from the hard conduit to the speaker wire box because it is above ground.
Everything mounted to the support post structure. Nothing is terminated yet. I had planned to do so had the power wire pulling not taken so long. The real task was just to get it all pulled before the rain.
Everything filled back in. It will need some more grading and still needs tamped down but at this point it was 10:30 and I was beat. It was good enough to survice the next two days of rain.
Everything in the shed ready to be terminated. I have have speaker binding wall plates coming for both ends of the speaker line pull and the power will be terminated into the existing outlet right above the conduit. There are only two connections in that box right now so adding a third will still be within code.
Only thing left to run then is the 3 cat5e/cat6 cables (probably going with cat5e cause it is cheaper and they won't be running network anyways) and the one 1/8in stereo cable that will extended the Harmony Hub IR signal into the shed from the TV cabinet.
I started with the 12awq speaker wire. Figured I only needed 50ft but cut two 60ft pieces just in case. Then labled both ends so I know what cable is what.
Taped to the fish tape and ready to go
With the pulling of the power being so frustrating I pretty much took no other pictures until complete.
I didn't glue the top vertical pipe because it is only temporay to keep water out. I did tape all the joints that were not glued. They will get glued when the final install is done with the cabinet. I also did not glue the connection from the hard conduit to the speaker wire box because it is above ground.
Everything mounted to the support post structure. Nothing is terminated yet. I had planned to do so had the power wire pulling not taken so long. The real task was just to get it all pulled before the rain.
Everything filled back in. It will need some more grading and still needs tamped down but at this point it was 10:30 and I was beat. It was good enough to survice the next two days of rain.
Everything in the shed ready to be terminated. I have have speaker binding wall plates coming for both ends of the speaker line pull and the power will be terminated into the existing outlet right above the conduit. There are only two connections in that box right now so adding a third will still be within code.
Only thing left to run then is the 3 cat5e/cat6 cables (probably going with cat5e cause it is cheaper and they won't be running network anyways) and the one 1/8in stereo cable that will extended the Harmony Hub IR signal into the shed from the TV cabinet.
Senior Moderator

Joined: Apr 2010
Posts: 48,312
Likes: 9,177
From: SoCal, CA
Did you lube before pulling? https://www.homedepot.com/p/Klein-To...6117/100660155
Never pull dry... that causes chafing
Never pull dry... that causes chafing