
Out with the old, in with the new(er) - BlackAck's 4Runner thread


Thread Starter
Joined: Jan 2005
Posts: 92,776
Likes: 4,687
From: ShitsBurgh
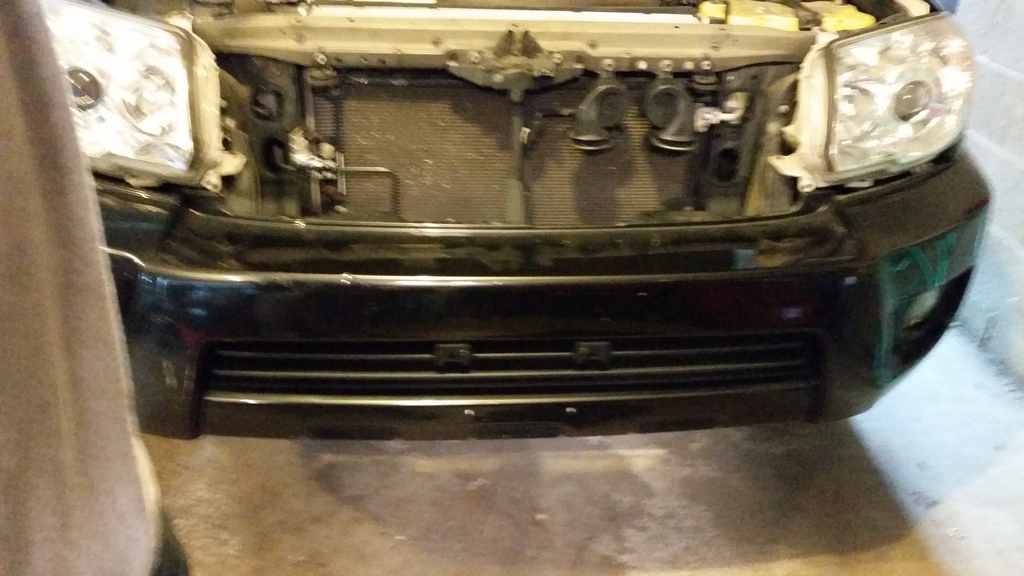
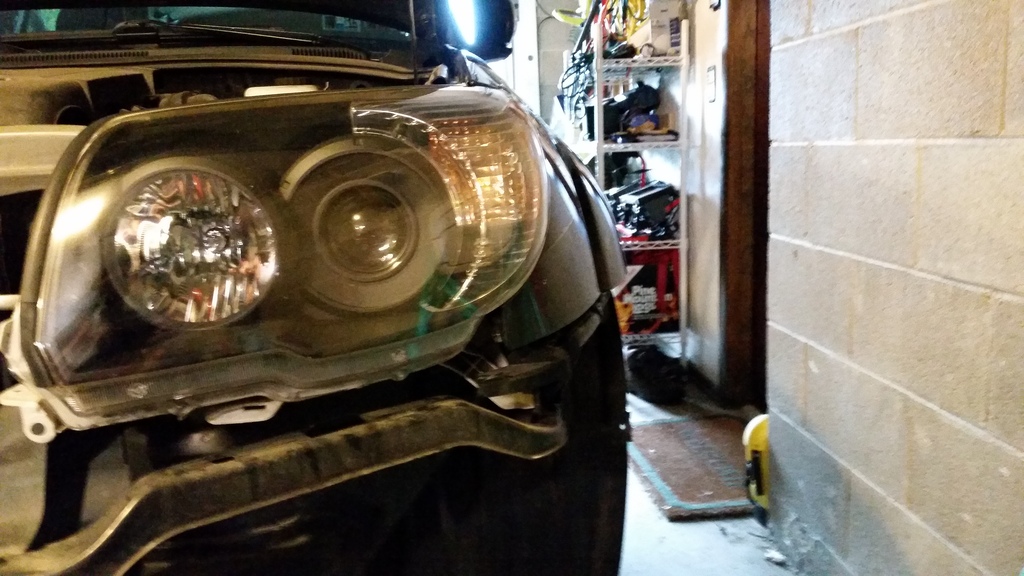
Had a busy weekend with the truck, I finally got around to installing the new front bumper, LED bar and retrofit headlights. Things went pretty smooth, with only a few hang ups here and there. First, here's a couple befores.

You can see the white crack/lines on the bumper, there was some other damage that's not real visible in the pics. A couple backed into me at the parking garage that I used to park at.
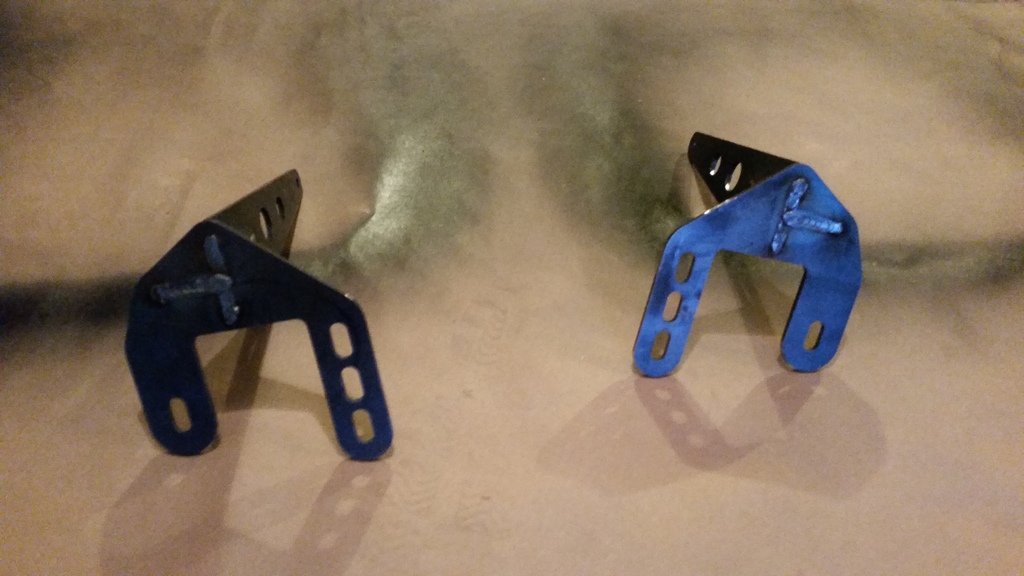
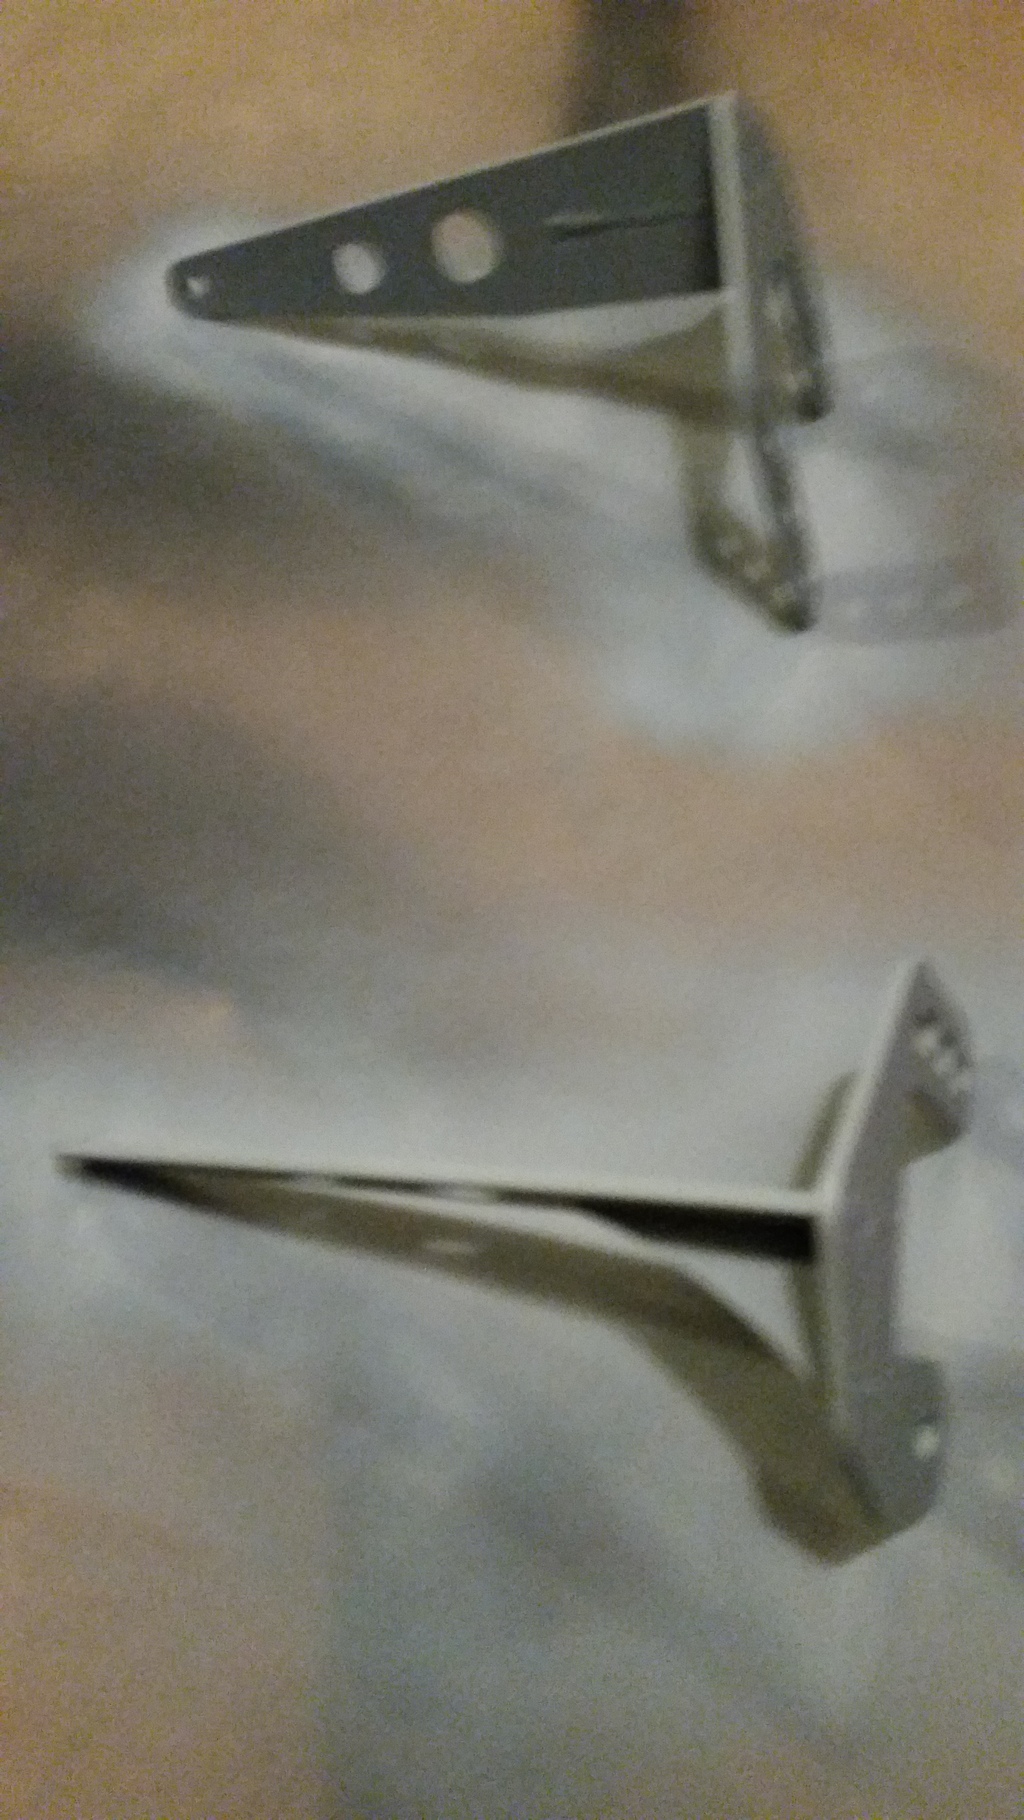
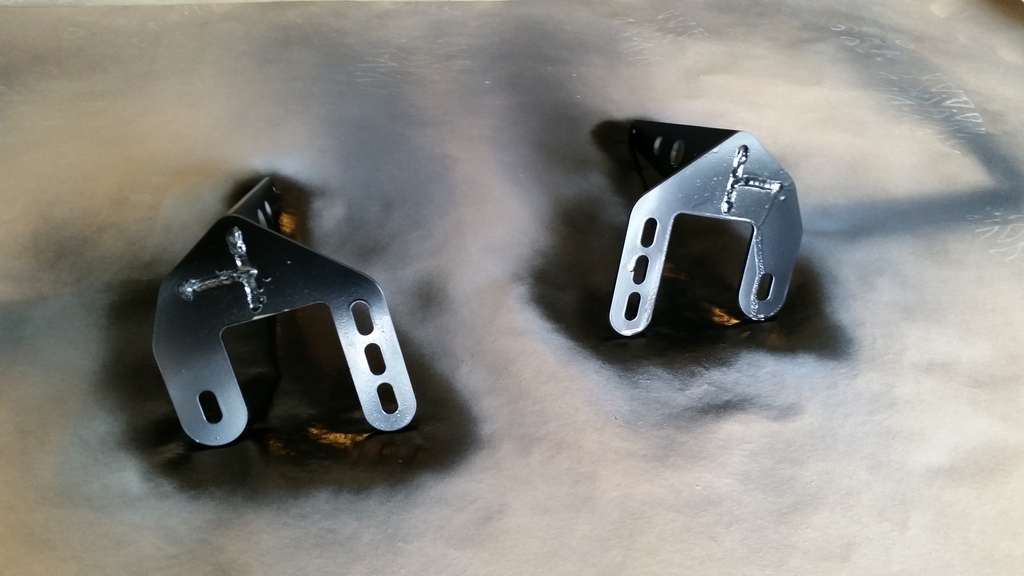
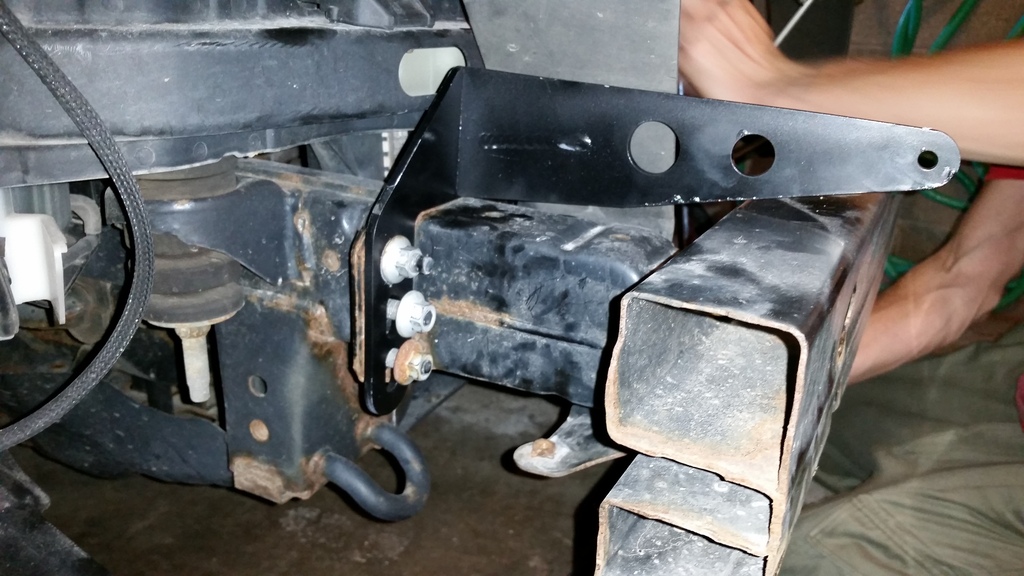
I got a custom set of brackets made for the LED bar, first I had to prime and paint them with high temp engine primer and semi-gloss black.
Bare metal
Primer
Paint coats going on
And now the fun begins...
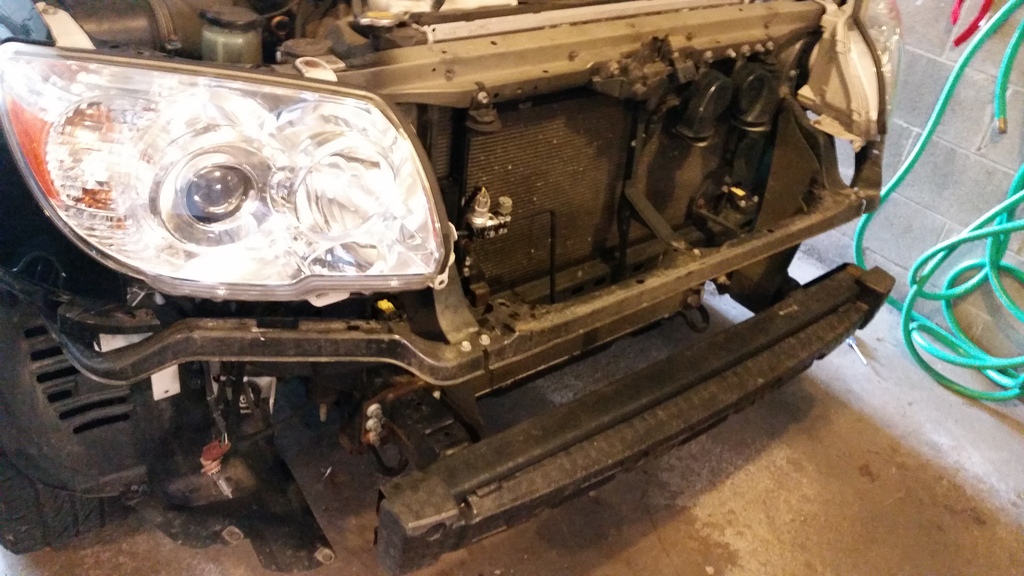
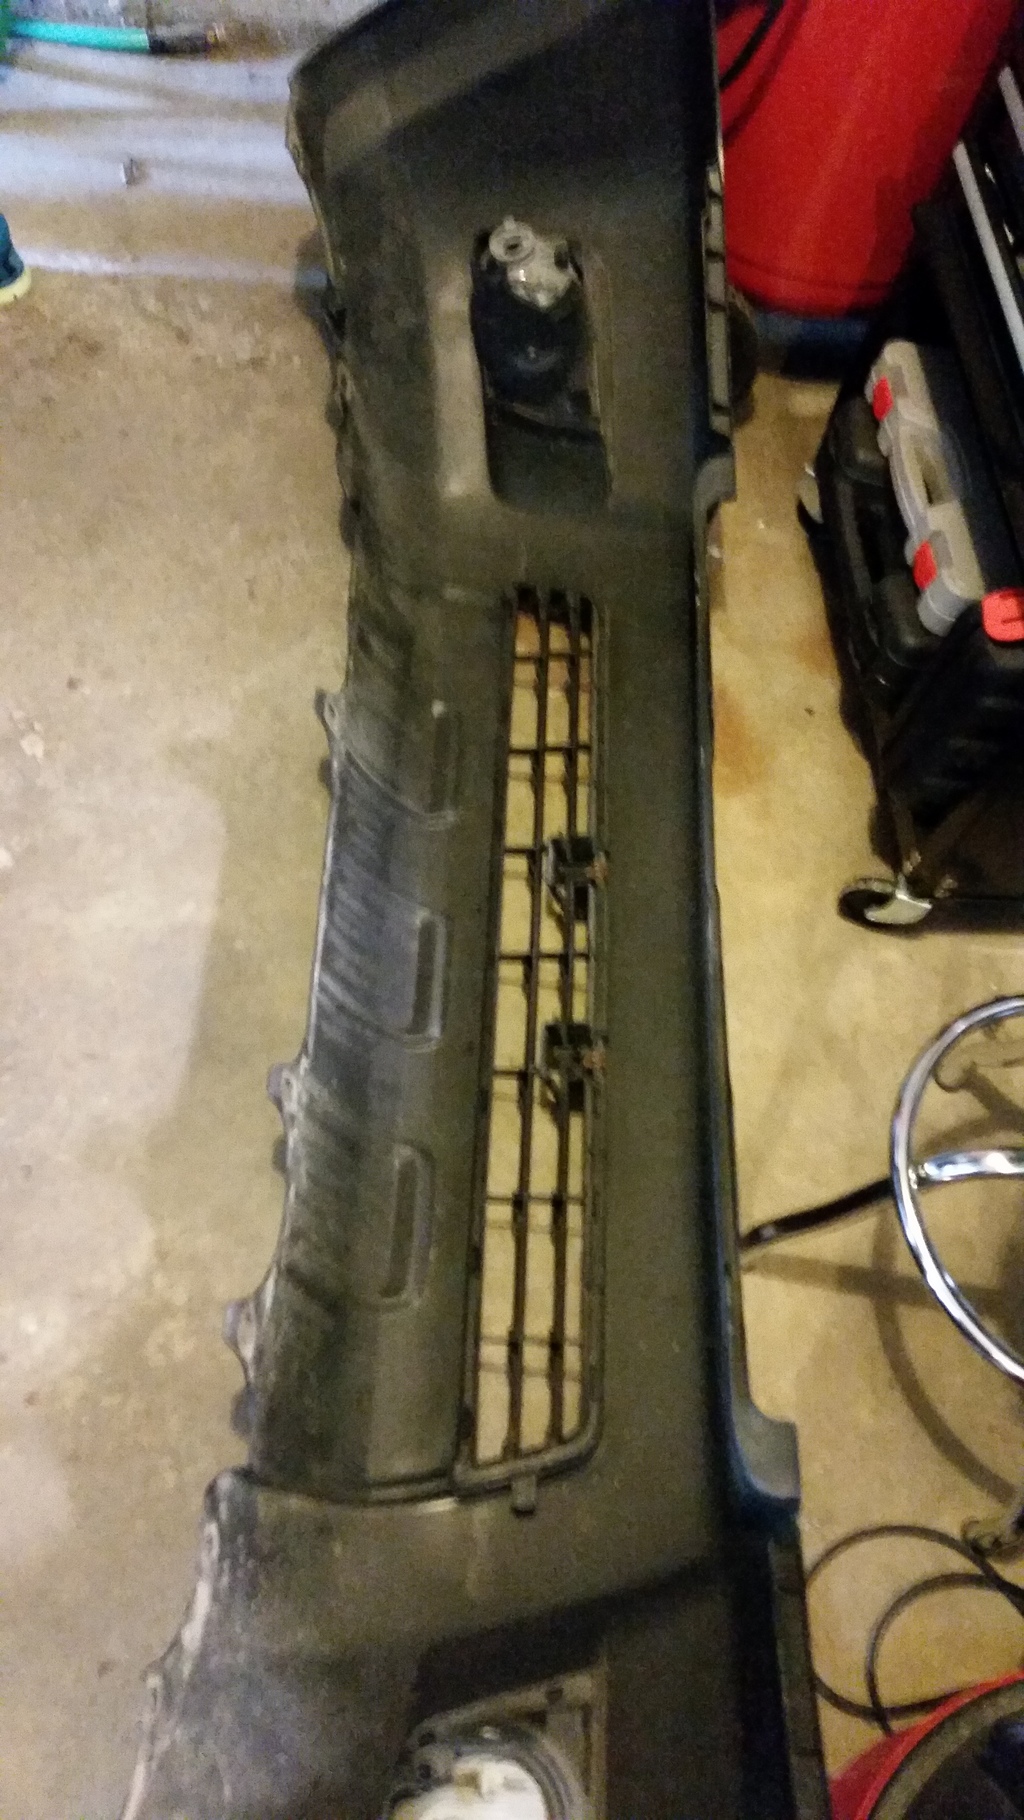
Bye Bye old bumper
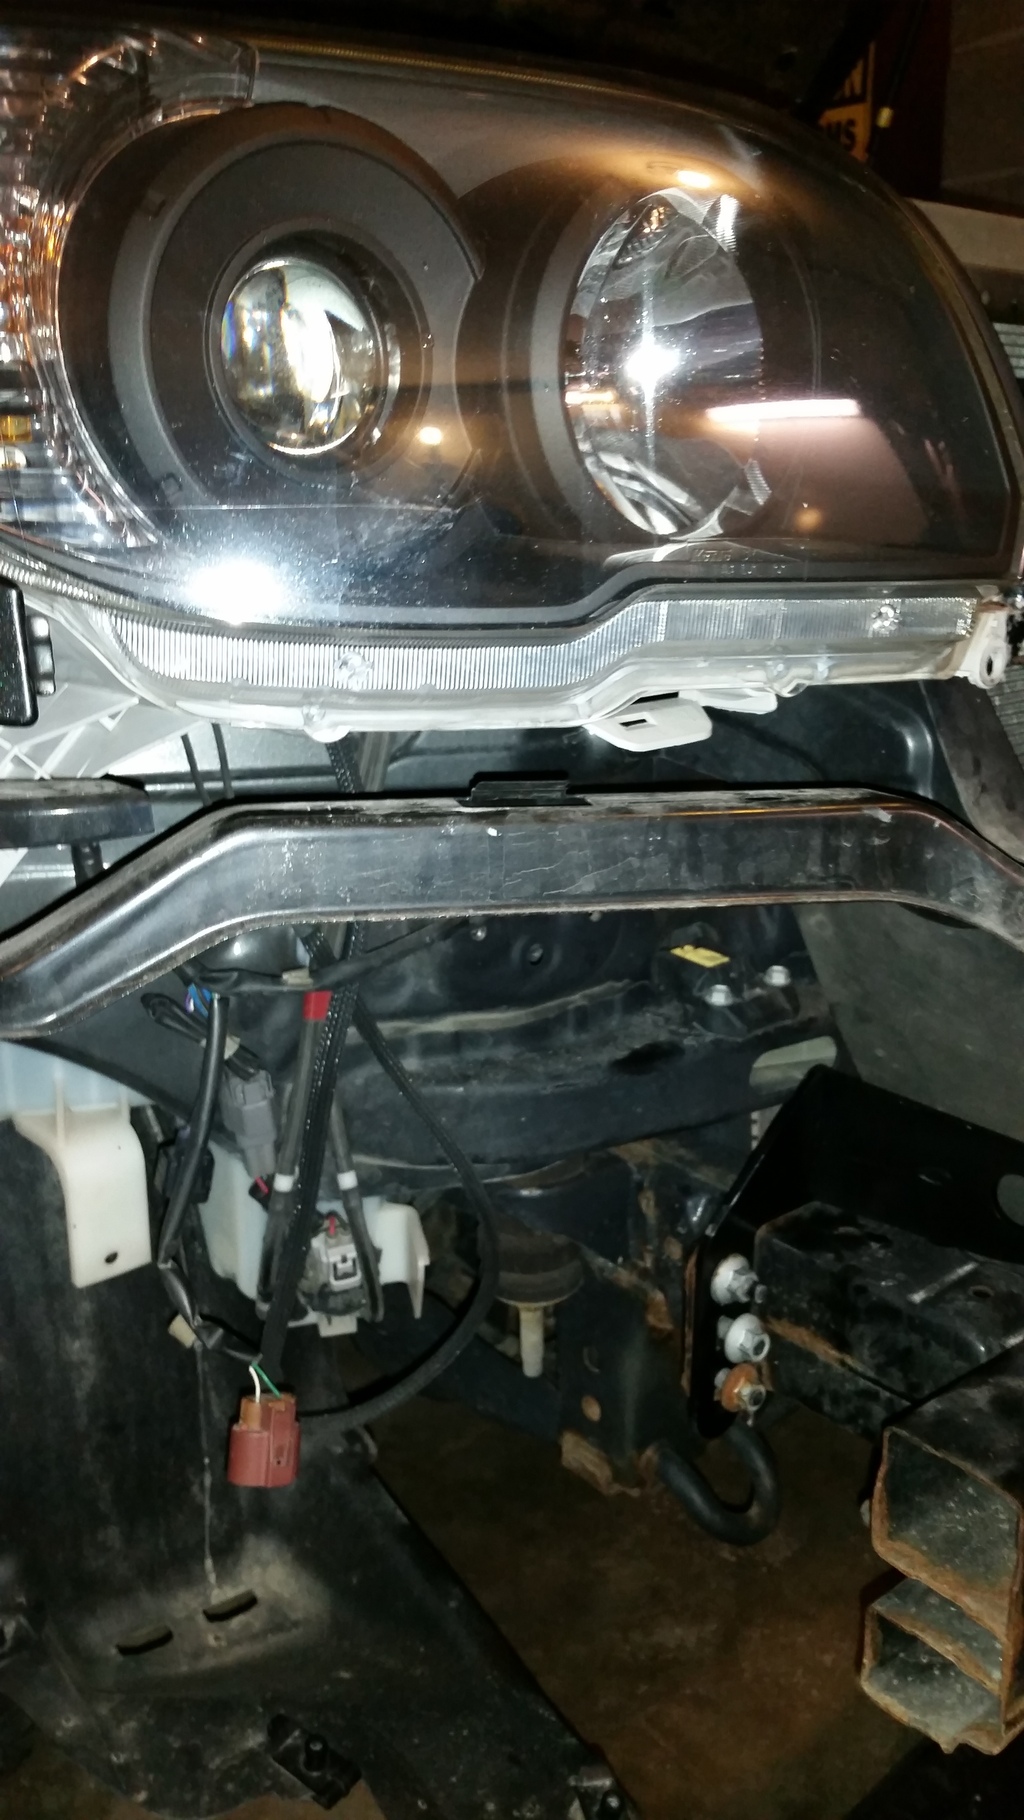
So I had a set of headlights with black housings all retrofitted and ready to go, however there were a couple broken clips and mounts on those headlights, so I decided to bake my stock headlights and use the housings that had all the clips intact, so I spent about 2 hrs baking headlights, and swapping the projectors, reflectors, backings, etc around.
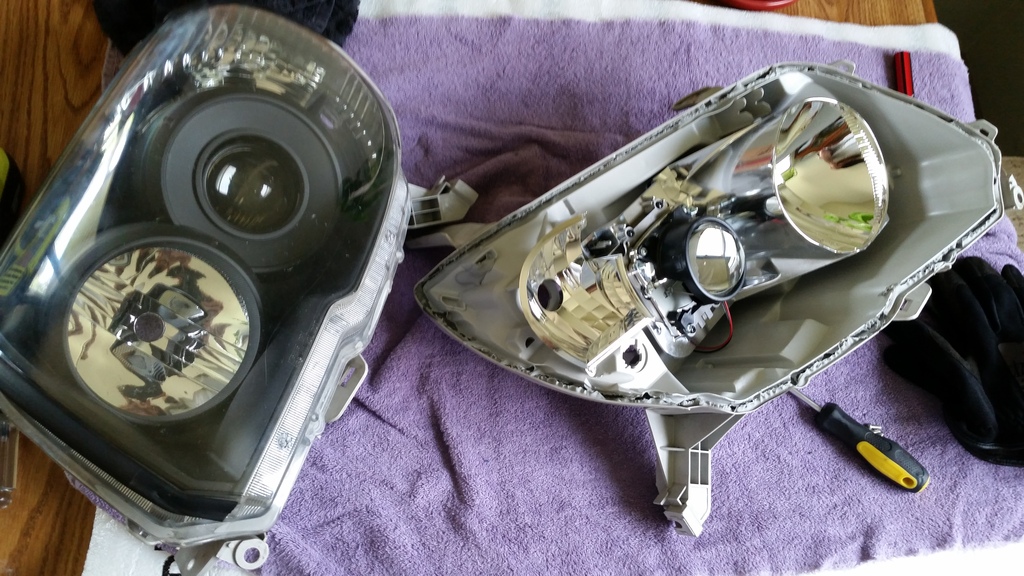
I didn't plan or intend to redo the headlights, but it was totally worth it, and now I won't have to do it again later. The projectors are d2s bi-xenon with high beam flap, I also have a splitter and installed brand new Silverstar Ultra 9005 bulbs in the high beams, and Voila!
Next comes the custom brackets made by a member on my 4Runner forum.
and...
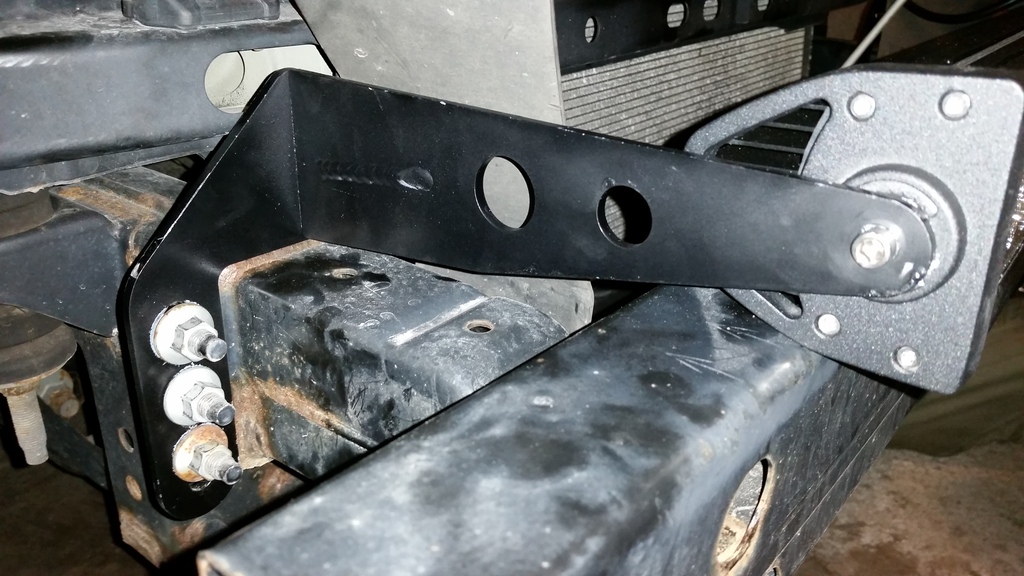
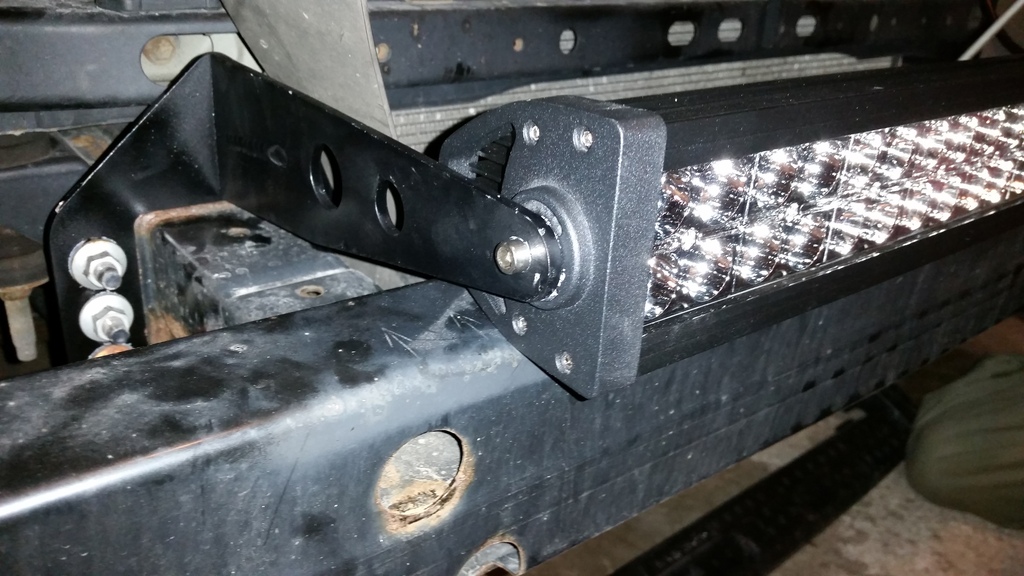
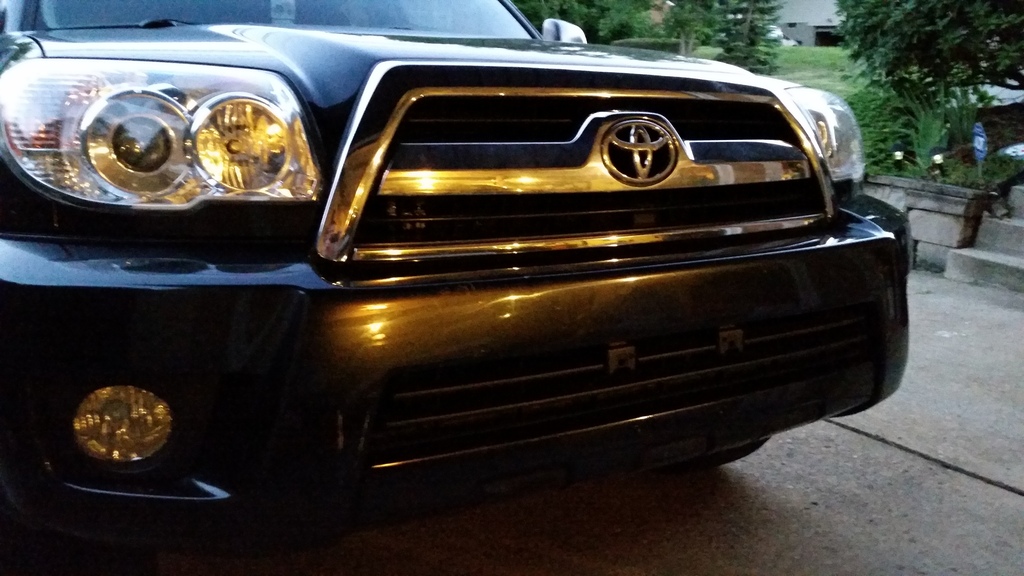
Boom! These brackets are designed to let the bumper sit flush inside of the bumper grille area.
Getting excited now!
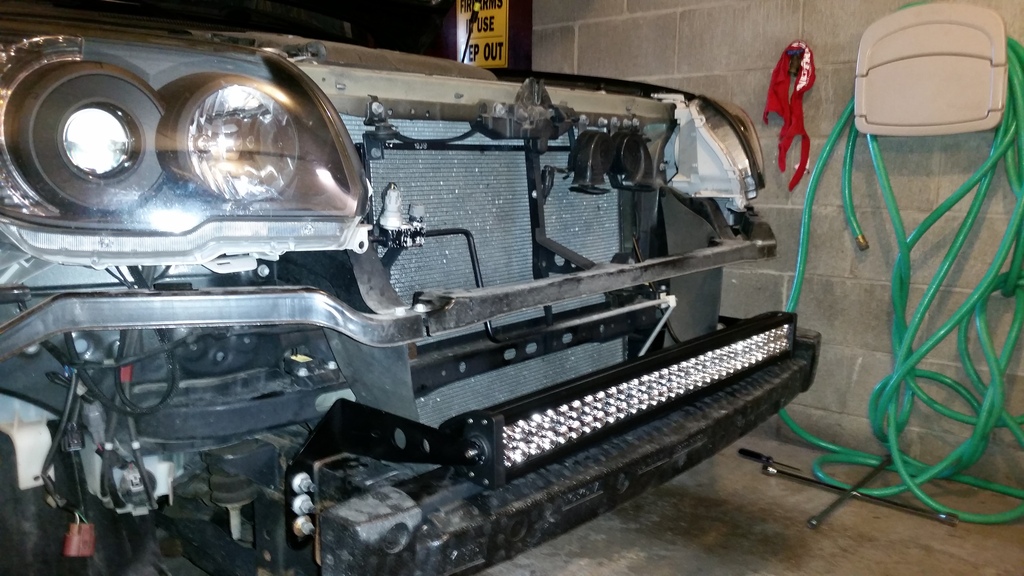
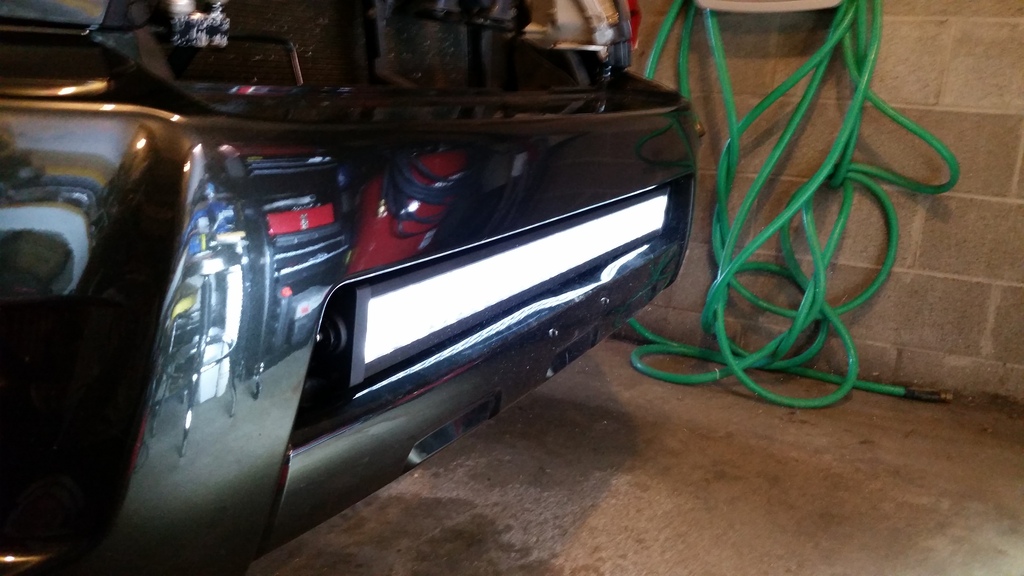
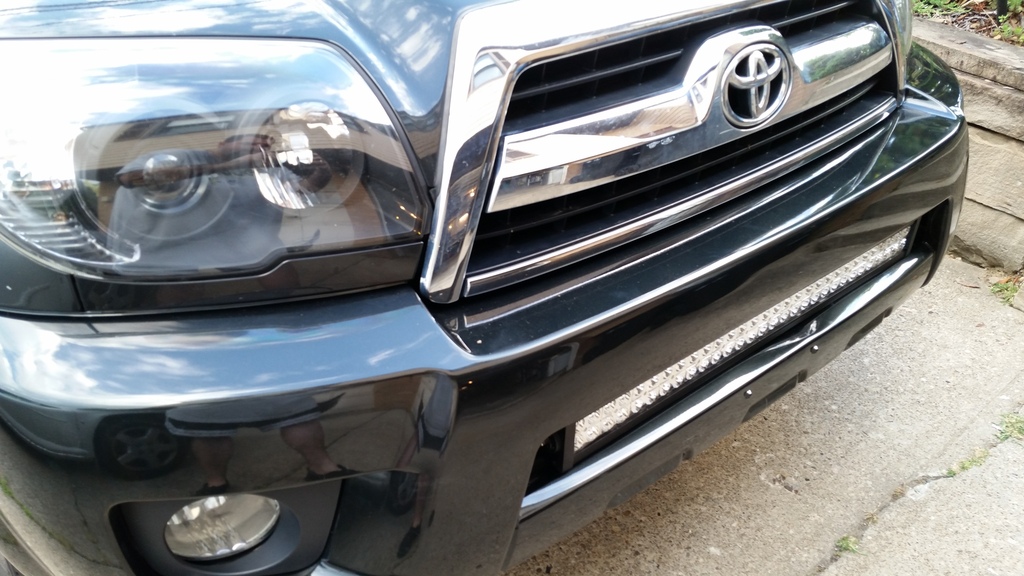
And next, the brand new painted bumper from Mr. Maker

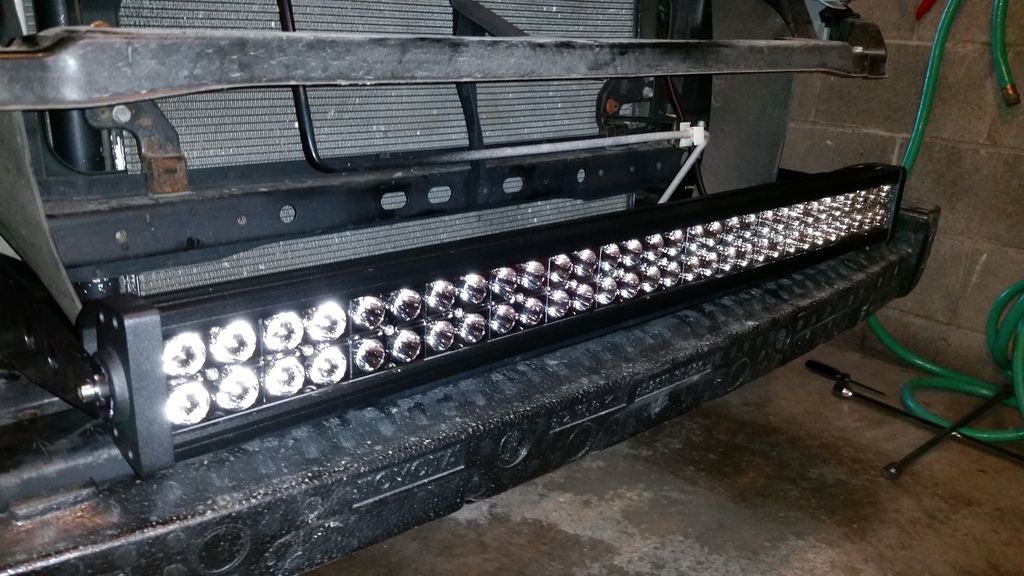
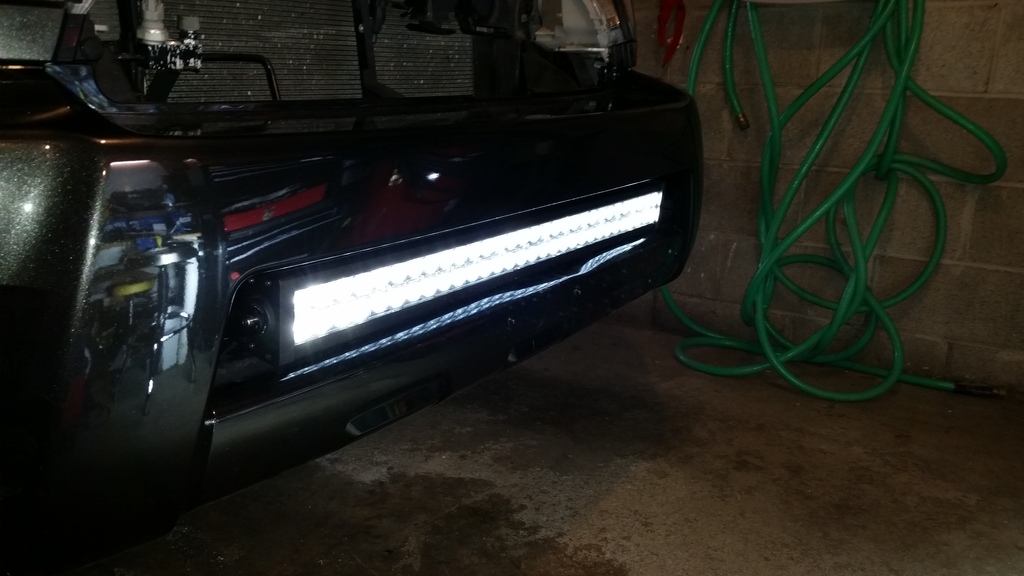
And, wired up with a switch, this thing is SO damn bright!
Oh yeah!
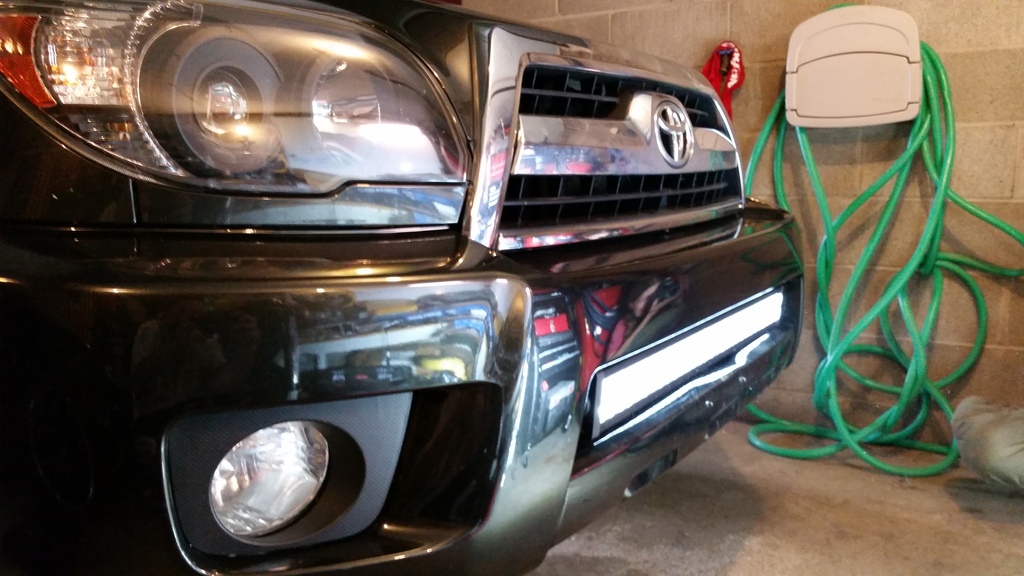
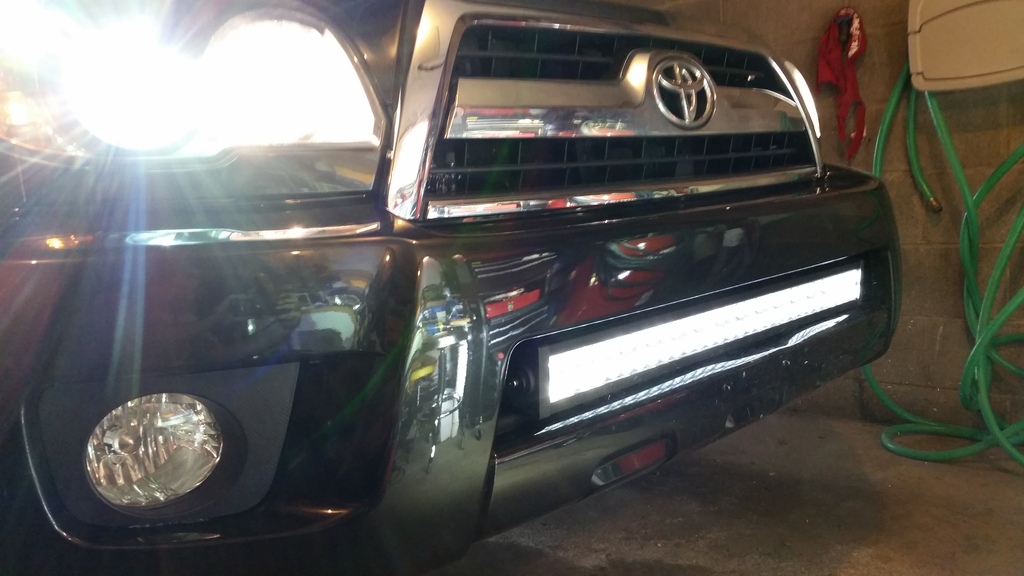
And now a little projector/dual highbeam action
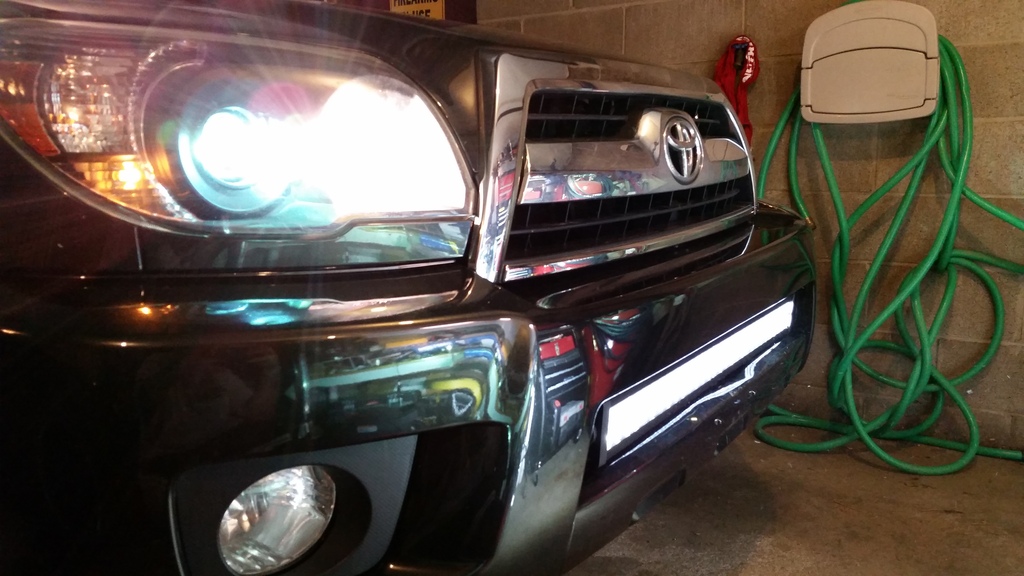
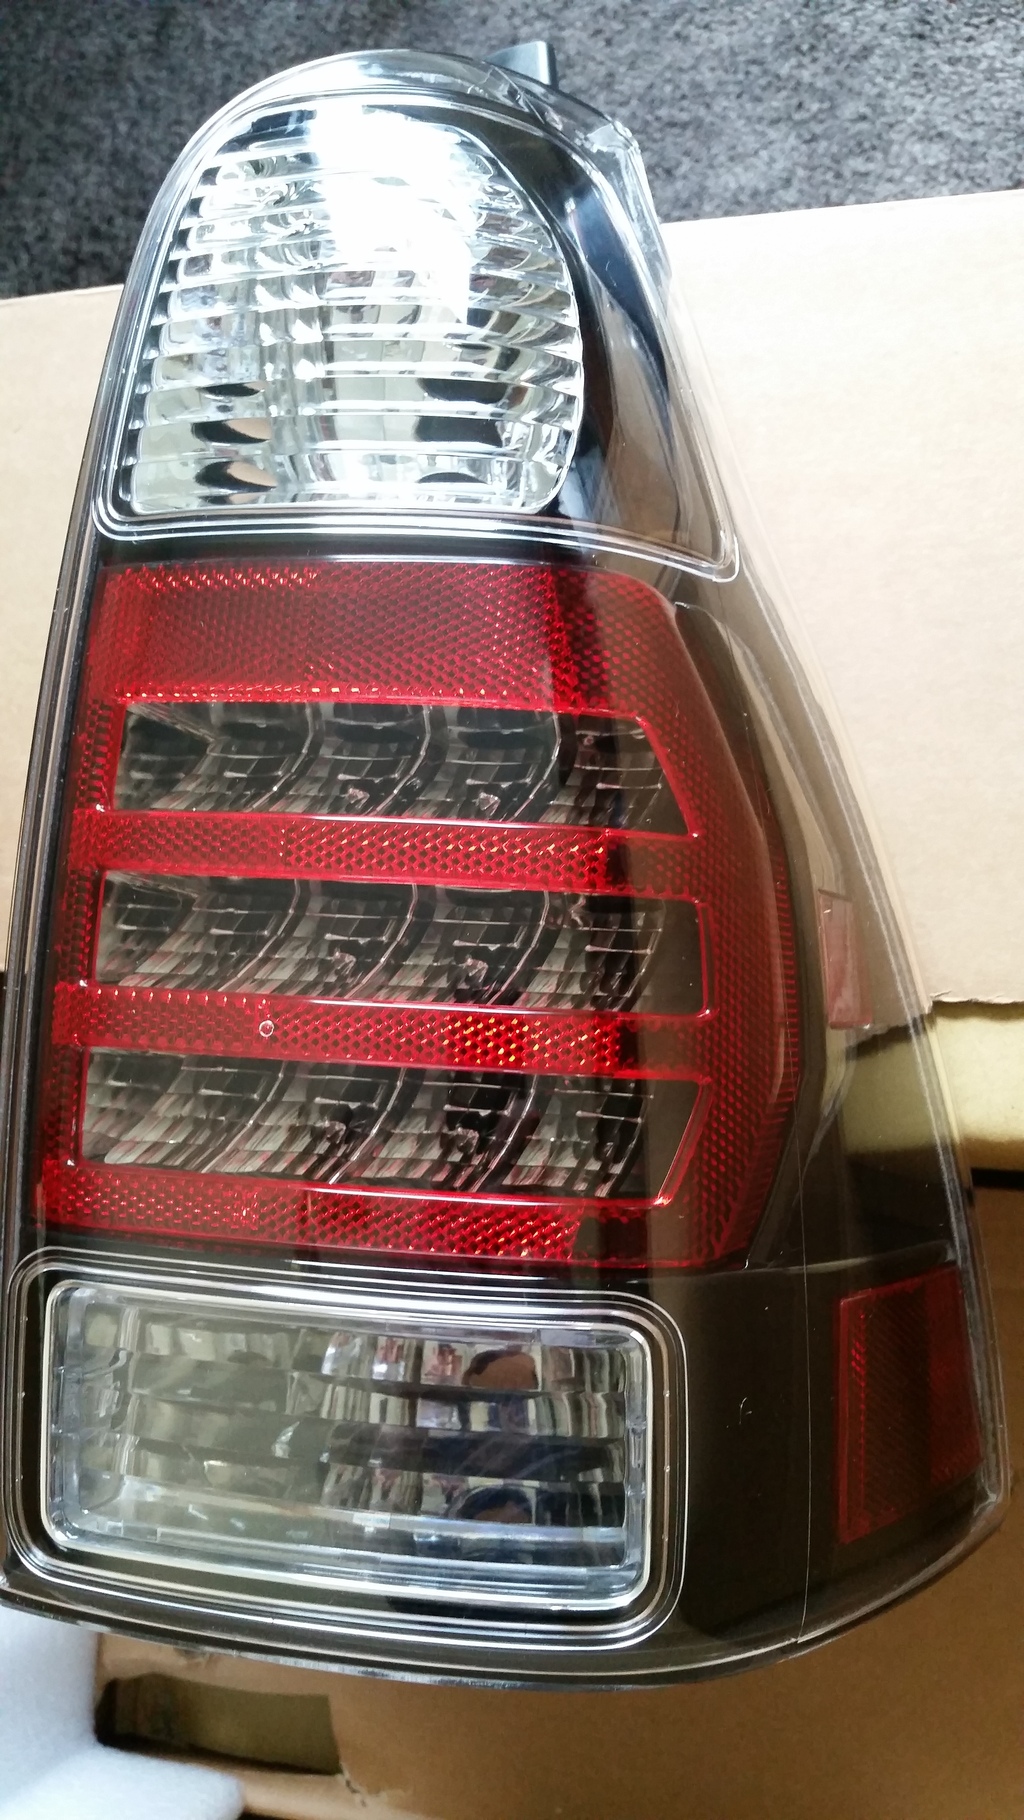
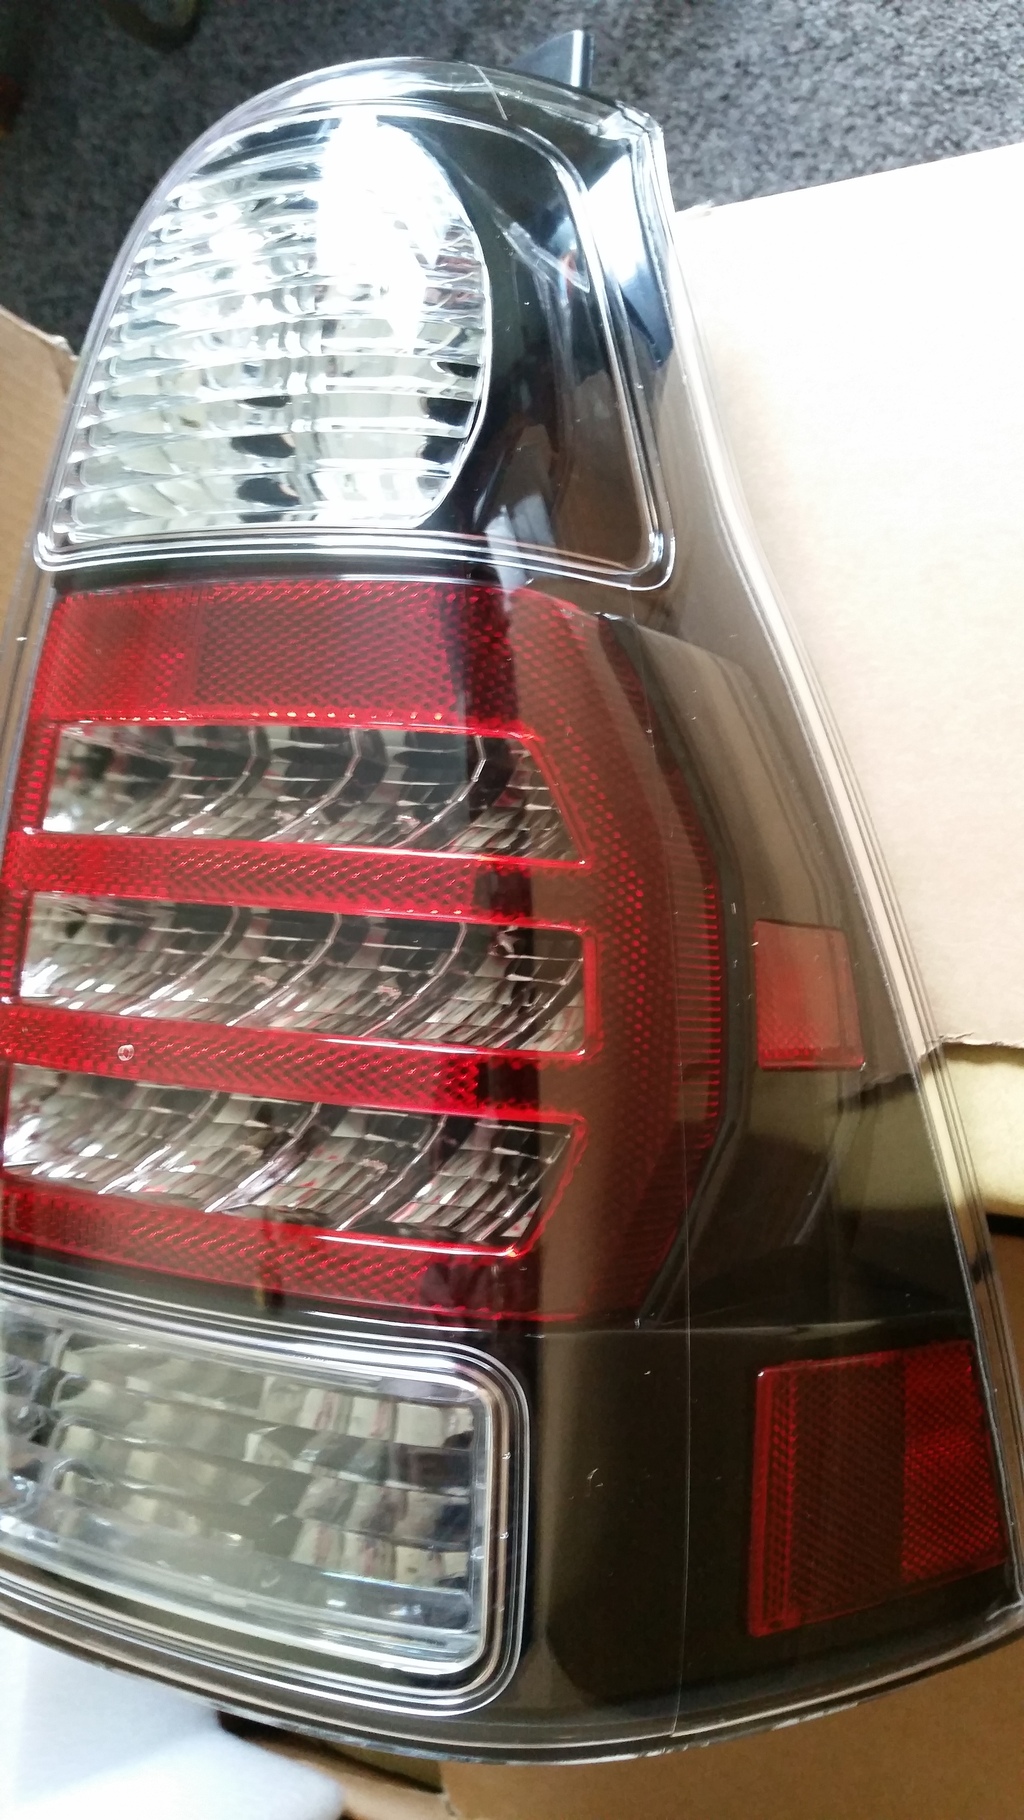
Headlights and new Silverstar Ultra fog light bulbs
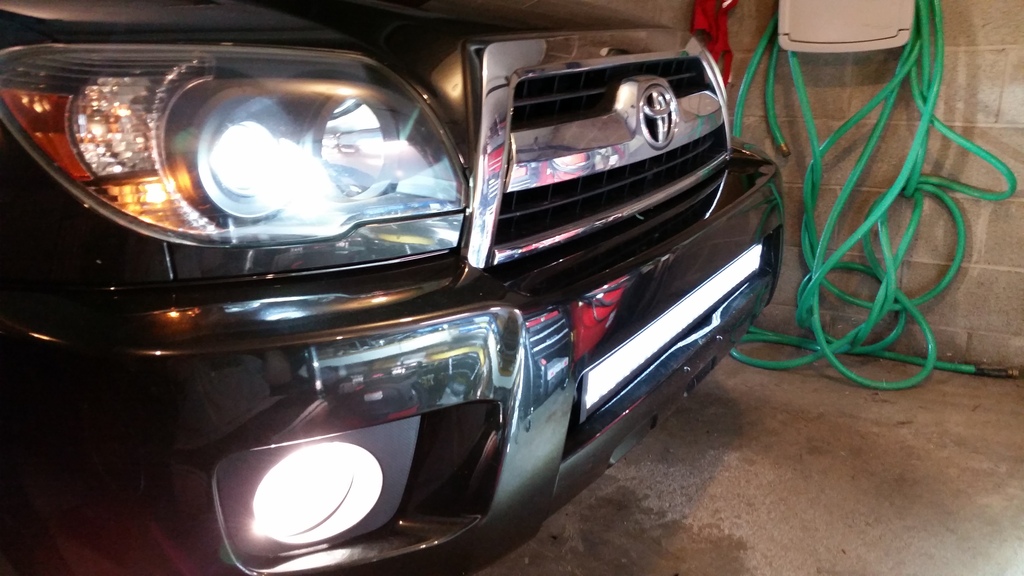
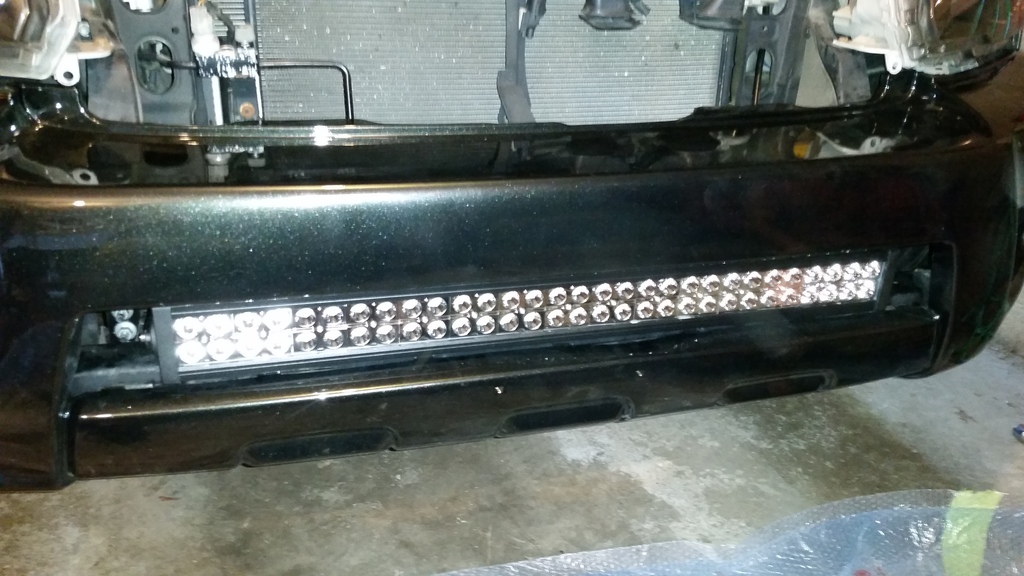
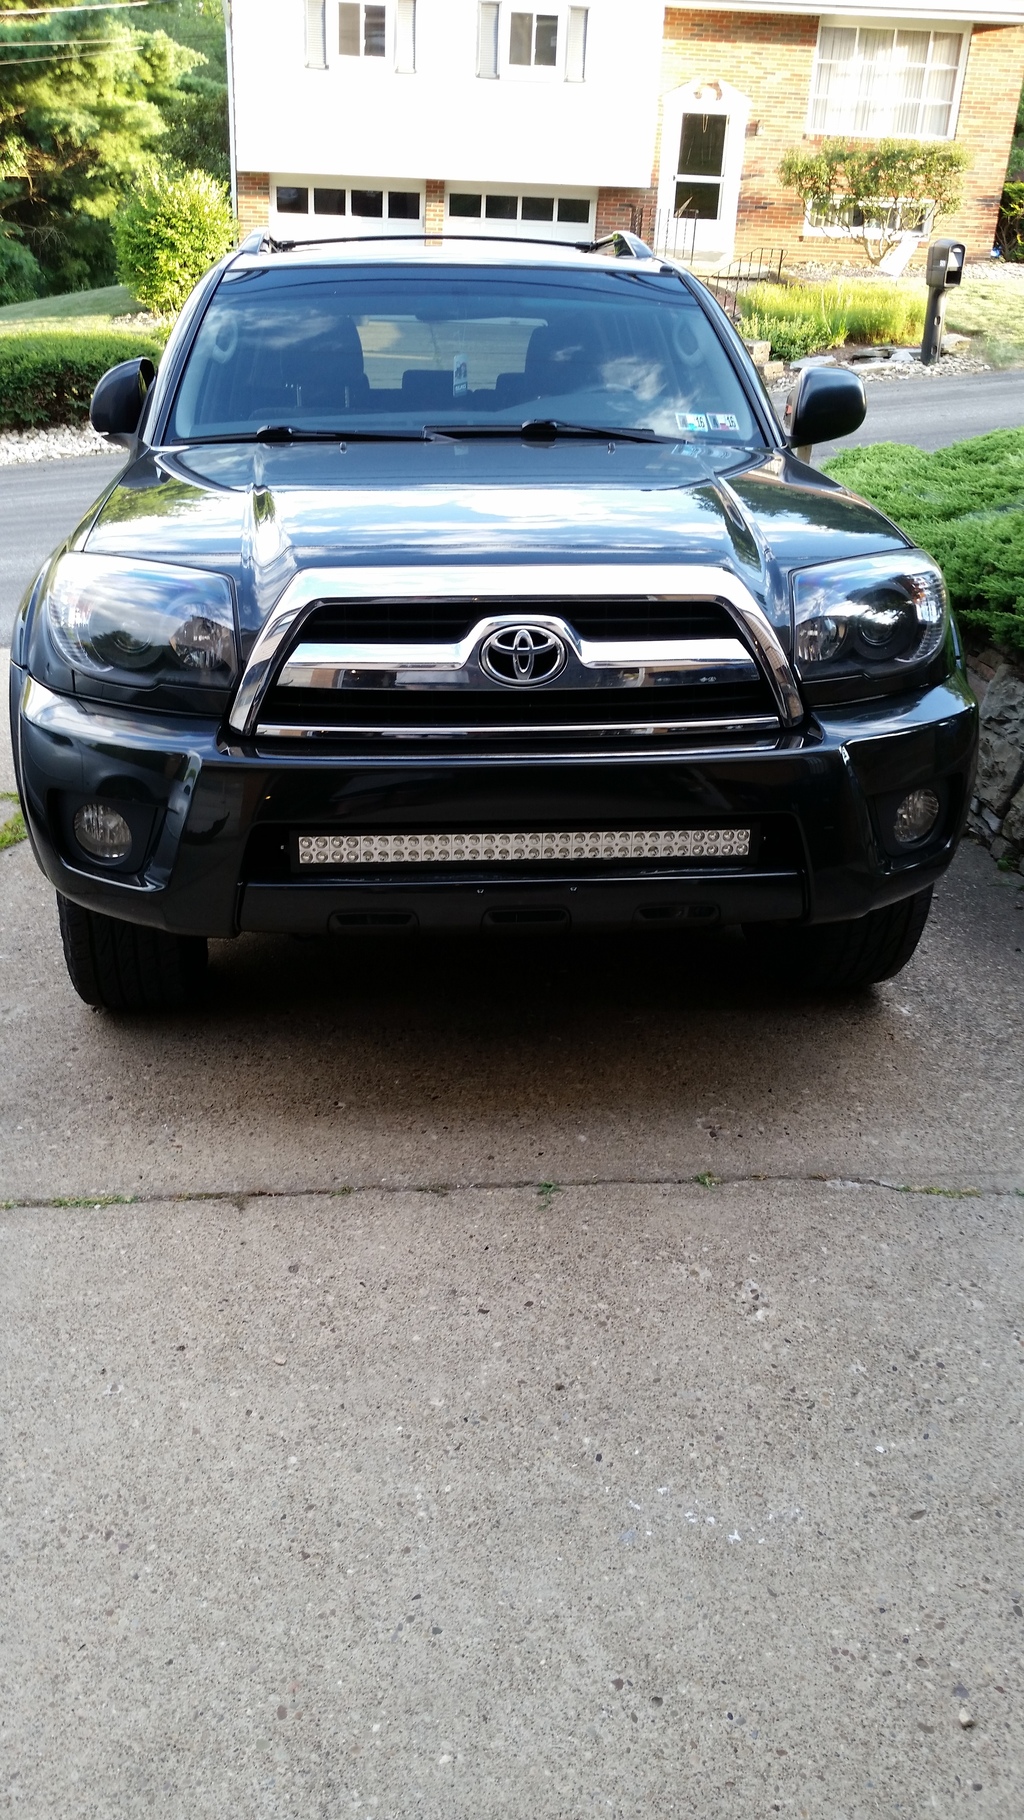
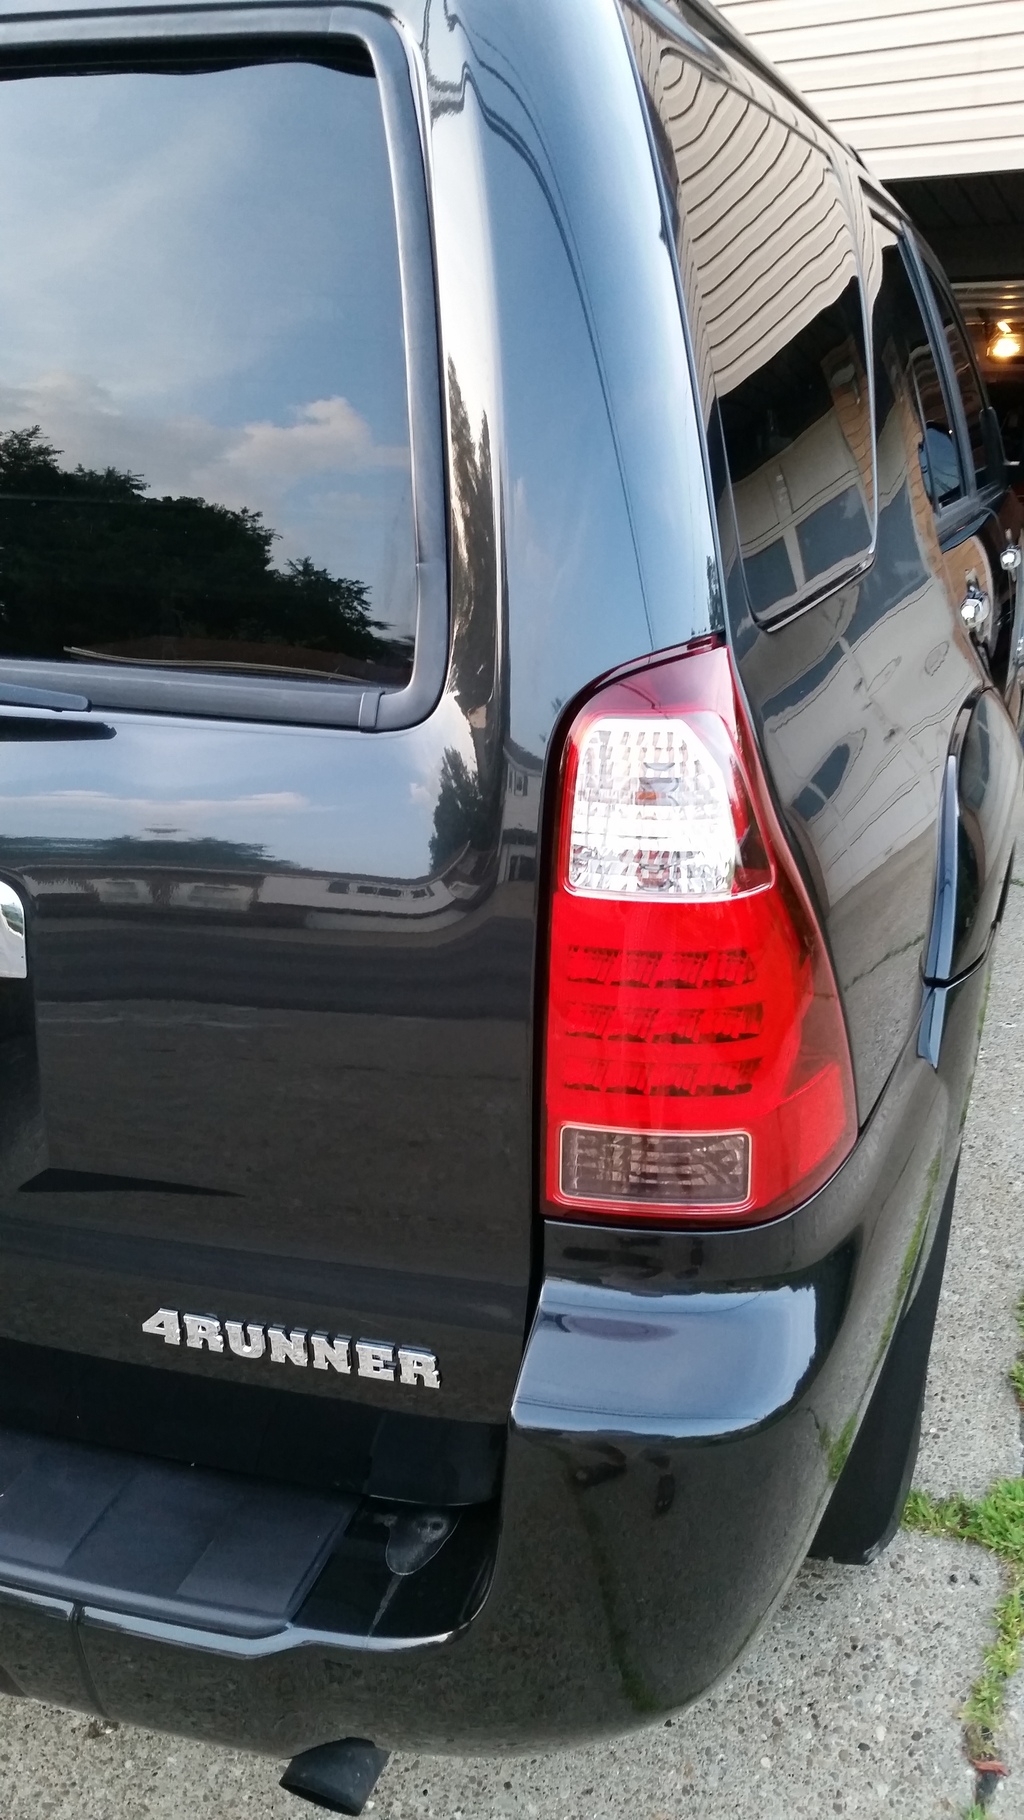
And now a few far away shots.

I'm really happy with the way that everything came together, and I'm loving the new look of the front end of my truck!
Got some more things in store coming soon
You can see the white crack/lines on the bumper, there was some other damage that's not real visible in the pics. A couple backed into me at the parking garage that I used to park at.
I got a custom set of brackets made for the LED bar, first I had to prime and paint them with high temp engine primer and semi-gloss black.
Bare metal
Primer
Paint coats going on
And now the fun begins...
Bye Bye old bumper
So I had a set of headlights with black housings all retrofitted and ready to go, however there were a couple broken clips and mounts on those headlights, so I decided to bake my stock headlights and use the housings that had all the clips intact, so I spent about 2 hrs baking headlights, and swapping the projectors, reflectors, backings, etc around.
I didn't plan or intend to redo the headlights, but it was totally worth it, and now I won't have to do it again later. The projectors are d2s bi-xenon with high beam flap, I also have a splitter and installed brand new Silverstar Ultra 9005 bulbs in the high beams, and Voila!
Next comes the custom brackets made by a member on my 4Runner forum.
and...
Boom! These brackets are designed to let the bumper sit flush inside of the bumper grille area.
Getting excited now!
And next, the brand new painted bumper from Mr. Maker
And, wired up with a switch, this thing is SO damn bright!
Oh yeah!
And now a little projector/dual highbeam action
Headlights and new Silverstar Ultra fog light bulbs
And now a few far away shots.
I'm really happy with the way that everything came together, and I'm loving the new look of the front end of my truck!
Got some more things in store coming soon

Thread Starter
Joined: Jan 2005
Posts: 92,776
Likes: 4,687
From: ShitsBurgh
 I had a nasty concussion when I did the first set of retros, but it felt like it was yesterday when I was baking the headlights again on Saturday. What can I say, I been busy


Thread Starter
Joined: Jan 2005
Posts: 92,776
Likes: 4,687
From: ShitsBurgh
Thanks boys, I'm in love with my truck again. Can't wait to undo the clusterfuck that they left in the back of the truck. Just hoping they didn't screw up my amp
Thread Starter
Joined: Jan 2005
Posts: 92,776
Likes: 4,687
From: ShitsBurgh
Thanks man, I'm absolutely loving it, I keep playing with it on back roads when no one else is coming. The sad thing is, now that I have the dual high beams, I don't even really need it to see the road, but it's so bright and awesome, that I just love it!
Moderator
Regional Coordinator (Southeast)
Regional Coordinator (Southeast)


Joined: Dec 2003
Posts: 44,129
Likes: 4,436
From: Mooresville, NC
I have to imagine the LED bar plus dual high beams is even brighter though.
Like park truck on side of field and play some night time flag football bright.
Like park truck on side of field and play some night time flag football bright.

Thread Starter
Joined: Jan 2005
Posts: 92,776
Likes: 4,687
From: ShitsBurgh


Thread Starter
Joined: Jan 2005
Posts: 92,776
Likes: 4,687
From: ShitsBurgh
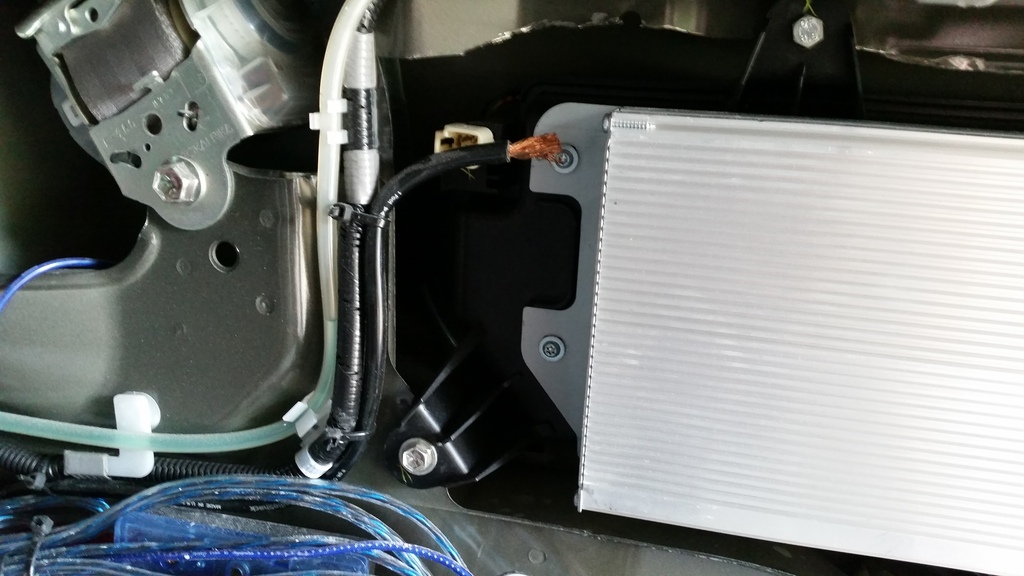
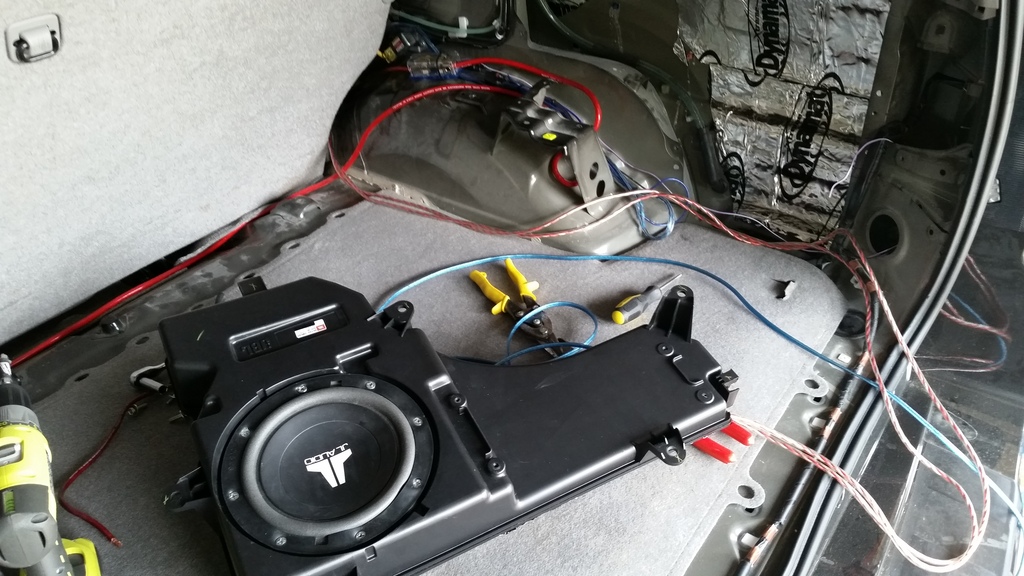
So, after the body shop decided to give me a brand new stock amp for the JBL system my truck doesn't have, a stock sub, and stock sub enclosure in place of my amp and JL amp and sub that still worked, I decided to pull the stock non-working stuff out and reinstall my JL equipment.
The stock stuff, not hooked up or plugged in to anything
All brand new at least
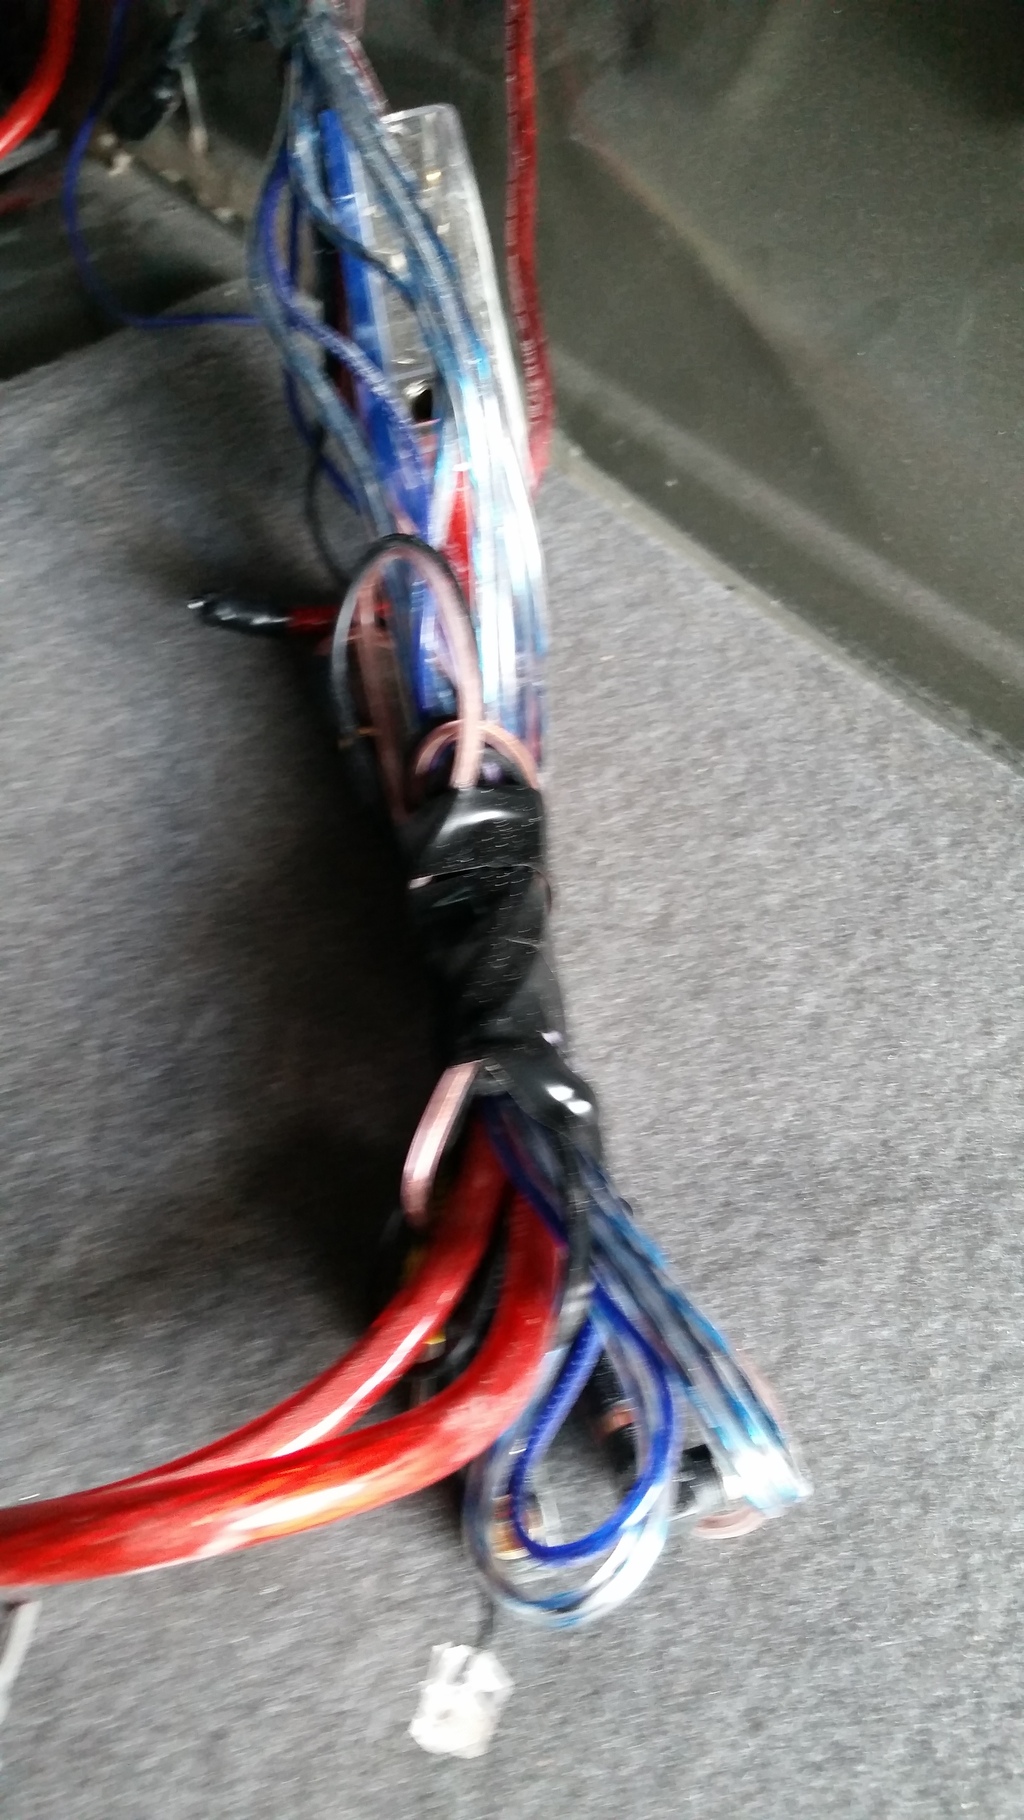
Here's what they did with my wires, thanks dbags!
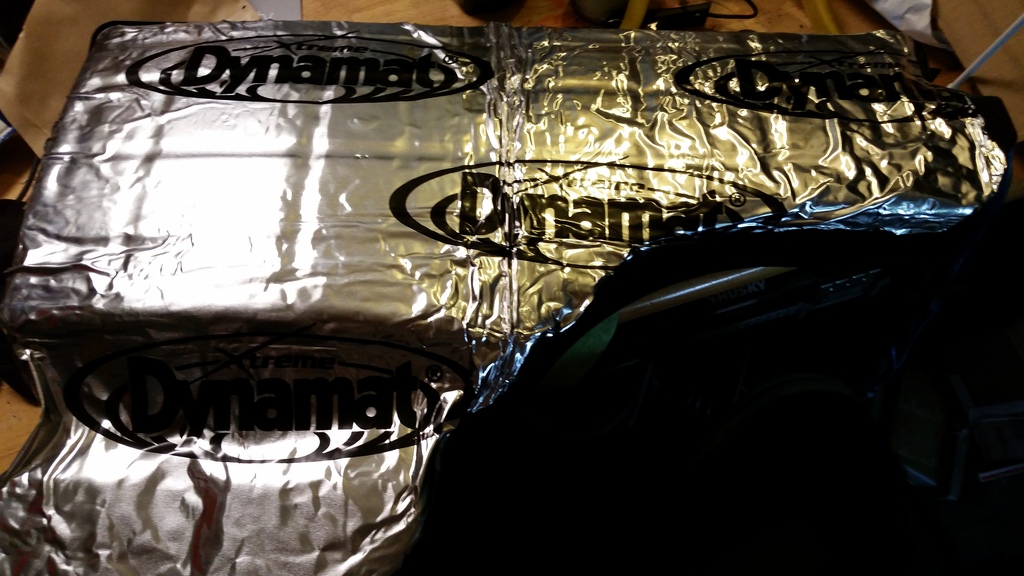
So, since they gave me a brand new sub enclosure, I decided to use it. Look how nice and shiny it was before I started destroying it

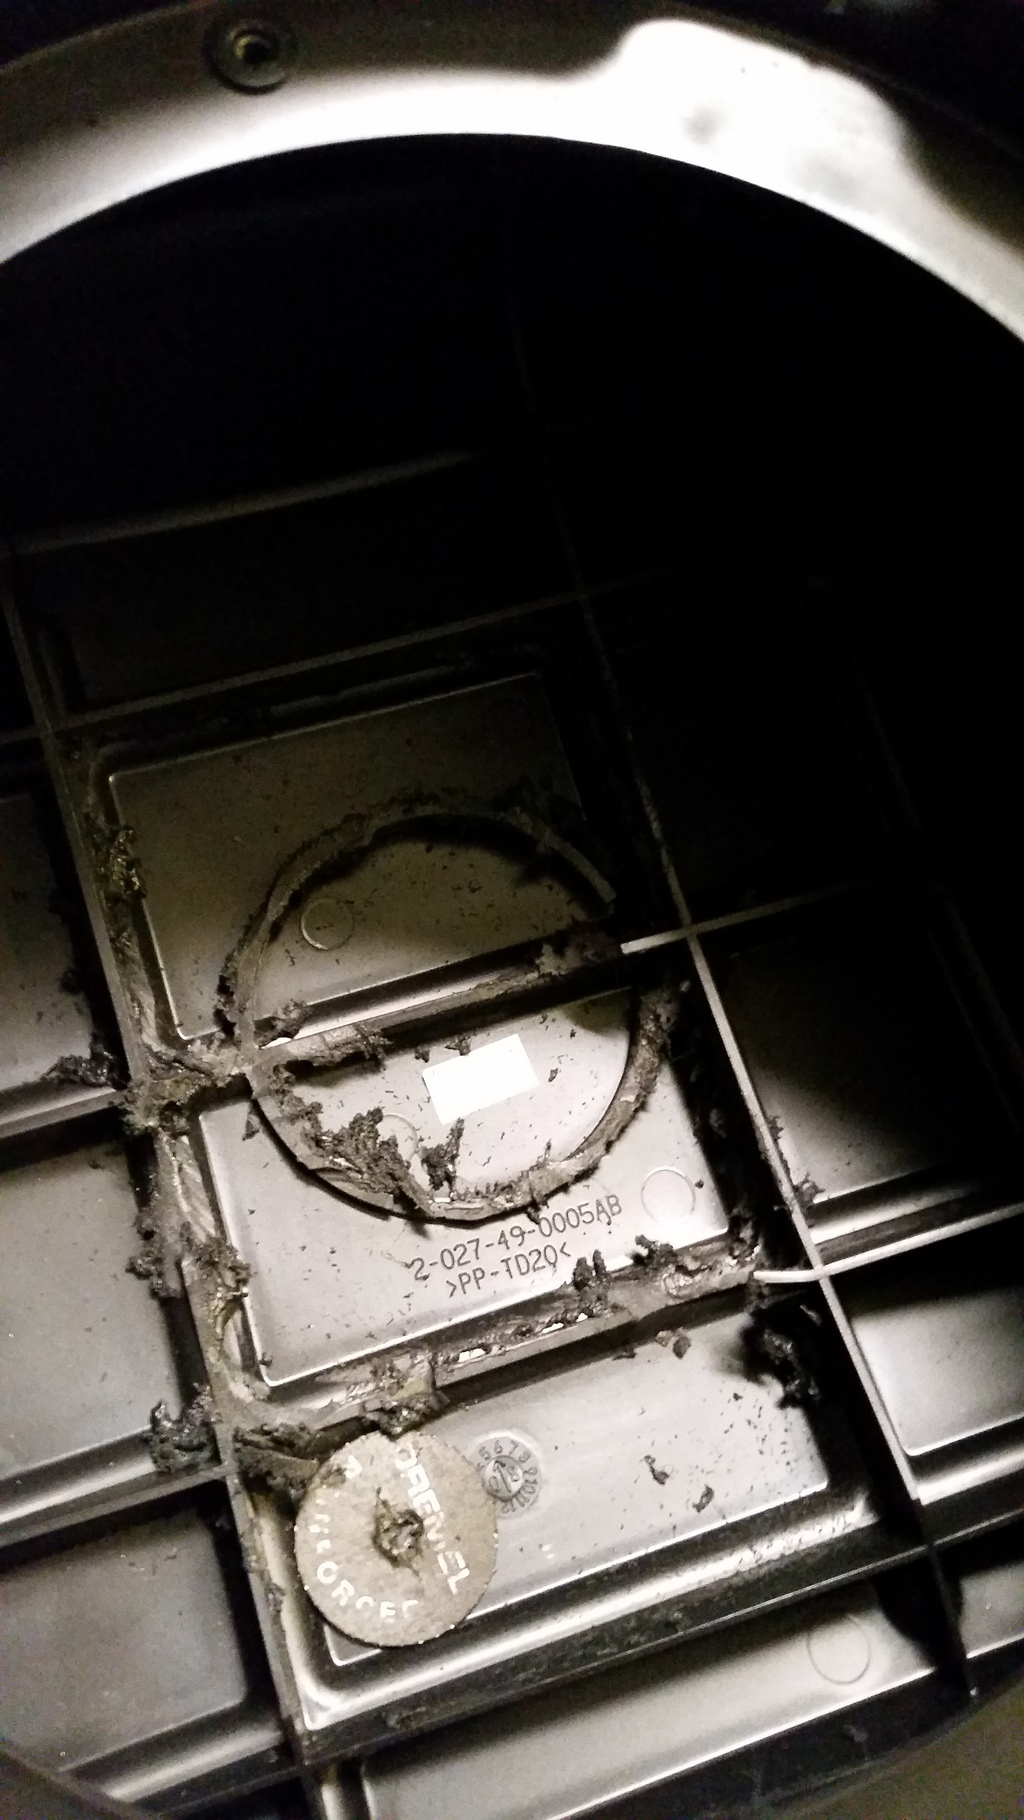
Bring on the dremel!
And another upgrade
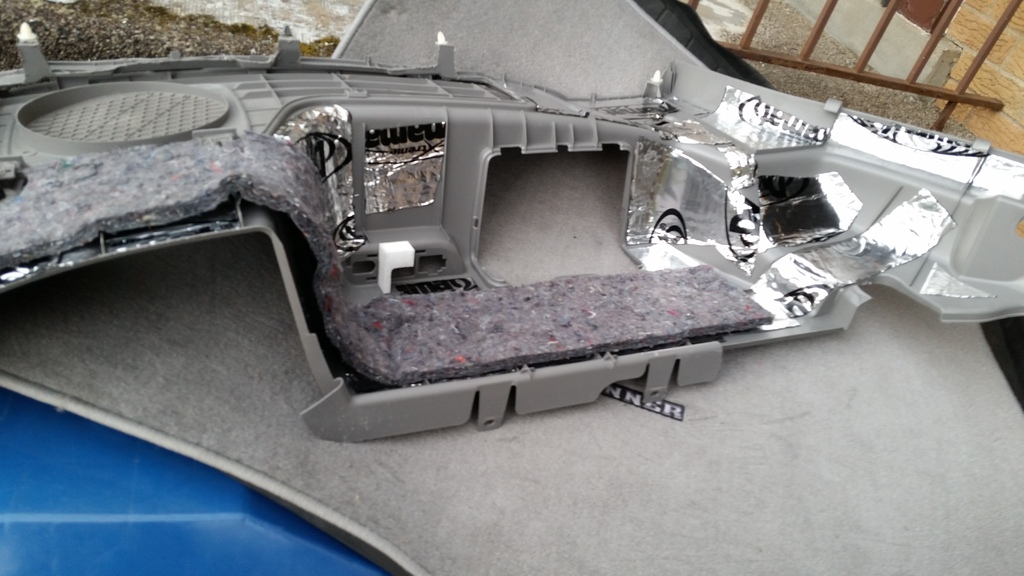
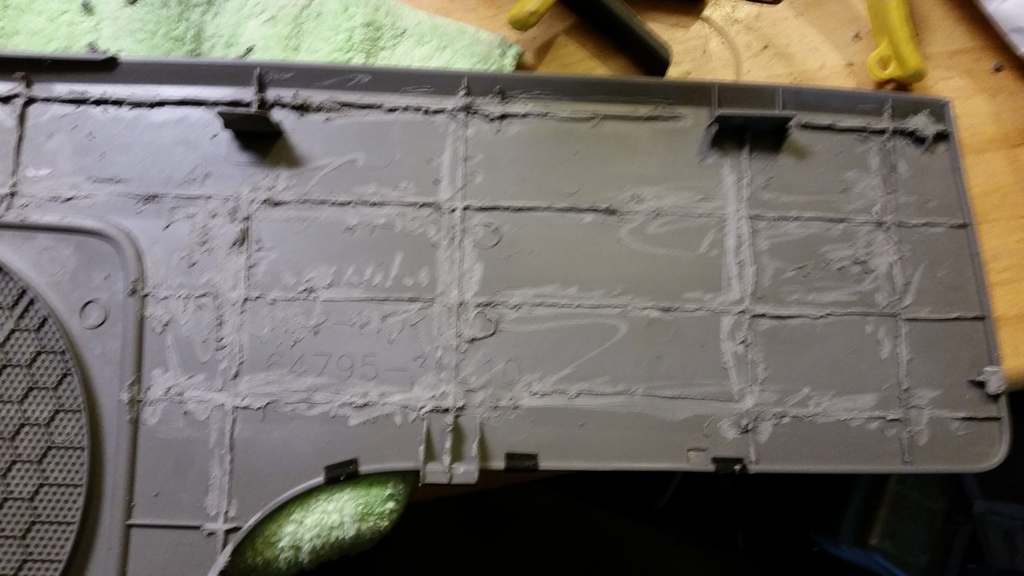
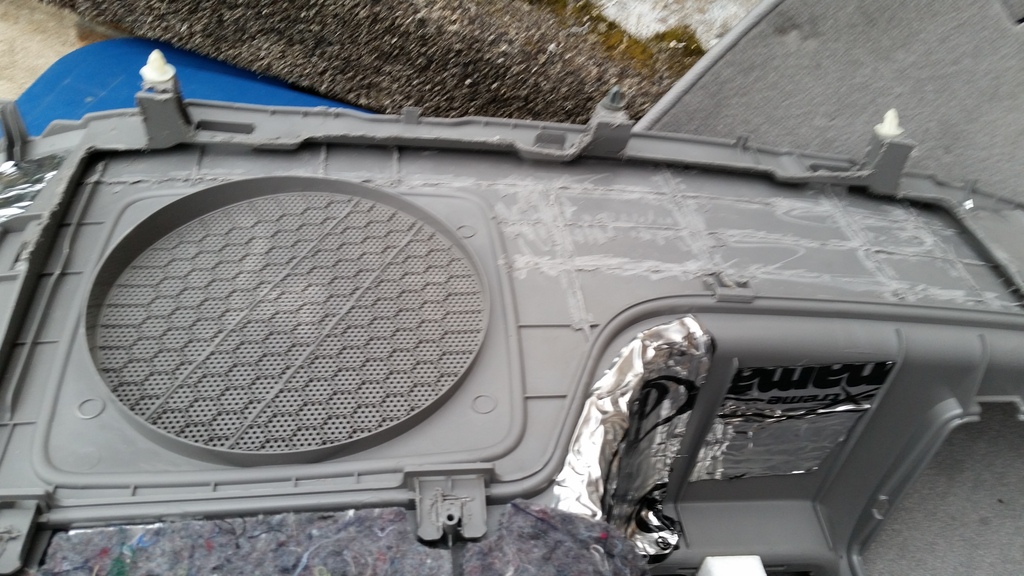
Also did the inside of the exterior panel that they repaired
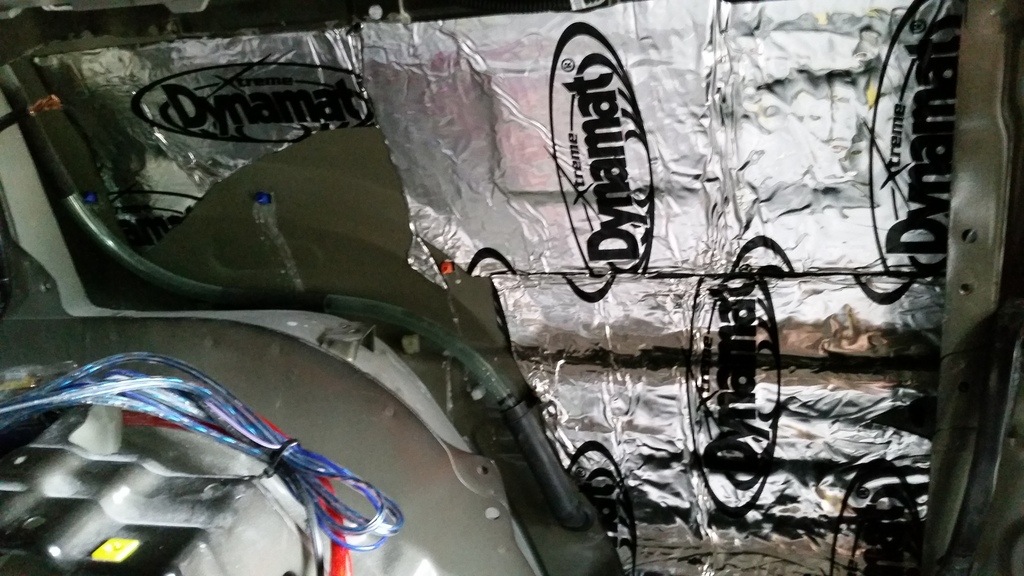
And hit the back of the trim panel as well
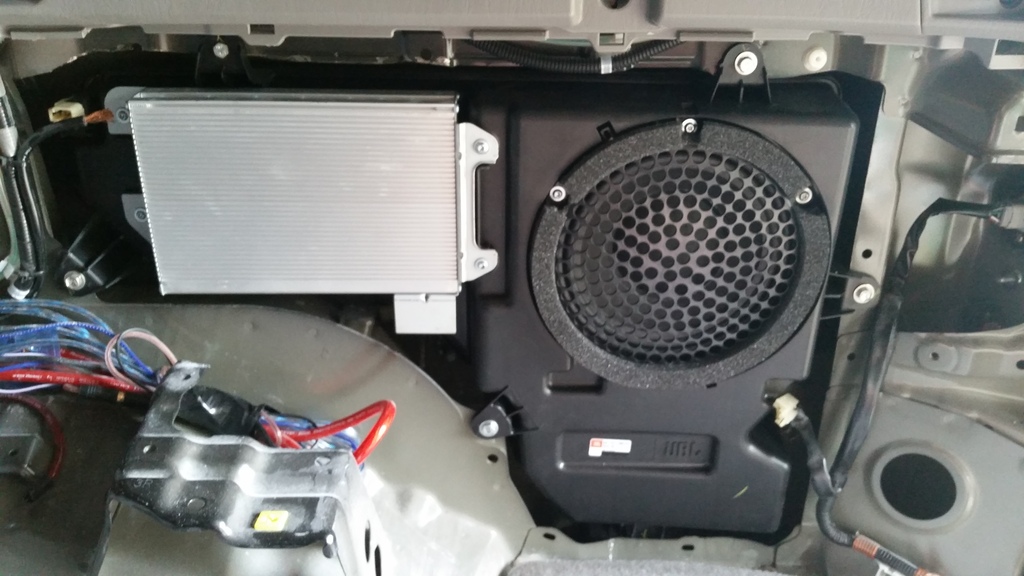
And, moved the sub to the new enclosure
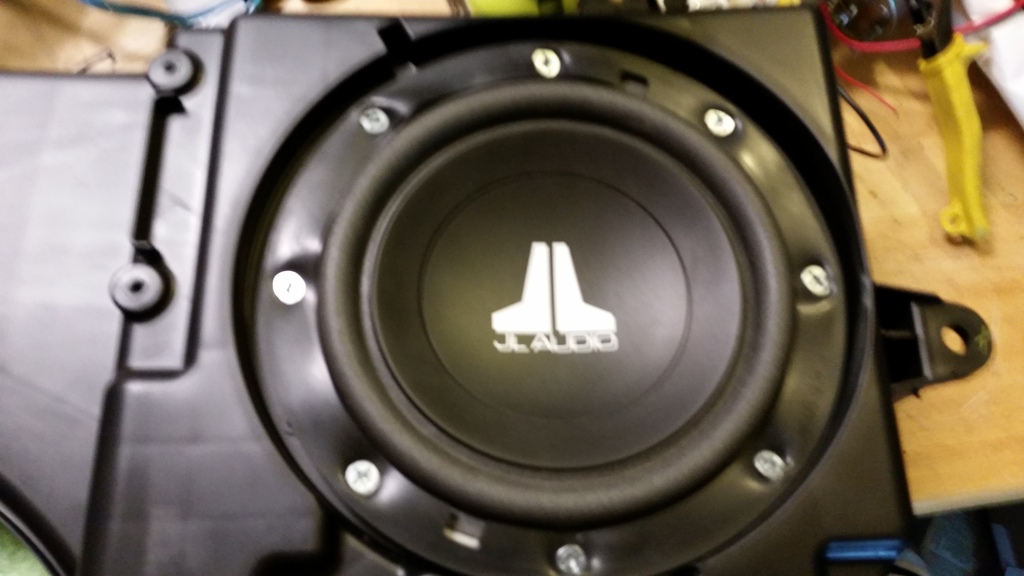
Bolted up the new enclosure
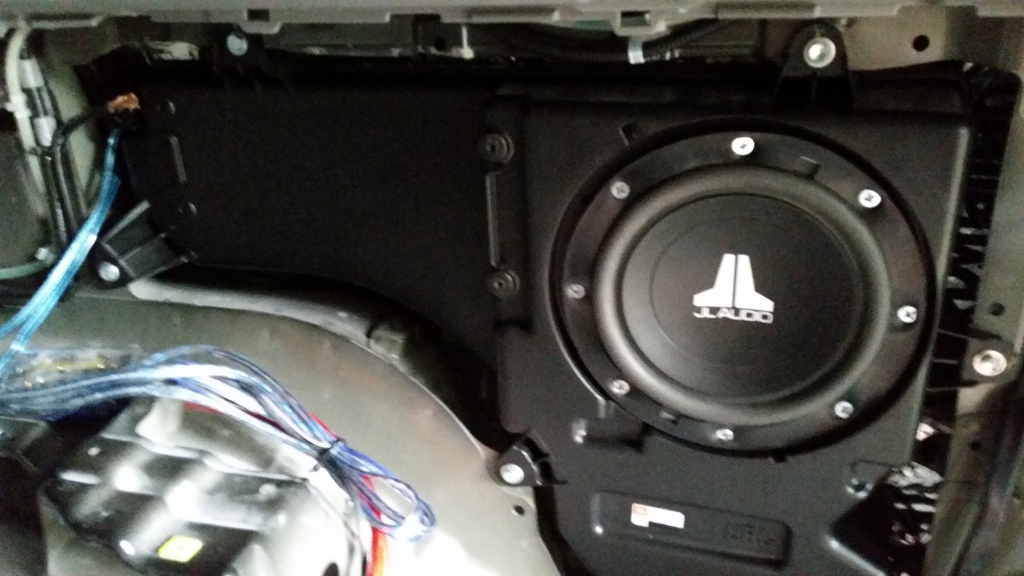
Now the problems begin, so on the old enclosure it had no top left bracket, so I was able to cut the body and mount the amp like this...
Well, with the new box, all the mounts are there, so mounting here is impossible for this amp... So the only solution if I didn't want to start hacking up my brand new sub box was to move the amp. This meant, pulling the box out and running new wires...
Needless to say, I was less than pleased, but wanted to do things right
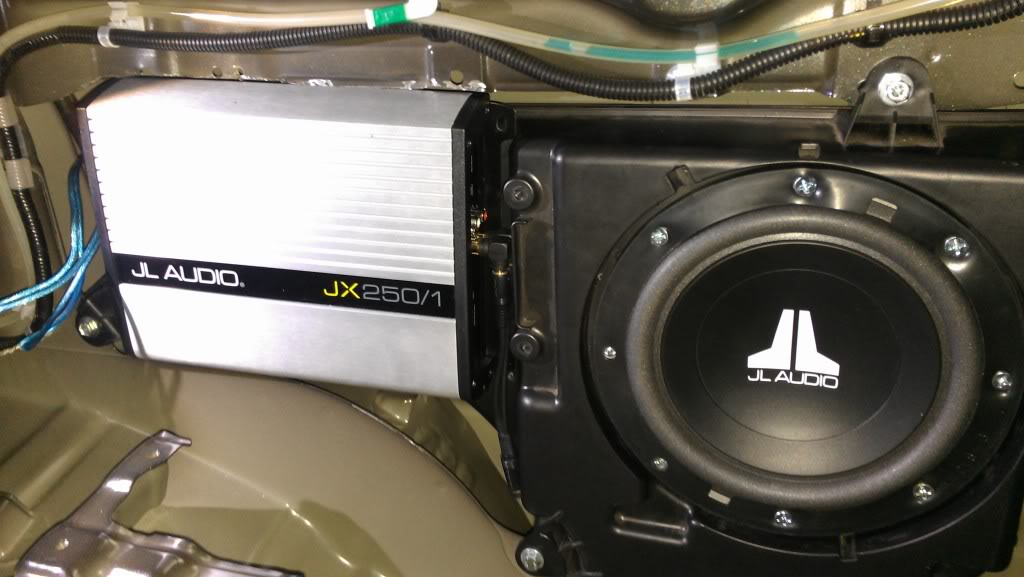
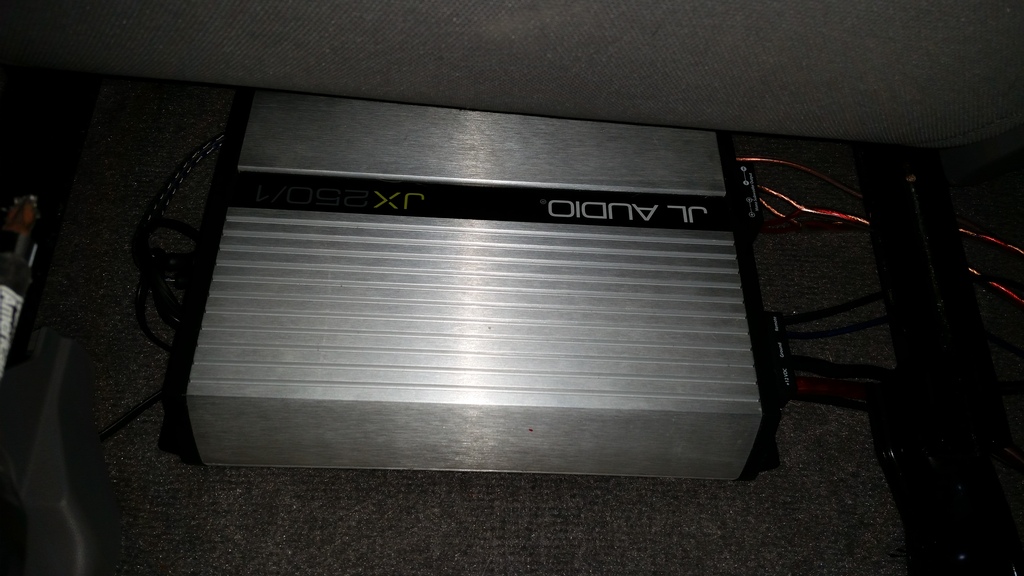
Since I still plan to run my 4-channel highs amp and wires, I plan to mount it (being smaller profile on the box) So the sub amp went under the passenger seat (still trying to be as stealth with the install as I can.
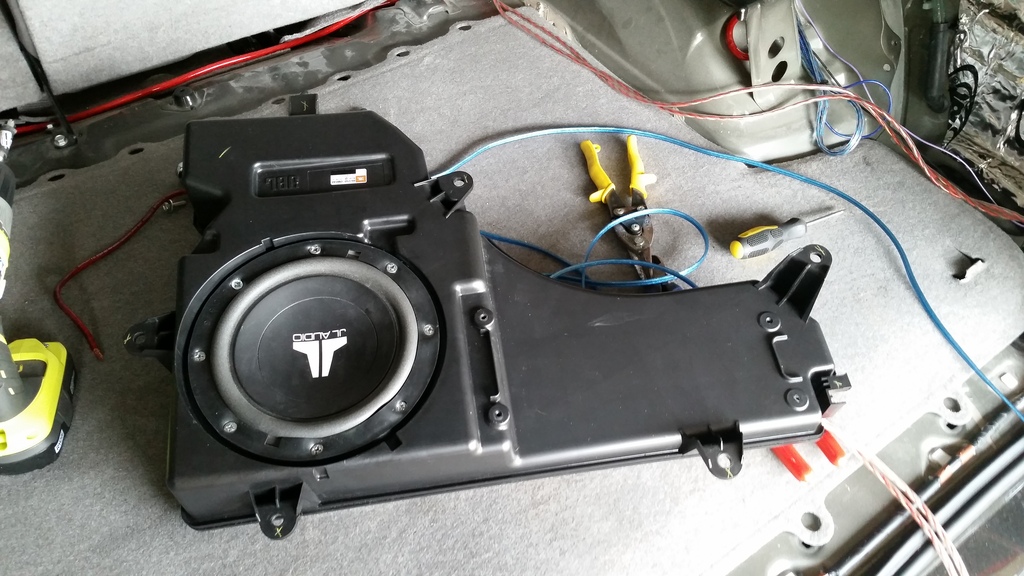
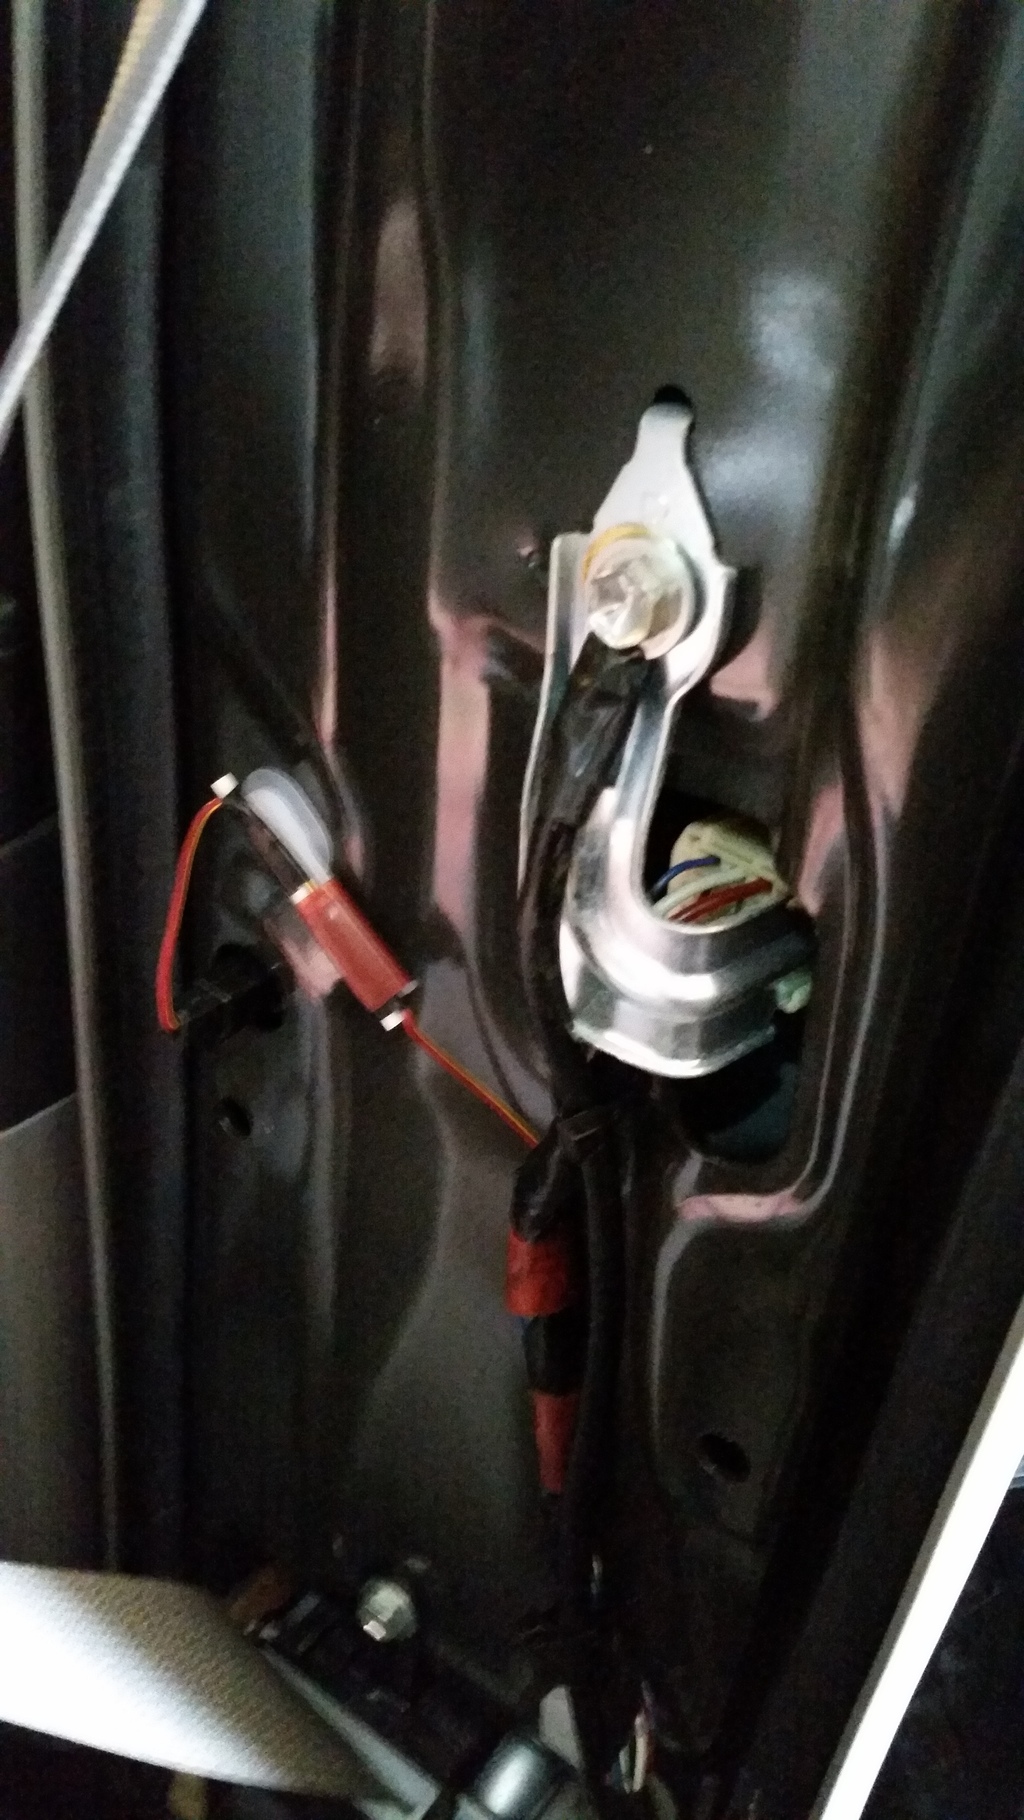
Finding a ground under the seat was not easy, I ended up running the ground up the center pillar behind the seat belt.
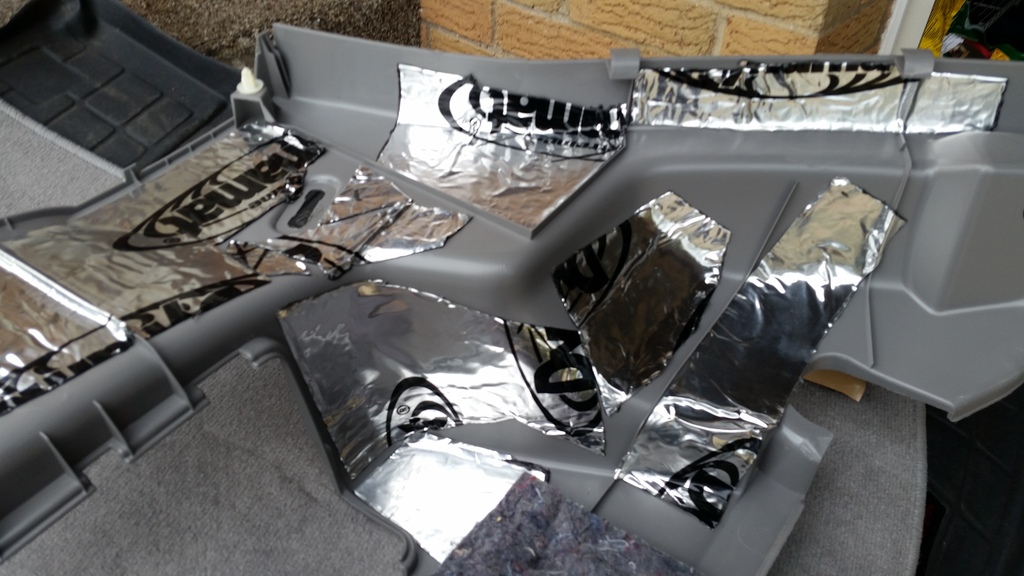
The other custom task that I had to do, was trying to fit a speaker cover panel in place of the storage compartment door that goes there stock. These covers are impossible to find, so I had 1 shot to do it right.
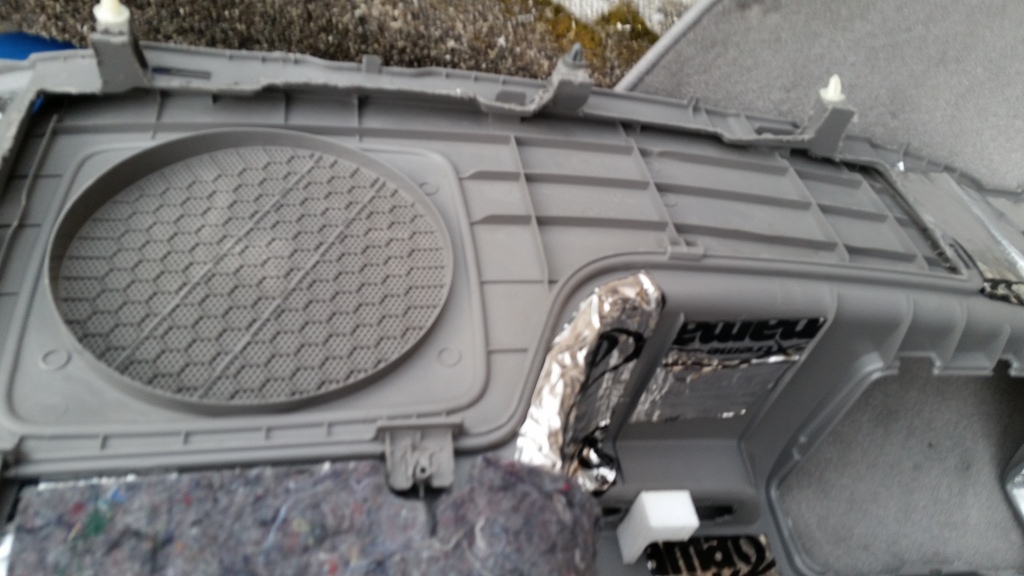
It's not made to go on this panel, and did not sit flush, so I began modifying it and trimming down all the fastening points for the other type of panel
I did all this before I knew that I was moving the amp, so I also had to smooth out all the ridges to not push against the amp that I thought was going back there.
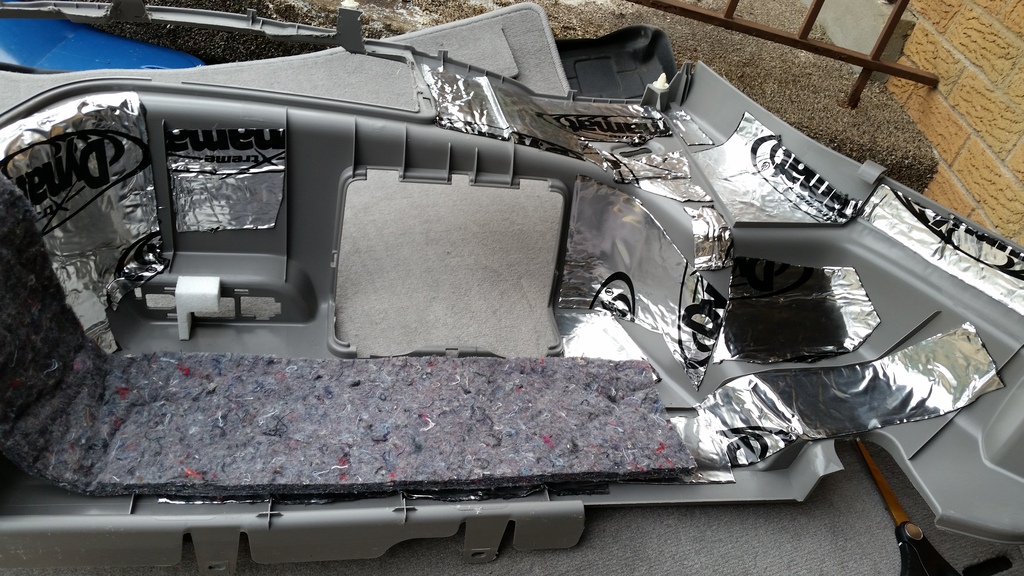
Sucker fits almost perfectly after all that trimming
Finished product for now. I intend to plastic weld the cover onto the panel whenever I do the highs amp, 1 of the clips came loose from flexing and I couldn't get it back without taking the panel back off, so it will do for now.
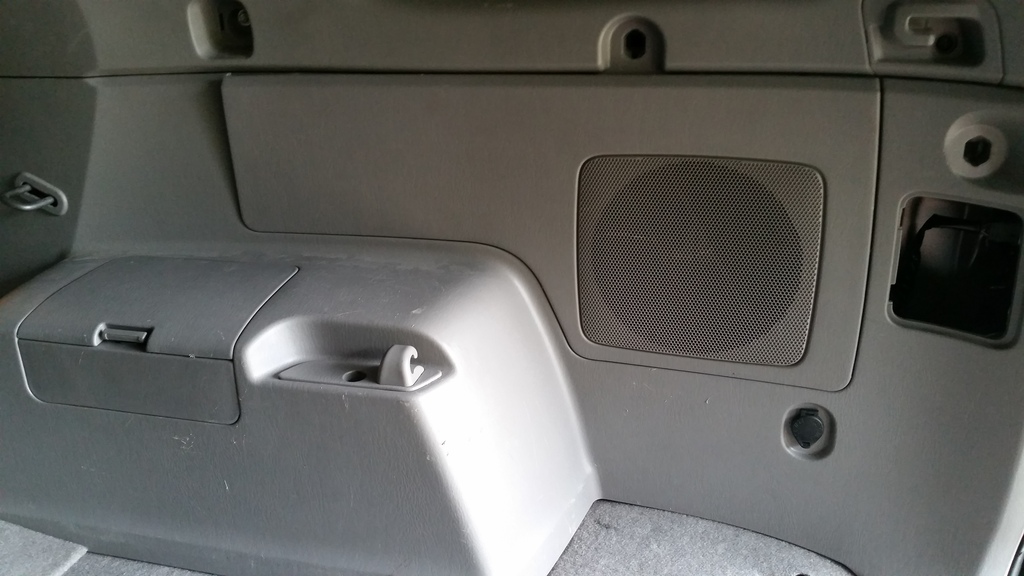
Still looks better than it did before and I'm all setup to install the highs amp for my next weekend project. But overall I'm happy with the way it turned out, even if it took twice as long as it should have. Had I used the old enclosure I could have just bolted everything back in and been done. But like I always say, "If it aint custom, it aint BlackAck"
The stock stuff, not hooked up or plugged in to anything
All brand new at least
Here's what they did with my wires, thanks dbags!
So, since they gave me a brand new sub enclosure, I decided to use it. Look how nice and shiny it was before I started destroying it
Bring on the dremel!
And another upgrade
Also did the inside of the exterior panel that they repaired
And hit the back of the trim panel as well
And, moved the sub to the new enclosure
Bolted up the new enclosure
Now the problems begin, so on the old enclosure it had no top left bracket, so I was able to cut the body and mount the amp like this...
Well, with the new box, all the mounts are there, so mounting here is impossible for this amp... So the only solution if I didn't want to start hacking up my brand new sub box was to move the amp. This meant, pulling the box out and running new wires...
Needless to say, I was less than pleased, but wanted to do things right
Since I still plan to run my 4-channel highs amp and wires, I plan to mount it (being smaller profile on the box) So the sub amp went under the passenger seat (still trying to be as stealth with the install as I can.
Finding a ground under the seat was not easy, I ended up running the ground up the center pillar behind the seat belt.
The other custom task that I had to do, was trying to fit a speaker cover panel in place of the storage compartment door that goes there stock. These covers are impossible to find, so I had 1 shot to do it right.
It's not made to go on this panel, and did not sit flush, so I began modifying it and trimming down all the fastening points for the other type of panel
I did all this before I knew that I was moving the amp, so I also had to smooth out all the ridges to not push against the amp that I thought was going back there.
Sucker fits almost perfectly after all that trimming
Finished product for now. I intend to plastic weld the cover onto the panel whenever I do the highs amp, 1 of the clips came loose from flexing and I couldn't get it back without taking the panel back off, so it will do for now.
Still looks better than it did before and I'm all setup to install the highs amp for my next weekend project. But overall I'm happy with the way it turned out, even if it took twice as long as it should have. Had I used the old enclosure I could have just bolted everything back in and been done. But like I always say, "If it aint custom, it aint BlackAck"


 @LED bar
Thread Starter
Joined: Jan 2005
Posts: 92,776
Likes: 4,687
From: ShitsBurgh


Needs a lift, wheel spacers, tube step runners or rock sliders, & the satoshi front grill mod.. Haha. I really like your lexus steering wheel swap tho.. Nice work so far, esp with changing the LED colors.
Thread Starter
Joined: Jan 2005
Posts: 92,776
Likes: 4,687
From: ShitsBurgh
Thread Starter
Joined: Jan 2005
Posts: 92,776
Likes: 4,687
From: ShitsBurgh


Thread Starter
Joined: Jan 2005
Posts: 92,776
Likes: 4,687
From: ShitsBurgh
I have the exact same 4Runner DD as you, 08 Shadow Mica SR5
I have no intention of doing a lift, it's my DD and I don't have additional clearance in my garage, plus I park in parking garages in town and wouldn't have clearance either, so no lift for me. All the mods I do are just for enjoyment or appearance.
I have no intention of doing a lift, it's my DD and I don't have additional clearance in my garage, plus I park in parking garages in town and wouldn't have clearance either, so no lift for me. All the mods I do are just for enjoyment or appearance.

