D-042: 3G Front and Rear extended stud install

 04-05-2013, 03:57 PM
#122
Intermediate
Difficulty: 5 out of 10
Time: Give yourself 2 hours. I took 2 and a half, but I'll help you save time by avoiding some of the mistakes I made.
Tools:
19MM socket and ratchet
10MM socket
bungee cord
shop towel
I used some antiseize
light
regular hammer
4 lb sledge
$11 grinder from harbor freight.
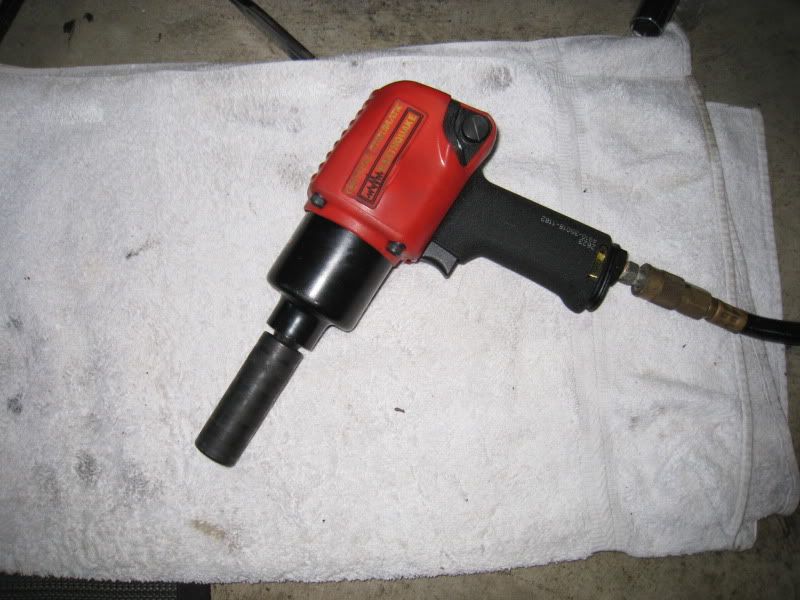
Your hands and patience or a impact gun. I have a compressor and 650 ft/lb earthquake double hammer gun from HB as well. I started out with my lith ion makita, but realized I was pushing it's limits.
Props: To my buddy Nitrous, for confirming the right way was to remove the hub, which I didn't want to do and also for the grinder was a go for extended nuts. Also to OPEL, for being a boss and coming up with this thread:
https://acurazine.com/forums/3g-tl-problems-fixes-114/quick-way-changing-broken-wheel-studs-790653/
I'll start with the DON'Ts:
1. Don't hit your hub with your sledgehammer as you hammer our the old studs. Learned the hard way and had a bitch of a time getting the rotor back on and especially the spacer to sit flat. Had to torque it down in a star patter to force it onto the OEM hub. The tolerances are very close so any little nick on the hub with the hammer will keep everything from sliding back on easily.
2. Don't, think you're going to save your old studs. If you want to, you can try and grind off the edge of the back of them to get them out without hurting the threads, but if you ever bother putting oem length back in...get new ones anyway. Easier to cut the groove you need to when they are off the car anyway.
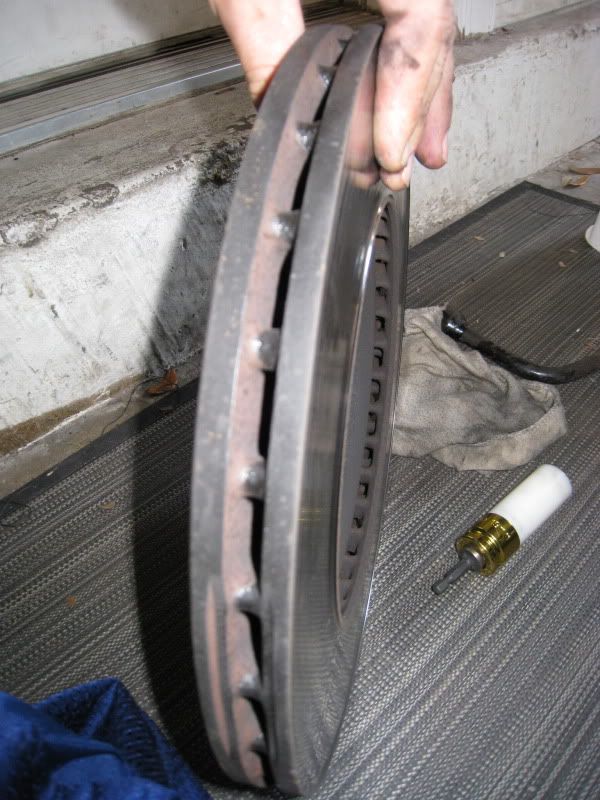
3. Don't hit your rotor with your hammer to free it from the hub. I did on the inside and made a few gouges in it. Nothing I care much about, but it's not the way. Hit the hub area a few times and move it around and jiggle it till it comes off.
This DIY is not intended to teach you how to remove your caliper or rotor, but I will include pics. If you can't do those things, this may be too involved.
Remove wheel, obviously. Then remove your pads and spring. I know you can take the caliper assembly off in one shot, but I wanted to put some CRC for the pads anyway so why not. Plus, I just painted the calipers and wanted to be able to gently take them off.
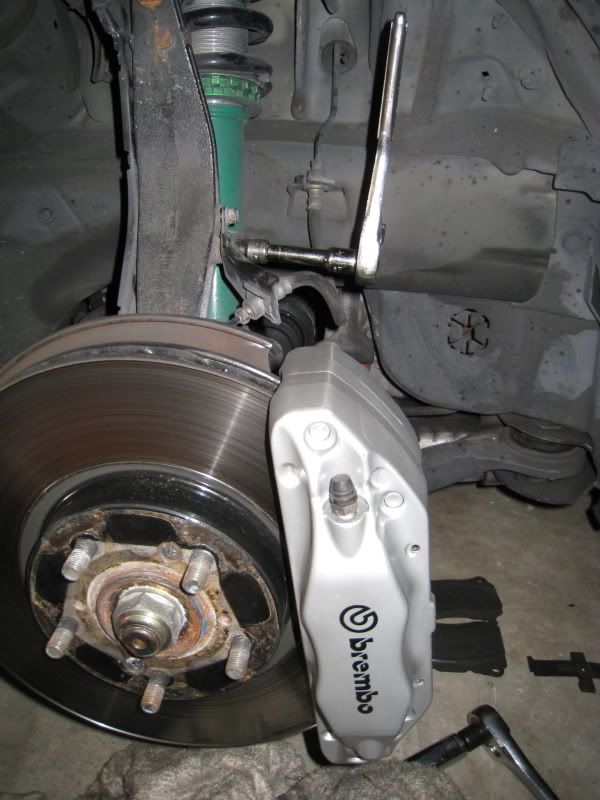
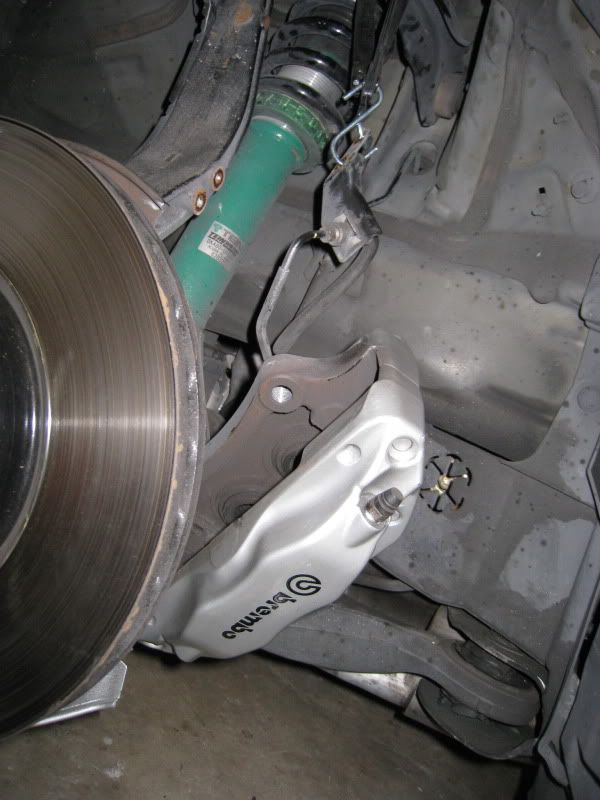
hang caliper up behind rotor
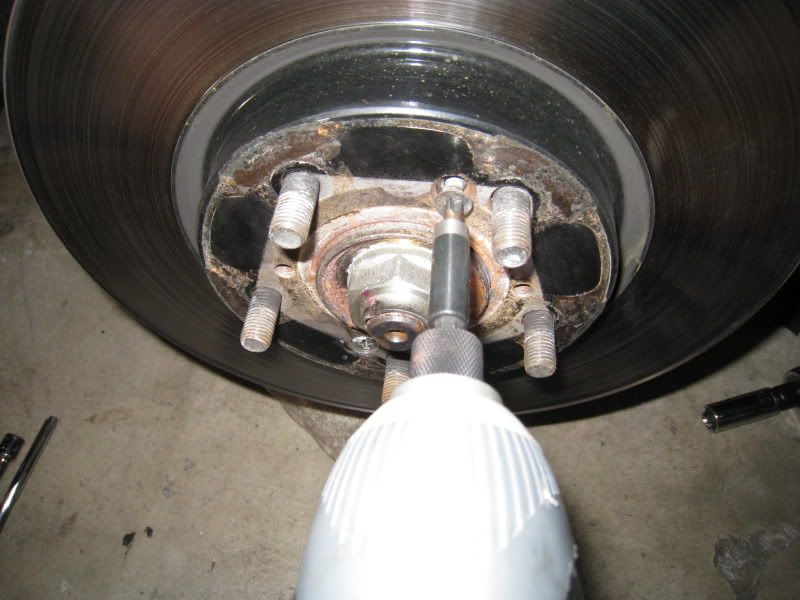
I had done this previously to see how hard it was. Take an impact extension, or something that will sit ON the screw head but NOT hit the rotor itself (since that won't jar the rust free). Whack that bitch with the 4lb sledge a few solid times like it owes you money. That screw will come off faster than your first date's longjohns. Easy.
Ok, caliper gone, now jiggle jiggle jiggle...rotor gone
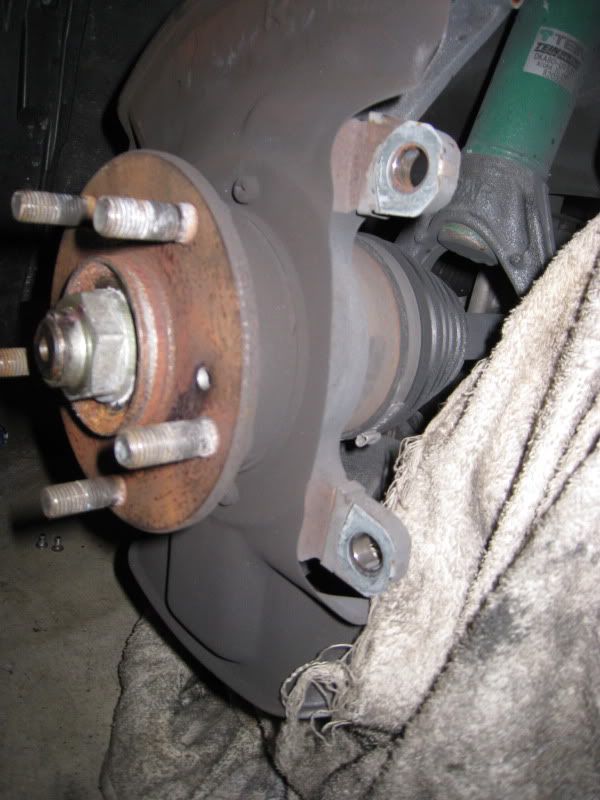
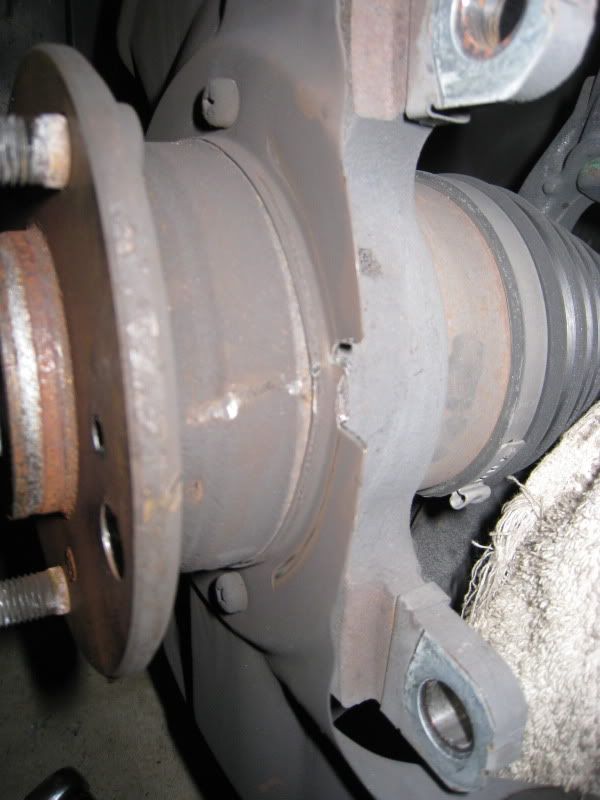
Ok, now, as I get older I take less chances. Put on ye eye protection as well as some ear protection (or an ipod with earbud style headphones) Cut a groove out of the dust cover. I start small and realized after reading Inaccurates thread on this that the dust cover is extraneous. So I cut a pretty decent channel out. You'll see it get bigger.
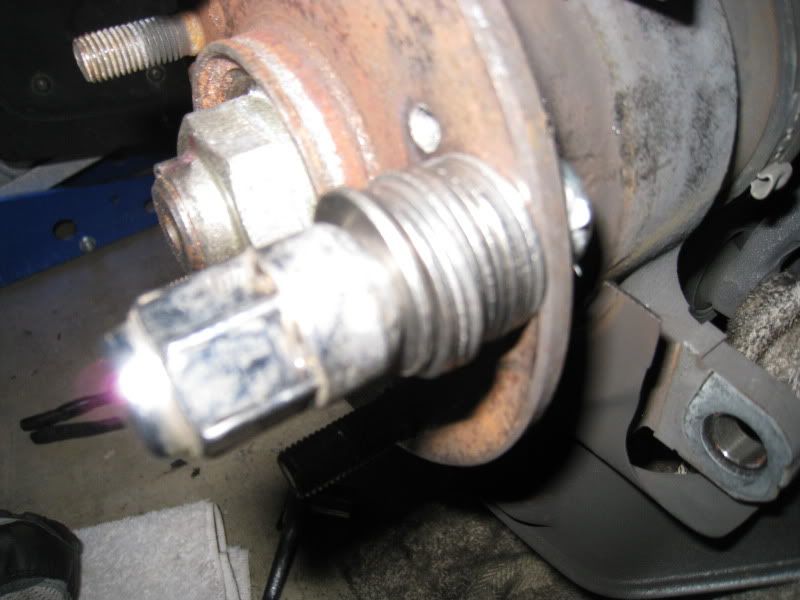
Like I mentioned, originally, I was trying to save the old studs...so I put the bolt on to hammer...once I realized it was useless, I went to town directly on the bolt. Although, in hindsight, the nut probably kept me from hitting the hub on the first side.
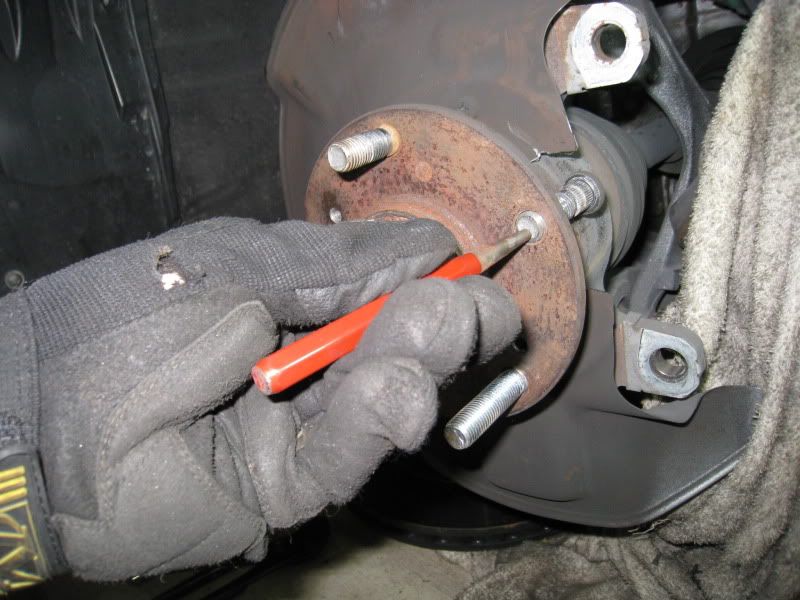
Once almost all the way thru, use a punch and hit it.
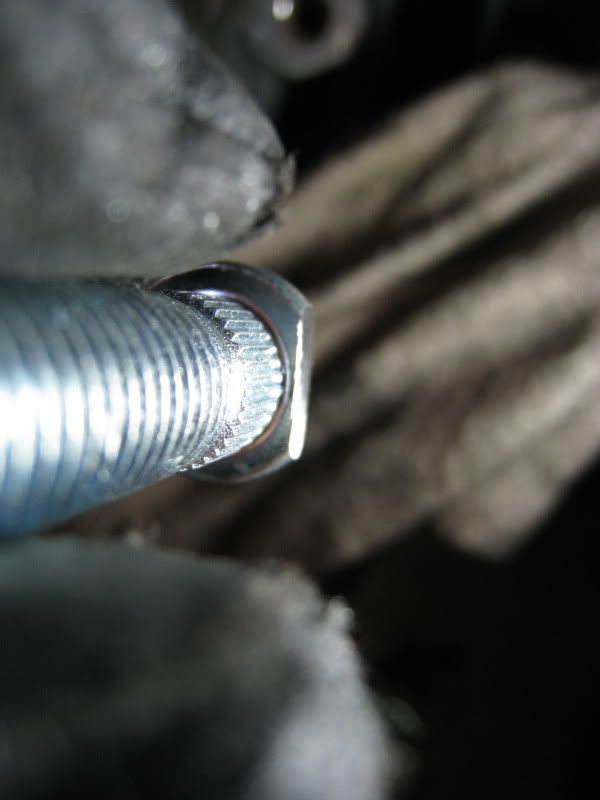
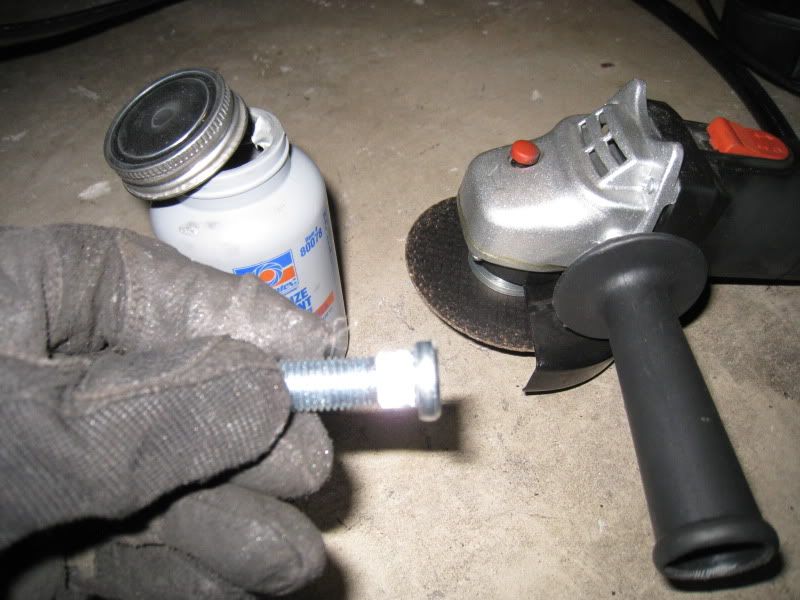
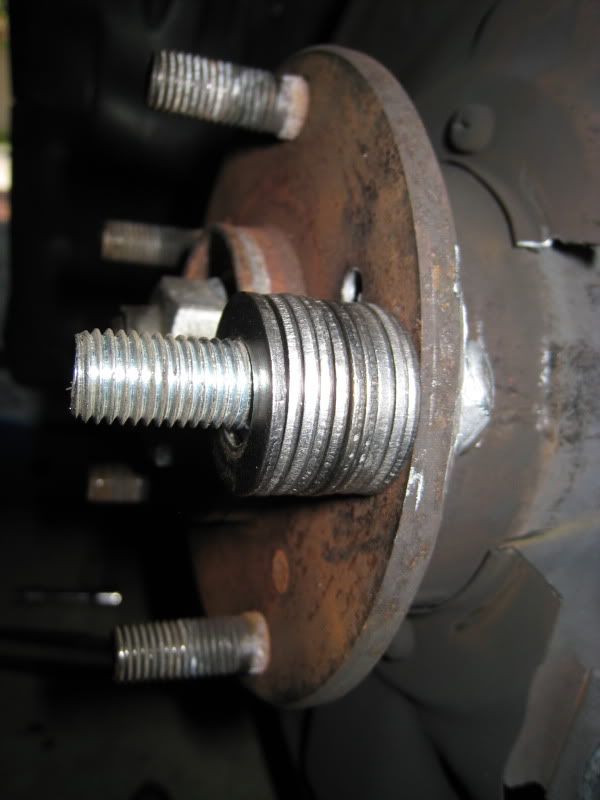
Ok, now here is where you grind the round part off the edge of the new extended stud. In my case, these came with my 10MM eibach spacer set I picked up on ebay for $55 shipped.
put a little antiseize on it

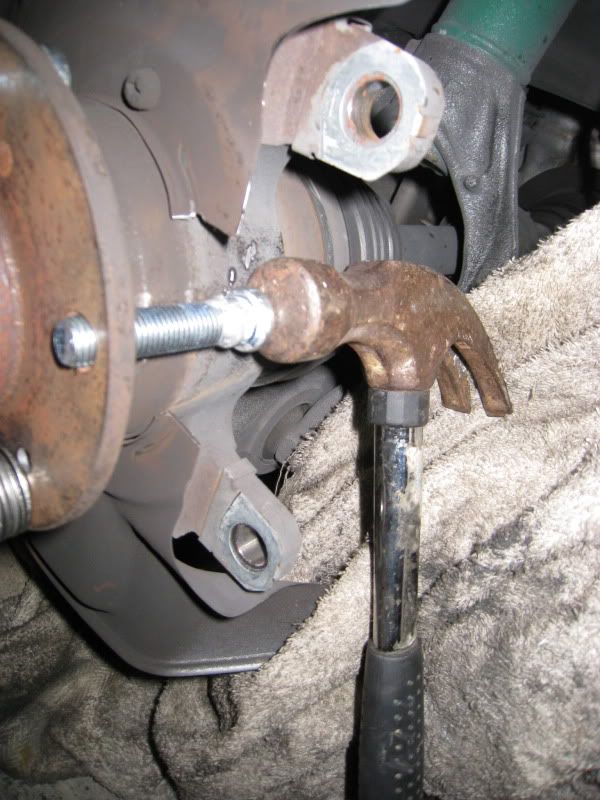
see the bigger channel cut out? now, you will lightly tap past the slight ridge on the axel. I did NOT have to regrind any of them and I didn't grind that much off. Some of them I was able to just push into place by hand.
La bestia
some washers from home depot, all of $3
old oem nut
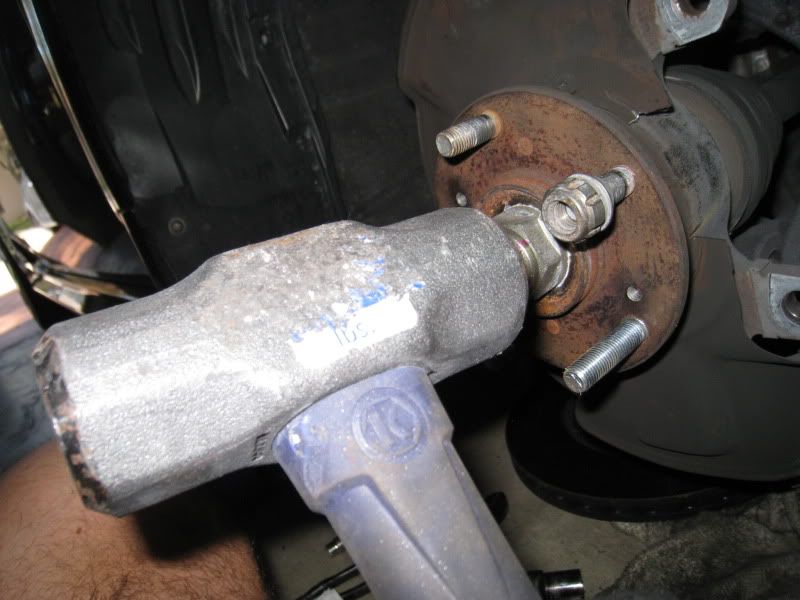
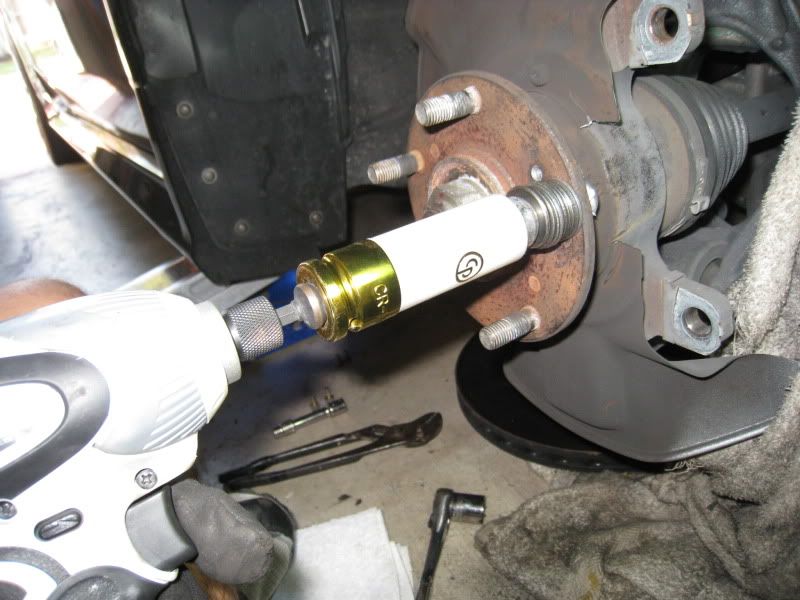
This was when I first hit it with my portable impact hammer. It worked, but wanted make sure I didn't break the shaft of the extension AND wanted the lugs seated right.
and voila, my friends...

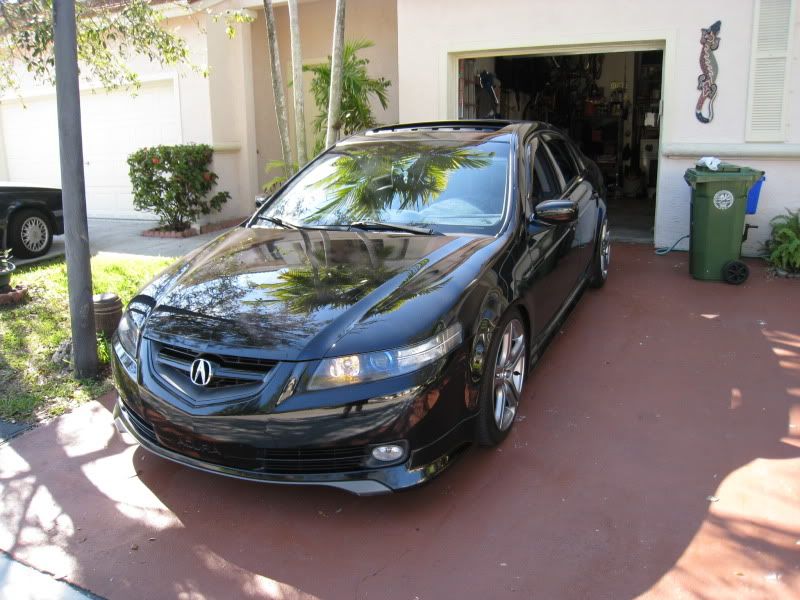
Rockin my aspecs...but I missed my +35 offset of the works...so wanted to add 10MM. I know you can get type II's with a 15MM...but for the front, where all vibrations are super apparent, I wanted a type I...plus, I knew +35 works and is tight...so +30 might have rubbed. I also didn't want to raise the car at all. Flush and low for me. If for whatever reason for whatever reason I ever need to take the spacer off, or go bigger/smaller, I'd probably just get open ended lugnuts anyway.
I have a +25 in the rear already with the 20MM ichiba type II. My aspecs are gunmetal 8.5"ers with a 235 tire.
J.
Hope this helps someone.
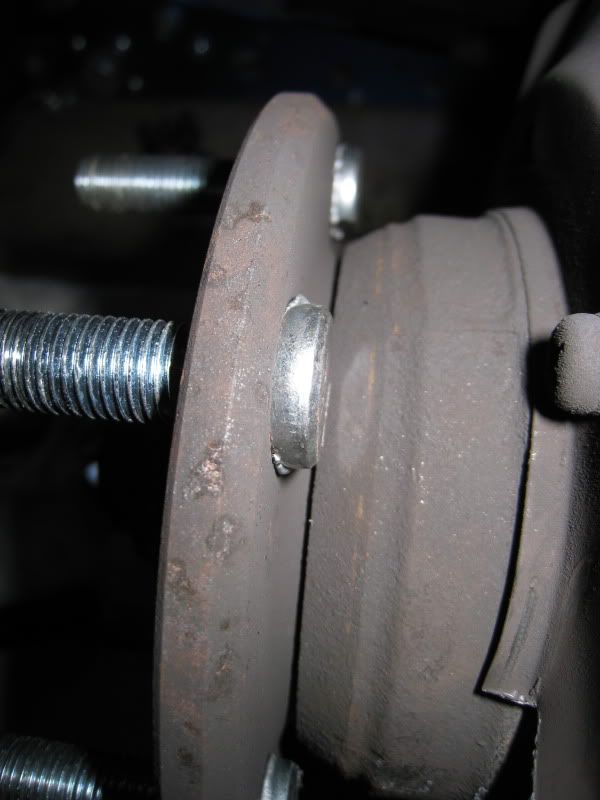
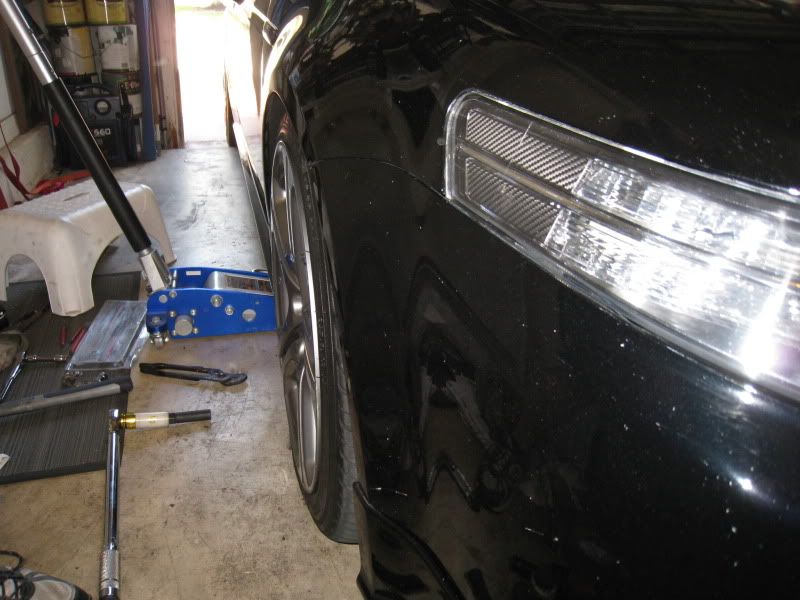
Prespacer

Post spacer
Time: Give yourself 2 hours. I took 2 and a half, but I'll help you save time by avoiding some of the mistakes I made.
Tools:
19MM socket and ratchet
10MM socket
bungee cord
shop towel
I used some antiseize
light
regular hammer
4 lb sledge
$11 grinder from harbor freight.
Your hands and patience or a impact gun. I have a compressor and 650 ft/lb earthquake double hammer gun from HB as well. I started out with my lith ion makita, but realized I was pushing it's limits.
Props: To my buddy Nitrous, for confirming the right way was to remove the hub, which I didn't want to do and also for the grinder was a go for extended nuts. Also to OPEL, for being a boss and coming up with this thread:
https://acurazine.com/forums/3g-tl-problems-fixes-114/quick-way-changing-broken-wheel-studs-790653/
I'll start with the DON'Ts:
1. Don't hit your hub with your sledgehammer as you hammer our the old studs. Learned the hard way and had a bitch of a time getting the rotor back on and especially the spacer to sit flat. Had to torque it down in a star patter to force it onto the OEM hub. The tolerances are very close so any little nick on the hub with the hammer will keep everything from sliding back on easily.
2. Don't, think you're going to save your old studs. If you want to, you can try and grind off the edge of the back of them to get them out without hurting the threads, but if you ever bother putting oem length back in...get new ones anyway. Easier to cut the groove you need to when they are off the car anyway.
3. Don't hit your rotor with your hammer to free it from the hub. I did on the inside and made a few gouges in it. Nothing I care much about, but it's not the way. Hit the hub area a few times and move it around and jiggle it till it comes off.
This DIY is not intended to teach you how to remove your caliper or rotor, but I will include pics. If you can't do those things, this may be too involved.
Remove wheel, obviously. Then remove your pads and spring. I know you can take the caliper assembly off in one shot, but I wanted to put some CRC for the pads anyway so why not. Plus, I just painted the calipers and wanted to be able to gently take them off.
hang caliper up behind rotor
I had done this previously to see how hard it was. Take an impact extension, or something that will sit ON the screw head but NOT hit the rotor itself (since that won't jar the rust free). Whack that bitch with the 4lb sledge a few solid times like it owes you money. That screw will come off faster than your first date's longjohns. Easy.
Ok, caliper gone, now jiggle jiggle jiggle...rotor gone
Ok, now, as I get older I take less chances. Put on ye eye protection as well as some ear protection (or an ipod with earbud style headphones) Cut a groove out of the dust cover. I start small and realized after reading Inaccurates thread on this that the dust cover is extraneous. So I cut a pretty decent channel out. You'll see it get bigger.
Like I mentioned, originally, I was trying to save the old studs...so I put the bolt on to hammer...once I realized it was useless, I went to town directly on the bolt. Although, in hindsight, the nut probably kept me from hitting the hub on the first side.
Once almost all the way thru, use a punch and hit it.
Ok, now here is where you grind the round part off the edge of the new extended stud. In my case, these came with my 10MM eibach spacer set I picked up on ebay for $55 shipped.
put a little antiseize on it
see the bigger channel cut out? now, you will lightly tap past the slight ridge on the axel. I did NOT have to regrind any of them and I didn't grind that much off. Some of them I was able to just push into place by hand.
La bestia
some washers from home depot, all of $3
old oem nut
This was when I first hit it with my portable impact hammer. It worked, but wanted make sure I didn't break the shaft of the extension AND wanted the lugs seated right.
and voila, my friends...
Rockin my aspecs...but I missed my +35 offset of the works...so wanted to add 10MM. I know you can get type II's with a 15MM...but for the front, where all vibrations are super apparent, I wanted a type I...plus, I knew +35 works and is tight...so +30 might have rubbed. I also didn't want to raise the car at all. Flush and low for me.
If for whatever reason for whatever reason I ever need to take the spacer off, or go bigger/smaller, I'd probably just get open ended lugnuts anyway. I have a +25 in the rear already with the 20MM ichiba type II. My aspecs are gunmetal 8.5"ers with a 235 tire.
J.
Hope this helps someone.
Prespacer
Post spacer
cutting the edge off the new stud idk if i like that idea. couldnt that technically weakin the new studs ? why do you have to trim them anyway
04-06-2013, 12:37 AM
#123
Whats up with RDX owners?
iTrader: (9)

You have to trim the head so it fits past the knuckle. Unless you want to press the hubs out.
04-06-2013, 07:35 AM
#124
:what:
No, I dont think this will signifacantly weaken the studs. You can grind a little material away from the knuckle to avoid this. I did a little of both so I didn't have to gind as much off the lip of the stud.
The following users liked this post:
civicdrivr (04-07-2013)
04-09-2013, 09:49 AM
#130
Whats up with RDX owners?
iTrader: (9)


Thread
Thread Starter
Forum
Replies
Last Post
nanos
Car Parts for Sale
26
11-12-2015 08:41 PM
Yumcha
Automotive News
2
09-04-2015 08:03 AM