
Project_CLeans Progress Thread


My mini-project for the weekend
Passenger Side Motor Mount, with new hardware. Technically, you only have to replace the one bolt going thru the top of the mount. But, for a few extra bucks, OEM hardware is a must in my book. Also, I will be doing my oil change along with a new PCV valve, though i was looking into the PCV delete; I think I'll leave it in there for a little while longer.
*I don't know if there is a DIY for the pass. mount, im sure there is somewhere, but if not: let me know and ill take some pics along the way.
*I don't know if there is a DIY for the pass. mount, im sure there is somewhere, but if not: let me know and ill take some pics along the way.
Joined: Sep 2008
Posts: 78,247
Likes: 20,201
I think I made a semi DIY when I did mine. I jacked up the engine slightly with a 2 x 4...which I found out later was completely unnecessary.
PS, Wacker recently added window weld to the hollow spaces inside the side mount (like the lower control arm thing). Might be a good idea for longevity?
PS, Wacker recently added window weld to the hollow spaces inside the side mount (like the lower control arm thing). Might be a good idea for longevity?
Swoosh!
I just weighed the 2004-05 Stock 5 Spoke wheel, came out to 22.9 pounds. i guess we could call it an even 23.0Lbs. I have yet to measure the Type S honeycomb, but if the other thread is correct. That 1.0 Pound difference doesn't seem worth it for weight reduction?
I just weighed the 2004-05 Stock 5 Spoke wheel, came out to 22.9 pounds. i guess we could call it an even 23.0Lbs. I have yet to measure the Type S honeycomb, but if the other thread is correct. That 1.0 Pound difference doesn't seem worth it for weight reduction?
Jeremy,
windo-weld? I don't know how i feel about that, did he specify which brand or why? If it's the one im thinking about 3M # 08609 , I wonder if that would actually help. I mean, the mount is 9 years old. I think that's a good lifetime lol. I'm actually thinking about picking up the Front one today as well; to get them both out of the way. Definitely would like to hear what people used for the front OEM or Aftermarket? I know Honda updated the mounts due to the high heat of the J series causing extreme wear on them, and for $95 ,I can't go wrong.
windo-weld? I don't know how i feel about that, did he specify which brand or why? If it's the one im thinking about 3M # 08609 , I wonder if that would actually help. I mean, the mount is 9 years old. I think that's a good lifetime lol. I'm actually thinking about picking up the Front one today as well; to get them both out of the way. Definitely would like to hear what people used for the front OEM or Aftermarket? I know Honda updated the mounts due to the high heat of the J series causing extreme wear on them, and for $95 ,I can't go wrong.
takin care of Business in
iTrader: (5)
Joined: Jan 2008
Posts: 30,994
Likes: 4,733
From: Kansas City, MO
The new pix looks great....eager to see the the car with Base rims on there...
So the Type S wheels are heavier by a pound eh...nice...I was thinking it was the other way around...eager to see you measure the Type S rims on the same scale and help me compare
So the Type S wheels are heavier by a pound eh...nice...I was thinking it was the other way around...eager to see you measure the Type S rims on the same scale and help me compare
Joined: Sep 2008
Posts: 78,247
Likes: 20,201
I wanna see what a 16" rpf1 with rubber on it weights in comparison to my works. Mine are 52 lbs with tires. 
Not TERRIBLE for 19's...but still.
Yeah, the 3M stuff, bud!
Not TERRIBLE for 19's...but still.
Yeah, the 3M stuff, bud!
RPF1, I don't have access to lol. However, I do remember reading on a forum while researching for my friends EG Civic, the Enkei's weighed 14lbs IIRC. It must have been for the 16" because we wouldn't put anything larger than that on such a tiny car.
takin care of Business in
iTrader: (5)
Joined: Jan 2008
Posts: 30,994
Likes: 4,733
From: Kansas City, MO
52lbs is not bad at all....my 18x8.5's with rubber were right at 50lbs per corner....the Volks are known for light weight rims

...and do add the weight of spacers....no weight shall go unnoticed

Over the while I have compiled an excel from multiple sources (multiple excels out there and removed duplicate values)....I have this master sheet for me where i go from time to time to see how heavy my rims/tires are....the leads me to websites to buy rims/tires which then reminds me how I have exhausted my yearly budget for modding the car LOL...
Vmodi: wheels are still available. Had one offer. Guy has not confirmed. I still need to get the tires dismounted in the morning.
Swoosh, that must be an interesting list. I never really pay attention to weight dis. But I'm sure that's huge for you. How much weight has been reduced off your TL?
Swoosh, that must be an interesting list. I never really pay attention to weight dis. But I'm sure that's huge for you. How much weight has been reduced off your TL?
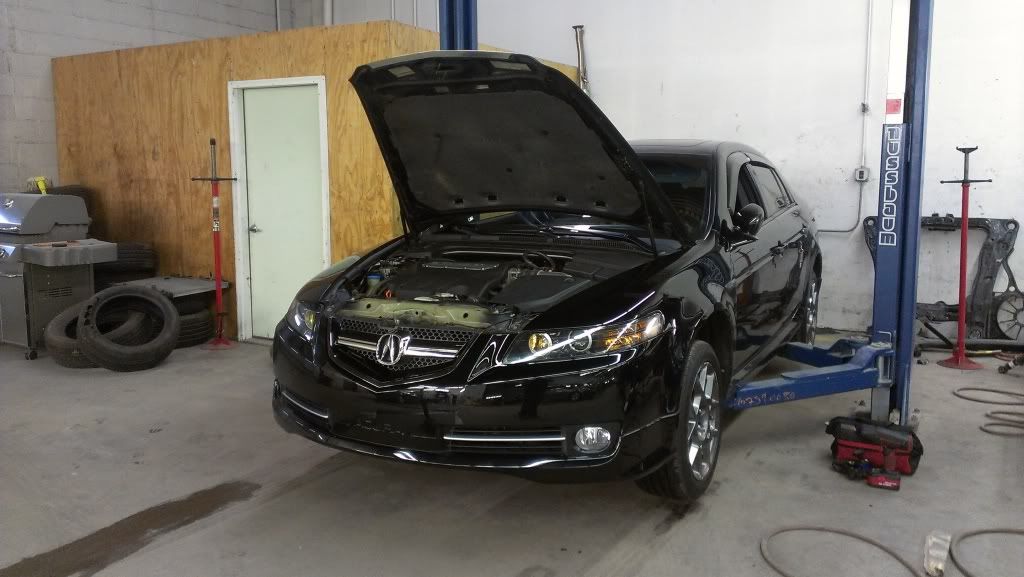
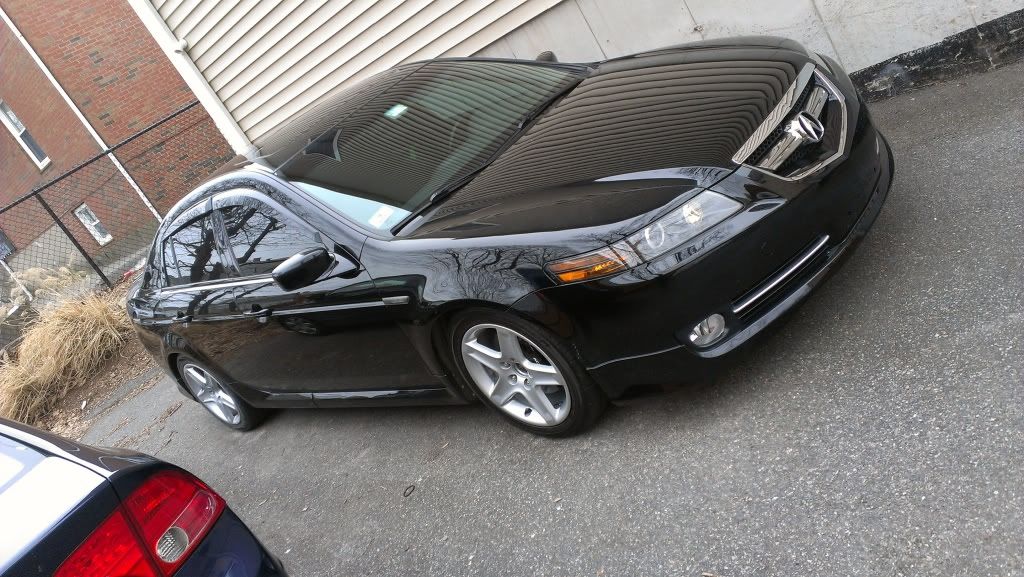
Saturday Update
Woke up early this morning and headed to the shop. Took advantage of the extra time and snapped a few pics along the way of replacing my passenger side motor mount. I decided I would post these up; not a complete diy by any means,and definitely not held responsible for anyones mistake- but if anyone ever searches "3g tl side motor mount" , I hope they will find some of these pics helpful.
Anywho:
Tools Needed:
Jack with Jackstands or Lift
An additional floor jack or scissor jack with a block of wood
17MM Socket (I used a deep socket but shallow will be fine)
3/8 Ratchet with an extendable handle or long enough handle to get some leverage
New hardware(not needed but recommended)
New motor mount ( should definitely match them up before you begin)
Anti Seize and Brakleen
1)Jack up your car or raise it with the lift, just enough for you to be able to lay under it.
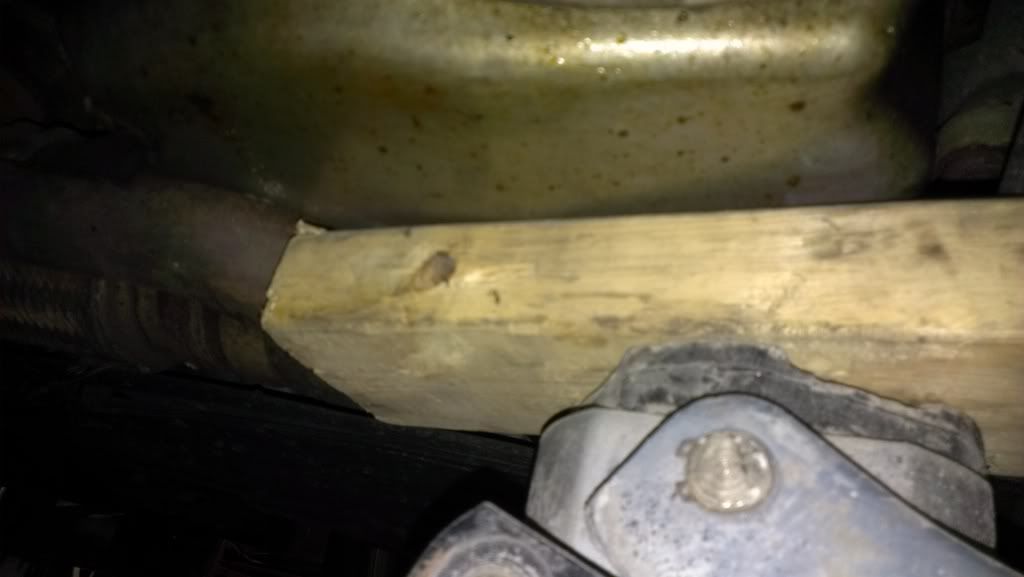
2) Slide your additional jack under the oil pan. DO NOT LIFT IT YET!! Place a block of wood under to disperse the weight evenly.THEN, raise it enough to take the tension off the motor mount, you'll see it raise slightly.
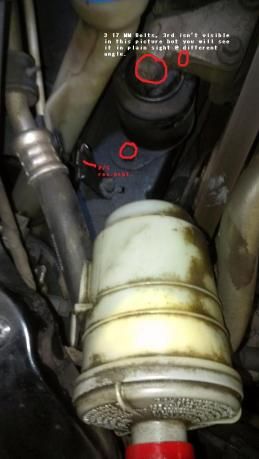
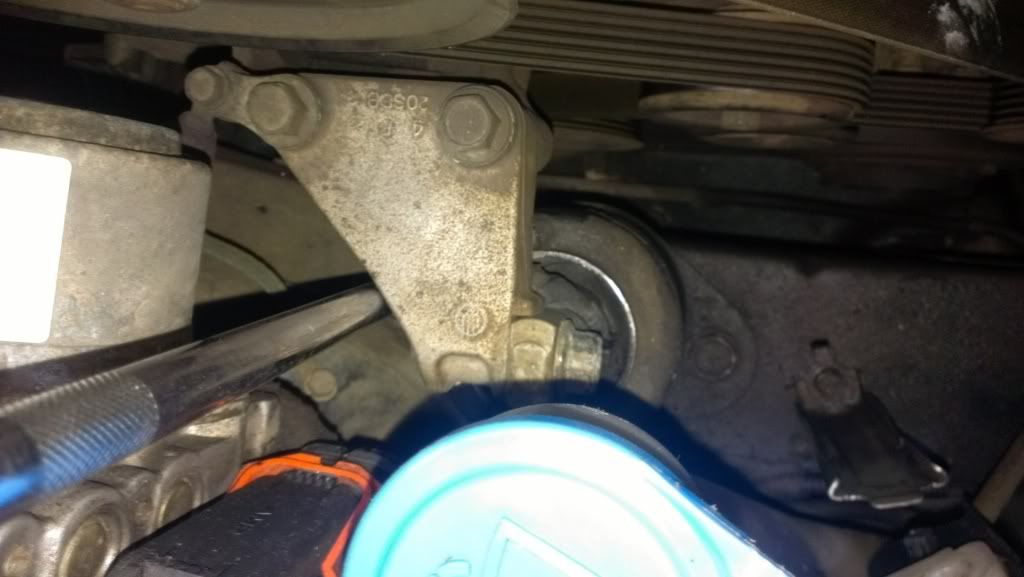
3)Slide the Power Steering Reservoir out of your work area. You will be able to see all 3 bolts easily:
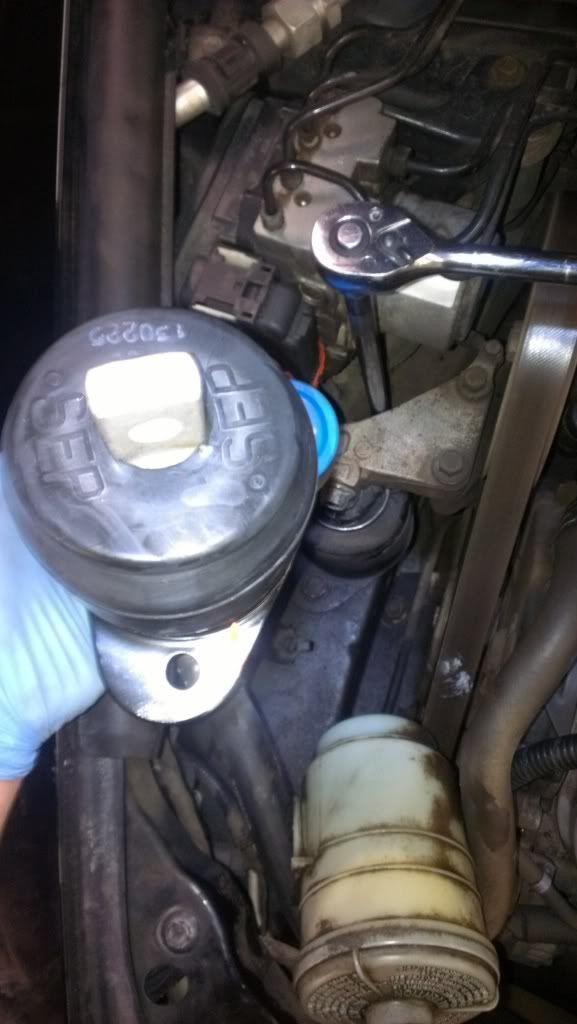
4)Before you loosen anything, compare your new mount with the one in the car now,notice the little arrow on the new mount. Should be pointing forward towards headlights.
5)Loosen all bolts. I chose to do the bottom ones first, then break the top bolt that goes into the bracket last and slowly turn it. Make sure there's no tension so the threads stay perfect! If it's too difficult to turn,try some PB plaster and try lifting or lowering the motor enough to release tension.
6)
7)Be amazed at what the %*#& came out.
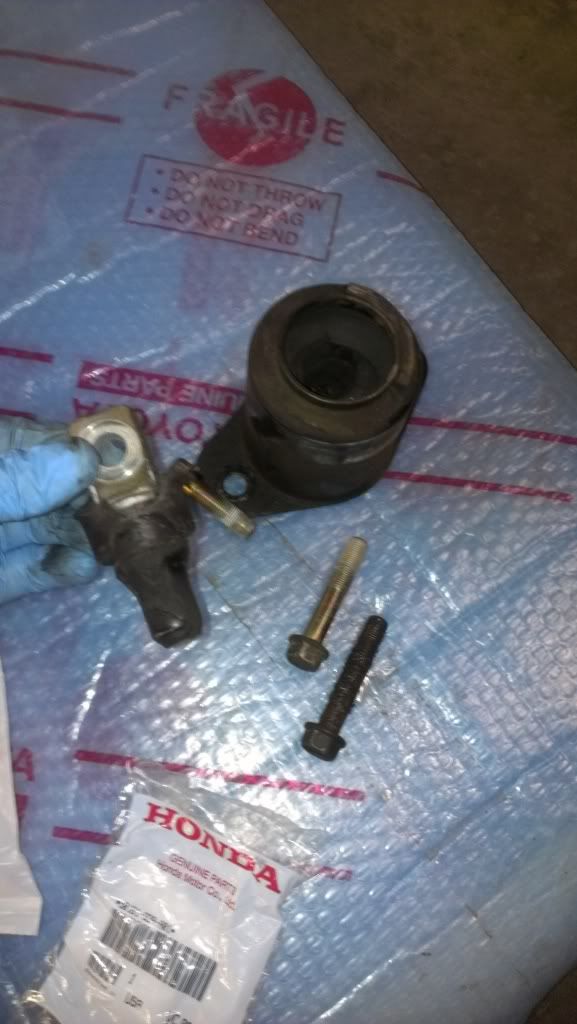
8) Put it all back together. Take this opportunity to clean the threads out with a small brush & apply anti-seize to the new bolts before reassembly( not pictured).
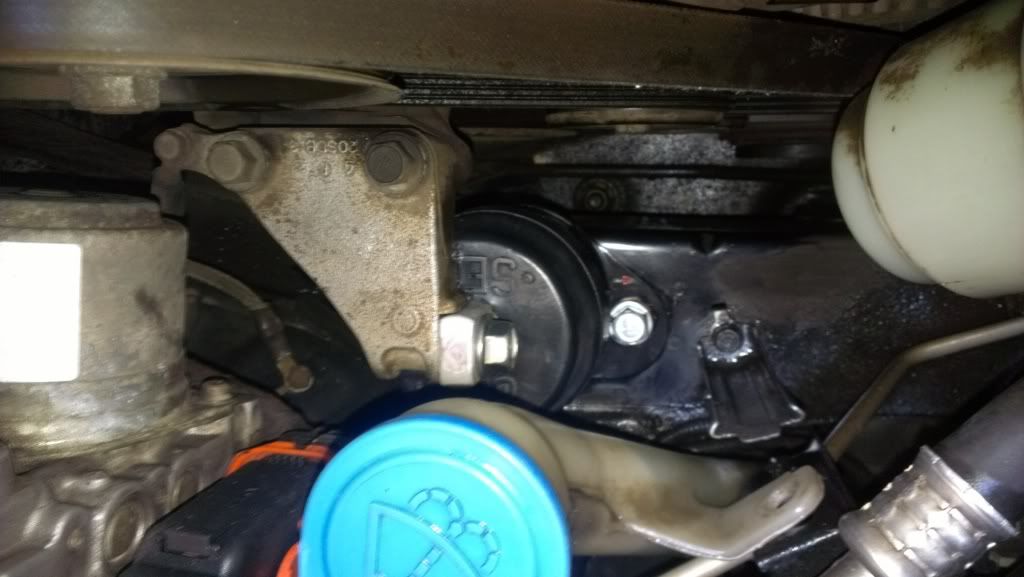
9) Be happy. This took me 20 minutes while taking pictures. Its an easy fix for any mysterious clunking or vibration.
Anywho:
Tools Needed:
Jack with Jackstands or Lift
An additional floor jack or scissor jack with a block of wood
17MM Socket (I used a deep socket but shallow will be fine)
3/8 Ratchet with an extendable handle or long enough handle to get some leverage
New hardware(not needed but recommended)
New motor mount ( should definitely match them up before you begin)
Anti Seize and Brakleen
1)Jack up your car or raise it with the lift, just enough for you to be able to lay under it.
2) Slide your additional jack under the oil pan. DO NOT LIFT IT YET!! Place a block of wood under to disperse the weight evenly.THEN, raise it enough to take the tension off the motor mount, you'll see it raise slightly.
3)Slide the Power Steering Reservoir out of your work area. You will be able to see all 3 bolts easily:
4)Before you loosen anything, compare your new mount with the one in the car now,notice the little arrow on the new mount. Should be pointing forward towards headlights.
5)Loosen all bolts. I chose to do the bottom ones first, then break the top bolt that goes into the bracket last and slowly turn it. Make sure there's no tension so the threads stay perfect! If it's too difficult to turn,try some PB plaster and try lifting or lowering the motor enough to release tension.
6)
7)Be amazed at what the %*#& came out.
8) Put it all back together. Take this opportunity to clean the threads out with a small brush & apply anti-seize to the new bolts before reassembly( not pictured).
9) Be happy. This took me 20 minutes while taking pictures. Its an easy fix for any mysterious clunking or vibration.
Here is a special request: on page 5 there is a side shot of my TL with the 17" honeycombs..can anyone PS XXR _521 in matte black for me. I'd post the pic I'm talking.about but I'm out and posting.this from my phone.


takin care of Business in
iTrader: (5)
Joined: Jan 2008
Posts: 30,994
Likes: 4,733
From: Kansas City, MO
I will be upwards of -700lbs when I put my new rims/tires
 wow that's amazing,
ewwww lol
DEFINITELY not used to this look
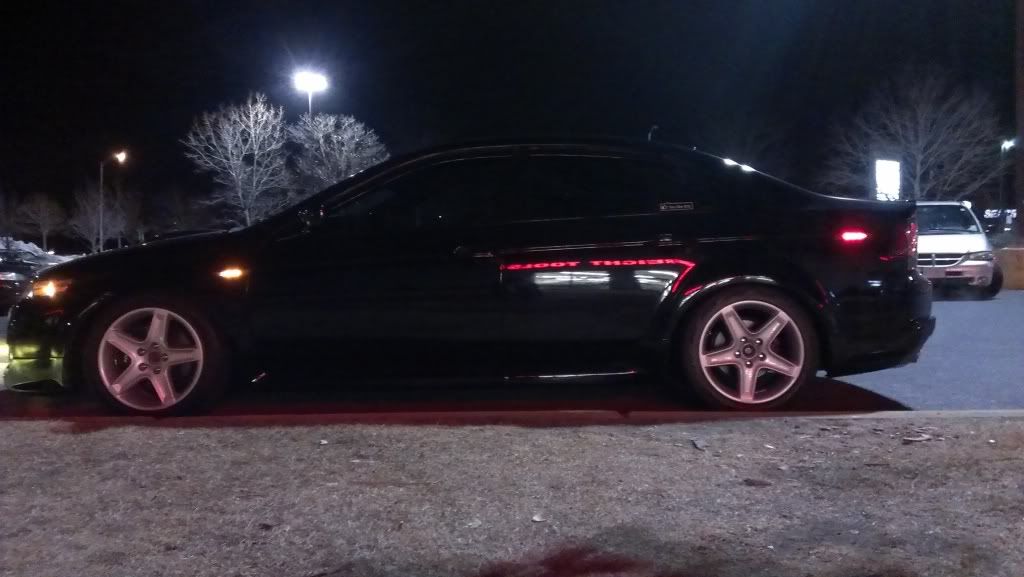
"..girl..you look better with the lights off..."
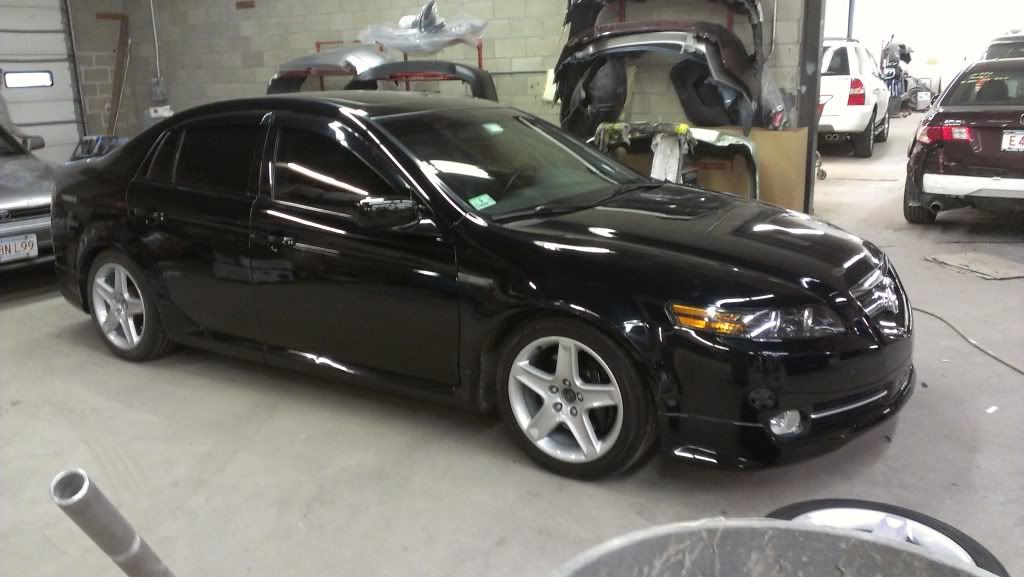
^ IMO, it looks better at night then during the day. lol Ah, driving this feels wrong.i need someone to photoshop those wheels! Once I sell the Honeycombs, I'm picking up a set of XXR's .
Bonus points for anyone that figures out where I went tonight to pick up some cheap swivel sockets!
Here's a pic of my old CL i miss so very badly
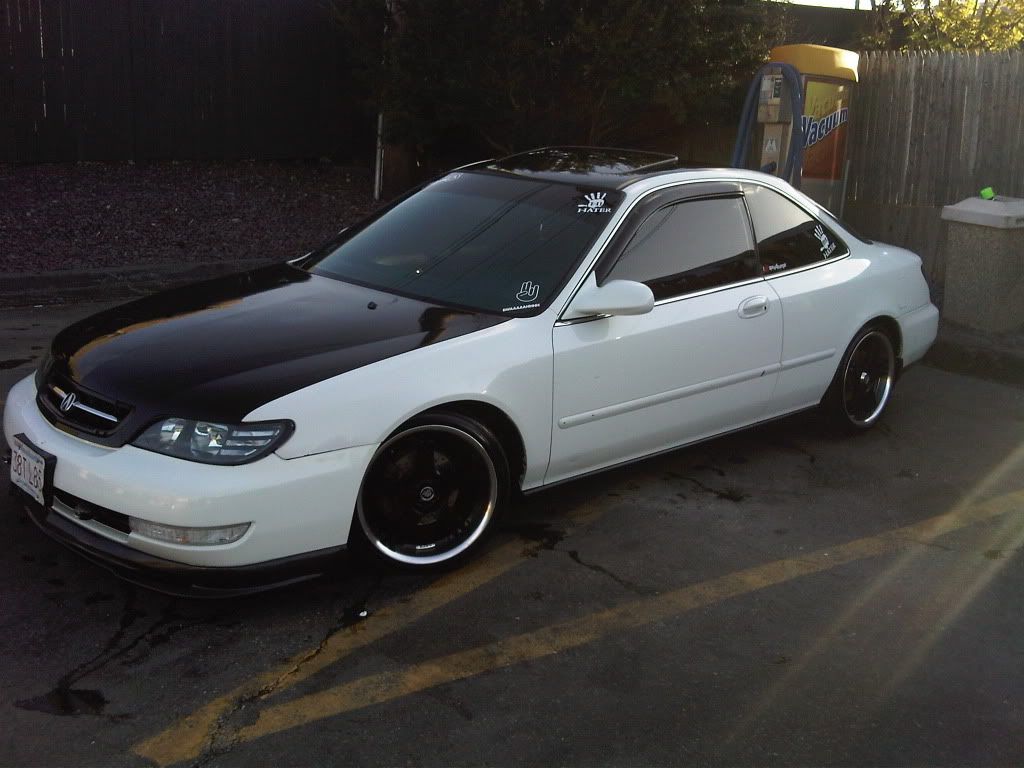
don't mind windshield and quarter glass stickers i was 16 when i got the car. the back window decal are angel wings for my 2 friends that had passed away.
DEFINITELY not used to this look
"..girl..you look better with the lights off..."
^ IMO, it looks better at night then during the day. lol Ah, driving this feels wrong.i need someone to photoshop those wheels! Once I sell the Honeycombs, I'm picking up a set of XXR's .
Bonus points for anyone that figures out where I went tonight to pick up some cheap swivel sockets!
Here's a pic of my old CL i miss so very badly
don't mind windshield and quarter glass stickers
i was 16 when i got the car. the back window decal are angel wings for my 2 friends that had passed away.
Last edited by Steven Bell; Mar 18, 2013 at 10:29 PM. Reason: Merged Posts

has anyone had any experience with the Shifter Kit from heeltoe?
http://www.heeltoeauto.com/ht-spec-s...-01-03-cl.html
I'm on the fence about it,
http://www.heeltoeauto.com/ht-spec-s...-01-03-cl.html
I'm on the fence about it,

thanks guys, Im excited for the kit with the new bushings. But i've read some mixed reviews about the shift knob. hm, I'll pick it up this weekend if i can justify the $200 for that or put it towards my suspension.
and yes Spacers are definitely in the future if i keep these. But I'm looking into getting some new wheels for the warmer weather.
I wanted to get them photoshopped before i pull the trigger. but I don't think i have very many visitors to get that done yet lol. everyone seems to go with the xxr 530 Chromium Black, I want a simple wheel to get me by until i locate some 18" ASpecs, and I feel these will fit my theme until them.
^ LOL, we're bound to run into eachother one of these days. I'm always around.
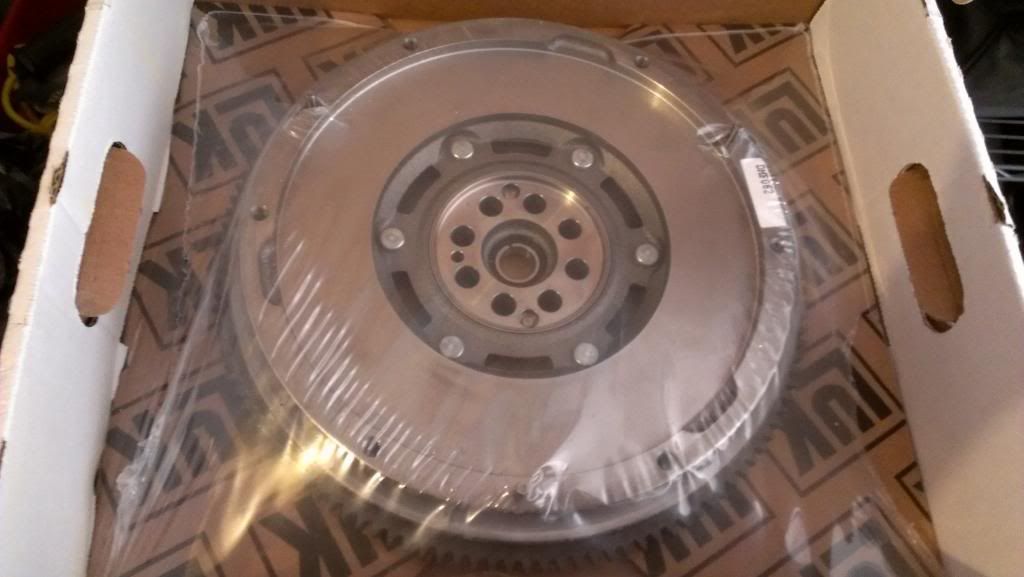
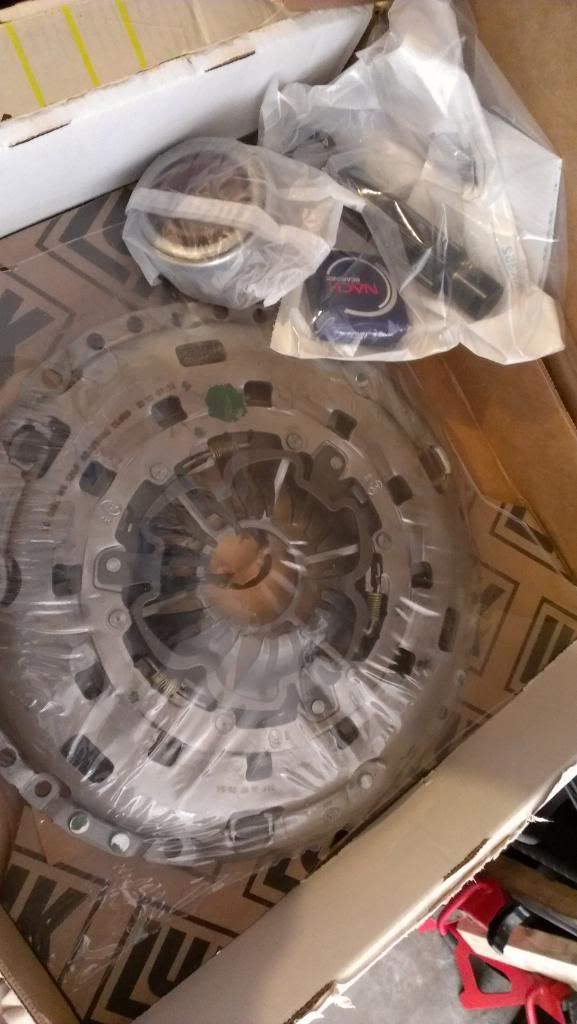
Update: Just ordered my clutch kit off Parts Geek, even at a discounted rate the clutch kit and flywheel would've been $700+ IIRC, from the dealer. Ordered both for $411.50 + FREE shipping from PartsGeek. Also gave in and ordered the Comptech Short Shifter along with the Hybrid Racing Linkage Bushings. Also ordered some OEM hardware for the clutch and flywheel, new front sway bar bushings,sway bar links,tie rods and a new OEM shift knob.
Update: Just ordered my clutch kit off Parts Geek, even at a discounted rate the clutch kit and flywheel would've been $700+ IIRC, from the dealer. Ordered both for $411.50 + FREE shipping from PartsGeek. Also gave in and ordered the Comptech Short Shifter along with the Hybrid Racing Linkage Bushings. Also ordered some OEM hardware for the clutch and flywheel, new front sway bar bushings,sway bar links,tie rods and a new OEM shift knob.
 that is a great deal
f***!
PartsGeek just emailed me to tell me the flywheel was on backorder! So now I either wait to see if they will get back in stock soon or fork over an additional $250 from the dealer!
I'm not in a rush, but it's a little annoying.
PartsGeek just emailed me to tell me the flywheel was on backorder! So now I either wait to see if they will get back in stock soon or fork over an additional $250 from the dealer!
I'm not in a rush, but it's a little annoying.
Well, just got off the phone with PG. The rep said that he can't even tell me when they might see another shipment of those flywheels.
Carolina clutches lists the DMF062 by LUK but it's more expensive and they charge shipping, an extra $50...
Carolina clutches lists the DMF062 by LUK but it's more expensive and they charge shipping, an extra $50...

yea,FML. I should have known. Oh well,called carolina Clutches to check availability and the guy said they had 5 on the shelf. So, I said F it! and ordered one from them. I'll be comparing these parts vs the OEM once I get them delivered. Can't wait for the SSK and HBR bushings!
Just a quick update to my thread Aziners:
Big Bertha: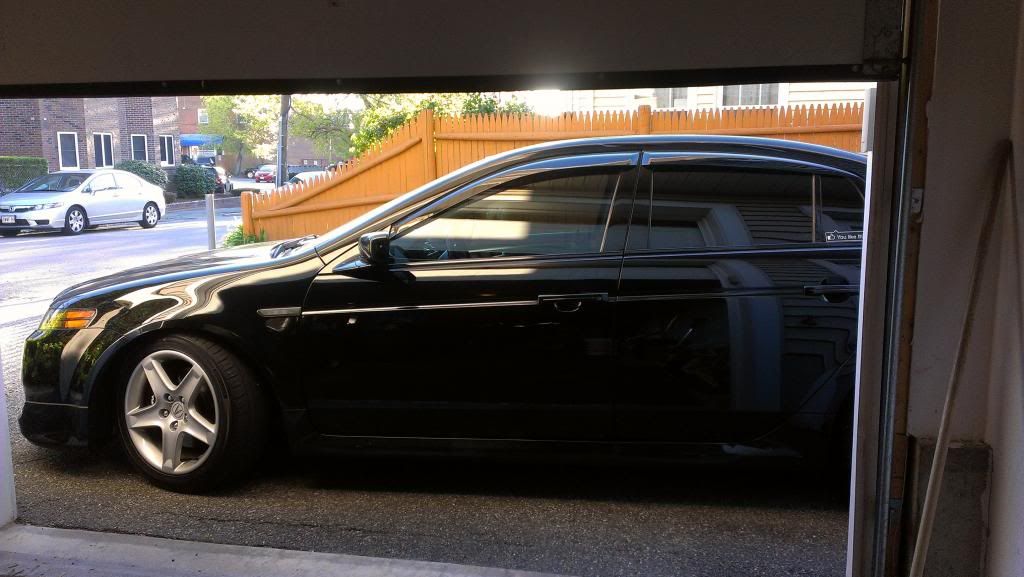
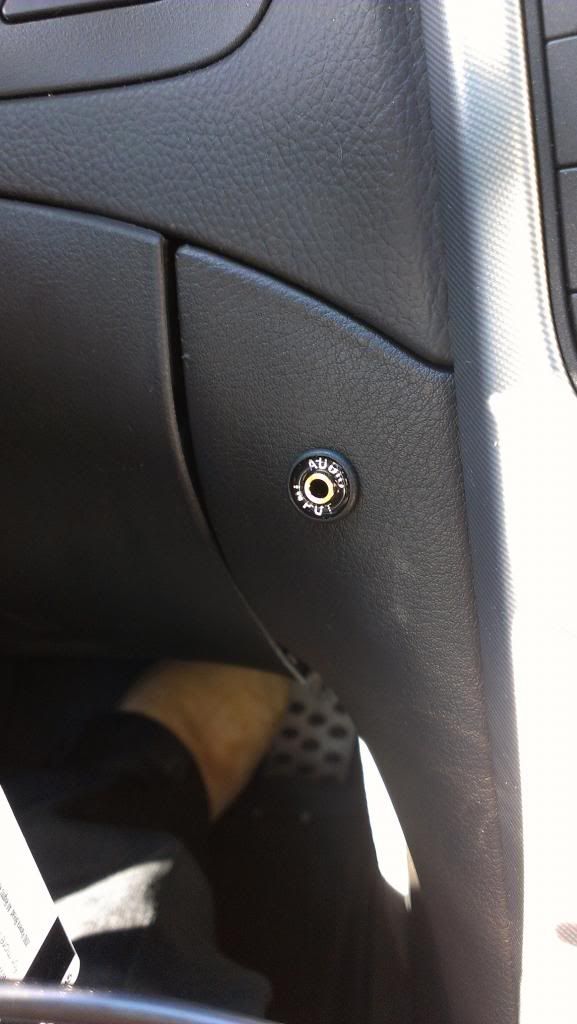
Installed an i-Simple Add-On, part number is IS335. Dash mounted auxilary input.Instead of having a cable hanging out of my armrest.
My deliveries that came in yesterday:
Also, picked up a 10" sub so i can regain my trunk space now that i have to carry a stroller around.
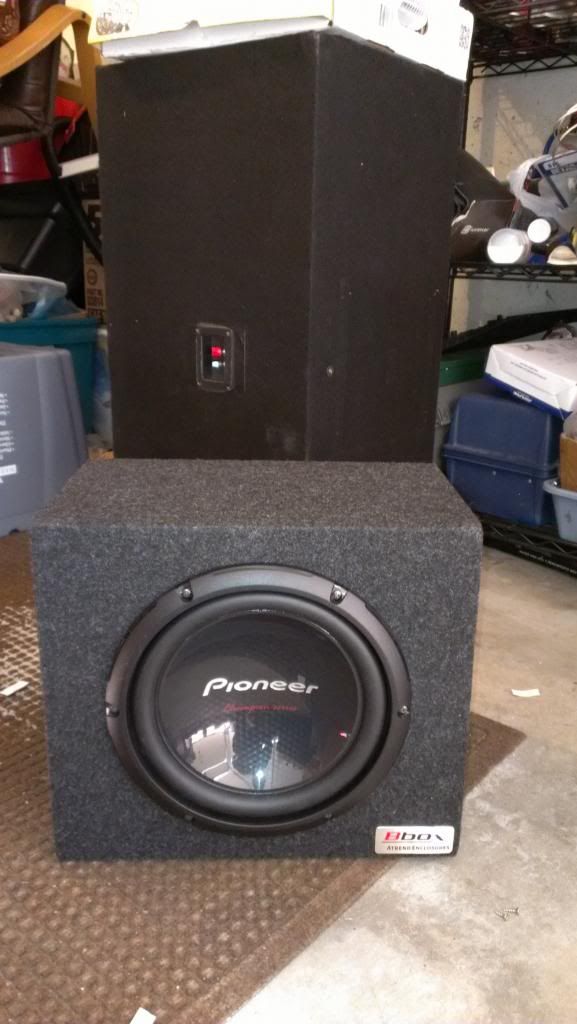
^That's a kicker L7 behind the tiny Pioneer, in the biggest box recommended by Kicker. Custom built by a friend of mine.It just wasn't practical. LOL
Big Bertha:

Installed an i-Simple Add-On, part number is IS335. Dash mounted auxilary input.Instead of having a cable hanging out of my armrest.

My deliveries that came in yesterday:


Also, picked up a 10" sub so i can regain my trunk space now that i have to carry a stroller around.

^That's a kicker L7 behind the tiny Pioneer, in the biggest box recommended by Kicker. Custom built by a friend of mine.It just wasn't practical. LOL
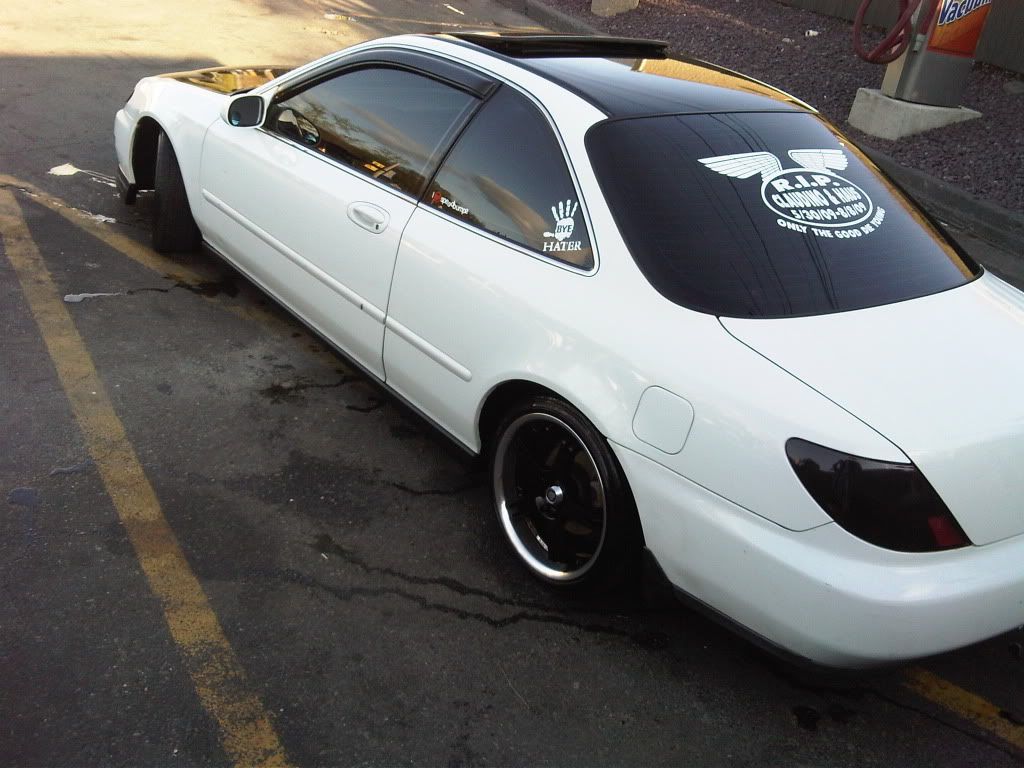
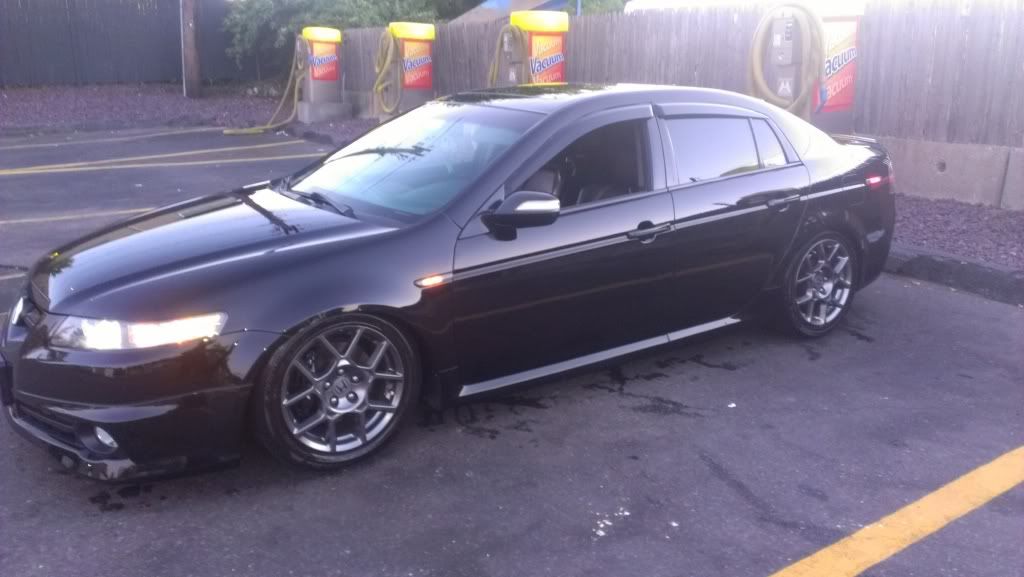
Kinda miss this look:
Well, now I'm just waiting for Heeltoe to send my Comptech Short shift kit and the Hybrid Bushings. I've been debating on which coilovers to get. I'm leaning towards what I already know and have experience with : KSport Kontrol Pros. But, at the same time, I'd like to try something like BC Racing,which people seem to always have something good to say about..hmm,decisions decisions.

Well, now I'm just waiting for Heeltoe to send my Comptech Short shift kit and the Hybrid Bushings.
I've been debating on which coilovers to get. I'm leaning towards what I already know and have experience with : KSport Kontrol Pros. But, at the same time, I'd like to try something like BC Racing,which people seem to always have something good to say about..hmm,decisions decisions.