When you click on links to various merchants on this site and make a purchase, this can result in this site earning a commission. Affiliate programs and affiliations include, but are not limited to, the eBay Partner Network.
Trying to devote some time to my car while renovating my master bedroom. I received the last pieces of hardware for the coilovers so I should have a direct swap with the OEM suspension. Anyone else order parts from TEIN? Their shipping is expensive as hell and slow as hell for what it costs, $27.00 and took 7 days to receive 6 items that could fit in a small envelope... Anyways, fingers crossed that I don't have to order from them again! Hopefully this weekend I'll have the bedroom done so I can get the Coilovers and SPC Upper arms on in between attending a C&C Opener Saturday morning and a Brewer's Game Sunday. Next I am thinking of doing the Armrest and Short Shifter.
Replaced a couple broken pieces last night and swapped out the PCV.
Common issue with the coolant reservoir cap.
This had 3 of the 4 tension tabs broken off. Noticed this when I swapped tails that it was a sloppy fit and the bulb was bouncing around in the socket.
Didn't look too bad but a new one can't hurt!
Caliper off my old car that I am trying to sell. Sanding it down and put some high temp gloss black paint on it. I think I may swap out my current rear for this one since it is painted and the one on the car now has some surface rust. I will do the same to that one when it is off the car.
The back of the car has been bugging me with just the Type-S emblem on the trunk so I added the "TL" back and added a little something. Not sure of the initial thought of it but I will see how I feel in a week or so.
Chemical Guys Citrus Wash & Gloss followed by a Quick Detail from Meguiar's leaves it nice and shiny! Next mod is in sight. Just waiting on the UPS guy.
What a busy weekend it was! Finally put a few hours to the side to work on the TL and was able to get my XLR8 J-pipe and Cat-back on. Was thinking of doing my coilovers but was beat from other projects going at the same time. I am very pleased with the outcome and the removal/install wasn't that bad. Was able to drop the J-pipe and Cat-back in once piece by myself. Putting the new stuff on was just as easy! Only thing I didn't like was working 12 inches off the ground, wish I had a lift to do work. Also picked up a Hydro-Dipped gas door in carbon fiber. Not sure if I like it or not. I will see in a week if it grows on me, but my initial thought was "no way am I leaving it". My rear bumper isn't tight so I think I need a new clip to hold it in place better. I will have to inspect it further.
So after tackling the TL Saturday morning, I figured since I am all dirty and the GF is away I will work on my truck. It has been sitting for a month and a half with busted brakes lines in the front. I hate working on brake lines but they need to get done so I can go get dirt/mulch for my yard. I ripped off the old lines from the MC back to the ABS Mod. I rented a dbl flare tool from the auto parts store which I broke the first time I tried to tighten the clamps. Previous guy must have torqued the hell out of it. Went back and got a new one. These tools are junk so I have to improvise a little and add a c-clamp to get the clamping power needed to set the first flare. What a pain in the ass this job really it, but it will be worth it in the end. Once the lines were gone, time to rip out the old hose, calipers, pads and rotors. Gotta love Wisconsin Rust! While pulling the Calipers off I noticed a shit ton of grease on the passenger side only to inspect and fine a torn CV boot with zero grease left in it. So new CV axle it is. While pulling the CV axle out I had to sawzall the stabilizer link, thanks to RUST again. Thank god it was only $8. My neighbor works for a company that sells everything to the auto parts stores so I am avoiding the "middleman" parts store mark up on all the parts. Should be fairly cheaper than expected, but still not looking forward to that bill. Have yet to get the total from him but some of the quoted parts were 50%-60% of the auto parts prices. My truck should be able to stop on a dime once all the lines are bled. Just waiting on the rear calipers to finish the job. The calipers come pre coated so Rust shouldn't (fingers crossed) be an issue the next time around.
Hopefully soon I will be able to find another 3-4 hours to put the Suspension on the TL-S. Currently looking into powder coating for my A-spec wheels as well.
Well summer officially hit! Upper 90's and Dew's in the 70's with heat indexes of 107... Fuggin hot and miserable! Low and behold, just like every summer, my weekends have been tied up with trips up north, long weekends out of town, home renovation and work trips that leave zero time/money for the car. I put maybe 3000 miles on it so far this year... But hopefully today it will go up on stands and have the suspension installed this week/weekend and have an alignment done once I get it buttoned up.
Small update:
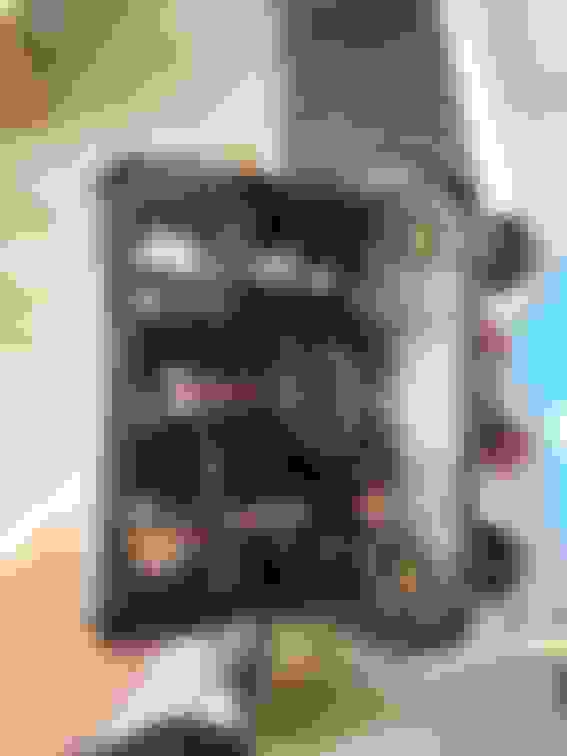
The A/C went out but I did diagnose why it wasn't working. Blew the fuse in the engine compartment fuse panel. Replaced the fuse with one from my old car and the clutch engaged and blew cold air again. This past weekend was not a good one to have no air! Does that fuse blow for the hell of it or is there something else to watch for that caused it?
The A/C went out but I did diagnose why it wasn't working. Blew the fuse in the engine compartment fuse panel. Replaced the fuse with one from my old car and the clutch engaged and blew cold air again. This past weekend was not a good one to have no air! Does that fuse blow for the hell of it or is there something else to watch for that caused it?
Just had a similar issue with my 07 TLS last month, only mine wasn't a popped fuse at first. I started by checking the AC clutch fuse physically and with a test light, everything was in working order but the AC clutch wasn't engaging. Next I bypassed the relay by jumping the 1 and 2(IIRC) pins, no dice. Then I tried bypassing the fuse box enteirely and the AC clutch kicked on just fine with direct power. Went back to the fuse box, and for shits and giggles, checked the 7 amp fuse(IIRC) for the clutch again with a test light. It popped right then and there with a spark, went ahead and replaced the fuse, and the clutch has been engaging fine since.
Don't know if its at all related to your case but just thought I'd throw it out there for public knowledge.
I will keep that in mind to test if it does pop again. Hoping I got lucky this time! Thanks
Originally Posted by rockstar143
Fuses generally don't just pop...
I don't envy your rusty suspension and brake woes!
Glad to follow along though so thanks for sharing.
From my previous experiences and assumptions, you'd think there should be some resistance that causes it to blow. I will keep my eye on it but not worried at this time! Your truck looks great and seem to be enjoying it. I love driving mine and my girlfriend likes it over her Jeep GC! Seats are so comfy.
Originally Posted by 90foxnotch
Just curious about how you like the new exhaust? Cars looking great
I like it a lot! I don't think it's too loud, but definitely louder at lower RPM's. Once you hit on it the sound kind of fades and can't hear it much unless you are next to a semi. Next up is HFPC, which I have been told and also read that it makes the exhaust tone a little louder so we will see when that time comes. For now, I feel it is perfect. There isn't any Drone or Rasp which is a definite plus! The power gains are there and you can feel them. I do believe I lost a little power at low RPM's but it is made up, up top. The 2nd the 3rd shift isn't as boggy as before and pulls hard thru the top half. I also have the OEM Clutch Slave Cylinder still so once I change it out for modded one that 2-3 shift will be even better! Soon I will need a tune to bring everything together.
Definitely, man...
and I have some rust to contend with myself as it spent the first 14 years in Maryland...but the guy weatherized it and kept up on maintenance apparently because rear brake lines are new and a slew of other maintenance was done as noted in paint pen on the engine covers
Just did 2000 miles in the last week...I have what I think is the dreaded 2004 faulty head and a slight coolant leak but I barely lost anything in that drive so I'm guessing when the metal gets hot it swells and seals up the leak. Need to check the state of my oil next.
Anyway...yeah, it's probably the first car that comes to mind when I think of being comfortable and enjoying the ride and putting in regular degular gas.
Awesome man glad to hear, I just got PCDs but Im going to wait to put them on when I get a jpipe, considering keeping 3rd cat to help rasp. Yeah Im sure tuning will help a lot, I just talked to Dom he seems like a great guy and knows his stuff
I have what I think is the dreaded 2004 faulty head and a slight coolant leak but I barely lost anything in that drive so I'm guessing when the metal gets hot it swells and seals up the leak. Need to check the state of my oil next.
I am chasing a coolant leak myself. I have yet to see any wet spots on the ground when parked. I had the oil tested to see if it was a head issue and that came back negative. I don't have a sweet smell in the exhaust so I don't believe it's a head issue with it burning off. After getting the Brake Lines replaced, I drove it for awhile and parked it on the road on a slight angle, and noticed a wet spot after sitting a bit. First thing I thought it was, was a line fitting not tight enough. Well it was coolant, which is good and bad. Good that I know it may not be the heads and bad because there is a definite leak and something else needs replacement. After taking a look at it I noticed the lower radiator hose (passenger side) was wet and the tray under it was catching the fluid and it never hitting the ground on a level surface then blowing off when driving. Guy at the autoparts store said the radiators crack and when hot swell up and cause a leak. I chose to do the cheaper route first and change out the hose and clamp. They didn't have enough coolant to do the job so I will have to go back and get more this weekend. I would start there. Here is what mine looked like. I am adding coolant maybe every 3-4 weeks.
thanks man...
hmmm...
well, i don't get the exhaust popping up into the coolant...
I do not have milky oil but it did get sludgy from whenever it was done before until I did my first oil change...
I'm not sure but I'll take a look at the radiator...
honestly, that would be a relief if it were something simple like that.
I tried blue devil with disastrous results...on the plus side it did cause me to fully flush my radiator and heater core and
i refilled with a vacuum attachment.
I recently hit the 5000 miles on the truck, since I bought it, and had the oil changed. The shop that did it is my buddies and he said they pulled the plug and nothing came out. They had to poke it with a screw driver to get it flowing. I may have a complete different issue going on but they still said it wasn't a head gasket.
not exactly but that pretty much described it for me too...I had to poke around to get it to come out...
I changed the oil level sensor and hoped for the best...I also ran seafoam in the crank for 300 miles before hand.
Maybe I cleaned it out.
Do we drive the same truck? Look outside and see if yours is a grey yukon with a florida wildlife plate
Current Condition:
-Headlights are polished and waiting to be cleared tomorrow.
-Rear seat is out
Next up:
-Coilovers
-Upper Camber Arms
-EDFC (might sell this and go active, or make extensions to adjust the rear coils with the rear deck installed)
-CT Short Shifter
-Window Roll-Up
-Clutch Slave Cylinder Check Valve Delete
-S.S. Clutch Line
-Oil/Filter Change
-Rear Rotors W/ Akebono Pads
-Paint Rear Calipers Black (Undecided on a color to repaint the Brembos)
I didn’t know you could make your own extensions for the coil over adjustments.... I’ll be keeping an eye out for that lol
I bet the car will look great after. For the brakes it’s hard to say. The blue is such a nice color. I’d be simple and say silver may look good. Or maybe color match?
Awesome updates, I need to start doing surgery on mine also. As for Brembo color I'm going burnt copper which I think would also look great on your blue.
I love the burnt copper but I feel I have seen about 15 TL's do that color in the last 2 weeks. I want something different but still flow well. I like Red, but its over played as well.
as someone that ran the edfc active for many years, i would say that's it's pretty amazing but after a few years i went back to manual adjustments via the controller so your edfc basic should be just fine. now that i'm on bc i do wish i had the on the fly adjustment that i used to have with the tein coilovers/edfc. bc gives you extenders for the rear i need to think of a way to put them on cleanly so i can adjust when i need to
go burnt copper breezy!
i'm considering changing mine from my (rockstar's) satin lagoon and was thinking burnt copper too. wonder how it would look on wdp tho...
I started the coilovers this evening and was able to get the passenger front done and moved on to the driver front and couldn't get the lower fork bolt out. Soaked it with PB Blaster for the night and will get at it tomorrow.
Question for the guys that have installed Coilovers. I went to clock the bushings on the passenger front and couldn't raise the suspension to 13" from fender to center with the coilover set at 1" from the bottom as recommended from Tein. I can only get it to go to 13.75" before I lift the car off the jack stands. Did I do something wrong or will that be good enough? I never took a measurement at stock height before I put it on stands. Can anyone at stock height, with a Type-S, take a measurement from the center of wheel to fender at the 12 o'clock position? Please and thank you.
Hopefully the bolt will come out tomorrow. The nut came off fine but I couldn't punch it thru the fork and bushing. I tried to raise the wheel to relieve pressure on the bolt but no dice.
As for the Calipers. I am looking at paint colors, Burnt Copper to be exact! Besides the typical sanding, high temp primer, burnt copper, brembo sticker the clear, do I need to do anything else to make sure they turn out good?
Would these work? J, can you share which rattle cans you used.
I can vouch for those rattle cans. I actually used those exact ones, same part number and all. The burnt copper color is fairly true, wish it was a tad bit brighter, but definitely no complaints for the price.
I used the 2 tone method of spraying though to get my "BREMBO" letters black. I didn't want to deal with the vinyl peeling off.
For the bolt, are you lifting the entire front end and leaving everything that puts tension on it off until you have done both sides? The one bolt should slide out easily and not being threaded, I would be hard pressed to think it seized in there, although I know it happens.
Brake cleaner for the major dust
Wipe down with ipa and water
3m red pad
6-800 grit
VHT Copper 4 coats, 10 min between
After final base coat rest 50 minutes but not over an hour (or you have to wait a week to add clear)
it'll be dry to touch enough to apply your decals. Lay on your side and face the caliper, that gives you the best shot at put it down once and right.
then 4 to 5 coats of vht engine enamel clear over it...
let sit, after at least 3 hours, put the hardware back in...a plus is to take it and clean with brake clean and reapply your grease
If you're positive your preload is set correctly, then I wouldn't sweat if it's 13 or 14"...
bottom line you need to load the bushings with the weight of the car on...which is when you lift the car off the stands.
What I do normally is put the half circle of the jackstands under the thick part of the rotor with a rag on it...then i lower the car
onto that until the jack isn't holding it up. Then I do the last revolution or 2 on the bolt that is holding the twistable bushing.
I'm assuming you were talking about preloading the bushings...
Yea, the fronts have 3 bolts you need to loosen then tighten up after you have a load on the suspension. I could only get it to 13.75 instead of 13 and mentioned in the DIY I was following.
For the calipers am I safe to order 2 cans of color and 2 of clear or would 1 of each be enough?
Yea, the fronts have 3 bolts you need to loosen then tighten up after you have a load on the suspension. I could only get it to 13.75 instead of 13 and mentioned in the DIY I was following.
For the calipers am I safe to order 2 cans of color and 2 of clear or would 1 of each be enough?
I THINK youd be ok with 1 of each.
I dunno what happened with mine but when i cleared mine, they were still super tacky after 12 or so hours of drying and they have gotten some dirt that doesn't clean out. I used the VHT Clear Coat though so I'm not sure about the other kind that was posted up. I'd just make sure it dries "hard".