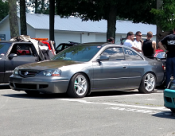
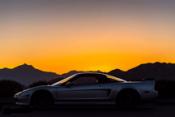
My '03 CLS6 progress thread

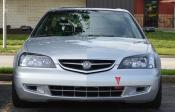
I removed the front bumper beam because I need to drill holes to mount tow hook.
I will be putting the beam back on. I am worried about bumper stability, whether beam serves structural purposes for keeping frame from twisting, and obvious safety aspects.
That got me to thinking why not hole-saw/Swiss cheese it to remove some weight plus cutting the damper brackets off. Then I will paint or plasti dip it.
Gonna work on it when I get home.
I will be putting the beam back on. I am worried about bumper stability, whether beam serves structural purposes for keeping frame from twisting, and obvious safety aspects.
That got me to thinking why not hole-saw/Swiss cheese it to remove some weight plus cutting the damper brackets off. Then I will paint or plasti dip it.
Gonna work on it when I get home.
Got some progress done on "swiss cheesing" the front bumper beam. It is more of a pain then I expected. I keep breaking/wearing out parts and it is getting expensive. That beam is thick heavy gauge steal. The front beam weighs a whopping 19 lbs.
Here is what I have broken/worn out just today. Broke my drill so had to go buy a new one. Broke my dremel I have had for many years. Bent 2 drill bits, wore out even more. Wore thru 5-6 hole saw bits already and they are pricey at 8-10 bucks each.

Top right of beam.

Back of beam right side.

Bottom right.

Still need to clean up the holes. Hopefully I can cut a good chunk of weight out.
Here is what I have broken/worn out just today. Broke my drill so had to go buy a new one. Broke my dremel I have had for many years. Bent 2 drill bits, wore out even more. Wore thru 5-6 hole saw bits already and they are pricey at 8-10 bucks each.
Top right of beam.
Back of beam right side.
Bottom right.
Still need to clean up the holes. Hopefully I can cut a good chunk of weight out.


Still working on the front bumper beam. It is taking me forever. Pretty much done drilling holes and cutting almost finished cleaning it up and prepping for paint. Should finish prep tonight and post pics. Then hopefully paint tomorrow if it isn't too windy outside.
In retrospect I would say this is not worth it. The time and money spent is far more than expected. The weight loss doesn't seem like it will be as much as I was hoping for.
In retrospect I would say this is not worth it. The time and money spent is far more than expected. The weight loss doesn't seem like it will be as much as I was hoping for.

I am close to done with prepping the beam for painting. I made holes with both drill bits and hole-saw bits. I cut out a big chunk of metal on the rear of the beam that had the bumper damper brackets on it. I ground most of the rust off. I also ground off some of the excess weld material. I used a grind stone to clean up the holes. Then I sanded it. Still more sanding to do.
Not sure if I want to stop here or try and get a lil more weight off it. Right now the weight loss is at 5 lbs. It started at 19 and is now 14.
Now for the pics.
Rear

Front

Top

Bottom I made 2 mounting points for tow hook here. Won't have to cut the bumper at all with way I did it.

Here is metal scraps.

Inside the beam.

Not sure if I want to stop here or try and get a lil more weight off it. Right now the weight loss is at 5 lbs. It started at 19 and is now 14.
Now for the pics.
Rear
Front
Top
Bottom I made 2 mounting points for tow hook here. Won't have to cut the bumper at all with way I did it.
Here is metal scraps.
Inside the beam.
Last edited by brian6speed; Sep 27, 2012 at 06:22 PM.

Lives in Boost
Joined: Jul 2004
Posts: 902
Likes: 51
From: Chicago
You can do so much with that line 
Brian, it's too bad you're not a big guy already, you could do another kind of weight reduction that would probably have even more of an effect on performance. I'm really curious to what it would run in the 1/4. The vid you posted sounded like a pretty healthy engine and strong pulls...
Brian, it's too bad you're not a big guy already, you could do another kind of weight reduction that would probably have even more of an effect on performance. I'm really curious to what it would run in the 1/4. The vid you posted sounded like a pretty healthy engine and strong pulls...
You can do so much with that line
Brian, it's too bad you're not a big guy already, you could do another kind of weight reduction that would probably have even more of an effect on performance. I'm really curious to what it would run in the 1/4. The vid you posted sounded like a pretty healthy engine and strong pulls...
Brian, it's too bad you're not a big guy already, you could do another kind of weight reduction that would probably have even more of an effect on performance. I'm really curious to what it would run in the 1/4. The vid you posted sounded like a pretty healthy engine and strong pulls...
I would expect low 13's. High 12's might be possible considering people like reese etc. have ran low 13's not fully gutted.
BTW read thru both dual tb intake threads on earlier and I really want one. That plus equal length headers would be sick. Since you don't need yours let me have it civic!!
Last edited by brian6speed; Sep 27, 2012 at 06:58 PM.
I finished up the bumper beam finally. Glad to be done with this project. I drilled some more holes, but not enough to really matter weight wise on an inaccurate scale. It ended up between 5 and 5.5 lbs.
Here are all the bits I bought and went through during this project. Drill bits were anywhere from $2.50 up to $6. Hole-saw bits were $8-10 a piece. The arbors were about $10 each. New drill $60. New dremel $60. Dremel metal cutting discs $10.

After I finished drilling, grinding, cleaning up, and sanding I sprayed it with rust remover and let that sit over night. Then I washed it with degreaser and dried it with blower. Next up, I primed it then painted it flat black.

For the tow hook, I realized if I mount it to the bottom of the beam in the right spot it will fit right through one of the rectangular holes in the lower grill on bumper.


Bumper beam bolted back up.


Here are all the bits I bought and went through during this project. Drill bits were anywhere from $2.50 up to $6. Hole-saw bits were $8-10 a piece. The arbors were about $10 each. New drill $60. New dremel $60. Dremel metal cutting discs $10.
After I finished drilling, grinding, cleaning up, and sanding I sprayed it with rust remover and let that sit over night. Then I washed it with degreaser and dried it with blower. Next up, I primed it then painted it flat black.
For the tow hook, I realized if I mount it to the bottom of the beam in the right spot it will fit right through one of the rectangular holes in the lower grill on bumper.
Bumper beam bolted back up.


Was thinking if I really need this chunk of metal. In the pic I posted in yellow are the only 2 holes that I use clips to secure bumper from top. In blue is where there are supposed to be 3 metal screws that hold bumper down. Since getting my car painted like 3 years ago, I have never had those screws or anything holding it since with no issues.
In red you can see the part I was thinking of cutting. Not sure if I should for bumper support/structure reasons and it would probably only be 1 lb saved. Hmm.
Now I keep thinking what I can cut out or drill holes in. Damn addiction.

I made 3 short video sound clips to test what horn sounds like. First video is both horns hooked up, 2nd is low horn only and 3rd is high horn only. Did this to decide which I wanted to remove.
Both.
Low.
High.
Both.
Low.
High.

High horn removed. Weight is a whopping .78 lbs. I also removed the fluid lines.(.21 lbs.) Gonna keep just in case I need to put back on. I left the spray nozzles attached to the hood.

Where the horn was.

Shiny new headlights arrived. I also ordered new bulbs for front lights, rear lights, and license plate.

I opened and cleared both my old and new driver's side headlight. For the old one I used a heat gun only. Then I scraped all the old silicone and put in new silicone, heat gun then clamp.

For the new one I used the oven, cut the glue while opening with screw driver or credit card. Reused the stock sealant heated in oven then clamped.


I prefer the oven method. Removing sealant is a pain so I hope my new light seals fine reusing sealant.
Now just need to do other 2 but don't have enough clamps so will need to wait.

Can't believe it took me 10 years to get the courage to do it. Compared to other stuff I am doing now tho this is nothing.
BTW I drove down the street without the front bumper, lights, etc and damn does the front feel light and responsive.
Last edited by brian6speed; Oct 3, 2012 at 03:12 PM.
Here are the PIAA bulbs I ordered. I ordered them for side markers, turn signals, license plate, back up, park/brake, reverse, and high beams. I tried using the front turn signal bulbs but they didn't function properly and are probably illegal anyway so swapped back to oem for now.

The removed headlight amber diffusers weighed .11 lbs.

New cleared headlights mounted. Just working on finishing touches before I put bumper back on.

I decided against using my benen tow hooks. I couldn't find a way to mount it without cutting the bumper some. I also don't really like the look that much, too flashy/ricey. I might look into one of the folding hooks or maybe tow straps, not sure.
Here is where I would need to cut bumper(behind styrofoam cutout).

I removed the engine bay firewall insulation. It weighs .4 lbs. It is pretty easy to remove. Remove the black clips by unscrewing them. Then cut the insulation with scissors in a few select areas to ease it around components. Finally just rip it out, it tears easily.

I want to keep my footrest and my pedal on it, but that steel plate weighs nearly 2 lbs. I cut out the excess metal and swiss cheesed it. This removed .55 lbs. I still need to paint it.

The removed headlight amber diffusers weighed .11 lbs.
New cleared headlights mounted. Just working on finishing touches before I put bumper back on.
I decided against using my benen tow hooks. I couldn't find a way to mount it without cutting the bumper some. I also don't really like the look that much, too flashy/ricey. I might look into one of the folding hooks or maybe tow straps, not sure.
Here is where I would need to cut bumper(behind styrofoam cutout).
I removed the engine bay firewall insulation. It weighs .4 lbs. It is pretty easy to remove. Remove the black clips by unscrewing them. Then cut the insulation with scissors in a few select areas to ease it around components. Finally just rip it out, it tears easily.
I want to keep my footrest and my pedal on it, but that steel plate weighs nearly 2 lbs. I cut out the excess metal and swiss cheesed it. This removed .55 lbs. I still need to paint it.
Last edited by brian6speed; Oct 10, 2012 at 11:06 AM.
The lights on the far right I used for the license plate and trunk , to be honest they are pretty weak . I replaced them with some LED's I got from a guy off here , they are brighter for sure . But the piaa's are better than oem . Not to sound like I'm hating on your new purchase .
Not to sound like I'm hating on your new purchase .
The lights on the far right I used for the license plate and trunk , to be honest they are pretty weak . I replaced them with some LED's I got from a guy off here , they are brighter for sure . But the piaa's are better than oem . Not to sound like I'm hating on your new purchase .
Not to sound like I'm hating on your new purchase .I am not really concerned about license plate brightness, just have that bulb for legal reasons.
What are the best options? Led's work fine in our lights? What do ppl use as turn signals? Orange bulbs? Are those ones that only flash orange considered corny?
Being seen isnt corny IMO.
I just replaced all the amber bulbs on the FR-S with chrome coated bulbs. They look chrome in the housing but flash amber. They arent as bright as Id like though so Im probably going to get some LEDs at some point.
LEDs do work fine, but for turn signals you'll need to get an LED relay so they dont hyper blink.
Im using orange 1157s in the turn signals, and orange 194s in the running lights (right below the turn signal). Personally, I don't like how LED clusters look in our housings.
I just replaced all the amber bulbs on the FR-S with chrome coated bulbs. They look chrome in the housing but flash amber. They arent as bright as Id like though so Im probably going to get some LEDs at some point.
LEDs do work fine, but for turn signals you'll need to get an LED relay so they dont hyper blink.
Im using orange 1157s in the turn signals, and orange 194s in the running lights (right below the turn signal). Personally, I don't like how LED clusters look in our housings.
Being seen isnt corny IMO.
I just replaced all the amber bulbs on the FR-S with chrome coated bulbs. They look chrome in the housing but flash amber. They arent as bright as Id like though so Im probably going to get some LEDs at some point.
LEDs do work fine, but for turn signals you'll need to get an LED relay so they dont hyper blink.
Im using orange 1157s in the turn signals, and orange 194s in the running lights (right below the turn signal). Personally, I don't like how LED clusters look in our housings.
I just replaced all the amber bulbs on the FR-S with chrome coated bulbs. They look chrome in the housing but flash amber. They arent as bright as Id like though so Im probably going to get some LEDs at some point.
LEDs do work fine, but for turn signals you'll need to get an LED relay so they dont hyper blink.
Im using orange 1157s in the turn signals, and orange 194s in the running lights (right below the turn signal). Personally, I don't like how LED clusters look in our housings.


In search of excitement
Joined: Feb 2012
Posts: 366
Likes: 57
From: NYC/Rochester
Hey Brian what is the deal with your headlight housings? Where did you order from? and how much if you don't mind me asking? I am in the market for a new drivers side, the clear effect looks great, I just looked a some pictures of mine and am trying to picture it clear, lol idk if I am ready to do that yet.
Hey Brian what is the deal with your headlight housings? Where did you order from? and how much if you don't mind me asking? I am in the market for a new drivers side, the clear effect looks great, I just looked a some pictures of mine and am trying to picture it clear, lol idk if I am ready to do that yet.
I remember back in the good ole days someone offered clear diffusers to replace amber ones, but those are long gone so just leave it empty now.
I've been checking everyones diet threads and plan on following suit.
So keep doing your thing cutting the weight so I can follow.
I appreciate you sharing pics with weights and I assume they are accurate.
I hope you don't mind if I go by your weight numbers so I don't have to try to weigh everything to get my numbers.
Today I pulled my rug and all my 0 gauge wire,feels like 20lbs worth wire.
This is better than spending money on mods.
It's free....
So keep doing your thing cutting the weight so I can follow.
I appreciate you sharing pics with weights and I assume they are accurate.
I hope you don't mind if I go by your weight numbers so I don't have to try to weigh everything to get my numbers.
Today I pulled my rug and all my 0 gauge wire,feels like 20lbs worth wire.
This is better than spending money on mods.
It's free....
I've been checking everyones diet threads and plan on following suit.
So keep doing your thing cutting the weight so I can follow.
I appreciate you sharing pics with weights and I assume they are accurate.
I hope you don't mind if I go by your weight numbers so I don't have to try to weigh everything to get my numbers.
Today I pulled my rug and all my 0 gauge wire,feels like 20lbs worth wire.
This is better than spending money on mods.
It's free....
So keep doing your thing cutting the weight so I can follow.
I appreciate you sharing pics with weights and I assume they are accurate.
I hope you don't mind if I go by your weight numbers so I don't have to try to weigh everything to get my numbers.
Today I pulled my rug and all my 0 gauge wire,feels like 20lbs worth wire.
This is better than spending money on mods.
It's free....
My total weight loss listed is underrated tho because I left out the parts I am not sure the weight of(bet I am close to 500 removed now).
Some of it is free, but some of it gets pricey. It is very addicting and you never want to stop. Right now I am going through my wiring and even thinking about getting a spot weld drill to remove the extra metal panels and brackets for rear seats, jack support, spare wheel mount point, etc.
I decided to start sorting through the wiring so I can remove some of the excess I don't need. I started with the harness that runs under the passenger door sill. I removed all the electric tape, that plastic tubing, and some clips. I removed the SRS harness and the audio wires, left the rest intact. Also removed a little more of the sound deadening behind dash.
Here I am sorting through the wires.


Here is what was removed.
Passenger side
SRS cable - .38 lbs
audio cables - .64 lbs
clips - .02 lbs
electric tape - .09 lbs
tubing - .12 lbs
sound deadening - .23 lbs
Total - 1.48 lbs

Here are the wires cleaned up. I used minimal electric tape and some of the clips.


Still got driver side, dash, and trunk to go through. Should be good for around 5 lbs total I would think.
Here I am sorting through the wires.
Here is what was removed.
Passenger side
SRS cable - .38 lbs
audio cables - .64 lbs
clips - .02 lbs
electric tape - .09 lbs
tubing - .12 lbs
sound deadening - .23 lbs
Total - 1.48 lbs
Here are the wires cleaned up. I used minimal electric tape and some of the clips.
Still got driver side, dash, and trunk to go through. Should be good for around 5 lbs total I would think.

The reason I had put stock seat back in was for when I took it to my tire shop for an alignment. The guy that pulled my car into the bay was probably 250-300 lbs so it was a good thing I did. Guess I should learn how to do my own alignments.
I am also planning on taking it to body shop in the next couple of weeks to clean up my fender and get my lipkit molded, painted, and installed. I might just get them to make my sunroof plug also.
Don't want the racing seats getting damaged during that. Gonna throw oem wheels and steering wheel back on also.
I left the power oem seat wires intact so that I can still use oem seats when needed(minus airbags).
I am also planning on taking it to body shop in the next couple of weeks to clean up my fender and get my lipkit molded, painted, and installed. I might just get them to make my sunroof plug also.
Don't want the racing seats getting damaged during that. Gonna throw oem wheels and steering wheel back on also.
I left the power oem seat wires intact so that I can still use oem seats when needed(minus airbags).
Last edited by brian6speed; Oct 12, 2012 at 08:18 AM.