


Replacement "fog light" lenses DIY


Thread Starter
Wait...I just blacked out
Joined: Oct 2006
Posts: 639
Likes: 0
From: Gainesville Florida
Replacement "fog light" lenses DIY
Ok so along with my headlight bulb replacement i figured it was time to do the "fog light" lens replacement modification. So this might not be the way others have done it, but it's working out great for me, so feel free to learn from my methods if you'd like....
anyways...
MATERIALS NEEDED
- Acura CL 01-02 "fog lights"
- Dremel
- Epoxy/Silicon/some kind of glue
- Plexiglass/Acrylic/some kind of clear thick plastic
PROCESS
here you see my old fog lights, with yellow lenses, looking kind of nasty and pitted.
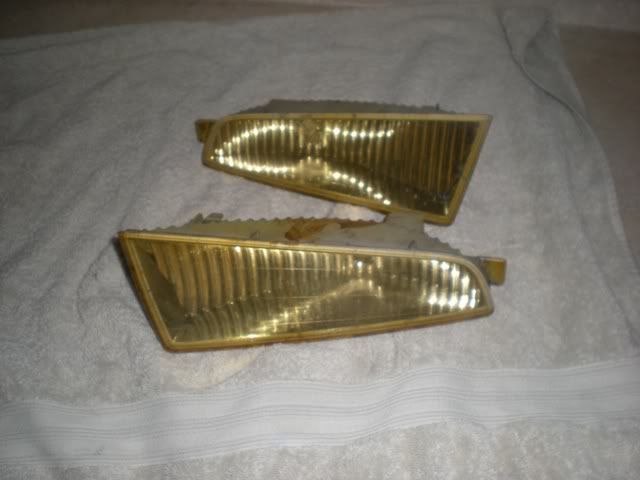
Now you want to dremel off the lenses of the old fog lights. make sure to keep atleast one intact so you can use it as a stencil. If they break don't worry, you can use the lights itself, it's just easier that way
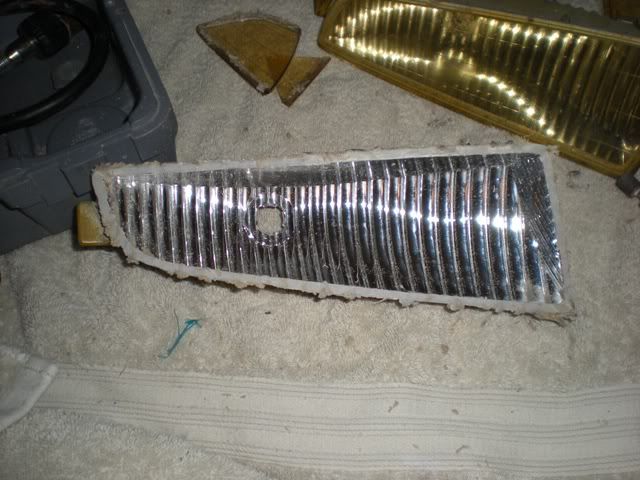
Do the same for the other light and you should have something that looks like this
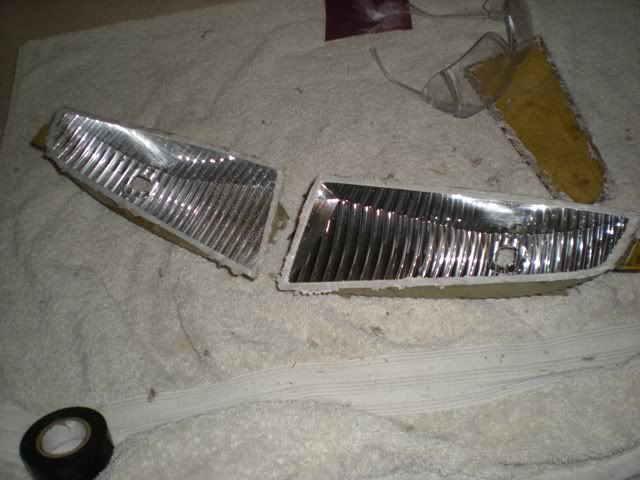
make sure to clean out the insides, i had a bunch of blue bulb flakes, dremel flakes, dust, etc.
Then use your old lens...(note how nasty it was)
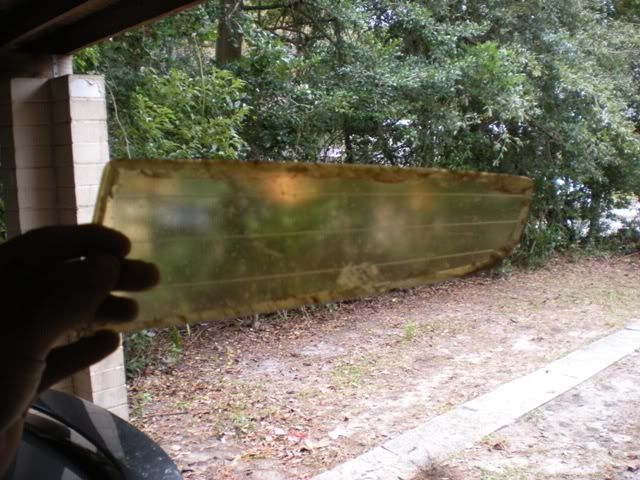
to trace out new lenses
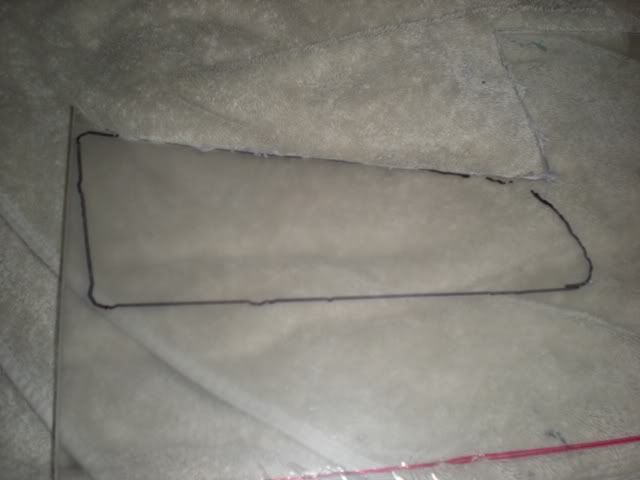
Then what I did was tape down the new lenses and then put sealer around them
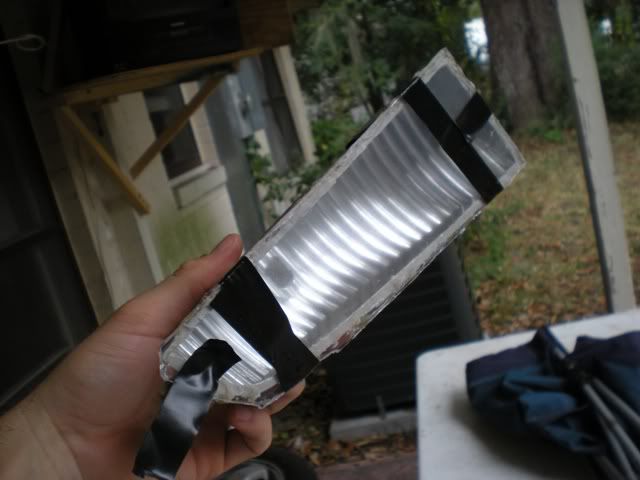
they look a bit hazy because i left the front plastic protector on there until i'm ready to paint them. They will obviously be much clearer when I take the plastic protector off of them.
More pics to follow as the project progresses!
anyways...
MATERIALS NEEDED
- Acura CL 01-02 "fog lights"
- Dremel
- Epoxy/Silicon/some kind of glue
- Plexiglass/Acrylic/some kind of clear thick plastic
PROCESS
here you see my old fog lights, with yellow lenses, looking kind of nasty and pitted.
Now you want to dremel off the lenses of the old fog lights. make sure to keep atleast one intact so you can use it as a stencil. If they break don't worry, you can use the lights itself, it's just easier that way
Do the same for the other light and you should have something that looks like this
make sure to clean out the insides, i had a bunch of blue bulb flakes, dremel flakes, dust, etc.
Then use your old lens...(note how nasty it was)
to trace out new lenses
Then what I did was tape down the new lenses and then put sealer around them
they look a bit hazy because i left the front plastic protector on there until i'm ready to paint them. They will obviously be much clearer when I take the plastic protector off of them.
More pics to follow as the project progresses!






Trending Topics
01 Type-S, Sexy Silver
Joined: Dec 2007
Posts: 520
Likes: 14
From: Keller, Texas
Ohh this brings back some memories... the frustration... lol. The hardest part was cutting out the new lenses. The heat from the dremel melts the lexan/acrylic and turns it into goo, but it's better than trying to score it with a knife. Get some pics up of the finished product! 
Ohh this brings back some memories... the frustration... lol. The hardest part was cutting out the new lenses. The heat from the dremel melts the lexan/acrylic and turns it into goo, but it's better than trying to score it with a knife. Get some pics up of the finished product!
Another member did this same kind of thing to his fogs. How are you planning to paint them? Looks good so far. I had a rock from a dump truck take out one of mine. Smashed it to shit so i had to replace the whole thing. Just did both cause they looks so bad. Not like yours, but pretty bad. GL with the rest of the work, can't wait to see how it turns out!

Thread
Thread Starter
Forum
Replies
Last Post
cycdaniel
1G TSX Performance Parts & Modifications
8
Dec 17, 2019 10:58 AM
InFaMouSLink
Car Parts for Sale
7
Oct 27, 2015 06:51 PM
Marmbo
4G TL Problems & Fixes
6
Sep 21, 2015 09:39 AM
