
DIY: Upper Control Arm Replacement


DIY: Upper Control Arm Replacement
Tools Required:
1.) 17mm Socket
2.) 10mm Socket
3.) Torque Wrench
4.) Ball Joint Separator & Hammer
5.) New Upper Control Arm (Passenger Side Part #: 51450-SZ5-010, Driver Side Part #: 51460-SZ5-010)
6.) New Cotter Pin
Time to completion: ~40mins
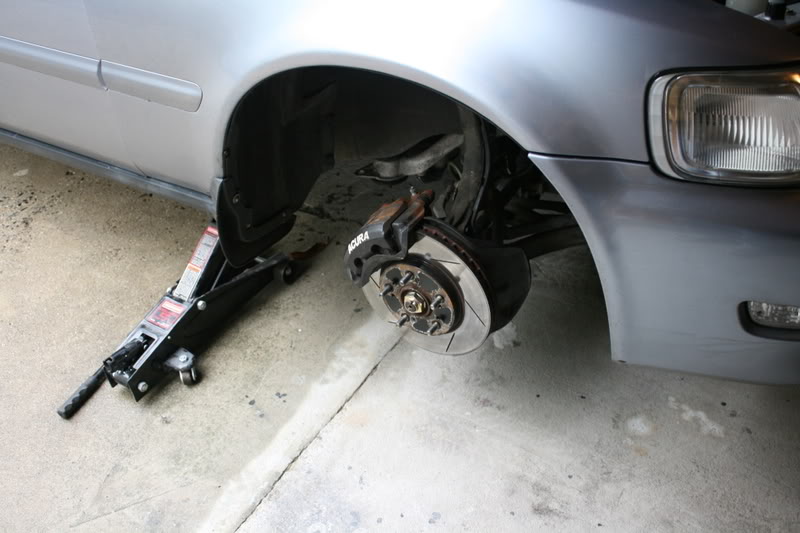
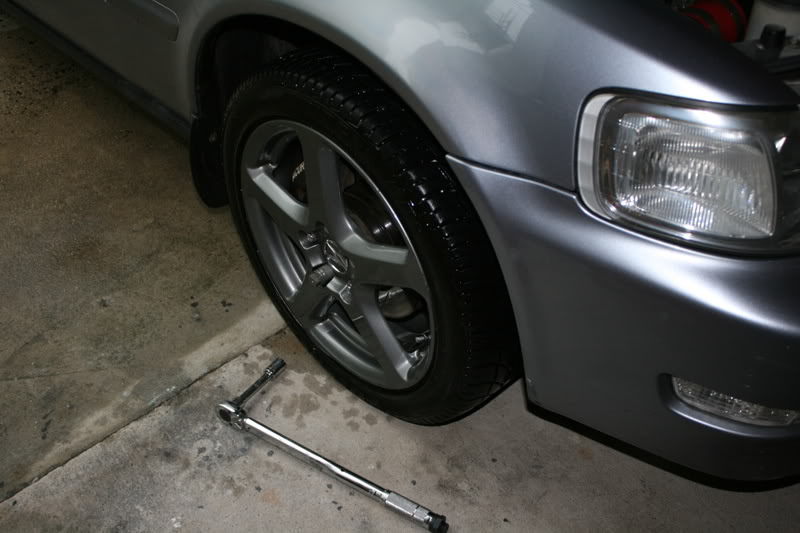
Step 1: Jack up vehicle and remove wheel
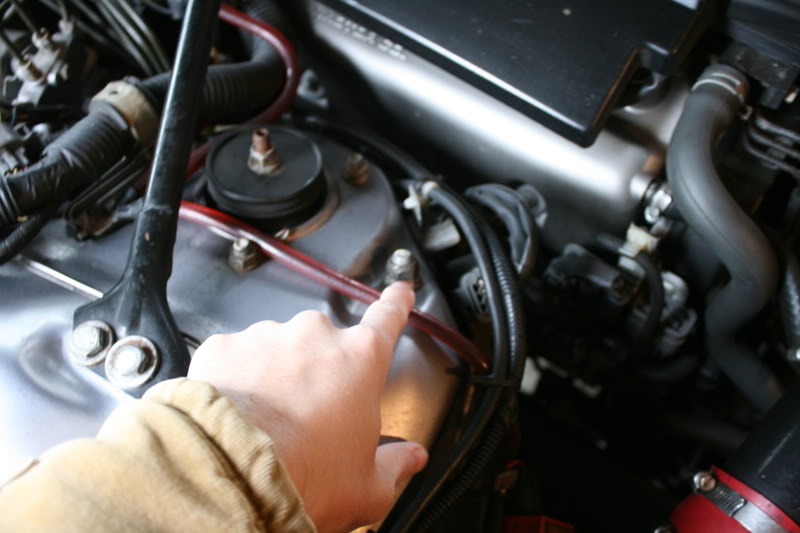
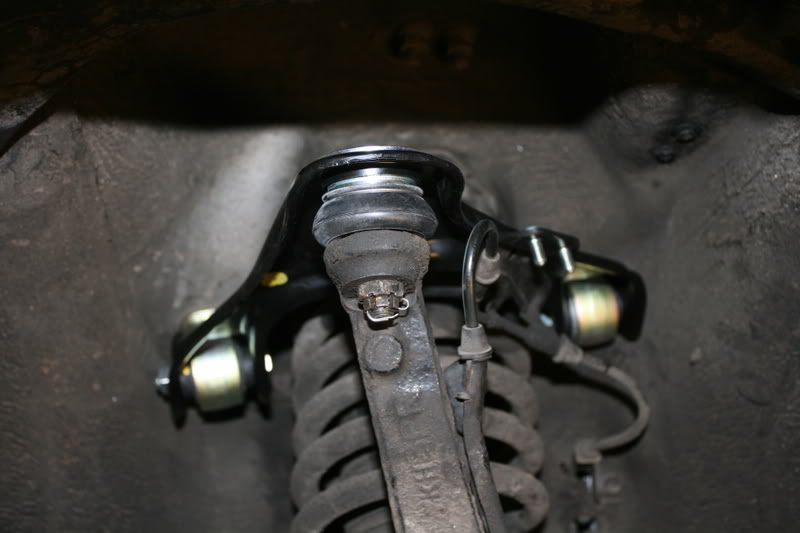
Step 2: In the engine bay you will need to locate the two 17mm bolts that hold the upper control arm to the body of the car. If you look around the top of your strut, you should see two larger sized bolts. Or you can visualize from the bottom.
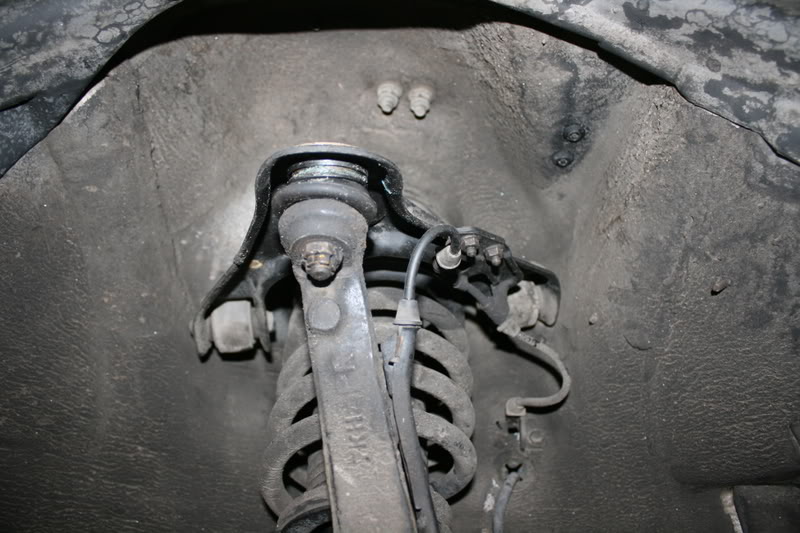
This is for the passenger side front
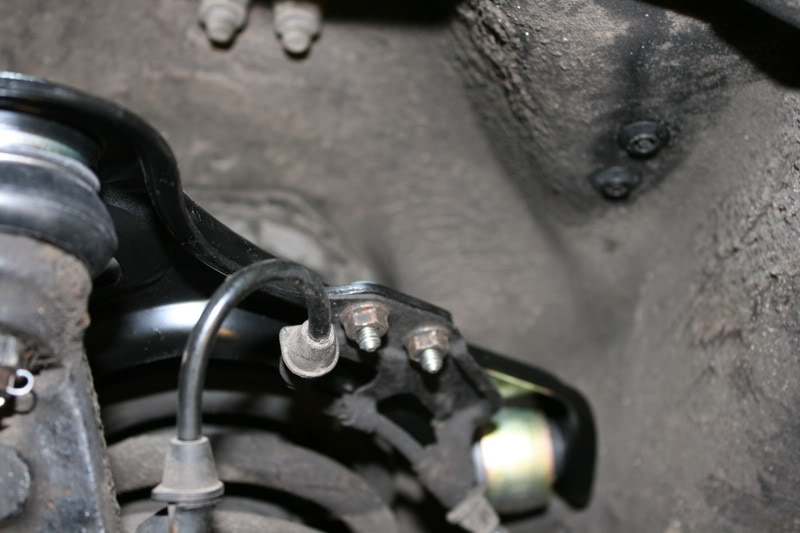
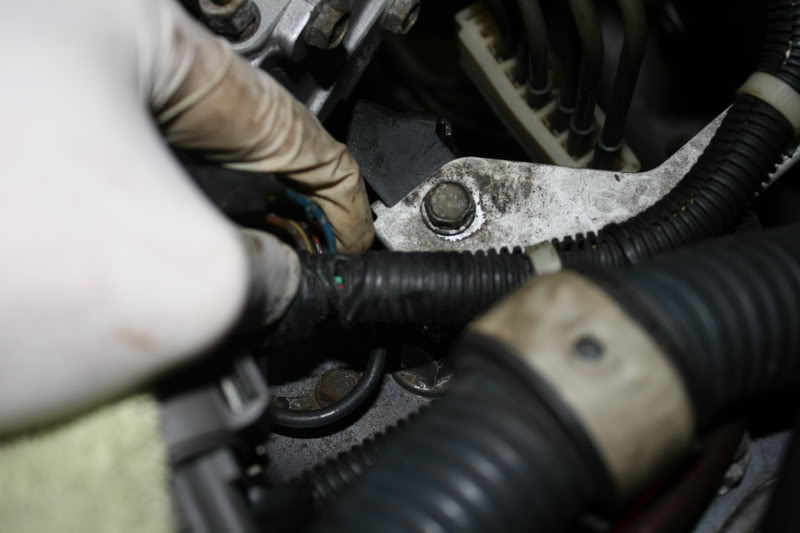
The passenger side rear is hiding underneath a bracket that secures wires. Remove this bolt to access (10mm).
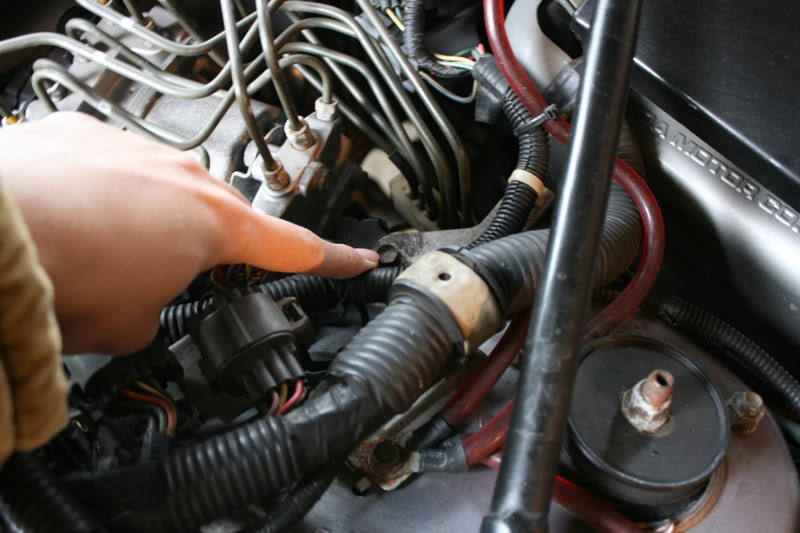
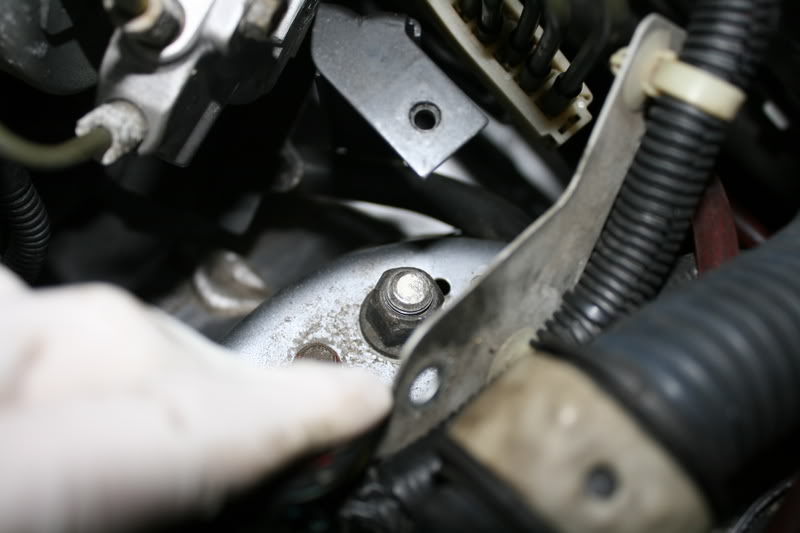
Once you remove the bolt holding down the bracket, pull it back
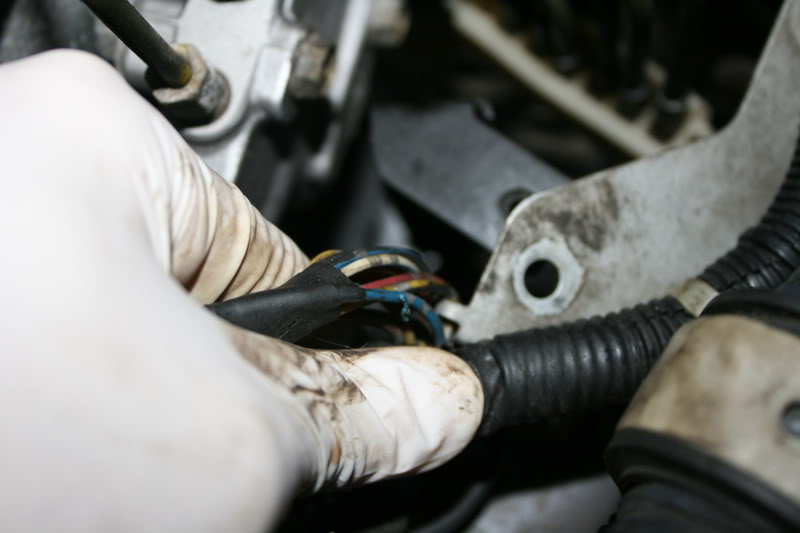
and you will see the bolt below it.
Step 3: Before you start to remove the top bolts, I would get to removing the two bolts holding the line for the wheel sensor (10mm), and then loosening the castle nut (17mm) that is on the ball joint. Don't forget to remove the cotter pin first. You won't want to totally remove the nut. Just loosen it enough. I would also take the time to tie up your knuckle for later. When you remove the upper arm later, if your knuckle is not secured, it will fall to the side.
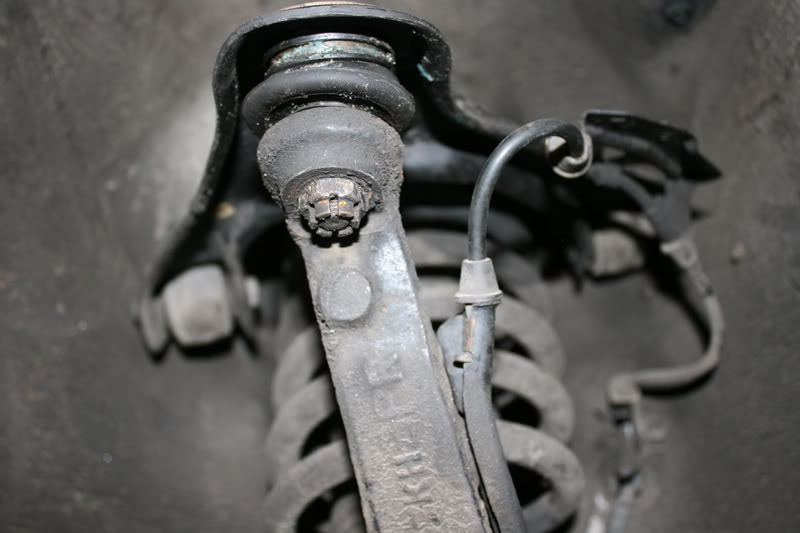
Step 4: (May not be necessary) When I started to loosen the castle nut on the ball joint, the knuckle started to separate from the weight of the spring pushing on it. If you do not see it budging, you should use your ball joint separator to loosen it now.
Step 5: Now remove the two 17mm bolts holding the top of the control arm in.
Step 6: After you get these bolts off go below and remove the castle nut off of the ball joint and take off the control arm.
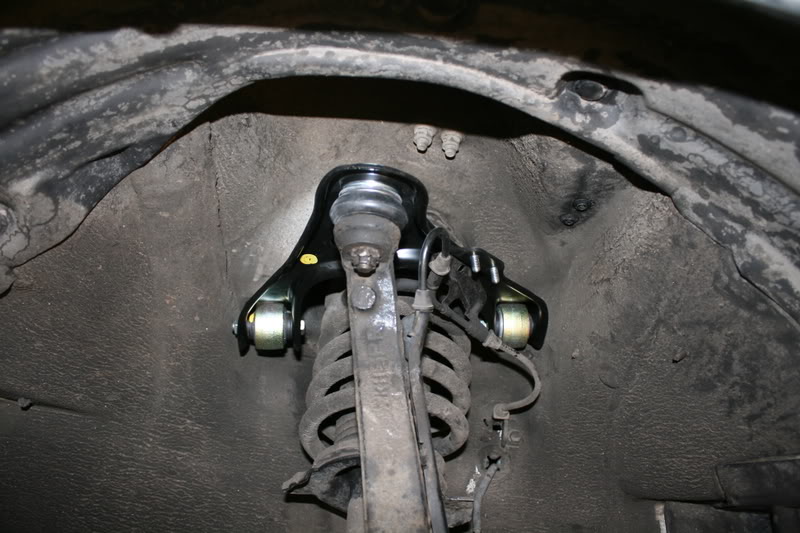
Step 7: Place the new control arm into the two upper holes on the body and screw the bolts in place. Torque to 47 ft/lbs.
Step 8: Place knuckle into the ball joint. If your knuckle fell down and does not push up to the ball joint, you will need a jack to push up the knuckle so it lines into the ball joint. Screw the castle nut into place and torque to 35 ft/lbs.
Step 9: Replace the cotter pin for the castle nut
Step 10: Screw in the bolts that hold the wheel sensor line
Step 11: Replace the bolt for the bracket that was covering the rear nut that you had to access before.
Step 12: Put your wheel back on
Done.
1.) 17mm Socket
2.) 10mm Socket
3.) Torque Wrench
4.) Ball Joint Separator & Hammer
5.) New Upper Control Arm (Passenger Side Part #: 51450-SZ5-010, Driver Side Part #: 51460-SZ5-010)
6.) New Cotter Pin
Time to completion: ~40mins
Step 1: Jack up vehicle and remove wheel
Step 2: In the engine bay you will need to locate the two 17mm bolts that hold the upper control arm to the body of the car. If you look around the top of your strut, you should see two larger sized bolts. Or you can visualize from the bottom.
This is for the passenger side front
The passenger side rear is hiding underneath a bracket that secures wires. Remove this bolt to access (10mm).
Once you remove the bolt holding down the bracket, pull it back
and you will see the bolt below it.
Step 3: Before you start to remove the top bolts, I would get to removing the two bolts holding the line for the wheel sensor (10mm), and then loosening the castle nut (17mm) that is on the ball joint. Don't forget to remove the cotter pin first. You won't want to totally remove the nut. Just loosen it enough. I would also take the time to tie up your knuckle for later. When you remove the upper arm later, if your knuckle is not secured, it will fall to the side.
Step 4: (May not be necessary) When I started to loosen the castle nut on the ball joint, the knuckle started to separate from the weight of the spring pushing on it. If you do not see it budging, you should use your ball joint separator to loosen it now.
Step 5: Now remove the two 17mm bolts holding the top of the control arm in.
Step 6: After you get these bolts off go below and remove the castle nut off of the ball joint and take off the control arm.
Step 7: Place the new control arm into the two upper holes on the body and screw the bolts in place. Torque to 47 ft/lbs.
Step 8: Place knuckle into the ball joint. If your knuckle fell down and does not push up to the ball joint, you will need a jack to push up the knuckle so it lines into the ball joint. Screw the castle nut into place and torque to 35 ft/lbs.
Step 9: Replace the cotter pin for the castle nut
Step 10: Screw in the bolts that hold the wheel sensor line
Step 11: Replace the bolt for the bracket that was covering the rear nut that you had to access before.
Step 12: Put your wheel back on
Done.


Originally Posted by BronxAcuraTL
nice touch on the break pads, whats your secret? im thinking oem or something?
https://acurazine.com/forums/ramblings-12/one-pimp-ape-%5Bpics%5D-%2A%2Akinda-nws-but-not-really%2A%2A-161684/
but i basically painted the whole thing white... then stuck a decal on it and painted it black... when the black paint dried, i remove the decal to expose the white letters underneath... then clear coat over it... not too shabby and it looks a bit like the 3rd gen stock brembos...
it stands out pretty well even when far away... probably because of the white and black contrast...
my fiancee was pulling away in my car this weekend and they even showed in the pic..

I need 2 more gears
Joined: Jun 2004
Posts: 3,228
Likes: 7
From: Springvale, Maine
how much was the whole arm? I'm pretty sure you can buy the ball joints seperately though. Great write up though. One thing I was confused about though was the bolts that hold the upper CA on are facing down? I though they'de be coming in from the sides?
Trending Topics

1998 2.5TL
Joined: Mar 2005
Posts: 175
Likes: 0
From: Malden, MA
Thanks for the write up, Kam... the pictures are great and very explanatory.
I tried this today, but I couldn't loosen the bolts that hold the wheel sensor line for the life of me! My mechanical skills aren't all that great but this seemed like a straightforward job. Will have a mechanic replace them for me. I loosened the upper bolts that hold the control arm and took the wheel off, but had to give up when I couldn't loosen the wheel sensor bolts.
I tried this today, but I couldn't loosen the bolts that hold the wheel sensor line for the life of me!
My mechanical skills aren't all that great but this seemed like a straightforward job. Will have a mechanic replace them for me. I loosened the upper bolts that hold the control arm and took the wheel off, but had to give up when I couldn't loosen the wheel sensor bolts.

2nd Gear
Joined: Sep 2010
Posts: 2
Likes: 0
Upper control arm or ball joint?
In the past couple of years I've replaced the left and right ball joints on my 1998 3.2 TL. My Acura dealer had diagnosed that the upper control arms needed to be replaced as that's just what they do. I found after market Moog ball joints but they wore out in about a year or so. Has anyone had a similar problem?

Intermediate
Joined: Jan 2011
Posts: 25
Likes: 0
Thanks for the write-up. It's definitely very helpful.
It would also help a great deal if the bolts or other parts you're referring to in each diagram is labeled or circled. I find myself squinting at the diagrams trying to figure out which part is which.
It would also help a great deal if the bolts or other parts you're referring to in each diagram is labeled or circled. I find myself squinting at the diagrams trying to figure out which part is which.


Intermediate
Joined: Jan 2011
Posts: 25
Likes: 0
I guess I was referring mainly to the second picture. I was trying to match up/reconcile the bolts that come out of the engine bay to the ones I see below, since the same bolts extend all the way through...I think. The bolts I see below are much closer together.
I think I got it now though
I think I got it now though
Oh wait...those are the bolts for the wheel sensor line. OK, I guess the engine bay bolts don't extend all the way to the bottom.


Thread
Thread Starter
Forum
Replies
Last Post
cycdaniel
1G TSX Performance Parts & Modifications
8
Dec 17, 2019 10:58 AM
marcelft
2G TL (1999-2003)
30
Jul 10, 2018 06:17 PM
nuldabz
3G TL Tires, Wheels & Suspension
3
Sep 3, 2015 05:49 PM