


I-010: How-To: 4th gen TL Valentine 1 w/Savvy and Concealed Display Install


Thread Starter
Safety Car


Joined: Jun 2006
Posts: 3,995
Likes: 148
From: San Antonio, TX
I-010: How-To: 4th gen TL Valentine 1 w/Savvy and Concealed Display Install
Finally decided to install my Valentine 1 with my Savvy unit, and Concealed display. Here is a how-to on how to do it with the Savvy unit because I saw now how-to's really on how to install the V1 in the first place for a 4th gen.
Items needed:
1 - Valentine 1 Radar
1 - Savvy Kit from V1
1 - Concealed Display Kit from V1
1 - Industrial Strength Velcro from Lowes or Home Depot
1 - OBD2 Extension cable with angle connector ( )


Tools Required:
1 - Small Interior Panel removal tool.
1 - Drop light
Many - Tie Straps - small and large
Procedure:
1) Start with removing the rubber molding around the upper part of the drivers side door by just pulling down on it. (Blue Lines in Picture below). It will go all the way down the front part of the car, and only half way down the middle B pillar. It can easily be reinstalled.

2) Next move your seat back and push the steering wheel all the way up.
3) Remove the black cover under the dash. Sorry no pics on this. Right above the gas pedal more towards the drivers seat, there is a twist screw, twist this, and this will allow that panel to drop. Disconnect the sensor by twisting it from the mount (no need to disconnect the wire). Next drop the panel the rest of the way and pull it out towards the drivers seat.
4) Remove the panel that goes along the floor between the B pillar and the left kick panel on the floor. Just PULL up on it from the carpet side and it will start to pop out.
5) Remove the kick panel from the left side of the drivers foot well by pulling the bottom out first and then pull it downward. It will slide out of the snap that holds it in.
6) Use the pry tool to remove the snap from the kick panel wall and put it back on the panel itself for install later.
Warning: This part is HARD.
7) Now to remove the A Pillar cover. There is one snap that does NOT come out of the metal. You can cause it to become loose if you try to pull on it (by pulling out). (2nd picture green arrow at the top with circle around it is the one that does not come out). Get your finders in the top of the panel, (Green circle in picture below) and half way down along the rubber strip side that you removed. You want to slide it towards the top of the roof but at the same angle it's at. It will be hard, but SLIDE it out. It will release. (As seen below with the Red Arrows)


8) Disconnect the tweeter connector and move the panel out of the way. Push in on the connector tab, and lift up. As seen below.

9) Use the pry tool to remove the GREY snap out (the one half way down with the green circle around it as seen below) and place it back on the panel. The upper one is not removeable (red circle). (Ignore the Red snap ones, they do nothing).

10) Next take your hard wire kit (straight cord) and run the wire from the radar mount location and leave some slack like below and run it across the top of the windshield. You will need to slide down the mirror black plastic cover and push the mirror down out of the way to get good access. You just tuck it in at the top and go all the way down to the left around that edge of the roof. It will stay up there once you reach the edge.

11) Mount your radar in the location above. You are probably wondering how I got the suction cups to stick to the dot matrix? Easy. Get some of the thicker, clear packing tape (not the thin stuff) and place two strips across the area where the suction cups will go. This will allow the surface to be smooth, and allow the mount to stay on the windshield. Did this on several cars and never faded or failed me.
12) Next run the wire down the A pillar along the other wires closer to the windshield side to keep it away from the airbags. Use tie straps as seen below (the white ones) to keep it away.

13) Next run the wire down between where the rubber seal of the door was, and the dash. There is a GAP there you can slide it into and it will then be behind the dash. Run the wire down into the kick panel area for later. Sorry for no pics on this.
14) Next use the new OBD2 cable with the L connector into the factory OBD2 port as seen below. Run the wire itself acround the left side behind the wires into the open area of the left kick panel that is a bit above it. You will disconnect this again before putting the black panel back on.

15) Take your Savvy Unit as seen below and connect it to the other end of the cable.

16) Take your phone cord from the V1 radar and connect it into the MAIN connection of the SAVVY as seen above.
17) Now is the best time to test it. OBD2 only gets power when the engine is started. So you will need to start the car. Make sure the radio is off (no speaker hooked up). Your radar should fire up after a few seconds (5-10). It doesn't start it right away to keep the radar from getting a surge. It also turns off delayed too for the same reasons. If all is good, then continue. If not, check your connections.
18) Take your concealed display and use some Industrial Strength Velcro and cut a piece out exactly the same size as the bottom of the display. You need the soft side and the hard plastic side to be matching.
19) Find the center part of your steering column and mount it to the top. It doesn't fit well between the gauges and wanted to fall forward so I could not mount it there. As seen below.

20) Connect the wire, and run it across the back down the right side of the steering column (yes I said right, this help prevent the cord from showing more and pulls it back on that side some. Run it down the column and route it towards the left into the left kick panel area. Tie strap them against some other wires to keep it from moving.
21) Connect the other end into the Savvy units Accessory side as seen below.

22) Tie up the excess wires as seen above.
23) Run another test on the system and make sure your Concealed display lights up like below.

24) Once done, tie up the wires into the upper left kick panel area and out of the way. Make sure they are not touching the car itself or anything other than wires. To help prevent rattles.
25) Next is to close everything back up in reverse order.
26) Remember to put that A Pillar back on is going to be a bit harder than taking it off. Slide the bottom into the slot of the dash (two prongs will guide themselves into it. But don't go all the way down. Connect the speaker back up.
27) Next have it about an inch above the roof liner and push it up and to the left to get that one snap to slide back on to the slot. You will be sliding it down into the dash at the same time. This is very hard and probably took me 15 minutes just to figure it out. Once you slide it most of the way down the center section will be sticking out because of the grey snap. You will need to wiggle it around till it snaps back into the hole it came out of. You can look through the windshield to help guide it some. Once it snaps in you will see the dot matrix evenly down the side of the a pillar.
28) Reinstall the Kick panel, and the plastic between the kick panel and B pillar.
29) Disconnect the OBD2 cable from the port.
30) Reinstall the black cover under the dash. Slide the back part back into the slot above the brake petal, and then connect the sensor by twisting it back into place. Push the panel back up and twist the lock. Make sure the panel around the OBD2 snaps in.
31) Guide the cable around the panel and reconnect the OBD2 cable into the port. It should look just like this below.

32) Readjust your mirror and put your black plastic piece back on behind the mirror that hides the wires.
33) You are done! See below for finished product pics!

How To install a Valentine 1 with Savvy and Concealed Display.
Items needed:
1 - Valentine 1 Radar
1 - Savvy Kit from V1
1 - Concealed Display Kit from V1
1 - Industrial Strength Velcro from Lowes or Home Depot
1 - OBD2 Extension cable with angle connector ( )

Tools Required:
1 - Small Interior Panel removal tool.
1 - Drop light
Many - Tie Straps - small and large
Procedure:
1) Start with removing the rubber molding around the upper part of the drivers side door by just pulling down on it. (Blue Lines in Picture below). It will go all the way down the front part of the car, and only half way down the middle B pillar. It can easily be reinstalled.
2) Next move your seat back and push the steering wheel all the way up.
3) Remove the black cover under the dash. Sorry no pics on this. Right above the gas pedal more towards the drivers seat, there is a twist screw, twist this, and this will allow that panel to drop. Disconnect the sensor by twisting it from the mount (no need to disconnect the wire). Next drop the panel the rest of the way and pull it out towards the drivers seat.
4) Remove the panel that goes along the floor between the B pillar and the left kick panel on the floor. Just PULL up on it from the carpet side and it will start to pop out.
5) Remove the kick panel from the left side of the drivers foot well by pulling the bottom out first and then pull it downward. It will slide out of the snap that holds it in.
6) Use the pry tool to remove the snap from the kick panel wall and put it back on the panel itself for install later.
Warning: This part is HARD.
7) Now to remove the A Pillar cover. There is one snap that does NOT come out of the metal. You can cause it to become loose if you try to pull on it (by pulling out). (2nd picture green arrow at the top with circle around it is the one that does not come out). Get your finders in the top of the panel, (Green circle in picture below) and half way down along the rubber strip side that you removed. You want to slide it towards the top of the roof but at the same angle it's at. It will be hard, but SLIDE it out. It will release. (As seen below with the Red Arrows)
8) Disconnect the tweeter connector and move the panel out of the way. Push in on the connector tab, and lift up. As seen below.
9) Use the pry tool to remove the GREY snap out (the one half way down with the green circle around it as seen below) and place it back on the panel. The upper one is not removeable (red circle). (Ignore the Red snap ones, they do nothing).
10) Next take your hard wire kit (straight cord) and run the wire from the radar mount location and leave some slack like below and run it across the top of the windshield. You will need to slide down the mirror black plastic cover and push the mirror down out of the way to get good access. You just tuck it in at the top and go all the way down to the left around that edge of the roof. It will stay up there once you reach the edge.
11) Mount your radar in the location above. You are probably wondering how I got the suction cups to stick to the dot matrix? Easy. Get some of the thicker, clear packing tape (not the thin stuff) and place two strips across the area where the suction cups will go. This will allow the surface to be smooth, and allow the mount to stay on the windshield. Did this on several cars and never faded or failed me.
12) Next run the wire down the A pillar along the other wires closer to the windshield side to keep it away from the airbags. Use tie straps as seen below (the white ones) to keep it away.
13) Next run the wire down between where the rubber seal of the door was, and the dash. There is a GAP there you can slide it into and it will then be behind the dash. Run the wire down into the kick panel area for later. Sorry for no pics on this.
14) Next use the new OBD2 cable with the L connector into the factory OBD2 port as seen below. Run the wire itself acround the left side behind the wires into the open area of the left kick panel that is a bit above it. You will disconnect this again before putting the black panel back on.
15) Take your Savvy Unit as seen below and connect it to the other end of the cable.
16) Take your phone cord from the V1 radar and connect it into the MAIN connection of the SAVVY as seen above.
17) Now is the best time to test it. OBD2 only gets power when the engine is started. So you will need to start the car. Make sure the radio is off (no speaker hooked up). Your radar should fire up after a few seconds (5-10). It doesn't start it right away to keep the radar from getting a surge. It also turns off delayed too for the same reasons. If all is good, then continue. If not, check your connections.
18) Take your concealed display and use some Industrial Strength Velcro and cut a piece out exactly the same size as the bottom of the display. You need the soft side and the hard plastic side to be matching.
19) Find the center part of your steering column and mount it to the top. It doesn't fit well between the gauges and wanted to fall forward so I could not mount it there. As seen below.
20) Connect the wire, and run it across the back down the right side of the steering column (yes I said right, this help prevent the cord from showing more and pulls it back on that side some. Run it down the column and route it towards the left into the left kick panel area. Tie strap them against some other wires to keep it from moving.
21) Connect the other end into the Savvy units Accessory side as seen below.
22) Tie up the excess wires as seen above.
23) Run another test on the system and make sure your Concealed display lights up like below.
24) Once done, tie up the wires into the upper left kick panel area and out of the way. Make sure they are not touching the car itself or anything other than wires. To help prevent rattles.
25) Next is to close everything back up in reverse order.
26) Remember to put that A Pillar back on is going to be a bit harder than taking it off. Slide the bottom into the slot of the dash (two prongs will guide themselves into it. But don't go all the way down. Connect the speaker back up.
27) Next have it about an inch above the roof liner and push it up and to the left to get that one snap to slide back on to the slot. You will be sliding it down into the dash at the same time. This is very hard and probably took me 15 minutes just to figure it out. Once you slide it most of the way down the center section will be sticking out because of the grey snap. You will need to wiggle it around till it snaps back into the hole it came out of. You can look through the windshield to help guide it some. Once it snaps in you will see the dot matrix evenly down the side of the a pillar.
28) Reinstall the Kick panel, and the plastic between the kick panel and B pillar.
29) Disconnect the OBD2 cable from the port.
30) Reinstall the black cover under the dash. Slide the back part back into the slot above the brake petal, and then connect the sensor by twisting it back into place. Push the panel back up and twist the lock. Make sure the panel around the OBD2 snaps in.
31) Guide the cable around the panel and reconnect the OBD2 cable into the port. It should look just like this below.
32) Readjust your mirror and put your black plastic piece back on behind the mirror that hides the wires.
33) You are done! See below for finished product pics!


Thread Starter
Safety Car
Joined: Jun 2006
Posts: 3,995
Likes: 148
From: San Antonio, TX
Works great.



Instructor
Joined: Sep 2006
Posts: 197
Likes: 2
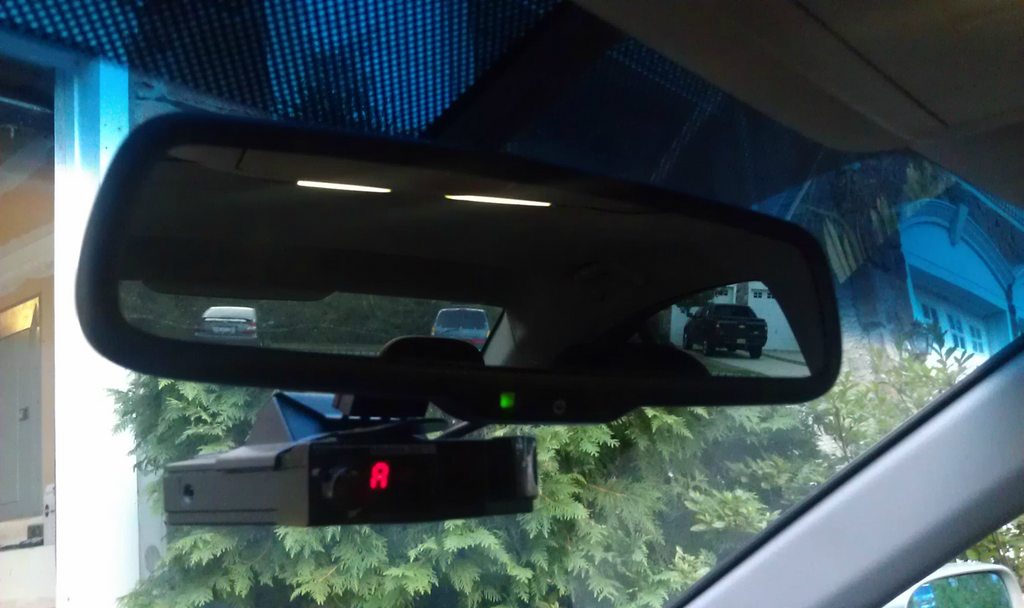
My only comment would be that its too high and might be limiting detection range on the rear. I put mine right under the mirror. I found the glow of the remote head too bright in that position.
For those that don't want to use the fancy cable to OBD; the mirror power is right there and you can tap it for key on power.
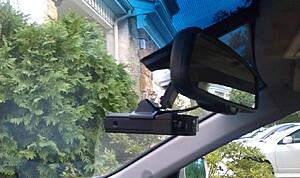
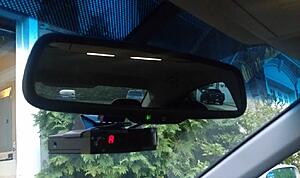
For those that don't want to use the fancy cable to OBD; the mirror power is right there and you can tap it for key on power.

Trending Topics
Thread Starter
Safety Car
Joined: Jun 2006
Posts: 3,995
Likes: 148
From: San Antonio, TX
My only comment would be that its too high and might be limiting detection range on the rear. I put mine right under the mirror. I found the glow of the remote head too bright in that position.
For those that don't want to use the fancy cable to OBD; the mirror power is right there and you can tap it for key on power.
For those that don't want to use the fancy cable to OBD; the mirror power is right there and you can tap it for key on power.
This is for a SAVVY install, with CD which you don't get with your way. Also having it as high on the windshield as possible is optimal position. And it works fine going through the rear. Remember, rear detection is less important than front. We still do get good rear detection. Your way also is not good for theft. Easily seen under your mirror where mine is you can't see it from the outside.

Instructor
Joined: Sep 2006
Posts: 197
Likes: 2
All Valid points. I bet mine is stolen tonight since you said something.
The Tint bar may be reducing range. re:
http://www.valentine1.com/lab/TechReport2.asp
The Tint bar may be reducing range. re:
http://www.valentine1.com/lab/TechReport2.asp
Thread Starter
Safety Car
Joined: Jun 2006
Posts: 3,995
Likes: 148
From: San Antonio, TX
All Valid points. I bet mine is stolen tonight since you said something.
The Tint bar may be reducing range. re:
http://www.valentine1.com/lab/TechReport2.asp
The Tint bar may be reducing range. re:
http://www.valentine1.com/lab/TechReport2.asp
Last edited by Steven Bell; Aug 8, 2012 at 10:43 PM. Reason: Merged Posts.
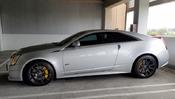

Thanks for the post, helped me install my Escort Redline with the mute button in the center console. I was trying to figure out how to route around the pillar and the pics and description really helped. 

10th Gear
Joined: Oct 2012
Posts: 14
Likes: 0
OP, do you get false K-Band signals from your TL Advance?? I ordered the Advance this wk and will be doing a similar install when it arrives. I've seen older posts claiming the V1 picks up constant false K-Band signals from the blind spot alert system. Thanks!!
Thread Starter
Safety Car
Joined: Jun 2006
Posts: 3,995
Likes: 148
From: San Antonio, TX
Most police use ka not k. K hasn't been used in like 10 years by any police department. K is used on business automatic doors now. But that's it.
10th Gear
Joined: Oct 2012
Posts: 14
Likes: 0
If you ever take a trip to the South East I would highly recommend taking heed to any K Band strong indications (not with tell-tale retail signs). Maybe its the Mayberry mentality but lots of cops run old school K Band around Charlotte, NC and all small towns in NC and SC. State Troopers must get the new technology because they all run KA and Laser exclusively (from what I've observed).
I heard a rumor (not from a valid source) that the mesh looking, tinted area on the windshield behind the rear-view mirror can negatively effect signal strength for radar. Have any issues? Truth in this rumor??
I heard a rumor (not from a valid source) that the mesh looking, tinted area on the windshield behind the rear-view mirror can negatively effect signal strength for radar. Have any issues? Truth in this rumor??

6G TLX-S

Joined: Dec 2000
Posts: 10,229
Likes: 1,184
From: YVR
Don't know about radar, but that black-dot pattern will definitely affect the overall effectiveness of Laser detection.
Thread Starter
Safety Car
Joined: Jun 2006
Posts: 3,995
Likes: 148
From: San Antonio, TX

All Valid points. I bet mine is stolen tonight since you said something.
The Tint bar may be reducing range. re:
Windshields, Testing for Laser Detector Range | Valentine Tech Reports | Radar Detectors
The Tint bar may be reducing range. re:
Windshields, Testing for Laser Detector Range | Valentine Tech Reports | Radar Detectors


Thread
Thread Starter
Forum
Replies
Last Post
orkoTL
4G TL Problems & Fixes
107
Sep 28, 2017 09:12 AM
spoiler900
5G TLX Audio, Bluetooth, Electronics & Navigation
4
Sep 10, 2015 01:06 PM
DiamondJoeQuimby
Car Parts for Sale
1
Sep 10, 2015 11:40 AM
