When you click on links to various merchants on this site and make a purchase, this can result in this site earning a commission. Affiliate programs and affiliations include, but are not limited to, the eBay Partner Network.
First of all, here are the parts you'll need to order:
1995 Legend LS left and right front calipers. I purchased mine from RockAuto - Raybestos part numbers FRC10627 and FRC10628.
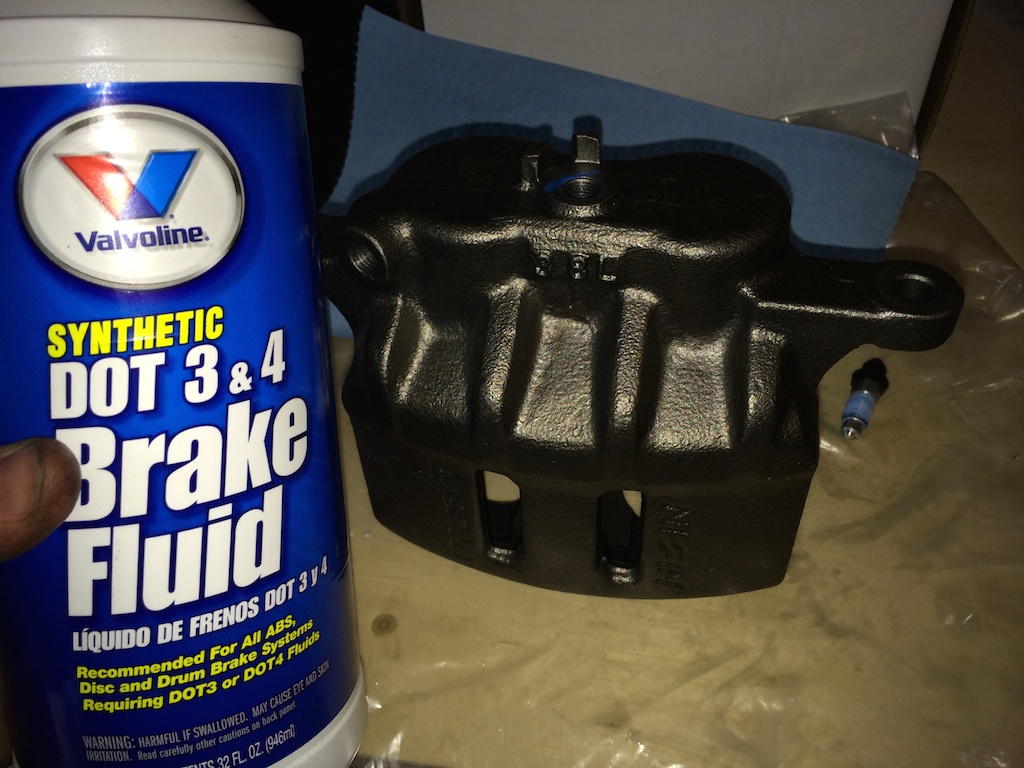
Brake fluid, either DOT 3 or DOT 4. Never DOT 5!!
Brake caliper lubricant.
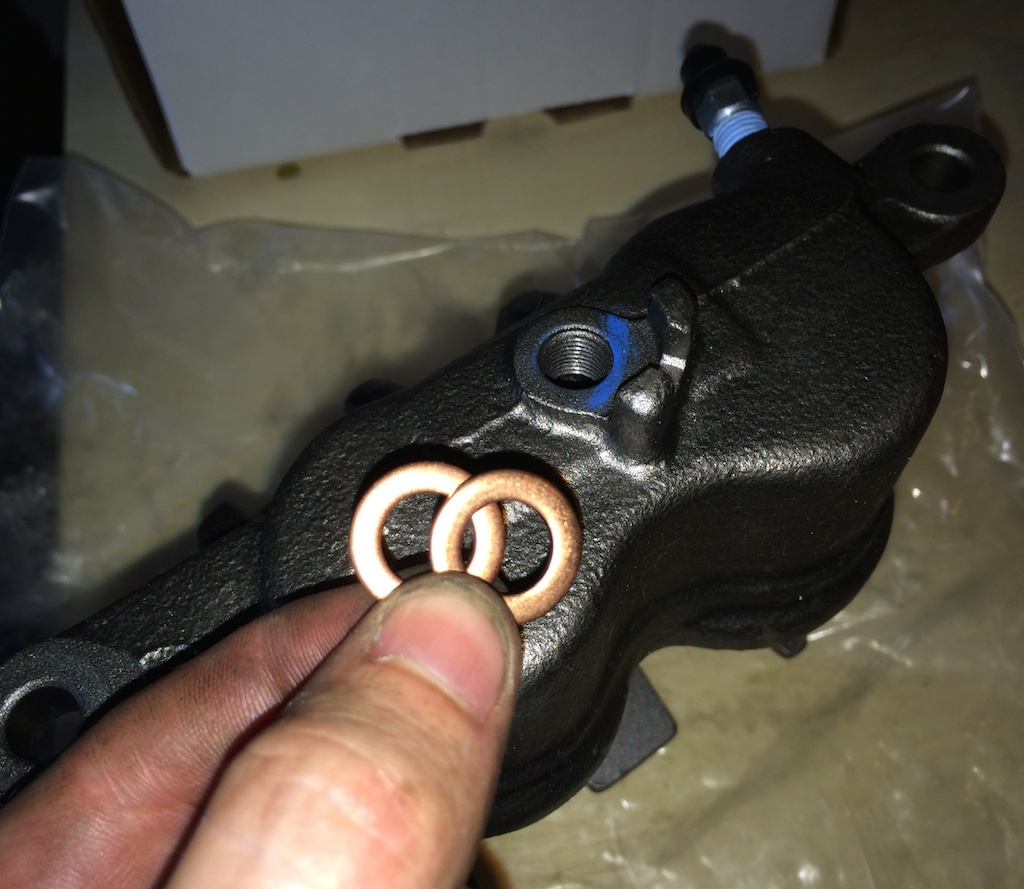
Crush washers for the brake line to caliper attachment. Each caliper requires 2 crush washers, and my calipers came with them.
Now for the process:
Jack your car up and put a jack stand under it.
Remove front wheel.
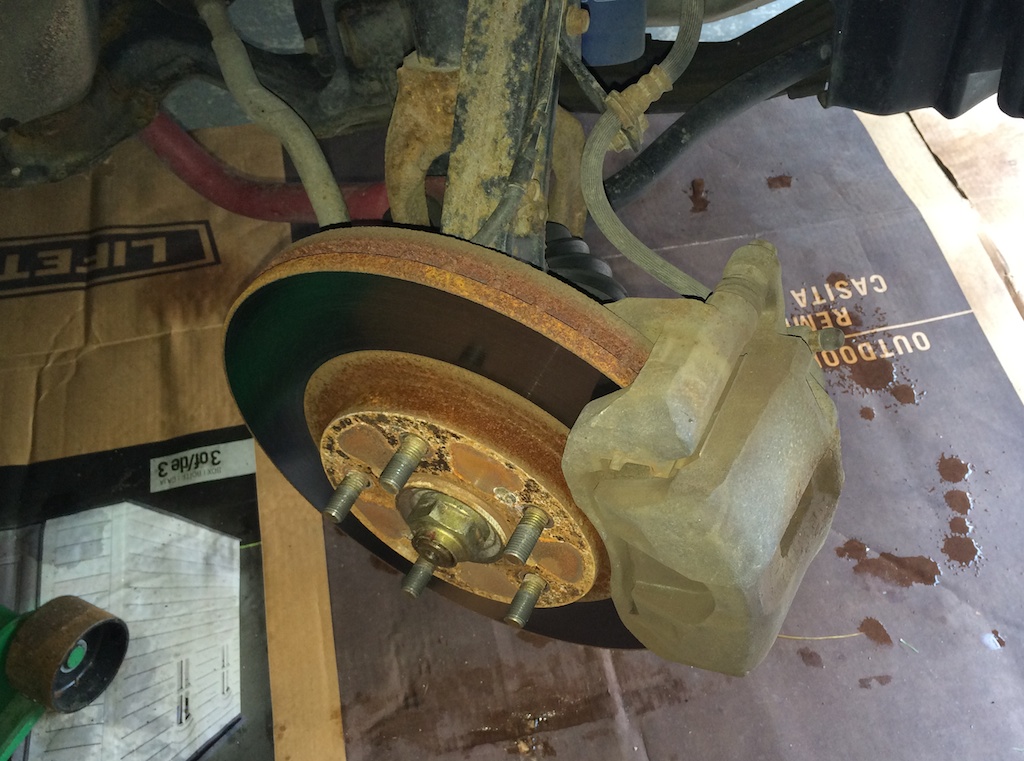
Turn steering wheel toward direction of the caliper you are doing (if doing passenger caliper, turn wheel to the right) to give the best access:
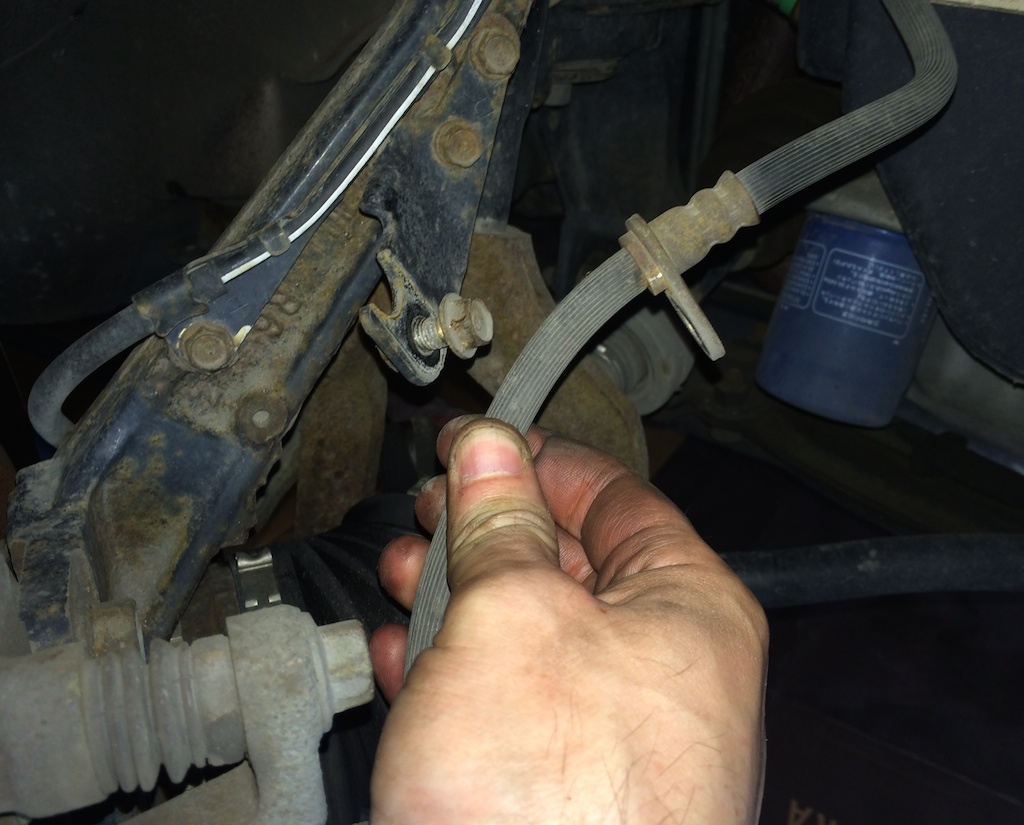
Remove the brake line bracket bolt (12mm):
And put the bolt back in its spot so you don't lose it:
Loosen upper caliper to bracket bolt:
Loosen lower caliper to bracket bolt:
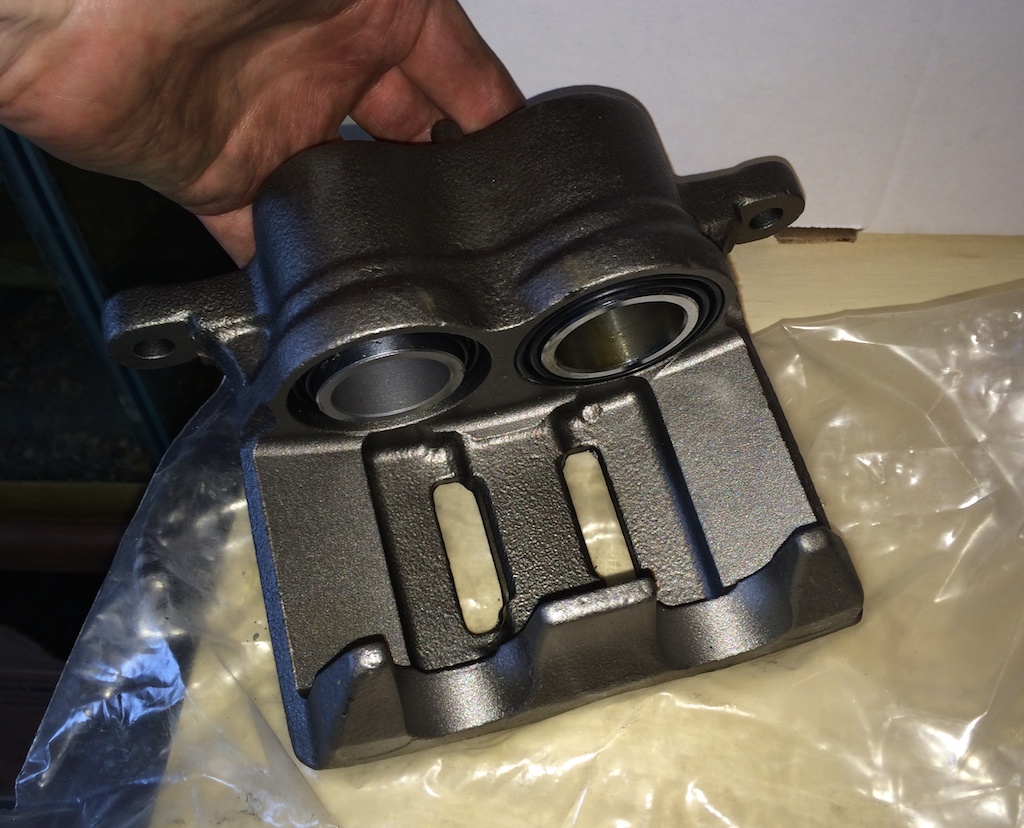
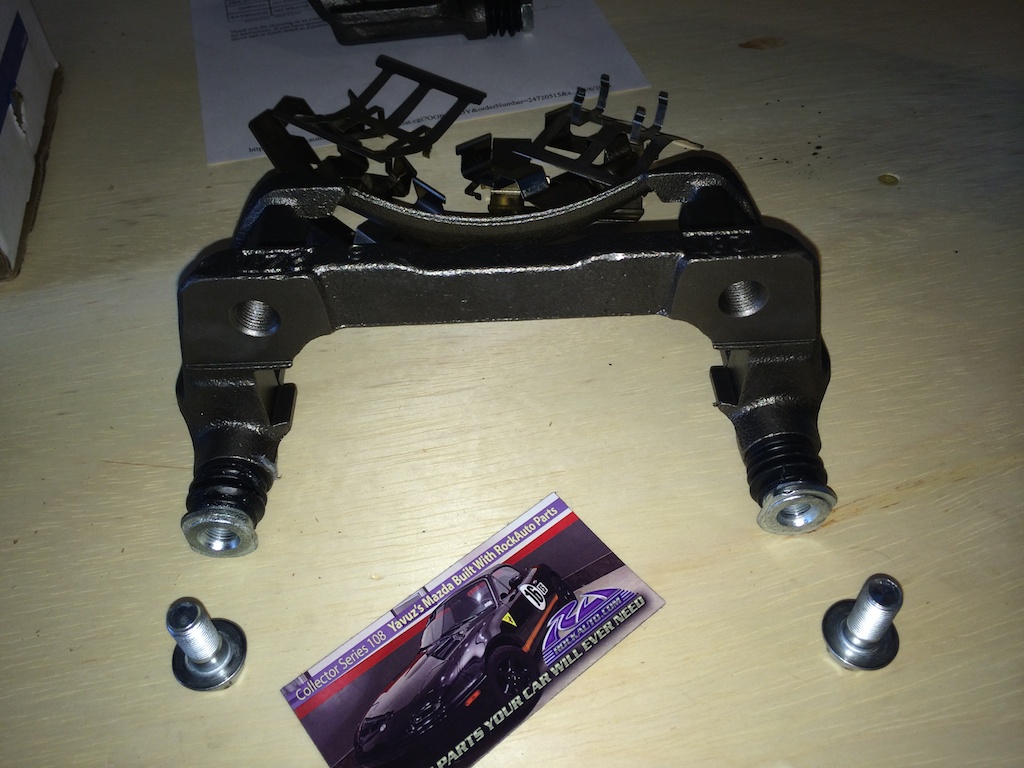
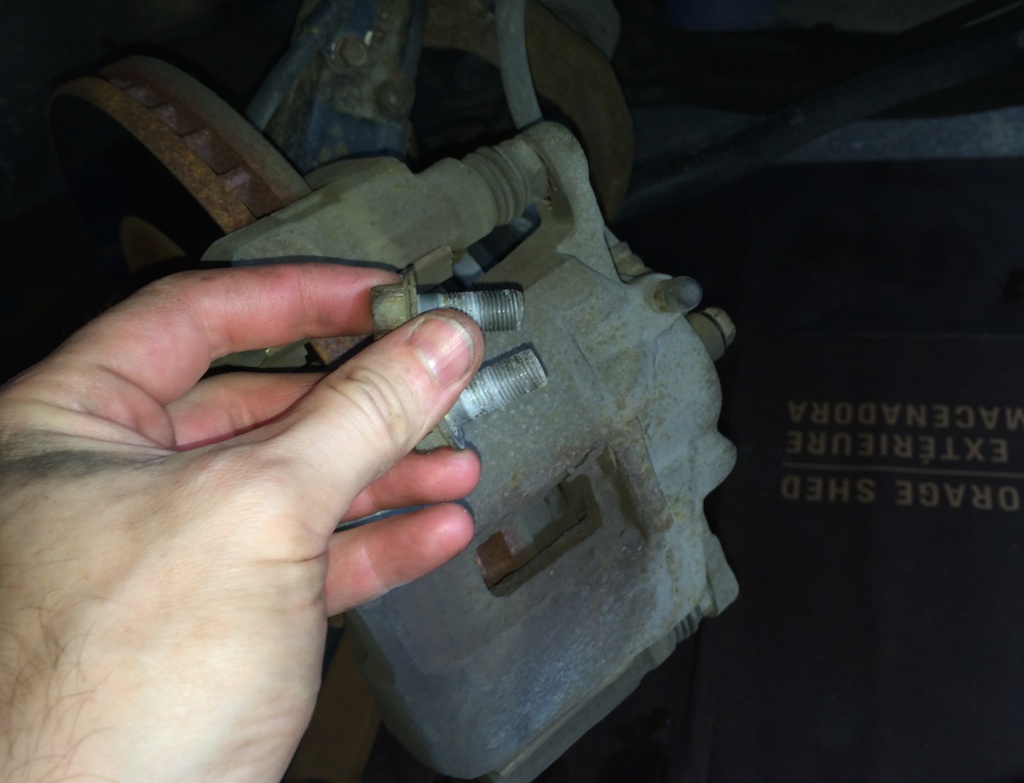
At this point I prepared the new caliper for installation, which will differ slightly depending on what caliper assembly you purchased. I had to remove the Legend caliper from its mounting bracket (which won't be used):
Remove the bleeder screw and wrap it in PTFE thread tape (Blue Monster is my favorite):
Just FYI! before installing the Legend Calipers, Paint them!!!!
They will rust in less than a Month as they don't come pre-painted the "Gun Metal" Color is just the bare metal after the sand blast.
And don't re-use the Slider Pins in the Legend Bracket! The Legend ones are slightly narrower which will introduce a horrible clunkin noise since the calipers will "over-float" in the TL bracket.
Remember not to paint the Piston Boots:
Last edited by Skirmich; Aug 10, 2014 at 11:13 PM.
With the bleeder screw still out, fill the caliper with brake fluid. It's full once it starts pouring out the bleeder screw hole:
Put the bleeder screw back in, and get your crush washers:
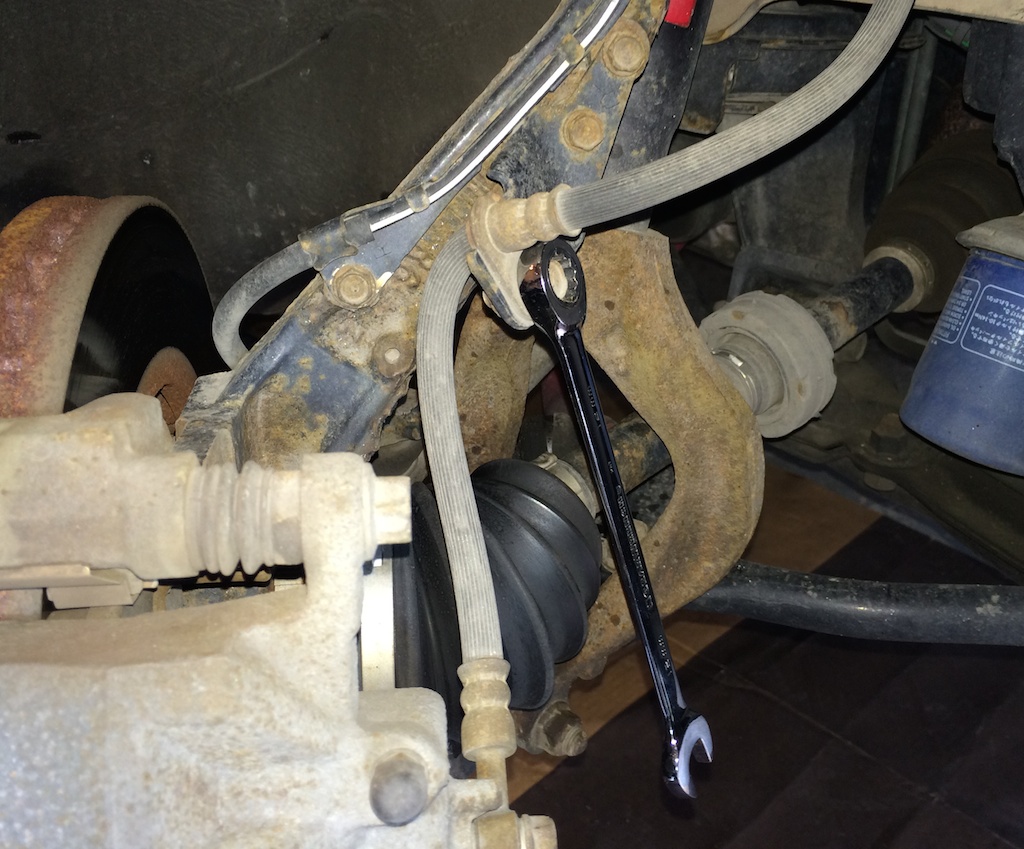
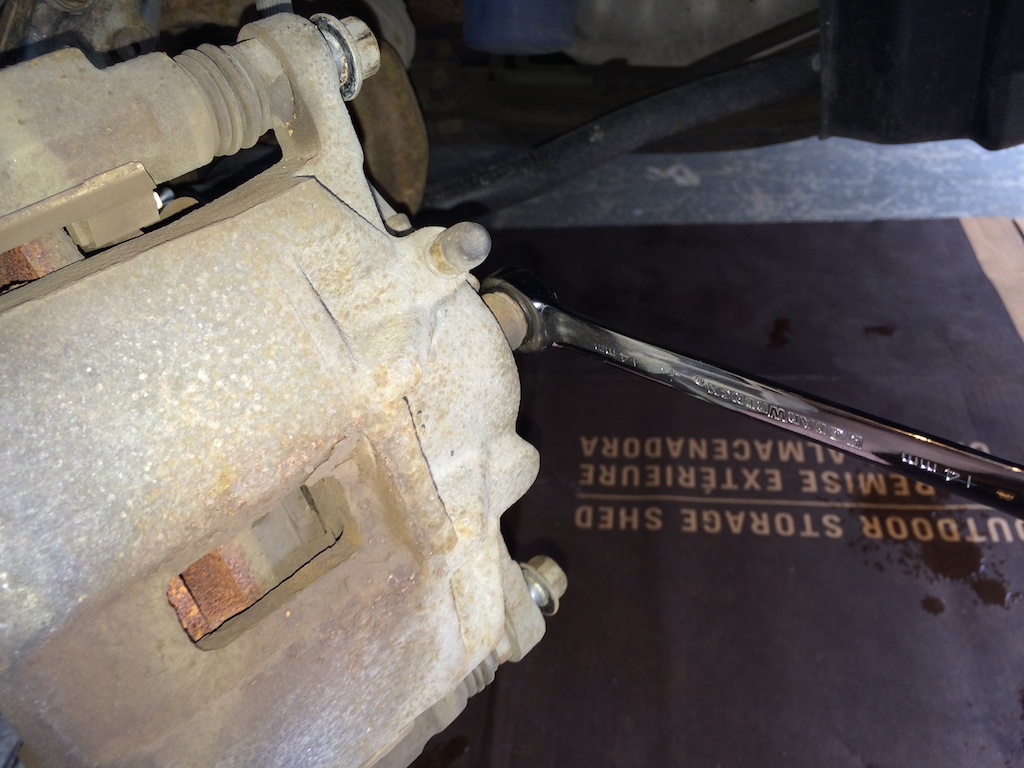
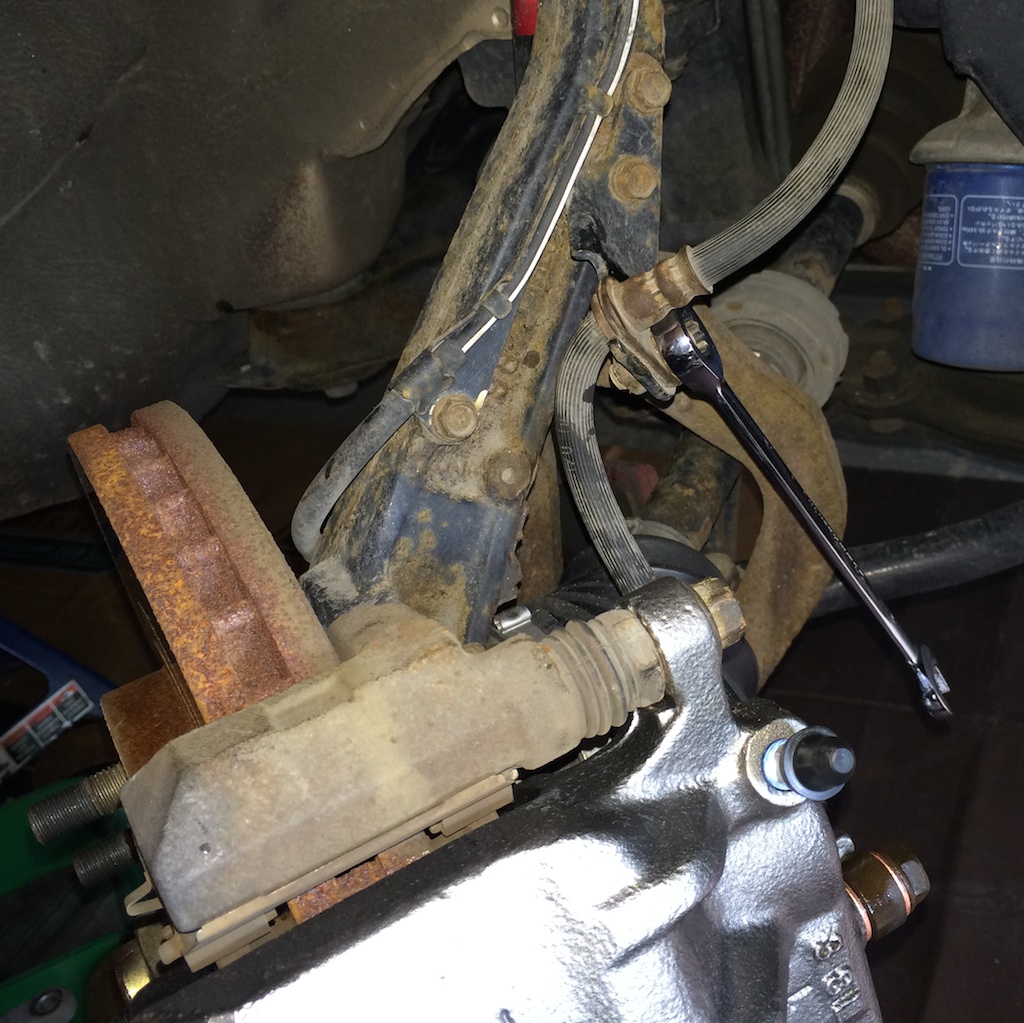
Return to the car and loosen the banjo bolt (14mm) connecting the brake line to the caliper, and then immediately tighten it until it just has a tiny bit of resistance (to prevent leaking until you're ready to remove the bolt):
Remove the two caliper to bracket bolts that you loosened but didn't fully remove earlier:
Balance the TL caliper on top of the spindle to prevent putting strain on the brake line:
Have the new Legend caliper near at hand because it's about to get messy:
Cover your rotor to protect it from dripped brake fluid, have your new caliper at the ready, and have your two crush washers where you can get them quickly:
Remove the banjo bolt completely from the old caliper. The crush washer between the brake line fitting and the caliper will probably stay stuck to the caliper so you won't have to worry about it, however the crush washer between the banjo bolt and the brake line fitting will probably remain stuck to the banjo bolt. This absolutely must be replaced with a new crush washer prior to connecting to the new caliper, so work quickly to remove it (brake fluid will be dripping out the entire time). Once off, put a new crush washer on the banjo bolt, pass the brake line fitting back over the banjo bolt, and then put another crush washer on the banjo bolt and begin threading it into the new caliper. Should look like this when you're done:
Put some caliper lube on the caliper fingers:
And then smear it around:
And do the same for the contact surface of the pistons:
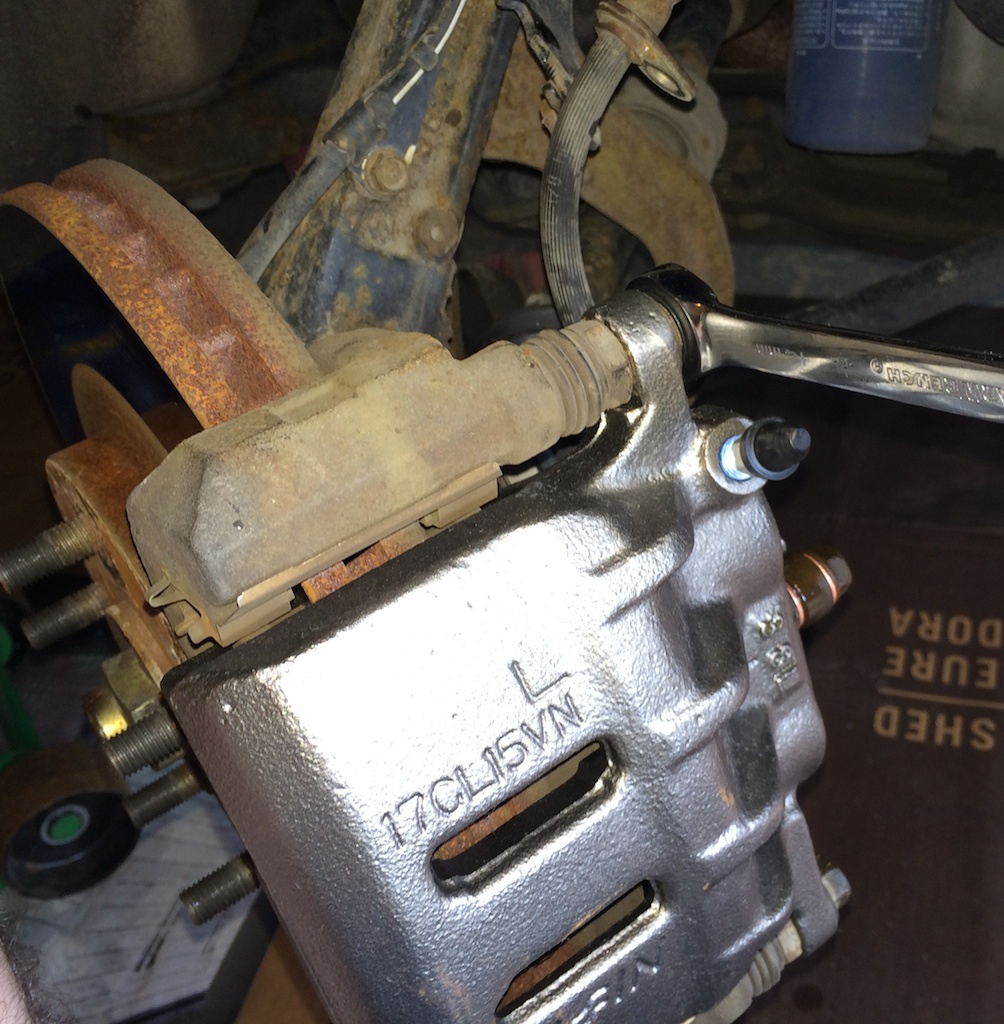
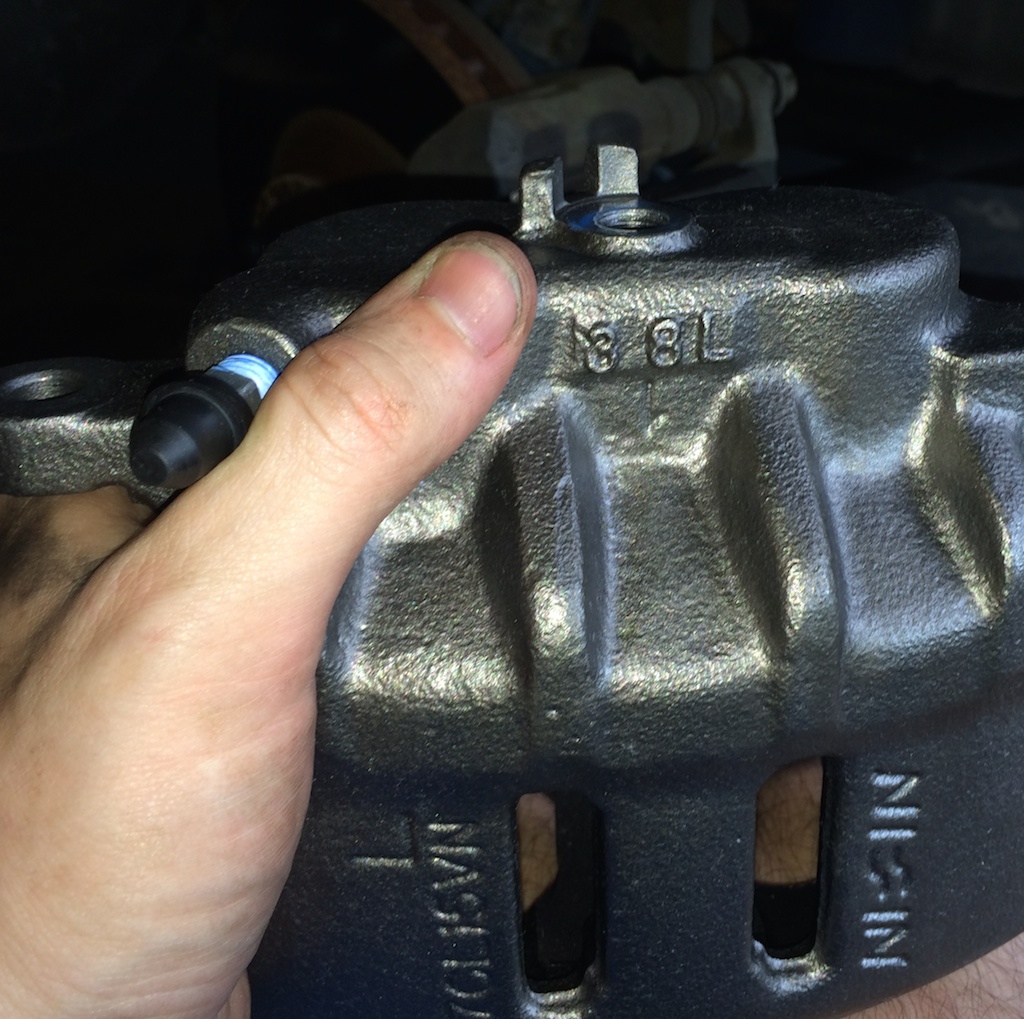
Slip the caliper on over the pads, line up the mounting holes, and put the two mounting bolts back in (note the large "L" stamped in the caliper denoting that it is left caliper, which on the TL must be installed on the right side):
Now all you have to do is bleed the caliper, put the wheel back on, and then do the other side! After you've done both calipers (and bled each of them individually), you should bleed all 4 brakes again, go and do two ABS stops, then bleed all 4 brakes one more time.
The forum won't let me go back and edit my initial post....
You will install the left Legend caliper on the right (passenger) side, and the right Legend caliper on the left (driver's) side.
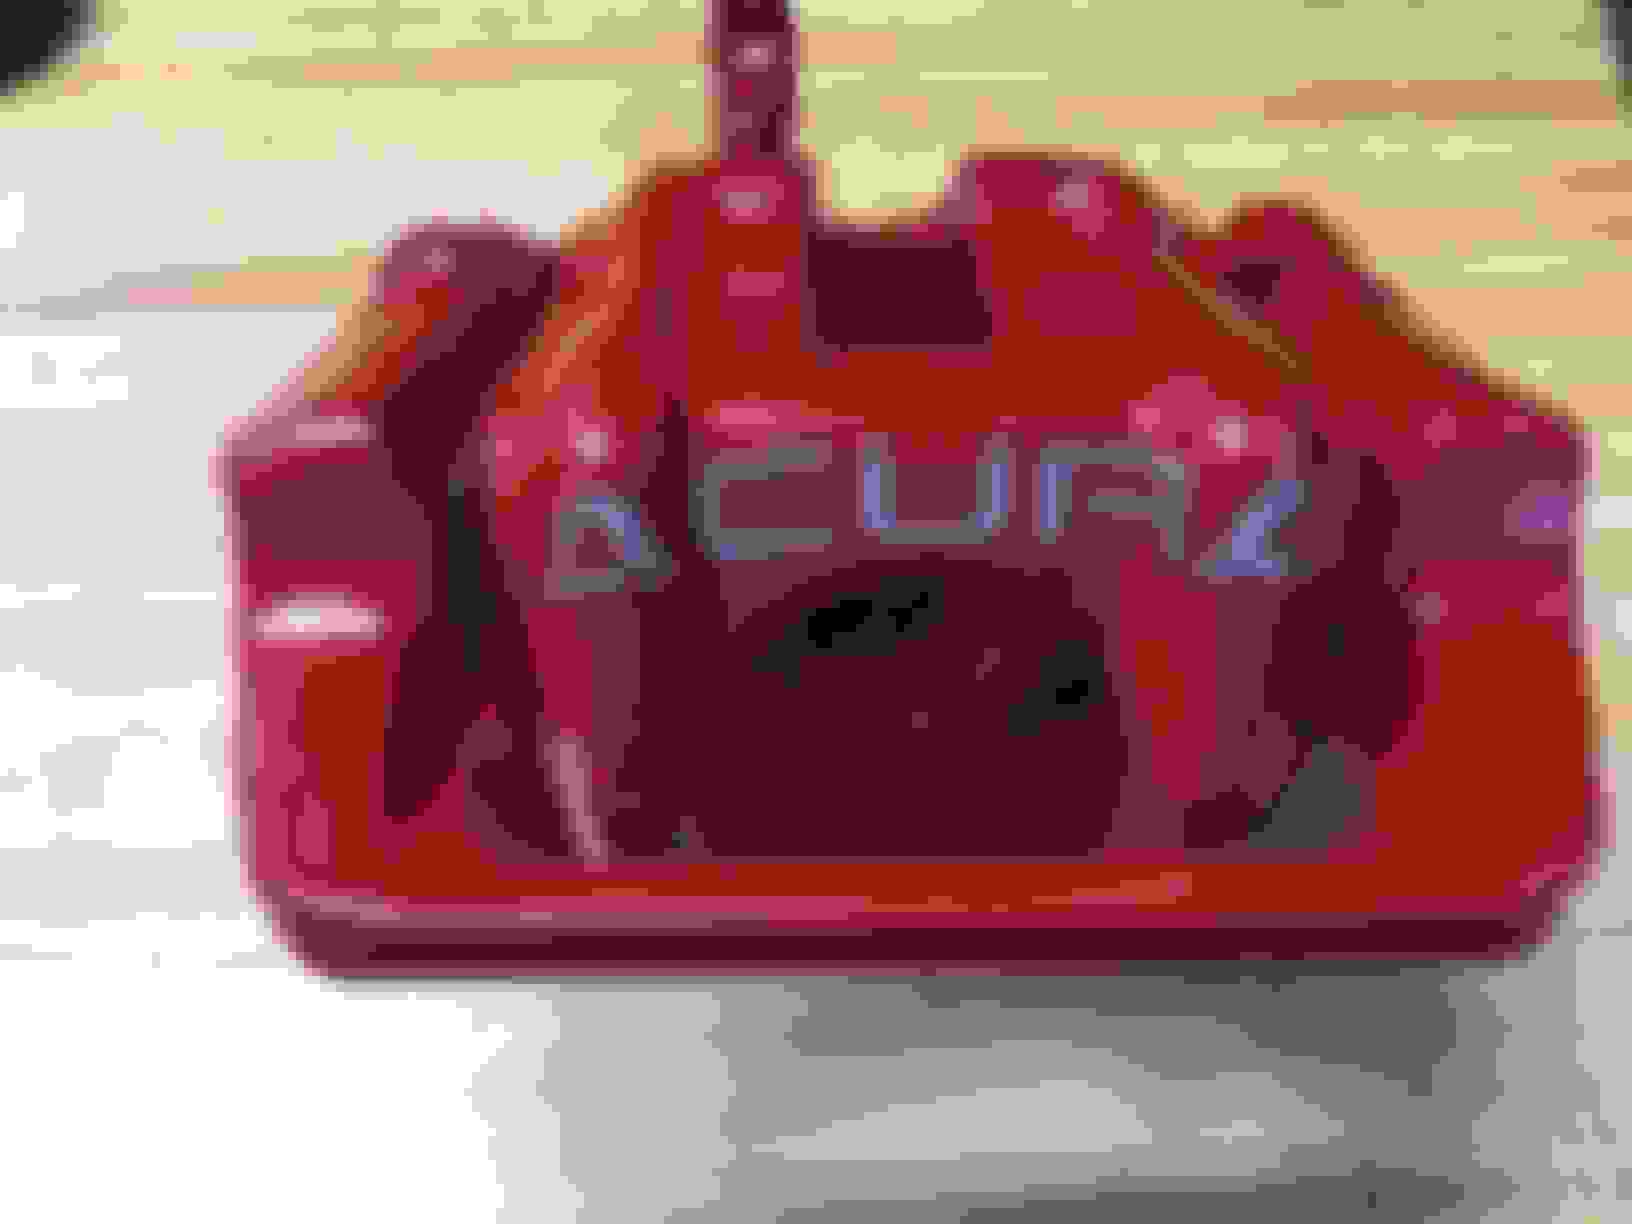
Here is the caliper I installed on the passenger side, note the large "L" stamped on it (denoting "left"):
If you have time, you should paint the calipers prior to install. I didn't do it (as you can tell from the pictures) as I didn't have time to get it all done in one day. I have new rotors and pads to install next weekend, so I'll paint the calipers at that time and recheck everything to ensure there are no leaks.
^^^ Yep, Thanks to RONE for a great job on the "LEGEND front caliper upgrade" DIY project.
Once completed, this thread needs added to the 2nd Gen's "DIY" sticky list.
So, the only part required for the front brake's upgrade are the Legend calipers.....the TL mounting bracket and slider pins are reused. Apparently, the rotor and pads are still the same as the TL's. However, new performance parts would compliment the Legend calipers, along with SS brake hoses.
yes everything else is TL parts and upgradable incl lines and rotors
NOTE: there is one major flaw in this diy-
NEVER put the caliper lube on the caliper piston ends!!!! a small amount on back of brake pad where it will make contact is the way to do it
Reason: grease that near the rubber dust seal of pistons attracts dirt and grime which can tear the rubber and allows crud into piston o-ring seal = caliper death
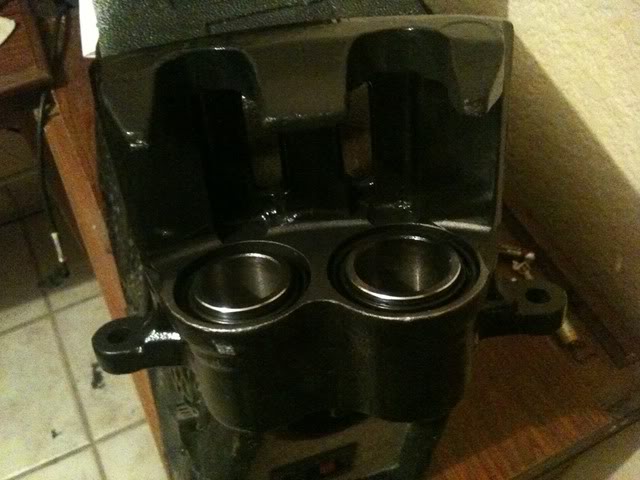
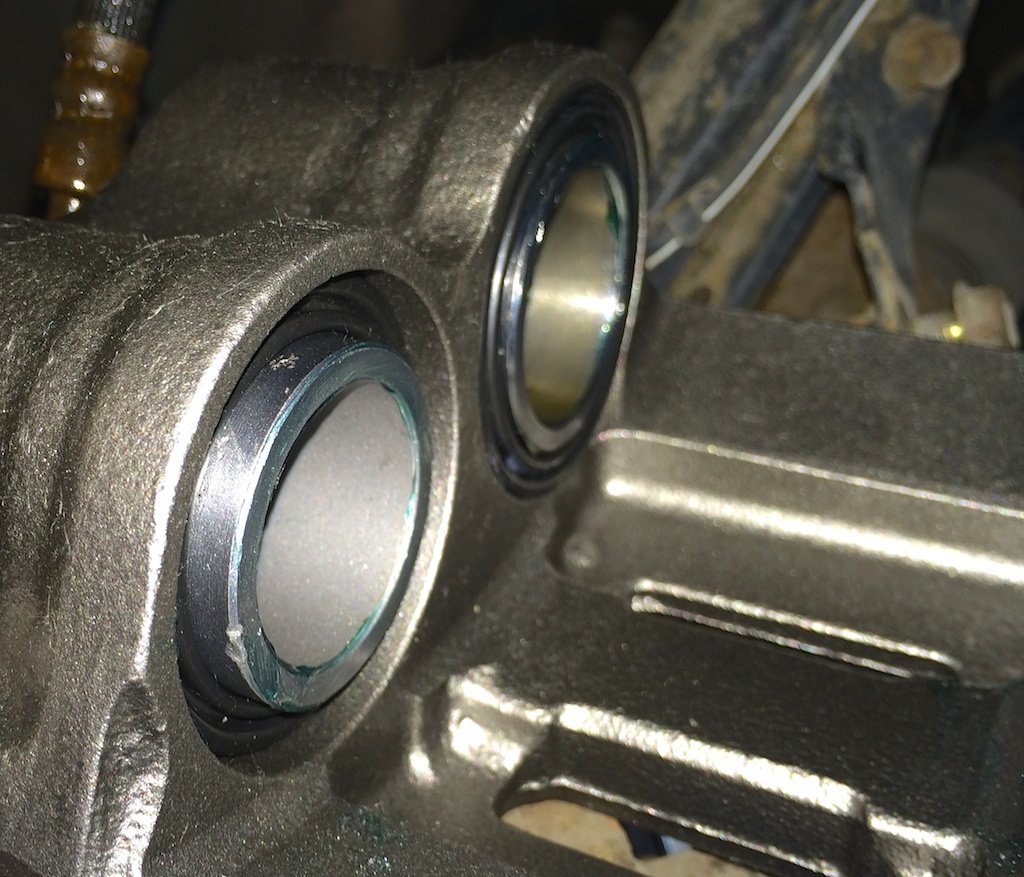
The excellent pics of legend caliper in this thread should end questions on why we use them, See how much pressure contact area to inner pad there is!!, plus the outer pad being supported by 3 fingers so it doesn't flex and has fuller contact
Compare to piston/finger wear pattern in grease on old pads
note: OP is doing this in 2 projects in order to perform the MANDATORY after brake line open- 2 ABS active stops from 45mph to 0 and immediately repeat
then rebleed all wheels in special TL order LF RF RR LR
If you did the abs stops on new pads and rotors you would cause problems in bedding them in correctly
Take a week in between !
Bedding the brakes, requires a small part of the brake pad material to meld to the rotor. Read the instructions on how to bed in brakes that are provided in the box you got rotors in.
Take it easy on your brakes the first 1000 miles or so, unless you obviously have to use them to avoid a collision.
NOTE: there is one major flaw in this diy-
NEVER put the caliper lube on the caliper piston ends!!!! a small amount on back of brake pad where it will make contact is the way..
yes, u dont apply lube anywhere the caliper, u apply lube on the slider pins and u don't apply lube on the brake pads it will send the pads flying out of the caliper lol use the red sticky brake quiet stuff.
Sorry if mixed up in between the DIY... But I thought the first post was complete.
No problem. That was good info you posted. I had maxed out the 9 images per post, which was I had to use several posts for the info.
Originally Posted by 3.2TLc
^^^ Yep, Thanks to RONE for a great job on the "LEGEND front caliper upgrade" DIY project.
Once completed, this thread needs added to the 2nd Gen's "DIY" sticky list.
So, the only part required for the front brake's upgrade are the Legend calipers.....the TL mounting bracket and slider pins are reused. Apparently, the rotor and pads are still the same as the TL's. However, new performance parts would compliment the Legend calipers, along with SS brake hoses.
Yup, quite literally the only part necessary is the Legend caliper. SS lines would take a small amount of sponginess out of the brake pedal, but they definitely aren't necessary to perform this upgrade to the calipers.
Originally Posted by 01tl4tl
yes everything else is TL parts and upgradable incl lines and rotors
NOTE: there is one major flaw in this diy-
NEVER put the caliper lube on the caliper piston ends!!!! a small amount on back of brake pad where it will make contact is the way to do it
Reason: grease that near the rubber dust seal of pistons attracts dirt and grime which can tear the rubber and allows crud into piston o-ring seal = caliper death
The excellent pics of legend caliper in this thread should end questions on why we use them, See how much pressure contact area to inner pad there is!!, plus the outer pad being supported by 3 fingers so it doesn't flex and has fuller contact
Compare to piston/finger wear pattern in grease on old pads
note: OP is doing this in 2 projects in order to perform the MANDATORY after brake line open- 2 ABS active stops from 45mph to 0 and immediately repeat
then rebleed all wheels in special TL order LF RF RR LR
If you did the abs stops on new pads and rotors you would cause problems in bedding them in correctly
Take a week in between !
I hadn't heard that before, but it surely makes sense. As you can see, I applied a very thin film of lubricant, and it's not on the outside edge of the pistons. The amount I applied is no more than would get transferred to the pistons from contacting with the pads if I'd applied directly to the pads. In fact, if I'd applied directly to the pads, I feel as though I wouldn't know where the pistons would contact so I'd end up using significantly more lubricant smeared over a large area, which would attract much more dirt & debris to the area and increase the risk of damage to the dust boots. Thoughts?
Originally Posted by TLZINE99
yes, u dont apply lube anywhere the caliper, u apply lube on the slider pins and u don't apply lube on the brake pads it will send the pads flying out of the caliper lol use the red sticky brake quiet stuff.
Thoughts on my above statement regarding lube application to the pistons vs pads? And I'm calling it lube for lack of a better name, but the tube of stuff says it's ok to apply to the back of pads. So far the brakes are as quiet as can be.
its a small distance between rubber seal, pad back and pistons- but enough to create a space to keep most grease off the rubber seals
when grease already on the piston - all it has to do is melt slightly and drip onto the boot
caliper lube is what I use, best temp resistance, don't forget the parts where the movement of pad end tip slides- to operate pads!
sticky stuff is needed for BMW pads (in my shop experience)
after the first time you remove calipers, the contact points requiring grease will be obvious in the old grease, then you know where and how much
Yes inspecting pads and clean-regrease the sliding parts is something that should be done every year
Thanks for this, I have had a seized or barely working rear caliper and with 240k, I decided to just go ahead and order all new calipers, rotors and pads all around. I'm glad I saw this first. I'm gonna grab legend fronts instead. Thanks!
I picked the same legend nissin calipers up at Autozone for I think for $60.00 a piece and since I wasn't changing them straight out right away, I got carried away. I knew I needed to paint them, so I got some high heat red paint and didn't really like how they looked with the rough cast finish. So ended up smoothing out the cast metal with a bench grinder. I went just deep enough to smooth out the dimples and imperfections and then buffed it out to smooth finish. I probably put 5 separate coats of the high heat paint, then got some supposedly heat resistant vinyl stickers off ebay for 7 bucks and then finished it with a few coats of high temp clear. In all I spent way too much time with this, but I'm wierd. I have not installed them yet, but plan to soon, as I'm not sure how the vinyl stickers will hold up to the heat.
You know I considered straight lettering, but the legend caliper is more curved than the more expensive larger faced calipers that have more of a straight face with the straight lettering. I thought the curved would look better as it contured to the brake face. If your saying my curve is crooked, which i don't think your saying. I didn't put the letters on individually, that would have been a nightmare. These are curved decals that go on as the are printed, you just rub the back side of the decal and the letters transfer the way they are printed . I received smaller straight decals with my curved decals that I just decide to try on my rears which turned out,...meh. I didn't grind these, I just did some light sanding. These smaller straight decals came with my curved decals I put on the fronts. This photo was taken before the clear coats and as you can see the A is lifting up, but that is fixed now with coats of clear.
well. I didn't put the time into it like the fronts.
Nice DIY Rone..... I am changing my calipers out in the next couple weeks. How are your Legend calipers holding up? I am changing them all out with Legends up front and just stock in the rear all with SS braided lines.
haha sorry to bump this up but wanted to put forth thanks where it was due. I ordered stainless lines, Legend fronts, TL rears and all new rotors and pads today. All for the pedal feel of a daily beater. What can I say..
haha sorry to bump this up but wanted to put forth thanks where it was due. I ordered stainless lines, Legend fronts, TL rears and all new rotors and pads today. All for the pedal feel of a daily beater. What can I say..
I hope DIY is helpful for you! Enjoy the new braking feel - you're going to love it, especially with those SS lines.
quick question on the brake line washers: do they have to be copper washers? also does anyone know offhand the size of the washer? Thanks in advance.
Yes, you should use the same type of washer material, not sure if it's copper, brass or a blend. The reason is in order for the torque specs to be applicable, to form a good seal, and not to strip the joint's threads.
Not sure the washer's size but simply use a regular wash for a template and bring that to the auto parts store to match it up.
quick question on the brake line washers: do they have to be copper washers? also does anyone know offhand the size of the washer? Thanks in advance.
The 'inlet port size' for either the Legend caliper or the NSX caliper is M10 x 1.0. Find washers that fit that bolt size and your should be good. Reference the specs for each below.
I called my local Acura and they don't have them in stock and they want $5.35 per washer, hahaha. Tonight I'm going to take on old washer off the NSX brake line (They have the same part # as the CL) and bring it into my local Part Source. I was there today but they had a few sizes and some looked more rounded than in the picture above in this thread. I might also check Napa, they might have more selection. I really want to tackle this this weekend on father's day but it's threatening rain. ugh.
It should work. Your knuckle is the same part number as the knuckle on my '03 CL-S6. I installed these, years ago, to fight rotor warpage the single pot calipers were giving me every 8-10K. However, beware, you have a 16x6.5 wheel disk compared to my 17X7 the '95 Legend 6MT had a 16X6.5 wheel disk as well. The Legend Knuckle has a different part # as well. RockAuto has some of the best prices, BTW.


 Reference the specs for each below.


