
Nexson's Ongoing Paint & Fabrication Pictoral/Video Thread!

 01-04-2012, 11:40 AM
#42
Im working on the custom grille for my CL but i dont want to post any pics without your permision and before its done. I would like to ask few questions though on how to finish my project. I also made myself a pilar gauge pod that i am currently using. Its looks good but it would look like shit compared to your work. I am in to learn.
01-04-2012, 04:21 PM
#43
-Brian
Thread Starter
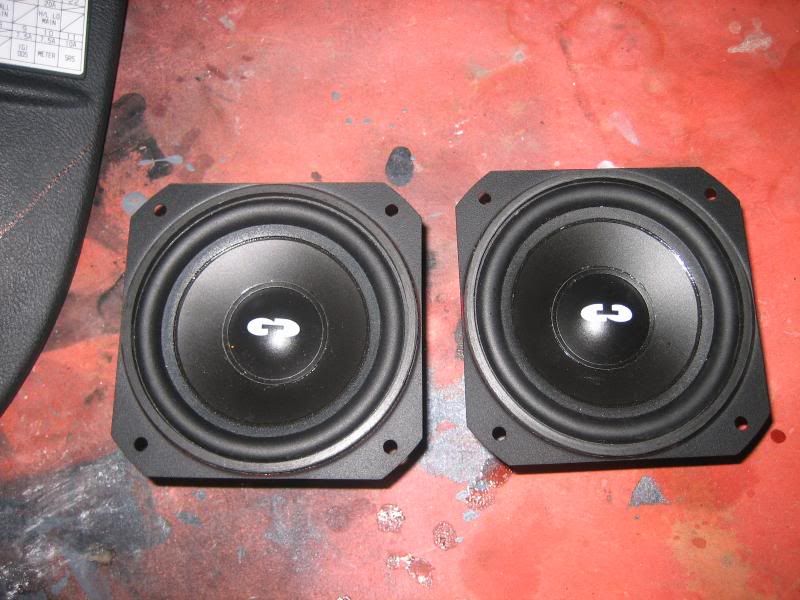
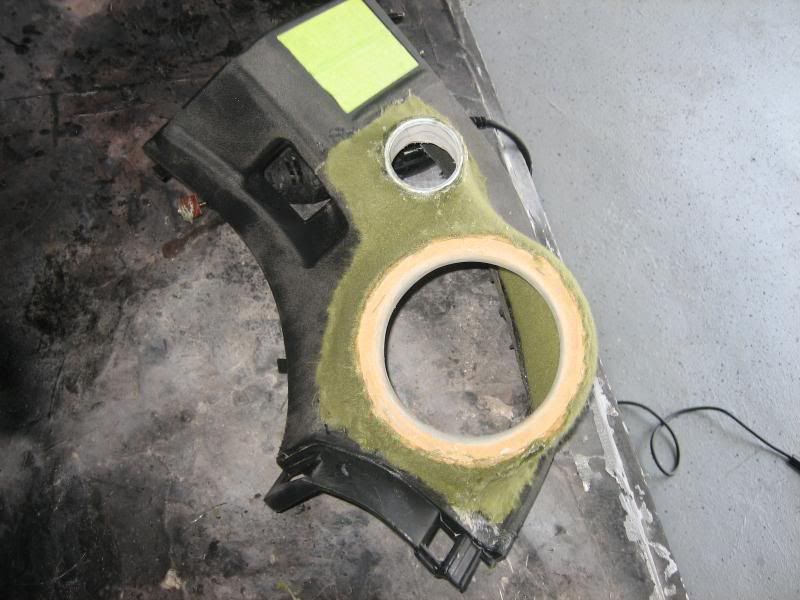
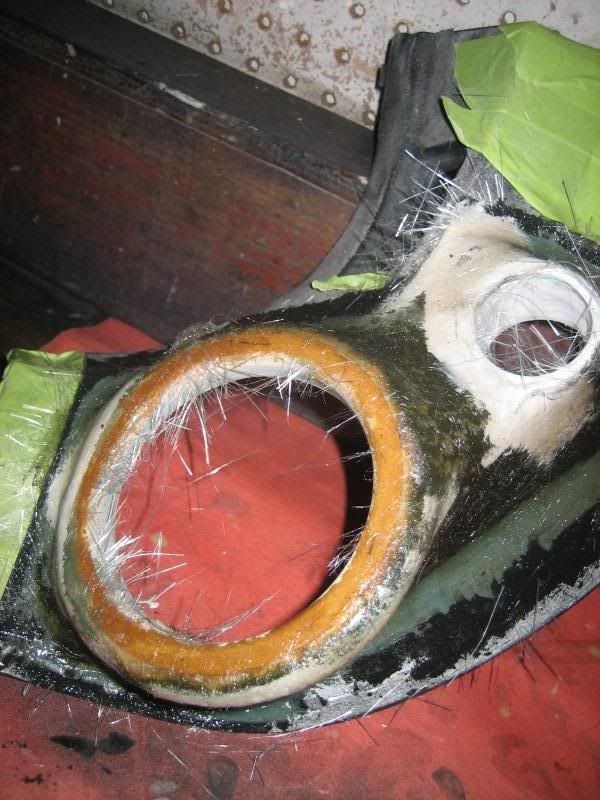
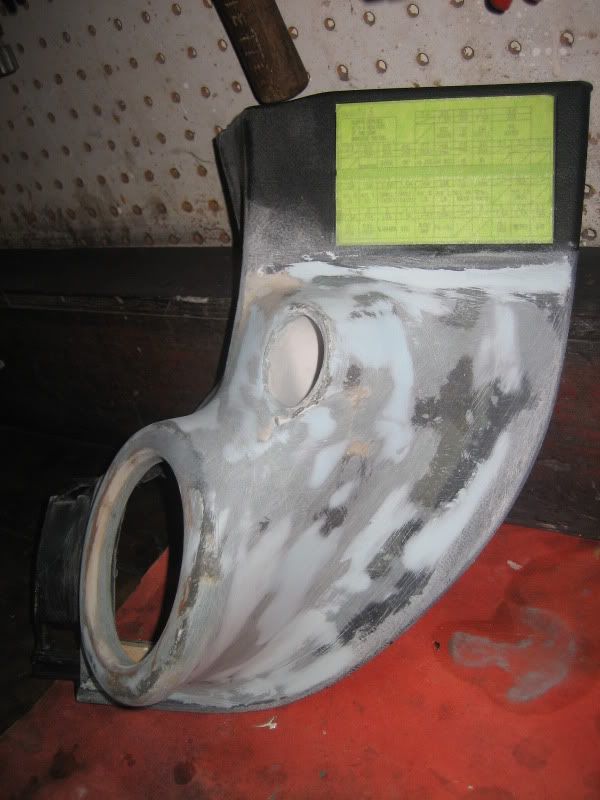
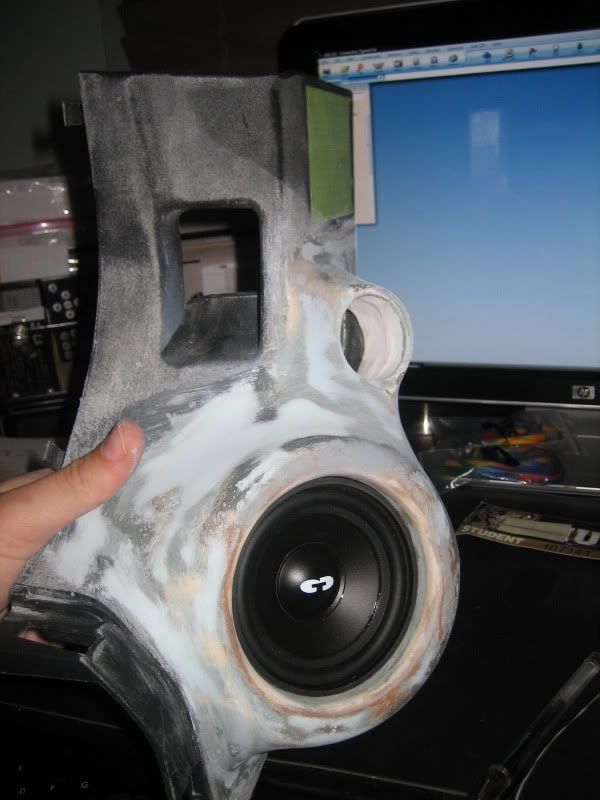
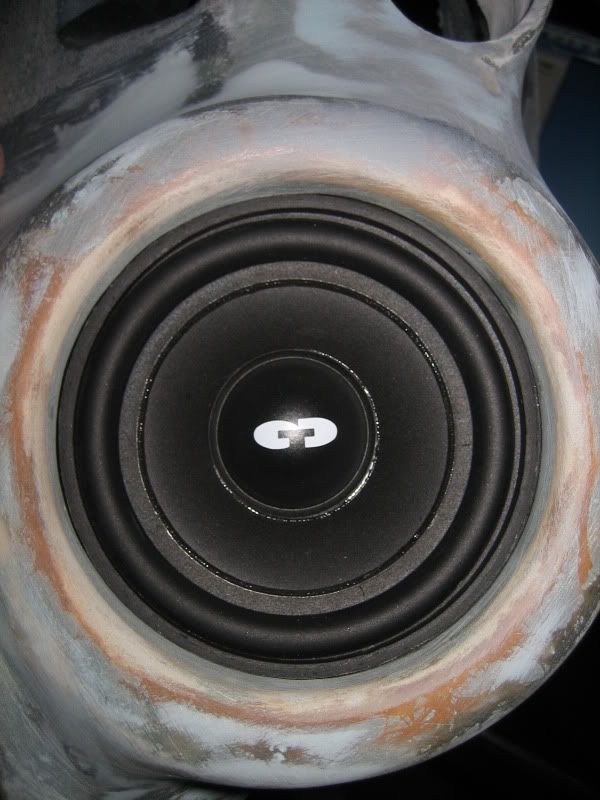
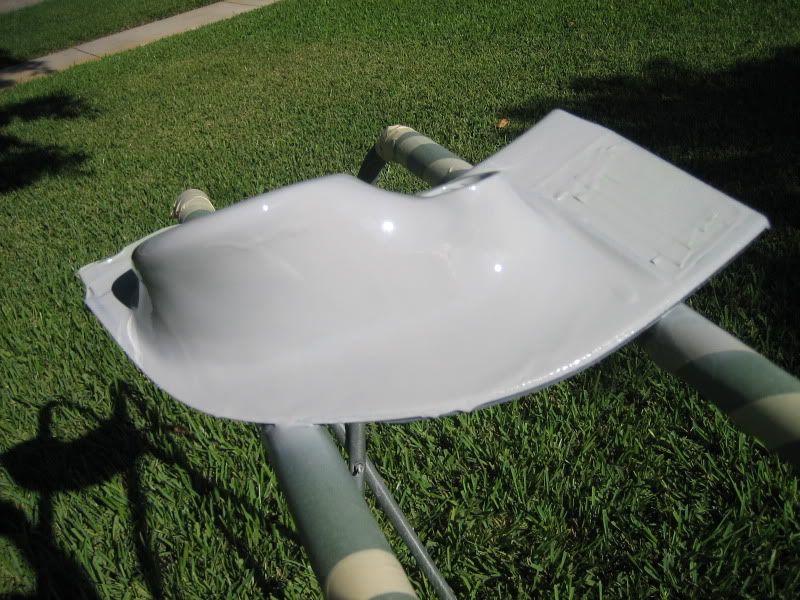
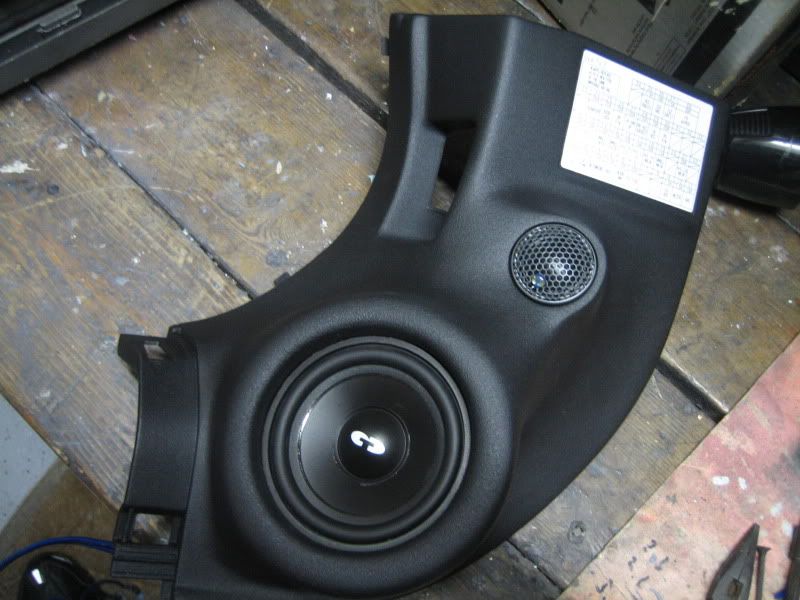
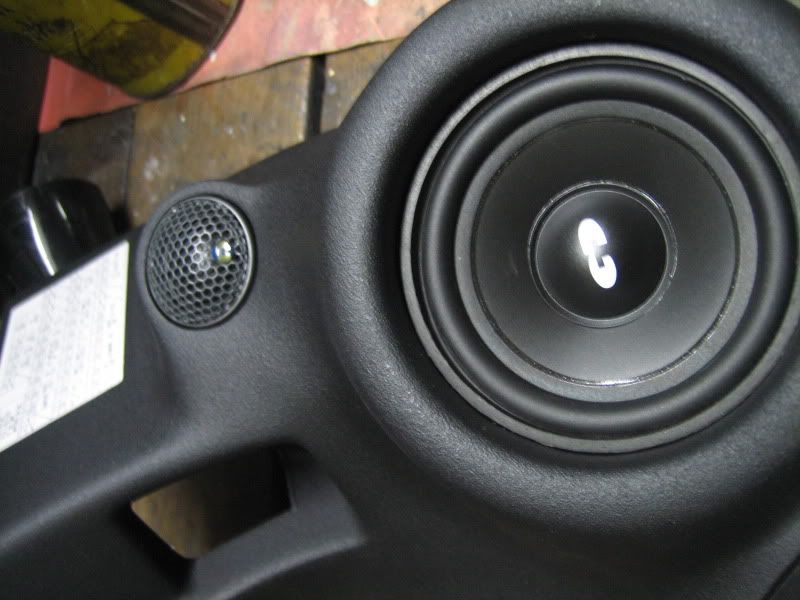
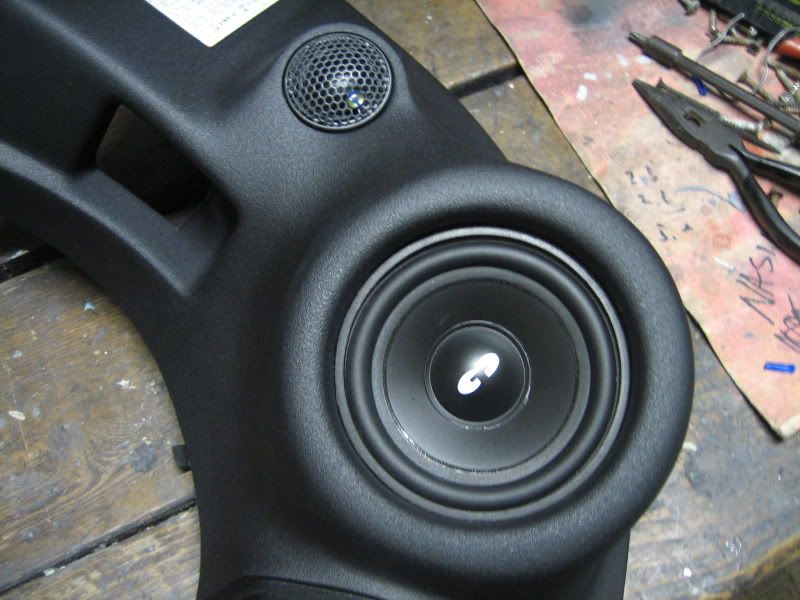
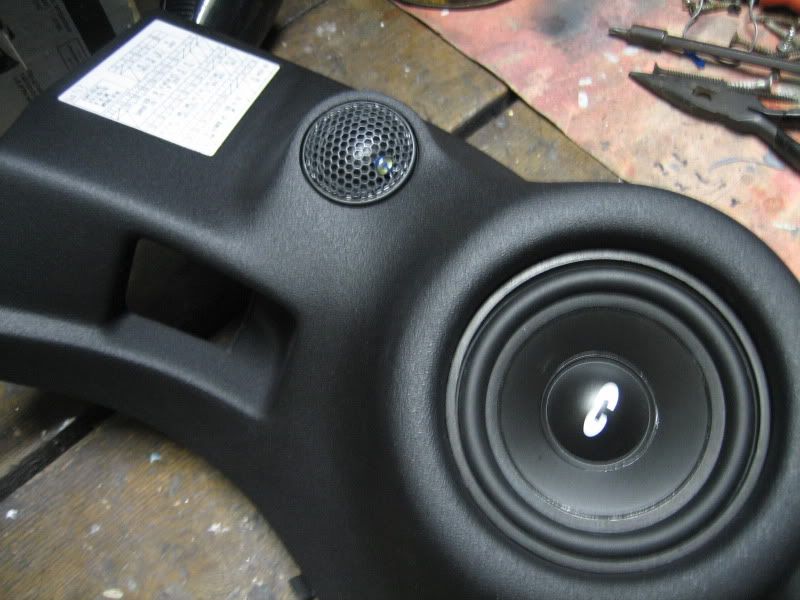
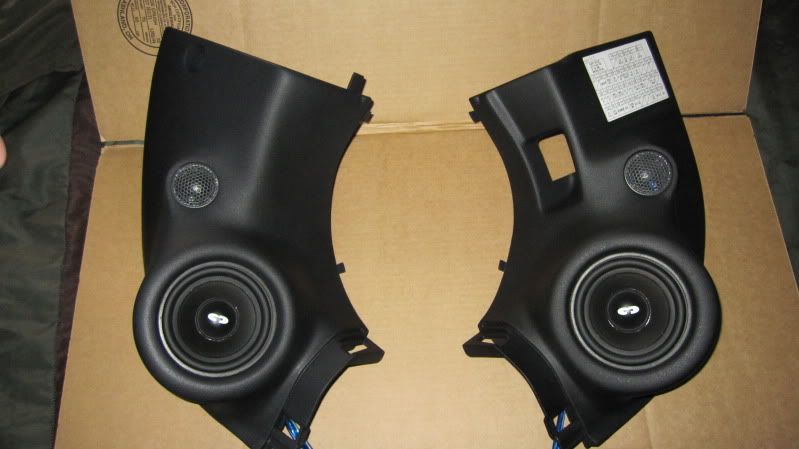
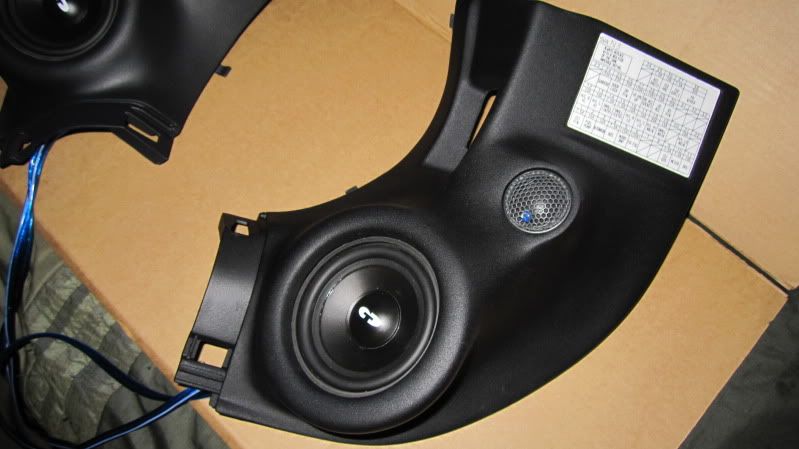
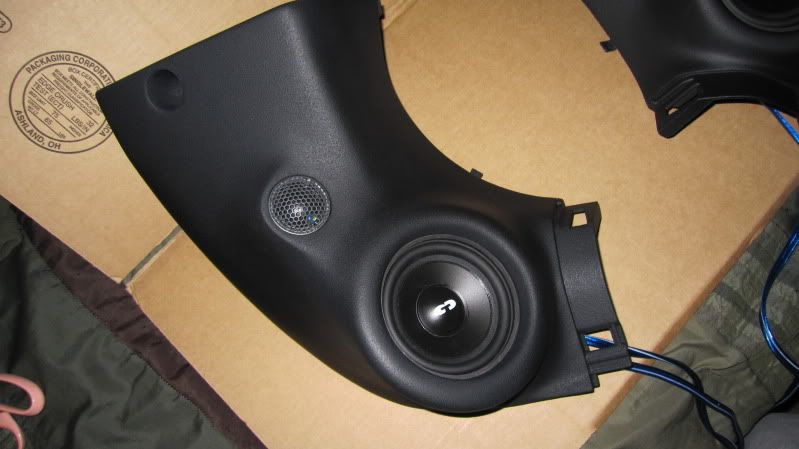
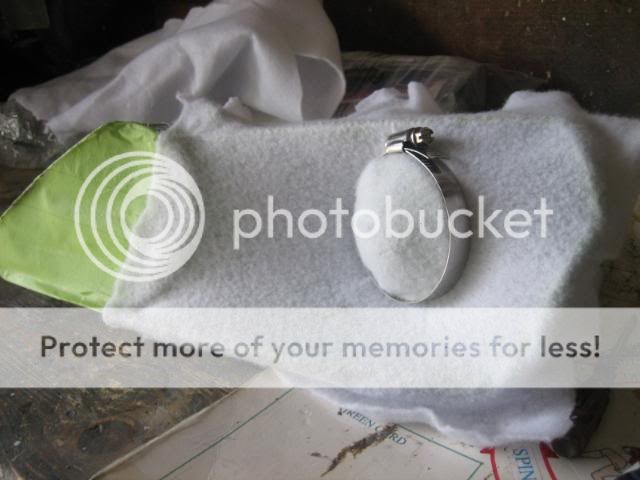
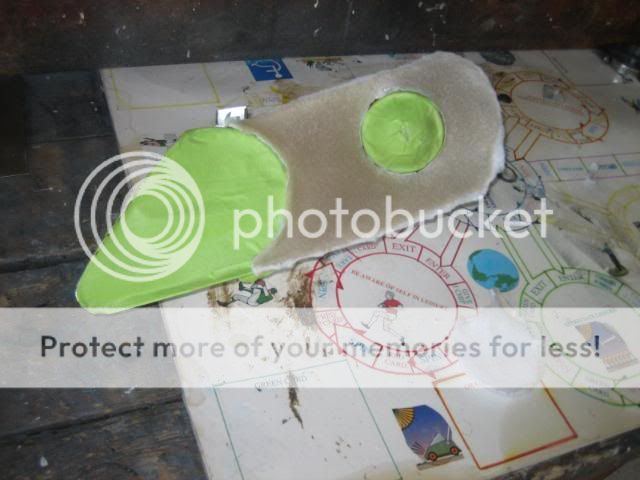
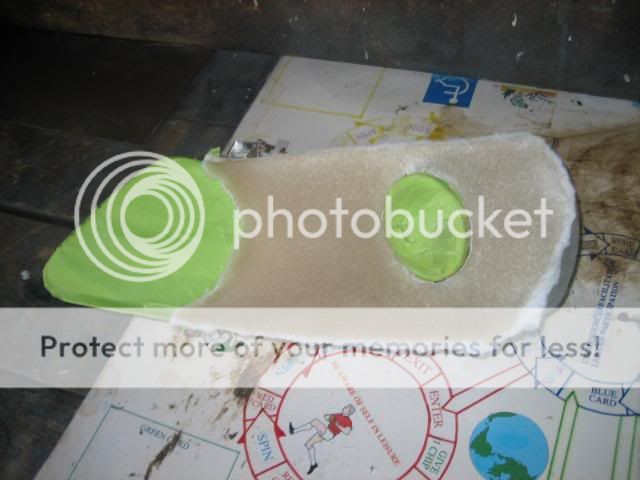
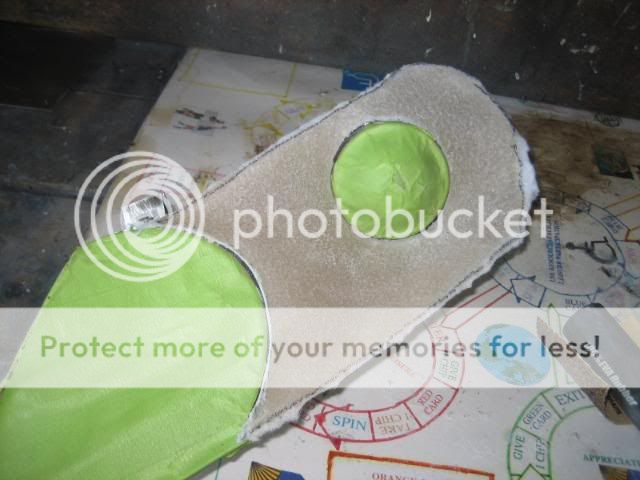
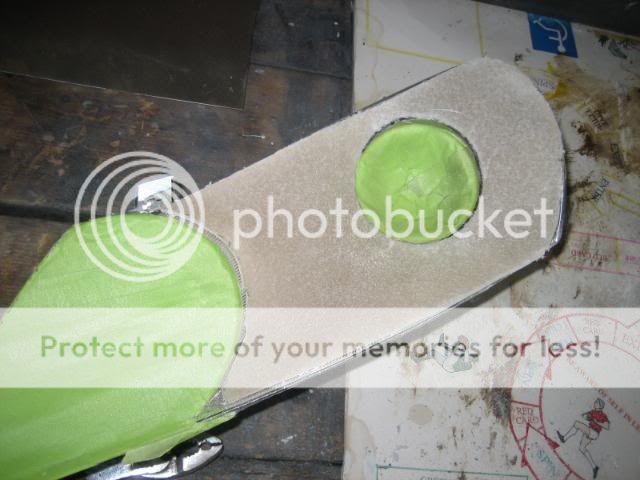
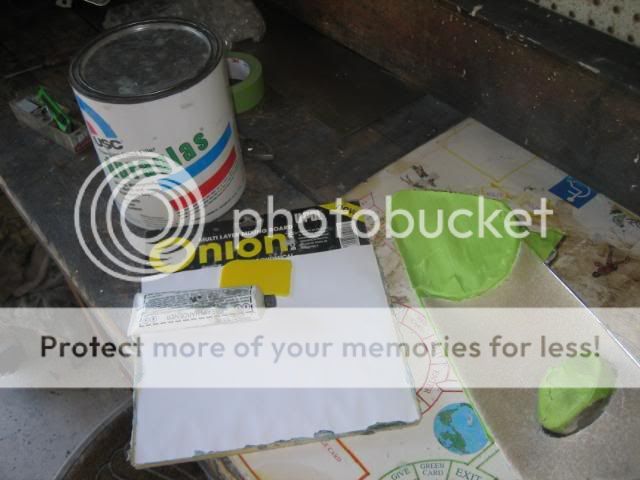
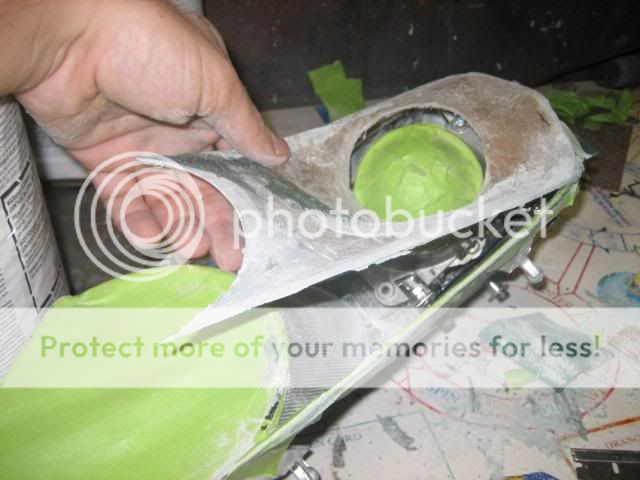
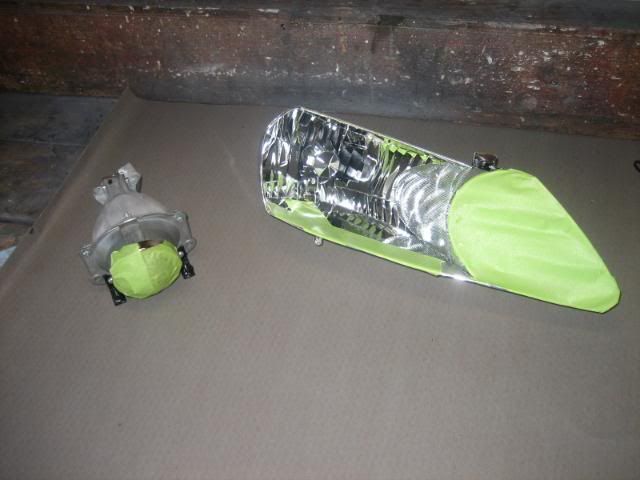
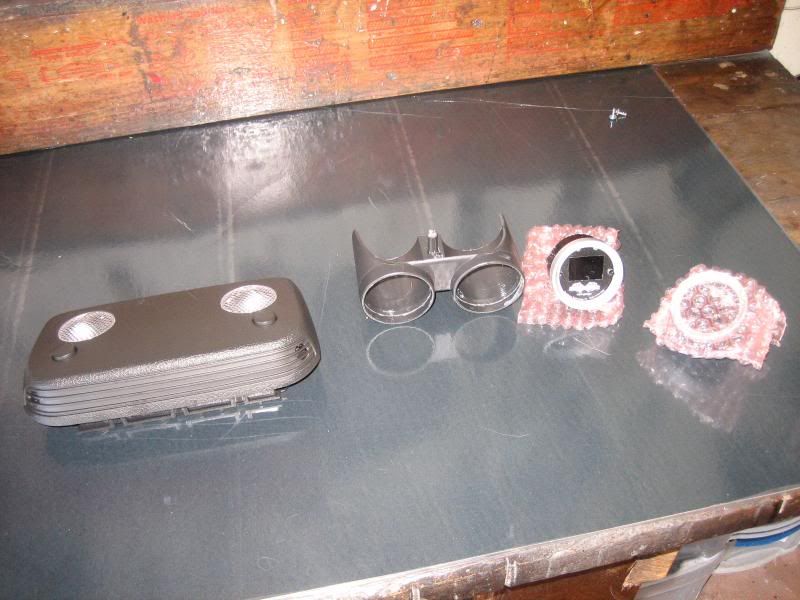
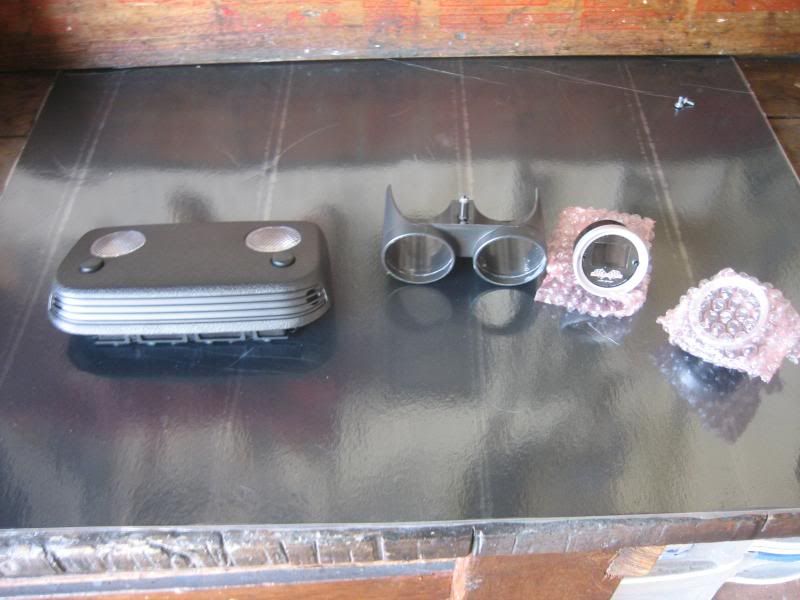
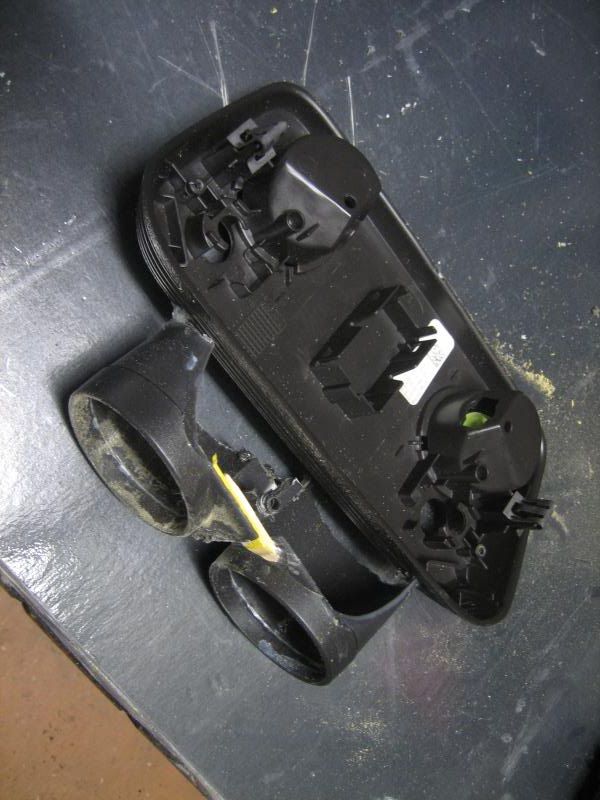
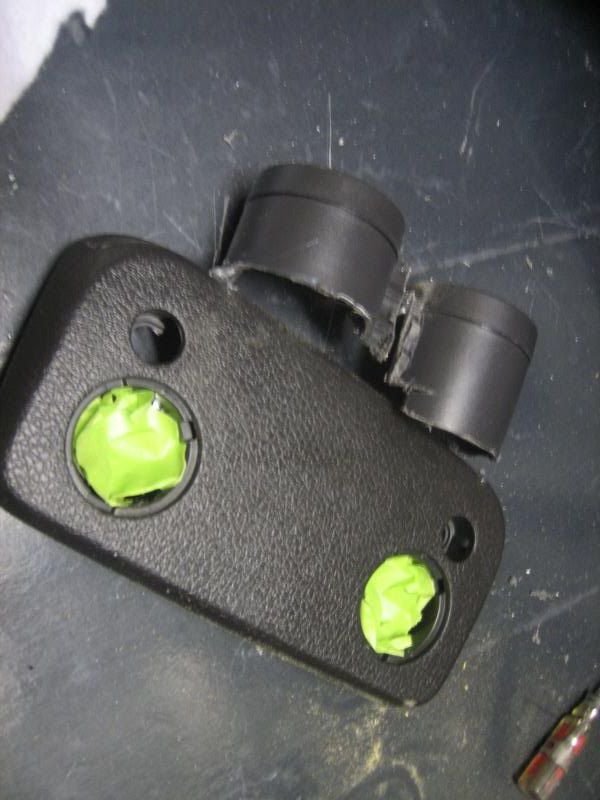
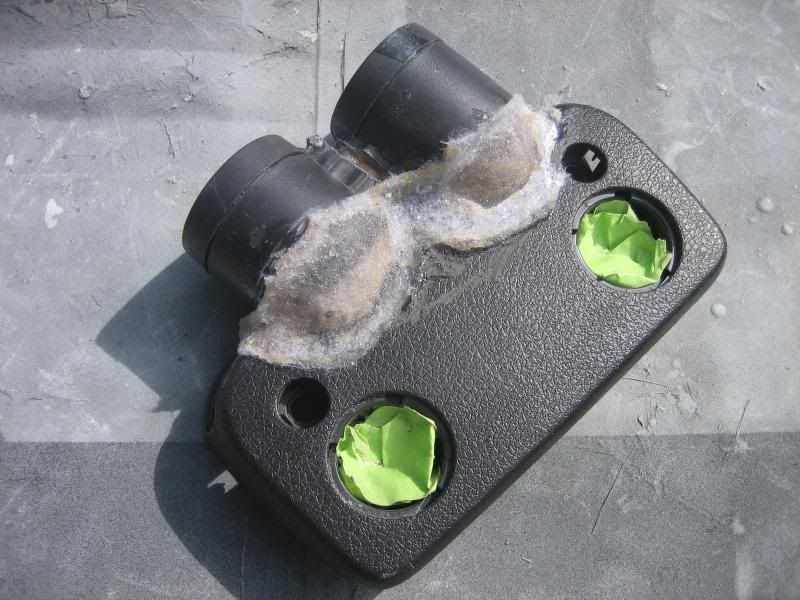
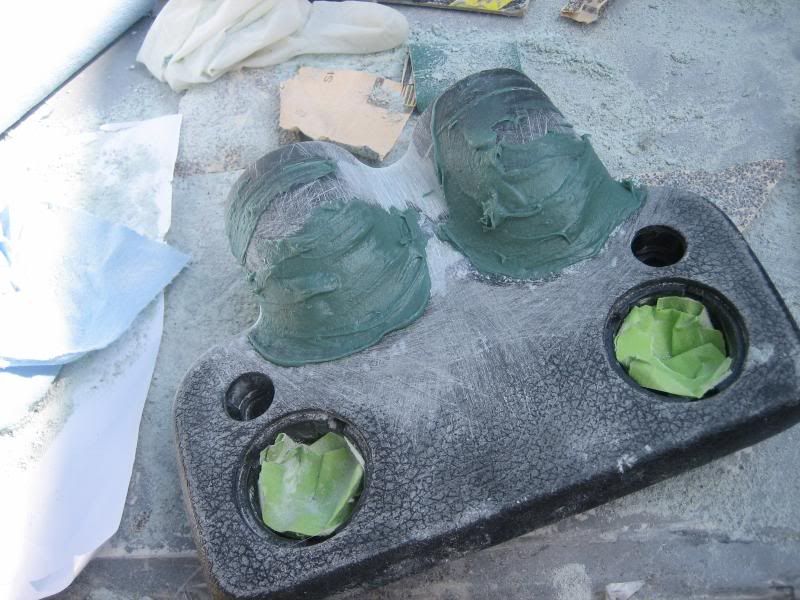
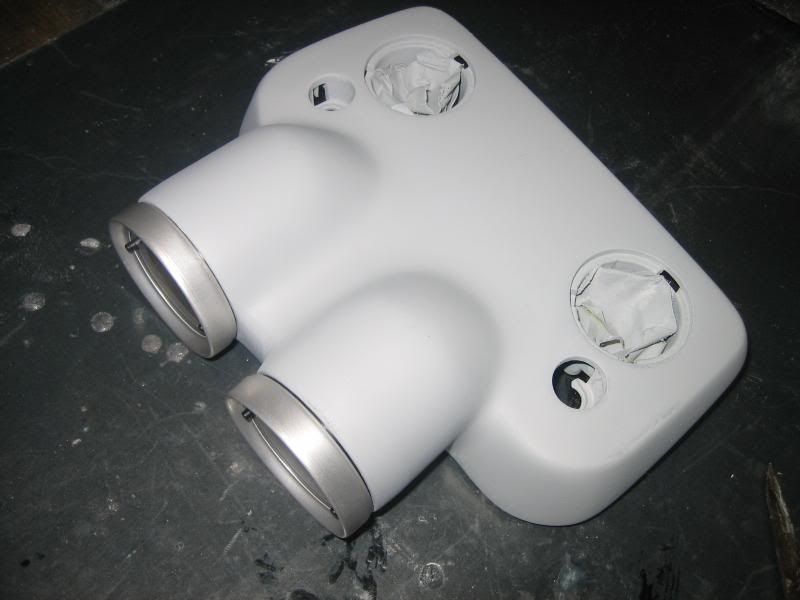
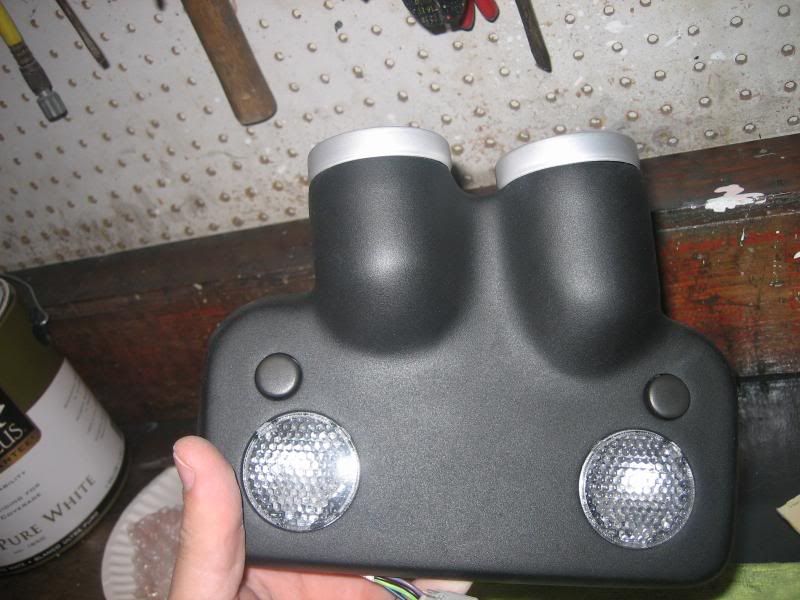
Here is a set of midranges with tweeters pods into a 8th gen Civic Coupe. Enjoy!
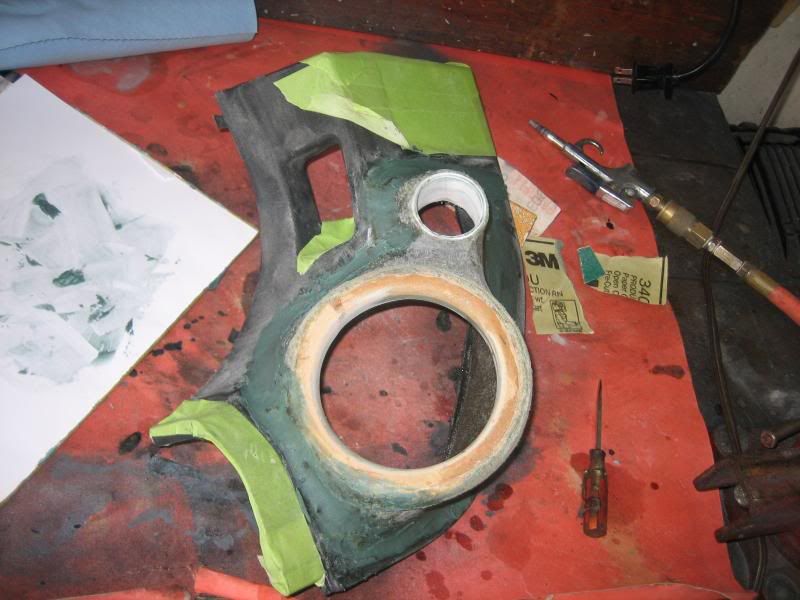
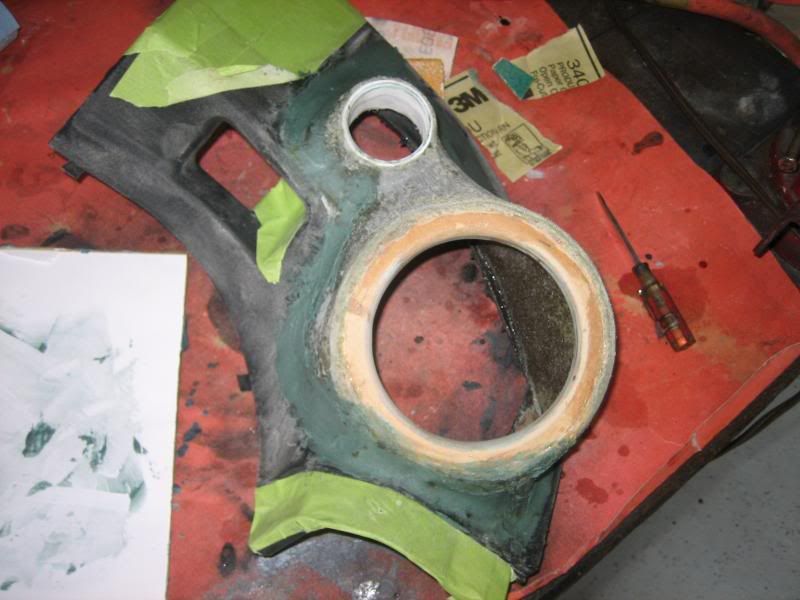
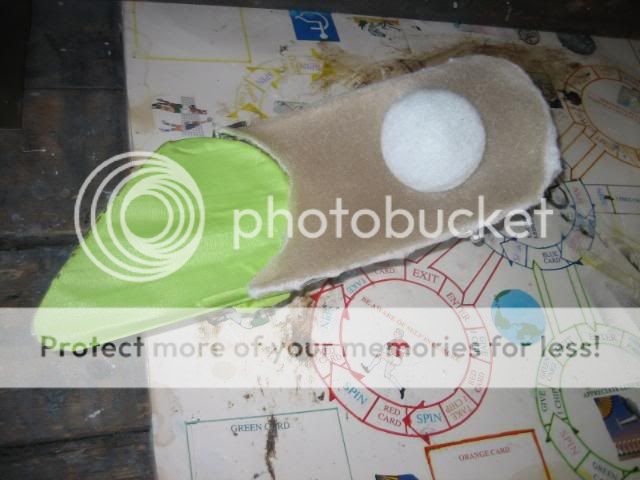
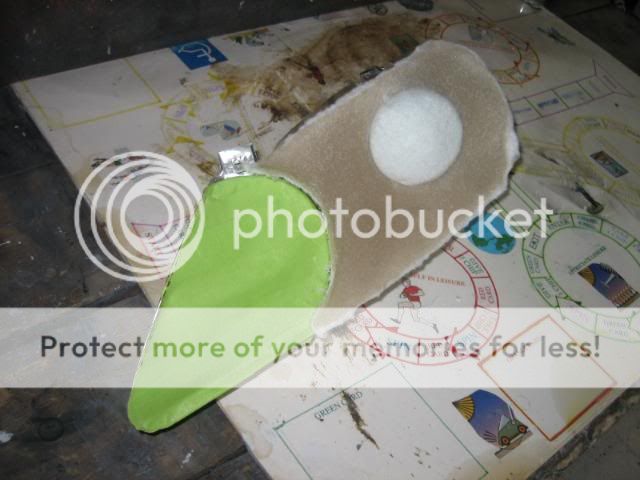
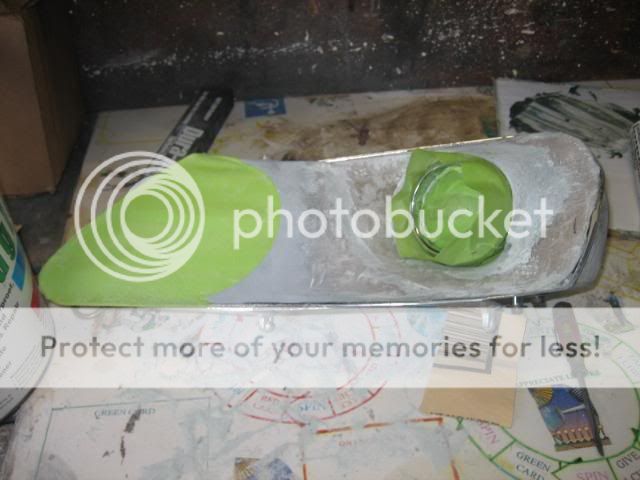
I started with the midranges. Although the rings will cover this area, I still wanted it all one color just because!

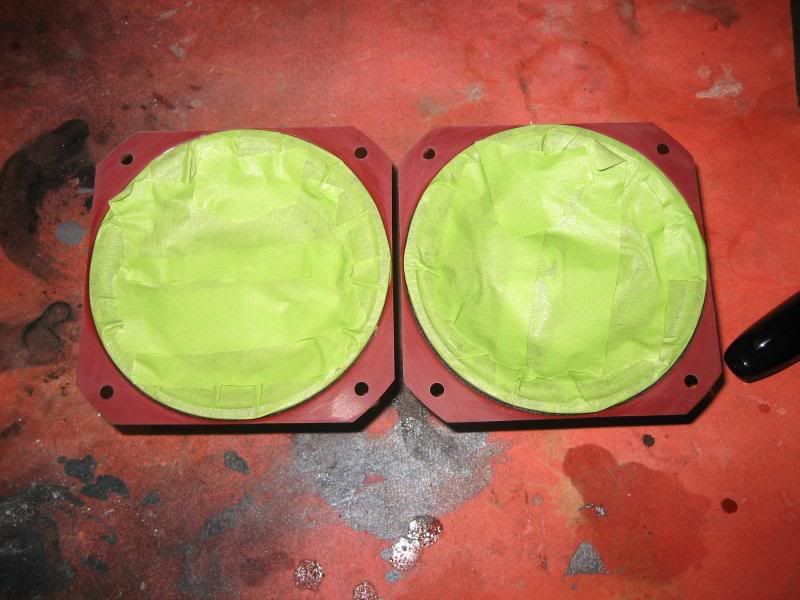
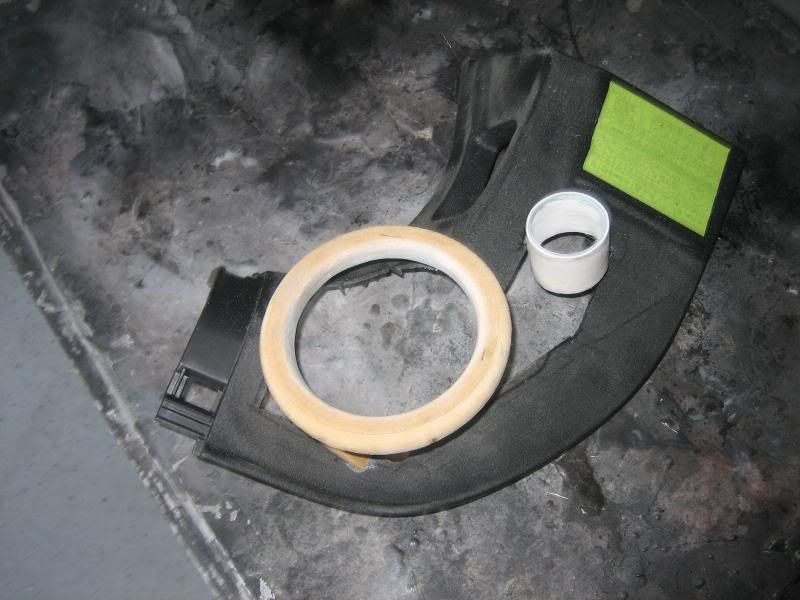
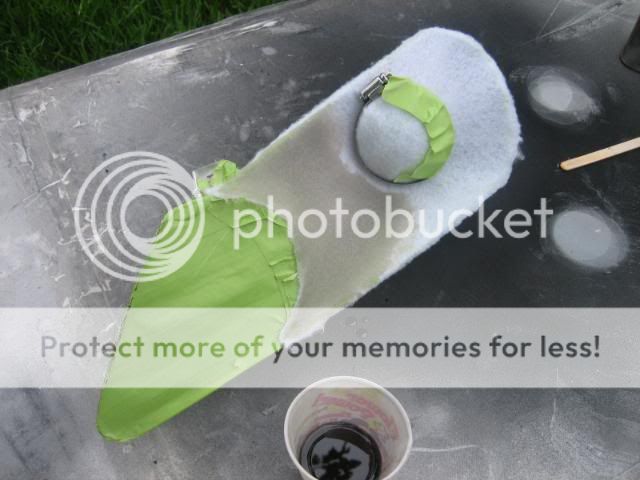
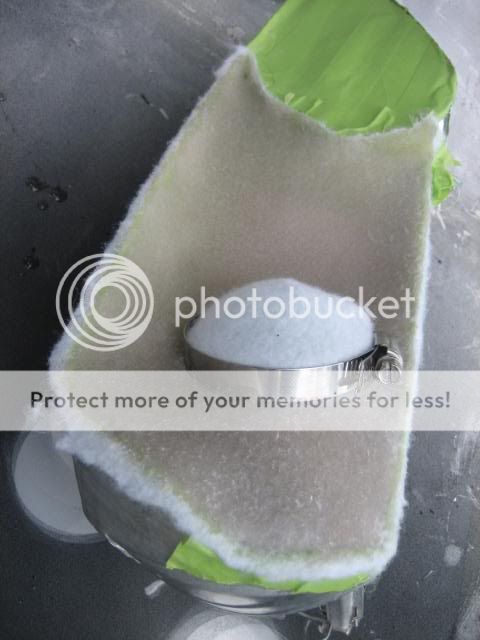
I got a set of rings from epicenterdesigns, they were PERFECT! Thanks Jon. I filled them a bit to fit how I wanted them.
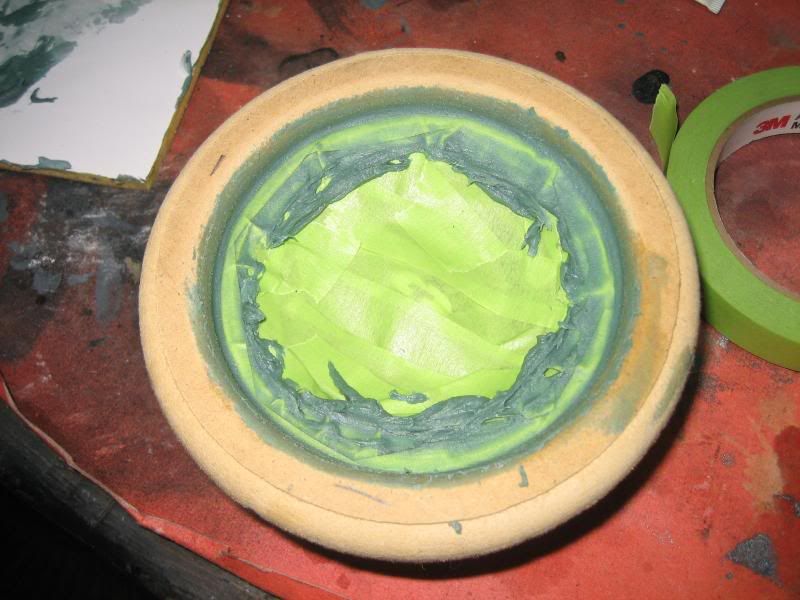
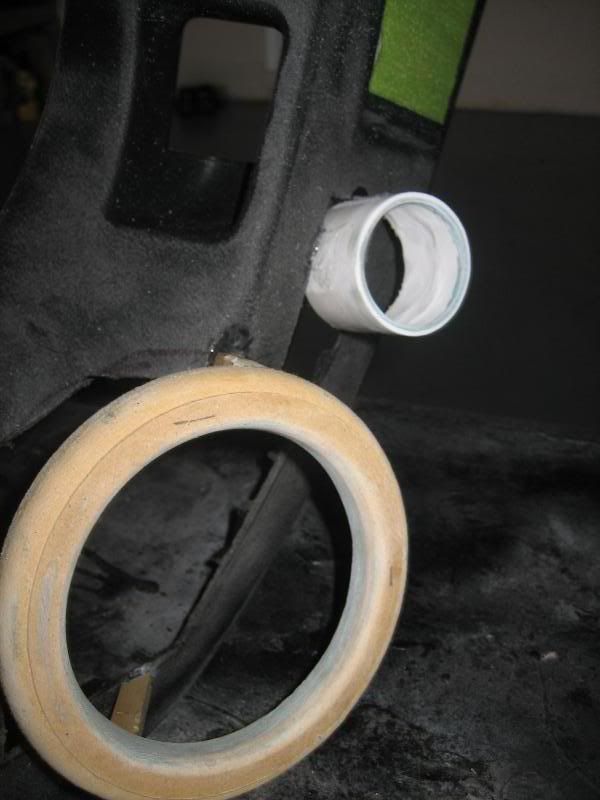
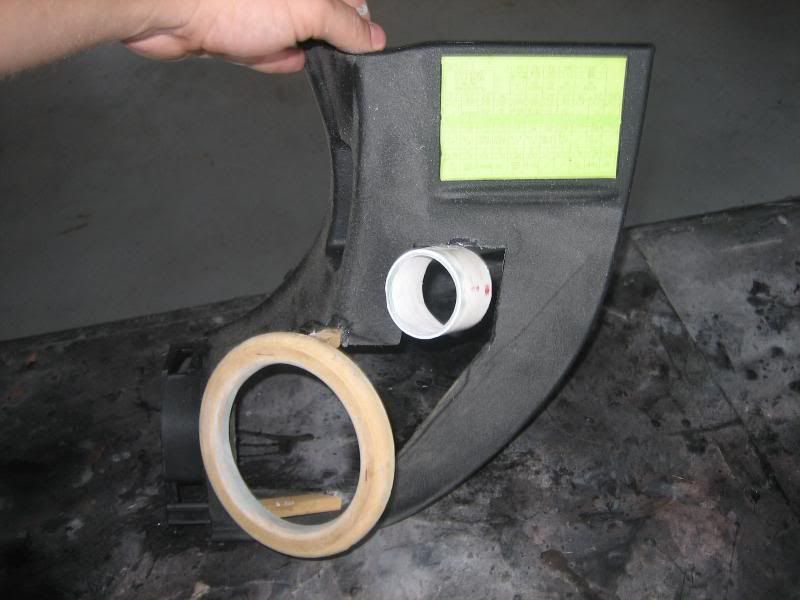
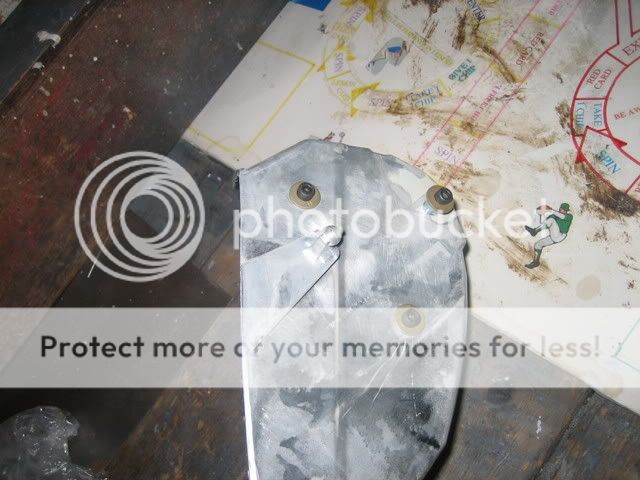
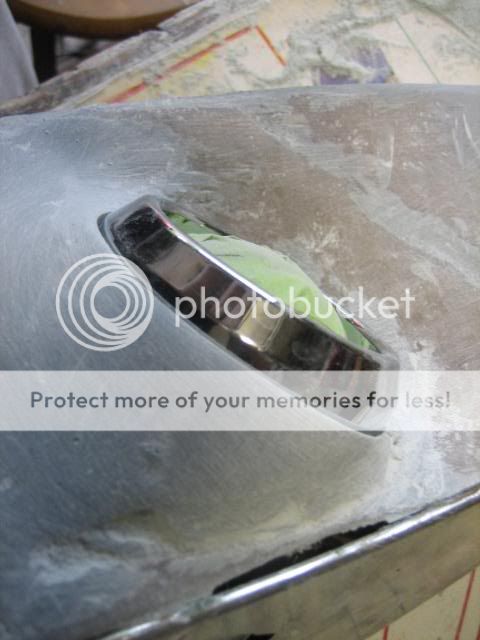
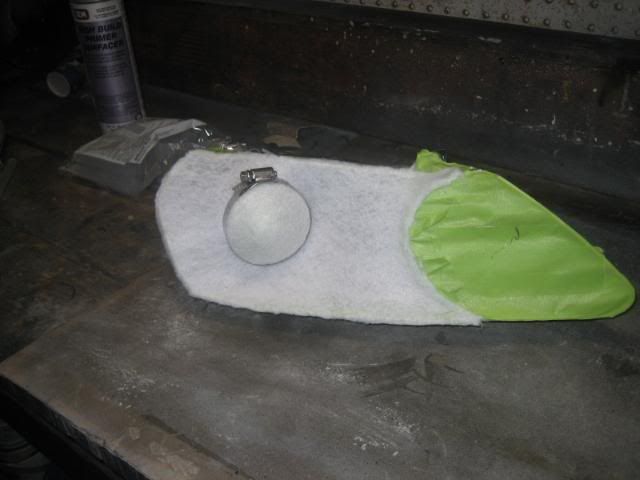
Here I was mounting the ring in the best position according to space. the driver's side kick panel is very tight. There is a small area to work within the panel, so the positioning had to be precise. Owner wanted speakers facing dome light.
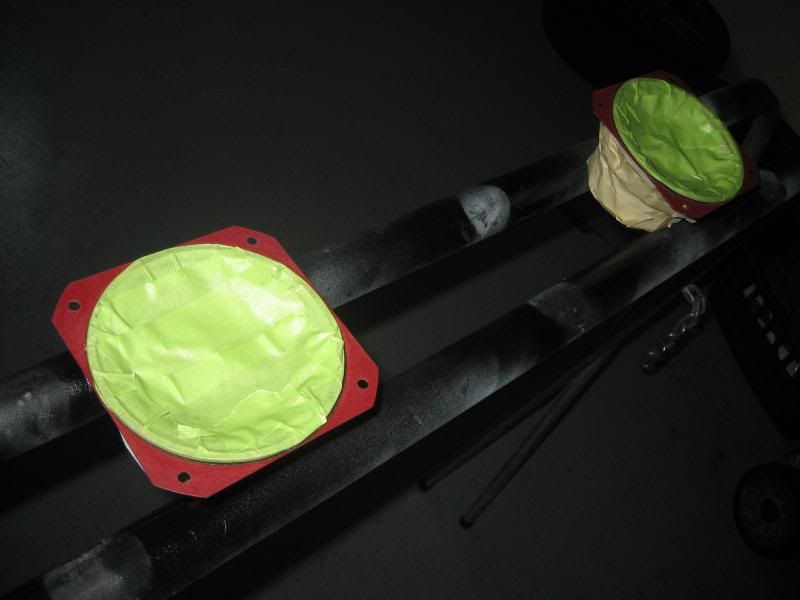
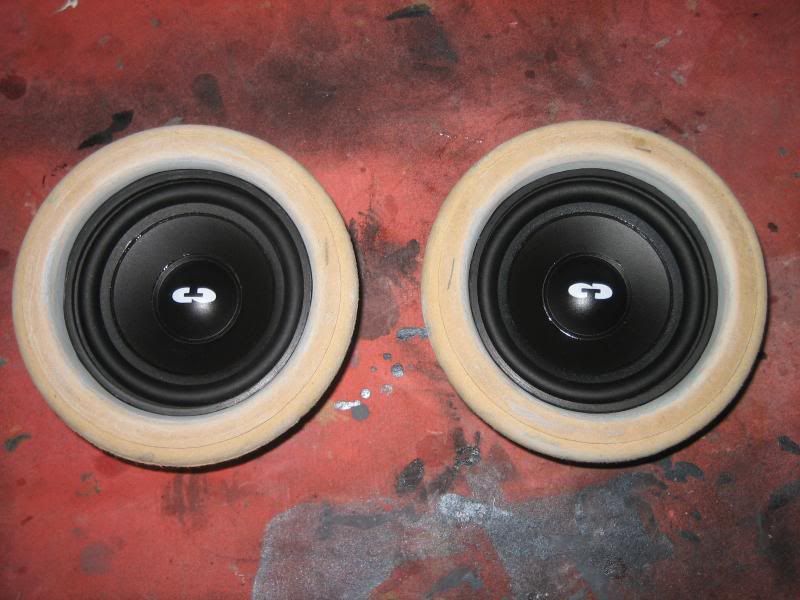
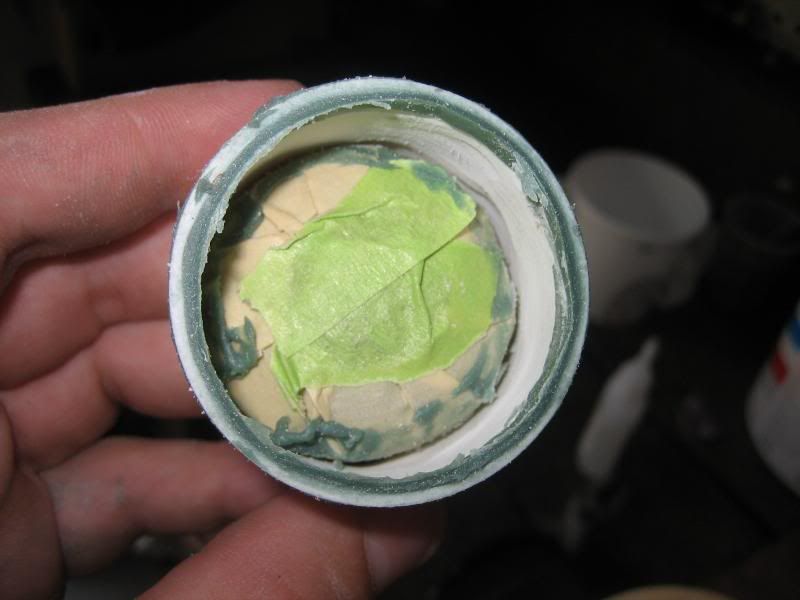
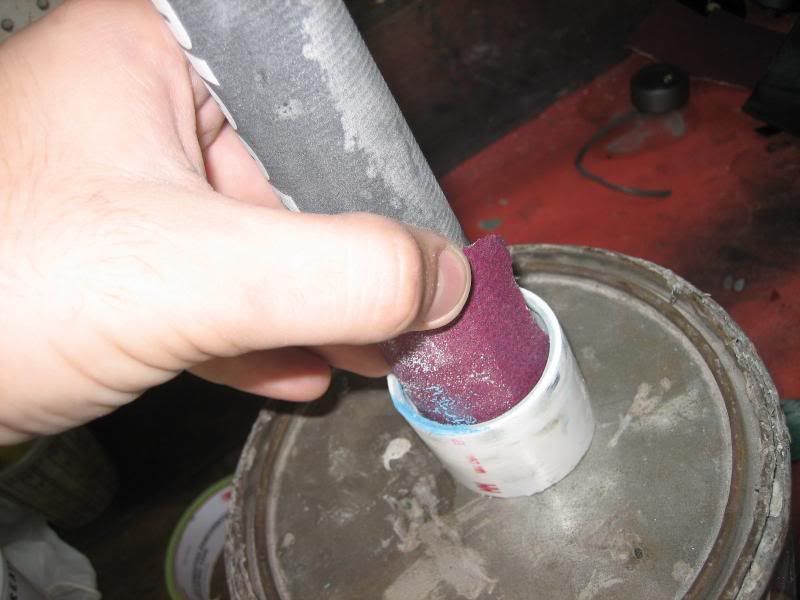
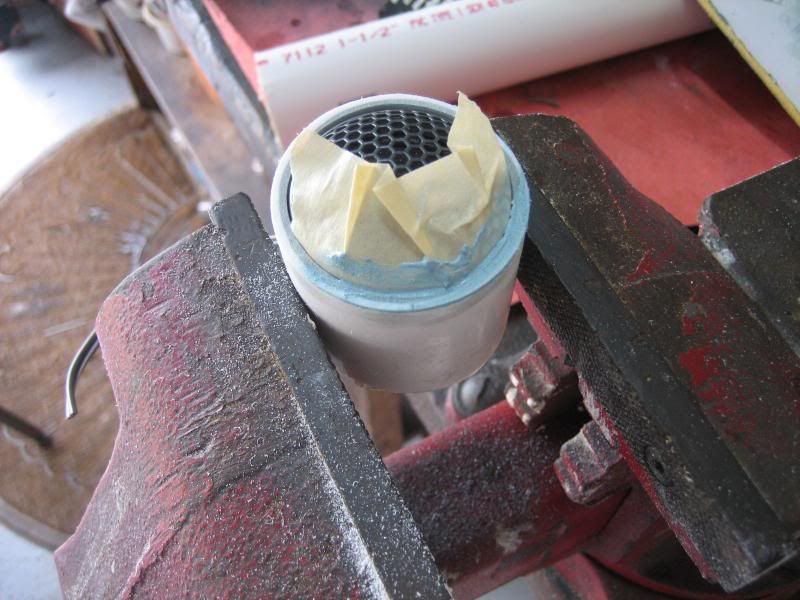
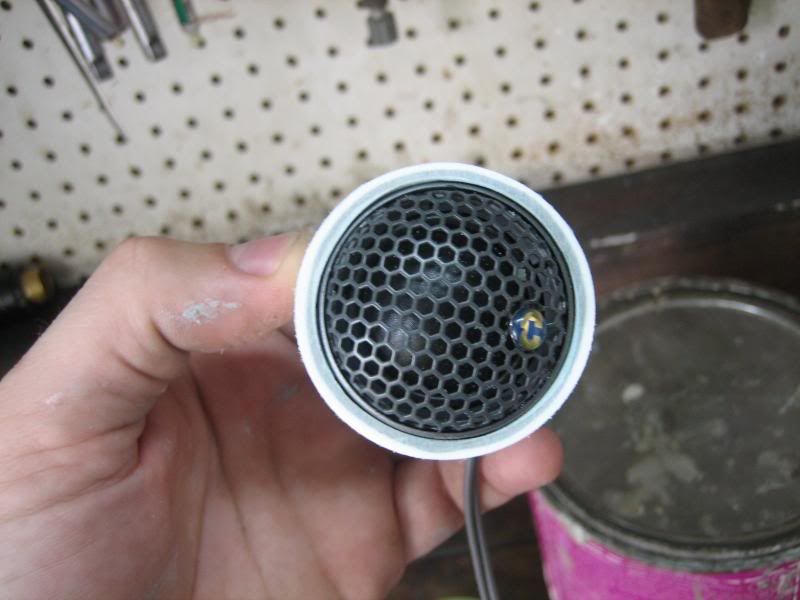
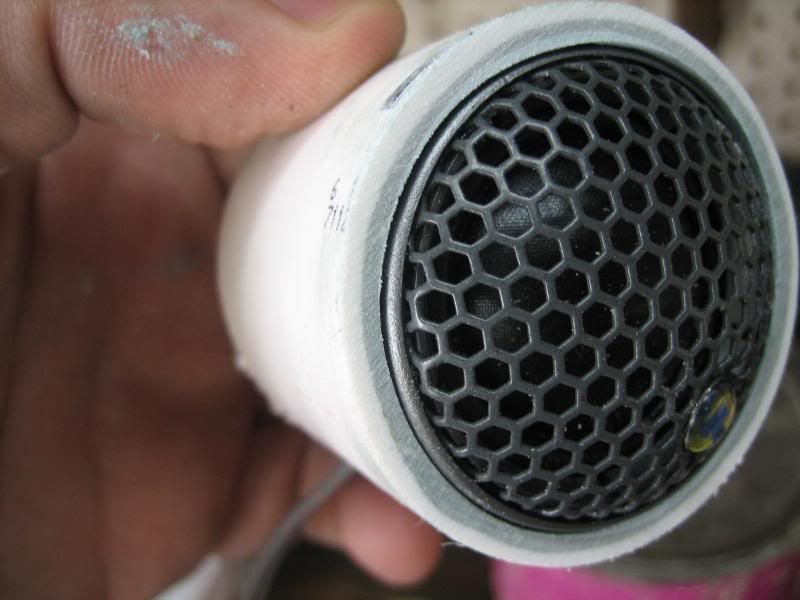
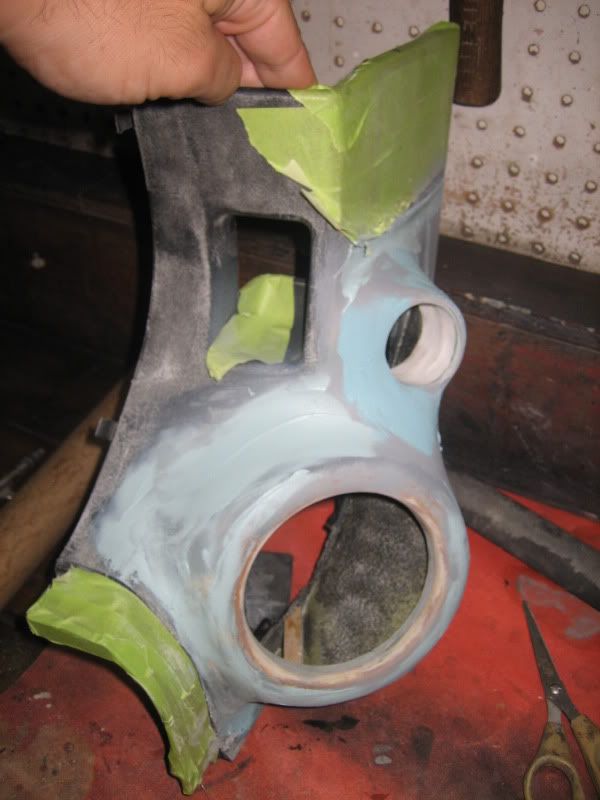
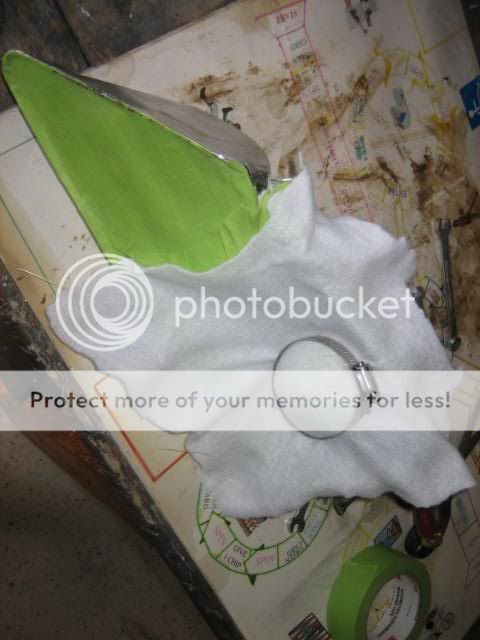
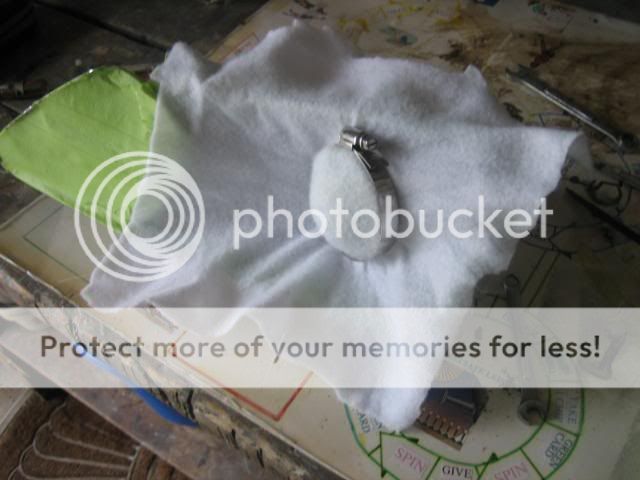
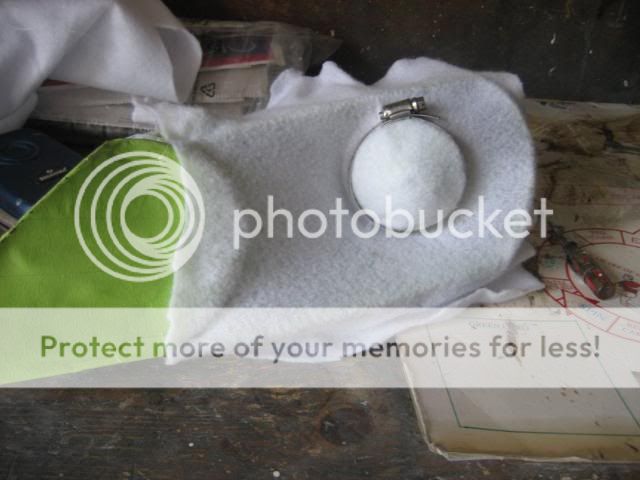
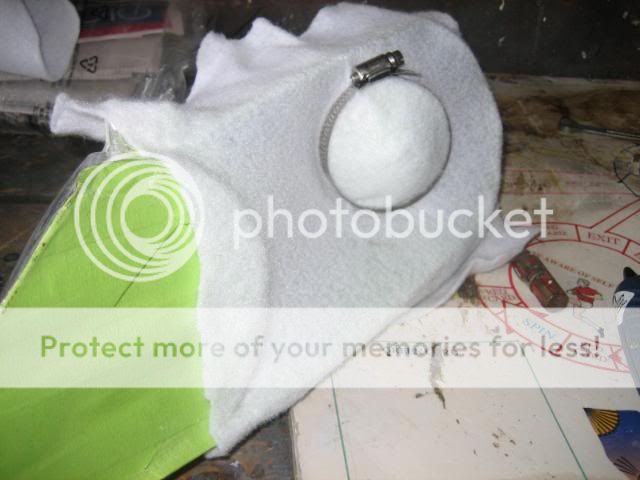
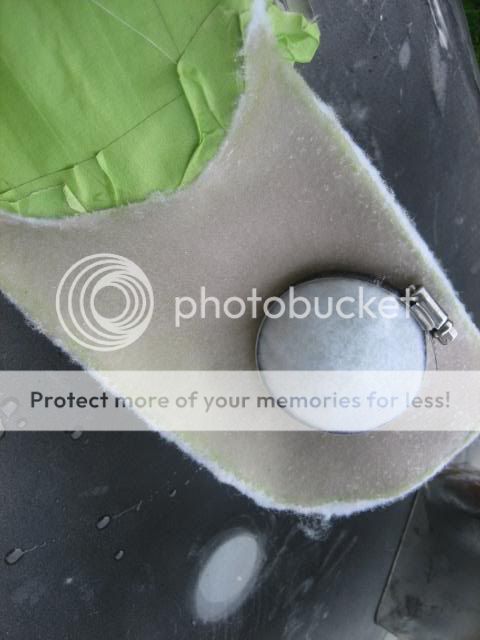
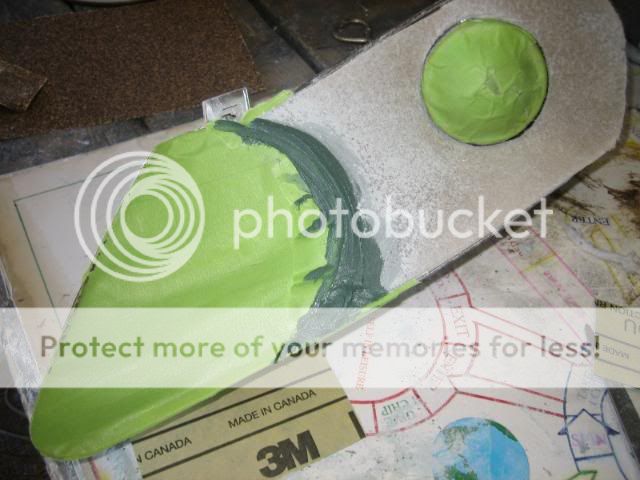
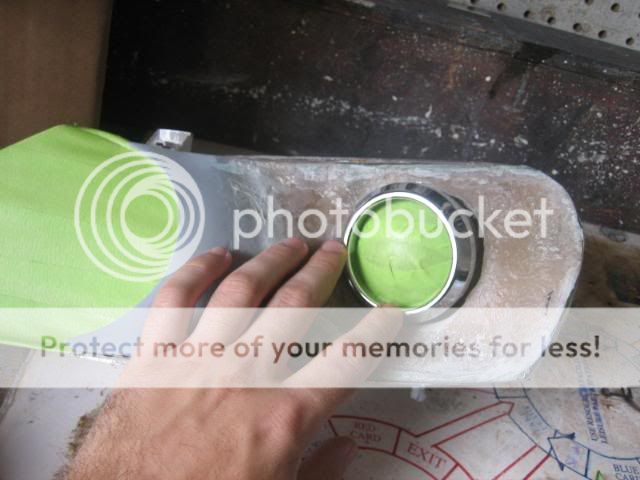
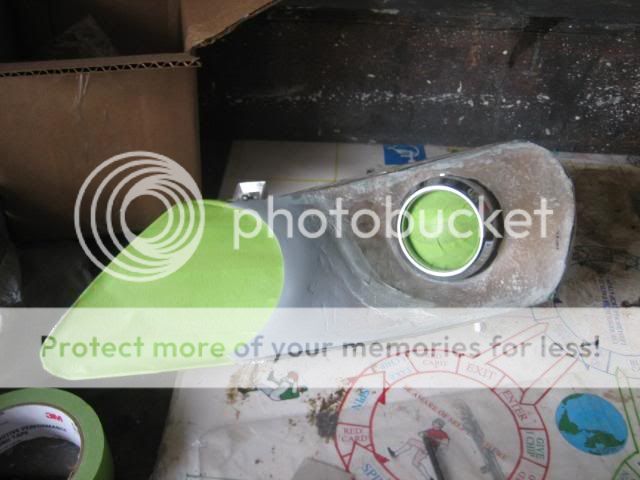
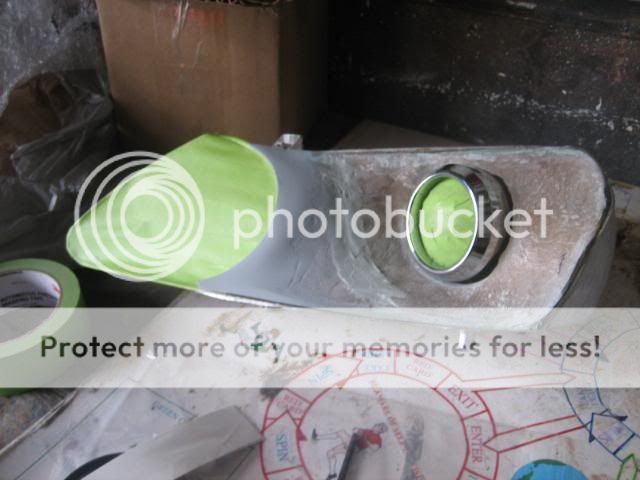
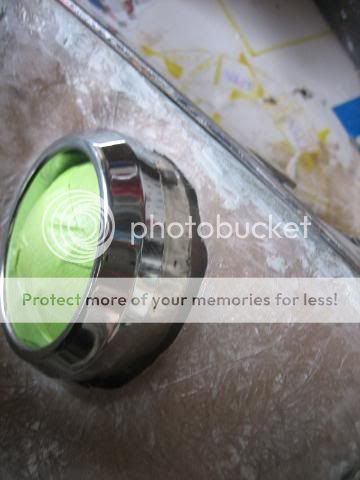
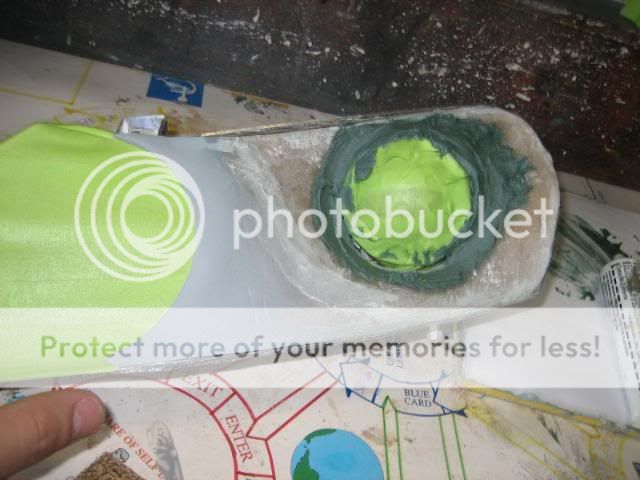
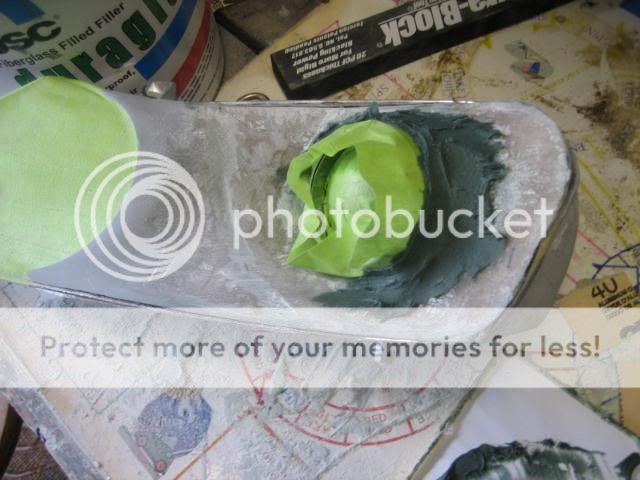
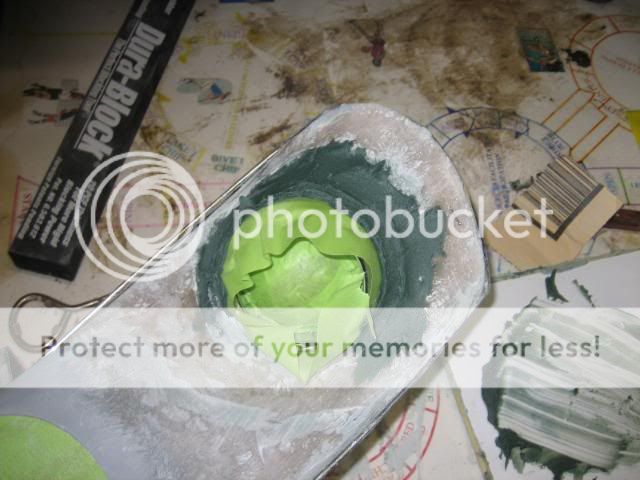
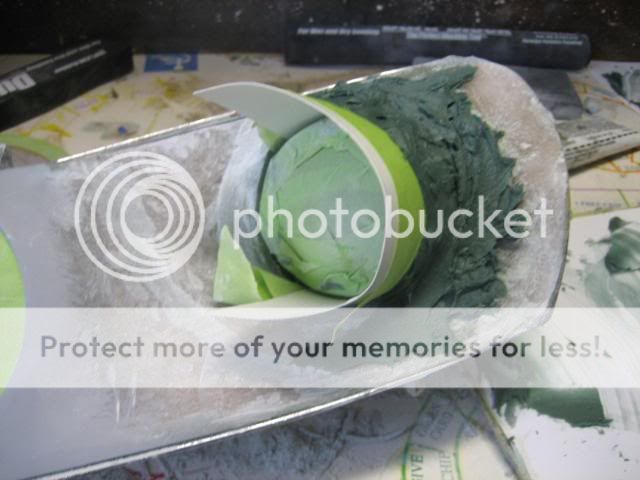
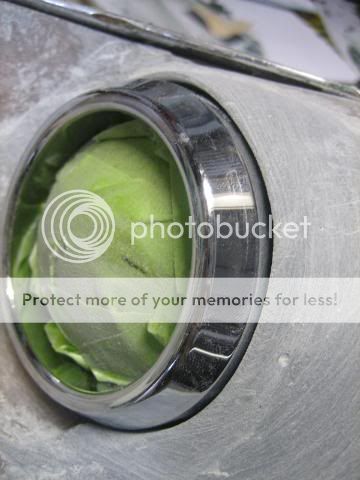
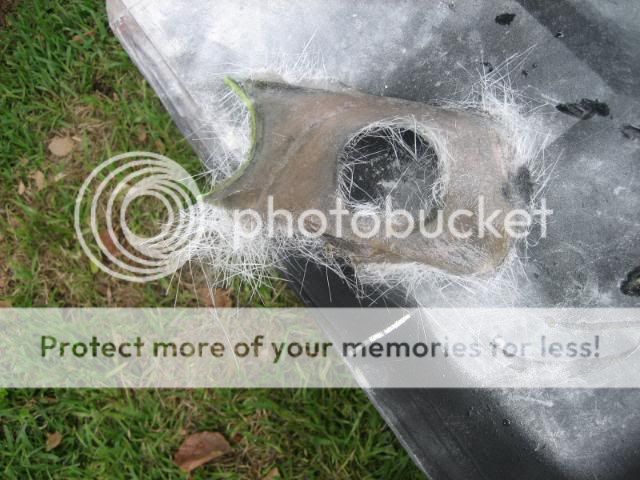
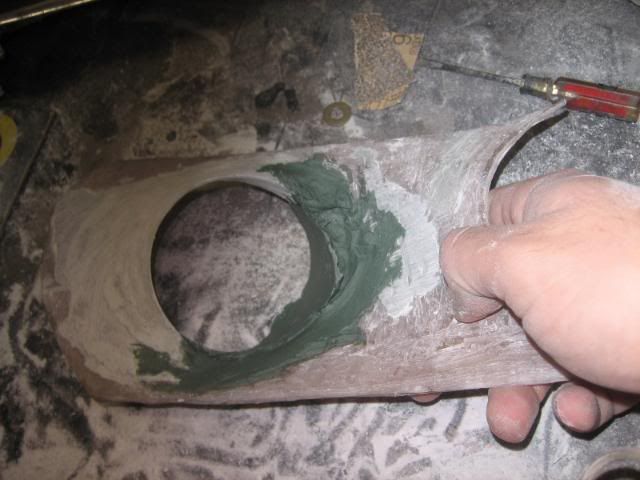
Here is the tweeter pod. I had to make a custom set to fit the tweeters. I only had one tweeter cup to work with, so I decided to just make my own. I use PVC for this and cut it bigger to size. A few passes with the filler and I got it perfect. I am good with tedious items as this is. The tweeter will get wrapped in two layers of electrical tape for a slight pressure fit, then 2 dabs of hot glue from the back will secure it.
Speaker and Tweeter Pod Placement
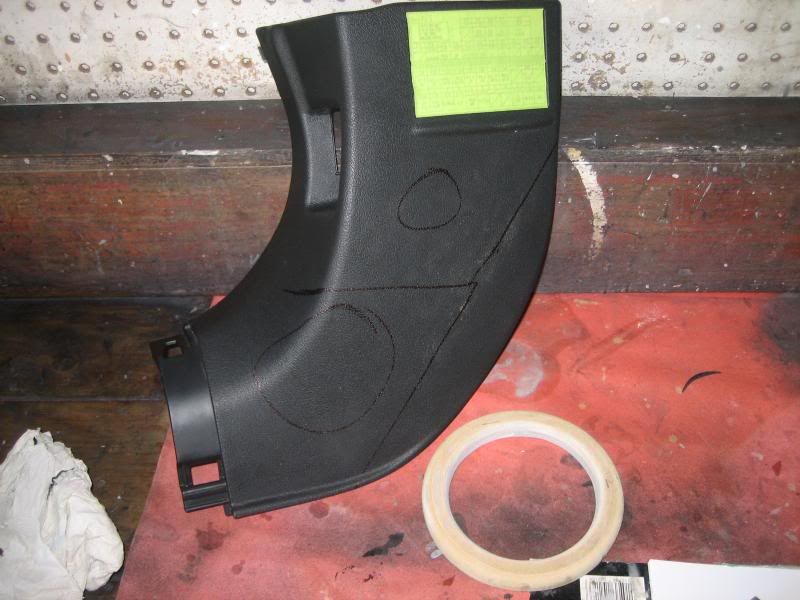
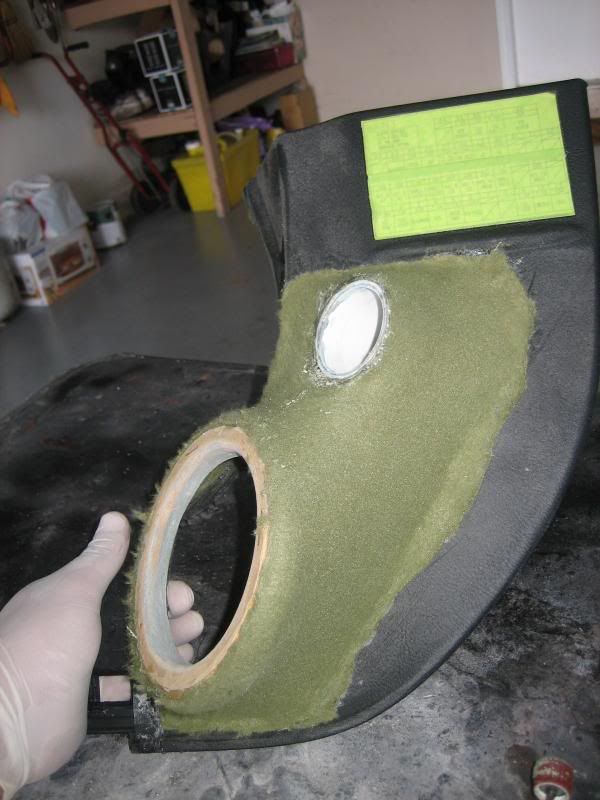
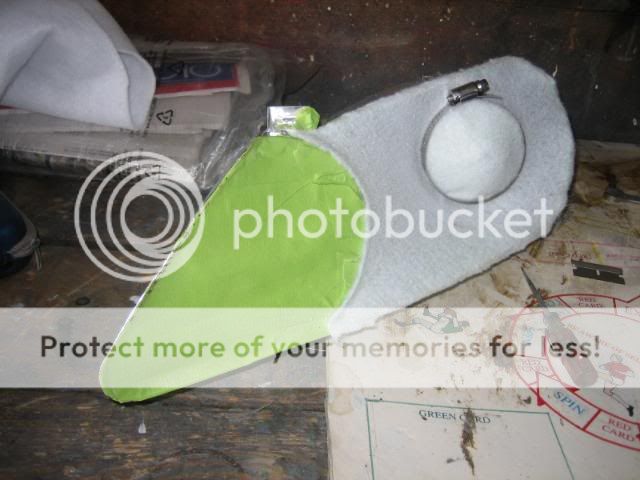
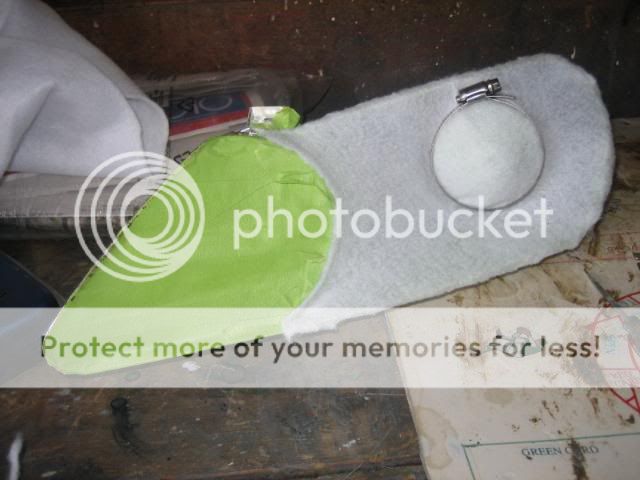
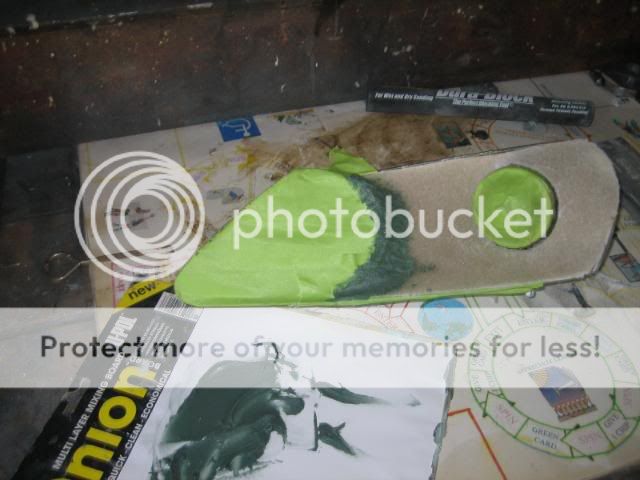
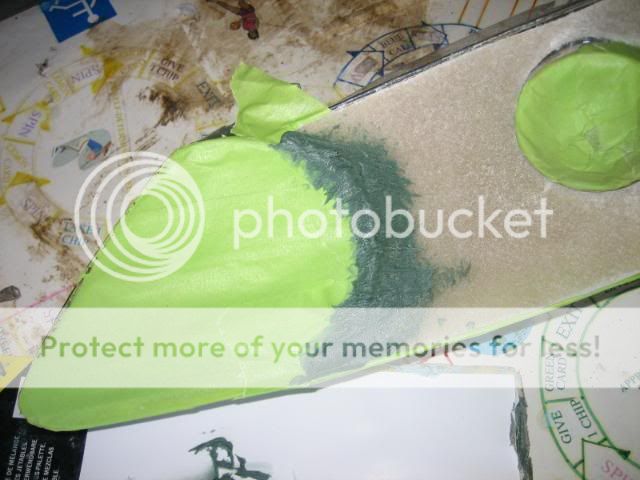
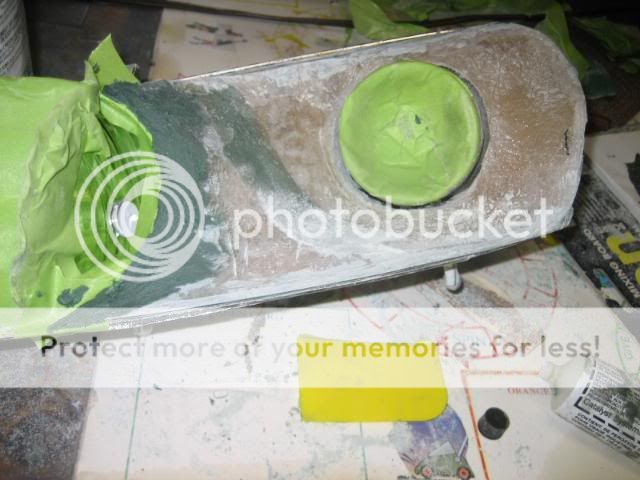
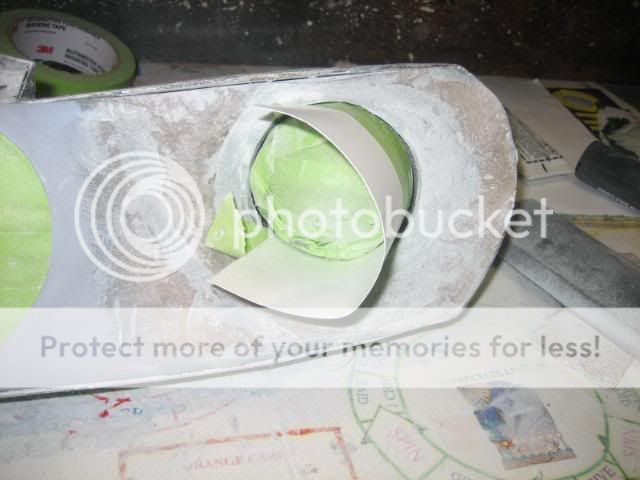
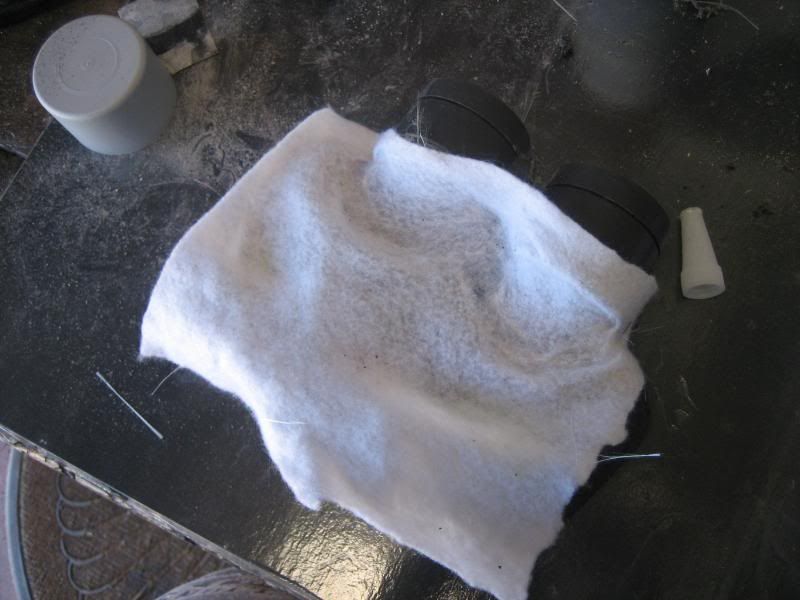
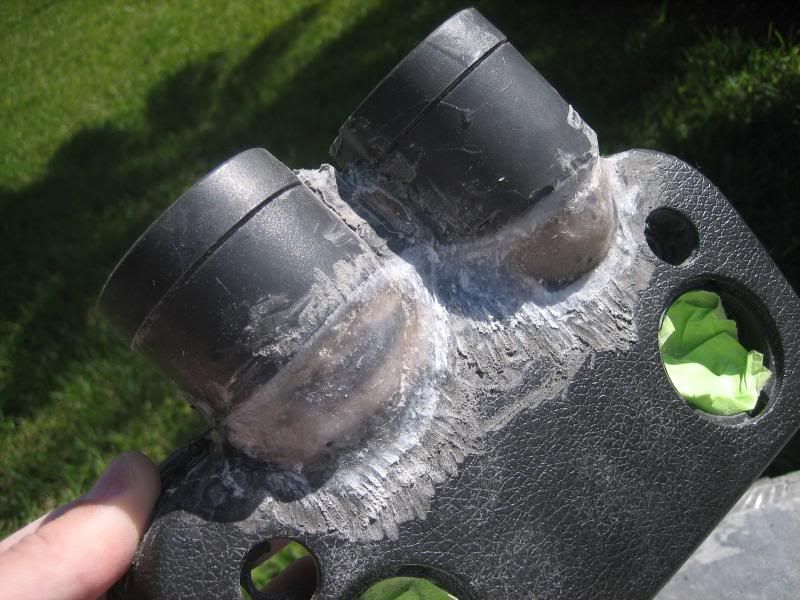
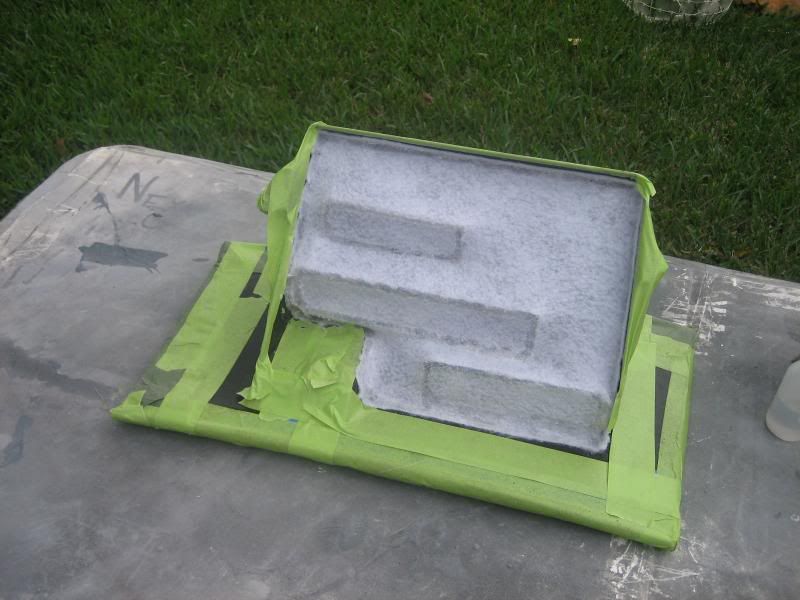
Fleece stretched here. Not the prettiest, but I could not stretch to the edges because the dead pedal sits against the fit panel, so far side of the panel needs to remain intact. I obviously cannot wrap to the oppose side because of the hood release. Getting the perfect wrapping job does not bother me as I know it is easy to fix up.
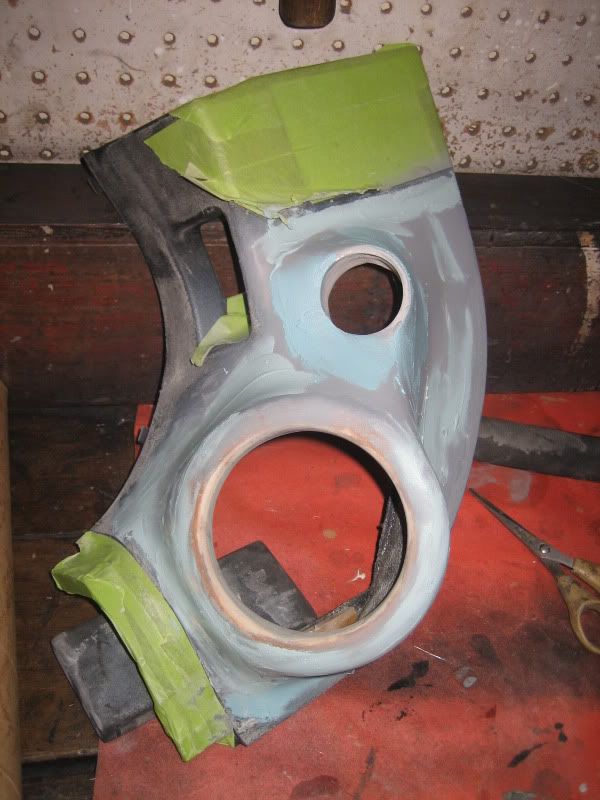
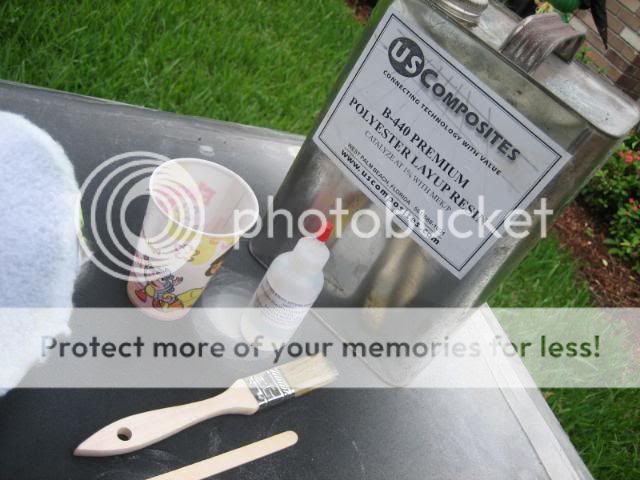
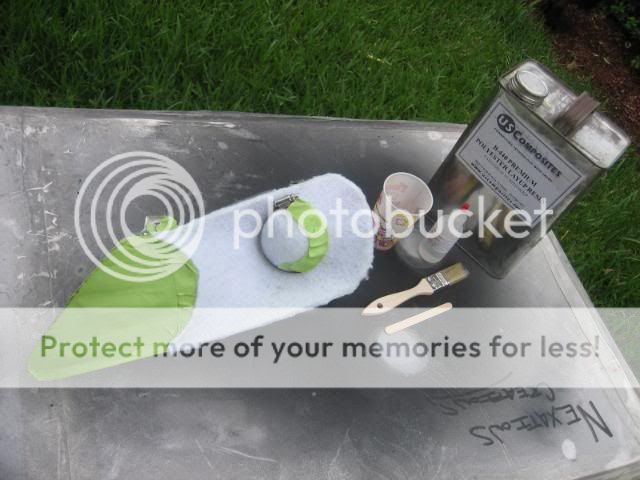
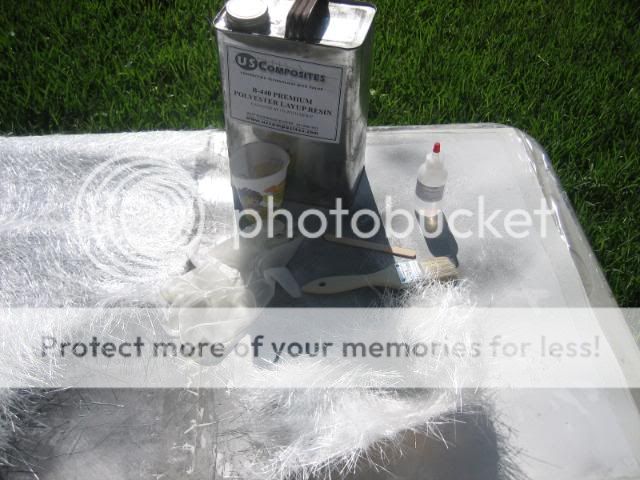
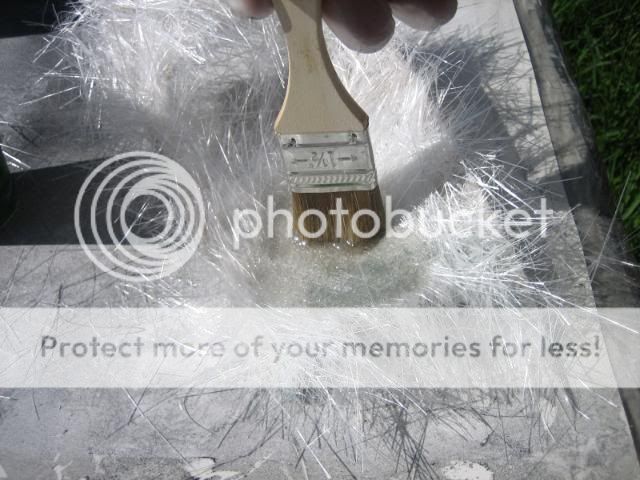
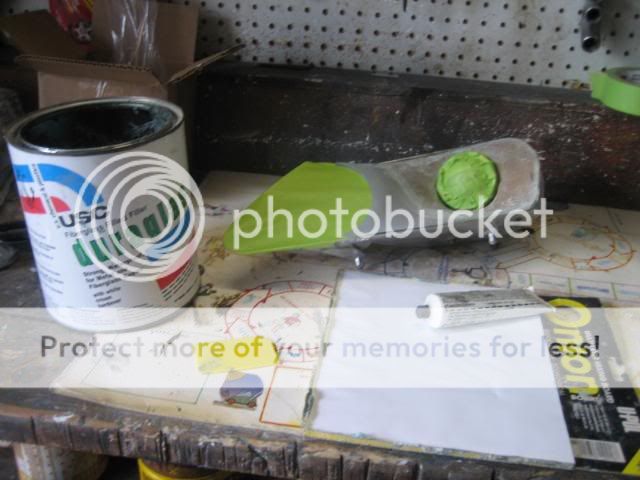
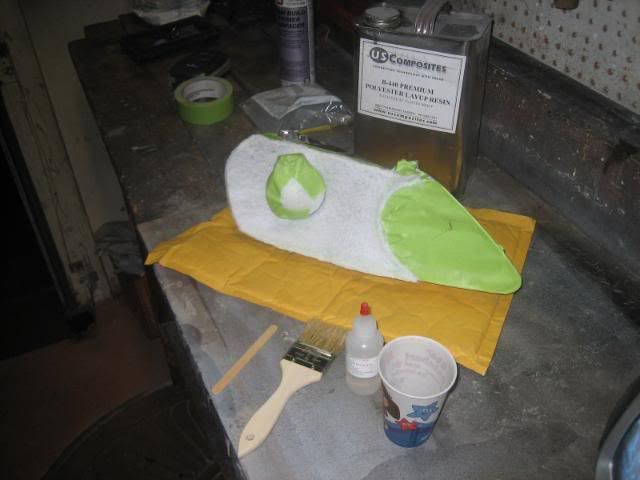
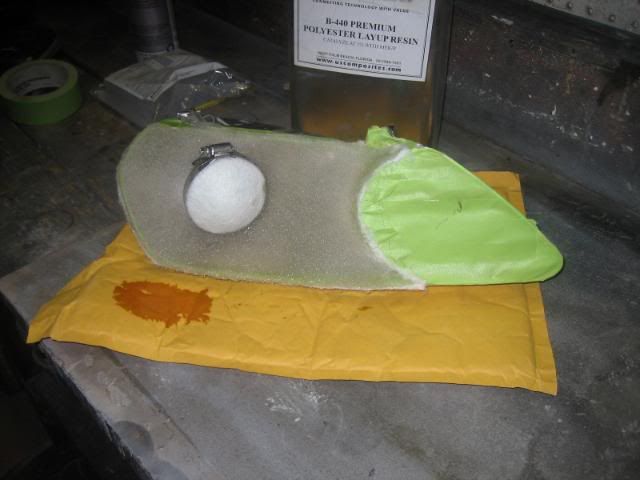
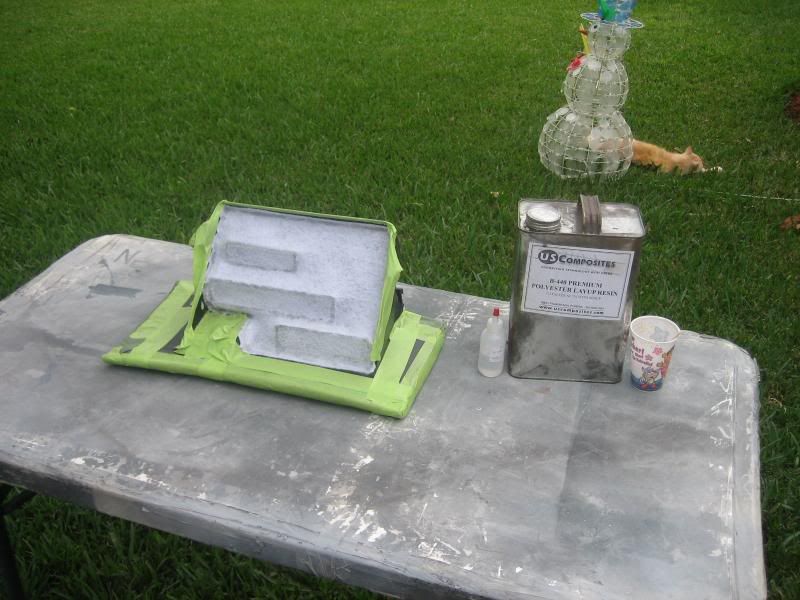
Some B440 Polyester Resin
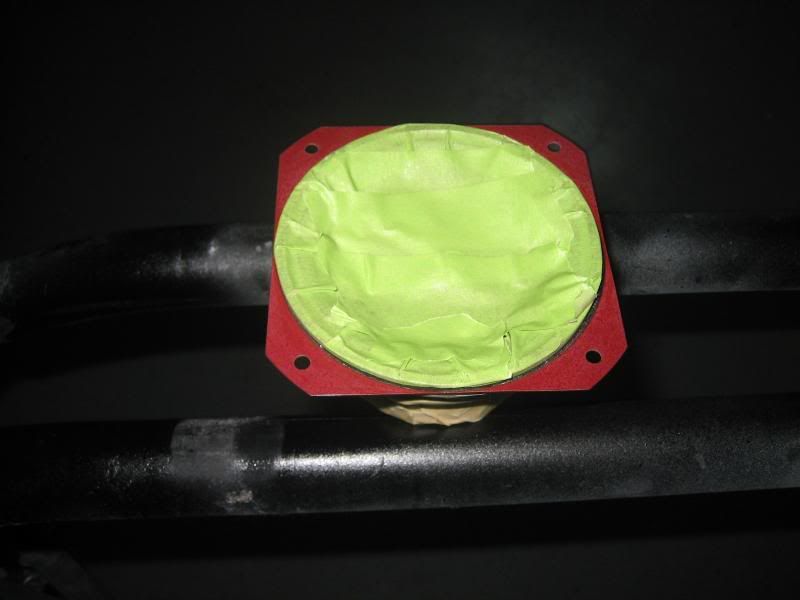
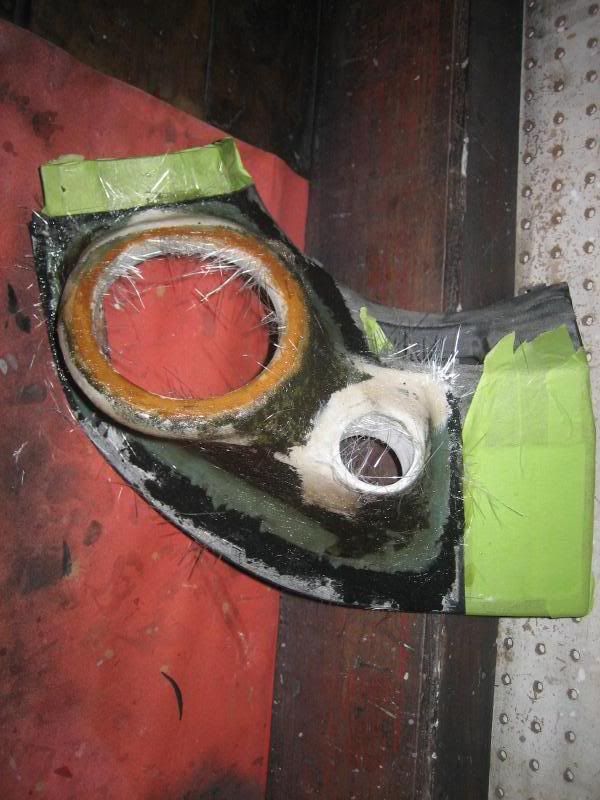
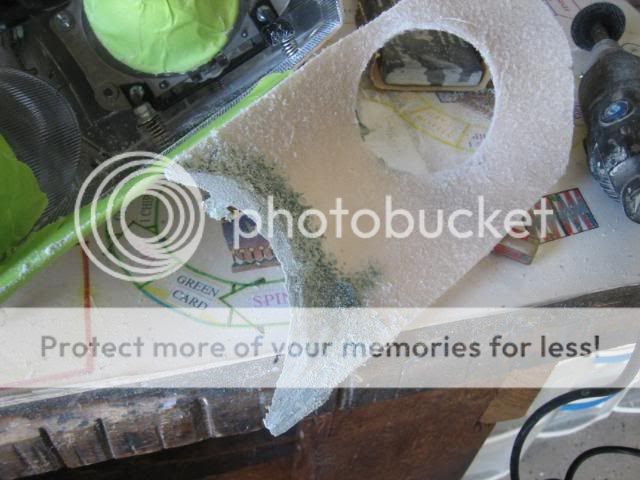
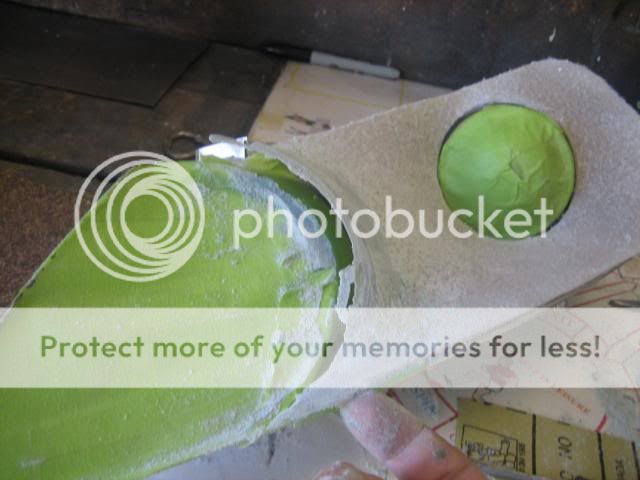
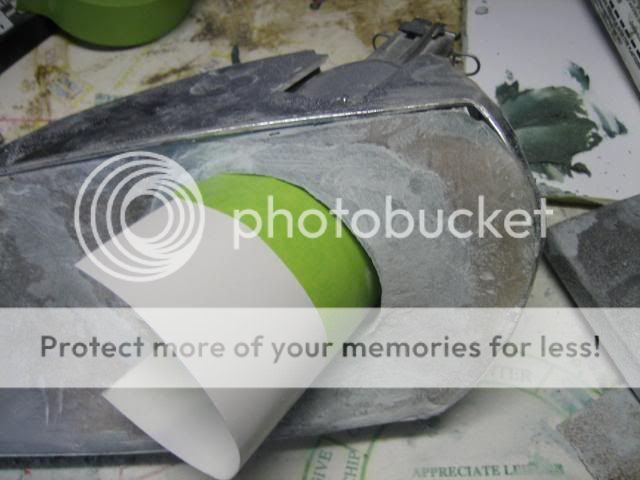
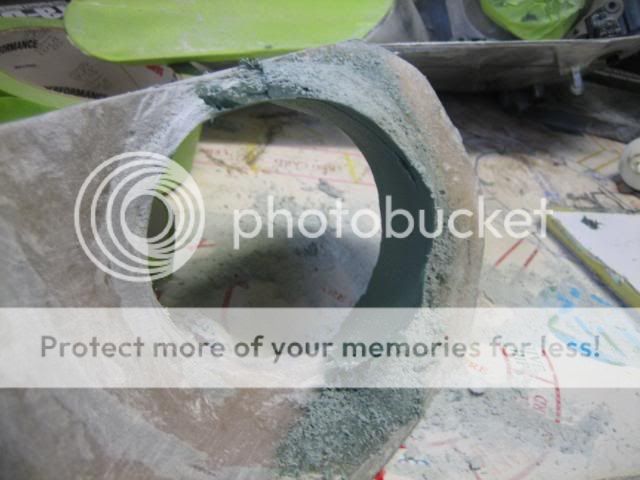
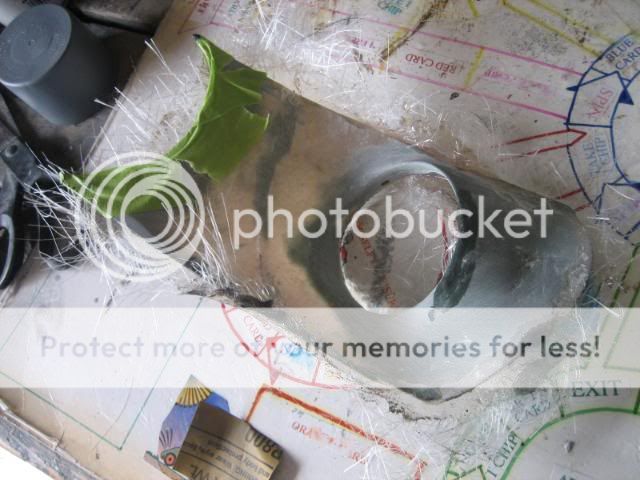
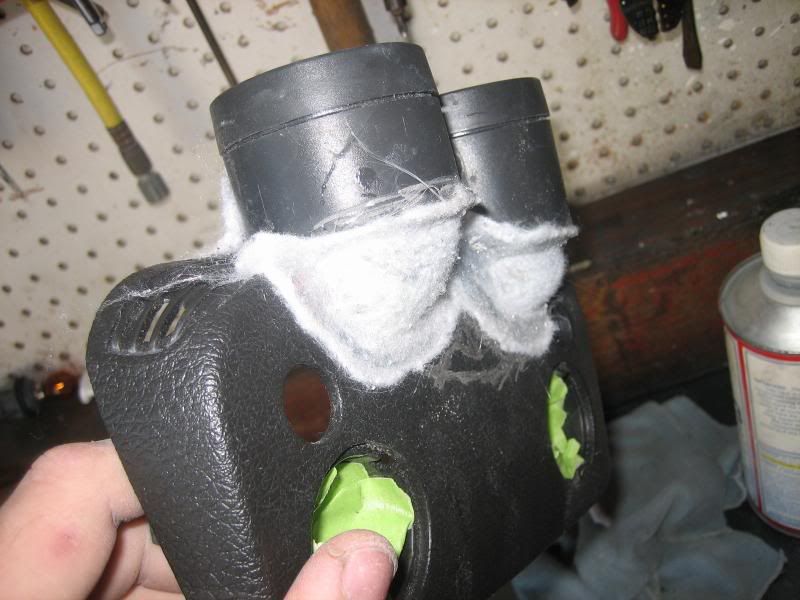
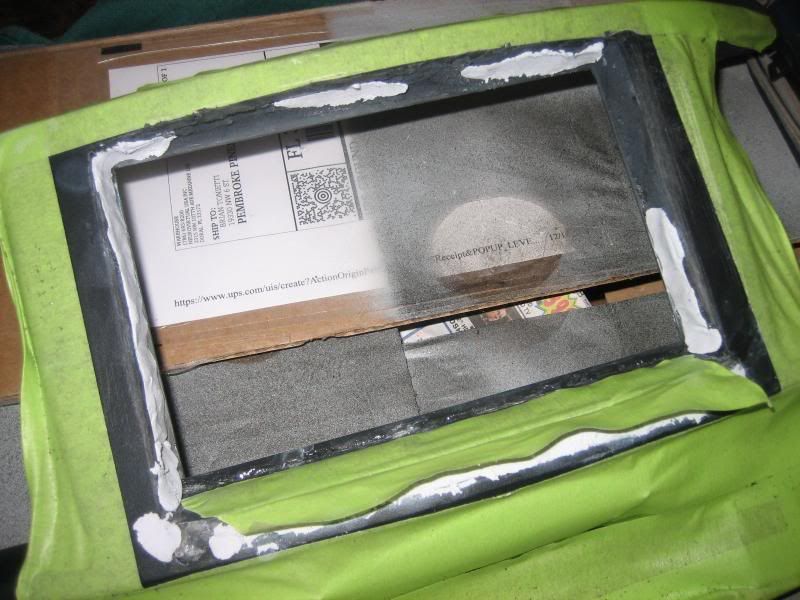
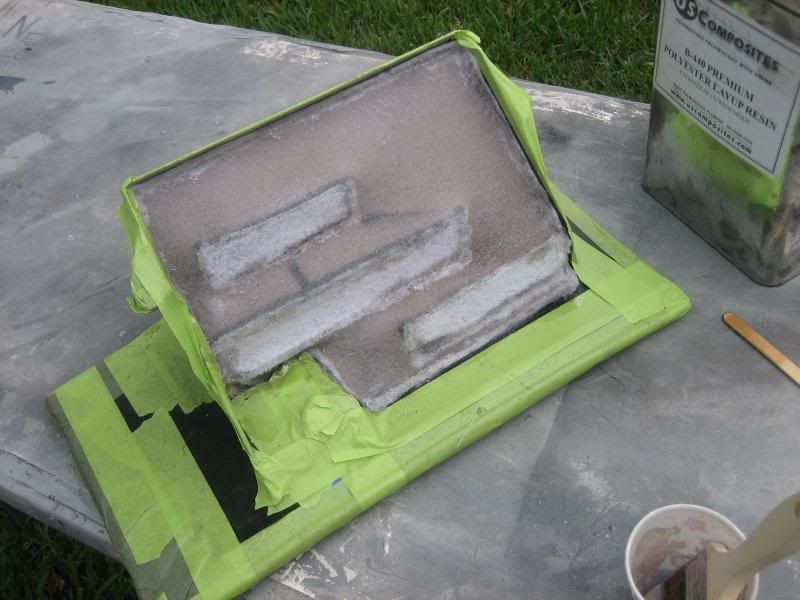
Here is where I sanded down the fleece and feathered in the edges with duraglass so that I could lay down the glass. I prefer to lay down the glass on the formed structure for more support. As you can see the rough edges that were CA glued with the fleece, easily turn into a nice smooth transaction in this step,
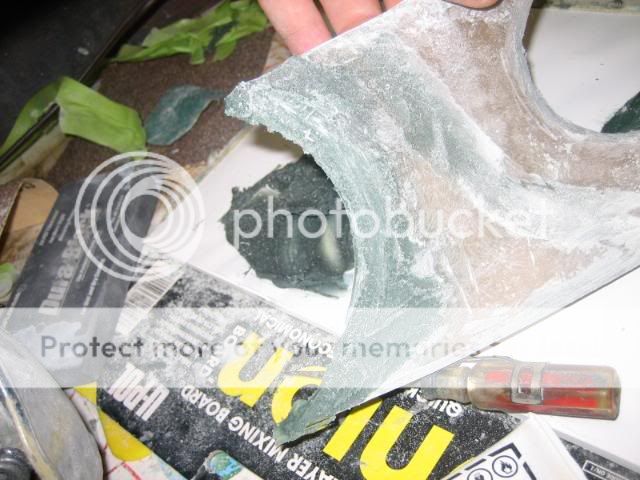
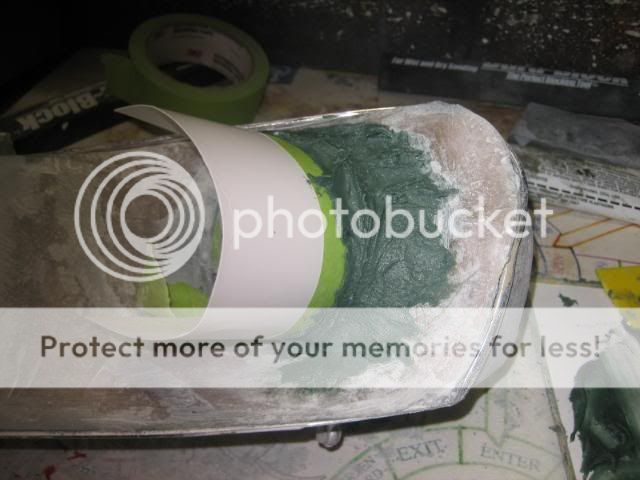
So here is where I put down some special epoxy around the brittle edges. Since I do not want to get the fiberglass to close to my perfect edges within my tweeter pod, I use the epoxy as a structural bond between the PVC and fleece, then I can glass over that, but not so close to the edge.
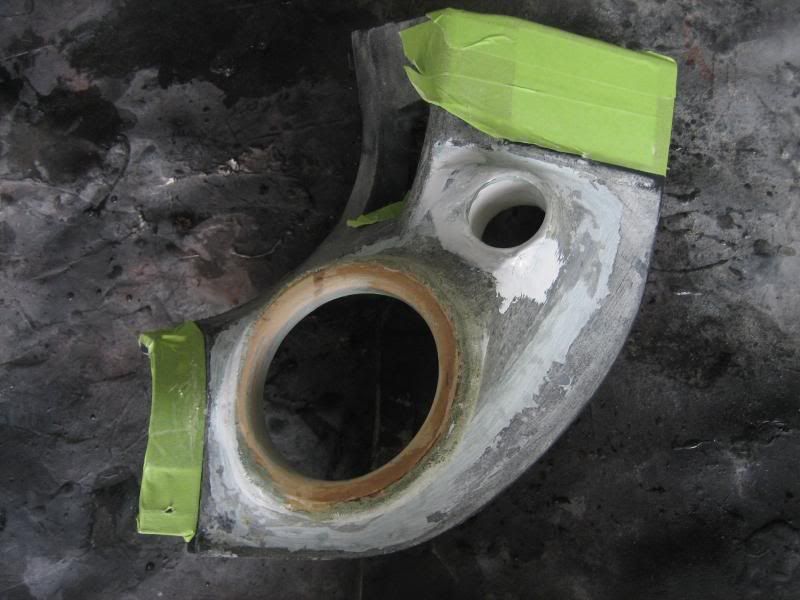
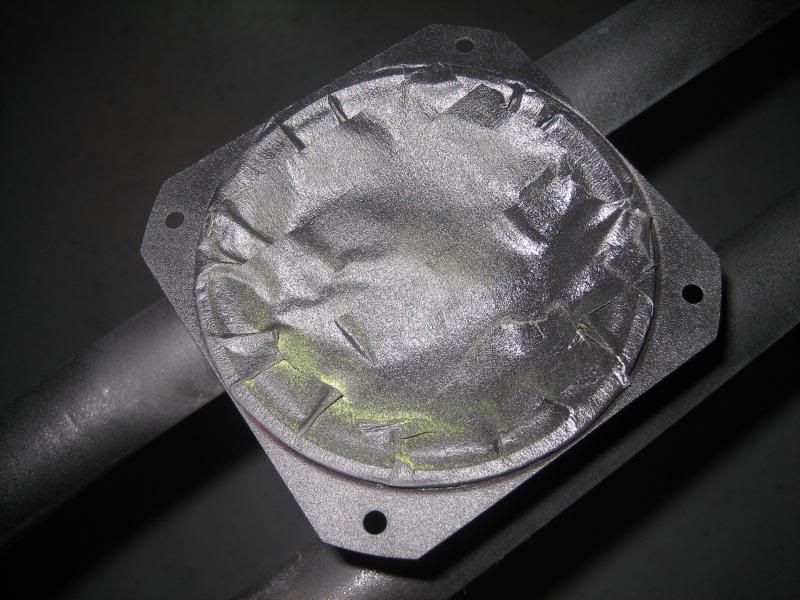
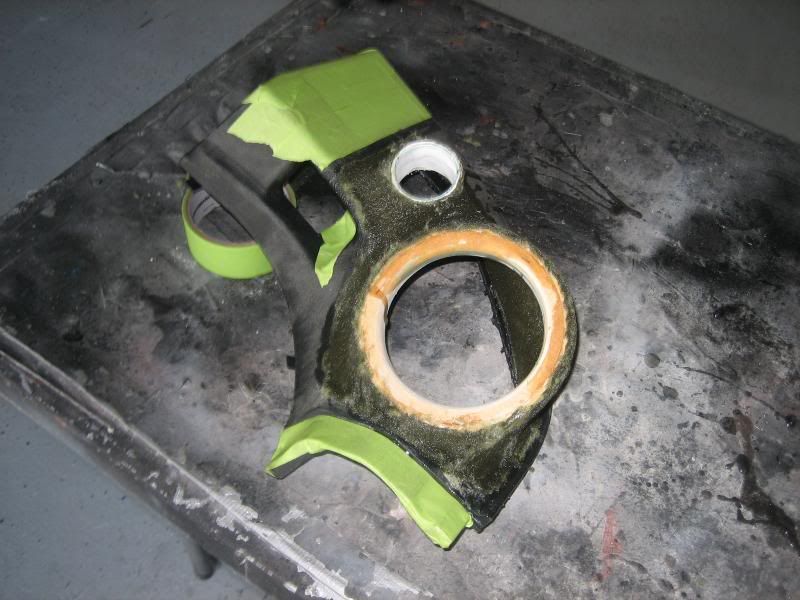
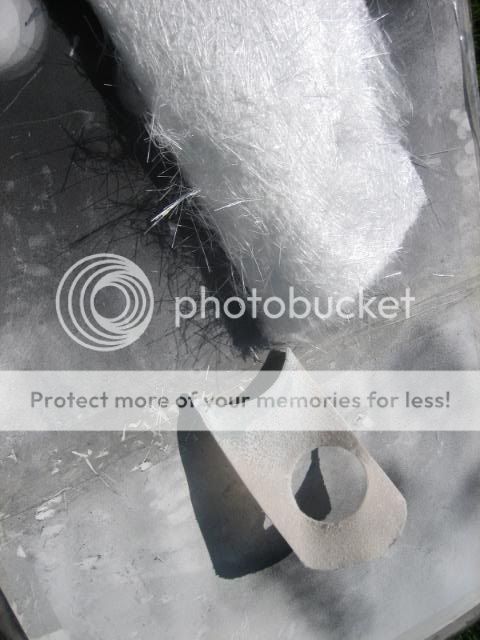
Some 1.5 oz mat
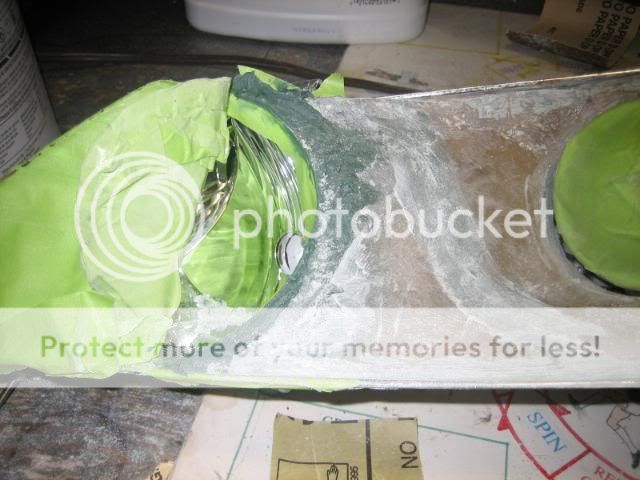
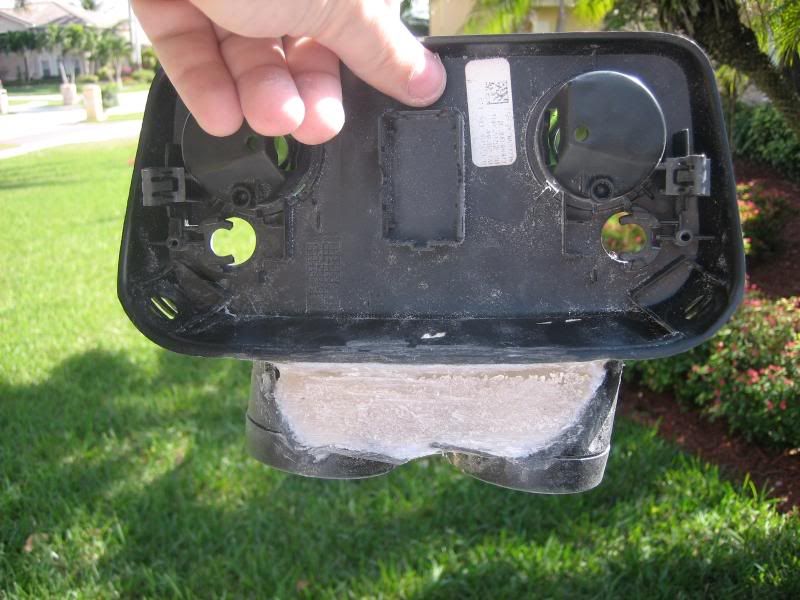
That's all for now, it is all a process from here, since the hard part is done. I am going to do the passenger side now and bring that up to the same stage as this one.
I started with the midranges. Although the rings will cover this area, I still wanted it all one color just because!
I got a set of rings from epicenterdesigns, they were PERFECT! Thanks Jon. I filled them a bit to fit how I wanted them.
Here I was mounting the ring in the best position according to space. the driver's side kick panel is very tight. There is a small area to work within the panel, so the positioning had to be precise. Owner wanted speakers facing dome light.
Here is the tweeter pod. I had to make a custom set to fit the tweeters. I only had one tweeter cup to work with, so I decided to just make my own. I use PVC for this and cut it bigger to size. A few passes with the filler and I got it perfect. I am good with tedious items as this is. The tweeter will get wrapped in two layers of electrical tape for a slight pressure fit, then 2 dabs of hot glue from the back will secure it.
Speaker and Tweeter Pod Placement
Fleece stretched here. Not the prettiest, but I could not stretch to the edges because the dead pedal sits against the fit panel, so far side of the panel needs to remain intact. I obviously cannot wrap to the oppose side because of the hood release. Getting the perfect wrapping job does not bother me as I know it is easy to fix up.
Some B440 Polyester Resin
Here is where I sanded down the fleece and feathered in the edges with duraglass so that I could lay down the glass. I prefer to lay down the glass on the formed structure for more support. As you can see the rough edges that were CA glued with the fleece, easily turn into a nice smooth transaction in this step,
So here is where I put down some special epoxy around the brittle edges. Since I do not want to get the fiberglass to close to my perfect edges within my tweeter pod, I use the epoxy as a structural bond between the PVC and fleece, then I can glass over that, but not so close to the edge.
Some 1.5 oz mat
That's all for now, it is all a process from here, since the hard part is done. I am going to do the passenger side now and bring that up to the same stage as this one.
01-04-2012, 04:22 PM
#44
-Brian
Thread Starter
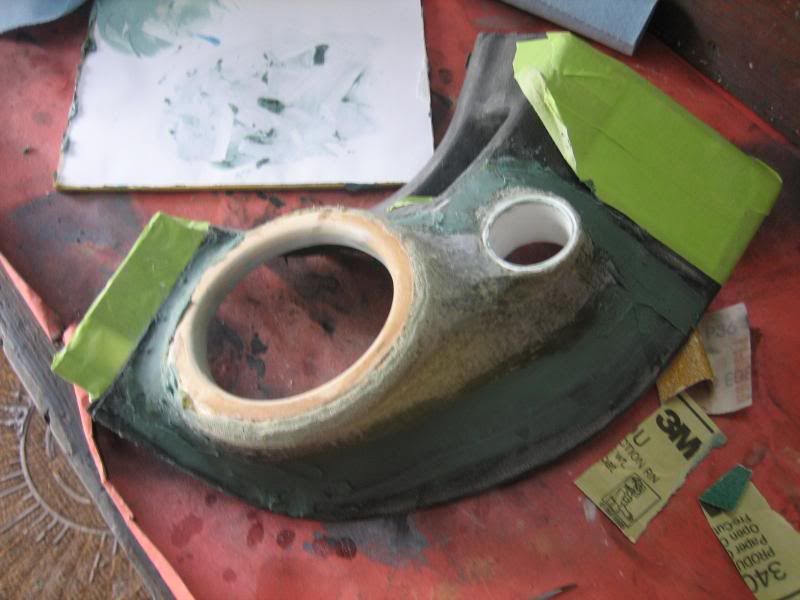
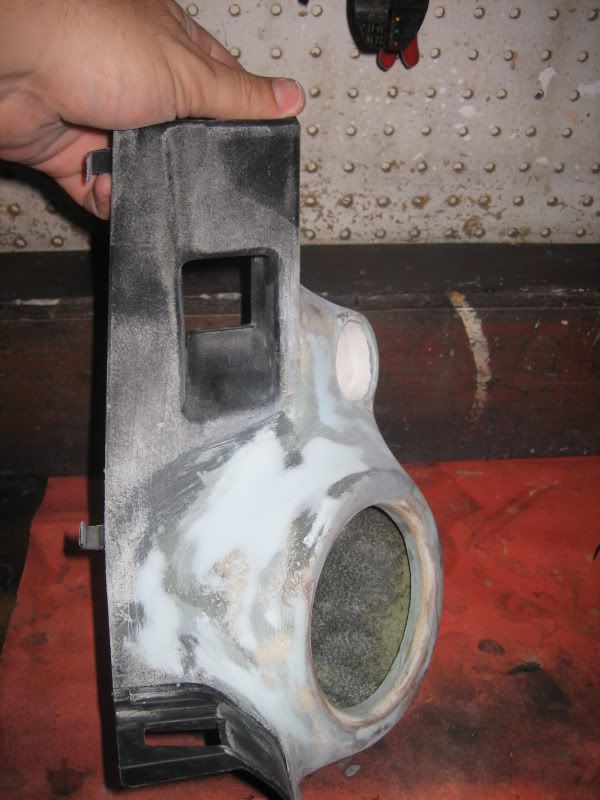
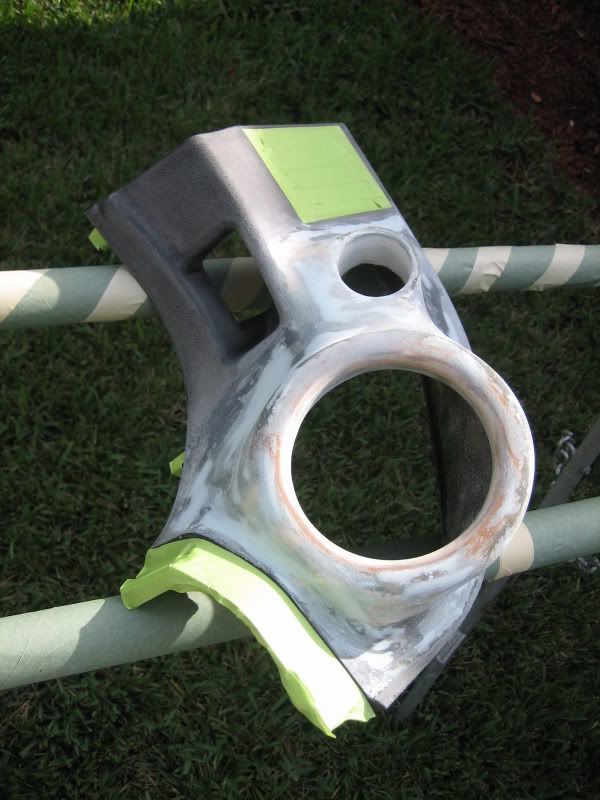
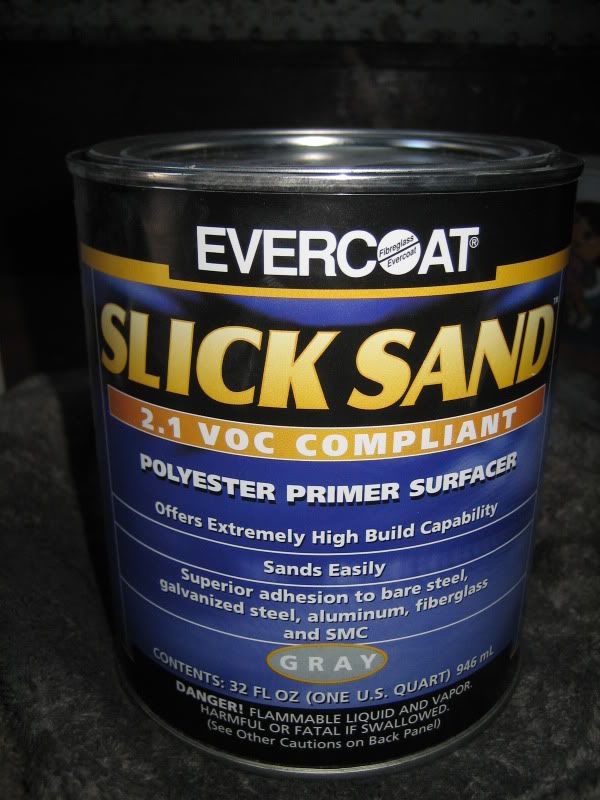
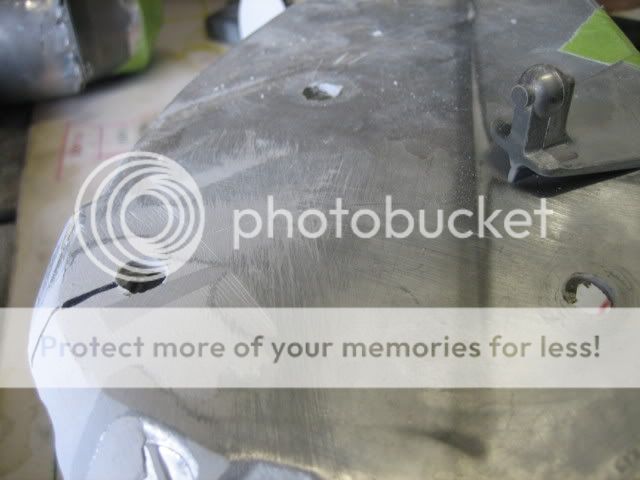
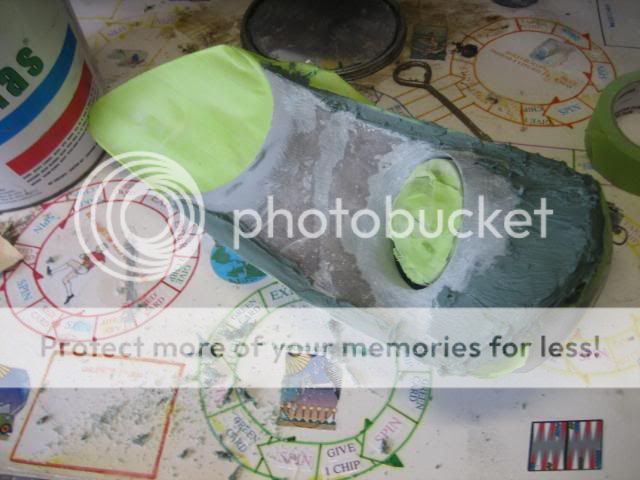
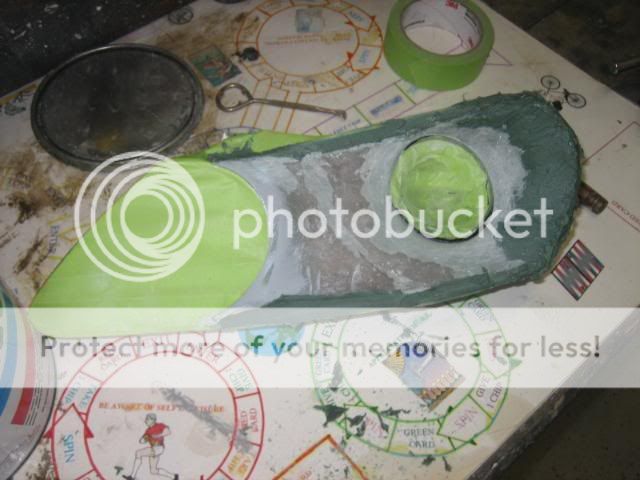
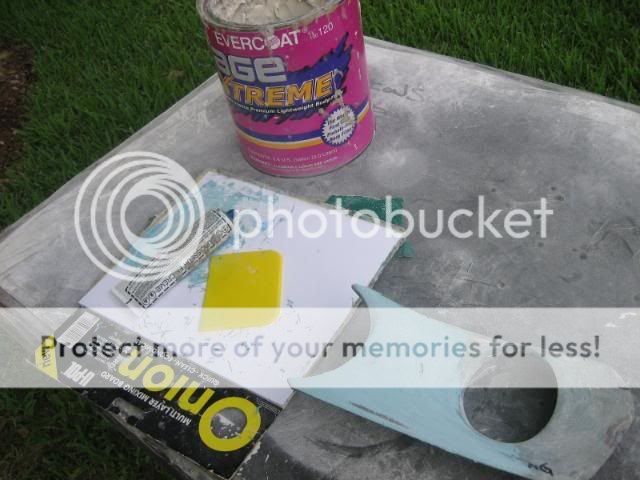
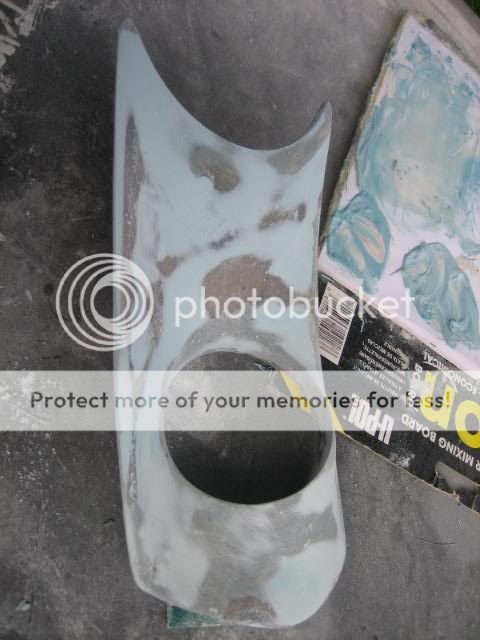
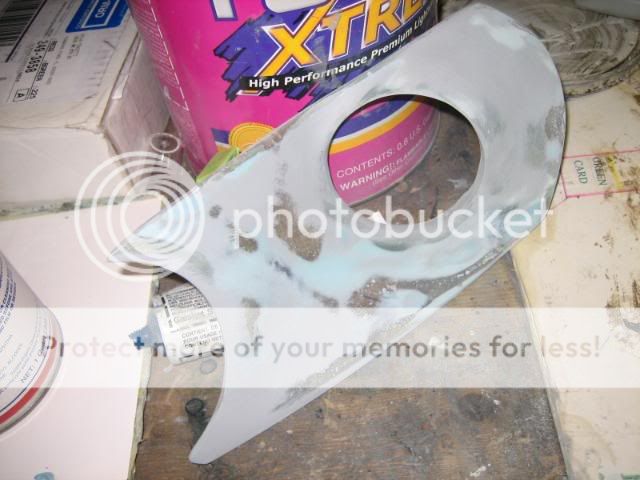
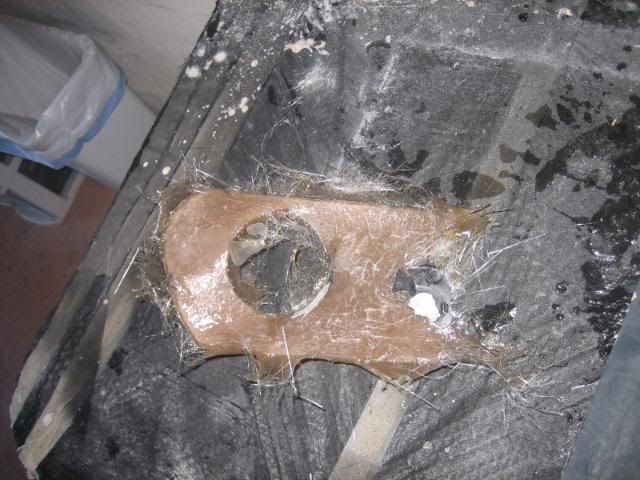
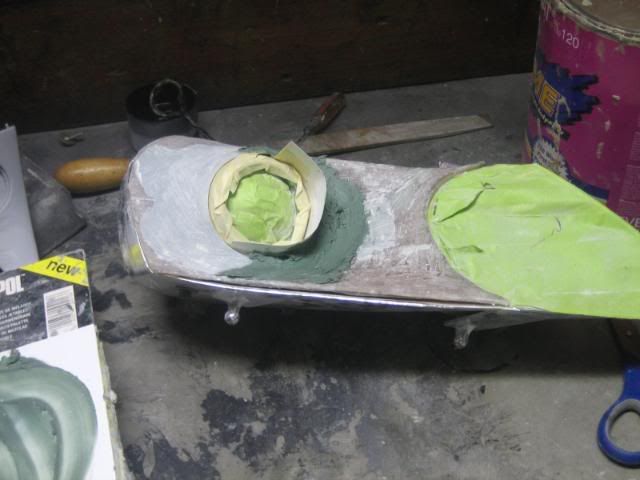
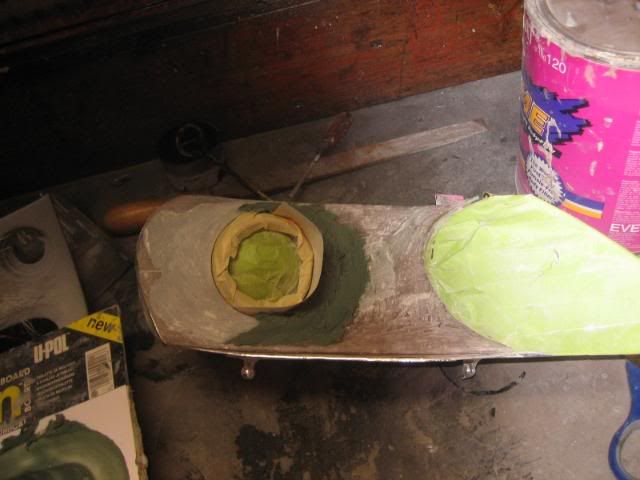
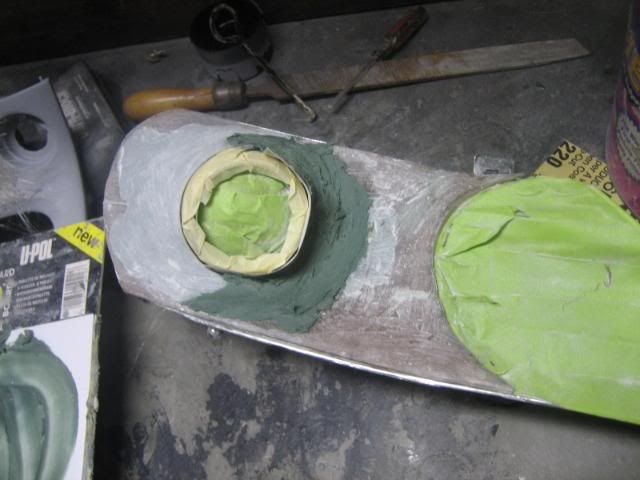
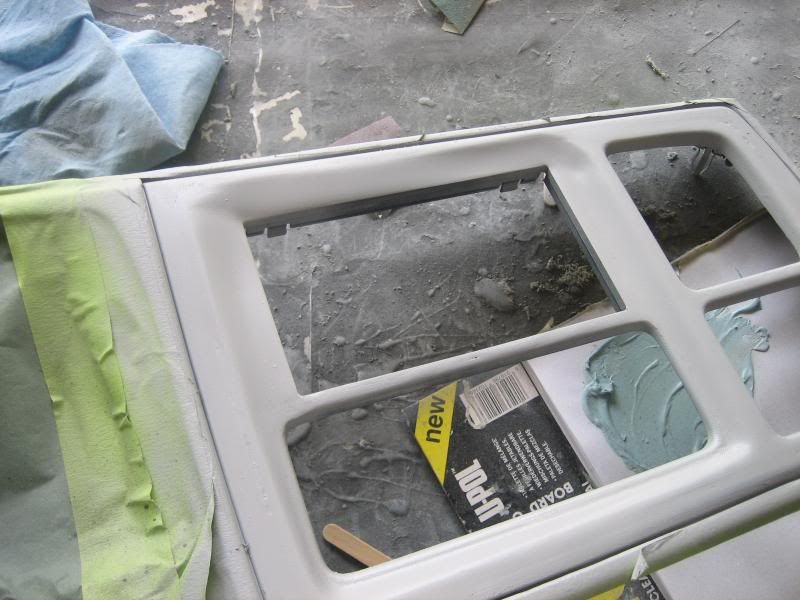
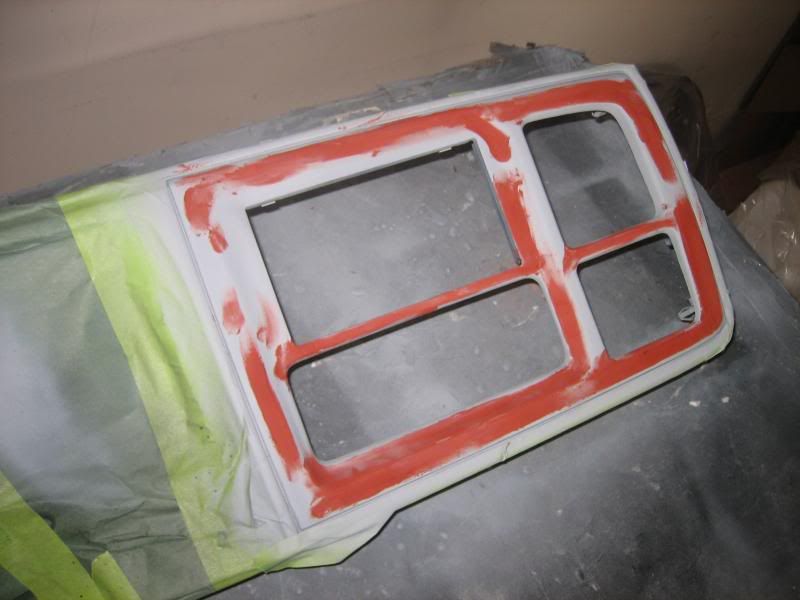
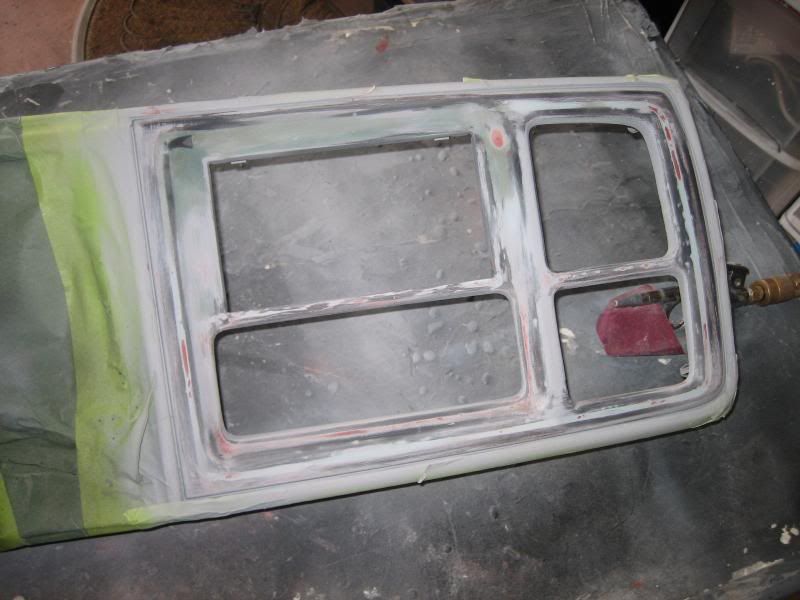
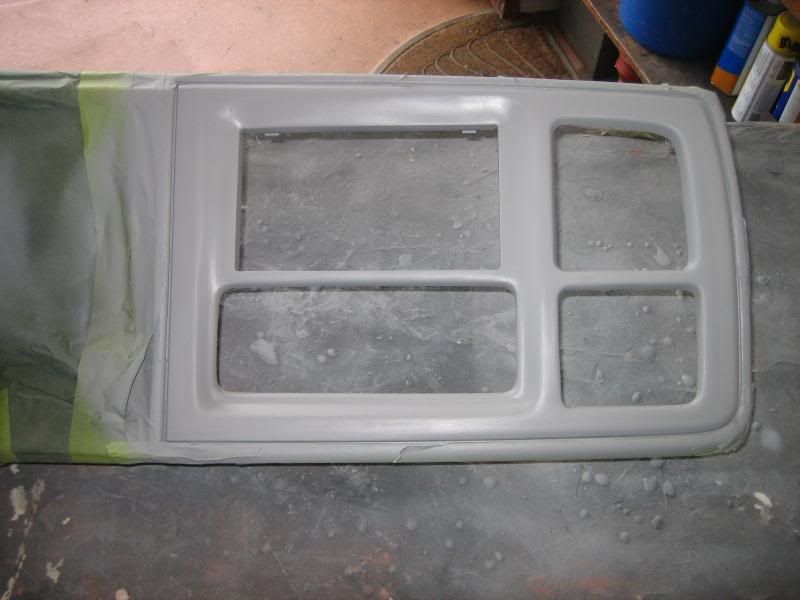
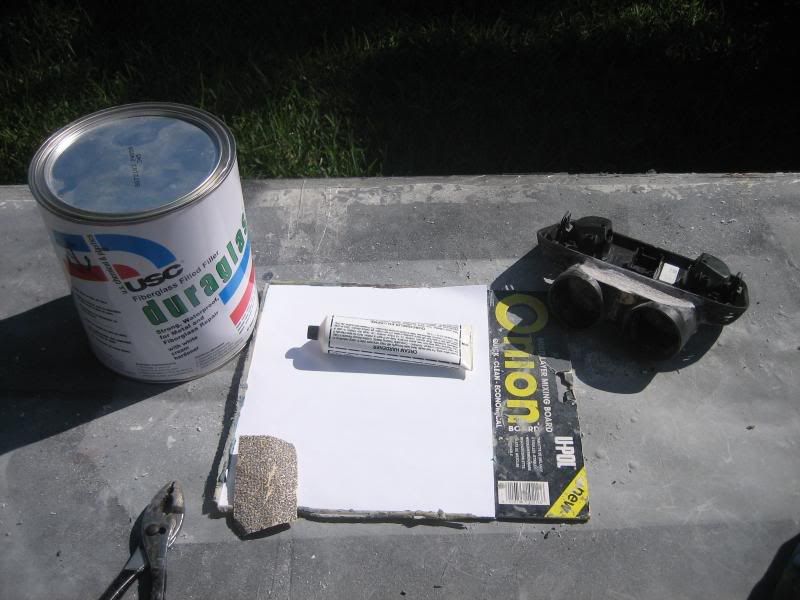
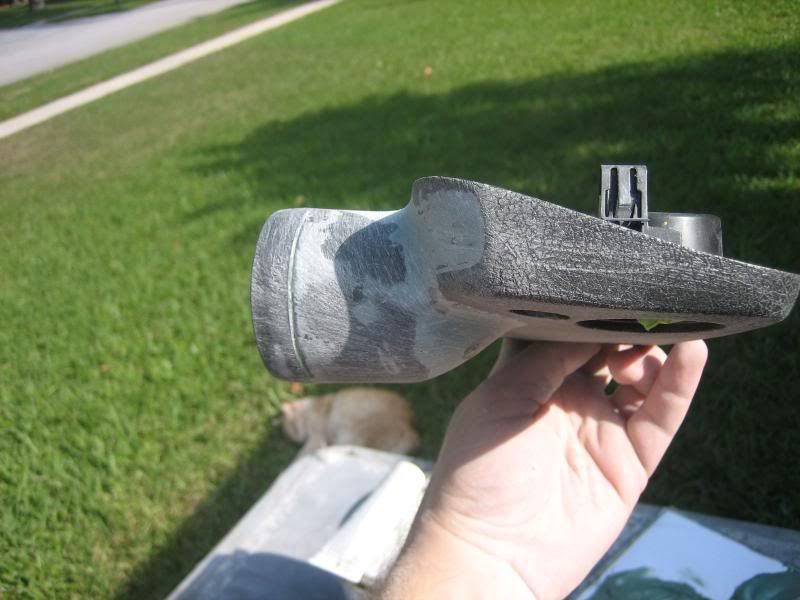
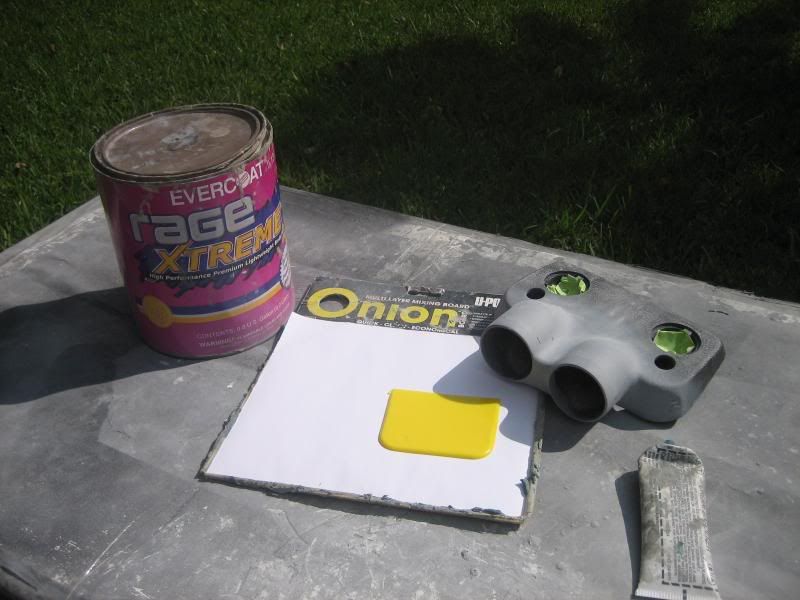
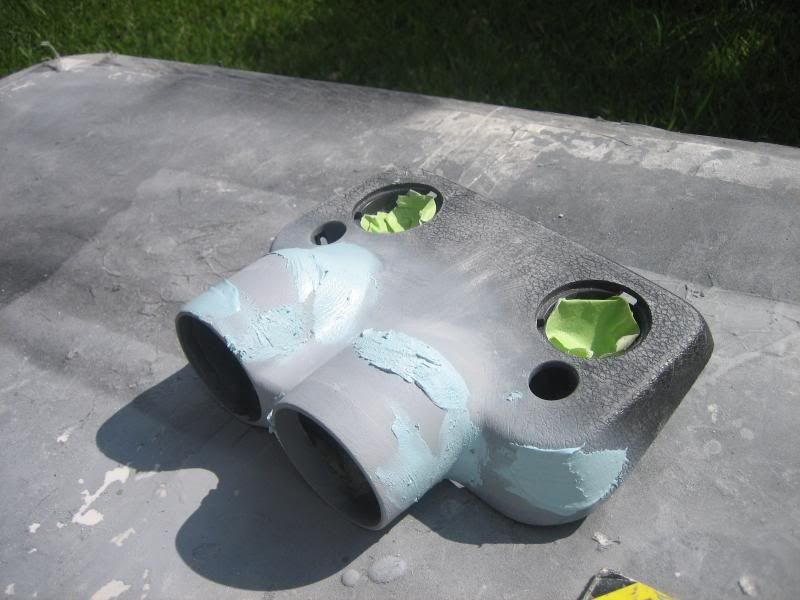
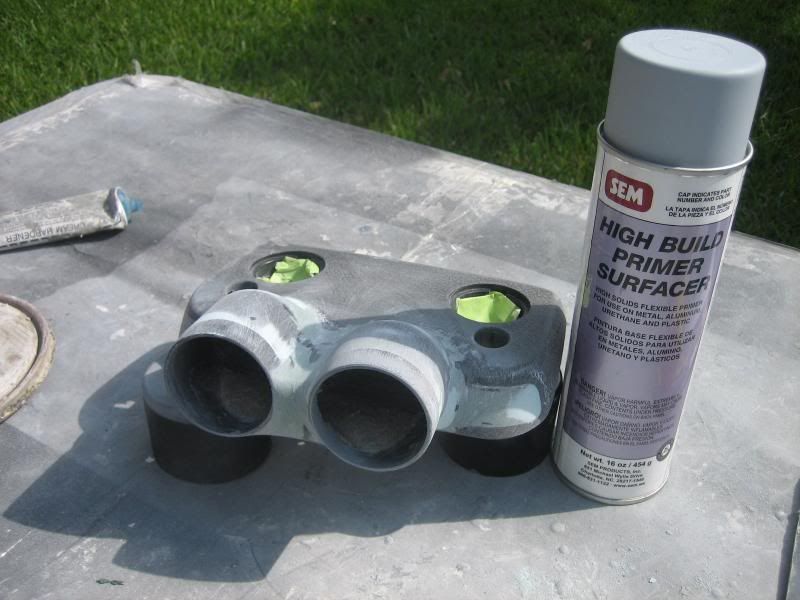
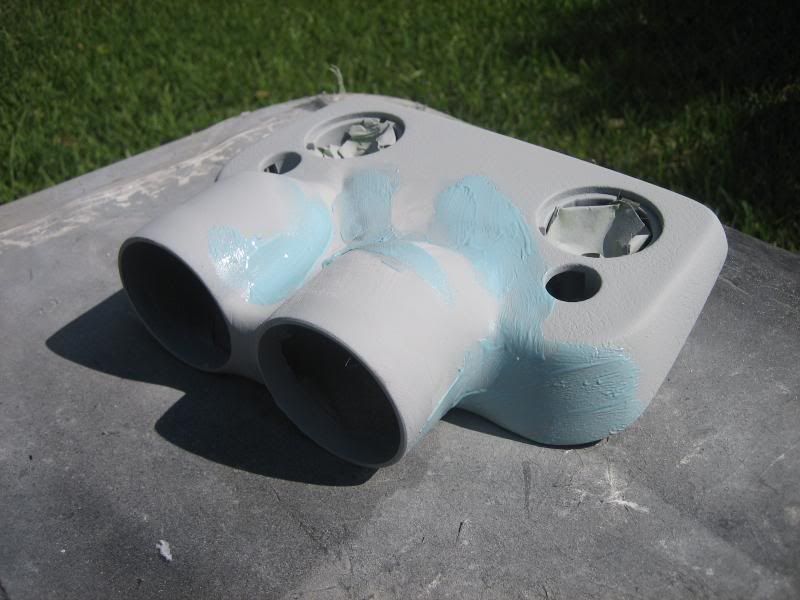
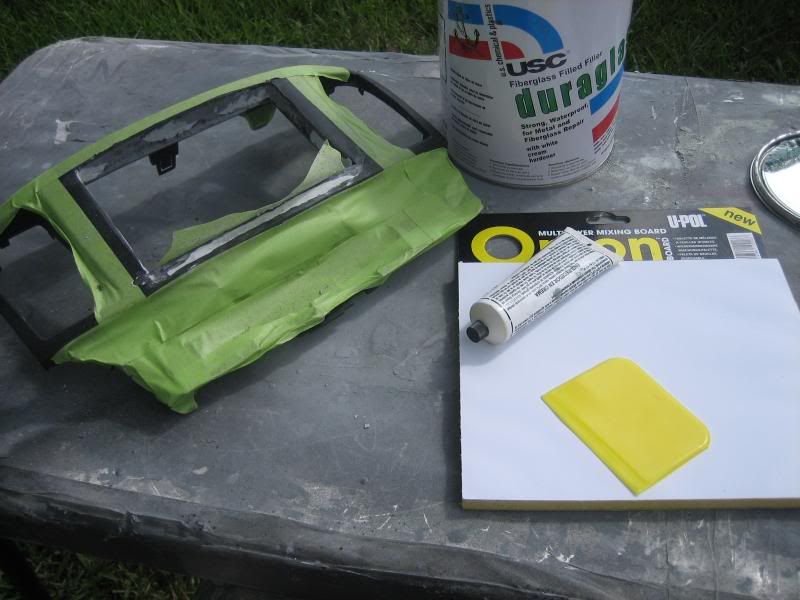
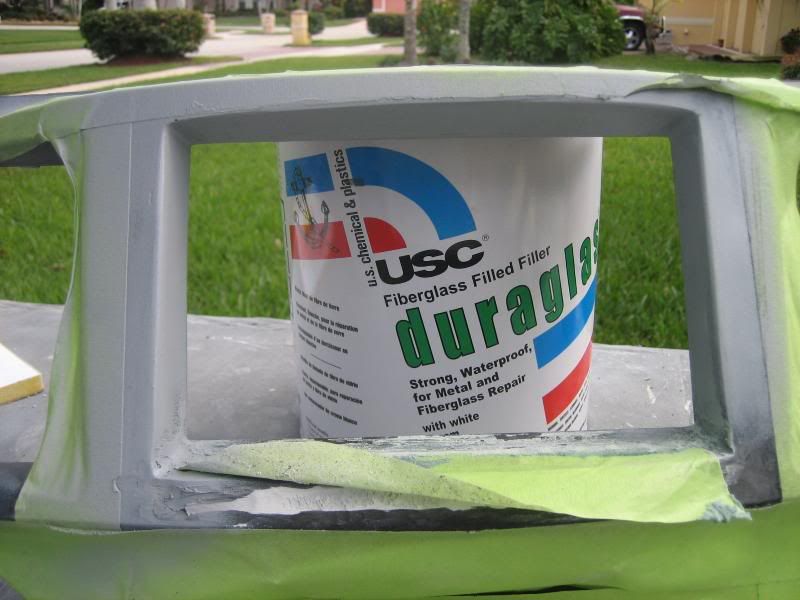
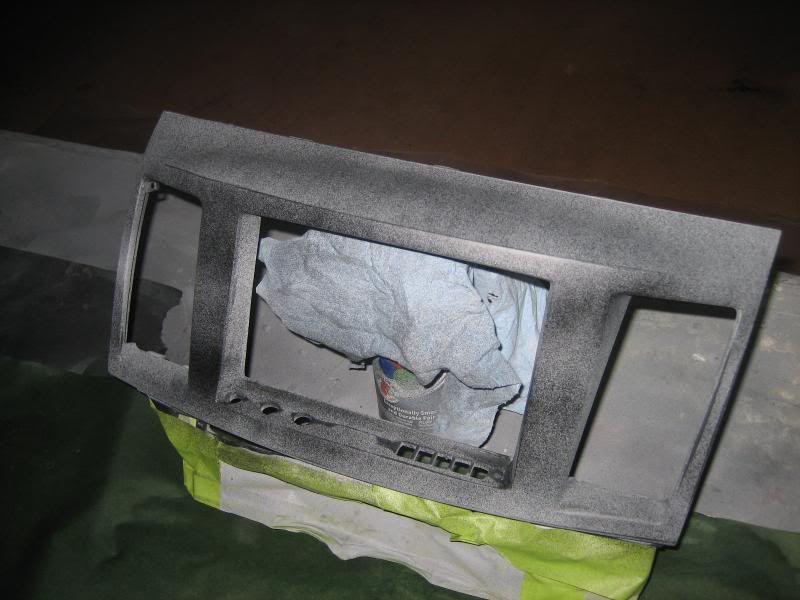
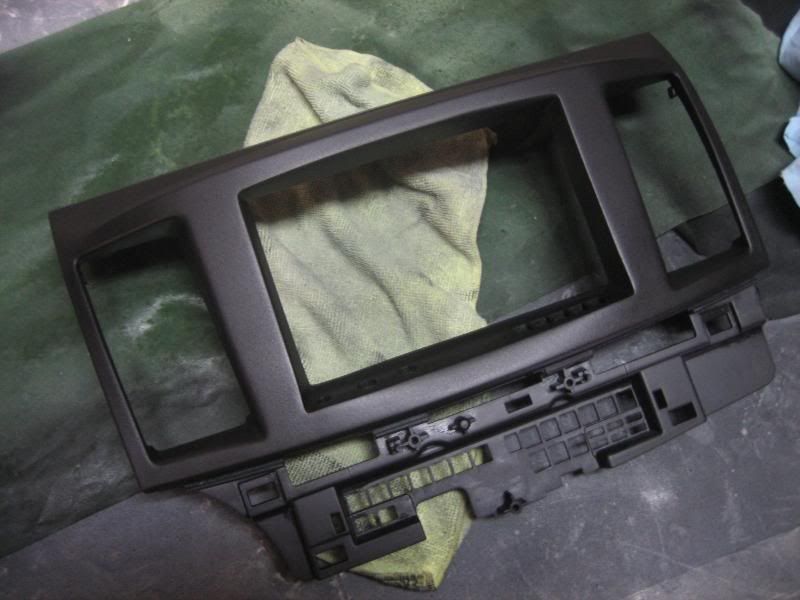
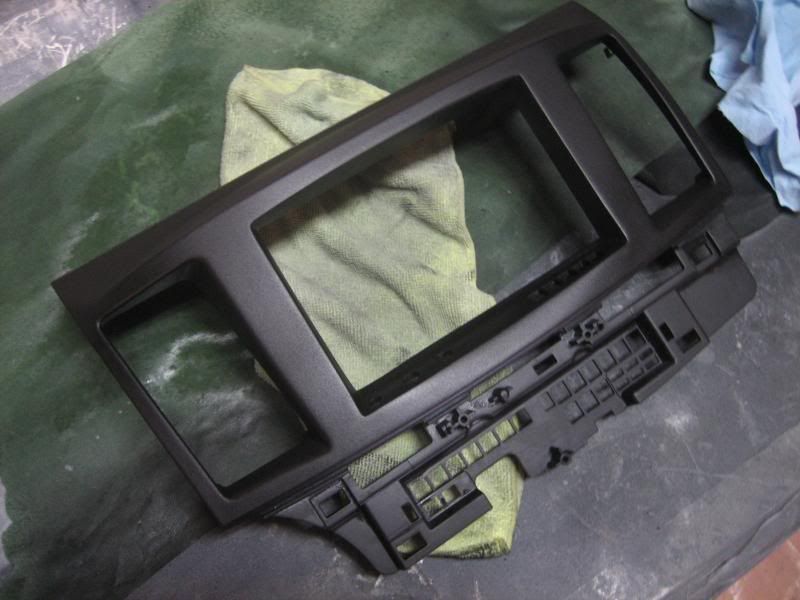
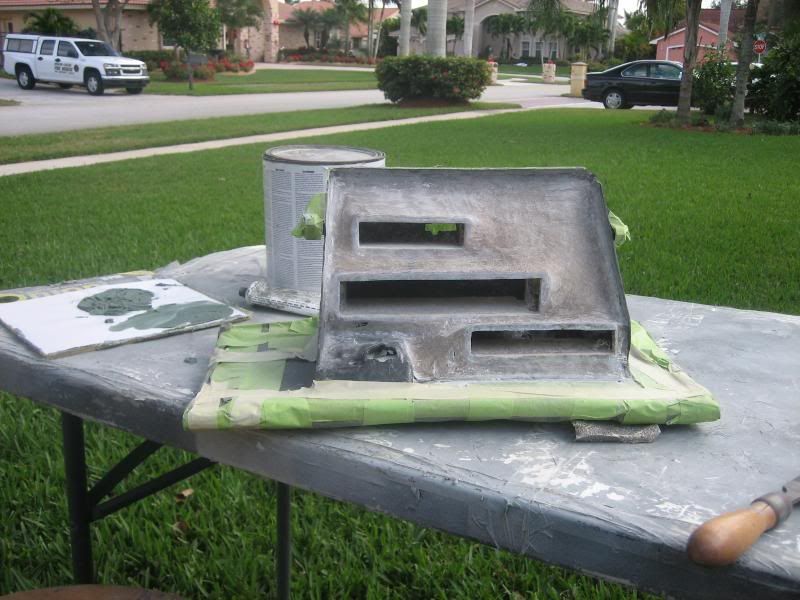
I put down some Rage Extreme where it needed it. It is now time for primer. I am going to use some slicksand on this panel to fill in all the defects. I have to pick some up though.


 01-04-2012, 04:34 PM
#47
Moderator
iTrader: (3)
 01-04-2012, 04:37 PM
#48
-Brian
Thread Starter
Hey Guys! This is the section where I post my work, ao I keep posting in the same section, Anyhow:
So this is my first retro attempt. I currently have an s2k Retro by Larry. I am very handy and do ALOT of custom work, so I know I had wanted to maybe try a retro out, and if it turns out great (as it should) then I can make a few extra bucks.
I Plan to do fiberglass molds with the HID Planet Chrome Bezel ($50 one). Fiberglass won't be a problem for me, since I do it barely every week for different dash panels. Anyhow, everything will get painted Nighthawk Black Pearl (automotive paint), and the Amber side marker will remain..
2 weeks ago I order brand new OEM Replica Lights, I was refunded for the Passenger side and will get here soon (when it gets back in stock). So I got started on the driver side. I made the bracket that Viper had made a CAD sketching of..
Without further ado!
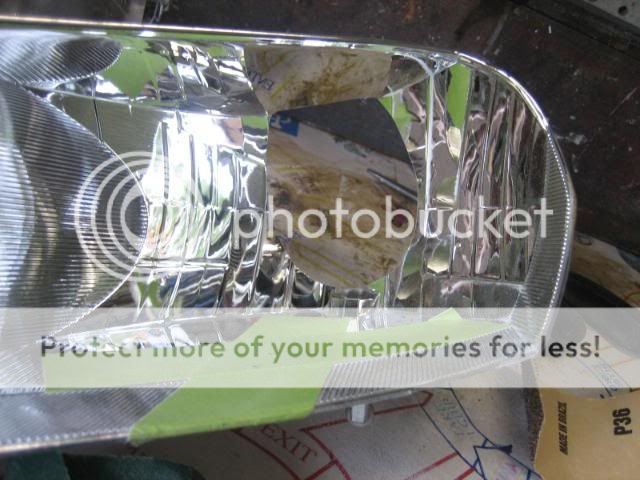
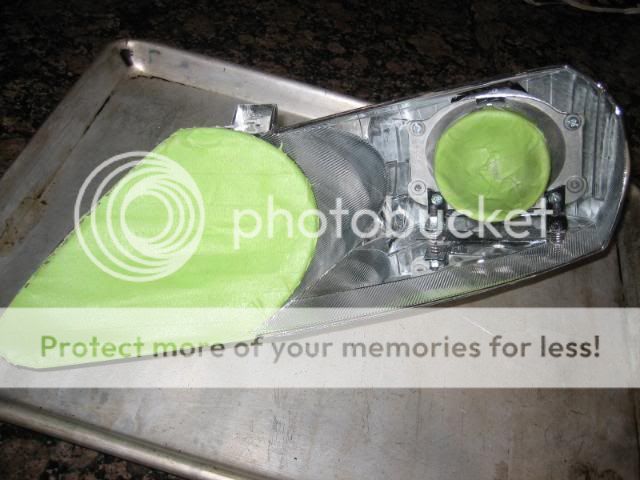
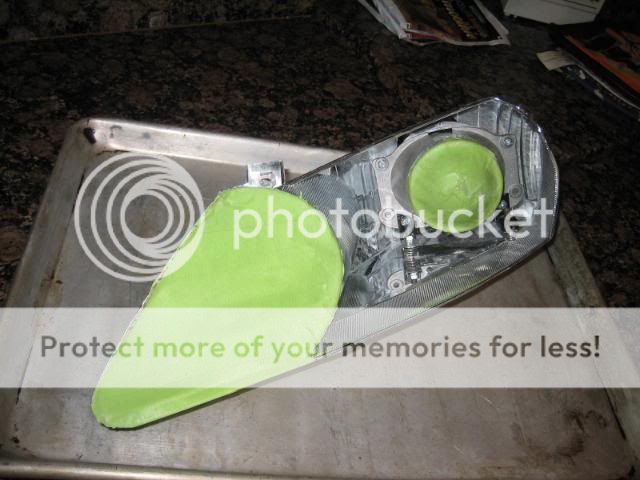
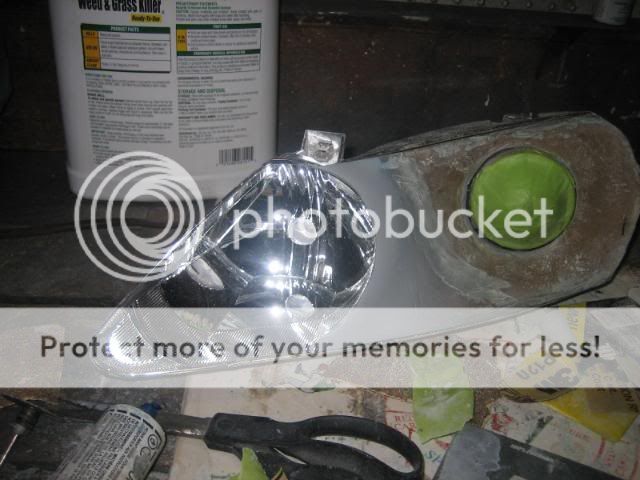
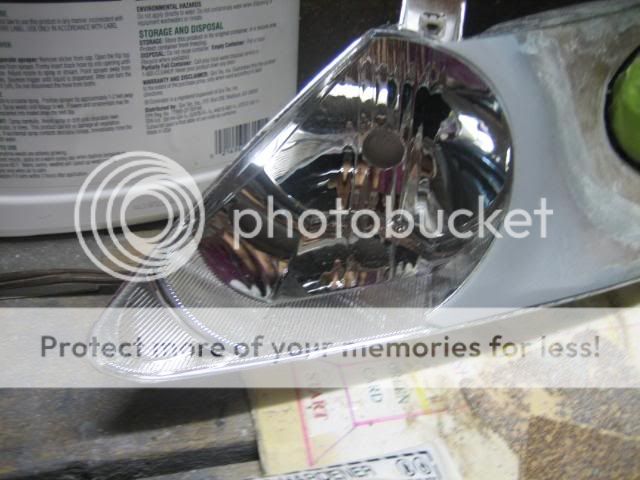
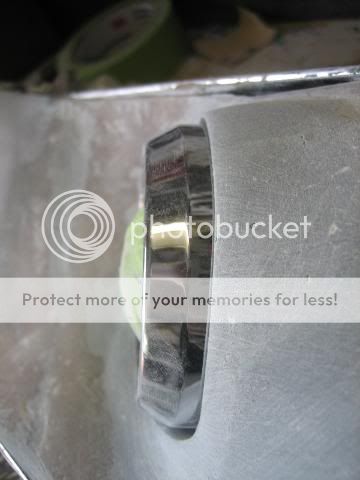
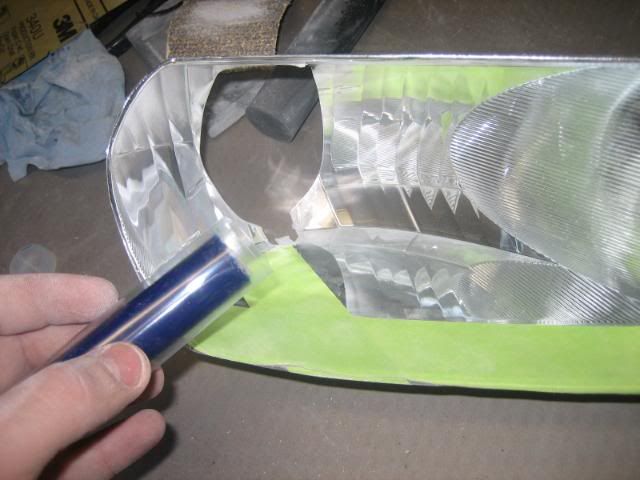
Brand new light! I am anal, I have to have perfect lense.
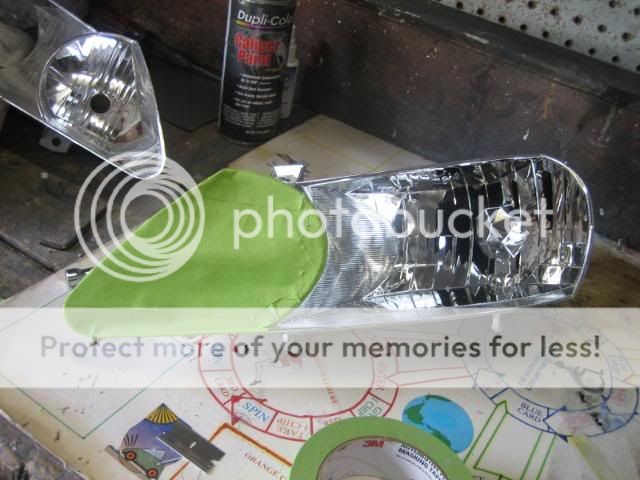
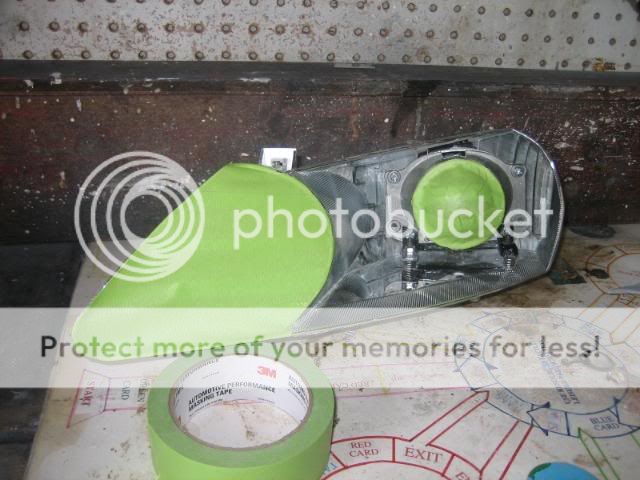
Some tape to sketch out the lines of the low beam
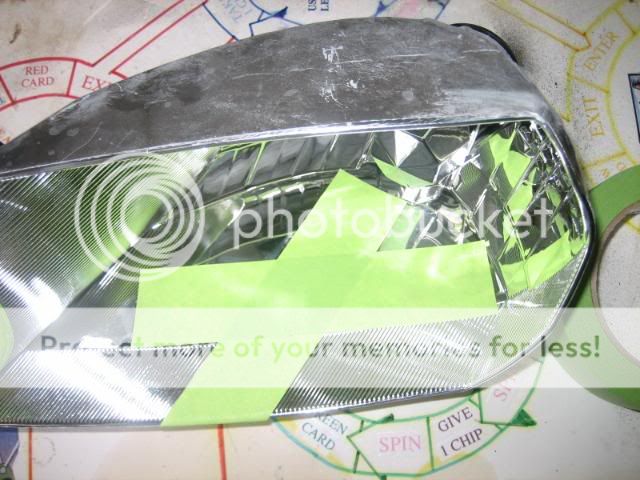
Ok, Ready for some cutting.
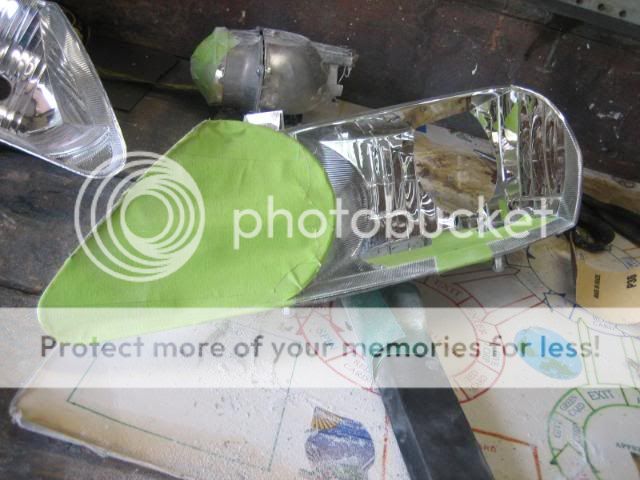
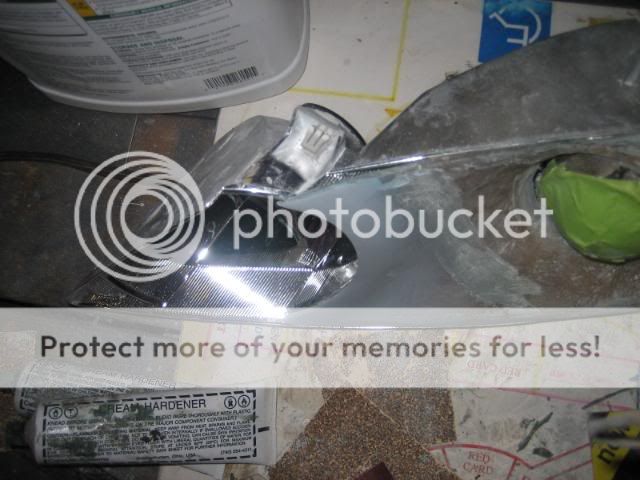
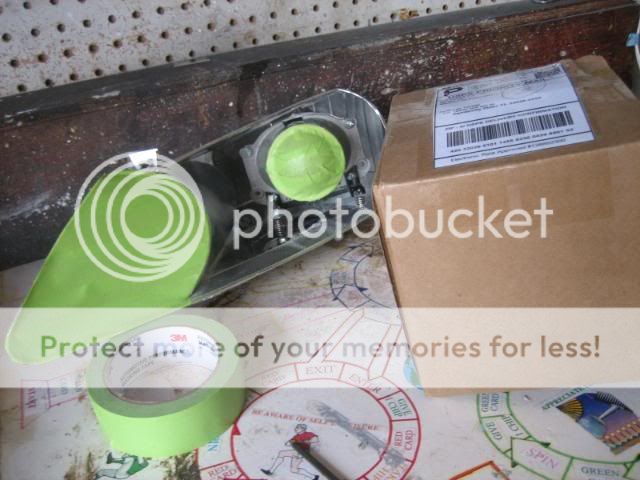
My brackets, no need for the paint, but I just had to, not pretty but they will do the job.
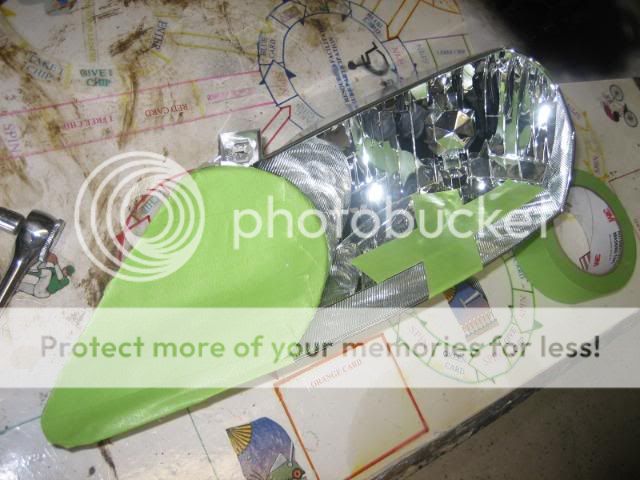
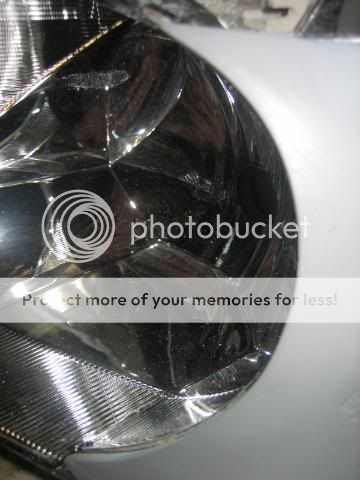
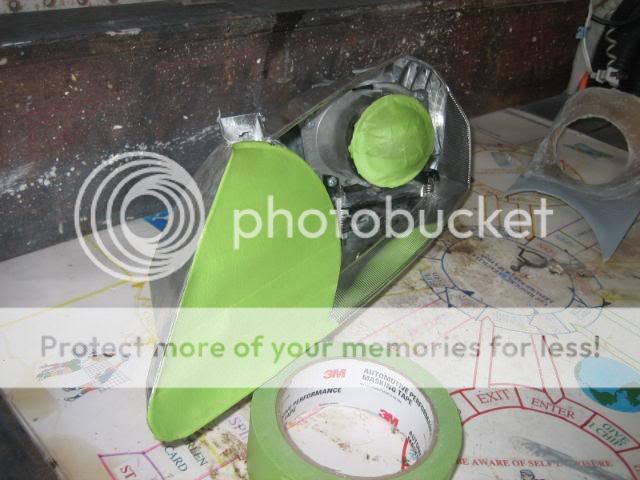
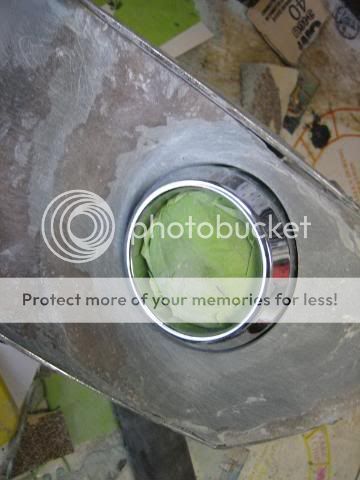
Then I realized that the circle was not going to be big enough, ah my poor nearly perfect circle
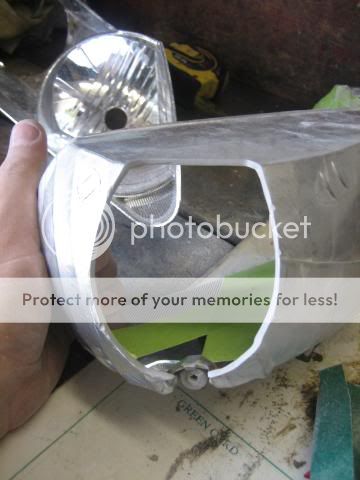
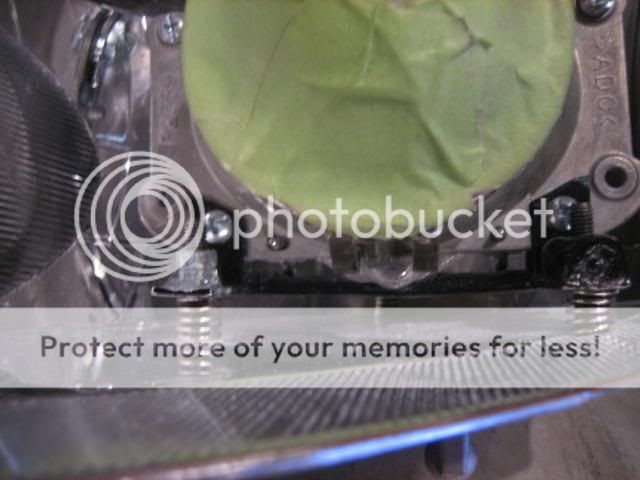
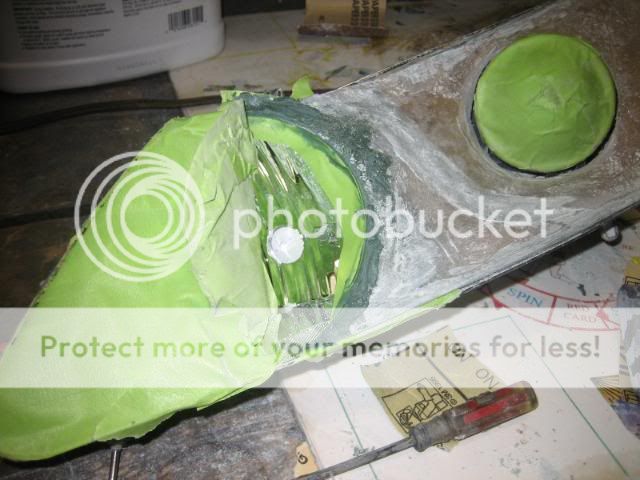
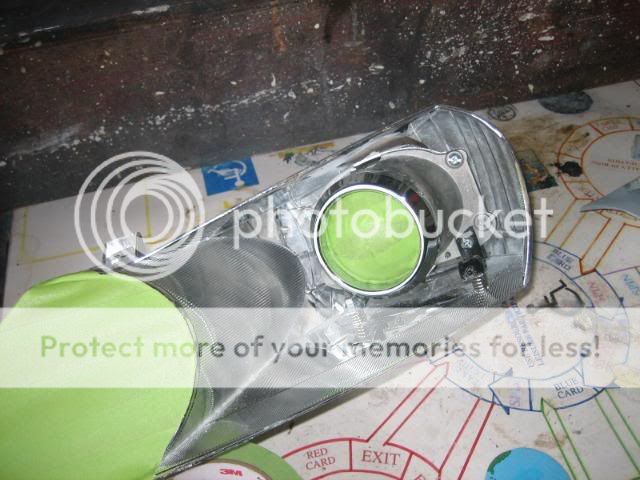
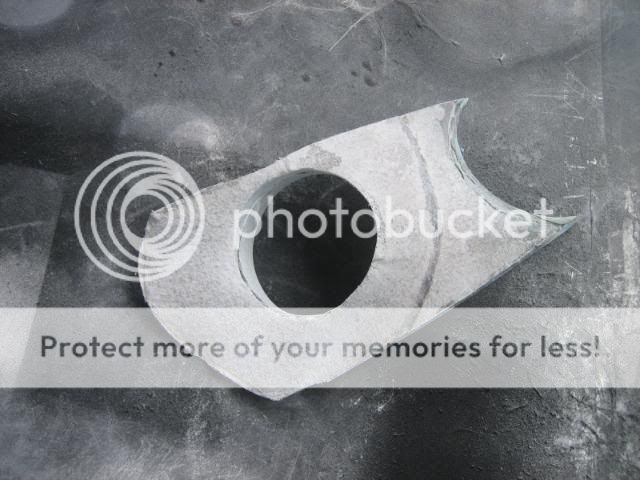
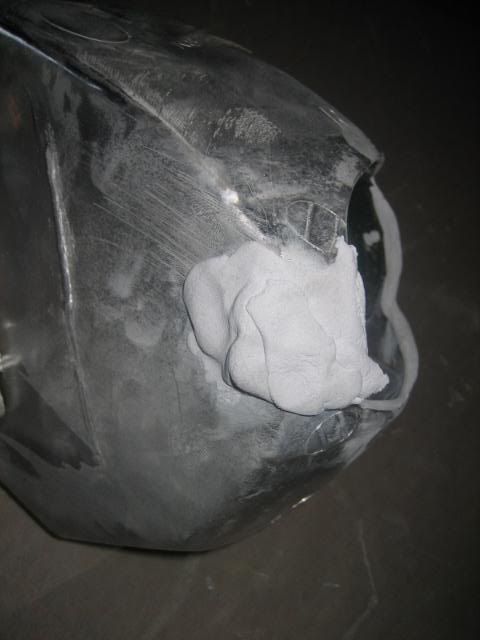
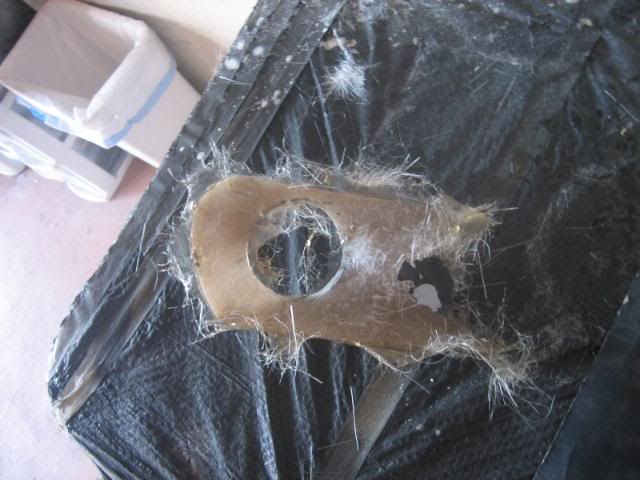
Then the spot near the rear of the low beam needed to be cut out. it was a hump for the reflector. Once it was cut out it left the surface with missing pieces. I took epoxy putty and rebuild the wall.
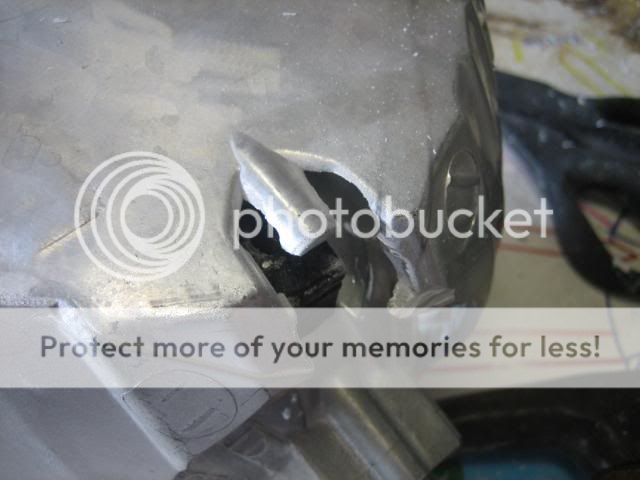
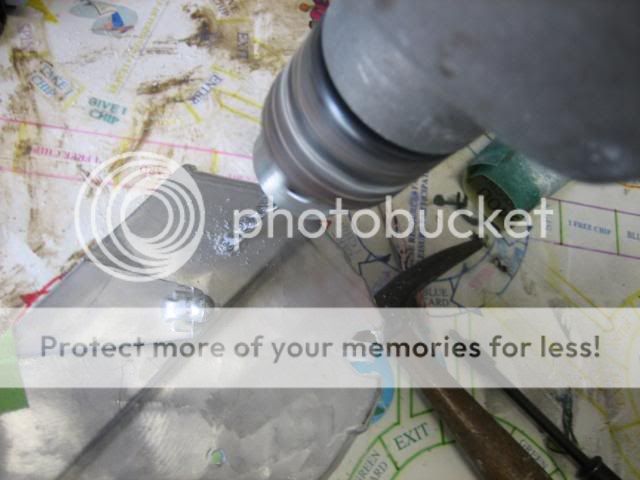
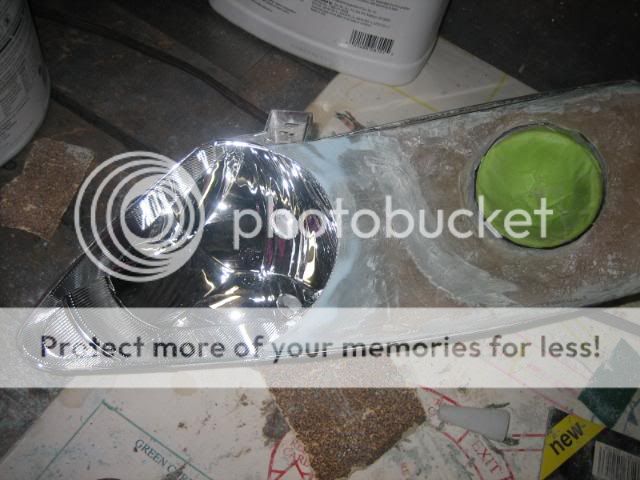
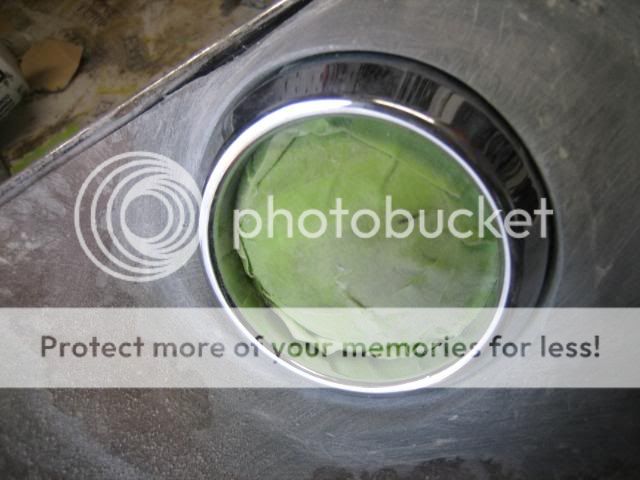
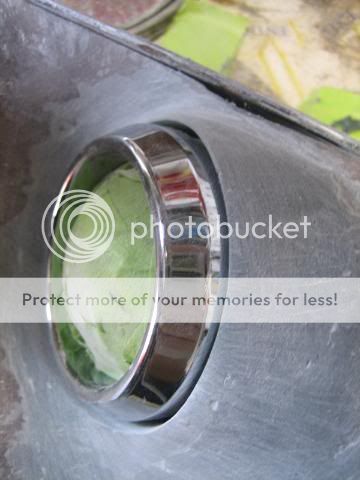
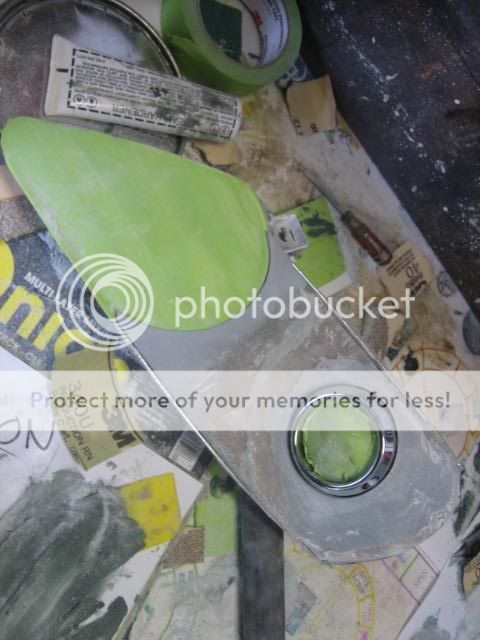
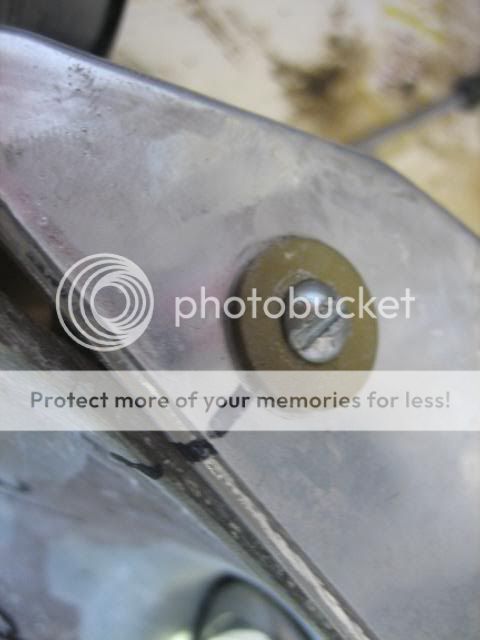
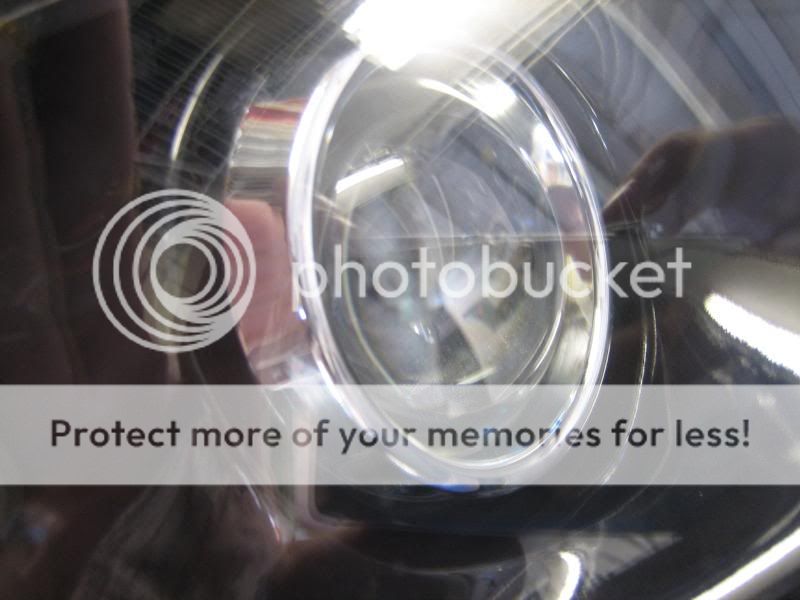
From here I was able to drill the 3rd hole and line up the projector. The projector is adjustable through the 3 allen wrench screws on the bottom. here is is all mounted up! You might noticed the left bracket, I had to re-dp the nut that attaches to the bolt.
Next I will wait for my HIDPlanet chrome bezels, then start the glassing!
I realized I did not need my Bezel to do the molds, so with that said I thought to myself how I could do this. A few minutes later a idea came to mind.
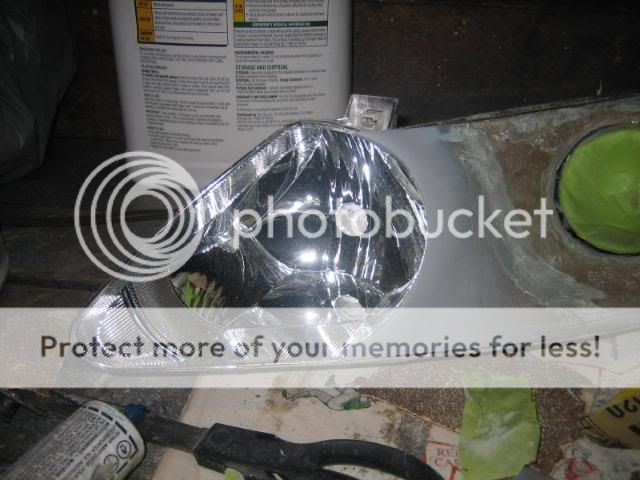
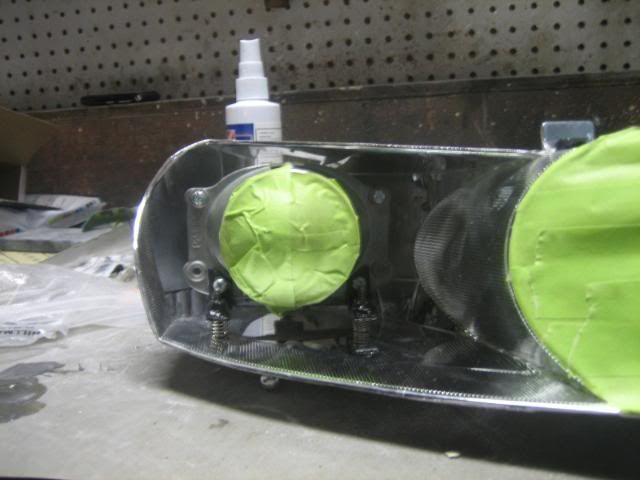
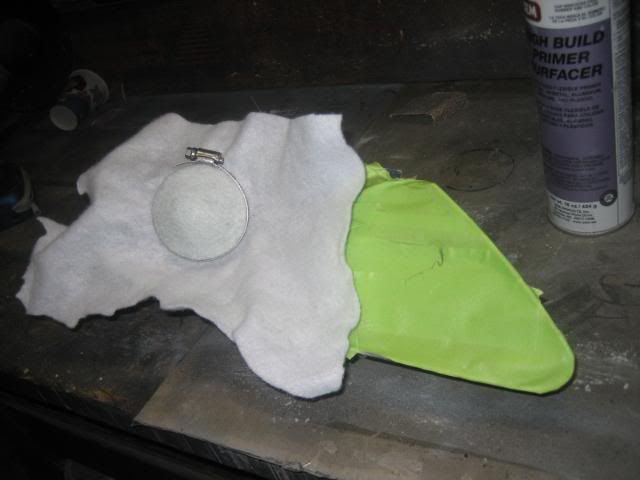
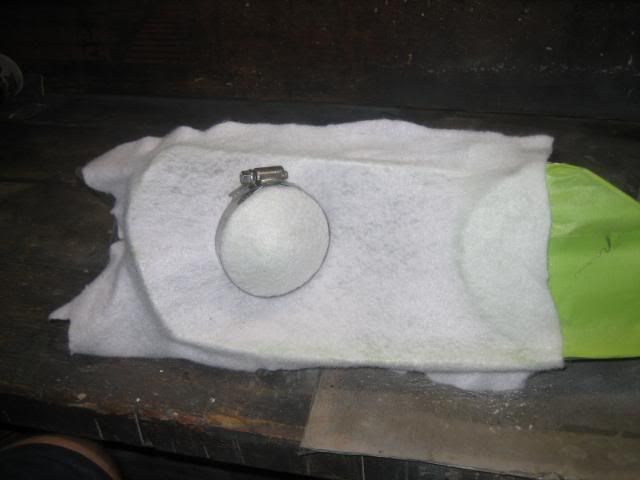
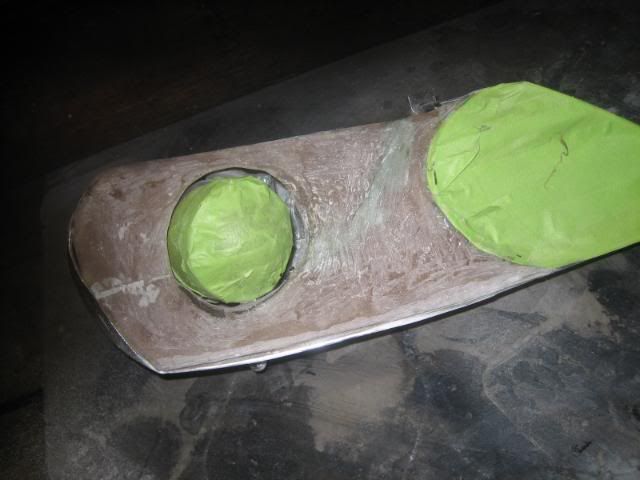
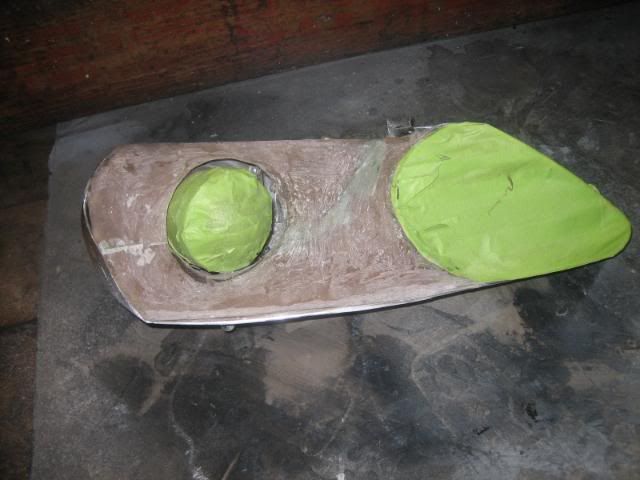
As you can see below I used a clamp on the projector. Later on this area will be cut out to fit the bezel.
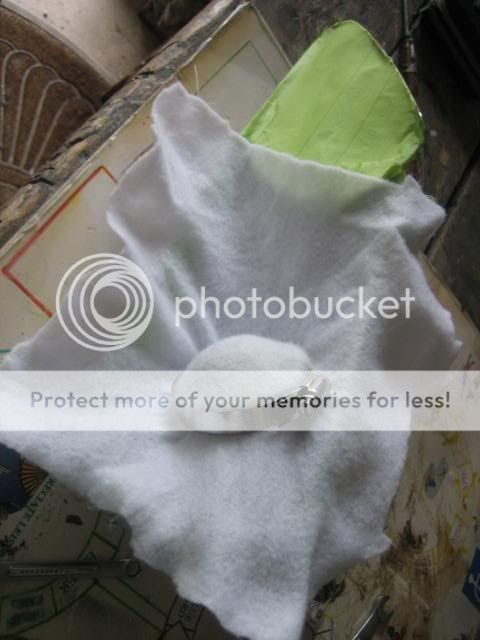
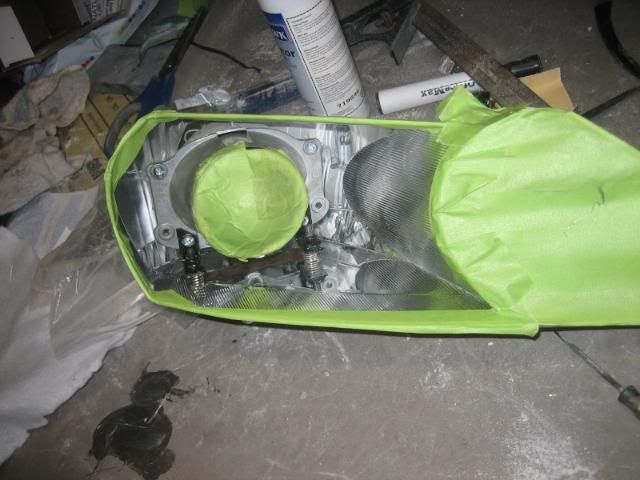
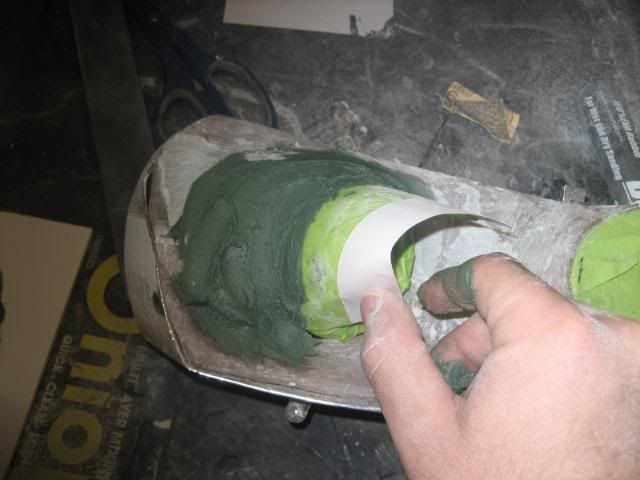
At this point I stretched out my fleece and used hot glue at all the seams. I masked it off before hand. I opted to use hot glue because the resin once cured will act as a relase agent to the glue and help to release the mold from the tape.
Here it is trimmed up. I left a little extra fleece near the hi beam so that I have room to sand it perfect to match the contour of the hi beam
Then came time to fiberglass. I use B-440 Polyester Resin, not that cheap Elmers/Bondo crap.
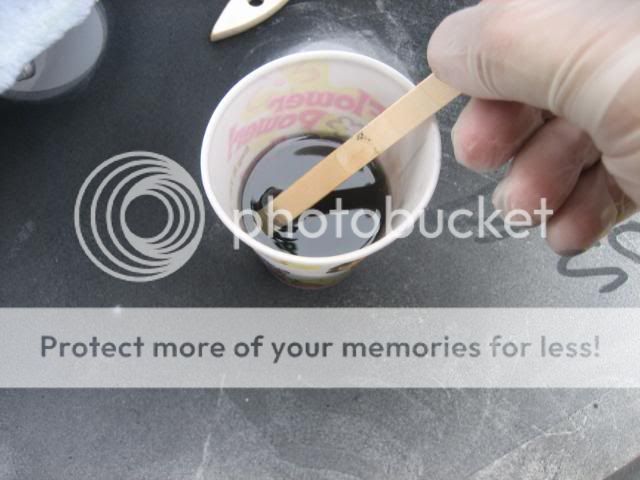
I love my Dora Cups! They have to be paper or else the resin will melt it down, I love these things, they are cheap and I through them away after each use along with the paint brush. One time use for everything
Laying on the resin, gently. This was somewhat calming for me.

Set to dry!
I mentioned I am anal right? You will see in the following pictures! My anal-ness helps out with very clean work.
So from the last update, I got some work done. First I pulled the mold and trimmed it up to fit well. From here I got the basic contour of the hi beam from some duraglass. Then I laid 2 layers of 1.5 oz chop mat over the duraglass and the rest of the mold. I let that dry and picked it up a day later. I trimmed it up all smooth and did a test fit and the damn thing warped on me! One side would fit, and the other wouldn't. I fixed the problem by cutting the mold down the middle and fitting each side into its counter and temporary tacked it in with some CA Glue and Duraglass, Later I will glass the back of it as it is pretty strong as of now.
Now at this point the only thing I can work on is the Hi beam area since I am waiting on my HID Planet Chrome Bezels, so that prevents me from working the projector area since the hole will be made bigger to fit the bezel. Usually (well all the time) I will do all the filling with the Duraglass and Xtreme at once, but since I wanted to work on it, I just started working in one small section. I spent about 3 hours on the hi beam area. I think I got it the way I want!
Pics Below.
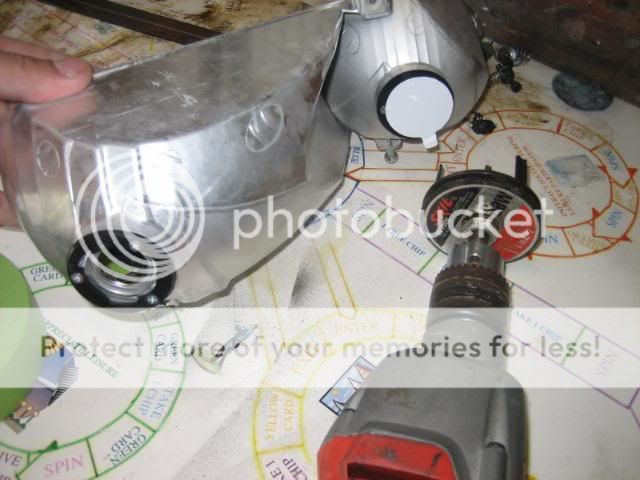
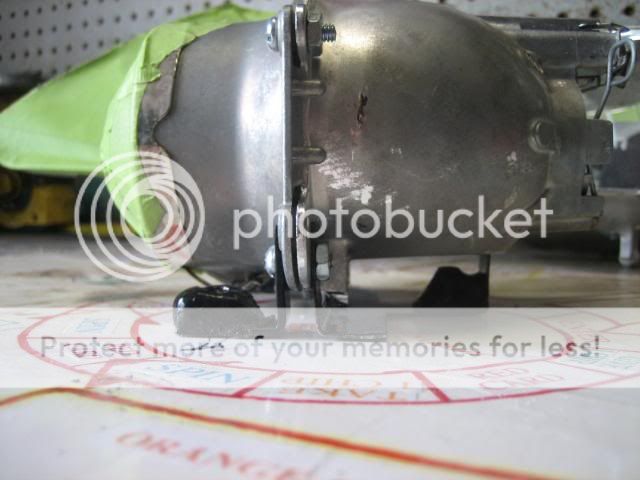
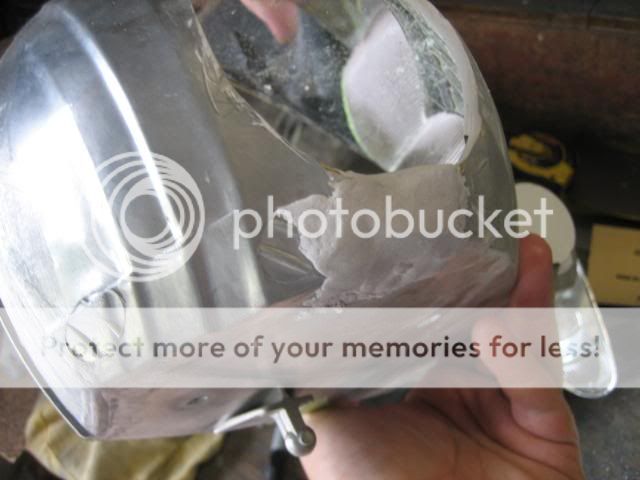
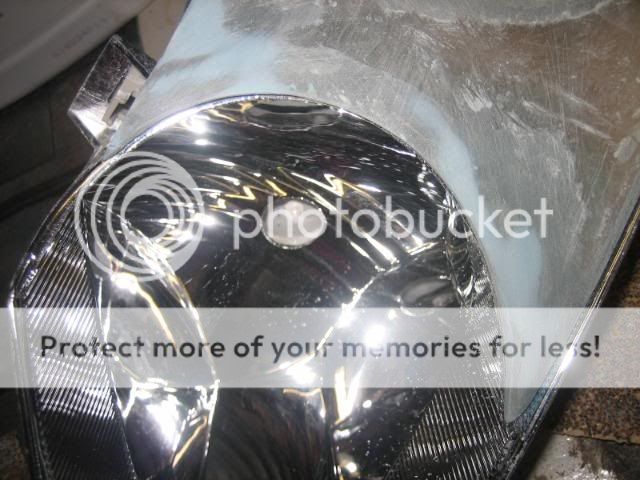
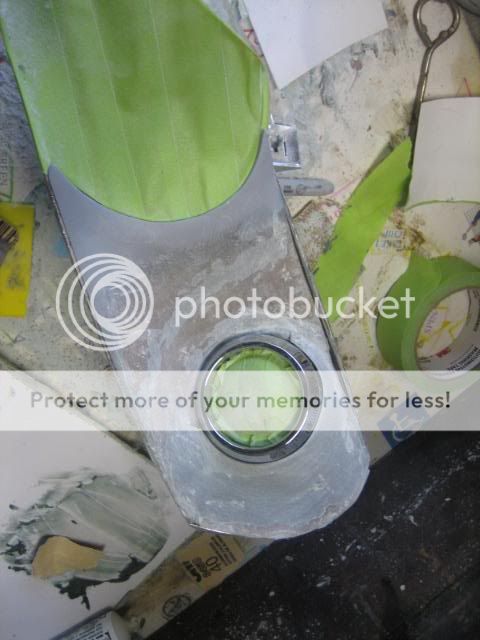
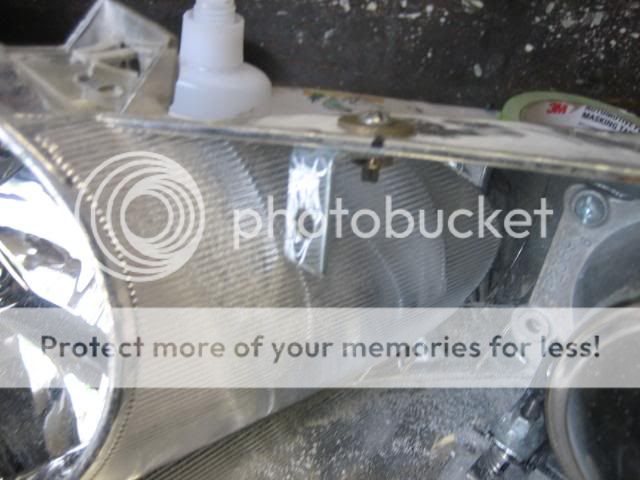
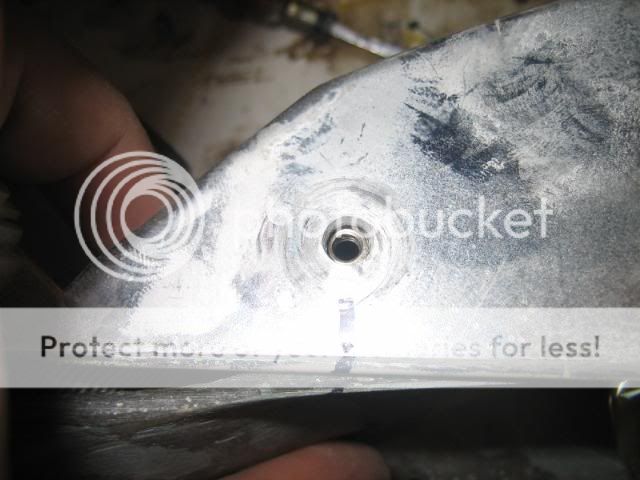
First off, I wanted to show the underside of the headlight housing. Here are the 3 adjustable screws.
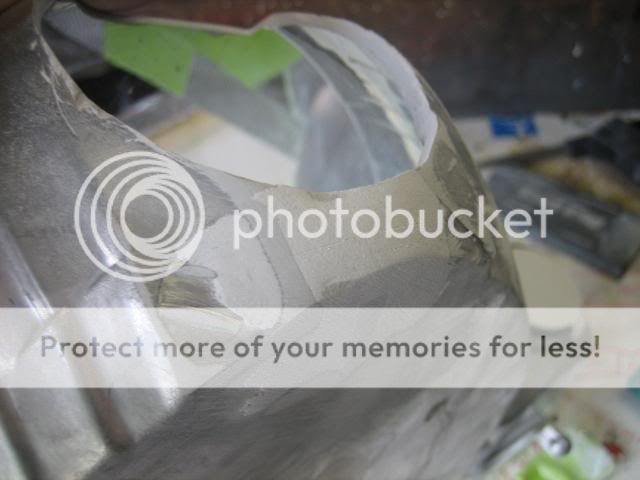
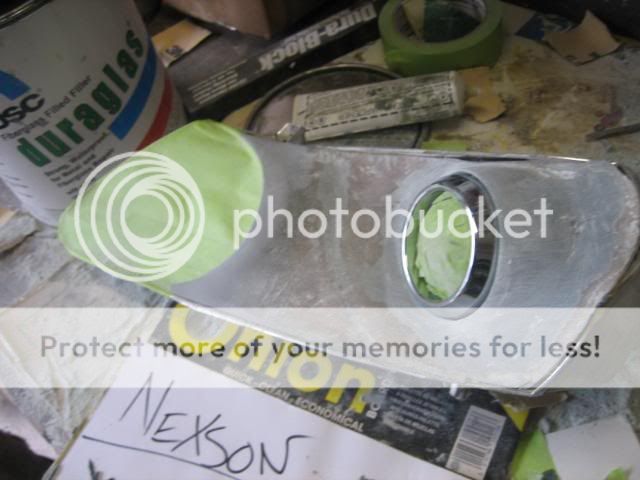
All dry and ready to be trimmed, lines are drawn for reference.
Here it is all trimmed up the best it can be trimmed up before glass and filler.
Getting ready for Duraglass. I wanted to fiberglass on top of the duraglass for strength, because I needed to duraglass to get the basic shape of the hi beam area.
Time for glass. I use spray adhesive to create this mess lol. Well to temp hold the mat to the mold, or until it is resined.


Here are some pictures of the countless hours I spent filling sanding filling sanding. I must have re-filled alone at least 15 times on the hi beam area. Oh well it is HAS to be perfect, there is no other way I work. You can see in the middle where I cut the mold apart and put it back together.
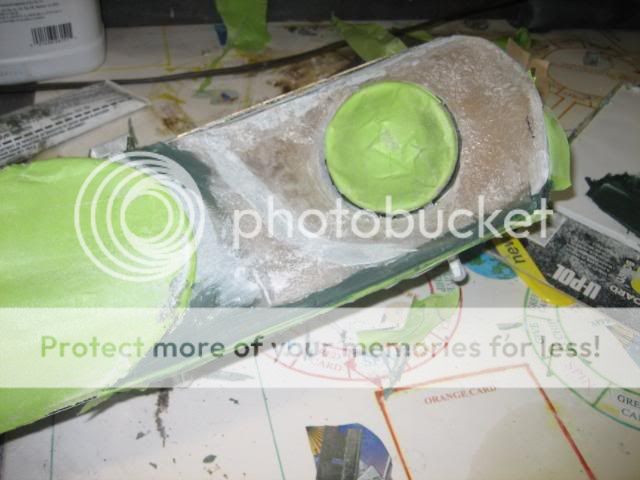
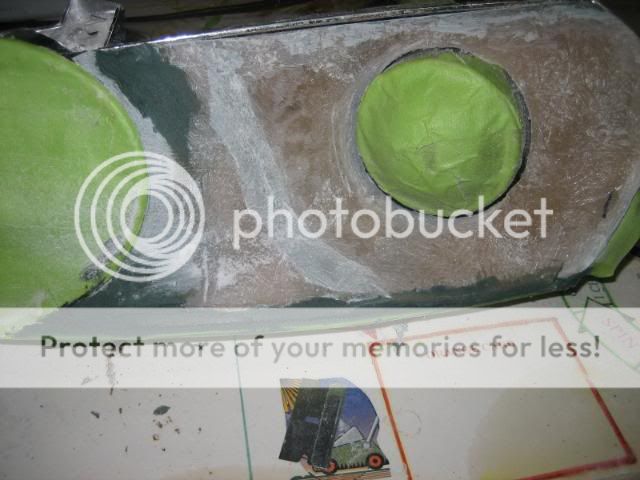
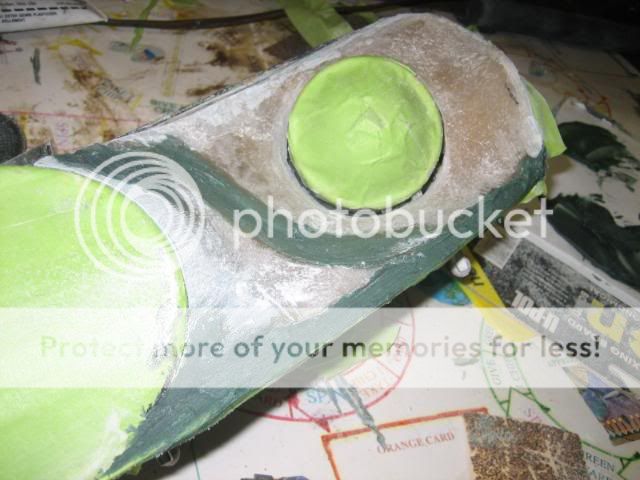
Here is a few pictures of where I ended for the night. Keep in mind I usually wouldn't post pictures of one area filled and the rest rough but I am just working the hi beam area. The area I worked in the picture still needs filler, but tonight's focus was to get that basic shape.
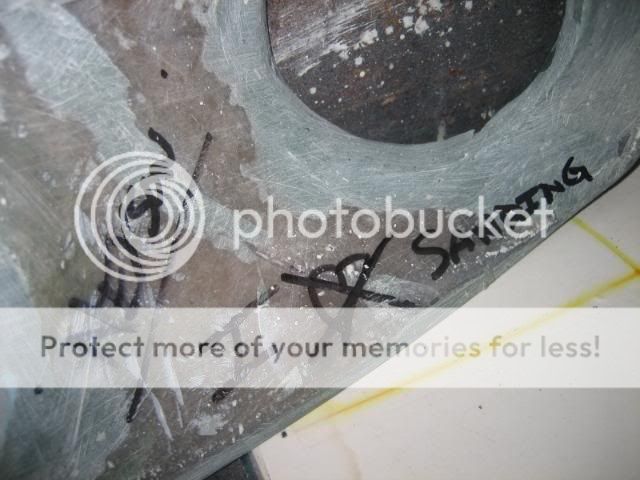
Also, you might notice the little "desisn" I had to do on the lower contour of the hi beam. I could not carry the line into a point, because it just would not look right, so I just made it into a back slant. It turned out pretty good.

First, I started off by re-tapping everything and getting ready to get back to work. I wanted to make sure everything was protected before work was resumed
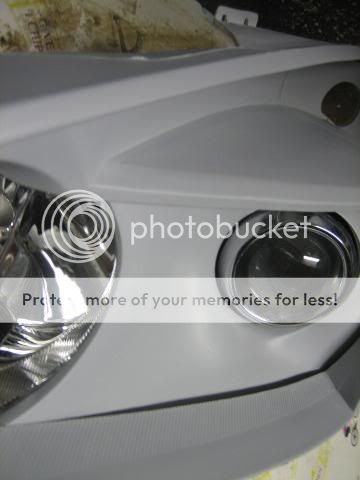
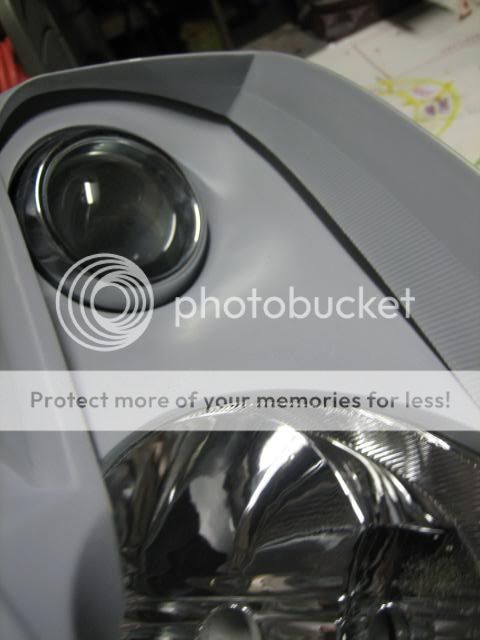
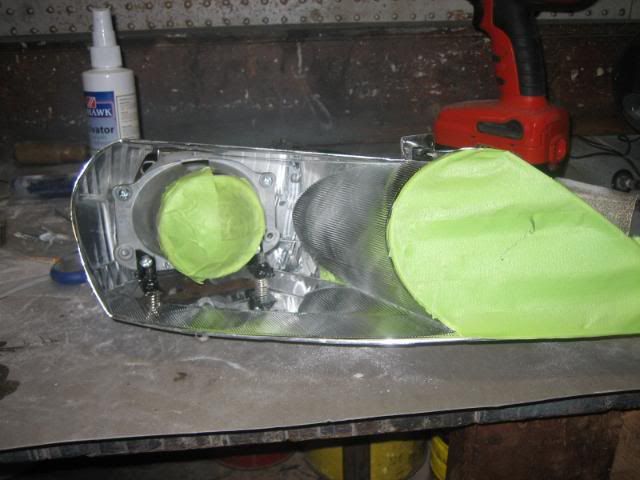
Then I got my HID Planet Chrome Bezels in, which will add a nice touch. I was actually waiting on these too, before I resumed work.
Time to do some beginning shaping
Then I got smart. I wanted the bezel to have some sort of "hidden" look, so that it looks like it is peaking out. So I came up with this little technique. Worked Great!

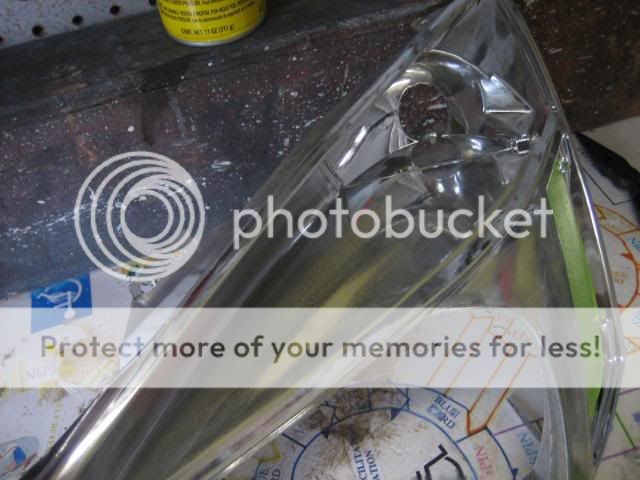
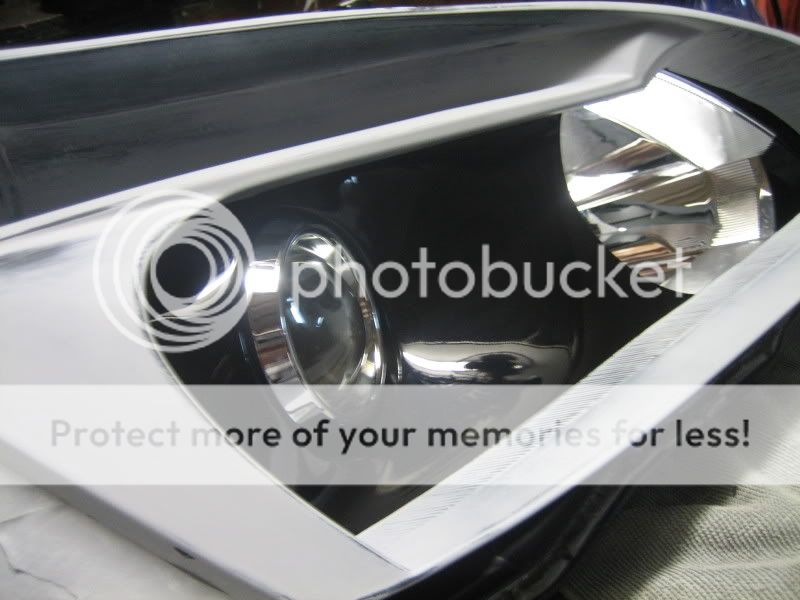
After it has all been shaped perfectly!
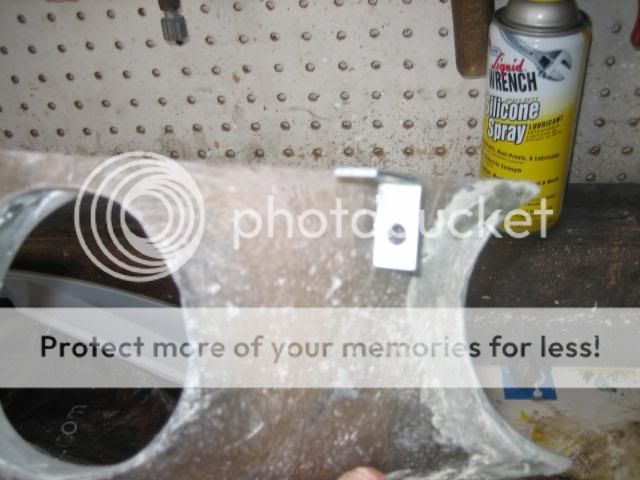
Now I can finally duraglass the rest of the mold and fix up any defects around the fiberglass mold
The hard part is done!
Almost there! I got a lot of much needed tedious work done since last update. I will let the pictures and explanations, show what I have done.
First off, I needed to do some more fiberglass reinforcing, so things got messy again. I needed to fiberglass the full backside. You can still see the seam where I cut and mended the pieces back together. Everything once glassed was strong as hell, but not heavy at all.


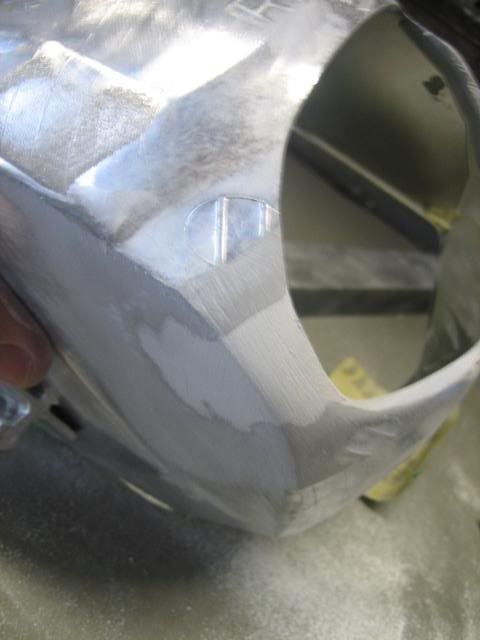
Here is it all trimmed back up again. I wanted to get the lines perfect where the mold meets the inner housing lines. I used duraglass to get it perfect. From here the contour around the Hi Beam somehow got completely off centered and messed up. Spent another hour on that to get it reshaped and perfect again.

My feelings lol
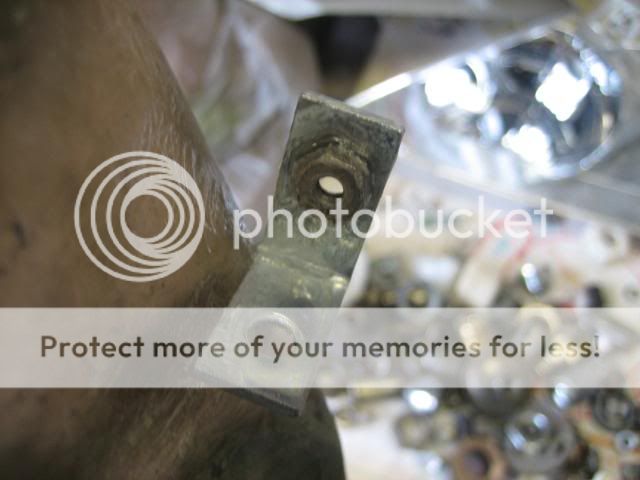
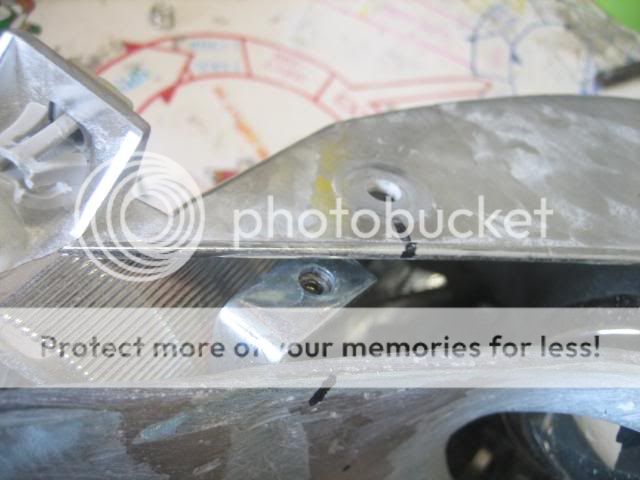
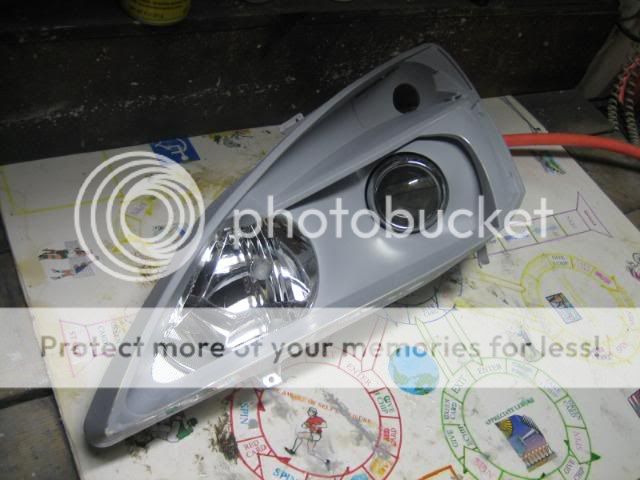
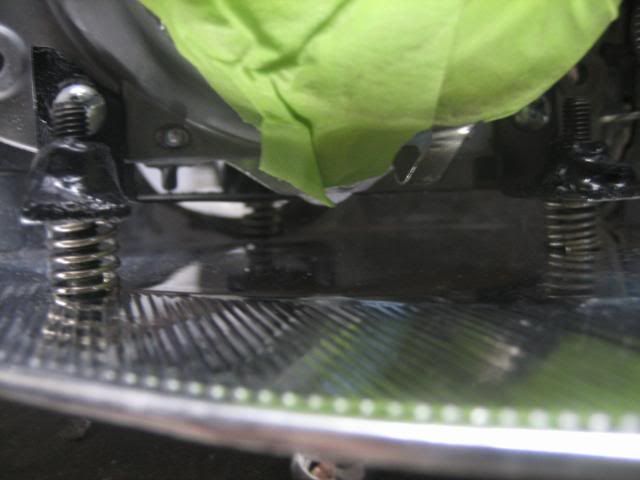
Now, I wanted to make some sort of bracket to center the mold up and hold it in nicely. Some people say that the mold will just sit in there, well that really doesn't float my boat too well. I used a L bracket. First I drilled a hole in the housing, then I positioned the bracket in a manner that the fiberglass mold would hit it when installed. From here I used some CA Glue and got the bracket to tack on the mold while the screw was still installed in the inner housing. I then removed the screw which left the L bracket attached to the mold.. I backed it up with an epoxy from here. Then I metal epoxied the nut on the bottom of the L bracket, so that I can just screw it right in without having to hold the nut somehow.. Works perfect and holds it in place like no one's business.

Next it was time for some Rage Xtreme, This I <3!!!
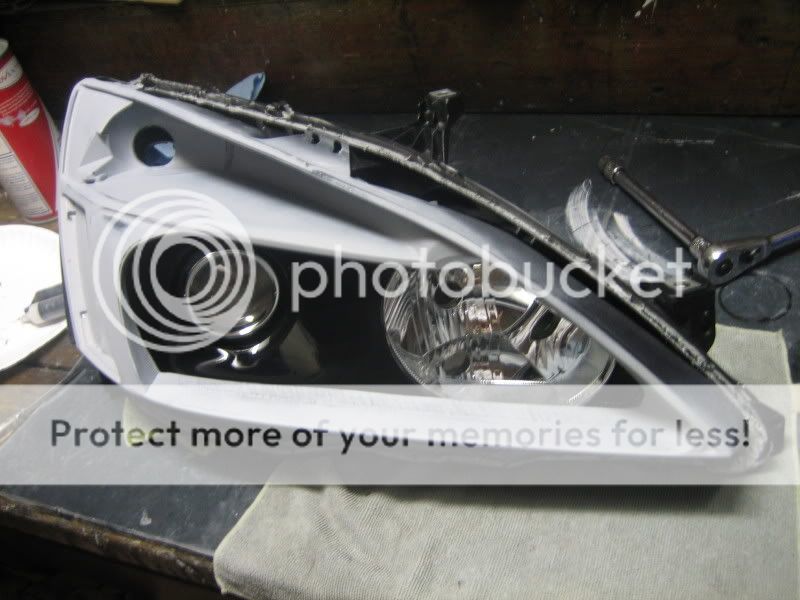
Got that spread and all sanded down, then primer-ed it, sanded it back down, primer-ed it, and I got a couple more sessions of that.

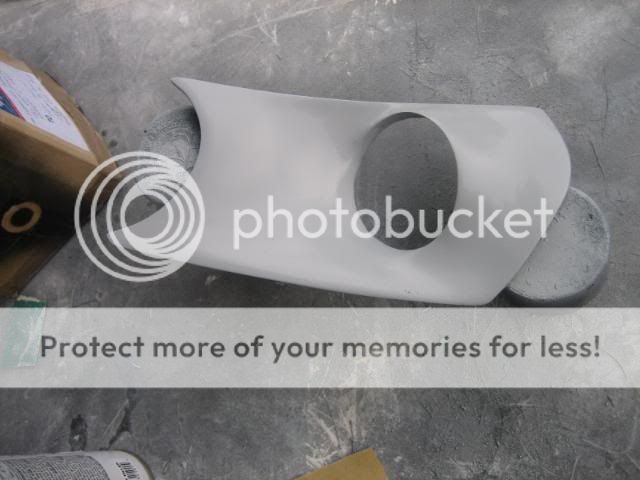
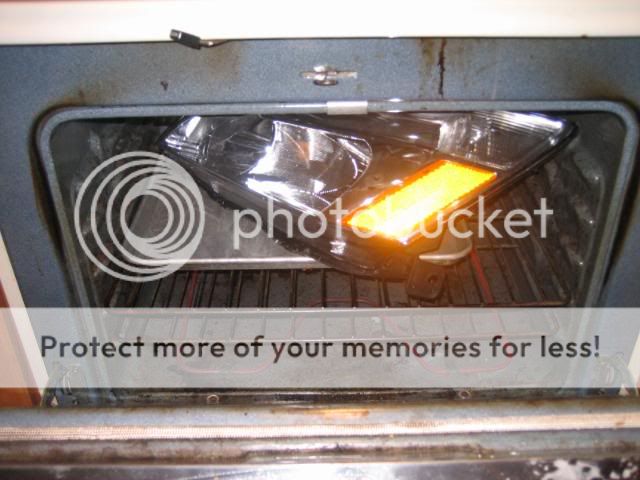
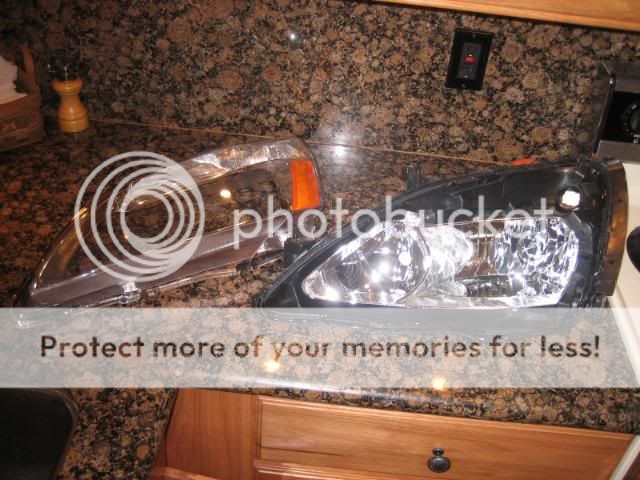
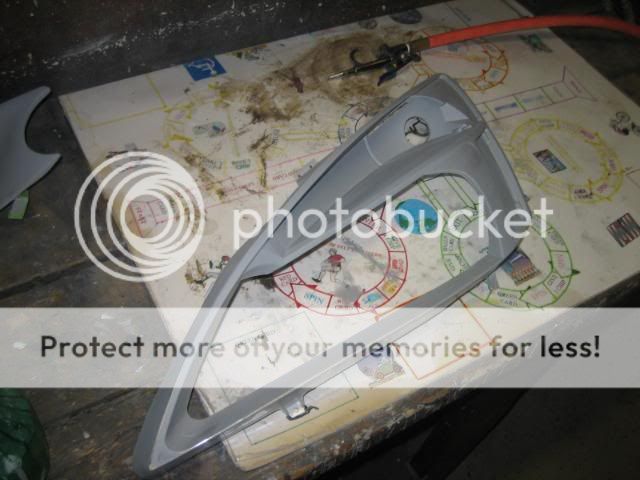
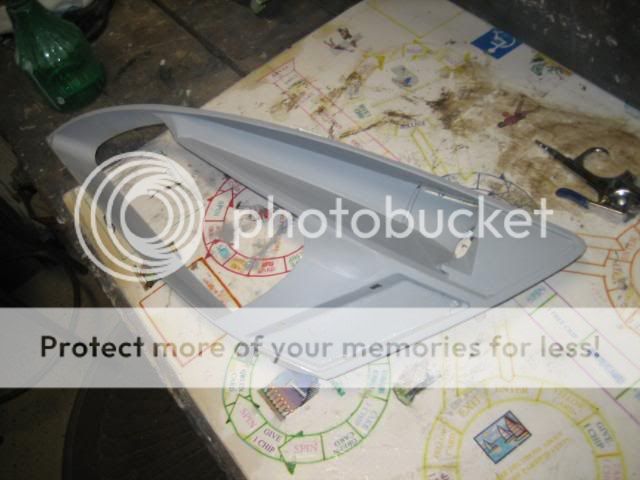
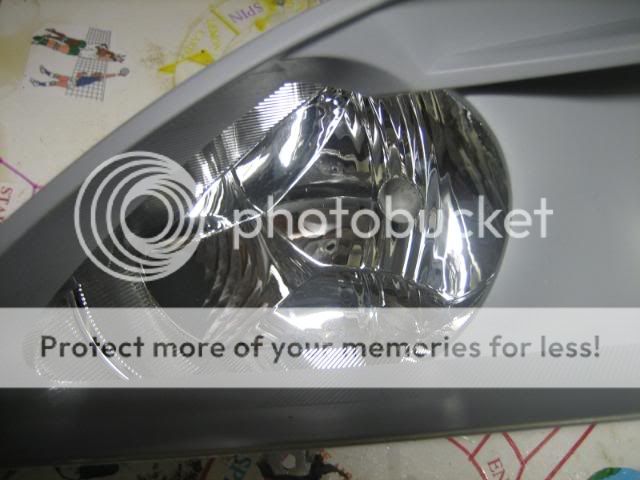
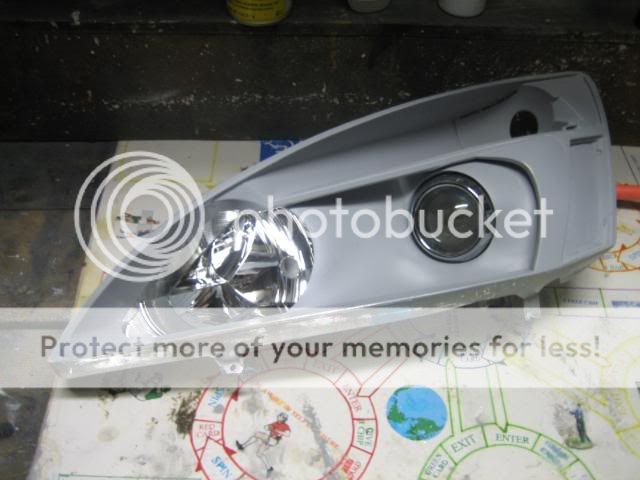
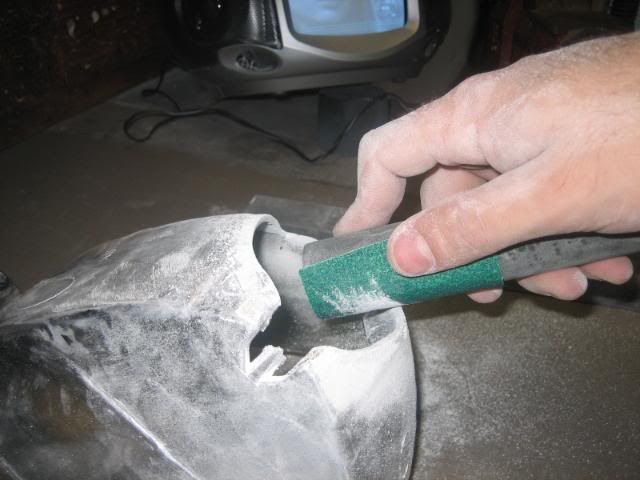
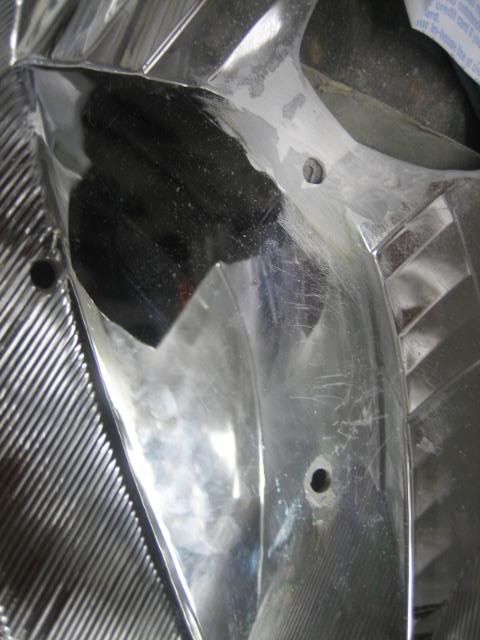
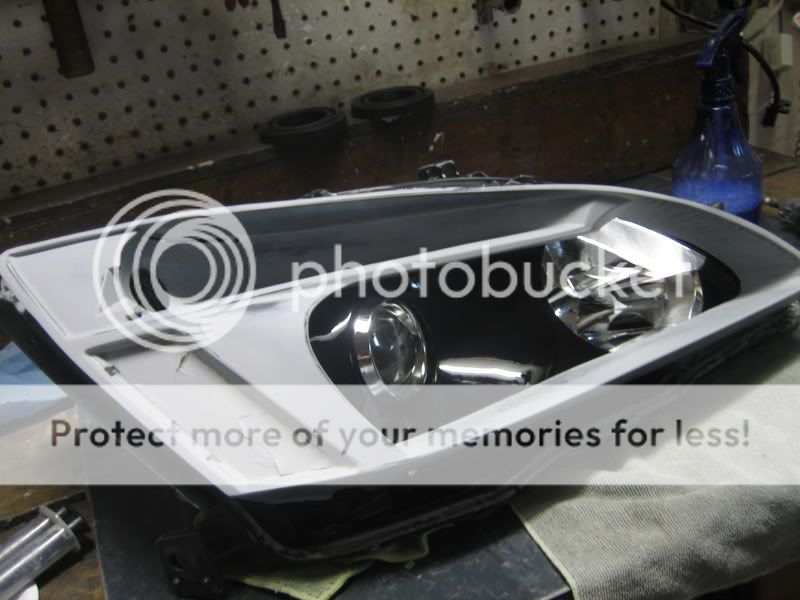
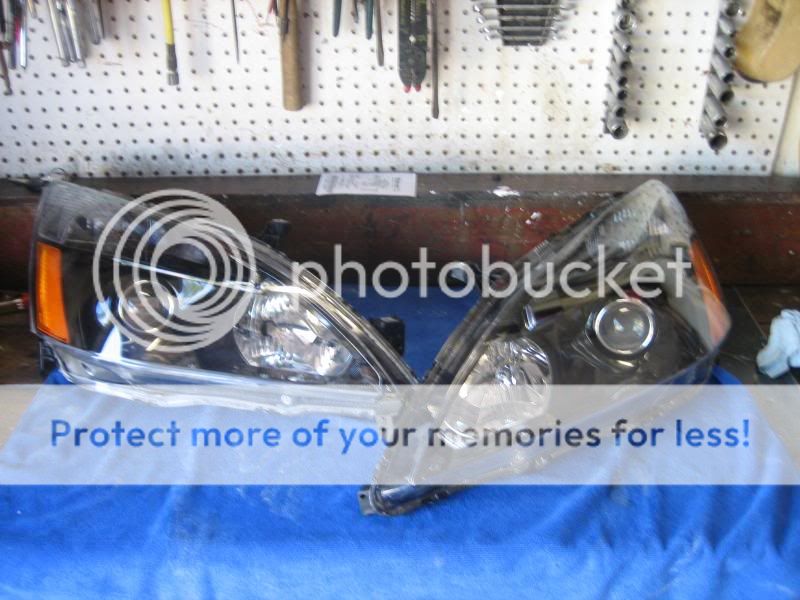
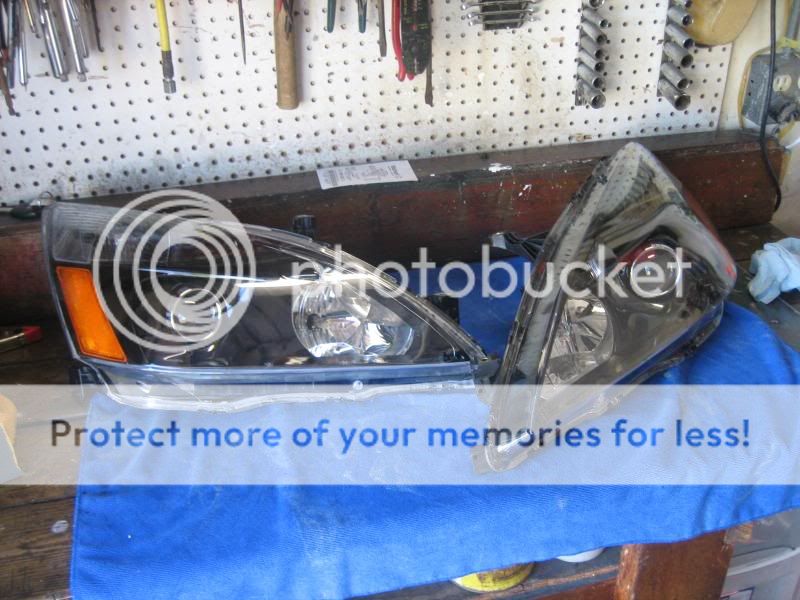
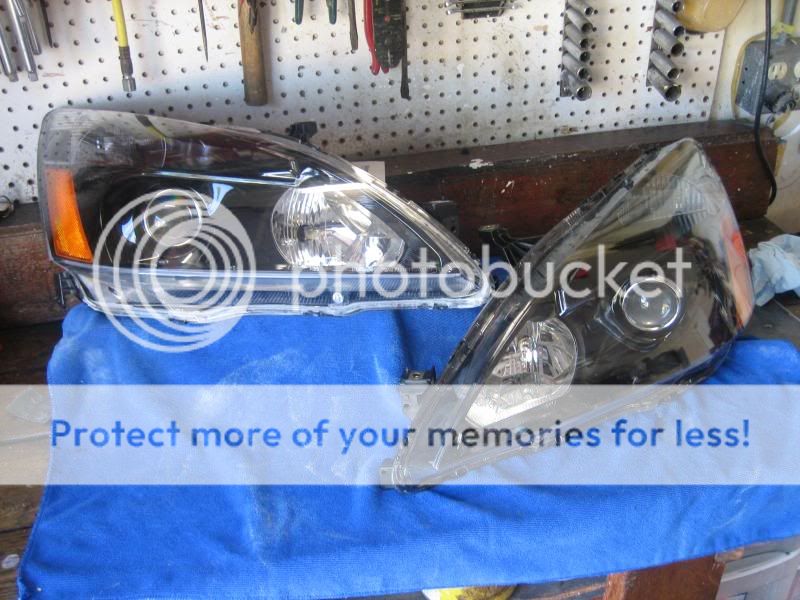
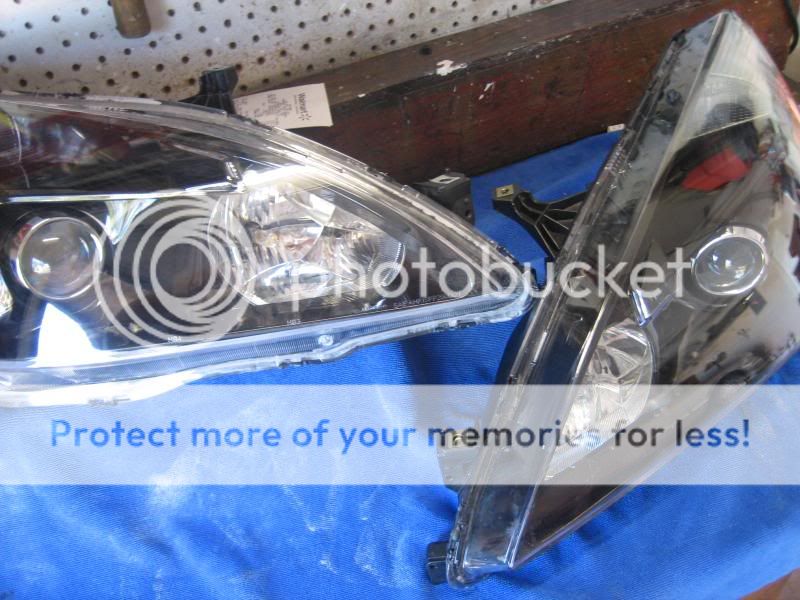
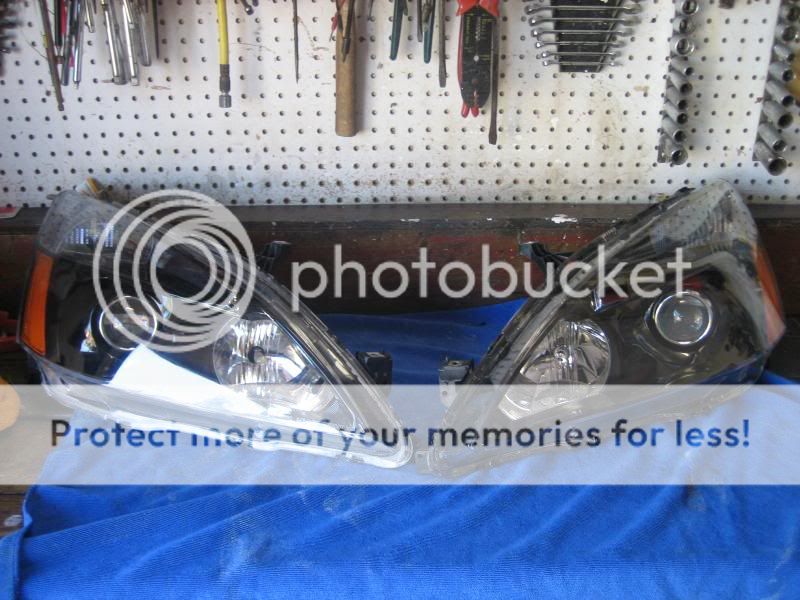
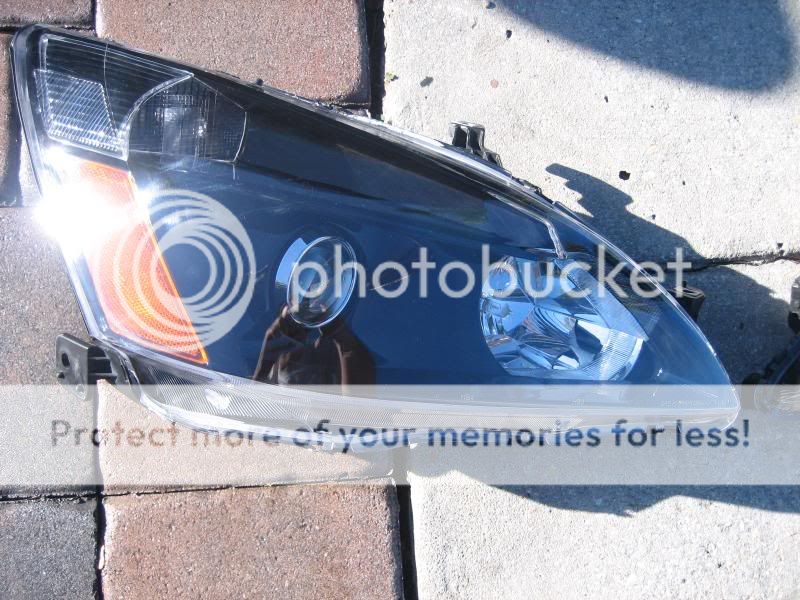
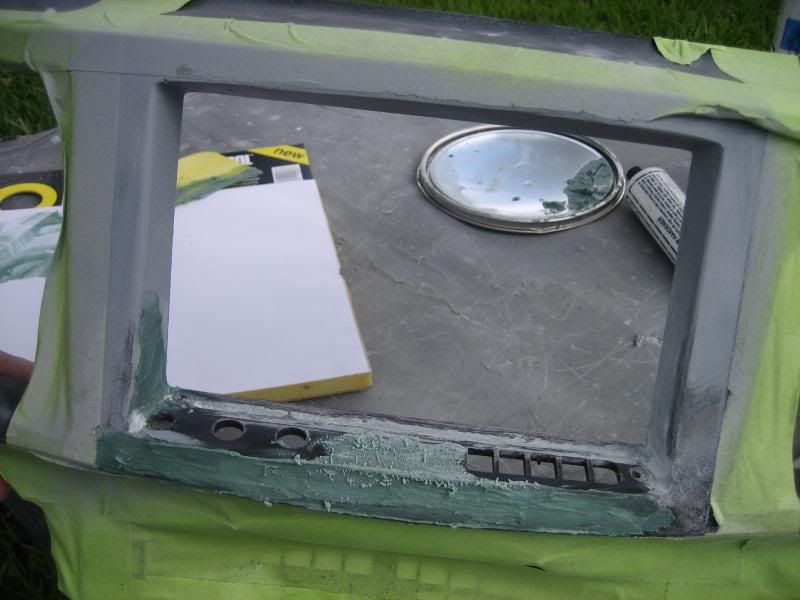
Next was the actual housing. Since it will be all painted, it has to be prepped correctly. First I sanded it all down, then gave it a wipe down with wax/grease remover. From here I primer-ed it and wetsanded it down, so it is smooth and ready to be painted.
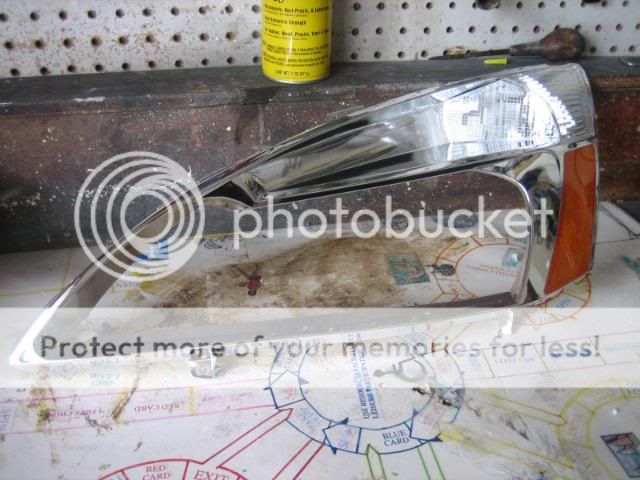
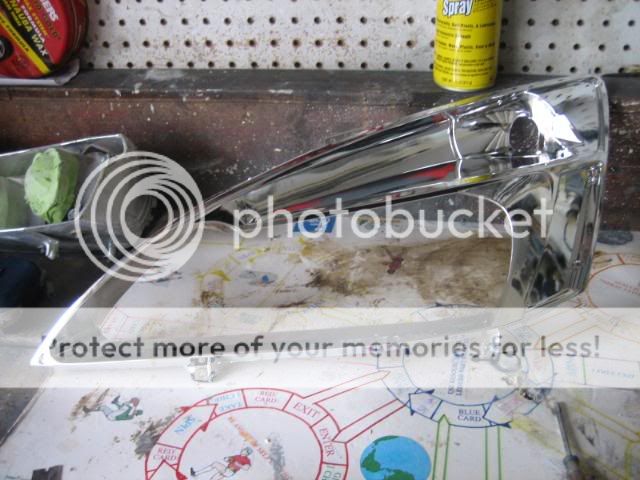
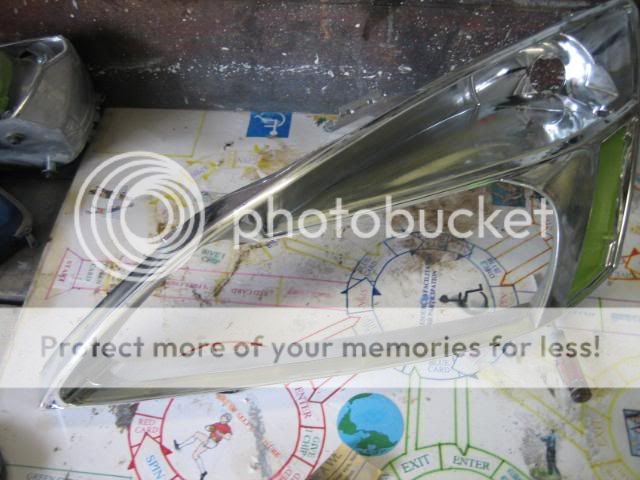
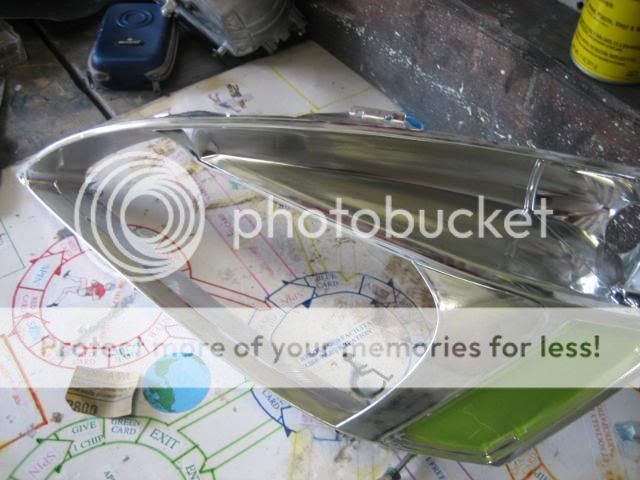
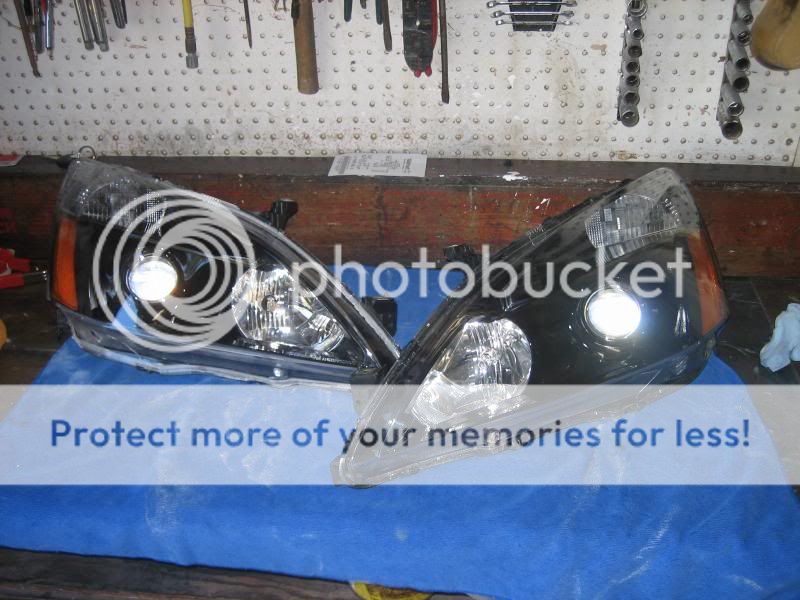
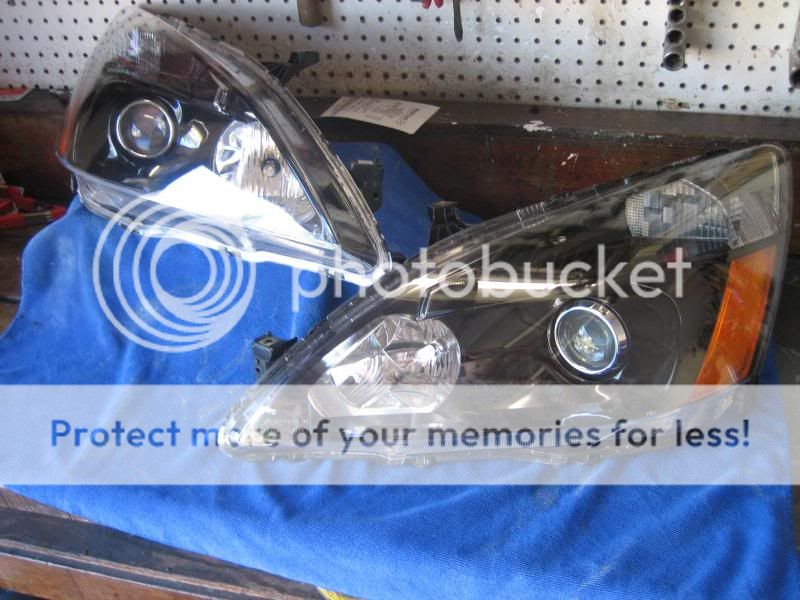
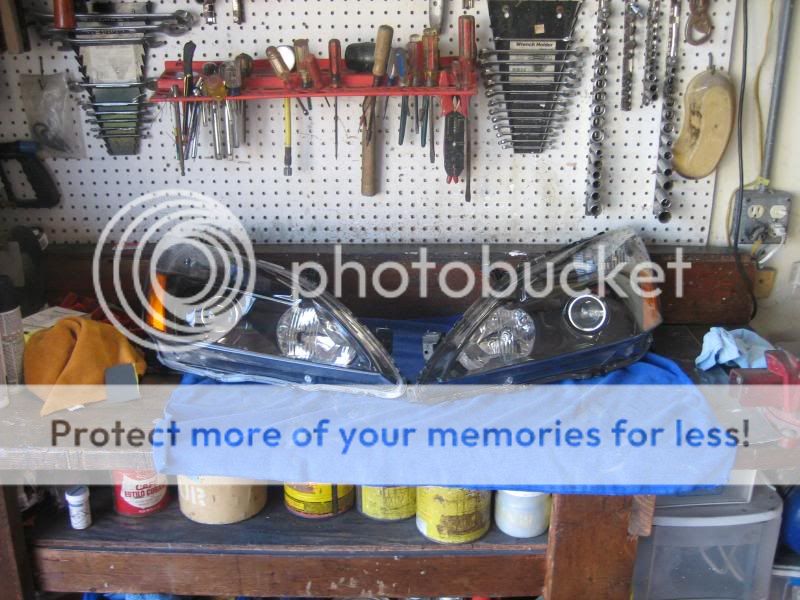
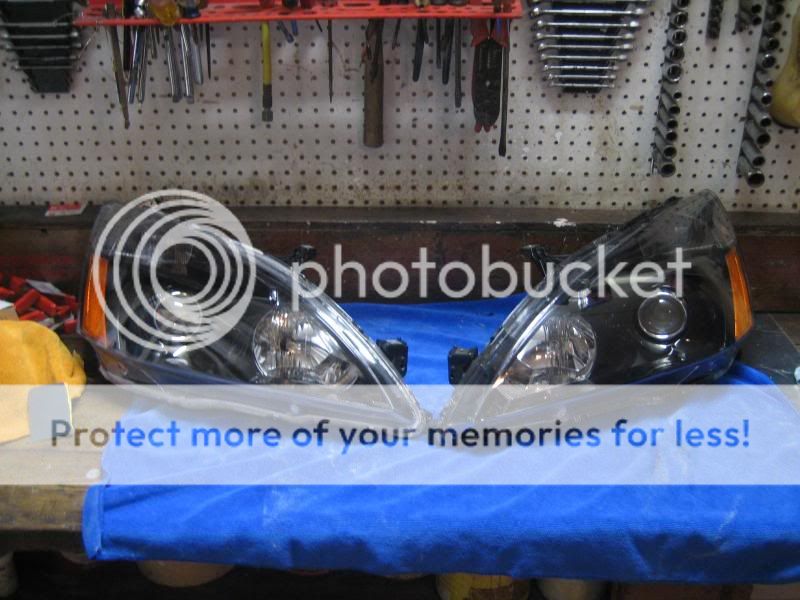
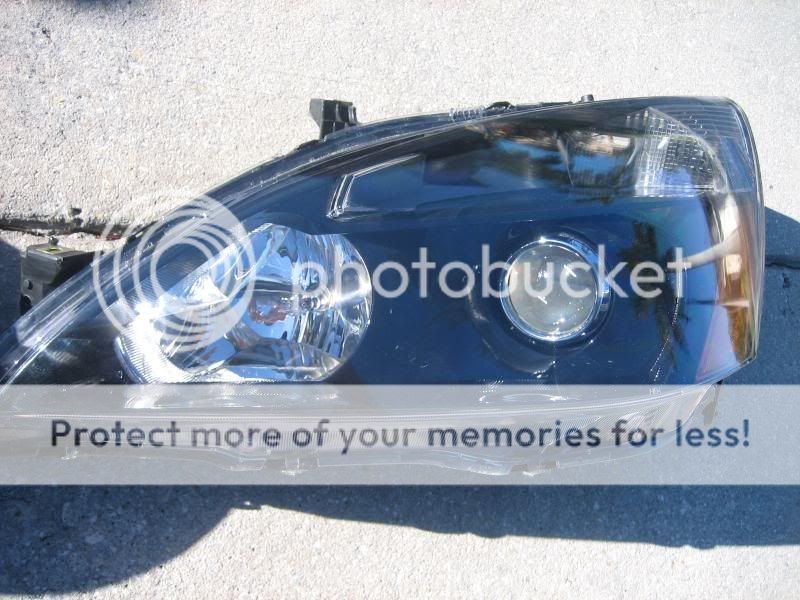
and Ta-dah!!!!
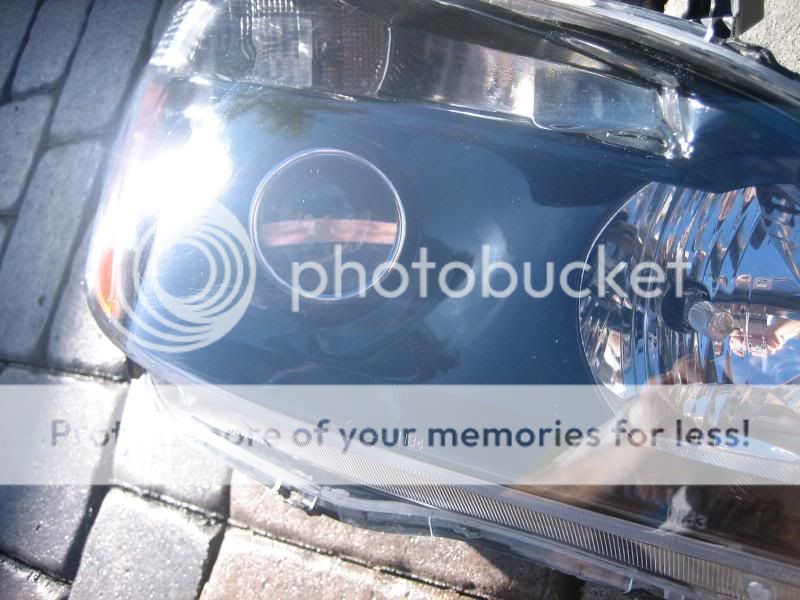
Almost ready for paint, still needs some more sanding, but I couldn't resist!!

So this is my first retro attempt. I currently have an s2k Retro by Larry. I am very handy and do ALOT of custom work, so I know I had wanted to maybe try a retro out, and if it turns out great (as it should) then I can make a few extra bucks.
I Plan to do fiberglass molds with the HID Planet Chrome Bezel ($50 one). Fiberglass won't be a problem for me, since I do it barely every week for different dash panels. Anyhow, everything will get painted Nighthawk Black Pearl (automotive paint), and the Amber side marker will remain..
2 weeks ago I order brand new OEM Replica Lights, I was refunded for the Passenger side and will get here soon (when it gets back in stock). So I got started on the driver side. I made the bracket that Viper had made a CAD sketching of..
Without further ado!
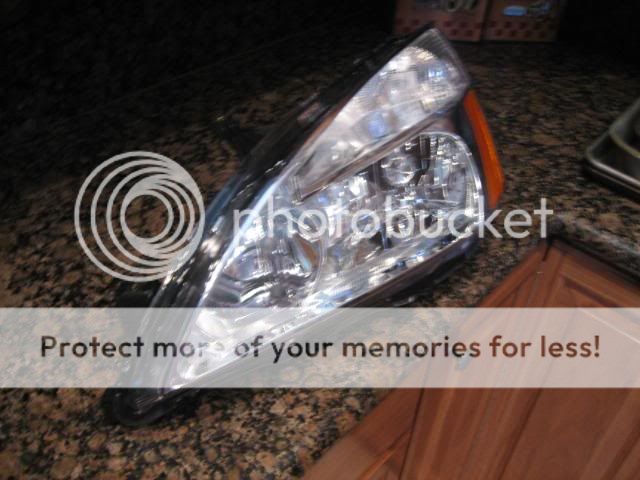
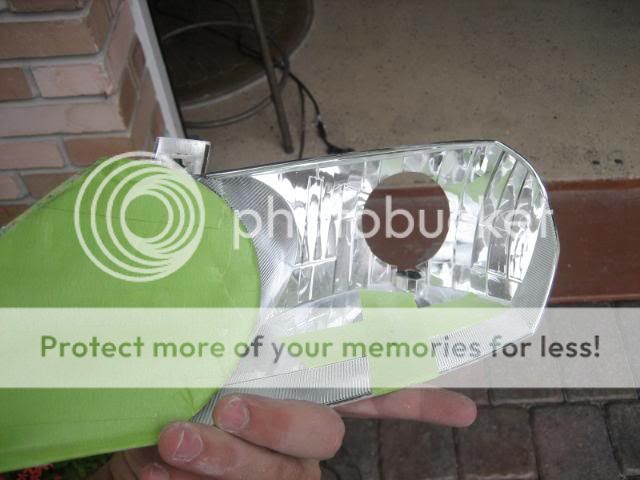
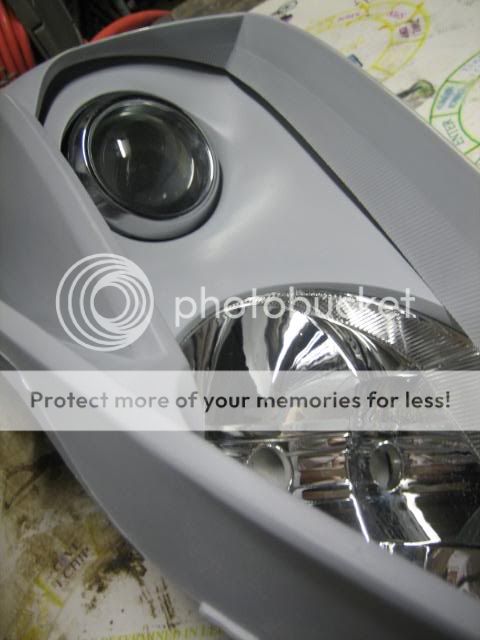
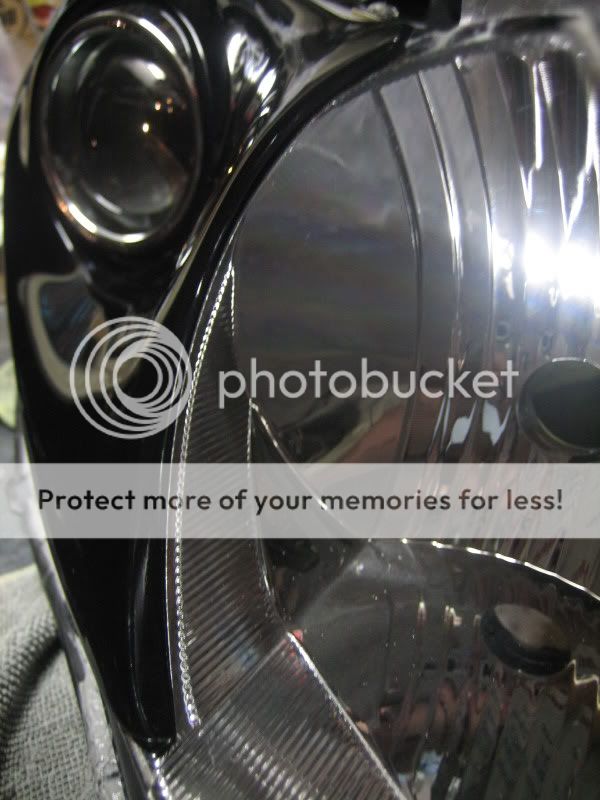
Brand new light! I am anal, I have to have perfect lense.
Some tape to sketch out the lines of the low beam
Ok, Ready for some cutting.
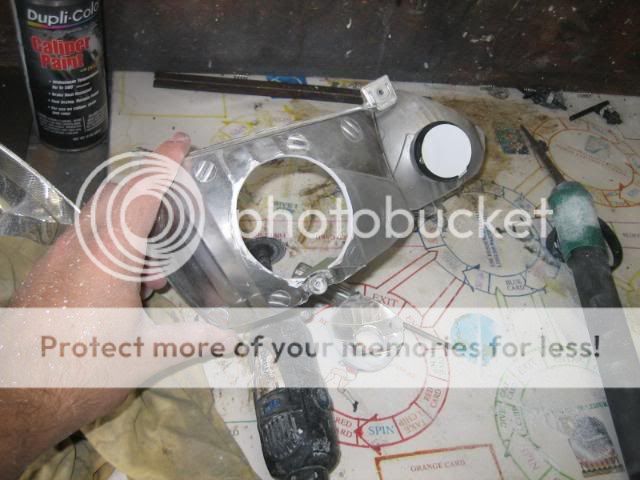
My brackets, no need for the paint, but I just had to, not pretty but they will do the job.
Then I realized that the circle was not going to be big enough, ah my poor nearly perfect circle
Then the spot near the rear of the low beam needed to be cut out. it was a hump for the reflector. Once it was cut out it left the surface with missing pieces. I took epoxy putty and rebuild the wall.
From here I was able to drill the 3rd hole and line up the projector. The projector is adjustable through the 3 allen wrench screws on the bottom. here is is all mounted up! You might noticed the left bracket, I had to re-dp the nut that attaches to the bolt.
Next I will wait for my HIDPlanet chrome bezels, then start the glassing!
I realized I did not need my Bezel to do the molds, so with that said I thought to myself how I could do this. A few minutes later a idea came to mind.
As you can see below I used a clamp on the projector. Later on this area will be cut out to fit the bezel.
At this point I stretched out my fleece and used hot glue at all the seams. I masked it off before hand. I opted to use hot glue because the resin once cured will act as a relase agent to the glue and help to release the mold from the tape.
Here it is trimmed up. I left a little extra fleece near the hi beam so that I have room to sand it perfect to match the contour of the hi beam
Then came time to fiberglass. I use B-440 Polyester Resin, not that cheap Elmers/Bondo crap.
I love my Dora Cups! They have to be paper or else the resin will melt it down, I love these things, they are cheap and I through them away after each use along with the paint brush. One time use for everything
Laying on the resin, gently. This was somewhat calming for me.
Set to dry!
I mentioned I am anal right? You will see in the following pictures! My anal-ness helps out with very clean work.
So from the last update, I got some work done. First I pulled the mold and trimmed it up to fit well. From here I got the basic contour of the hi beam from some duraglass. Then I laid 2 layers of 1.5 oz chop mat over the duraglass and the rest of the mold. I let that dry and picked it up a day later. I trimmed it up all smooth and did a test fit and the damn thing warped on me! One side would fit, and the other wouldn't. I fixed the problem by cutting the mold down the middle and fitting each side into its counter and temporary tacked it in with some CA Glue and Duraglass, Later I will glass the back of it as it is pretty strong as of now.
Now at this point the only thing I can work on is the Hi beam area since I am waiting on my HID Planet Chrome Bezels, so that prevents me from working the projector area since the hole will be made bigger to fit the bezel. Usually (well all the time) I will do all the filling with the Duraglass and Xtreme at once, but since I wanted to work on it, I just started working in one small section. I spent about 3 hours on the hi beam area. I think I got it the way I want!
Pics Below.
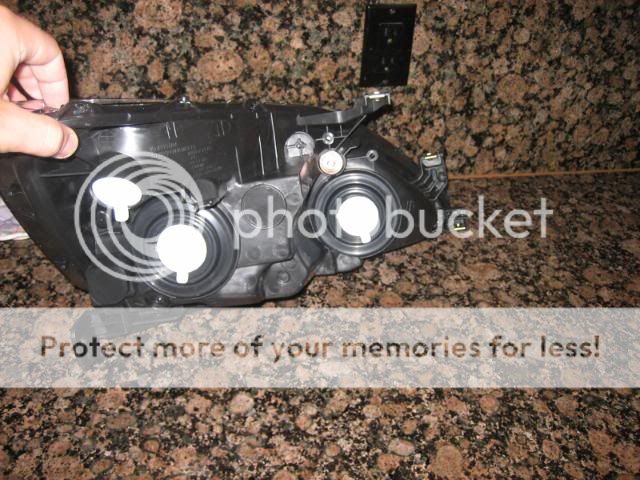
First off, I wanted to show the underside of the headlight housing. Here are the 3 adjustable screws.
All dry and ready to be trimmed, lines are drawn for reference.
Here it is all trimmed up the best it can be trimmed up before glass and filler.
Getting ready for Duraglass. I wanted to fiberglass on top of the duraglass for strength, because I needed to duraglass to get the basic shape of the hi beam area.
Time for glass. I use spray adhesive to create this mess lol. Well to temp hold the mat to the mold, or until it is resined.
Here are some pictures of the countless hours I spent filling sanding filling sanding. I must have re-filled alone at least 15 times on the hi beam area. Oh well it is HAS to be perfect, there is no other way I work. You can see in the middle where I cut the mold apart and put it back together.
Here is a few pictures of where I ended for the night. Keep in mind I usually wouldn't post pictures of one area filled and the rest rough but I am just working the hi beam area. The area I worked in the picture still needs filler, but tonight's focus was to get that basic shape.
Also, you might notice the little "desisn" I had to do on the lower contour of the hi beam. I could not carry the line into a point, because it just would not look right, so I just made it into a back slant. It turned out pretty good.
First, I started off by re-tapping everything and getting ready to get back to work. I wanted to make sure everything was protected before work was resumed
Then I got my HID Planet Chrome Bezels in, which will add a nice touch. I was actually waiting on these too, before I resumed work.
Time to do some beginning shaping
Then I got smart. I wanted the bezel to have some sort of "hidden" look, so that it looks like it is peaking out. So I came up with this little technique. Worked Great!
After it has all been shaped perfectly!
Now I can finally duraglass the rest of the mold and fix up any defects around the fiberglass mold
The hard part is done!
Almost there! I got a lot of much needed tedious work done since last update. I will let the pictures and explanations, show what I have done.
First off, I needed to do some more fiberglass reinforcing, so things got messy again. I needed to fiberglass the full backside. You can still see the seam where I cut and mended the pieces back together. Everything once glassed was strong as hell, but not heavy at all.
Here is it all trimmed back up again. I wanted to get the lines perfect where the mold meets the inner housing lines. I used duraglass to get it perfect. From here the contour around the Hi Beam somehow got completely off centered and messed up. Spent another hour on that to get it reshaped and perfect again.
My feelings lol
Now, I wanted to make some sort of bracket to center the mold up and hold it in nicely. Some people say that the mold will just sit in there, well that really doesn't float my boat too well. I used a L bracket. First I drilled a hole in the housing, then I positioned the bracket in a manner that the fiberglass mold would hit it when installed. From here I used some CA Glue and got the bracket to tack on the mold while the screw was still installed in the inner housing. I then removed the screw which left the L bracket attached to the mold.. I backed it up with an epoxy from here. Then I metal epoxied the nut on the bottom of the L bracket, so that I can just screw it right in without having to hold the nut somehow.. Works perfect and holds it in place like no one's business.
Next it was time for some Rage Xtreme, This I <3!!!
Got that spread and all sanded down, then primer-ed it, sanded it back down, primer-ed it, and I got a couple more sessions of that.
Next was the actual housing. Since it will be all painted, it has to be prepped correctly. First I sanded it all down, then gave it a wipe down with wax/grease remover. From here I primer-ed it and wetsanded it down, so it is smooth and ready to be painted.
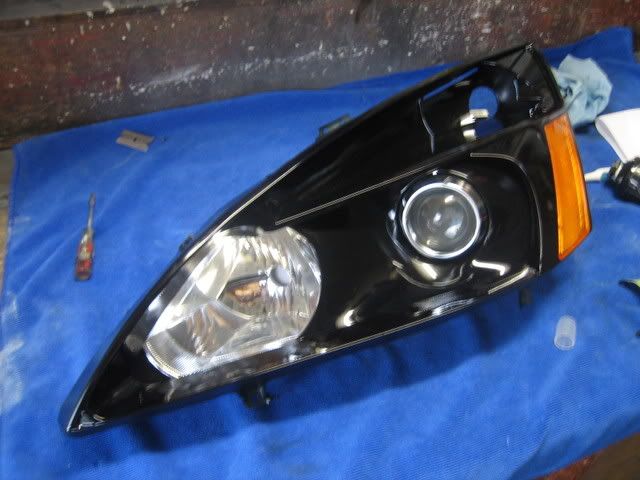
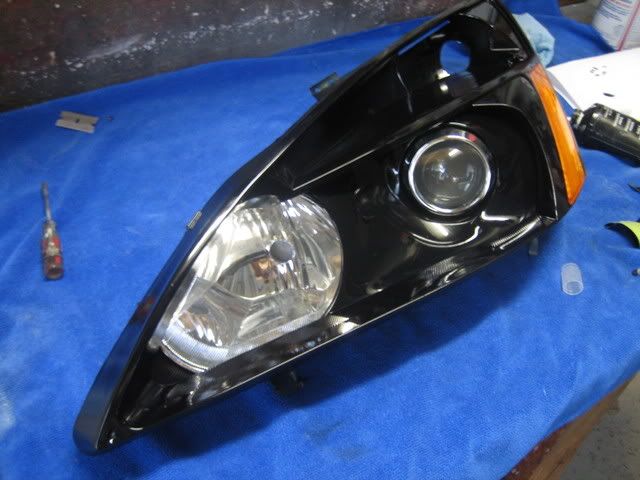
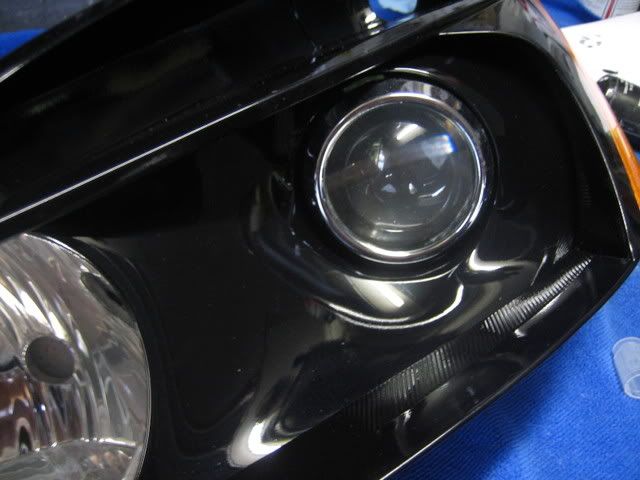
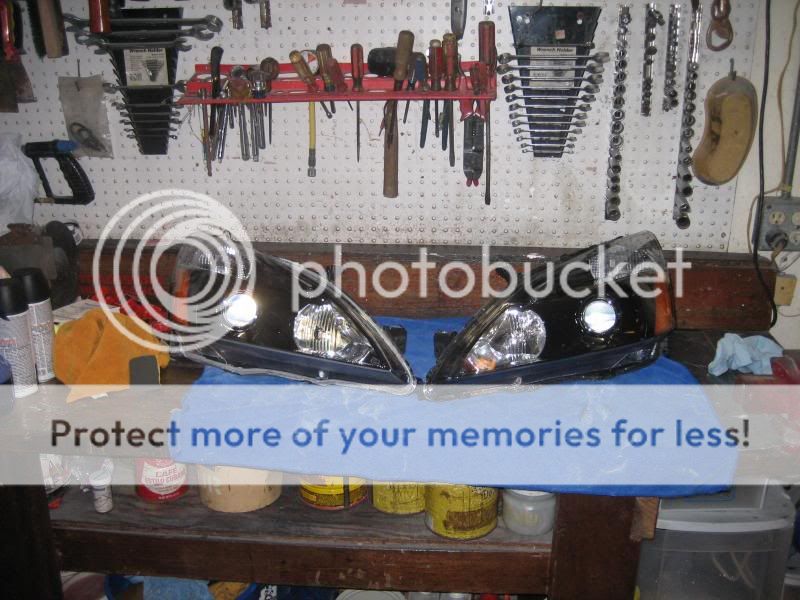
and Ta-dah!!!!
Almost ready for paint, still needs some more sanding, but I couldn't resist!!
 01-04-2012, 04:39 PM
#50
-Brian
Thread Starter
It has been a great experience.!~
Thanks to Everyone to has followed this thread along the way. More to come once they are installed in the future owner's car.
...the Thread isn't over yet heh.


Thanks to Everyone to has followed this thread along the way. More to come once they are installed in the future owner's car.
...the Thread isn't over yet heh.
01-04-2012, 04:46 PM
#51
-Brian
Thread Starter
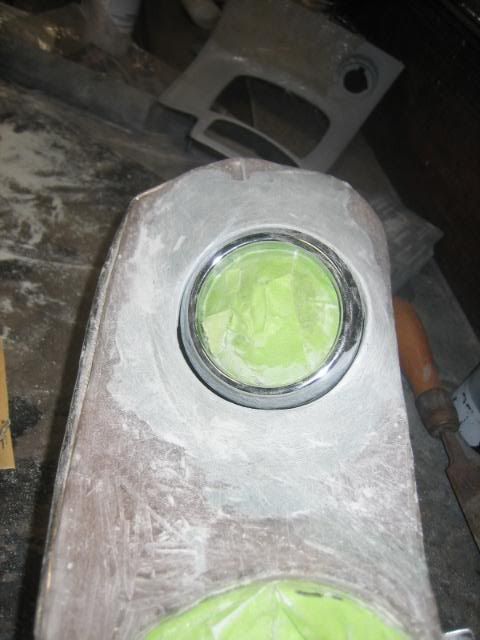
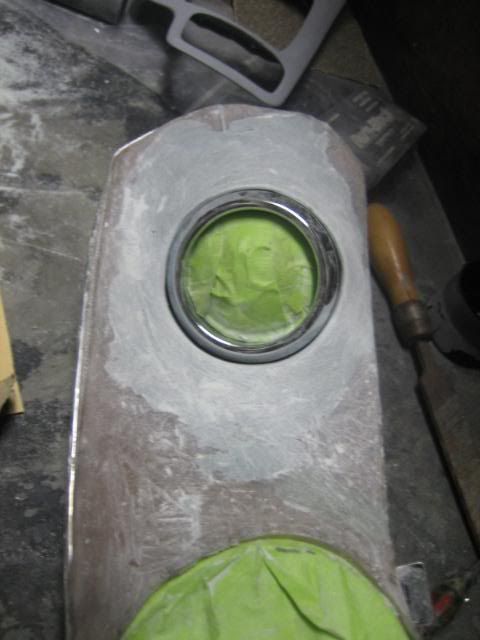
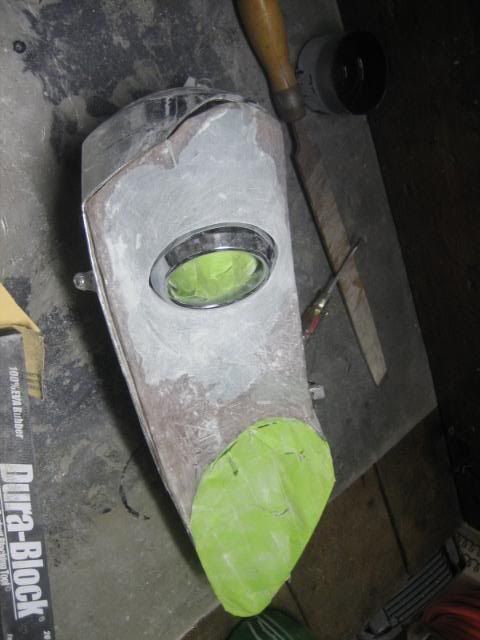
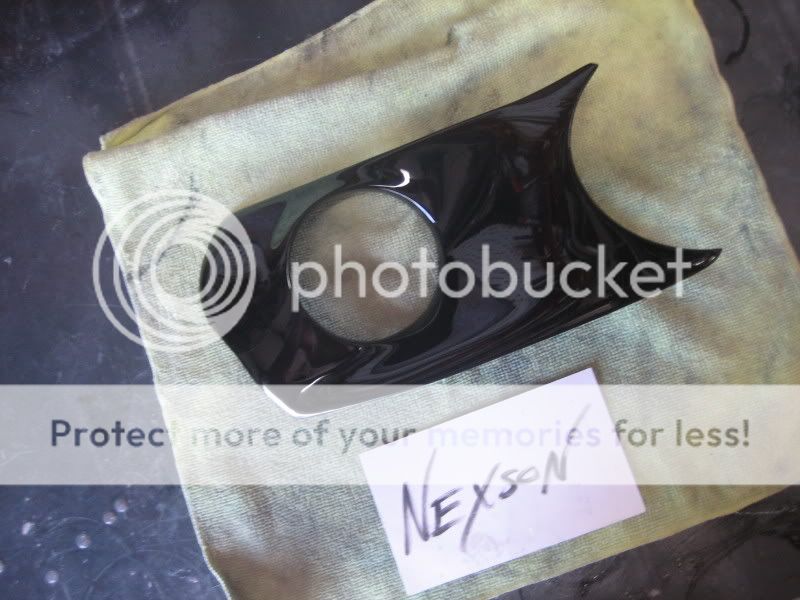
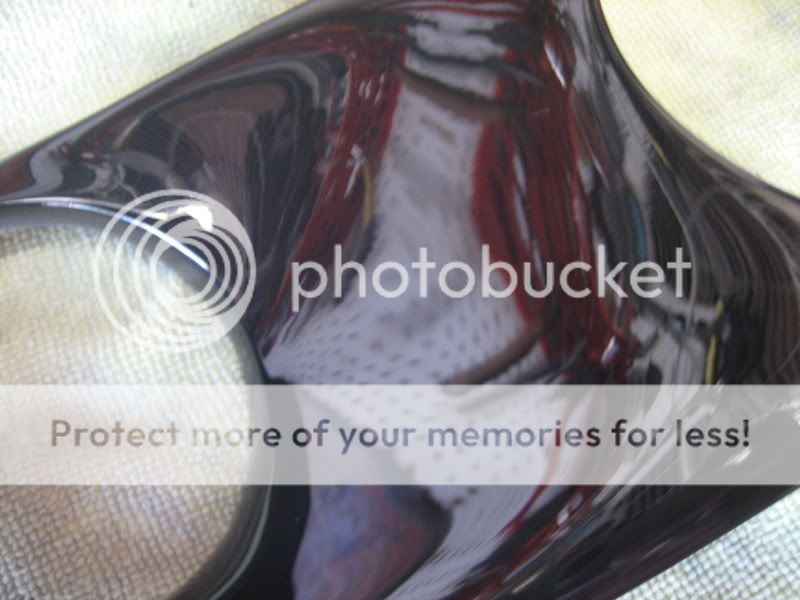
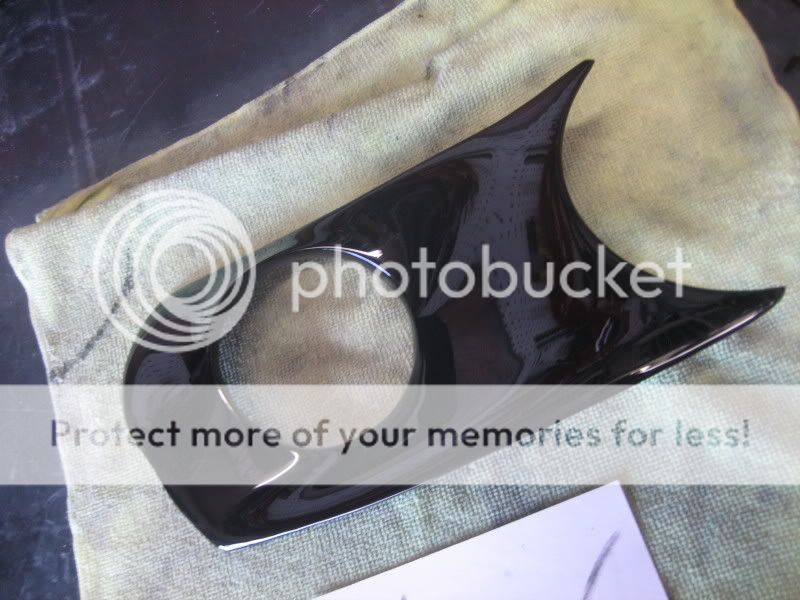
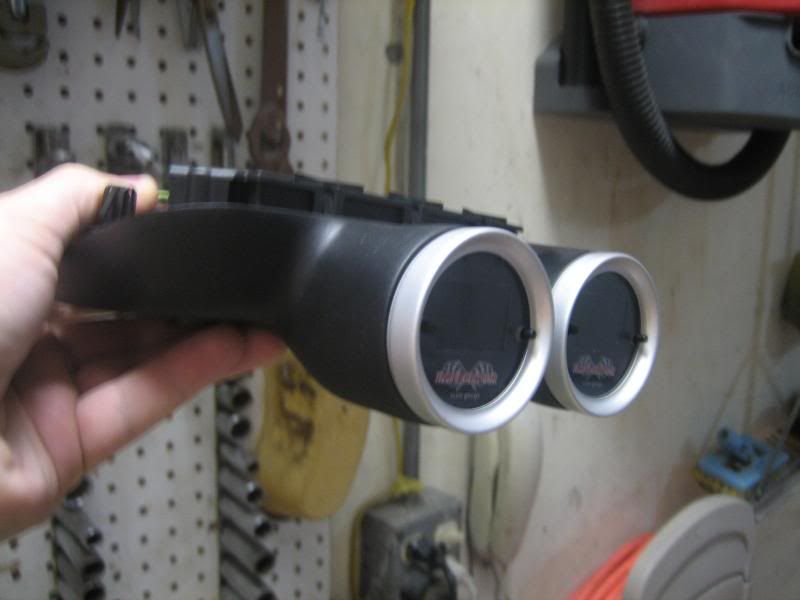
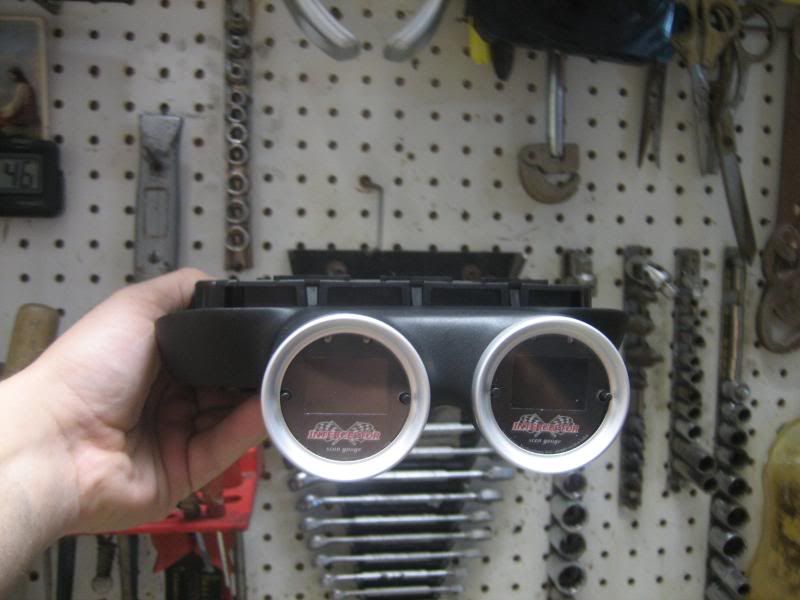
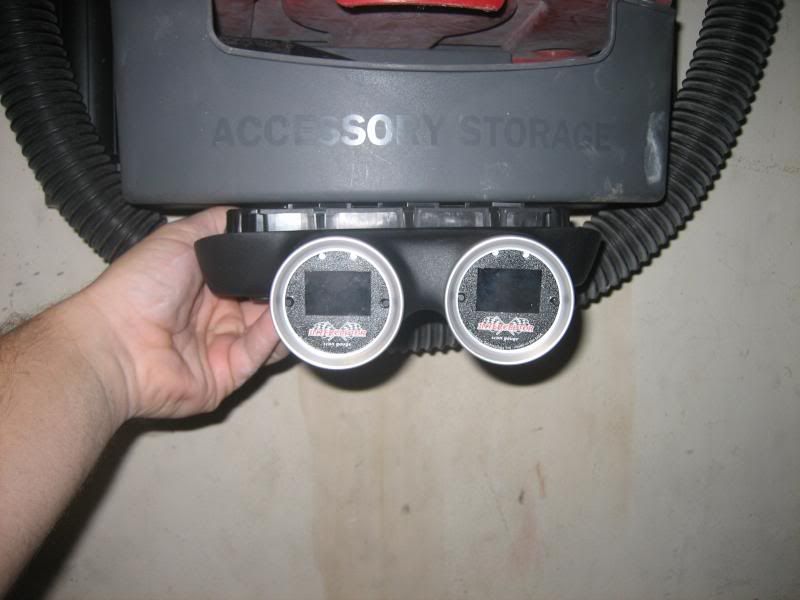
he sold it to me and now i have it in my car and love it. i got pulled over one time and the cop said he really liked the gauge setup lol. great work nexson.

403690_10150469047013972_500043971_8509349_6638310 8_n by diddy1226, on Flickr
403690_10150469047013972_500043971_8509349_6638310 8_n by diddy1226, on Flickr
Thanks for the support!!!
 01-04-2012, 04:49 PM
#52
-Brian
Thread Starter
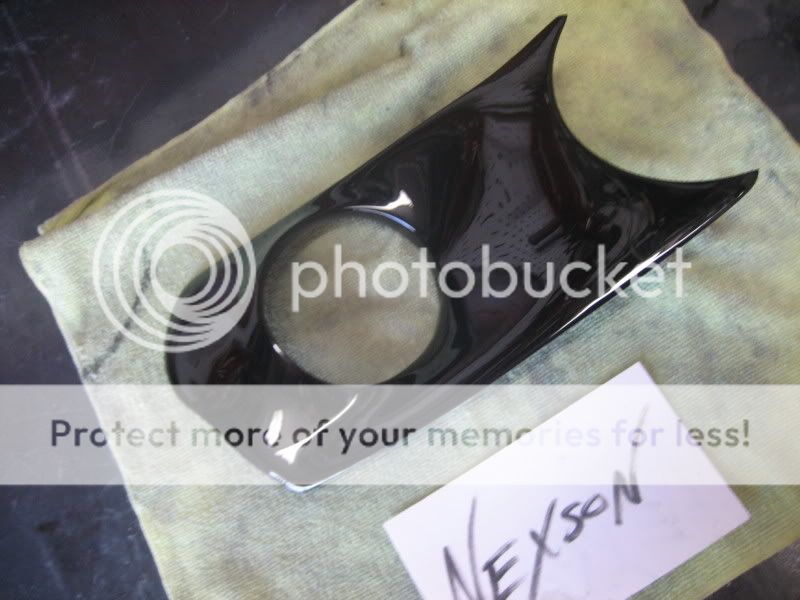
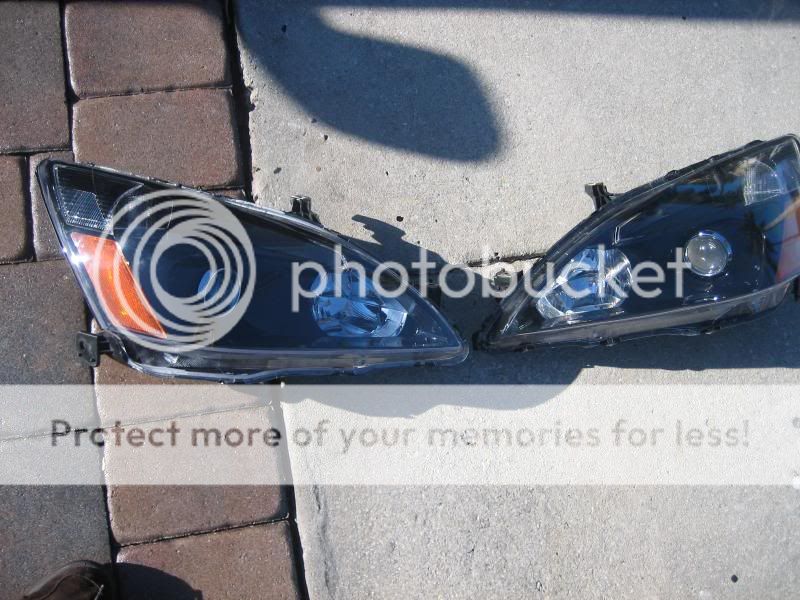
And the result!!
I would love to see the pictures and help you out. Let me get everything I have out here in the thread first and then I will tell you to post it, that way it doesn't get lost in all the pictures
In the mean time, your welcome to AIM me at exus28
Im working on the custom grille for my CL but i dont want to post any pics without your permision and before its done. I would like to ask few questions though on how to finish my project. I also made myself a pilar gauge pod that i am currently using. Its looks good but it would look like shit compared to your work. I am in to learn.
In the mean time, your welcome to AIM me at exus28
01-04-2012, 08:40 PM
#53
Team Owner
iTrader: (2)
Join Date: Jan 2008
Location: Kansas City, MO (Overland Park, KS)
Posts: 36,545
Received 6,470 Likes
on
5,162 Posts
Bri-
You're almost at page 3. I hope you've got more!
You're almost at page 3. I hope you've got more!
01-04-2012, 08:49 PM
#54

Wow,
Very nice. Again, you have talent & patience. Keep up the good work.
Very nice. Again, you have talent & patience. Keep up the good work.
01-04-2012, 09:30 PM
#55
I shave my change purse
Do you think you have what it takes to join the team?
We are looking for skilled, talented and qualified craftsmen to fill multiple positions. Tell us about yourself, specify your skills and position you are applying for. Email us at jobs@westcoastcustoms.com be sure to attach your resume or fax us at (951) 284-0688.
No walk-ins or phone calls.
only dedicated and experienced works need apply
http://www.westcoastcustoms.com/blog/?p=6961
LOL, seriously dude awesome work!
01-04-2012, 09:37 PM
#56
01-04-2012, 10:15 PM
#57
-Brian
Thread Starter
Yes I sure do! This is a good time to upload all my photos. Going down memory lane and I just cannot believe all the jobs I have done.
THANKS! Yes patience is a virtue!
I emailed them!! Let's see what they say hehe.
Do you think you have what it takes to join the team?
We are looking for skilled, talented and qualified craftsmen to fill multiple positions. Tell us about yourself, specify your skills and position you are applying for. Email us at jobs@westcoastcustoms.com be sure to attach your resume or fax us at (951) 284-0688.
No walk-ins or phone calls.
only dedicated and experienced works need apply
http://www.westcoastcustoms.com/blog/?p=6961
LOL, seriously dude awesome work!
We are looking for skilled, talented and qualified craftsmen to fill multiple positions. Tell us about yourself, specify your skills and position you are applying for. Email us at jobs@westcoastcustoms.com be sure to attach your resume or fax us at (951) 284-0688.
No walk-ins or phone calls.
only dedicated and experienced works need apply
http://www.westcoastcustoms.com/blog/?p=6961
LOL, seriously dude awesome work!


 01-04-2012, 10:21 PM
#62
-Brian
Thread Starter
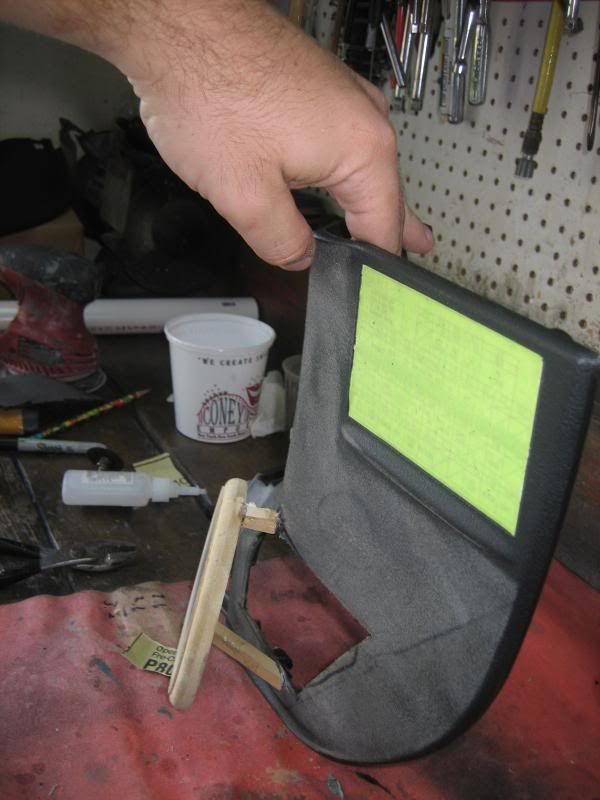
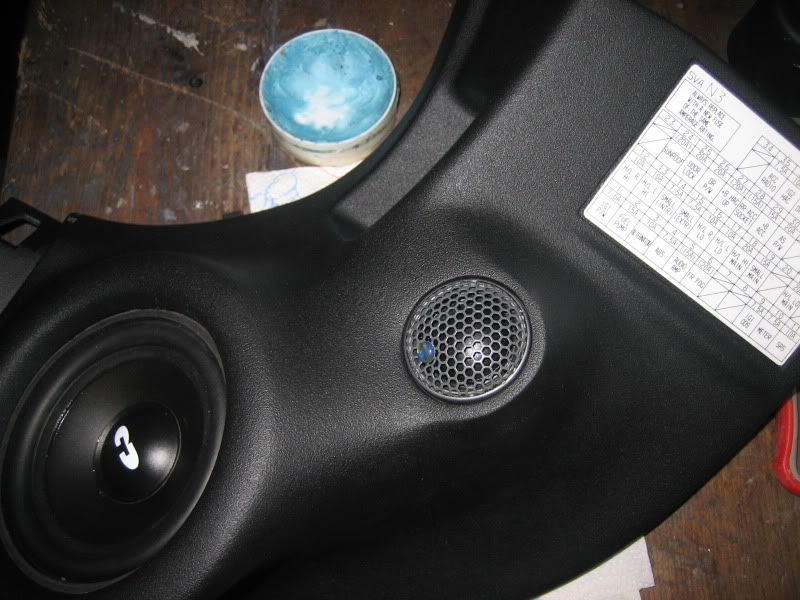
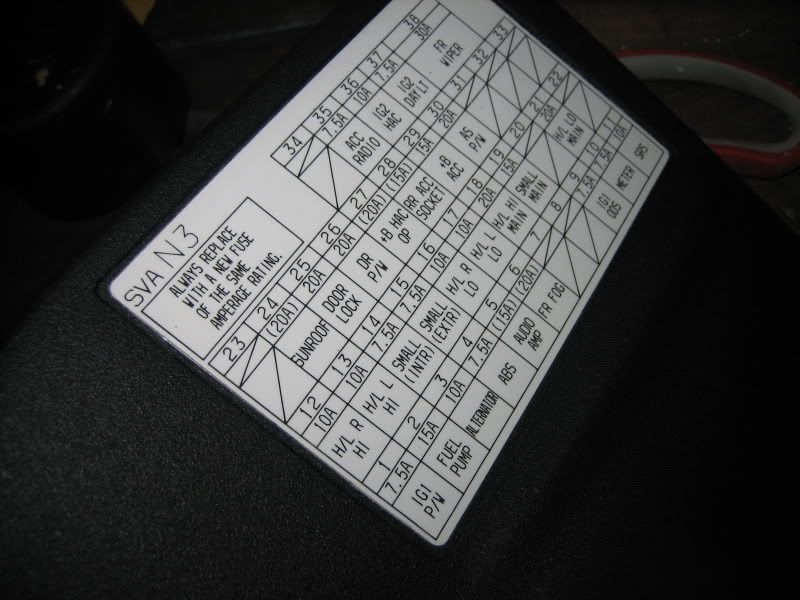
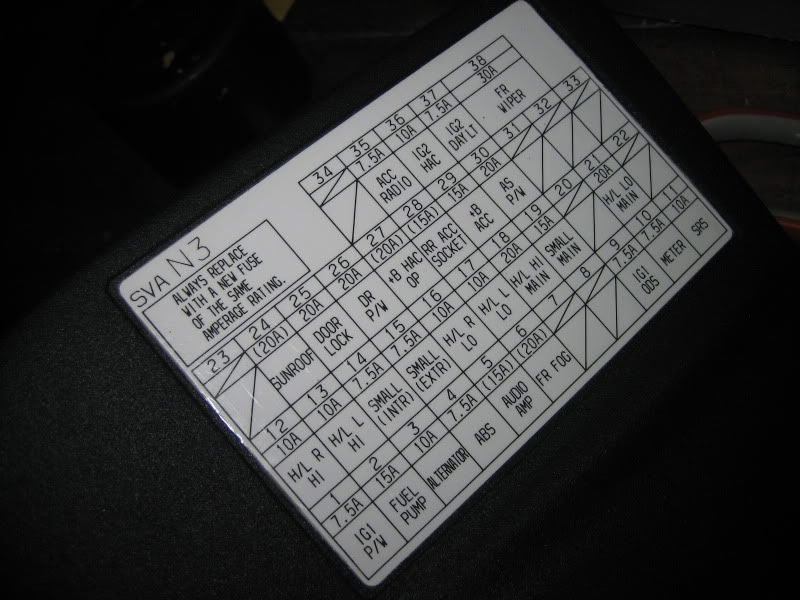
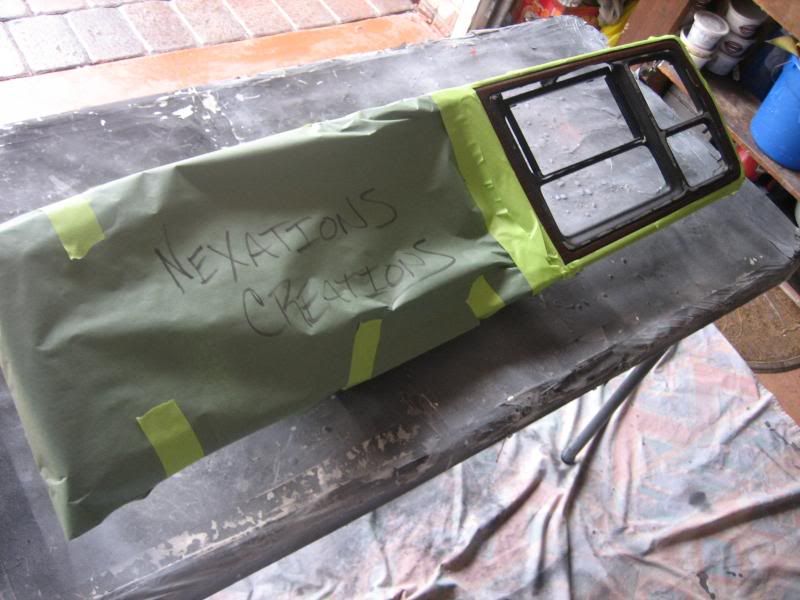
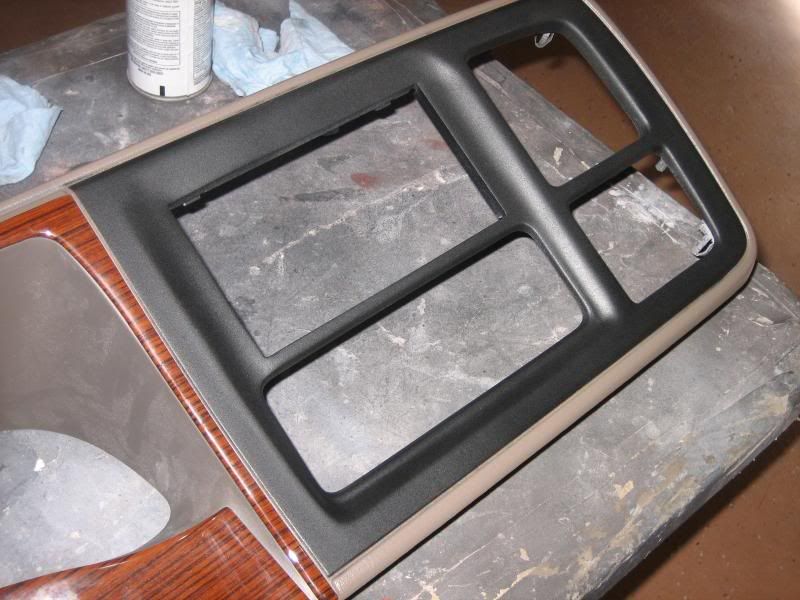
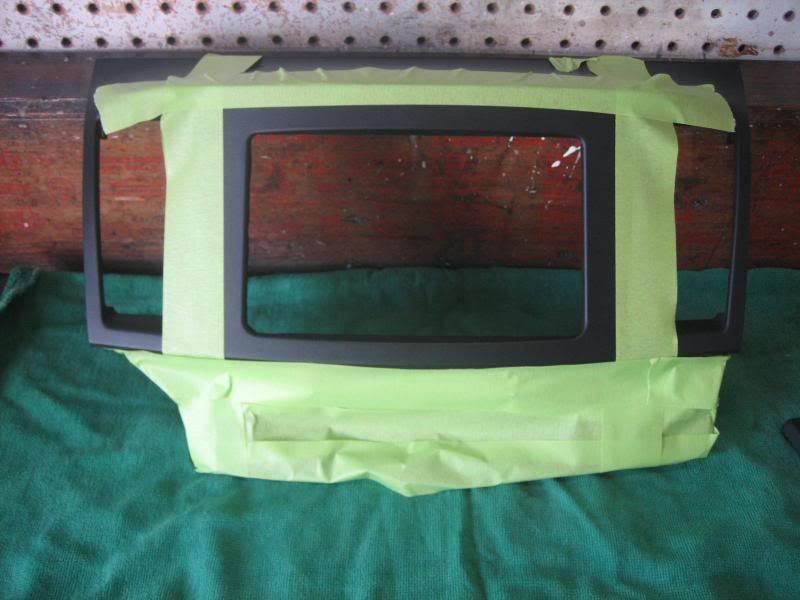
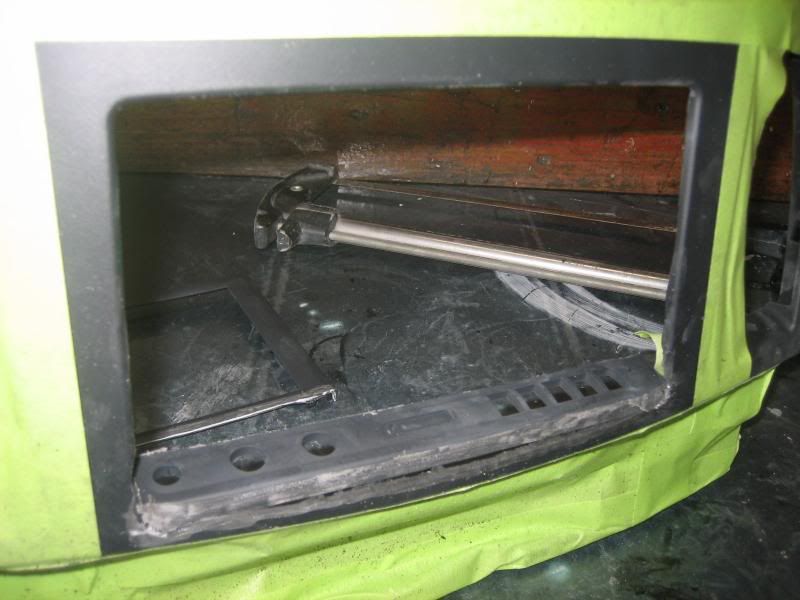
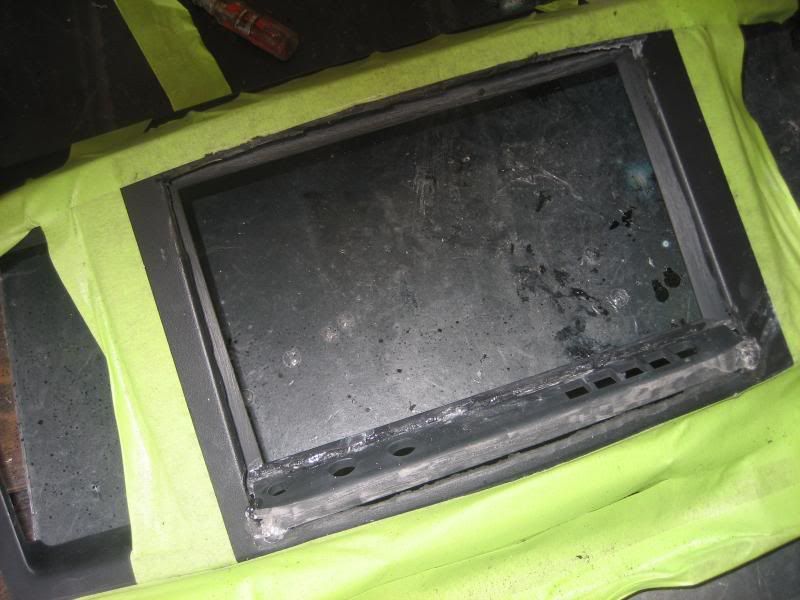
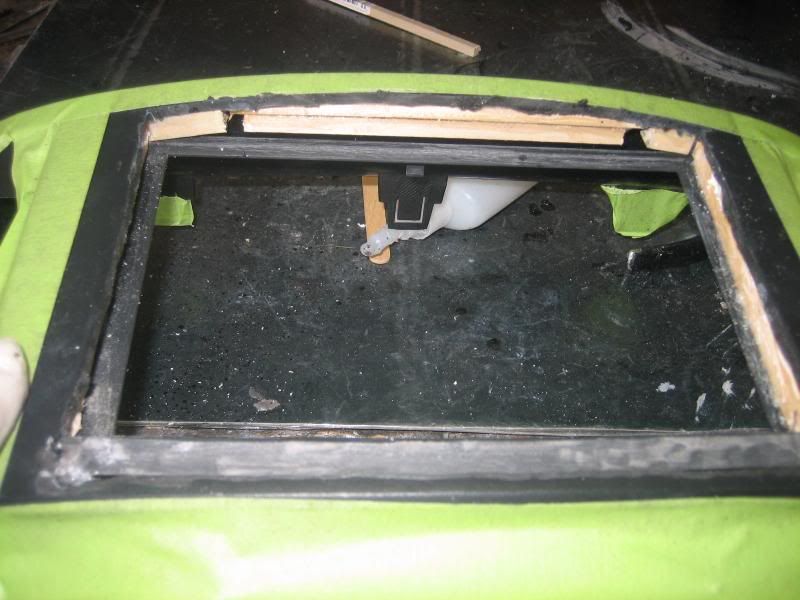
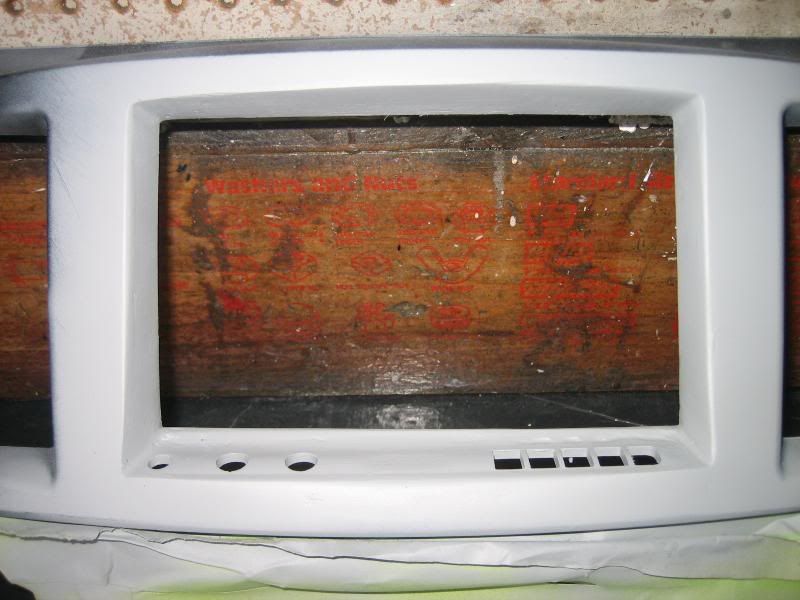
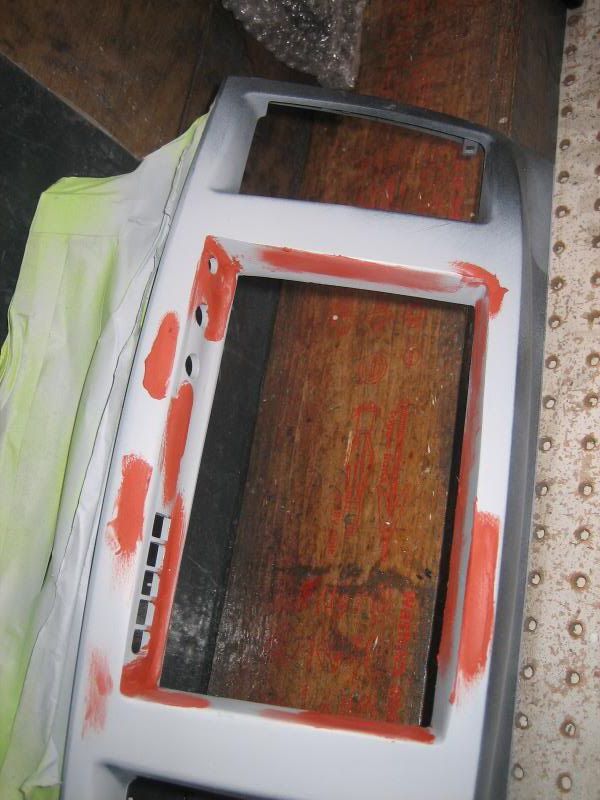
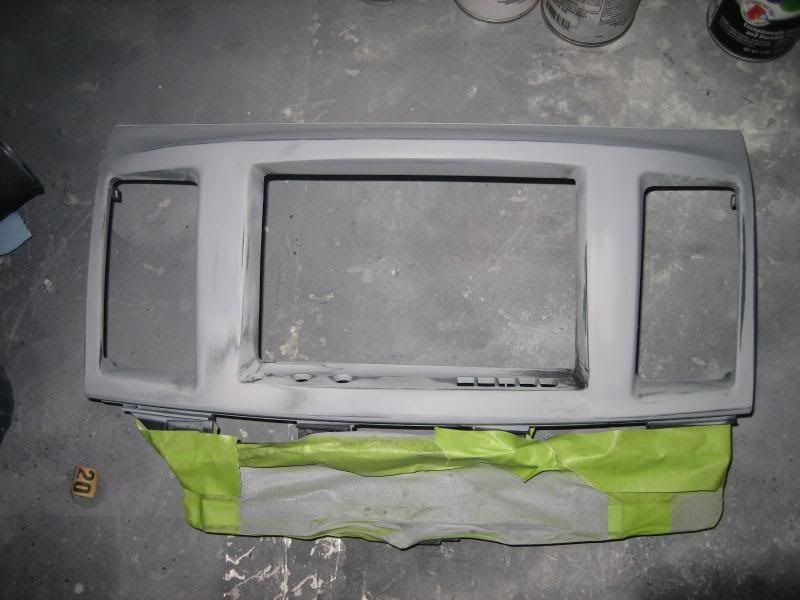
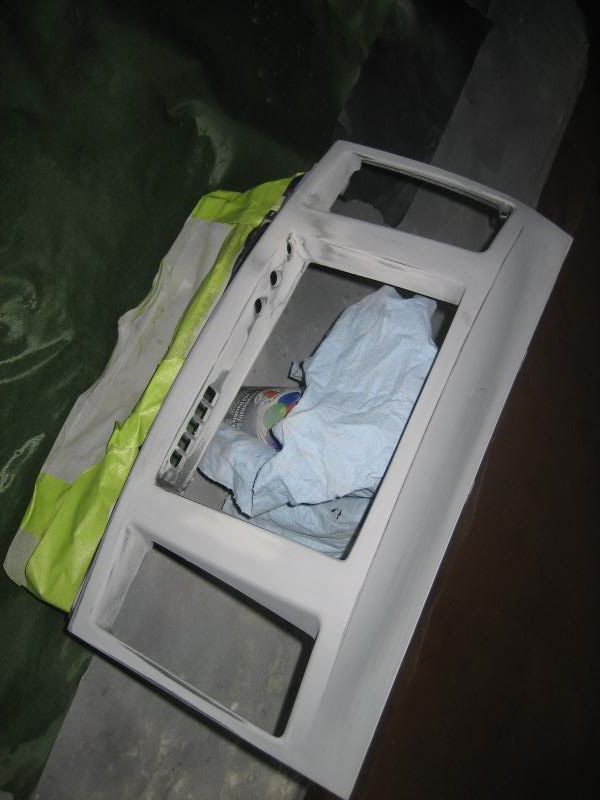
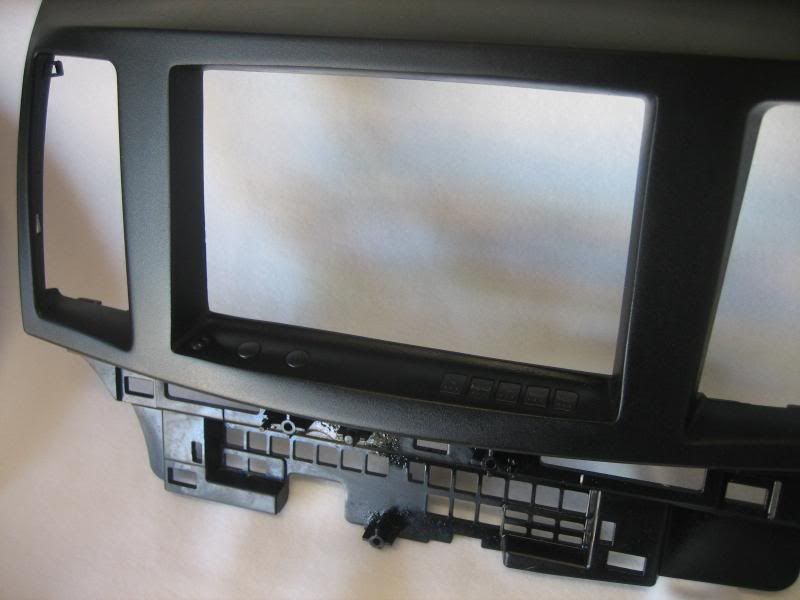
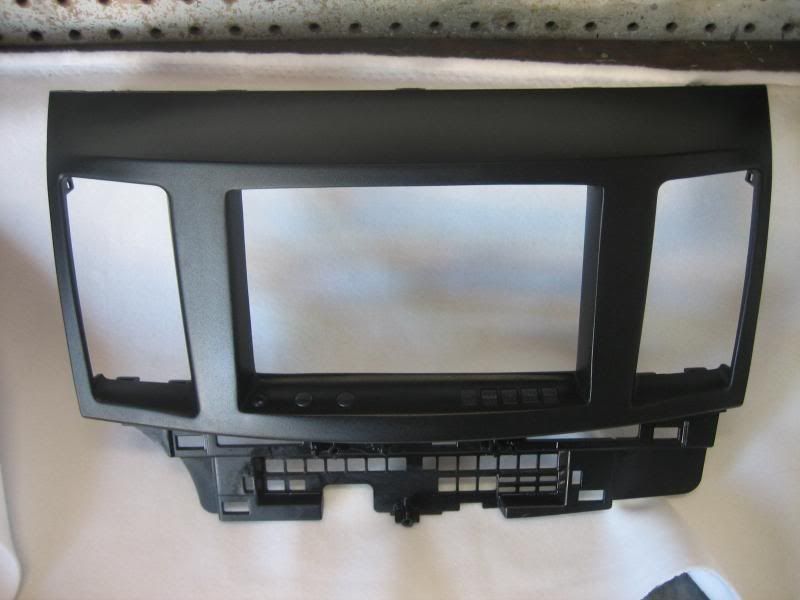
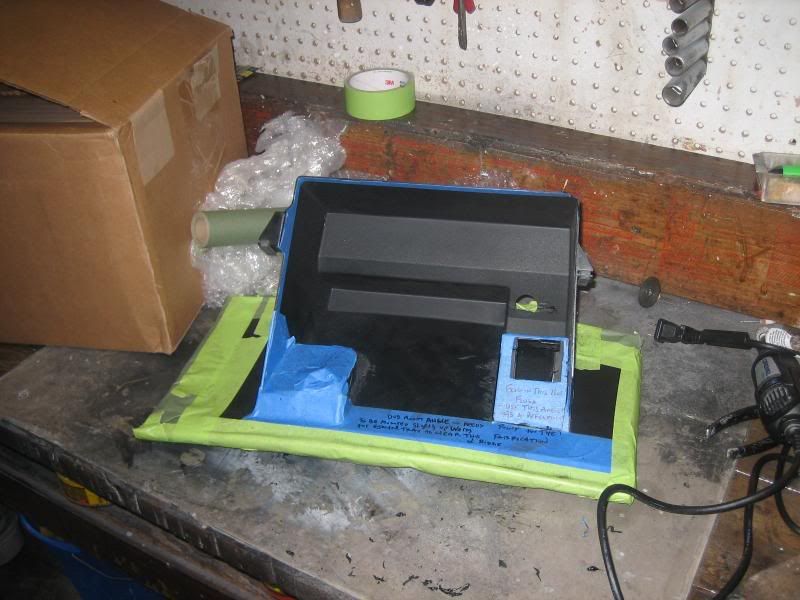
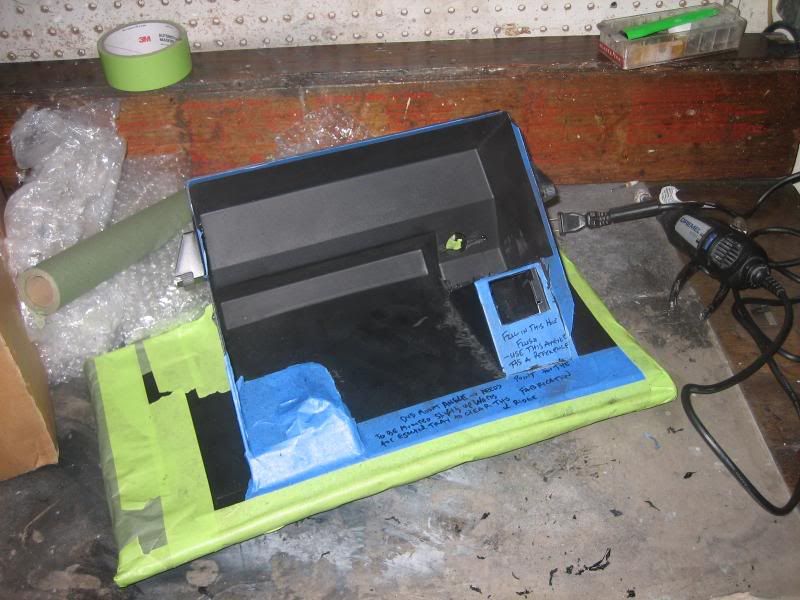
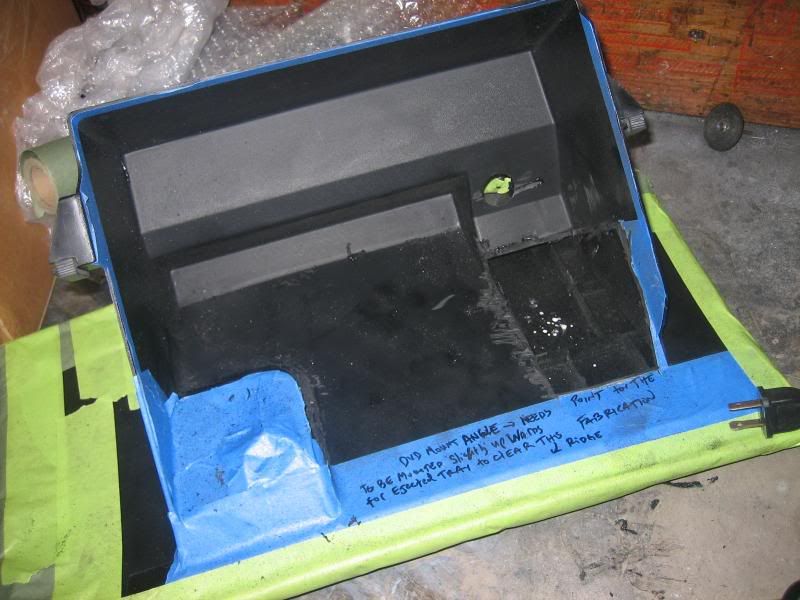
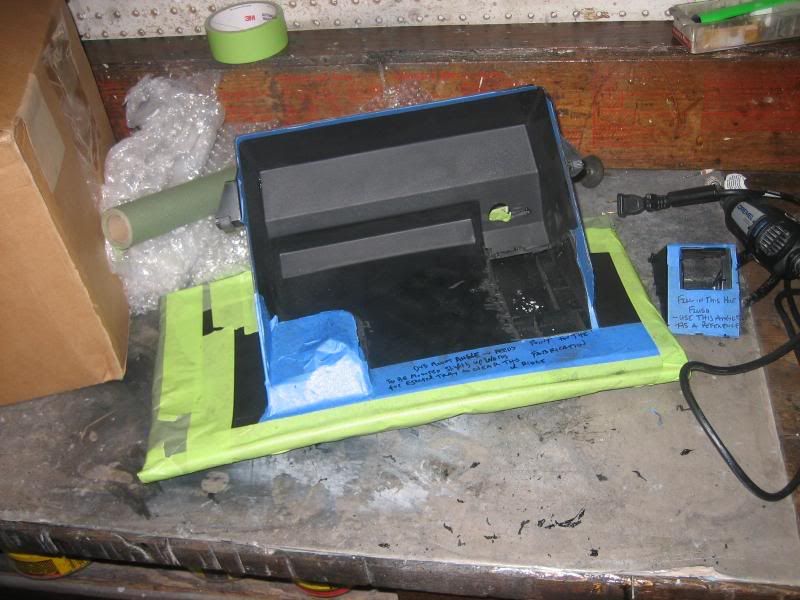
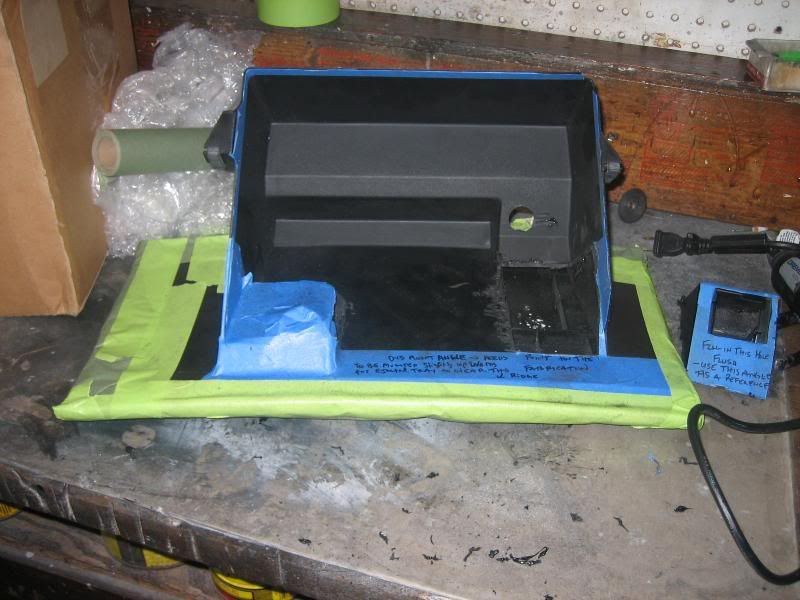
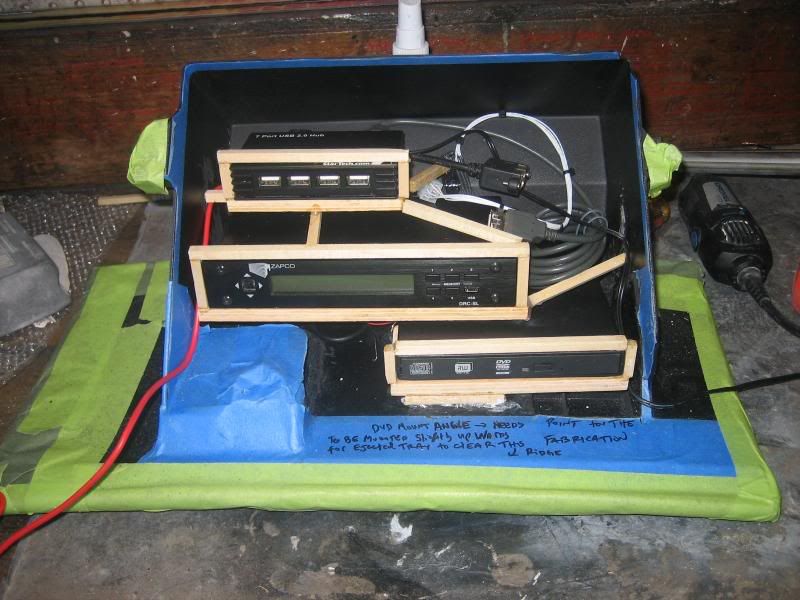
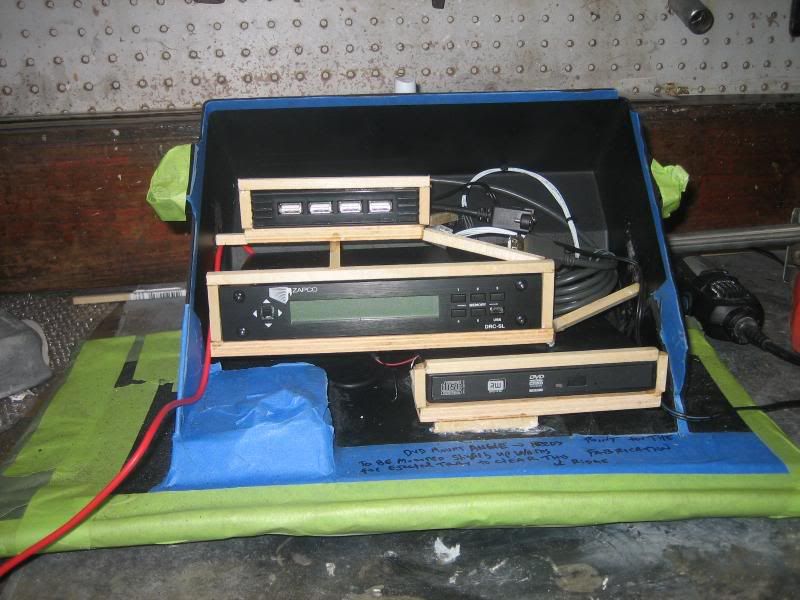
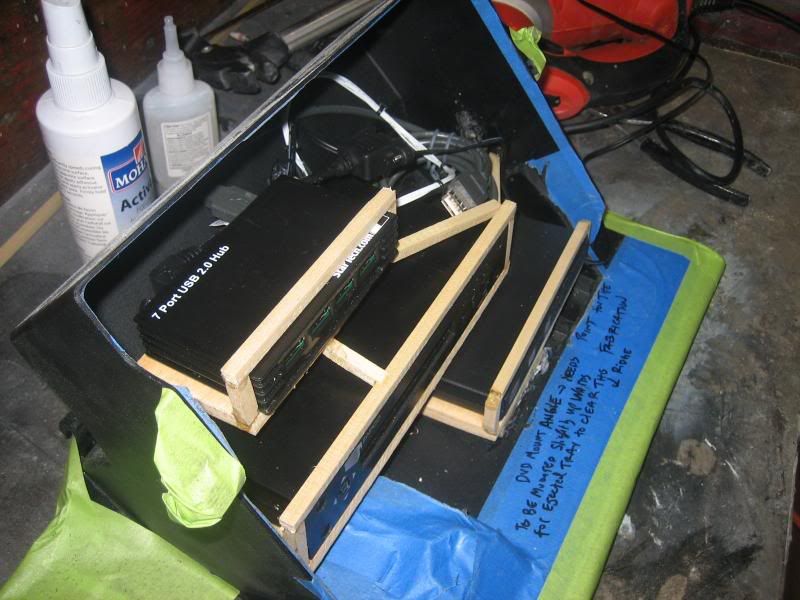
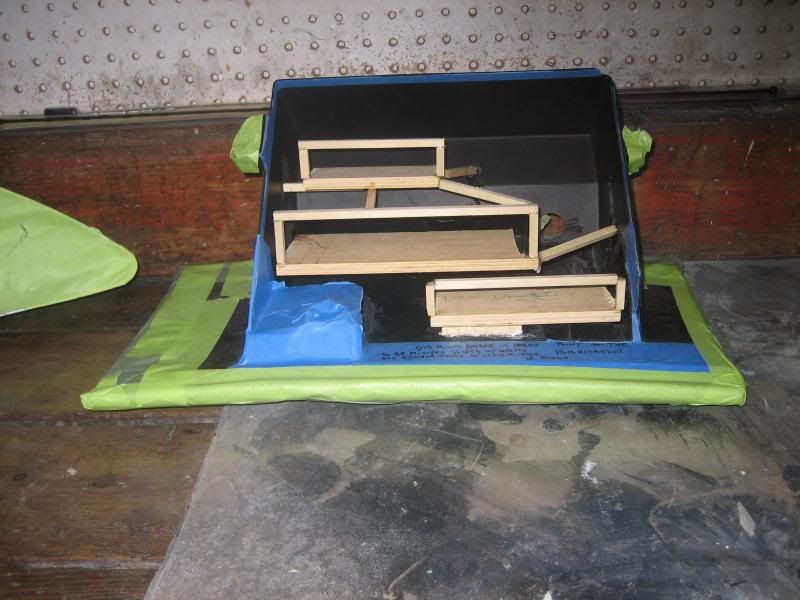
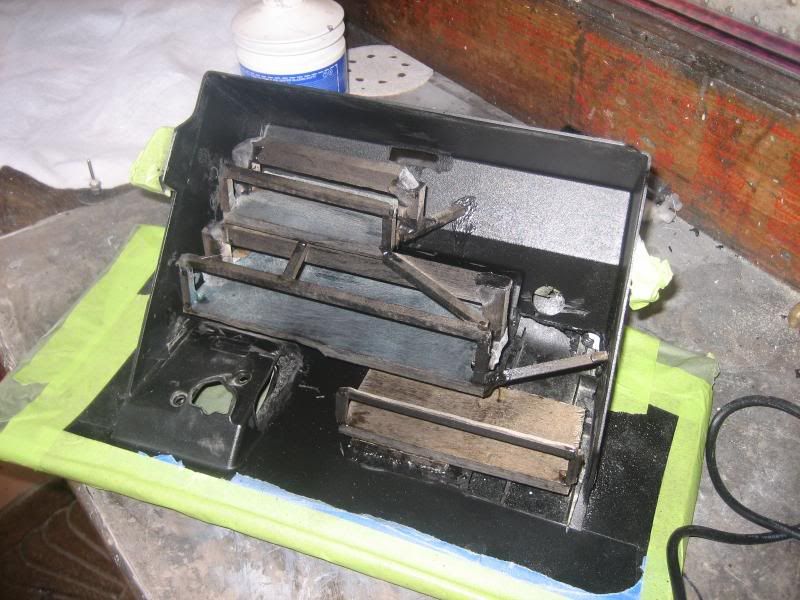
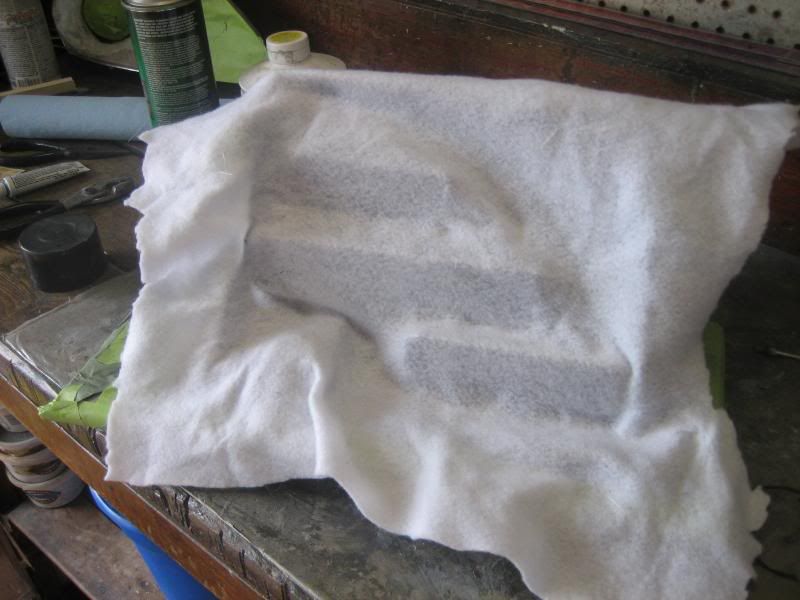
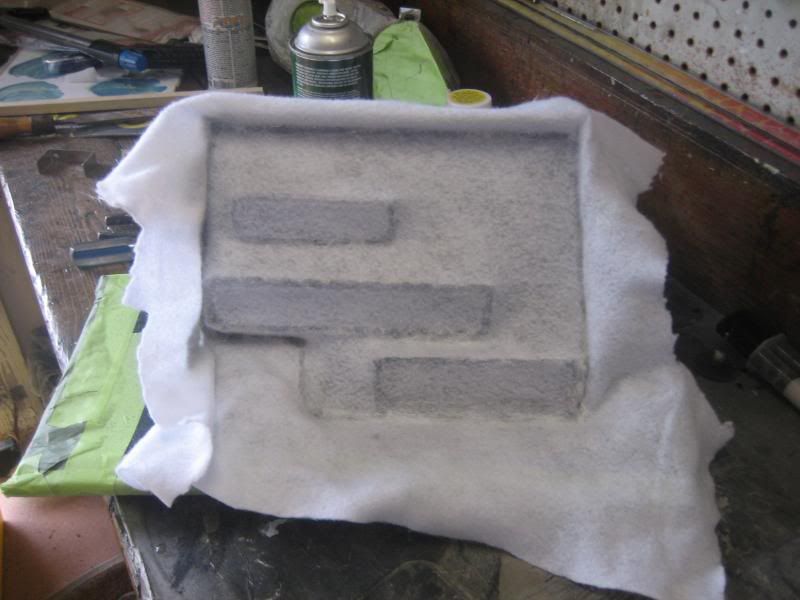
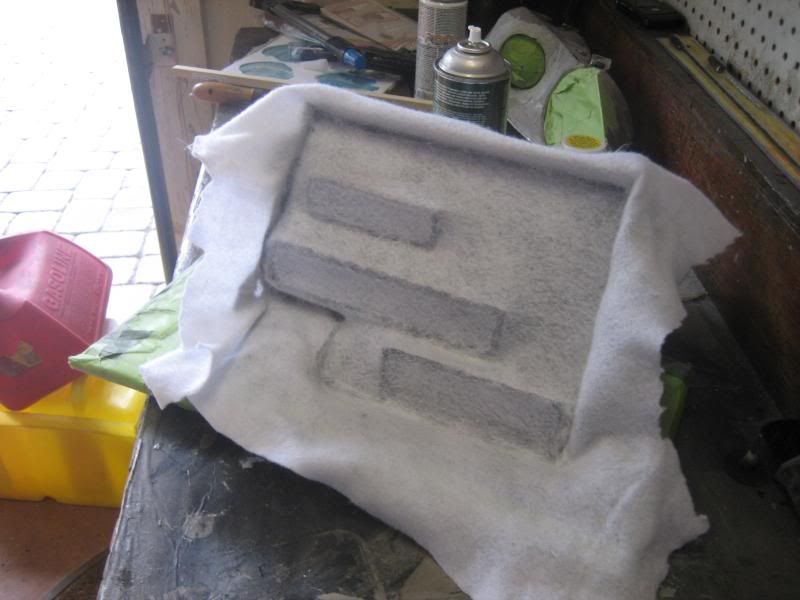
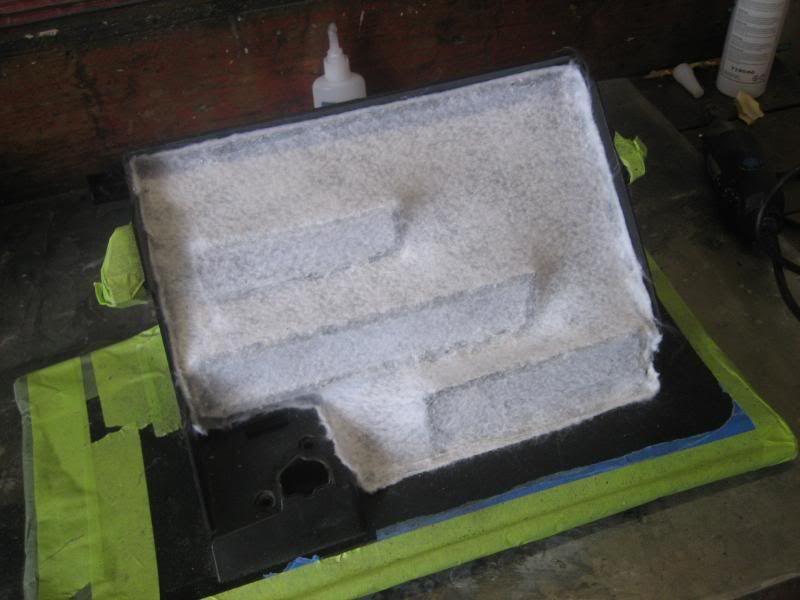
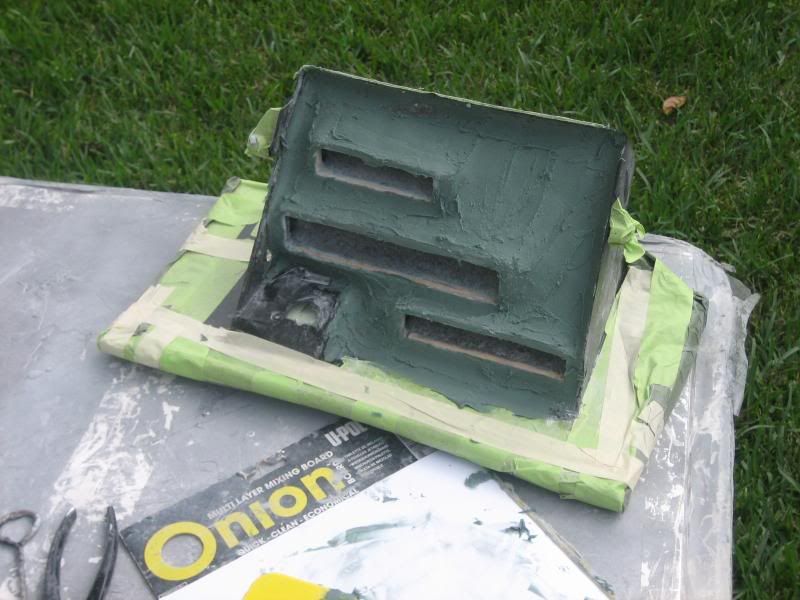
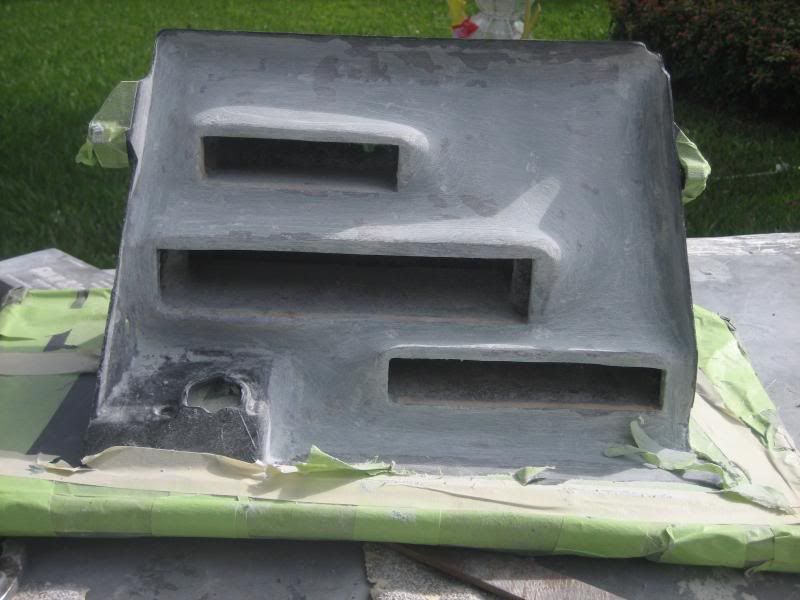
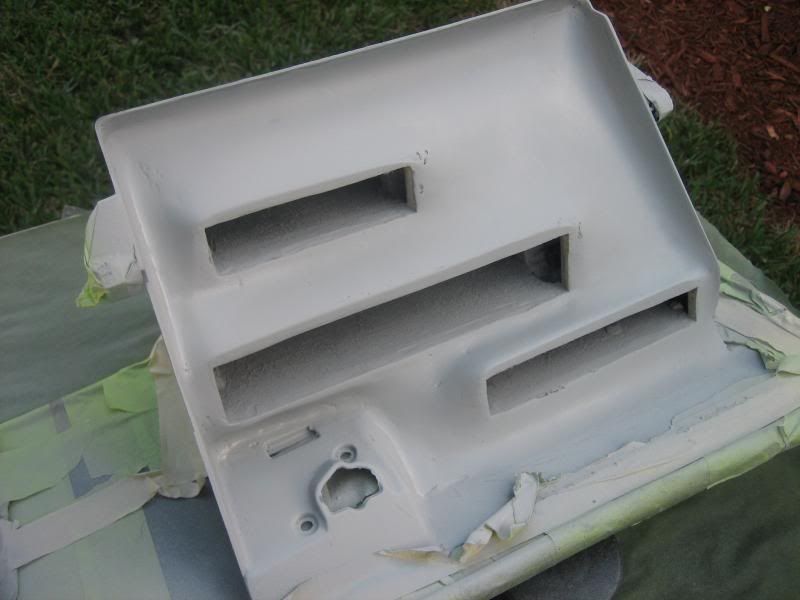
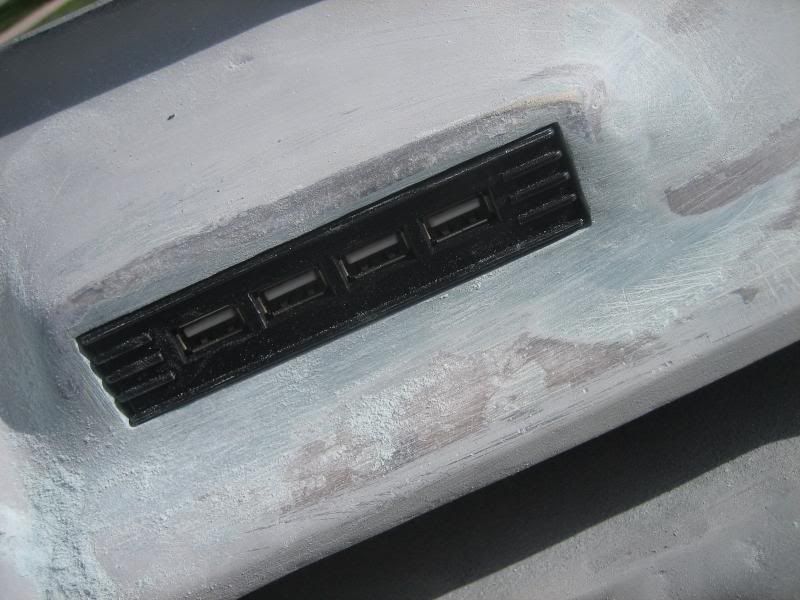
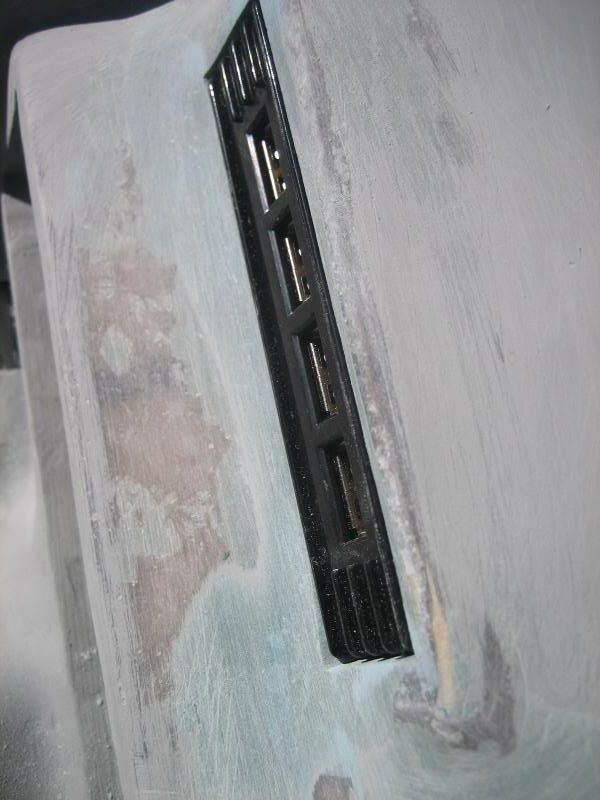
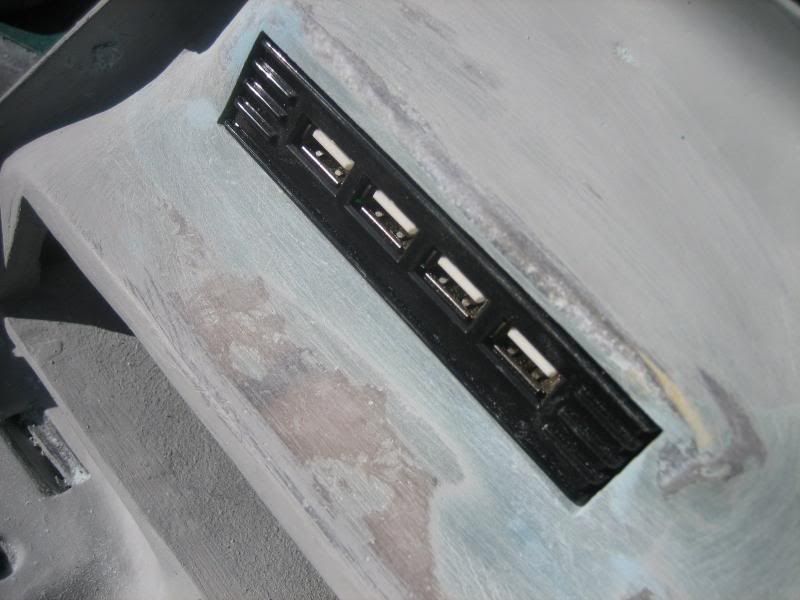
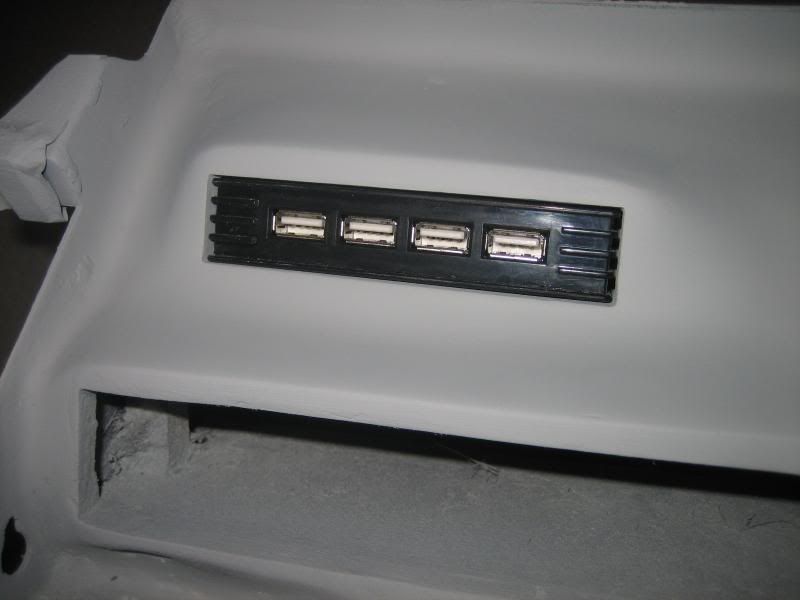
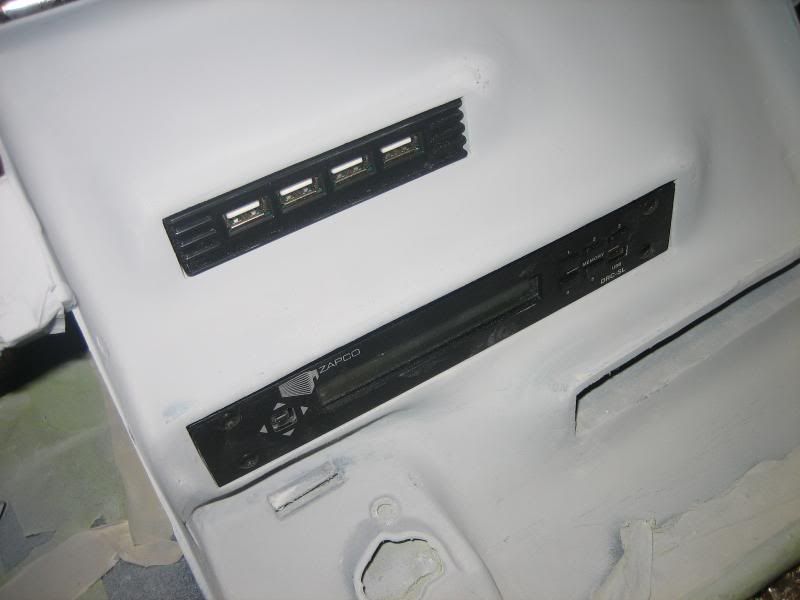
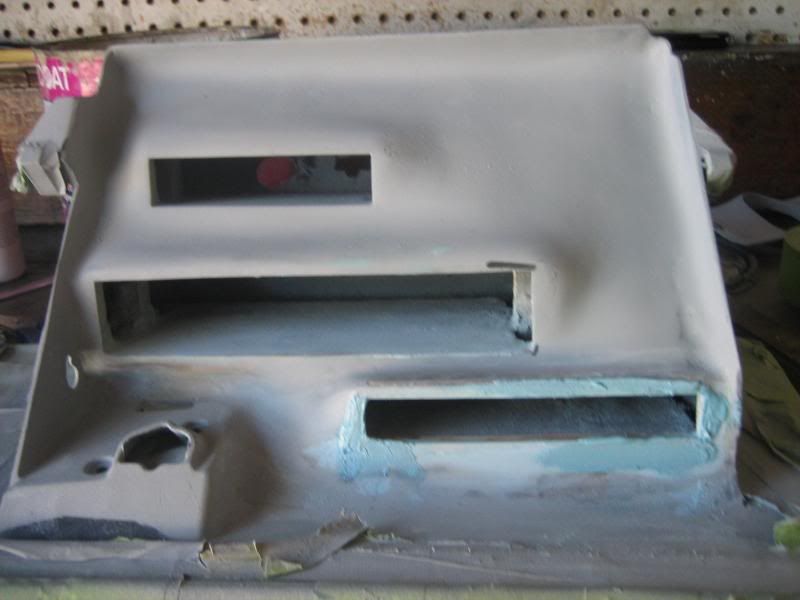
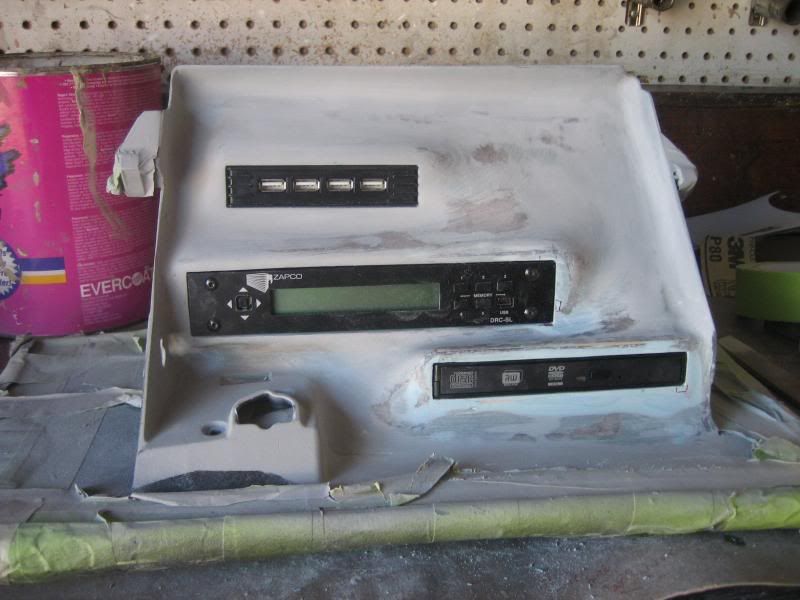
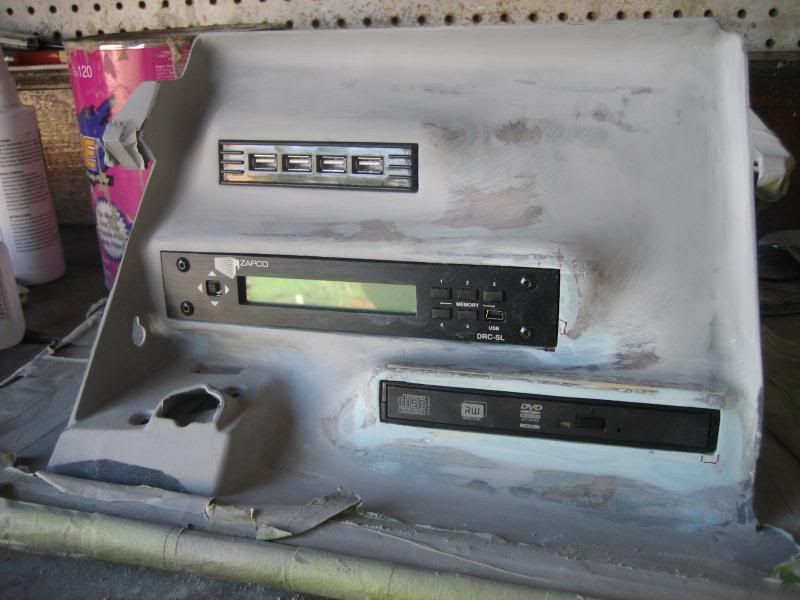
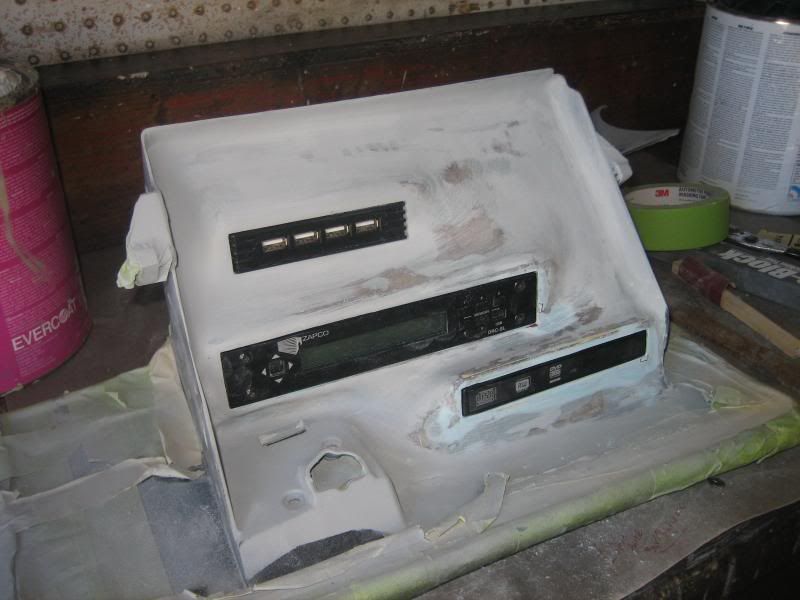
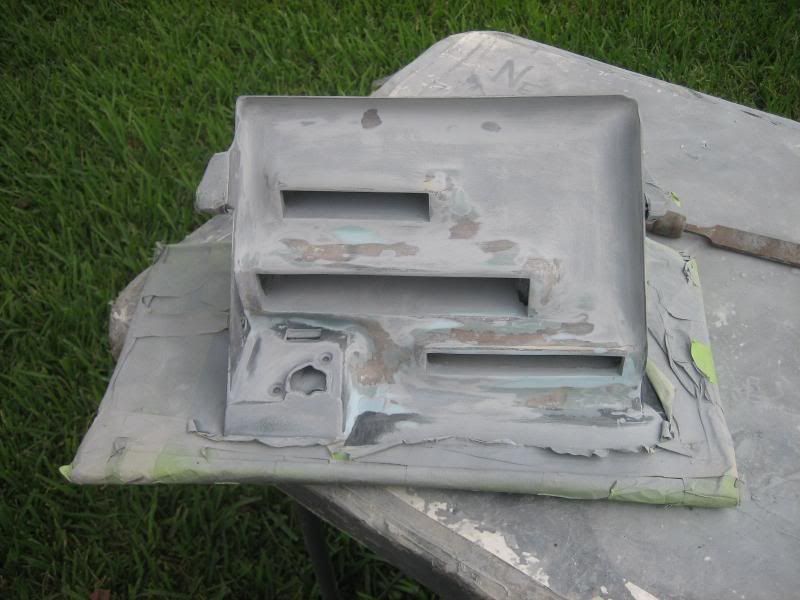
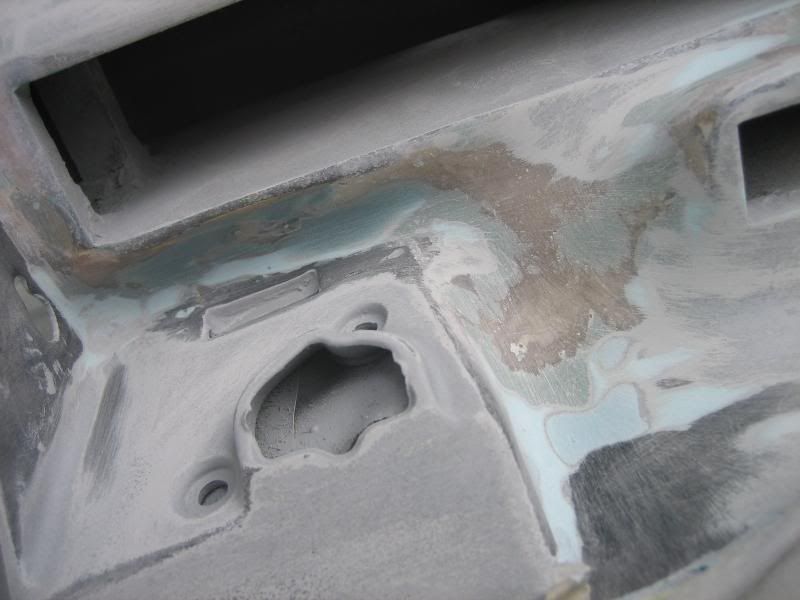
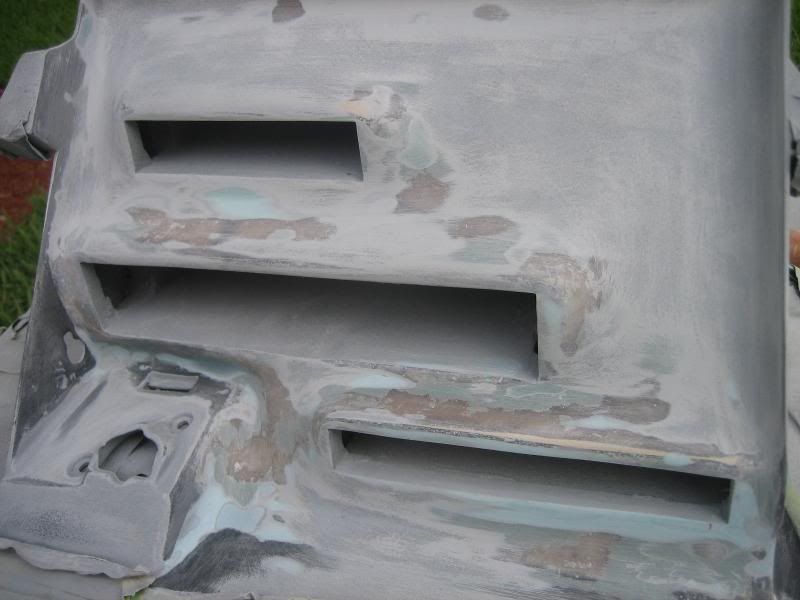
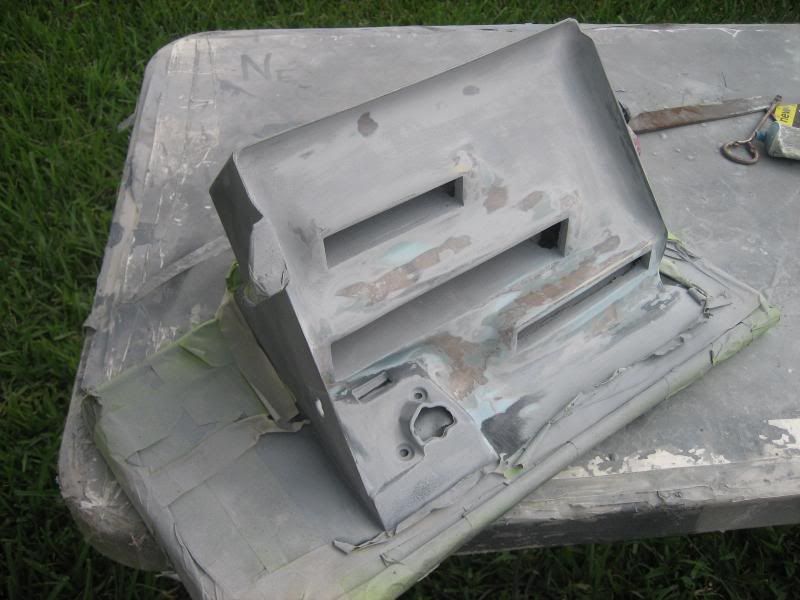
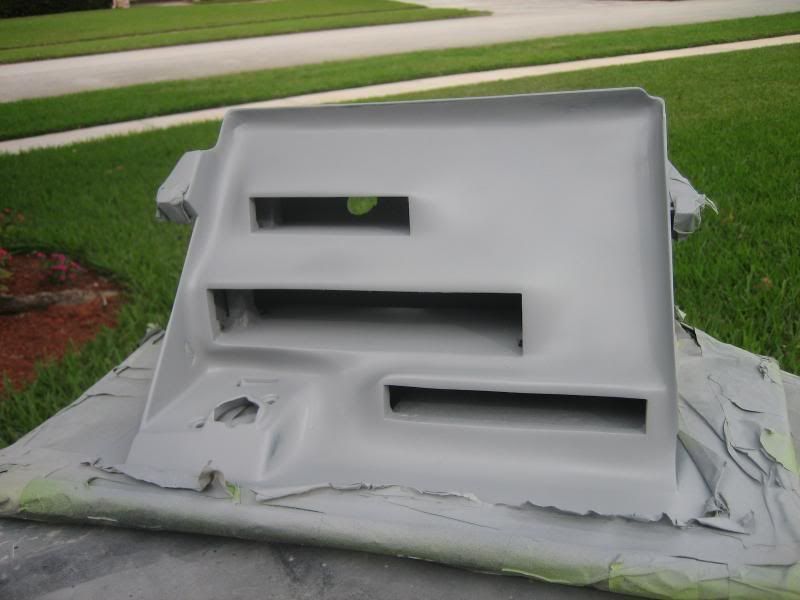
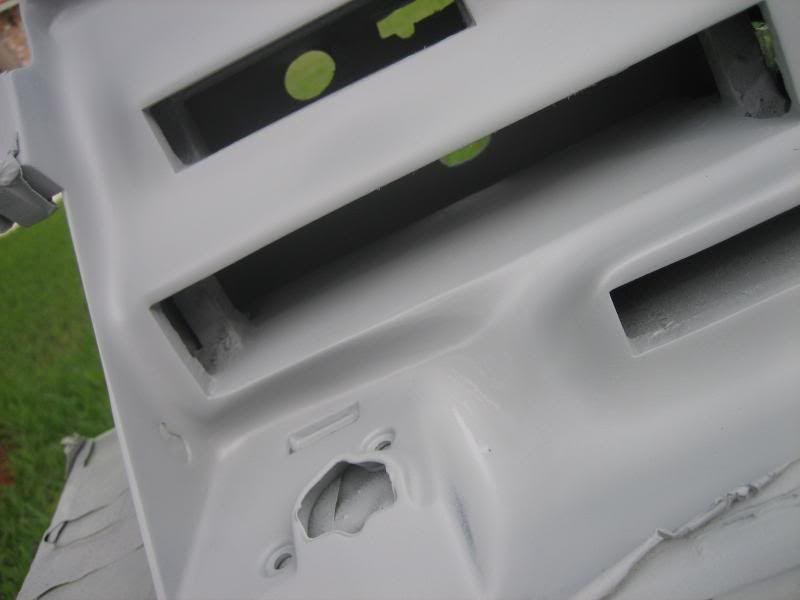
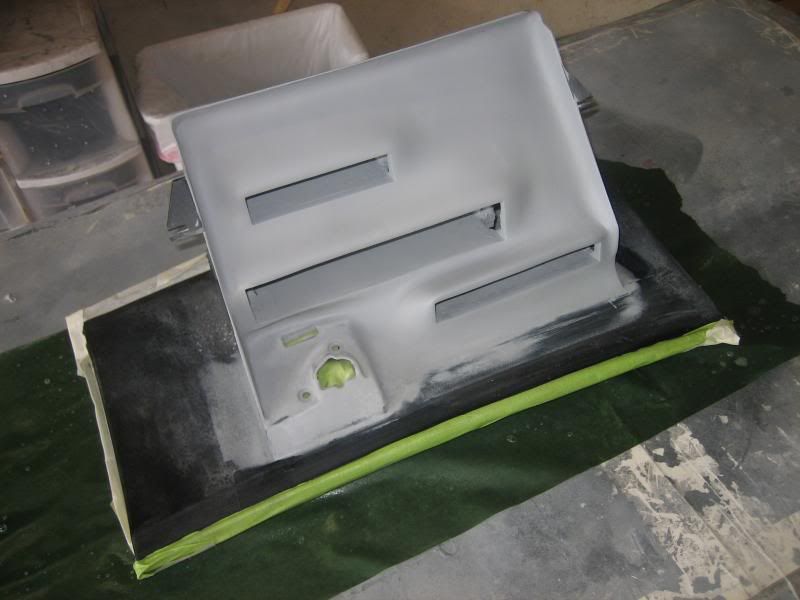
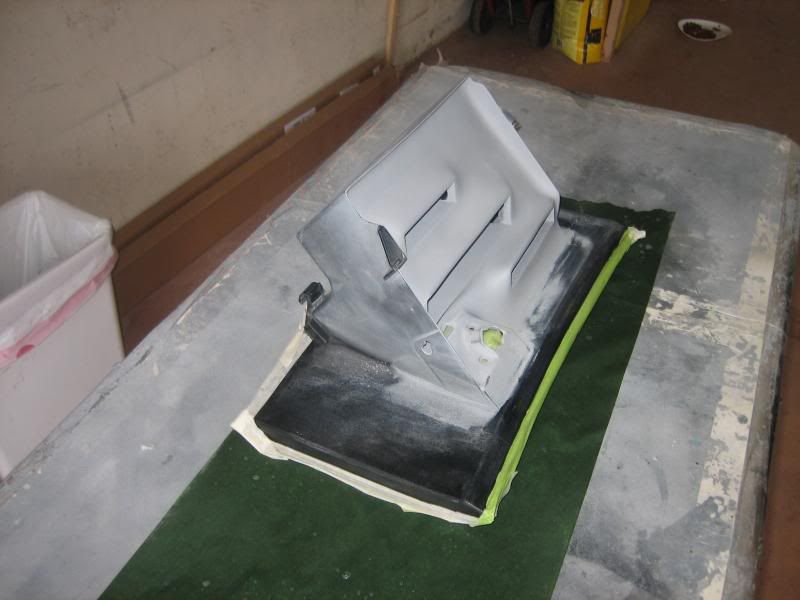
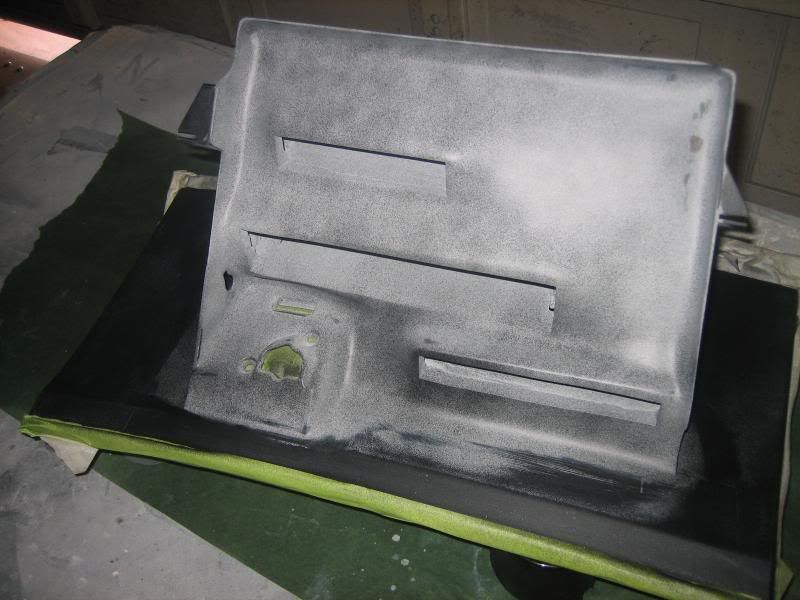
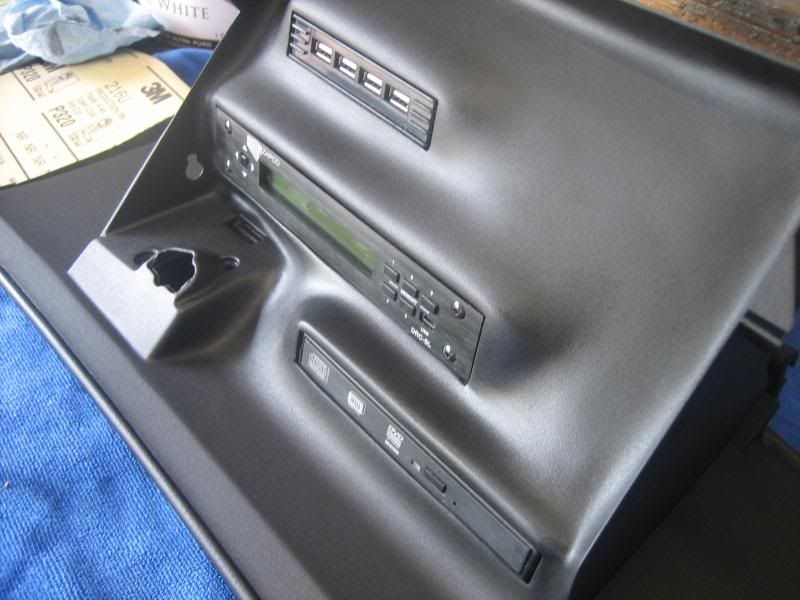
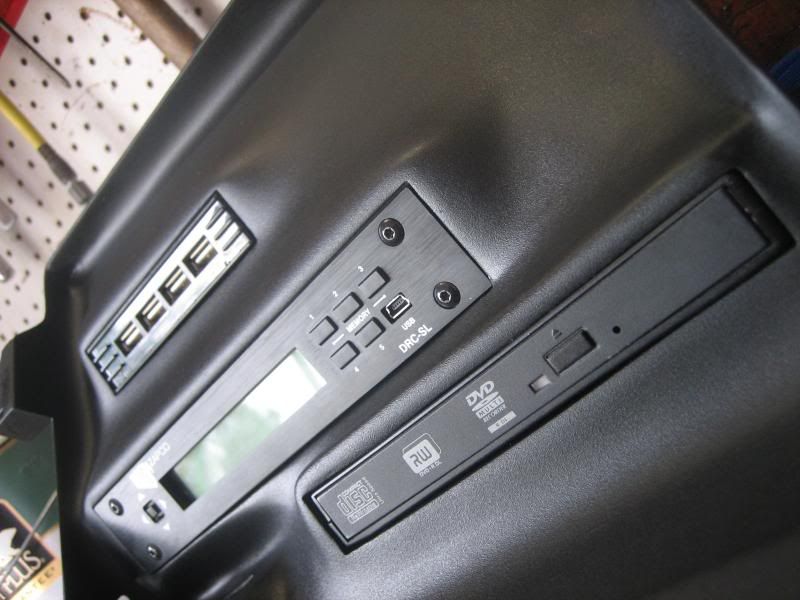
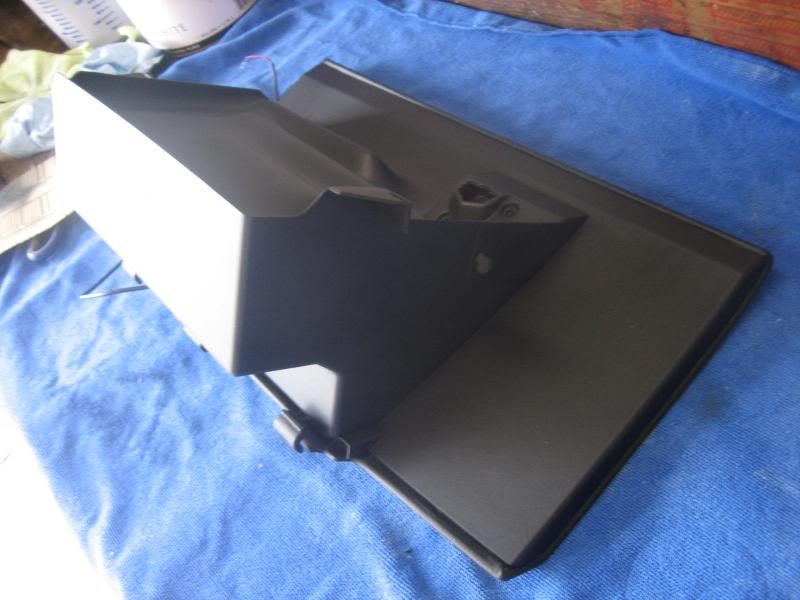
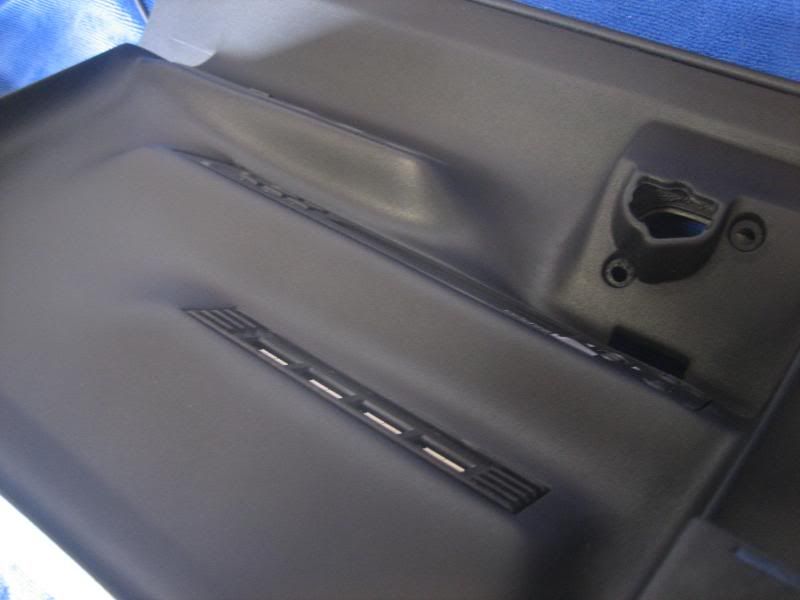
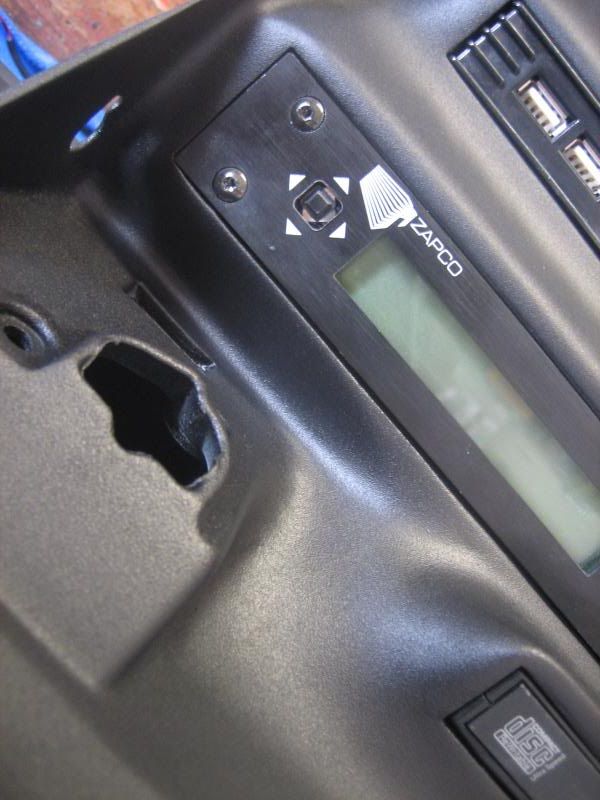
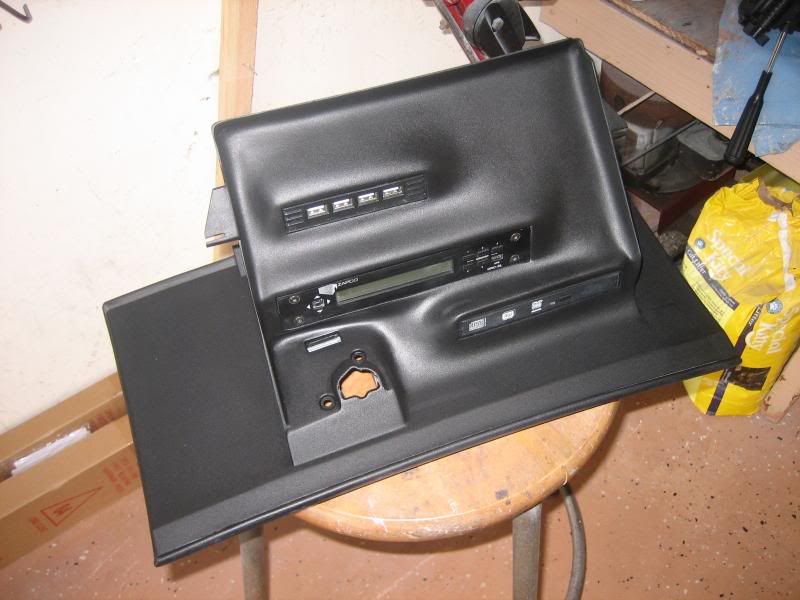
Coming to you all with a Corvette Z06, Carputer Glove Box Workstation. I previously did a small trim panel for the customer, and after a lot of planning we worked out a way to host 3 units for his computer system. The 3 units that are molded in are a Zapco Headunit, External DVD drive, and 4 Port USB Hub. Each unit is pressure fit in once it is pushed all the way back. In the back of each unit is a hole in the back of the glove box. Using a simple wood dowel each unit can be uninstalled.
The Job was definitely a lot of work, but often enough you look past that, in the pursuit to the final product, which I am happy about.
Also, I have taken a full video of each step. I have to edit it all together, which will then be posted on youtube. The video is to assist other fiberglassers and hopefully get myself out there a bit more..
Here was the process...
When it is flipped down you will see all 3 units, once you flip it up, there will be no trace of it.
 01-05-2012, 09:01 AM
#64
-Brian
Thread Starter
01-05-2012, 08:33 PM
#65
Oderint dum metuant.
Join Date: Mar 2005
Location: Lake Wylie
Age: 46
Posts: 12,496
Likes: 0
Received 534 Likes
on
446 Posts
Best part of the page 2 pics is that I saw them when they were on page 1  . It took several tries and a few tricks, but I was able to load the whole page before it was fixed (call it my OCD or my desire to see the work
  ). Originally I thought it was me because I was streaming music at the same time, but I was glad to see others were having issues with the original page 1.
. It took several tries and a few tricks, but I was able to load the whole page before it was fixed (call it my OCD or my desire to see the work ). Originally I thought it was me because I was streaming music at the same time, but I was glad to see others were having issues with the original page 1.
01-06-2012, 07:52 AM
#66
-Brian
Thread Starter
Best part of the page 2 pics is that I saw them when they were on page 1 . It took several tries and a few tricks, but I was able to load the whole page before it was fixed (call it my OCD or my desire to see the work ). Originally I thought it was me because I was streaming music at the same time, but I was glad to see others were having issues with the original page 1.
. It took several tries and a few tricks, but I was able to load the whole page before it was fixed (call it my OCD or my desire to see the work ). Originally I thought it was me because I was streaming music at the same time, but I was glad to see others were having issues with the original page 1.At any rate I got a bunch more, but I am going to wait until page 3. You haven't seen "page 3" yet lol...
 how much would you charge for a projector retrofit like that?
01-06-2012, 10:51 AM
how much would you charge for a projector retrofit like that?
01-06-2012, 10:51 AM
#68
Oderint dum metuant.
Join Date: Mar 2005
Location: Lake Wylie
Age: 46
Posts: 12,496
Likes: 0
Received 534 Likes
on
446 Posts
You must have a great connection. I really felt bad after loading all those pictures lol. I can't believe someone (you) even got it to load, I thought for sure only a 1/4 of the page would load.
At any rate I got a bunch more, but I am going to wait until page 3. You haven't seen "page 3" yet lol...
At any rate I got a bunch more, but I am going to wait until page 3. You haven't seen "page 3" yet lol...
 LOL. Then I was finally able to get it loaded, so I was good.
Can't wait! While I love seeing the work, the best part for me is the possibilities seeing your work opens up. Inside and out, there are so many little things that you can "fix" that, at least I, would've never have thought of. And if it can be done on whatever car you did it on, it can be done on any car.
01-06-2012, 04:13 PM
#72
-Brian
Thread Starter
Not really, but it usually gets the job done. I did get a little frustrated at first...I was like "why did he post so many pics?" LOL. Then I was finally able to get it loaded, so I was good.
Can't wait! While I love seeing the work, the best part for me is the possibilities seeing your work opens up. Inside and out, there are so many little things that you can "fix" that, at least I, would've never have thought of. And if it can be done on whatever car you did it on, it can be done on any car.
LOL. Then I was finally able to get it loaded, so I was good.Can't wait! While I love seeing the work, the best part for me is the possibilities seeing your work opens up. Inside and out, there are so many little things that you can "fix" that, at least I, would've never have thought of. And if it can be done on whatever car you did it on, it can be done on any car.
hehe, Yea, lots of time, and not all of it was the result of what you see. Tons of jobs starting off with ugly results, but that's how you learn. I think having a gift or talent is half of it, and other half desire and experience.
01-06-2012, 04:18 PM
#73
-Brian
Thread Starter
01-06-2012, 04:32 PM
#74
Whats up with RDX owners?
iTrader: (9)


 01-06-2012, 05:14 PM
#75
-Brian
Thread Starter
01-06-2012, 08:13 PM
#76
Racer

I think I check this thread once every few hours to see what amazing work has been done.
I don't understand anything you say in your explanations lol, but I can hands-down say that your work is so damn meticulous and the end product turns out ridiculous.
Keep up the good work, you put out some damn good things!
I don't understand anything you say in your explanations lol, but I can hands-down say that your work is so damn meticulous and the end product turns out ridiculous.
Keep up the good work, you put out some damn good things!
