'04 to '08 front lower control arm bushing failure - please read and look


 03-02-2013, 08:14 AM
#925
Race Director
Haven't you already had more than $35 worth of wasted time and frustration, not to mention a broken tool?
03-02-2013, 03:03 PM
#927
Moderator
iTrader: (7)
i saw your post about the homemade tool, do you have a pic of all the bolts and washers and sockets laid out? also what sizes would i need to press the other 2 bushings out of the control arm?
03-02-2013, 03:21 PM
#929
My new fix. They are blue, rather have a girlie color..
I'm getting these installed next week. Wish me luck. They look very strong.
Pics with the orig type. If they work out, my other half is going to start installing them for locals or maybe do core swaps.
What do you guys think?
Pics with the orig type. If they work out, my other half is going to start installing them for locals or maybe do core swaps.
What do you guys think?
03-02-2013, 04:14 PM
#930
No there isn't it is a 14mm nut on the endlink. I should know since I just had it off. I see you have an 07, type-s so most likely yours is different. Bigger sway bar bigger endlinks i'd assume. I have an 04' tl. Thanks for telling me what size nut I took off....appreciate it. 
03-02-2013, 08:25 PM
#931

ohhhh you got the superpro.. how did you get them? i contacted all 3 dealers in USA and none of them would order for me
03-02-2013, 10:28 PM
#933
Instructor
I have changed 2 of these in the 4 years I have my car, all OEM replacements, they go pretty quickly and yes they cause a very noticeable clunk...
03-02-2013, 10:43 PM
#934
Radical Member
Because I had a 12ton press in the garage, and would rather use it than pay for another one. The tool that was ruined was a rental, so I didn't have to pay for it.
 03-02-2013, 11:33 PM
#936
Race Director
As far as the tool, I assume you found the picture and the list I made for the parts?
03-03-2013, 03:55 AM
#937
Moderator
iTrader: (7)
No there isn't it is a 14mm nut on the endlink. I should know since I just had it off. I see you have an 07, type-s so most likely yours is different. Bigger sway bar bigger endlinks i'd assume. I have an 04' tl. Thanks for telling me what size nut I took off....appreciate it.
Yep
03-03-2013, 05:32 PM
#938
Radical Member
Got it all back together! I could only work on it a little at a time, so I was stuck driving my old car for a few days. I cant tell if the TL handles and rides WAY better now, or if I got used to the way the old Mercedes drives.
Side note, thank you to the previous owner for writing the radio code and the nav code in the owners manual... I didn't notice that my trunk was popped for the whole time it sat in the garage. oops
Side note, thank you to the previous owner for writing the radio code and the nav code in the owners manual... I didn't notice that my trunk was popped for the whole time it sat in the garage. oops
03-03-2013, 05:43 PM
#939
03-06-2013, 07:19 AM
#941
Race Director
That seems to be confirmed by the Schley tool specs:
http://www.amazon.com/Schley-SCH6810.../dp/B0079GQLO2
03-06-2013, 09:29 AM
#943
just to be difficult...first set of coils I bought (were damaged) came off a 03-05 Accord and fit just fine on the TL too...a LOT of similarities as a base for our cars. Pump that baby full of window weld and call it a day! 
03-06-2013, 09:39 AM
#944
They fit our suspension. I was there when they were measured. 2003 and up model. I was told they may be tuned differently; whatever that means.. I was going to have some installed but ended up with an aftermarket bushing kit that i should be installing anyday now.
03-06-2013, 11:18 AM
#946
Race Director
03-06-2013, 06:05 PM
#947
:what:
I am filling the voids of the bushing with urethane anyways so it is a moot issue.
I just left tractor supply with the 2 1/8" socket. Going to truck pro tomorrow to buy the bigger one. I have allthread at home that I will use in place of the bolts.
Very thrifty nfn.
03-06-2013, 07:21 PM
#948
I may bite and go with these come payday, http://www.ebay.com/itm/181040889879...84.m1423.l2649 .........Reading up everything and these should fit
03-07-2013, 01:26 AM
#949
Race Director
03-07-2013, 06:29 AM
#950
:what:
Allthread invented stress!!! Lol. Ill find out soon enough. I've got years and years of nut/bolt accumulation if it fails, so I'm not to worried about it. Ill try to throw some pics up this weekend. Ill be very busy with multiple projects plus getting an allignment.

The following users liked this post:
Wacker (03-07-2013)
03-07-2013, 08:45 AM
#952
Instructor

Join Date: Apr 2007
Location: Toms River, NJ
Age: 43
Posts: 118
Likes: 0
Received 0 Likes
on
0 Posts
Well I received my sockets from Amazon on Monday and it looks like good news. The outside diameter of the Powerbuilt 2 1/8" socket I ordered is perfect. Hopefully the hole for the 3/4" drive doesn't give me any trouble. I got Grade 8 washers. I'm planning to do a 3x3 trans fluid change as well so I won't be getting to this until a week from this Sunday give or take. It should go like this: 1x3-drive car-change bushing-1x3-drive car-change other bushing-1x3-drive car-done. This way I will spend the time changing the bushing while the car is cooling down between flushes and I can get the whole 3x3 done in one day.
Last edited by SLAYER6669; 03-07-2013 at 08:48 AM.
The following users liked this post:
rockstar143 (03-07-2013)
03-11-2013, 11:23 AM
#954
:what:
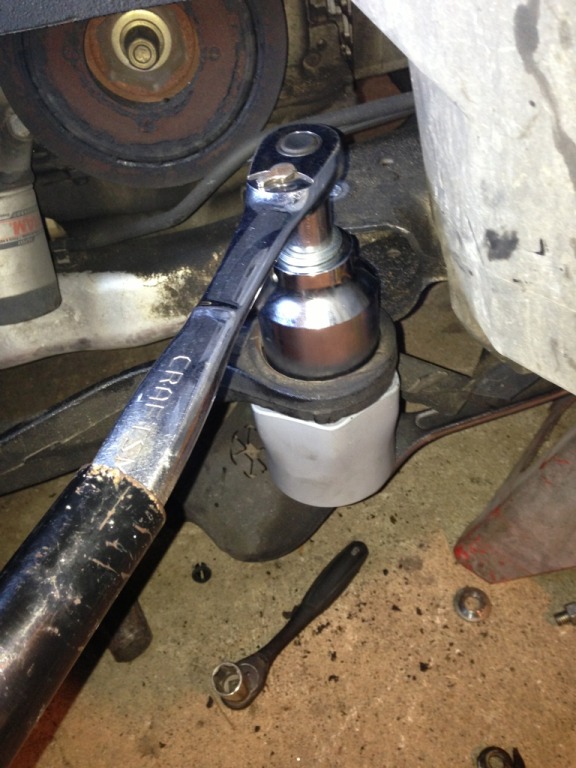
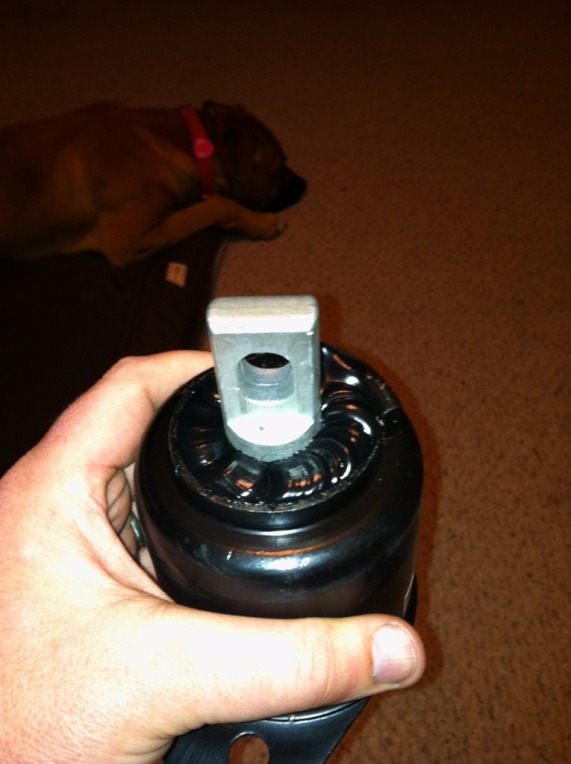
Pressing old out.
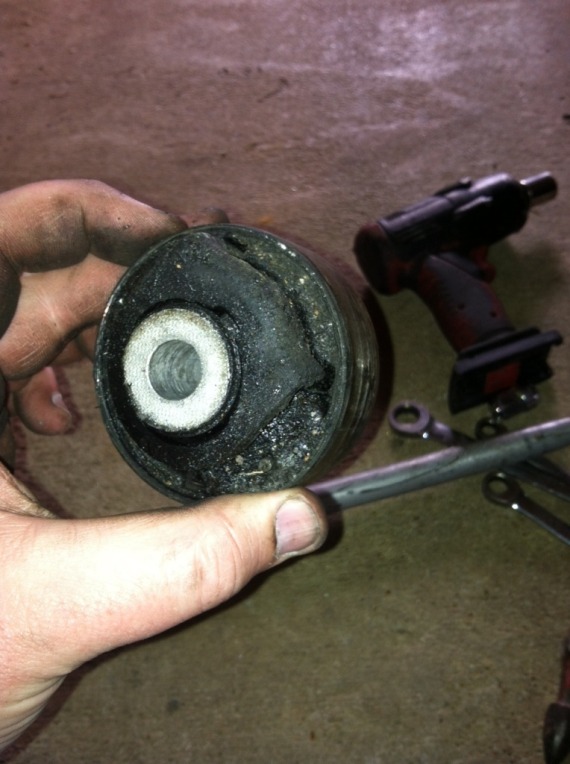
Old Bushing.. Doesn't look too bad once its out, but it was split to hell.
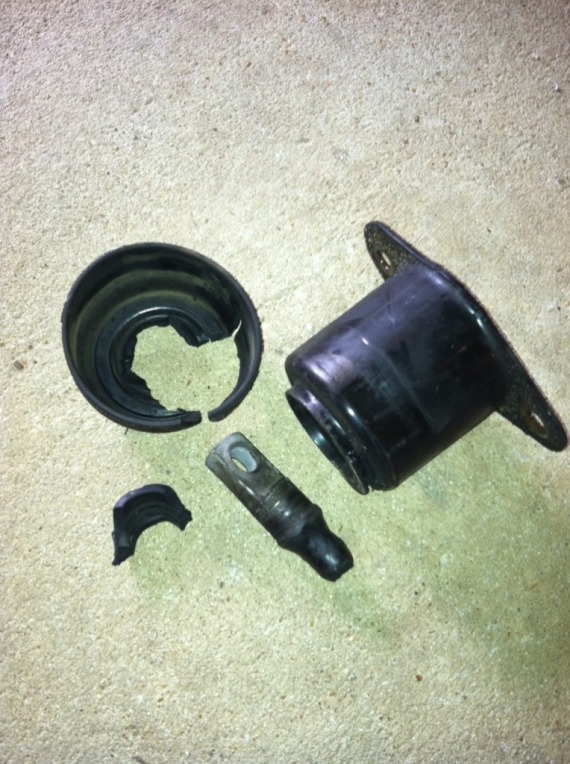
New accord bushing filled with window weld urethane.

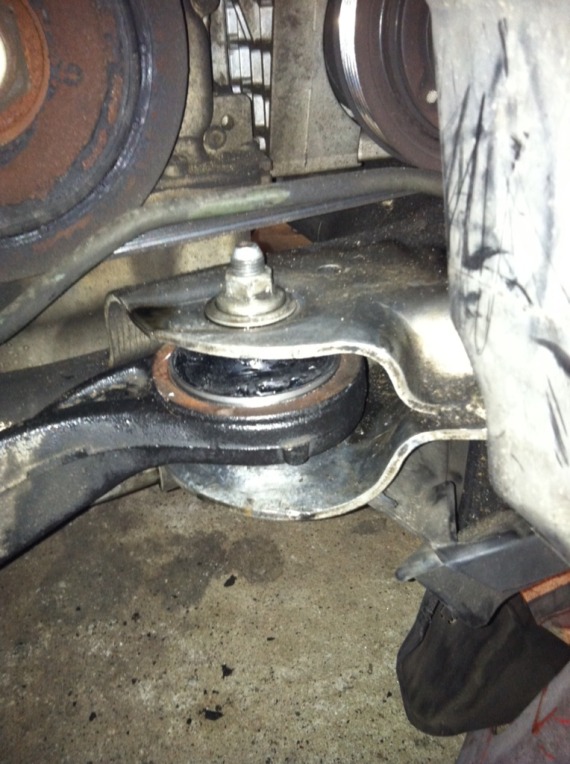
All pressed in...
Next issue...
Filled it with window weld also..
Looks stock when done.
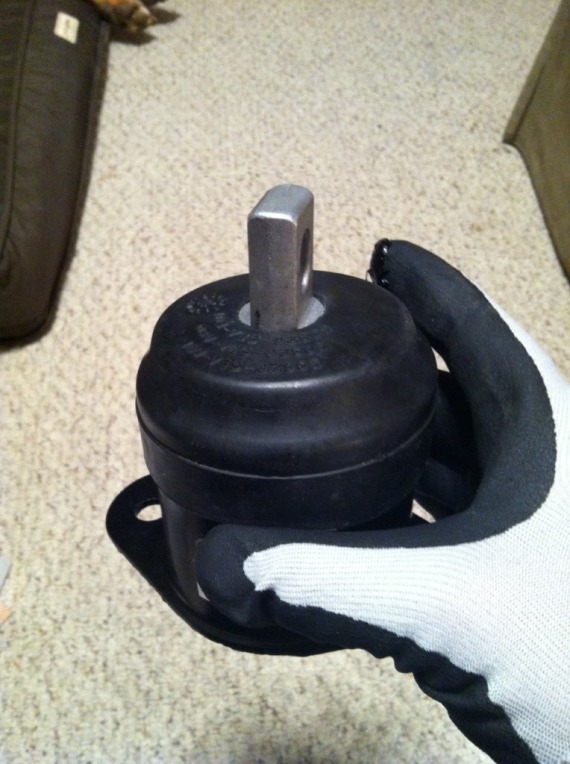
Made a huge difference.
Old Bushing.. Doesn't look too bad once its out, but it was split to hell.
New accord bushing filled with window weld urethane.
All pressed in...
Next issue...
Filled it with window weld also..
Looks stock when done.
Made a huge difference.
The following users liked this post:
rockstar143 (03-11-2013)
03-11-2013, 11:37 AM
#955
Race Director
Nice!! That tool is priceless IMO. Beats the heck out of pulling the ball joint. No issues with the allthread? What diameter and length? Did you use high grade nuts?
 ..
03-11-2013, 02:57 PM
..
03-11-2013, 02:57 PM
#957
:what:
Good to know, maybe any 2 1/8" socket will work? I think you'll be ok with the 3/4" drive and washers. Only issue may be that you'll need a 10" bolt (9" if they make them in that size)... Or an allthread?
Nice!! That tool is priceless IMO. Beats the heck out of pulling the ball joint. No issues with the allthread? What diameter and length? Did you use high grade nuts?
Nice!! That tool is priceless IMO. Beats the heck out of pulling the ball joint. No issues with the allthread? What diameter and length? Did you use high grade nuts?
03-11-2013, 03:51 PM
#958
Race Director
I bought 8 washers but only think I used 4 (2 on each end). Any more than that and I didn't have enough threads to start the nut (this was using an 8" bolt). What length bolt were you using?
Oh, and for those contemplating this tool, it's cheaper to buy the Grade 5 hardware from a store like Mac's that sells by the pound. And be sure you thread the nut on at least the width of the nut (e.g. the bolt end is flush with the nut) before you start. There is way too much pressure generated for only a few threads to support.
Last edited by nfnsquared; 03-11-2013 at 03:53 PM.
The following users liked this post:
glennjr15 (01-06-2017)
03-11-2013, 07:38 PM
#959
Instructor
Join Date: Apr 2007
Location: Toms River, NJ
Age: 43
Posts: 118
Likes: 0
Received 0 Likes
on
0 Posts
@Wacker, great pics! I'm hoping to do this on Sunday. Thanks.
03-11-2013, 07:52 PM
#960
Race Director

Last edited by nfnsquared; 03-11-2013 at 07:54 PM.
The following users liked this post:
glennjr15 (01-06-2017)