When you click on links to various merchants on this site and make a purchase, this can result in this site earning a commission. Affiliate programs and affiliations include, but are not limited to, the eBay Partner Network.
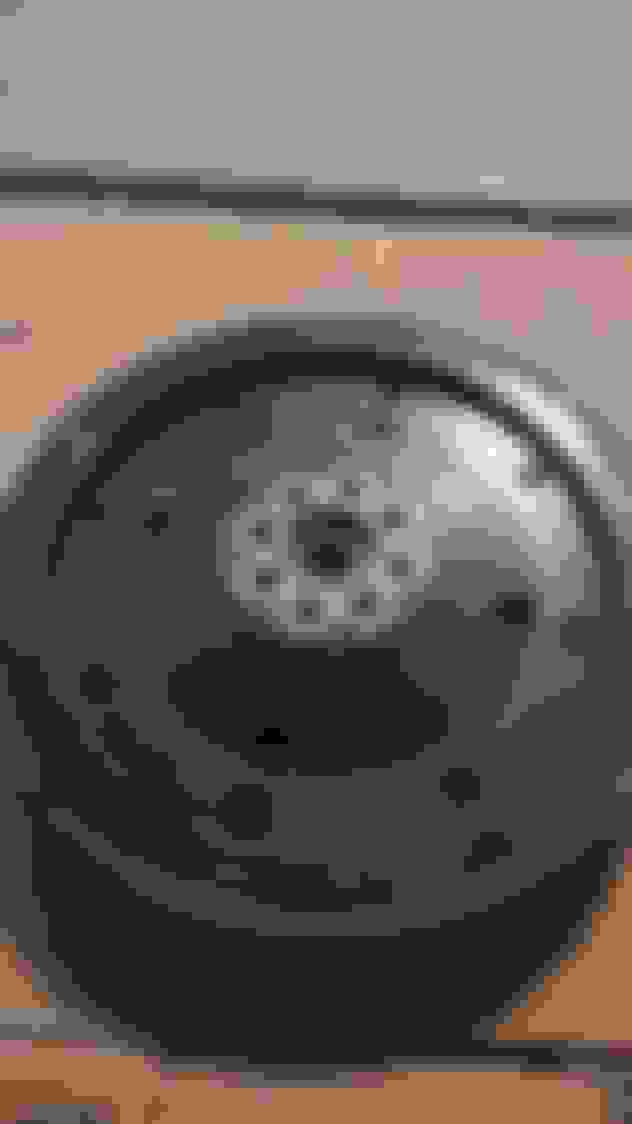
Hey all. i have a j37a1 from an 08 MDX (no timing wheel on the crank) in a j32a3 block. I am comparing the flywheel mounting surfaces and noticed a significant difference in the thickness of this area in the pictures. P2r sells a "crank washer kit" which would make up the space and make the j37a1 equal to the j32a3 crank pictured. When speaking with sean, he mentioned this item they sell is for the j37a4 and i dont need the "washer" for my j37a1 crank in my j32a3 block. Id like to hear from some people who have built j36s and what they are running. there is potential for the starter, pilot bearing position and slave cylinder push rod throw to all be off if i dont get this right, so id rather not just wing it. Thanks!
^
The only active forum member I can say may be able to assist is @619rcr .
He's currently building a J35A3 for his prelude swap and may be familiar with your dilemma?
So, what you are saying, is that the earlier style blocks/cranks have additional material thickness on the crank flange?
Although I'm not aware of this, it wouldn't surprise me based on the dimensional differences of the earlier style flywheels.
Fwiw, I have put a j37a2 crank in a j35z block. Also a j35a8 crank in a j32a2 block. The one that needed spacers was the j35a8, for which I originally purchased both the p2r front 'nose' spacer and the rear disc shaped spacer. The nose spacer worked well and has been installed for over a year.
For the rear, I originally thought the spacer looked too thick and opted to skip installing it. This eventually led to intermittent starter engagement issues. Mind you this was not with a stock flywheel. I then tried installing the p2r rear spacer and found that the trans bellhousing would not sit flush with the block. Next, I tried different thickness washers installed between the rear of the crank and the flywheel, which were obtained from a local hardware store. The combo I settled on with was maybe a quarter to third of the p2r spacer.
Washers used for spacing
^ This ended up fixing the starter issue, but led to another issue down the line...
After several months of driving, I learned that shifting the flywheel closer to the starter, kept the clutch partly engaged even in neutral. This started to wear out the clutch, being that it was constantly dragging. My final fix was to replace the clutch and sand down the throwout bearing approximately the same amount as the rear spacers. This kept the clutch disengaged in neutral as it should.
So, depending on clutch/flywheel and starter engagement, one may or may not need a rear spacer. It's one of those things that will be figured out during or after assembly. Good luck with your build.
Fwiw, I have put a j37a2 crank in a j35z block. Also a j35a8 crank in a j32a2 block. The one that needed spacers was the j35a8, for which I originally purchased both the p2r front 'nose' spacer and the rear disc shaped spacer. The nose spacer worked well and has been installed for over a year.
For the rear, I originally thought the spacer looked too thick and opted to skip installing it. This eventually led to intermittent starter engagement issues. Mind you this was not with a stock flywheel. I then tried installing the p2r rear spacer and found that the trans bellhousing would not sit flush with the block. Next, I tried different thickness washers installed between the rear of the crank and the flywheel, which were obtained from a local hardware store. The combo I settled on with was maybe a quarter to third of the p2r spacer.
Washers used for spacing
^ This ended up fixing the starter issue, but led to another issue down the line...
After several months of driving, I learned that shifting the flywheel closer to the starter, kept the clutch partly engaged even in neutral. This started to wear out the clutch, being that it was constantly dragging. My final fix was to replace the clutch and sand down the throwout bearing approximately the same amount as the rear spacers. This kept the clutch disengaged in neutral as it should.
So, depending on clutch/flywheel and starter engagement, one may or may not need a rear spacer. It's one of those things that will be figured out during or after assembly. Good luck with your build.
The pic on the Clutchmasters website doesn't look accurate. Either way, the pressure plate may have stuck out further than, say, a stock pressure plate. Or the hub on the disc stuck out further, which would cause the clutch not to fully engage. Look for signs of wear on the mainshaft snout, from it rubbing on the disc hub.
Last edited by Euro-R_Spec_TSX; Jan 31, 2024 at 03:55 PM.
The pic on the Clutchmasters website doesn't look accurate. Either way, the pressure plate may have stuck out further than, say, a stock pressure plate. Or the hub on the disc stuck out further, which would cause the clutch not to fully engage. Look for signs of wear on the mainshaft snout, from it rubbing on the disc hub.
Well, i did all this over a year ago. The problem wasnt clutch engaging, it was not disengaging fully. In any case, I dont advocate for crankshaft spacers if not needed. It's just what I ended up using on that project. clutch & fw installed
The j36 I mentioned first doesnt use any spacers. But, it uses a Luk flywheel, with stage 1 clutchmasters clutch and pressure plate.
Well, i did all this over a year ago. The problem wasnt clutch engaging, it was not disengaging fully. In any case, I dont advocate for crankshaft spacers if not needed. It's just what I ended up using on that project.
clutch & fw installed
The j36 I mentioned first doesnt use any spacers. But, it uses a Luk flywheel, with stage 1 clutchmasters clutch and pressure plate.
Sorry, that's what I meant. Not fully disengaging.
Confirmed: the cranks for older style blocks (with older style trans mounting bolt pattern) have 5mm longer crank flanges. I just measured a J30 short block and I have previous measurements from a J35A8 and J37A2.
To answer OP question, yes you need the 5mm spacer when using the J37 crank. For the issue that 619rcr had, I think it was the clutch kit. If you put that clutch kit on a stock J32A3, you would have had the same issue.
Confirmed: the cranks for older style blocks (with older style trans mounting bolt pattern) have 5mm longer crank flanges. I just measured a J30 short block and I have previous measurements from a J35A8 and J37A2.
To answer OP question, yes you need the 5mm spacer when using the J37 crank. For the issue that 619rcr had, I think it was the clutch kit. If you put that clutch kit on a stock J32A3, you would have had the same issue.
Thank you guys for the responses. this is actually a J36 ive been running for about 6-7 years now. the current setup is j37a1 crank, j32a3 block aasco lwfw and the old xlr8 "daily" pp and sprung organic disc. I have the P2R crank spacer sitting in my garage uninstalled. when i built this engine initially i opted to use two "drive plate washers" to space the fw out instead of the P2R washer. I was concerned because the P2r washer was thick enough to totally cover the center hub on the crank the fw will use to locate itself which could potentially add radial runout to the fw. is this a valid concern or should i not worry about using the center hub to locate the fw and just run the p2r spacer?
i have an fx350 kit i was going to put onto my aasco fw but now im concerned with the experiences 619rcr had with that kit, especially not knowing which part of the fx350 kit caused his issues.
to add to all of this...after talking to p2r and explaining my whole setup they said i did not need the crank spacer which doesnt make much sense to me based on the measurements taken. They said that spacer was for "2009 and newer" j37 cranks with the timing trigger wheel attached, but my crank without the timing wheel is still measuring short which should mean it needs spacing. thoughts?
Fwiw, I have put a j37a2 crank in a j35z block. Also a j35a8 crank in a j32a2 block. The one that needed spacers was the j35a8, for which I originally purchased both the p2r front 'nose' spacer and the rear disc shaped spacer. The nose spacer worked well and has been installed for over a year.
For the rear, I originally thought the spacer looked too thick and opted to skip installing it. This eventually led to intermittent starter engagement issues. Mind you this was not with a stock flywheel. I then tried installing the p2r rear spacer and found that the trans bellhousing would not sit flush with the block. Next, I tried different thickness washers installed between the rear of the crank and the flywheel, which were obtained from a local hardware store. The combo I settled on with was maybe a quarter to third of the p2r spacer.
Washers used for spacing
^ This ended up fixing the starter issue, but led to another issue down the line...
After several months of driving, I learned that shifting the flywheel closer to the starter, kept the clutch partly engaged even in neutral. This started to wear out the clutch, being that it was constantly dragging. My final fix was to replace the clutch and sand down the throwout bearing approximately the same amount as the rear spacers. This kept the clutch disengaged in neutral as it should.
So, depending on clutch/flywheel and starter engagement, one may or may not need a rear spacer. It's one of those things that will be figured out during or after assembly. Good luck with your build.
thanks for the info man, i have a similar setup using the auto flexplate washer as a spacer, im concerned it isnt machined well enough to prevent an axial runout condition i may be feeling as a vibration through the clutch pedal after installing an em2 cmc. it feels like theres a high spot while im slipping the clutch which gets worse with high rpm. only while the clutch is being slipped in any gear or neutral. it almost feels like a warped rotor feels through the brake pedal. have you had any issues like that? of course i didnt feel any of this until i added the em2 cmc which doesnt have a damper like the factory one does. i suspect the factory cmc damper could have been hiding this issue all along.
this may be a dumb question but did you ever try to adjust the cmc push rod to recitfy your clutch never fully engaging? it sounds like it was being constantly held against the pp and if you adjust the rod further into the saddle it may have helped?
Thank you guys for the responses. this is actually a J36 ive been running for about 6-7 years now. the current setup is j37a1 crank, j32a3 block aasco lwfw and the old xlr8 "daily" pp and sprung organic disc. I have the P2R crank spacer sitting in my garage uninstalled. when i built this engine initially i opted to use two "drive plate washers" to space the fw out instead of the P2R washer. I was concerned because the P2r washer was thick enough to totally cover the center hub on the crank the fw will use to locate itself which could potentially add radial runout to the fw. is this a valid concern or should i not worry about using the center hub to locate the fw and just run the p2r spacer?
i have an fx350 kit i was going to put onto my aasco fw but now im concerned with the experiences 619rcr had with that kit, especially not knowing which part of the fx350 kit caused his issues.
to add to all of this...after talking to p2r and explaining my whole setup they said i did not need the crank spacer which doesnt make much sense to me based on the measurements taken. They said that spacer was for "2009 and newer" j37 cranks with the timing trigger wheel attached, but my crank without the timing wheel is still measuring short which should mean it needs spacing. thoughts?
Personally I would prefer having the center hub on the crank locate the flywheel, but it's mainly for maintaining a precise balance. If you don't notice any extra engine vibration using the 5mm spacer, then it shouldn't matter.
Shame on P2R for spouting misinformation. They should know better since they build J-series engines all the time.
You would have to pay me a lot of money to install a Clutchmasters or Spec clutch kit on my car. I've had bad experiences with both, and I'm not the only one. I went through a great deal of experimentation and research to design my own clutch setup. It's better than anything I've seen offered for J-series applications.
thanks for the info man, i have a similar setup using the auto flexplate washer as a spacer, im concerned it isnt machined well enough to prevent an axial runout condition i may be feeling as a vibration through the clutch pedal after installing an em2 cmc. it feels like theres a high spot while im slipping the clutch which gets worse with high rpm. only while the clutch is being slipped in any gear or neutral. it almost feels like a warped rotor feels through the brake pedal. have you had any issues like that? of course i didnt feel any of this until i added the em2 cmc which doesnt have a damper like the factory one does. i suspect the factory cmc damper could have been hiding this issue all along.
this may be a dumb question but did you ever try to adjust the cmc push rod to recitfy your clutch never fully engaging? it sounds like it was being constantly held against the pp and if you adjust the rod further into the saddle it may have helped?
TBH, I don't recall ever feeling a pulsation from the pedal with the stage 3 setup outside typical chattering at low speeds. And that's even after deleting the slave cyl check valve and replacing the stock hardline with the p2r braided hose.
But, I do recall having to adjust the clutch pedal to well past the factory specs to get a decent engagement position. I drove it like that for maybe a year with no spacer or engagement/disengagement issues. So, can't totally blame the clutch kit. Come to think of it, it could have been that I wore down the friction surface.
As to your vibration, you could always try washers like I did. But, I would speculate the flywheel could be the cause. Especially if you're seeing any hot spots or rough areas. Luckily, the AASCO lfw wear surface appears to be replaceable.
Pedal buzz is normal. That's why the stock CMC has a damper in it. And the Aasco flywheel doesn't help because it has less mass to help dampen. If you had a stock dual mass flywheel, the pedal buzz might not be noticeable.
Personally I would prefer having the center hub on the crank locate the flywheel, but it's mainly for maintaining a precise balance. If you don't notice any extra engine vibration using the 5mm spacer, then it shouldn't matter.
Shame on P2R for spouting misinformation. They should know better since they build J-series engines all the time.
You would have to pay me a lot of money to install a Clutchmasters or Spec clutch kit on my car. I've had bad experiences with both, and I'm not the only one. I went through a great deal of experimentation and research to design my own clutch setup. It's better than anything I've seen offered for J-series applications.
in regards to the balance, i paid a machine shop to balance the whole ra before i assembled it, so using the spacer and not being able to locate the fw on the crank hub would in my mind totally destroy that time/effort i paid for. Thats why i elected to stack two flexplate washers from an auto behind there so i could still catch a bit of the hub to locate the flywheel correctly but still get close to the flywheel spacing i need. perhaps im overthinking it but what are the chances that stacking of the flexplate washers could introduce axial runout from them not being machined well enough and causing a "wobble" along the axis like a trapezoid would produce if it were behind the flywheel?
the setup seemed fine UNTIL i added an EM2 CMC and SS line. some ppl call it "pedal buzz" im experiencing now but i might even call it more severe than that. it almost feels like there is a high spot when i am slipping the clutch in any gear or neutral, and it gets worse with higher rpm. when the clutch pedal is fully pressed and the clutch is fully disengaged there is no vibration at all, even at high rpm, which to me means the pp and release bearing are fine. I was careful about routing the flexible ss line and have secured it well. Maybe i am being way to sensitive on this feeling and it is normal.
I would agree that it's best to maintain the balance, but those 8 bolts fit kind of snug and don't allow much movement of the flywheel. A spacer with a concentric hub machined into it would be ideal, but I'm not sure if it's feasible.
If someone has a crank handy, it would be nice to get a measurement of the height of the hub, although going by the pics posted, it looks to be at least 5mm. My engines are in crates and it's a pain dealing with them.
The pedal buzz isn't consistent with regard to RPM. My pedal buzzes much more at higher RPM. I've gotten used to it, so I don't really notice it anymore. Keep in mind that once the pedal is pushed in all the way, it's resting on the stops, which effectively dampens the pedal itself. The path of the engine vibration is through the pressurized fluid. If a higher clamping load pressure plate is used, then the pressure in the clutch line is higher, and so the fluid more effectively transfers the vibration.
I would agree that it's best to maintain the balance, but those 8 bolts fit kind of snug and don't allow much movement of the flywheel. A spacer with a concentric hub machined into it would be ideal, but I'm not sure if it's feasible.
If someone has a crank handy, it would be nice to get a measurement of the height of the hub, although going by the pics posted, it looks to be at least 5mm. My engines are in crates and it's a pain dealing with them.
The pedal buzz isn't consistent with regard to RPM. My pedal buzzes much more at higher RPM. I've gotten used to it, so I don't really notice it anymore. Keep in mind that once the pedal is pushed in all the way, it's resting on the stops, which effectively dampens the pedal itself. The path of the engine vibration is through the pressurized fluid. If a higher clamping load pressure plate is used, then the pressure in the clutch line is higher, and so the fluid more effectively transfers the vibration.
that makes sense about the pedal buzz, so maybe i am overthinking it, b nice if someone w a EM2 CMC could drive my car so they could just tell me im crazy haha.
im not sure how snugly the bolts fit inside the flywheel, but there is a .69mm difference between the flywheel bolt od and the spacer hole ID. that sounds like more slop than im comfortable with to locate a large heavy fast spinning engine component onto but u guys tell me. the bolt shanks are 11.91mm the holes on the spacer are shaping up to be 12.6mm, maybe someone can measure the hole diameter in an aasco fw? im speculating here but it looks to me that p2r took the flexplate washer and just increased the thickness to 5mm. i think it couldhave been done better but thats one mans opinion.
i have a spare j37a1 crank and the hub is 6.54mm long but there is a radius on the end so the effective locating length is only 5mm for the flywheel. i have a buddy 3d printing a "tophat" to slide into the crank hub recess and effectively extend the locating hub. id like to test it by measuring radial runout with all three setups. locating around the factory hub, the bolts alone using the spacer, and the tophat piece im getting made. the plan would be to use the spacer to get fw spacing correct, use the tophat to locate the fw well, bolt it down and then remove the tophat and press in the pilot bearing. ive attached pics for reference only, not drawn to scale haha
perhaps im overthinking it but what are the chances that stacking of the flexplate washers could introduce axial runout from them not being machined well enough and causing a "wobble" along the axis like a trapezoid would produce if it were behind the flywheel?
the setup seemed fine UNTIL i added an EM2 CMC and SS line. some ppl call it "pedal buzz" im experiencing now but i might even call it more severe than that.
Originally Posted by 97'CL2.2
that makes sense about the pedal buzz, so maybe i am overthinking it, b nice if someone w a EM2 CMC could drive my car so they could just tell me im crazy haha.
... i have a buddy 3d printing a "tophat" to slide into the crank hub recess and effectively extend the locating hub. id like to test it by measuring radial runout with all three setups. locating around the factory hub, the bolts alone using the spacer, and the tophat piece im getting made. the plan would be to use the spacer to get fw spacing correct, use the tophat to locate the fw well, bolt it down and then remove the tophat and press in the pilot bearing.
Personally, I believe you are overthinking it. If the car 'seemed fine' with the Acura master cyl, I would go back to that.
Also, not following what you mentioned about pressing in the pilot bearing with the custom top hat. The pilot bearing is installed in the fw not the crankshaft. So, it shouldn't matter that it's not installed on the end of the crank when pressing in.
If you are really worried about it, you probably could have the crank balanced with the 5mm spacer and fw installed. Then mark the orientation of the 3 pieces so that when you reassemble the motor, you will have alignment marks to line up.
Personally, I believe you are overthinking it. If the car 'seemed fine' with the Acura master cyl, I would go back to that.
Also, not following what you mentioned about pressing in the pilot bearing with the custom top hat. The pilot bearing is installed in the fw not the crankshaft. So, it shouldn't matter that it's not installed on the end of the crank when pressing in.
If you are really worried about it, you probably could have the crank balanced with the 5mm spacer and fw installed. Then mark the orientation of the 3 pieces so that when you reassemble the motor, you will have alignment marks to line up.
i know the pilot bearing goes in the fw. heres what im saying, the fw would locate on the top hat piece WITHOUT a pilot bearing, the fw bolts go in and get tq to spec, the top hat piece gets REMOVED from the crank because it was only a keyway to prevent runout, then the pilot bearing gets driven in from the front side of the fw to the correct depth.
balancing the crank w the spacer and fw on is not the issue, each individual piece balances just fine, but if you cant put them together in a uniform manner each time then whenever it gets reassembled it wont balance correctly. thats why theres a crank hub, to keep uniformity during assembly, if you take that away then it all means nothing. Think of a wheel that has a larger center bore than the cars hub, you install hub centric rings to locate the wheel to prevent radial runout, you dont rely on the lugs to locate the wheel for you. a wheel sees maybe 1/5th of the rpm a crank can see. i dunno if i explained that well but....you dont want to put a small shaft in a huge hole hope its centered and spin it at high speeds. the stakes get raised the higher the weight and the raster the rpm, so the discrepancy doesn't have to be much to cause issues. .69mm is a lot spinning off center at 7k rpm.
That spacer from P2R is definitely poorly designed. It should have just as tight of tolerances as the flywheel.
I think your tool idea should work fine. It's just a pain having to reinstall the pilot bearing. But it also gives you the opportunity to add some bearing retainer adhesive to secure the bearing (green Loctite). FYI, the pilot bearing that comes with the Aasco flywheel is not a sealed bearing, like the OEM bearing. I recommend getting an OEM bearing while you're at it.
That spacer from P2R is definitely poorly designed. It should have just as tight of tolerances as the flywheel.
I think your tool idea should work fine. It's just a pain having to reinstall the pilot bearing. But it also gives you the opportunity to add some bearing retainer adhesive to secure the bearing (green Loctite). FYI, the pilot bearing that comes with the Aasco flywheel is not a sealed bearing, like the OEM bearing. I recommend getting an OEM bearing while you're at it.
good to know, I have a genuine pilot bearing ready to go already thankfully. here is V1 on the flywheel alignment tool, it fits snugly in the crank and should work well, OD is just a hair smaller than the OD of the pilot bearing so it should fit the fw well too. i could tap it in completely w a mallet completely but maybe have trouble getting it out lol. i will prob make a V2 w a hole in the center i can thread a handle into to make it easier to pull out. i will make the file downloadable for anyone who needs it/cares if this works out well.
i dunno if i explained that well but....you dont want to put a small shaft in a huge hole hope its centered and spin it at high speeds. the stakes get raised the higher the weight and the raster the rpm, so the discrepancy doesn't have to be much to cause issues. .69mm is a lot spinning off center at 7k rpm.
Fair enough.
Out of curiousity, have you ever checked your differential carrier bearings for looseness/play? I used to have a vibration on one of my j series cars under heavy acceleration, which turned out to be worn differential carrier bearings.
Probably better if the locating tool sits flush against the hub, so that it's square.
If the spacer isn't centered, it will throw off the balance that you are working so hard to maintain.
ya man im with you, like i said if i were installing the flywheel i would have tapped the locating piece in flush, i just wanted to take a quick picture. i will make revisions on the v2.
Originally Posted by 619rcr
Fair enough.
Out of curiousity, have you ever checked your differential carrier bearings for looseness/play? I used to have a vibration on one of my j series cars under heavy acceleration, which turned out to be worn differential carrier bearings.
where did you feel the vibration? mine is only through the clutch pedal while its being slipped. when the original engine build went in 6 years ago i added an LSD from a TL into the trans, both carrier bearings got replaced then, genuine parts. i even had to make a tool back then to measure the breakaway tq correctly so i could select the right thickness shim.
Was a pulsing from the front end, almost like a bad wheel bearing or bent wheel that would be more noticable in lower gears, then stabilize when cruising.
Started after installing a used LSD and final drive into a non- LSD trans.
i just got off the phone with jordan at aasco. After explaining everything and sending him pictures of the crank differences with measurements he said using that spacer is a terrible terrible idea, which doesn't surprise me at all. he said he could make me a custom piece that was the exact same as the 04-06 TL fw i currently have (PN 103212-11) but just add 5mm on the fw mounting side. he could make one for $1000 or two for $850. if anyone wants a proper fw for this setup just pm me within the next week. long shot but worth a try, its looking like ill be getting one regardless.
thanks to Euro-R for facilitating a better price with aasco, after everything comes in and i get it all installed ill report back how things worked out, thanks for the input everyone.
parts arrived and everything looks good. heres how things stack up w the custom fw vs the factory j32a3 components, its all almost exactly the same so i see no reason why this wont bolt right in without an issue. I am at a crossroads with the current j36 setup that a near future leakdown test will tell me how i want to proceed. i might be swapping in a j35a6 with a supercharger setup soon. if things come back ok on my leakdown ill probably leave the j36 na and do this clutch job along with some other things on my list while the engine is out. Sorry guys i don't move as quickly as most of you, family obligations and other projects have a way of doing that lol. i will update this thread with whatever i decide and results with the final outcome.
Last edited by 97'CL2.2; Mar 31, 2024 at 10:17 AM.
parts arrived and everything looks good. heres how things stack up w the custom fw vs the factory j32a3 components, its all almost exactly the same so i see no reason why this wont bolt right in without an issue. I am at a crossroads with the current j36 setup that a near future leakdown test will tell me how i want to proceed. i might be swapping in a j35a6 with a supercharger setup soon. if things come back ok on my leakdown ill probably leave the j36 na and do this clutch job along with some other things on my list while the engine is out. Sorry guys i don't move as quickly as most of you, family obligations and other projects have a way of doing that lol. i will update this thread with whatever i decide and results with the final outcome.
No worries. I was just curious on the fitment. Also, completely understand how unexpected things can occur in the middle of a project.
I actually just finished the break in period on my second j36 build. But, along the way there were some issues that forced me to swap heads and transfer all the valvetrain components. Still working on the tune.
apparently my last post on this thread was exactly a year ago today....weird. anyway, i know its been awhile but i got everything installed and have done a few miles on the new setup from brockway. i am in the process of breaking the new disc in but have had no engagement issues so far using the custom aasco lwfw with the 5mm added to the mounting flange. i haven't even had to adjust the clutch pedal although i suspect i might just for preference rather than necessity. It engages in the mid point of release and id prefer it a bit closer to the ground. i did not end up using the supplied precision washer from the brockway kit which goes behind the pivot ball for the release fork. When i had the custom fw on there and the spacer the slave rod was compressed way further than i was comfortable with in its resting position based off measurements i took from the old setup before disassembly. the custom fw by itself was measuring out better and the slave rod boot also "looked" much more correct (not completely compressed in resting position). id also wager i could slot the washer and slip it in from the dust boot end if it really comes to it, or test out the adjustable slave rod ive made for the car. i can update after the break in but prelim trials look 100%.
The old setup had only 2mm of starter gear engagement based off of the witness marks on the old fw ring gear, new setup should give full engagement and no sticking so far. the old pilot bearing was completely roasted, im not sure how it was functioning at all honestly. This could have been due to the fact it had less engagement on the mainshaft than it should have due to the incorrect spacing on the original setup, or because aasco sends the fw out to customers with an unsealed pilot bearing. regardless, the new aasco fw got a genuine nachi sealed pilot bearing and has better backspacing so it should be good to go. hope this helps ppl in the future somehow.
[QUOTE=97'CL2.2;16932453]parts arrived and everything looks good. heres how things stack up w the custom fw vs the factory j32a3 components, its all almost exactly the same so i see no reason why this wont bolt right in without an issue. I am at a crossroads with the current j36 setup that a near future leakdown test will tell me how i want to proceed. i might be swapping in a j35a6 with a supercharger setup soon. if things come back ok on my leakdown ill probably leave the j36 na and do this clutch job along with some other things on my list while the engine is out. Sorry guys i don't move as quickly as most of you, family obligations and other projects have a way of doing that lol. i will update this thread with whatever i decide and results with the final outcome. Hey so I was thinking about doing a 3.6 Stroker on my 2004 Acura TL using the J32a3 block, however i’m wondering if you think i could still call jordan and get this same flywheel custom ordered ? also if you have any tips on the build please feel free to share them, could use all the help i can get lol