Wrapping Matte WHITE or Matte Black.....advice?
#1
Wrapping Matte WHITE or Matte Black.....advice?
sorry for the typo...^ADVICE...
So I am going to wrap my car to either Matte white or black....
Please give me advice....
original color is KBP....Blue
Have anyone done that before? I searched the whole forum and no result
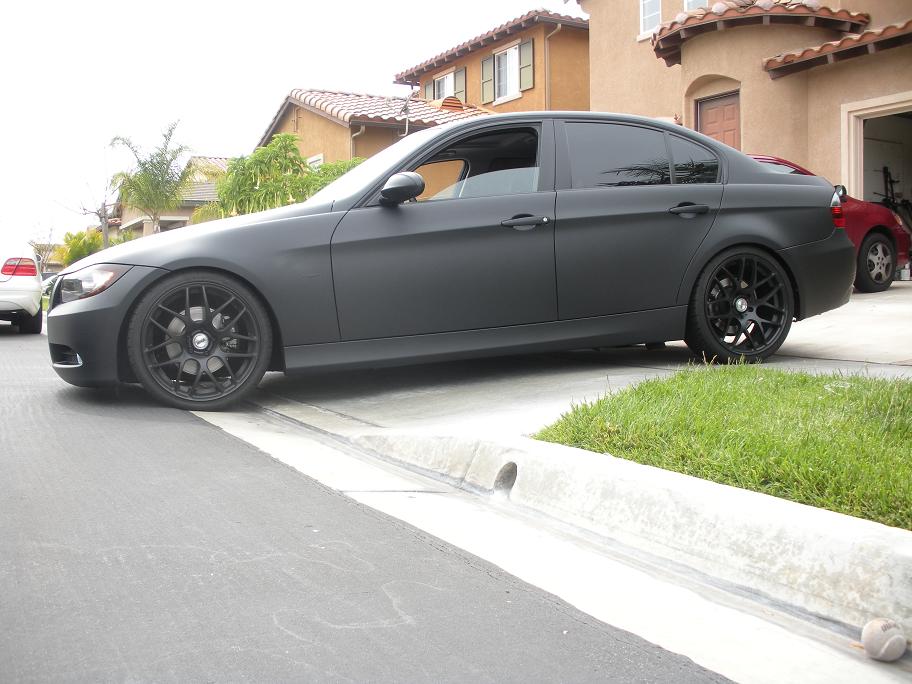
Sth like these............

So I am going to wrap my car to either Matte white or black....
Please give me advice....
original color is KBP....Blue
Have anyone done that before? I searched the whole forum and no result
Sth like these............


Last edited by jray906; 05-12-2011 at 04:40 AM.
#4
what are you asking advice for?
there was one guy on a bmw forum who wrapped his entire car matte black.
he had no prior experience.
visit youtube and figure out the method on how to wrap.
then buy a shit load of fucking vinyl and go to town.
I have no prior experience with vinyl but its not rocket science.
1. vinyl.
2. heat source
3. a lot of fucking time.
if you're asking about advice about the color, why mess up a pretty blue?
.
there was one guy on a bmw forum who wrapped his entire car matte black.
he had no prior experience.
visit youtube and figure out the method on how to wrap.
then buy a shit load of fucking vinyl and go to town.
I have no prior experience with vinyl but its not rocket science.
1. vinyl.
2. heat source
3. a lot of fucking time.
if you're asking about advice about the color, why mess up a pretty blue?
Originally Posted by bimmerforum
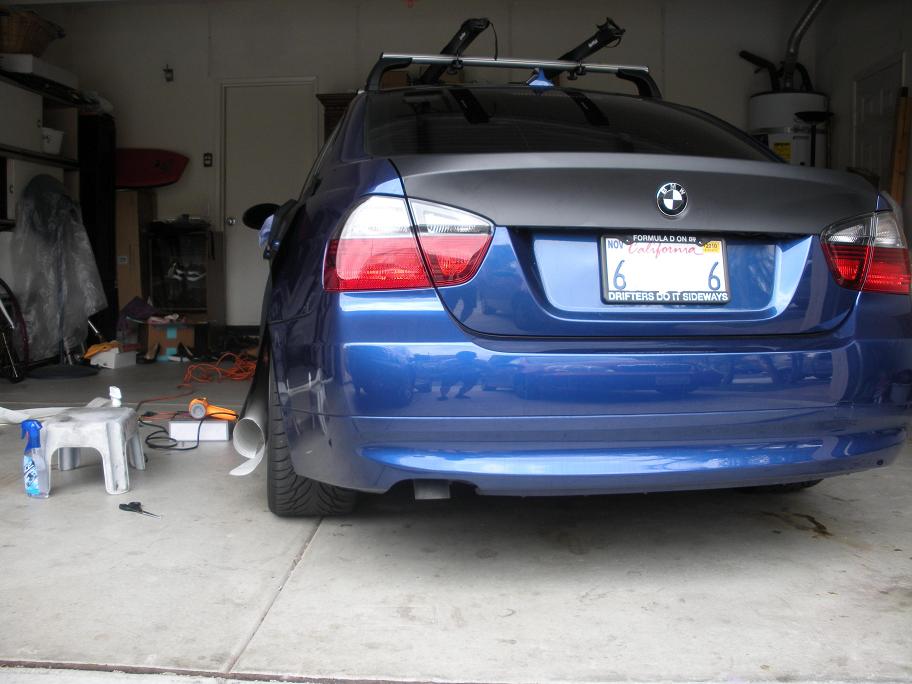
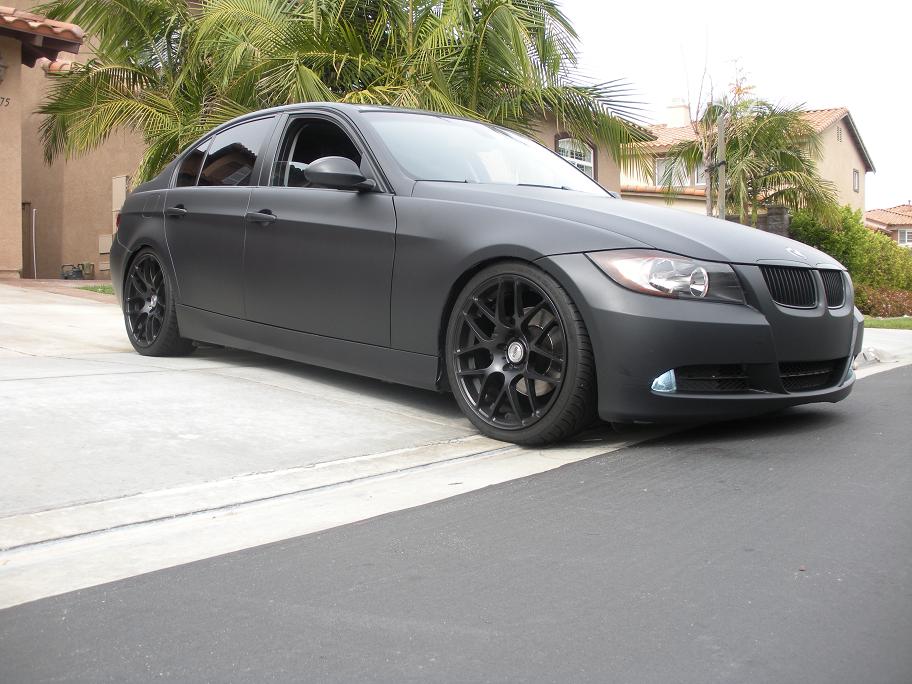
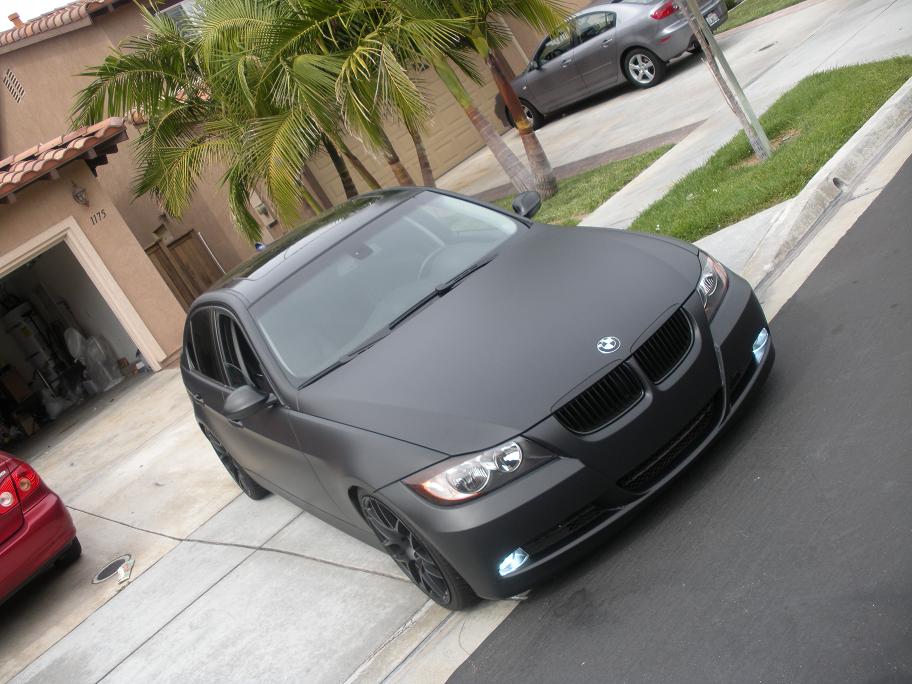
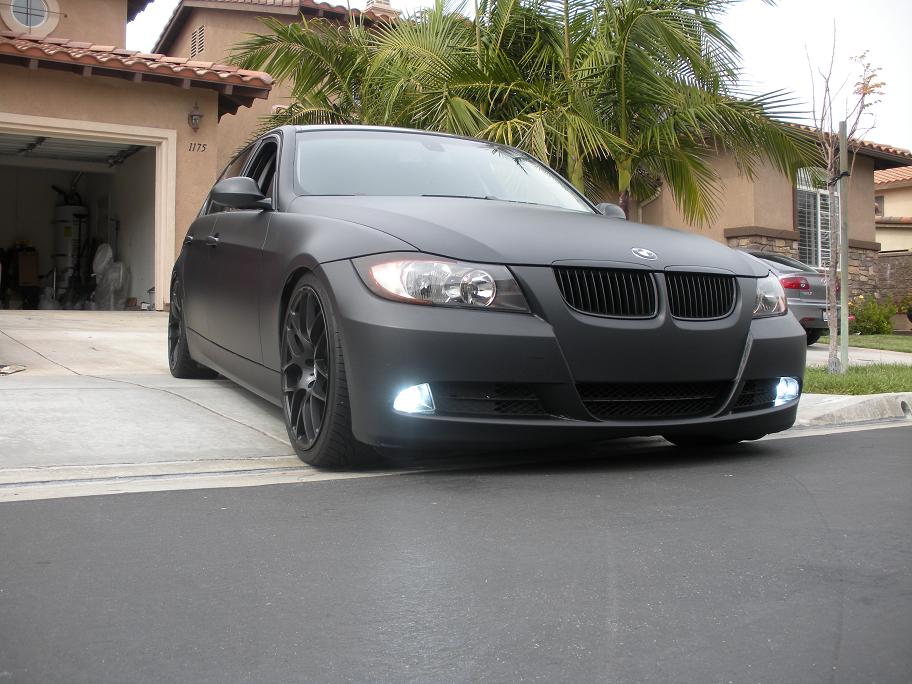
I vinyl wrapped my car flat black. This was just a random project i decided to pull the trigger on.... I had no experience whatsoever on vinyling anything. I just watched a few vids on youtube and got some advice from friends who do vinyl stickers. Here's a few pics of the process and outcome...
Hate it, Love it...It was my first time... it took me 1 week and a day to complete....did a panel a day after work =)
oh, and for the record... I didn't pay over $3000 bucks that most people pay to vinyl their car....
I paid about $120 for all materials... and i did all the work myself, with some help from my fiance from time to time
=) enjoy
DIY!!!!
so this will be my little DIY since there's not really much to mention =)
THINGS YOU NEED:
Vinyl (about 25 yards give it take..also depending how much you mess up)... measurements for the vinyl i got were 25 yrds and 48 inches wide....
2 qts of application fluid for the vinyl
I used a felt squeegee so it wont scratch the surface of the vinyl.
I also used a heat gun from Harbor Freight... $10 FTW!!!!
1 XActo knife and scissors
AND LOTS OF PATIENCE!!!!!
I fully detailed the car prior to vinyling including:
- Full car wash, Clay bar'ed the car, and waxed just to be sure the car was flawless.
It is important to make sure there are no specs of dust, bugs, dirt, or anything that would affect the vinyl application onto the car...
Applying:
1. Start with the easiest parts first (for me, it was the roof, trunk, and hood)
2. Cut the vinyl to the size of the section you are going to start on and make sure you cut an oversized piece just in case for stretching the vinyl.
3. Spray the application fluid all over the area you are about to vinyl, and peel off the backing of the vinyl and apply it to the section.
4. Be sure you squeegee the vinyl slowly because if you're too rapid, that may cause creases and lots of air bubbles; this is where the heat gun comes into play. With creases, just lift the vinyl back up and heat the area which you creased, stretch the vinyl until there is no more crease and reapply the vinyl. ALWAYS SQUEEGEE FROM MIDDLE OUTWARD...
5. The vinyl may keep coming up at the edges, this is due to the application fluid. Let it dry and you may continue to squeegee the vinyl down.
Now for the curvy areas!!!!
This is where you may need some help from a person or two...
FOR THE BUMPERS:
1. do not use application fluid when vinyling the bumpers or the most curvy areas of the car. If you do, it will be a Bi*ch to apply it.
2. Use A LOT of stretch and heat for this application
3. Start middle outward; squeegee the middle area of the bumper on, and have someone pull on the vinyl away as you heat the vinyl and squeegee it down. Do NOT over heat or overstretch the vinyl as it may lose its flat black appearance.
FYI: There will be a lot of bubbles on the sections where you do not spray the application fluid. NO WORRIES! try to get the bubbles as small as possible, and when you're done, let the car sit out in the sun and the bubbles will magically disappear!! (with the help of a needle from time to time) =)
when starting this project, you'll learn more and more as you keep vinyling sections of your car.
I learned as i went, and you all will too! (if you decide to tackle this)
Try vinyling a piece a time. I vinyl'd a section a day because that took all my patience in a day..
In the end, you'll be satisfied. This is a pretty straightforward DIY, so if there's any other questions, feel free to PM me.
Thanks again everyone!!!!!
<B>UPDATE!!!!!!!!</B>
VINYL REMOVED ON NOVEMBER 12, 2010
VINYL HELD UP VERY WELL. MINIMAL TO NO GLUE RESIDUE. PAINT INTACT AND LOOKS EXACTLY LIKE THE FIRST DAY I BOUGHT IT.
ALSO ADDED PICTURES OF THE CAR WHEN IT WAS EGGED LAST MONTH. VINYL HELD UP THROUGH THAT, TOO. I DON'T KNOW WHO DID IT, BUT I HOPE THEY ROT IN HELL..HAHA...
THE CAR IS NOW BONE STOCK AS OF TODAY!!!!!
ENJOY!!
Attached Images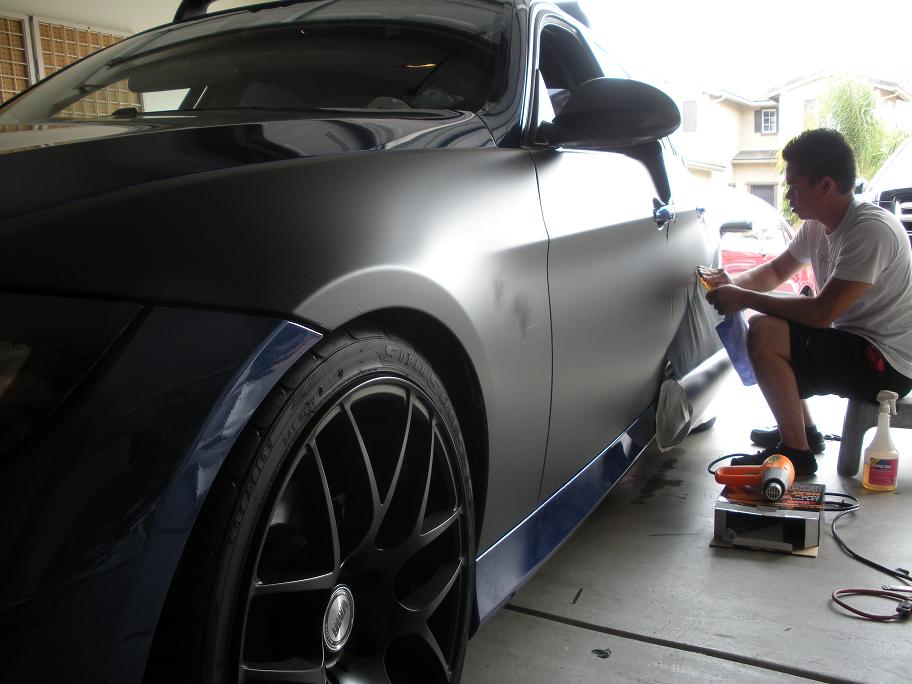
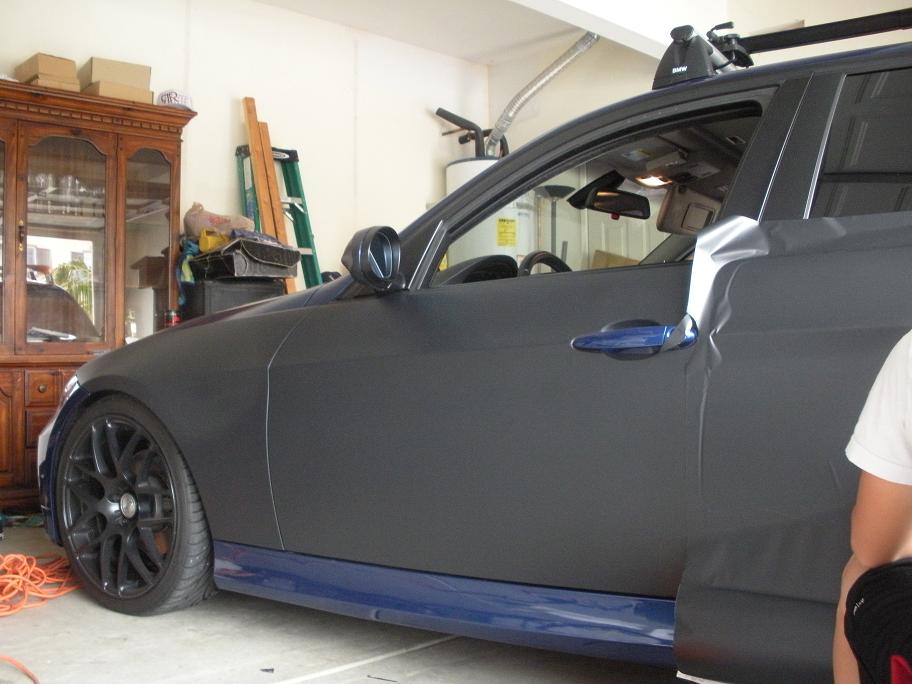
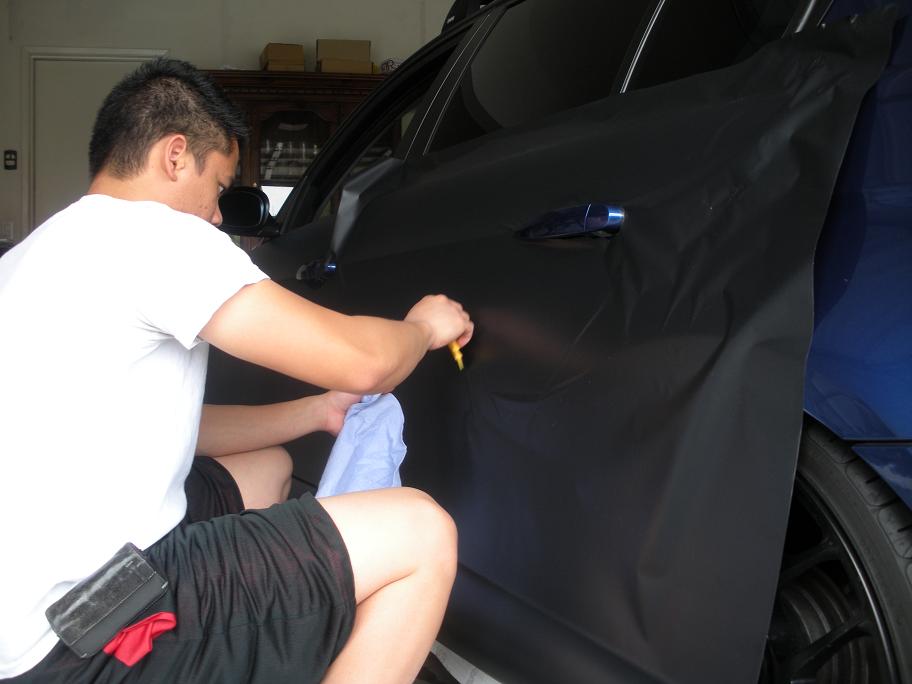
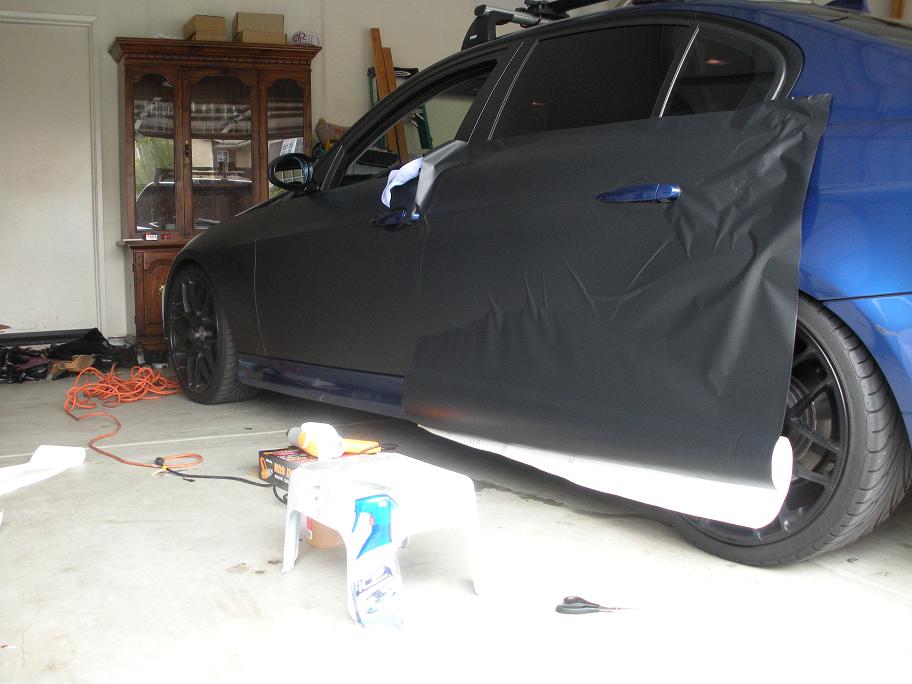
Last edited by Steven Bell; 05-12-2011 at 07:48 PM. Reason: Merged posts.
Trending Topics
#13
IF you must, then matte white. i think matte black looks cheap to me but maybe i havent seen a good quality job done yet. personally matte black reminds me of all those civic and integras with those cheap spray can jobs, but then there are porches and GTRs that ive seen in pictures that look clean.
#14

don't ruin or get rid of the beautiful KBP, doing any sort of wrap with KBP is just wasting money...
#16
#19
I saw matte white for the first time on a Bentley the other day and I must say its pretty nice. I would probably go with the matte white on a TL. I don't think the black would match well with the car. But who knows.... anyone wanna try and photoshop it?
#21
Ok....Thanks for all the advices, Actually I bought two big roll already, one matte white and one matte black both are 2000" by 60".
At first I gonna wrap my wifey's car to matte white and mine to matte black. I thought that is awesome.....
You guys changed my mind and I will just wrap my wifey's car to matte white and remind my KBP....
Where did that guy buy all the materials for only $120 = =
heatgun, squeegee and vinyl for only $120.....
Last edited by Steven Bell; 05-12-2011 at 07:49 PM. Reason: Merged posts.
#24
She has a white 2011 2DR Civic, too many against so i think I wont vinyl my TL....and I am too lazy...
I guess i will go to DMV and change it for FREE...no worries
I guess i will go to DMV and change it for FREE...no worries
Last edited by jray906; 05-12-2011 at 07:45 PM.
#30
I will post up photo once i finish my wifey's car....see if it turns out good....i will remain unchange my KBP and do it in the summer.....because I need to remove too many stuff....like the door handle, all the emblems on the trunk, blah blah blah......
#32
#34


