
F-170: DIY 3M Di-Noc Carbon Fiber Grille+Interior DIY page 4
 04-24-2010, 11:26 PM
#121
10th Gear

Join Date: Apr 2010
Age: 44
Posts: 13
Likes: 0
Received 0 Likes
on
0 Posts

haha, u just block your turn signal light.
Actually where did you buy this? ebay?
 04-25-2010, 01:30 AM
#123
Looking for new mods
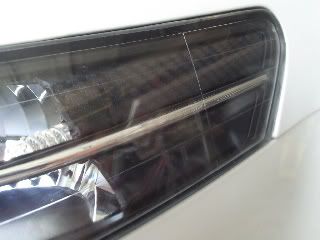
^+1 He didn't, just blocked the reflectors... that all. This material is neat, i got 3sq ft today in the mail and was playing around with it .
04-25-2010, 06:48 AM
#124
Intermediate

Join Date: Apr 2010
Age: 37
Posts: 35
Likes: 0
Received 0 Likes
on
0 Posts
yeah i just cut the reflector to about where on the type s headlights would be orange at then wrapped it with some vinyl.... here a front view of it 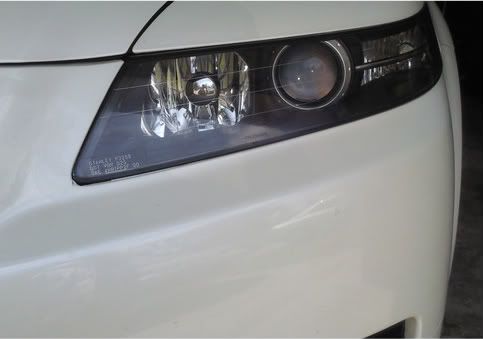
Last edited by 05wdptl; 04-25-2010 at 06:52 AM.
04-25-2010, 05:31 PM
#127
Intermediate
Join Date: Apr 2010
Age: 37
Posts: 35
Likes: 0
Received 0 Likes
on
0 Posts
make sure you know what you totally want first lol.. cause i did the whole baking thing 4 times.. and make sure you take your time... first time i just cleared it.. the 2nd time was the following day after clearing it.. i kinda did a sloppy job on resealing.. or felt like it was a sloppy job so i rebaked and redid sealing parts..... 3rd time i actually blacked it out and did the whole 3m wrap with the cut reflector.. then a week later one of my headlight started having moisture in it cause from the first time i did that headlight.. i put too much silicon so i started picking off all the old silicon and didnt put too much back on.. so yeah... but yeah if you use the silicon method after taking it apart.. you could just put 1 layer coat around the lining of the headlight when you put it back together if you just plan on using the old silicon. never hurts to have extra silicon on headlight... oh and if you dont have clamps.. you really dont need it.. when letting headlight rest after putting it back together.. i did it all 4 times without any clamps around the edges of the headlight.. as long as all the tabs are back into correctly place it holds up fine.. i know some people would probably disagree about not using clamps but yeah i did it without any =]
04-25-2010, 08:35 PM
#129
I'm Craig
Thread Starter
iTrader: (2)
Semi-DIY/Update
Ever since I put the Di-Noc in my car, I wasn't happy with some of the cuts and fitment of a few of the pieces. I had some free time this weekend so I decided to fix those areas up with some left over CF I've had in my trunk for a while now. The first area I tackled was the center shifter area. There were wrinkles and jagged cuts I never was really too happy about. I took some pics of the process with my iPhone 3GS...so let's excuse the sub-par quality. 
Before shot:
Notice the sloppy cuts and wrinkles on the upper right section. I didn't take my time the first time around.

Step 1:
Remove the old Di-Noc with heat.


Surprised that there was zero residue left over. I kind of miss the stock shiny look.
Step 2:
Cut a chunk of the vinyl that is slightly larger than the area you want to cover. Since this area was around the shifter, I cut a hole in the middle of it for easier application.

Step 3:
Use heat to melt it down and mold it to the surface. Press down along the edges of it so you can see where to cut.


Step 4:
Cut it up! I used a straight razor blade for this step. Didn't take any pictures unfortunetly. But here are the finished pics of this area. Notice how I covered up part of the silver area around the shifter this time. And yes I fixed the area on the lower corner of it. And the upper left. Heat allows this stuff to be easily stretched out to cover up slips with cutting like that.


Part II.
The right section of my steering wheel also had some cuts that I wasn't happy with. So I decided to redo that while I was at it.
Step 1:
After cutting the chunk of Di-Noc, put it on. Use heat to mold.

Step 2:
Cut! Here's a pic of what I used for all the cuts. Small and very sharp.


Step 3:
Press down along the edges of the buttons so you can see where to cut. And then very carefully cut. One slip and you'll have to start over.

Finished product:

Thanks for reading! I'll post some night shots of my interior in the next post.
Before shot:
Notice the sloppy cuts and wrinkles on the upper right section. I didn't take my time the first time around.
Step 1:
Remove the old Di-Noc with heat.
Surprised that there was zero residue left over. I kind of miss the stock shiny look.
Step 2:
Cut a chunk of the vinyl that is slightly larger than the area you want to cover. Since this area was around the shifter, I cut a hole in the middle of it for easier application.
Step 3:
Use heat to melt it down and mold it to the surface. Press down along the edges of it so you can see where to cut.
Step 4:
Cut it up! I used a straight razor blade for this step. Didn't take any pictures unfortunetly. But here are the finished pics of this area. Notice how I covered up part of the silver area around the shifter this time. And yes I fixed the area on the lower corner of it. And the upper left. Heat allows this stuff to be easily stretched out to cover up slips with cutting like that.
Part II.
The right section of my steering wheel also had some cuts that I wasn't happy with. So I decided to redo that while I was at it.
Step 1:
After cutting the chunk of Di-Noc, put it on. Use heat to mold.
Step 2:
Cut! Here's a pic of what I used for all the cuts. Small and very sharp.
Step 3:
Press down along the edges of the buttons so you can see where to cut. And then very carefully cut. One slip and you'll have to start over.
Finished product:
Thanks for reading! I'll post some night shots of my interior in the next post.
04-25-2010, 08:37 PM
#130
I'm Craig
Thread Starter
iTrader: (2)
Here are some shots of my interior at night taken with my Nikon D60. These pics don't do it justice. Di-Noc with blue LEDs is a stunning combo. Added a piece of CF to the bottom of my steering wheel- yes it sticks to leather.


04-25-2010, 08:59 PM
#131
Looking for new mods
Why dint you remove the garnish around the gear selector, that piece comes out very easy.
How hard was it to remove it? I have the dark brown wood from 07-08 base, is cool, but i want to give this a try. I have the material at home but not sure how removal it is
How hard was it to remove it? I have the dark brown wood from 07-08 base, is cool, but i want to give this a try. I have the material at home but not sure how removal it is
04-25-2010, 10:28 PM
#132
Moderator
iTrader: (3)
Damn that looks great!
Nice DIY. I may put this over my woodgrain eventually.
Oh and D60 FTW
Nice DIY. I may put this over my woodgrain eventually.
Oh and D60 FTW
04-25-2010, 10:46 PM
#133
Team Owner
iTrader: (2)
Join Date: Jan 2008
Location: Kansas City, MO (Overland Park, KS)
Posts: 36,545
Received 6,470 Likes
on
5,162 Posts
CJ-great updated pics. Well done!
National Acura Meet-June 6th/Kansas City. Click here for details and to sign up!
.
National Acura Meet-June 6th/Kansas City. Click here for details and to sign up!
.
04-25-2010, 10:54 PM
#134
Looking good CjTL! I've only had time to do the doors, front map light, rear trim above the license plate and the front trim on the hood......but then again I've taken everything apart and wrapped the pieces. Each door took about 2-2.5 hours to do.....but then again I'm incredibly anal about it being perfect. I'll have to post some pics. I'm gonna try and do the steering wheel and center console like you have this week and if I have a chance I'm gonna try the front grill next weekend. I have a few other things I'm working on at the moment so taking the car apart a little at a time is good for me. I'm definitely thinking about getting blue interior leds now that I've seen the pics from your car! Which LEDs did you get for the interior? They're 921/168 right? Keep up the good work man!
04-26-2010, 04:32 PM
#136
I'm Craig
Thread Starter
iTrader: (2)
Glad to see my DIY made its way into the 3G Garage. 
I didn't really have a need to remove it honestly. Yeah I could have but there wasn't too much of a benefit, IMO.
But it was super easy to peel off with a hair dryer. I tried to without and it's doable, but takes some muscle. This stuff is amazing.
Thanks! Yeah I'd recommend this stuff in place of the faux wood. Fits the TL better.
And yeah for sure. I take way too many pics with it.
Thanks!

Damn dude you're really taking your time with this stuff. Props. Post pics asap once you finish it.
As far as the LEDs- they're the WLED-x6 off of superbrightleds.com
Thank you. Made it to the 3G Garage. Woo.
But it was super easy to peel off with a hair dryer. I tried to without and it's doable, but takes some muscle. This stuff is amazing.
And yeah for sure. I take way too many pics with it.
Thanks!
Looking good CjTL! I've only had time to do the doors, front map light, rear trim above the license plate and the front trim on the hood......but then again I've taken everything apart and wrapped the pieces. Each door took about 2-2.5 hours to do.....but then again I'm incredibly anal about it being perfect. I'll have to post some pics. I'm gonna try and do the steering wheel and center console like you have this week and if I have a chance I'm gonna try the front grill next weekend. I have a few other things I'm working on at the moment so taking the car apart a little at a time is good for me. I'm definitely thinking about getting blue interior leds now that I've seen the pics from your car! Which LEDs did you get for the interior? They're 921/168 right? Keep up the good work man!
Damn dude you're really taking your time with this stuff. Props. Post pics asap once you finish it.
As far as the LEDs- they're the WLED-x6 off of superbrightleds.com
Thank you. Made it to the 3G Garage. Woo.
04-26-2010, 07:28 PM
#137
Pro
Looks amazing for an affordable price! I was thinking about getting a CF dash kit but you've changed my mind. Thanks for the DIY. I'll be ordering a roll of this stuff once I get my ride 
04-26-2010, 10:04 PM
#138
Can we get a diy for the grill? It looks more complex and i just repainted mine for the second time after the side effects of the shit rock salt they put down in pa, Rock Chips FTMFL, so Im considering this
04-26-2010, 10:15 PM
#139
Yeah.....I'm kind of a perfectionist when it comes to stuff, but it pays off in the end! I'll try and get some pics of the stuff I've done so far. I've already done the front map light twice cause there was one minor spot that bothered me, but it looks hella nice now!! Thanks for the info about the leds....just ordered some. Hopefully they are the right ones.
04-27-2010, 06:46 PM
#141
I'm Craig
Thread Starter
iTrader: (2)
Yeah.....I'm kind of a perfectionist when it comes to stuff, but it pays off in the end! I'll try and get some pics of the stuff I've done so far. I've already done the front map light twice cause there was one minor spot that bothered me, but it looks hella nice now!! Thanks for the info about the leds....just ordered some. Hopefully they are the right ones.
I'd guess ~20-30 minutes for that section.
04-27-2010, 08:28 PM
#142
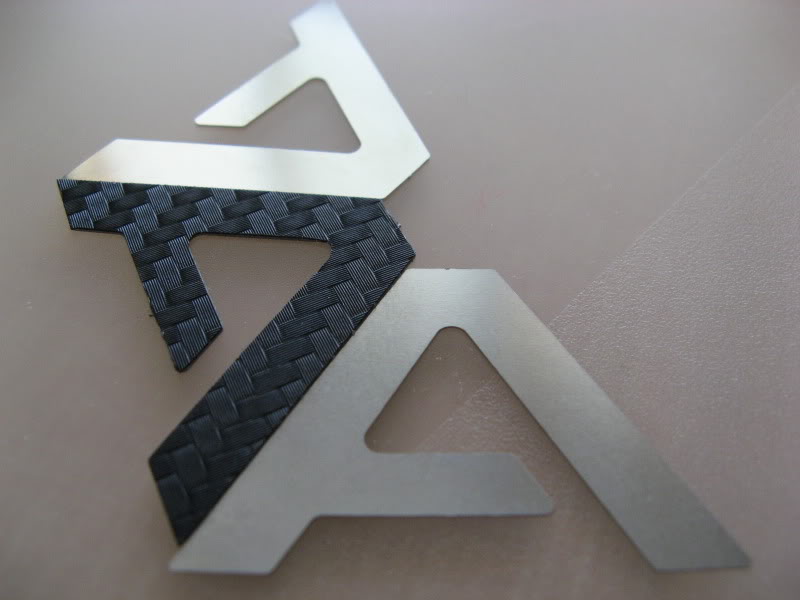
nice DIY, the only thing i would have tried was to make all the CF lines align up together when there are multiple parts so close. the silver center console shifter bezel can be removed for easier application.
in fact i recommend removing any parts wrapped in this stuff. wrapping it around the backside of any part will ensure a better overall finished product. i removed every part i did. and wrapped this stuff to the backside.
here is an example 07=07 steering wheel button area
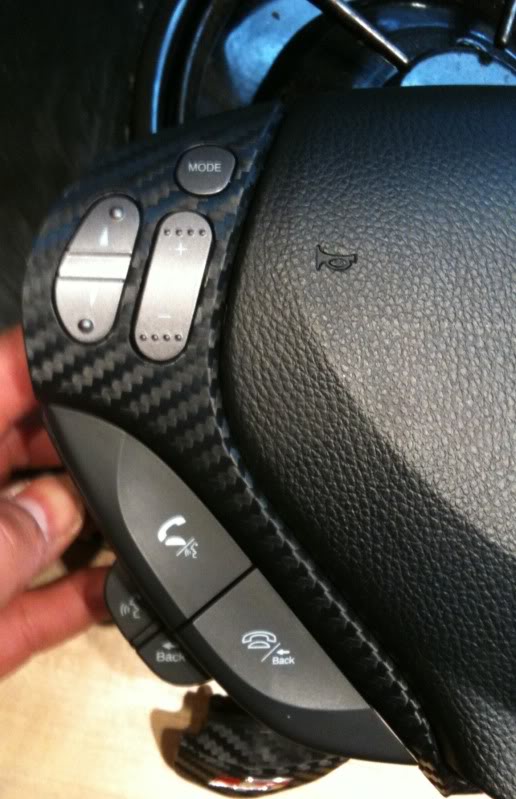
i doubt i would have been able to do as clean a job with this part attached.
in fact i recommend removing any parts wrapped in this stuff. wrapping it around the backside of any part will ensure a better overall finished product. i removed every part i did. and wrapped this stuff to the backside.
here is an example 07=07 steering wheel button area
i doubt i would have been able to do as clean a job with this part attached.
 04-28-2010, 12:26 AM
#144
socal WDP
iTrader: (2)
Join Date: May 2008
Location: San Diego/Irvine
Age: 34
Posts: 953
Likes: 0
Received 1 Like
on
1 Post
haha in the blue light it looks really weird like im trippin out. i really want to do that cf vinyl wrap but i have dark wood grain which just looks... bad ass. i might just wrap the oem fake carbon fiber areas around it (like that silver panel that runs around your stereo and around your dash)
 05-22-2010, 12:35 PM
#149
05-22-2010, 07:23 PM
#152
Advanced

Join Date: Oct 2009
Posts: 82
Likes: 0
Received 0 Likes
on
0 Posts
I believe it'll look good too, especially my WDP TL! I am just worry about the residue or it'll damage the original color of the car.
I am planning to do the hood and the top of the car.
05-22-2010, 11:48 PM
#153
Team Owner
iTrader: (2)
Join Date: Jan 2008
Location: Kansas City, MO (Overland Park, KS)
Posts: 36,545
Received 6,470 Likes
on
5,162 Posts
I'd totally do my Type S with this (surprise, surprise)! I've seriously considered doing my exterior in matte black, but I like this better.
National Acura Meet-June 6th/Kansas City-LESS THAN ONE MONTH AWAY!!!.
Click here for details and to sign up!
.
Post #6,000
National Acura Meet-June 6th/Kansas City-LESS THAN ONE MONTH AWAY!!!.
Click here for details and to sign up!
.
Post #6,000
06-03-2010, 01:12 AM
#155
http://www.youtube.com/watch?v=LWi6C...eature=related
I read that you missed the shiny look. Here is your solution (: Thank you for making this thread and DIY btw, im buying myself a roll and gunna go crazy with it Lol. thanks again!
Would using this material under your hood, as in the cover pieces,probably be the worst idea ever or no ? Just a thought lol.
I read that you missed the shiny look. Here is your solution (: Thank you for making this thread and DIY btw, im buying myself a roll and gunna go crazy with it Lol.
thanks again!Would using this material under your hood, as in the cover pieces,probably be the worst idea ever or no ?
Just a thought lol.
Last edited by huystAr; 06-03-2010 at 01:17 AM. Reason: failure happened
 06-28-2010, 02:50 AM
#159
http://www.youtube.com/watch?v=LWi6C...eature=related
I read that you missed the shiny look. Here is your solution (: Thank you for making this thread and DIY btw, im buying myself a roll and gunna go crazy with it Lol. thanks again!
Would using this material under your hood, as in the cover pieces,probably be the worst idea ever or no ? Just a thought lol.
I read that you missed the shiny look. Here is your solution (: Thank you for making this thread and DIY btw, im buying myself a roll and gunna go crazy with it Lol.
thanks again!Would using this material under your hood, as in the cover pieces,probably be the worst idea ever or no ?
Just a thought lol.