
DIY: Window visor


Thread Starter
Instructor
Joined: Oct 2008
Posts: 153
Likes: 15
DIY: Window visor
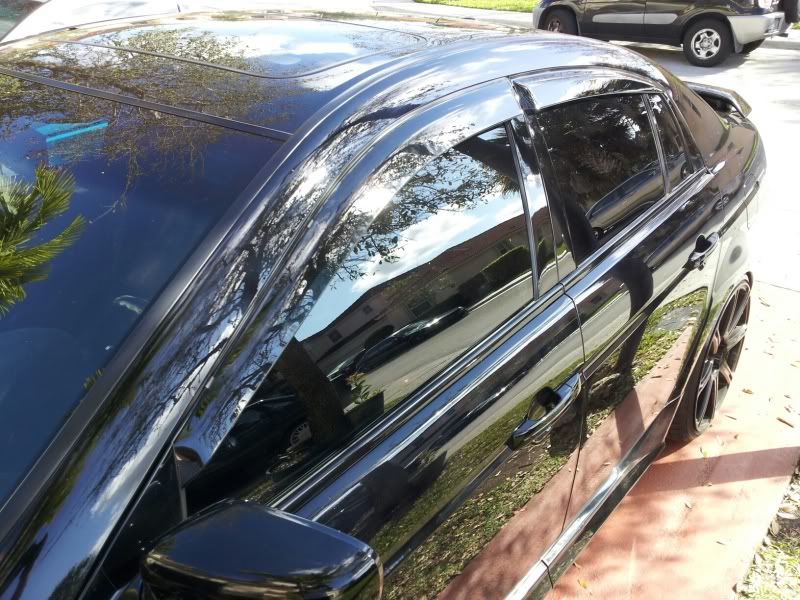
didn't see a diy with actual pic so here it goes. this is oem purchased from acura dealer so installation might be different from ebay's or weathertech. sorry for the crap pic since i don't have a cam anymore. i learned a few dos/donts on the way so flame is unnecessary. the visors can't be mixed and matched since length and direction is exclusive for each window, common sense here.
make sure you do this when it's dry and warm and no water contact within 24 hours after installation to give the adhesive plenty time to cure and settle.

wipe down visible dirt with a soft dry towel around the installation area first. drop down the windows all the way. pull the weather/door guard/stripe/rubber piece out lightly. made a mistake here as you don't nee to pull everything out, just enough so the clips/hooks on the visor can hook on

find the correct visor for the door, peel off the adhesive cover at the ends only, less the better so adjustment can be made once you first attach the visor. fold the cover back slightly so you can reach it once visor is installed temporarily

wipe down the shinny, black, reflective pillar (where the visor tape will attach to) with an small alcohol pad to remove all the little crap.
install the front visors from the mirror to the center of car (mirror clip, 2 over hanging clip, 2 underneath clip)
install the rear visors from the back of the car to the center (1 overhang clips, 2 underneath clips)
always install the overhanging clips first
there is a small protruding plastic tab which need to be inserted behind the mirror assembly first. then clip on the first 2 "overhanging clips". then push in the last 2 "underneath clips". common sense here as well.

you can see the 2 overhanging clips here, clip them on. A mistake here is that i pulled too much of the weather stripe out as you can see. you don't need to remove it from the plastic spinning retainers. now you need to push the remaining 2 underneath clip into the weather stripe track (no pic, too dark). now adjust the visor for perfect fit (make sure it's aligned nicely and it's evenly spaced all around)

once you made the final adjustment, pull the tape cover slowly to expose all the adhesive. there is no going back here as the tapes are very strong. now press the visor with firm and steady force against the door frame to initiate bonding. i rested my forearms across the visor for about a minute. make sure every inch of the tape is stick onto the trim.
now put the weather stripe back, make sure it's completely back into the original groove/track. then do a final wipe down with DRY soft towel

same thing for back but just much easier, make sure you follow the same steps but install from back of car to center of car

the alignment, left is rear, right is front

finished product. to a final DRY wipe down to remove any dirt and fingerprint.
make sure you do this when it's dry and warm and no water contact within 24 hours after installation to give the adhesive plenty time to cure and settle.
took me about 1 hour since i had no clue, but should take you 30 min max. diff level 2/10. ask if you got ?s
make sure you do this when it's dry and warm and no water contact within 24 hours after installation to give the adhesive plenty time to cure and settle.
wipe down visible dirt with a soft dry towel around the installation area first. drop down the windows all the way. pull the weather/door guard/stripe/rubber piece out lightly. made a mistake here as you don't nee to pull everything out, just enough so the clips/hooks on the visor can hook on
find the correct visor for the door, peel off the adhesive cover at the ends only, less the better so adjustment can be made once you first attach the visor. fold the cover back slightly so you can reach it once visor is installed temporarily
wipe down the shinny, black, reflective pillar (where the visor tape will attach to) with an small alcohol pad to remove all the little crap.
install the front visors from the mirror to the center of car (mirror clip, 2 over hanging clip, 2 underneath clip)
install the rear visors from the back of the car to the center (1 overhang clips, 2 underneath clips)
always install the overhanging clips first
there is a small protruding plastic tab which need to be inserted behind the mirror assembly first. then clip on the first 2 "overhanging clips". then push in the last 2 "underneath clips". common sense here as well.
you can see the 2 overhanging clips here, clip them on. A mistake here is that i pulled too much of the weather stripe out as you can see. you don't need to remove it from the plastic spinning retainers. now you need to push the remaining 2 underneath clip into the weather stripe track (no pic, too dark). now adjust the visor for perfect fit (make sure it's aligned nicely and it's evenly spaced all around)
once you made the final adjustment, pull the tape cover slowly to expose all the adhesive. there is no going back here as the tapes are very strong. now press the visor with firm and steady force against the door frame to initiate bonding. i rested my forearms across the visor for about a minute. make sure every inch of the tape is stick onto the trim.
now put the weather stripe back, make sure it's completely back into the original groove/track. then do a final wipe down with DRY soft towel
same thing for back but just much easier, make sure you follow the same steps but install from back of car to center of car
the alignment, left is rear, right is front
finished product. to a final DRY wipe down to remove any dirt and fingerprint.
make sure you do this when it's dry and warm and no water contact within 24 hours after installation to give the adhesive plenty time to cure and settle.
took me about 1 hour since i had no clue, but should take you 30 min max. diff level 2/10. ask if you got ?s


Acura's installation instructions are posted in the 3G Garage for more info:
https://acurazine.com/forums/showpos...96&postcount=1
Thanks for the writeup OP!
https://acurazine.com/forums/showpos...96&postcount=1
Thanks for the writeup OP!
Trending Topics


Joined: Sep 2008
Posts: 78,249
Likes: 20,202
Now that I tried out the weathertech ones and liked how visors looked, I pulled the trigger on the oem ones. I will surely use your tips to install mine this weekend. Thanks for the write up!


Joined: Sep 2008
Posts: 78,249
Likes: 20,202
Ha...this thread was dormant for a year!  Guess there were a bunch of people waiting to install this!
sunny201, c'mon, you don't want to install these...you wanna sell em to me for 1/2 price! I know it!
J.
Honestly was ALWAYS against visors...but now that I've had them, the car looks naked without em.
Guess there were a bunch of people waiting to install this!sunny201, c'mon, you don't want to install these...you wanna sell em to me for 1/2 price! I know it!
J.
Honestly was ALWAYS against visors...but now that I've had them, the car looks naked without em.

Joined: Sep 2008
Posts: 78,249
Likes: 20,202
in the 80's, a "useful bump" had a whole other meaning.
will...yes, go to autozone and look for the silver 3m stuff...it's super strong and meant for install for moldings etc...easy to spot, it's got a red backing...
now that I think about it, I bought a 15' roll from amazon for $6 rather than the 5' roll for $9 at the parts store. Look into it.
will...yes, go to autozone and look for the silver 3m stuff...it's super strong and meant for install for moldings etc...easy to spot, it's got a red backing...
now that I think about it, I bought a 15' roll from amazon for $6 rather than the 5' roll for $9 at the parts store. Look into it.
Joined: Sep 2008
Posts: 78,249
Likes: 20,202
no way, even my weathertech ones didn't do that.
but these, with the way they are designed and the double sided tape, air isn't going to whistle through...
at least I HIGHLY doubt it
but these, with the way they are designed and the double sided tape, air isn't going to whistle through...
at least I HIGHLY doubt it

Joined: Sep 2008
Posts: 78,249
Likes: 20,202
ABP, coming from you, that is quite a compliment...I'm SOOO blushing right now.
J.
LOW how the oems look, I really do...the weathertechs were good too, but the rears flow much better and I do like how they are not in the way of the glass here.
J.
LOW how the oems look, I really do...the weathertechs were good too, but the rears flow much better and I do like how they are not in the way of the glass here.

Racer
Joined: May 2009
Posts: 467
Likes: 36
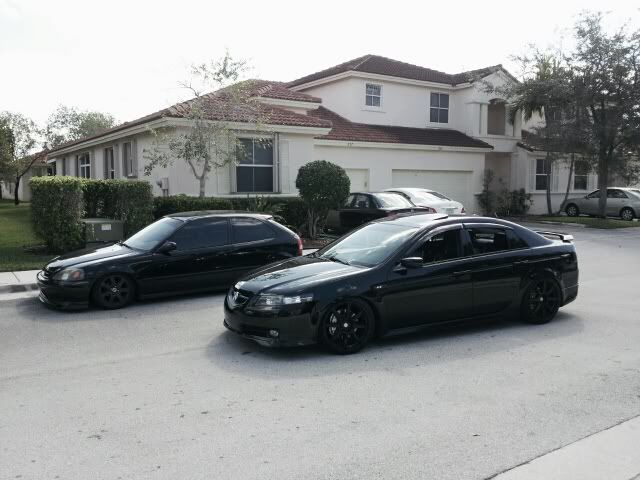
Thanks for the response but,I seem to end up with the same problem as my integra. Noticed my tint at the upper window edge got mild fuckage possibly due to the friction points and that the bottom clip area has mild bulge
I also noticed with the windows closed up there was some mild rattling, could have already been pre-existing rattle but driver side never had any before but is very minimal.
OEM honda access visors btw
and your car is a rockstar

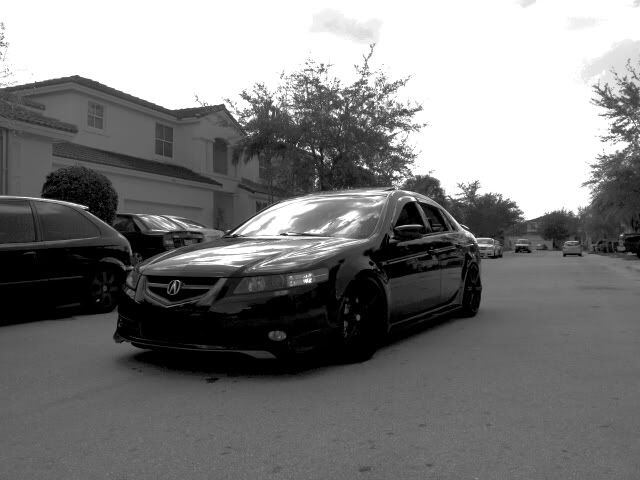
here is mine but no close up

sometimes i'm not too sure about the visors other times all for it
I also noticed with the windows closed up there was some mild rattling, could have already been pre-existing rattle but driver side never had any before but is very minimal.
OEM honda access visors btw
and your car is a rockstar
here is mine but no close up
sometimes i'm not too sure about the visors other times all for it
Last edited by DC2many; Jun 28, 2012 at 03:47 AM.
Joined: Sep 2008
Posts: 78,249
Likes: 20,202
Dave, thanks man!
DC2...hmmm...funny, if you go back to my first 2 years on the site I am very ANTI visors...i got a killer deal on some weathertech ones....liked them on black on black...then got oem.
I've often thought they'd probably look good painted to match the car! I think they look great on your car...the bulge is definitely there for me...but I must be used to it because it doesn't bother me. Thanks for the compliment too.
DC2...hmmm...funny, if you go back to my first 2 years on the site I am very ANTI visors...i got a killer deal on some weathertech ones....liked them on black on black...then got oem.
I've often thought they'd probably look good painted to match the car!
I think they look great on your car...the bulge is definitely there for me...but I must be used to it because it doesn't bother me. Thanks for the compliment too.
Intermediate
Joined: Feb 2012
Posts: 42
Likes: 6
From: St. Louis, Missouri (Overland, MO)
great writeup, just used it on my whip. thanks again. I see really light scratches or scuffs in the plastic(only when you get really close up to it), what do you clean these things with so they dont get so scratched over time? is it because its plastic or do i just need to wax the visors or something as well? J your car always looks so clean im so jealous it only has 85k and is 4 years older then my car, i almost have 74K. boo.
Last edited by Redbirds11; Jul 17, 2012 at 05:39 PM. Reason: added more comments
Joined: Sep 2008
Posts: 78,249
Likes: 20,202
LOL...how you know my dang mileage! 
Congrats, Cory...post up a picture, man...I do love how the visors look on the car. Honestly, when I wax, I put a coat on them too...you always see the cheap knockoffs getting sunbaked and cracking over time, which I want to avoid.
Congrats, Cory...post up a picture, man...I do love how the visors look on the car. Honestly, when I wax, I put a coat on them too...you always see the cheap knockoffs getting sunbaked and cracking over time, which I want to avoid.
Advanced
Joined: Mar 2011
Posts: 72
Likes: 1
From: locust grove, va
Just got my oem visors and will be using this install once it warms up outside a Lil.. Nothing worse than when after its rained and u get in and cracked window then turn and water pours all over instrument panel on door

Joined: Sep 2008
Posts: 78,249
Likes: 20,202
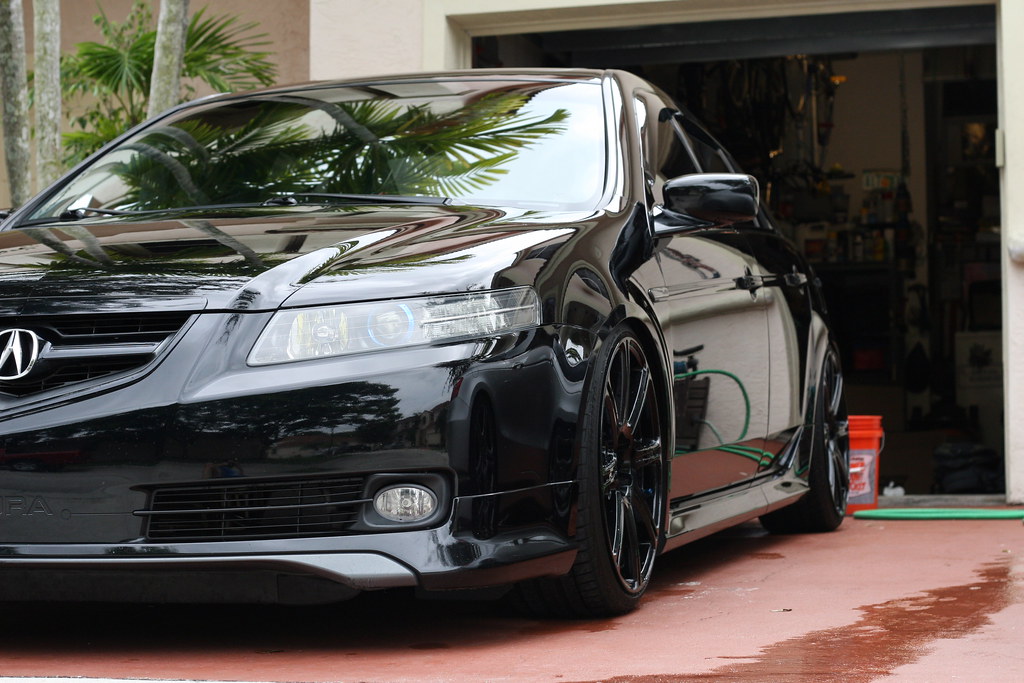
The more I see the visors, the more I realize I'm only okay with them on a black car since it doesn't add another color to. I actually used to hate all window visors...
So racist of me...
here's a shot of mine, still going strong...
http://www.flickr.com/photos/rockstar143/8715309153/http://www.flickr.com/photos/rockstar143/8715309153/ by http://www.flickr.com/people/rockstar143/, on Flickr
So racist of me...
here's a shot of mine, still going strong...
http://www.flickr.com/photos/rockstar143/8715309153/http://www.flickr.com/photos/rockstar143/8715309153/ by http://www.flickr.com/people/rockstar143/, on Flickr
Last edited by rockstar143; May 8, 2013 at 09:41 AM.