When you click on links to various merchants on this site and make a purchase, this can result in this site earning a commission. Affiliate programs and affiliations include, but are not limited to, the eBay Partner Network.
I agree with Street Guardian recommendation. It saved my bacon after I hit a dude who ran a red light. Replaced the totalled 2015 TL with a 2018 TLX and needed the wiring hardware. Support sent me everything I needed for less than 60 bucks and they threw in stickers, pads, etc. for free. They made sure I had the right stuff for the SG9663DCPRO. Outstanding Support!
Thanks for the advice, etc. Monday I am having a Blackvue 900X Plus, front and rear cameras along with a Blackvue 124X Battery. This will be the biggest upgrade in cameras I have ever had, but since our new son-in-laws car got totalled, (and JB's experience on this blog) I feel like the protection is needed. Hopefully the supplied sticker can hold the camera up in the Vegas heat.
Thanks for the advice, etc. Monday I am having a Blackvue 900X Plus, front and rear cameras along with a Blackvue 124X Battery. This will be the biggest upgrade in cameras I have ever had, but since our new son-in-laws car got totalled, (and JB's experience on this blog) I feel like the protection is needed. Hopefully the supplied sticker can hold the camera up in the Vegas heat.
Ironically, the other driver (Mexican License) never denied she was responsible, her Mexican insurance denied that she had a policy, and numerous attempts to contact her have been futile. The Municipality is prosecuting her for DUI, and another related violation, and I MAY see a reimbursement of the $500 deductible I paid as a Victim to her felony. The prosecuting attorney is trying to get her to agree to a plea deal which would substantially reduce her jail time, but so far, her attorney is trying to find one little problem in the way the police did the blood alcohol testing to get her off. Next court date is Oct 4.
SO..a dash camera or rear camera would not have helped me! LOL
Ahhh,,,got it. Our son-in law is a "he said/she said" scenario and she has gotten an attorney. He swears he was crossing on a green light and she ran a red, but with no witnesses (there were plenty of course, but they just drove around the accident and 'moved on' and no video...well, who knows how this ends up. In this litigious country we live in, all the protection you can get seems worth it, and for me it is going to be dash cam overkill. Good luck JB...
Thanks! And I get what your SIL is up against! Good luck to him!
Honestly, I had moved on, and then I got a letter from the Prosecuting Attorney...so now I would like the $500 back, just on principle...but really, it doesn't matter.
OK - I decided to keep this UPDATE in the original thread that we all posted in back when the 19 RDX came out. So anyway, the 2019 RDX ASpec I had was replaced with a new 22 A-Spec/Advance, and to celebrate I upgraded from my previously installed Blackvue DR900S Front/Back DashCam to a newer Blackvue DR900X Front/Back DashCam. The newer model has much improved live streaming and features. I also decided to purchase and install the Blackvue Battery for two reasons. 1) It would take a load of the real battery when the camera is in Parking Mode, and 2) By using the Battery, I did not have to climb under the dash and find the 24/7 hot and 'engine on' hot points to wire the camera for power. More on that later.
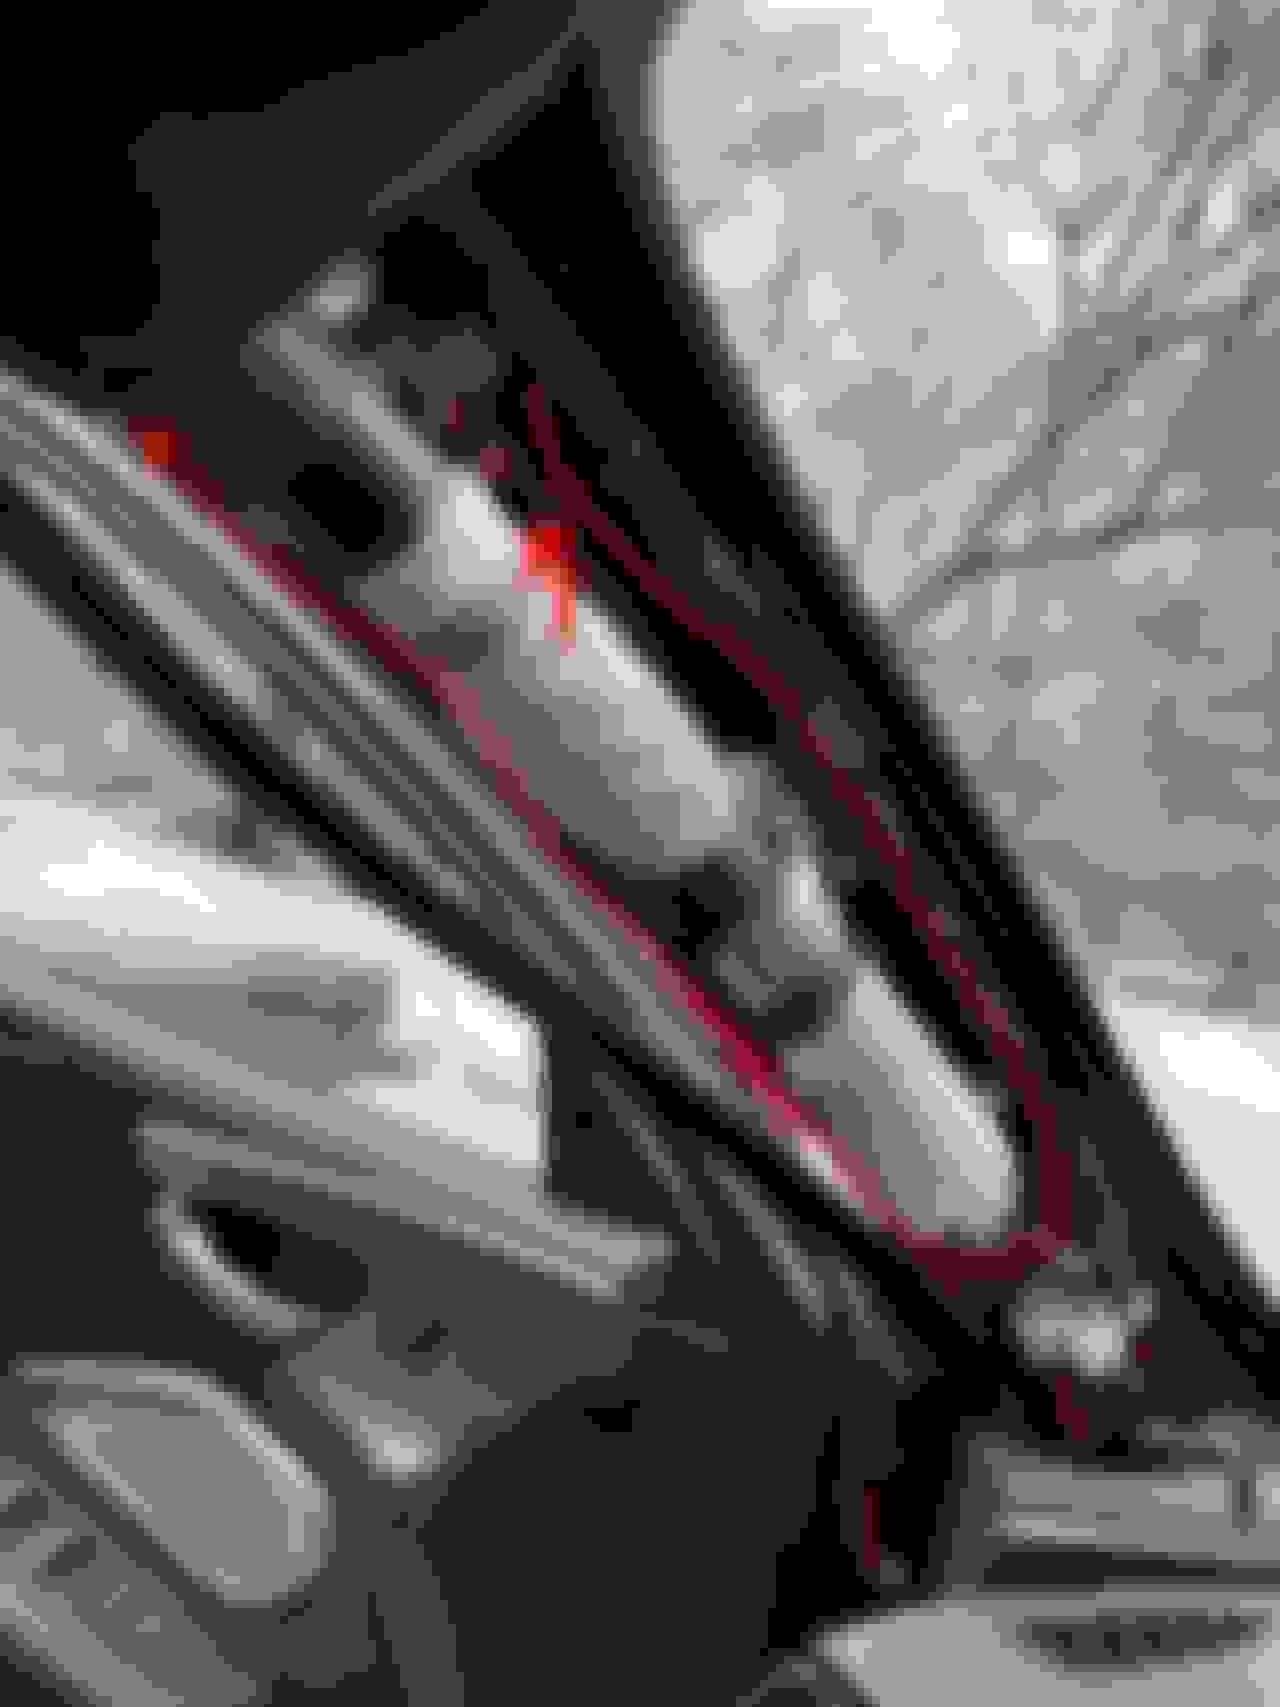
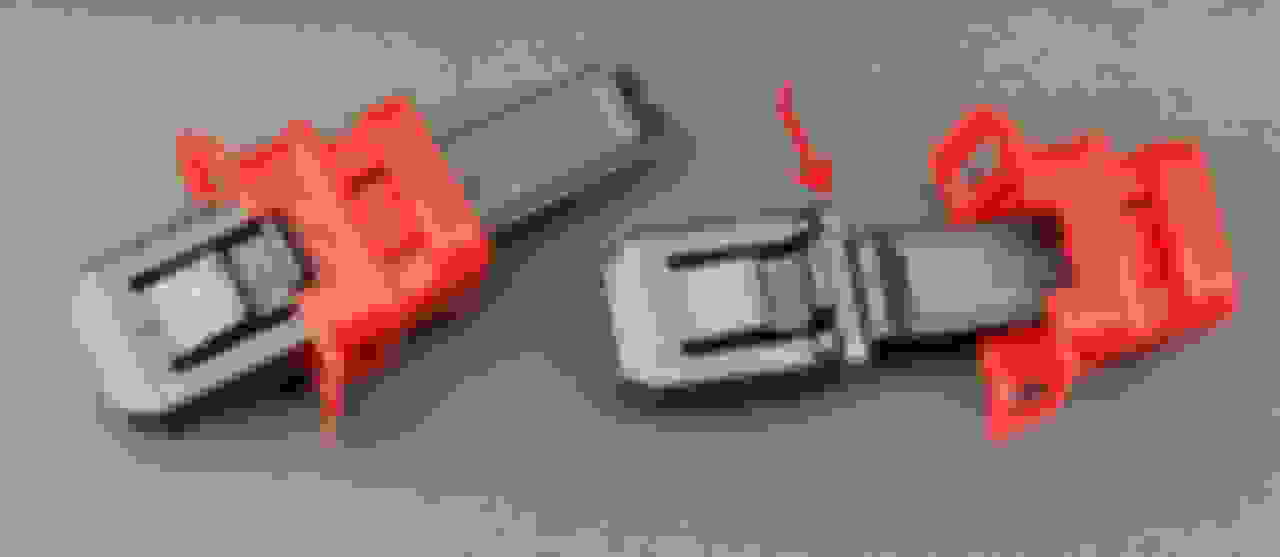
So getting the new camera on the windshield and the wire around the Drivers Side Pillar was done exactly the way I did it on the '19. Fortunately, I still had the box of clips I bought 3 1/2 year ago, as these little buggers break when you pull off the pillar cover. I guess they are designed to do just that when the air bag explodes. The picture below shows the route I took with the two wire (power and back camera video) down around and back up around the air bag cylinder.
And here is a good view of the clip. It pops into that square opening indicated by the larger arrow I drew on the picture above. The clip with the arrow is the broken clip
With my 19 RDX, I ran the video wire to the back camera across the top of the doors and the power wire down to under the steering wheel and had the dealer hard wire the power. This time I did not want to get the dealer involved, so I decided to make the power run to the 12v outlet located in the hatch back area of the car. I got pretty lucky, because it just made it. It was a BITCH to get this thing back there.
I had to take apart the entire back of the car. I was able to snake both wires through an opening between the driver side front and rear doors, and along the weather stripping to the back panels, which had to be loosened. It was pretty intimidating, but not as bad as I expected. Of course, in order to get those back side panels loose, you have to remove the cargo compartments and tie down hooks. For reference in doing so, I downloaded the directions from the forum that were posted for installing the remote key fob, since the antenna for that goes in the roof of the cargo compartment.
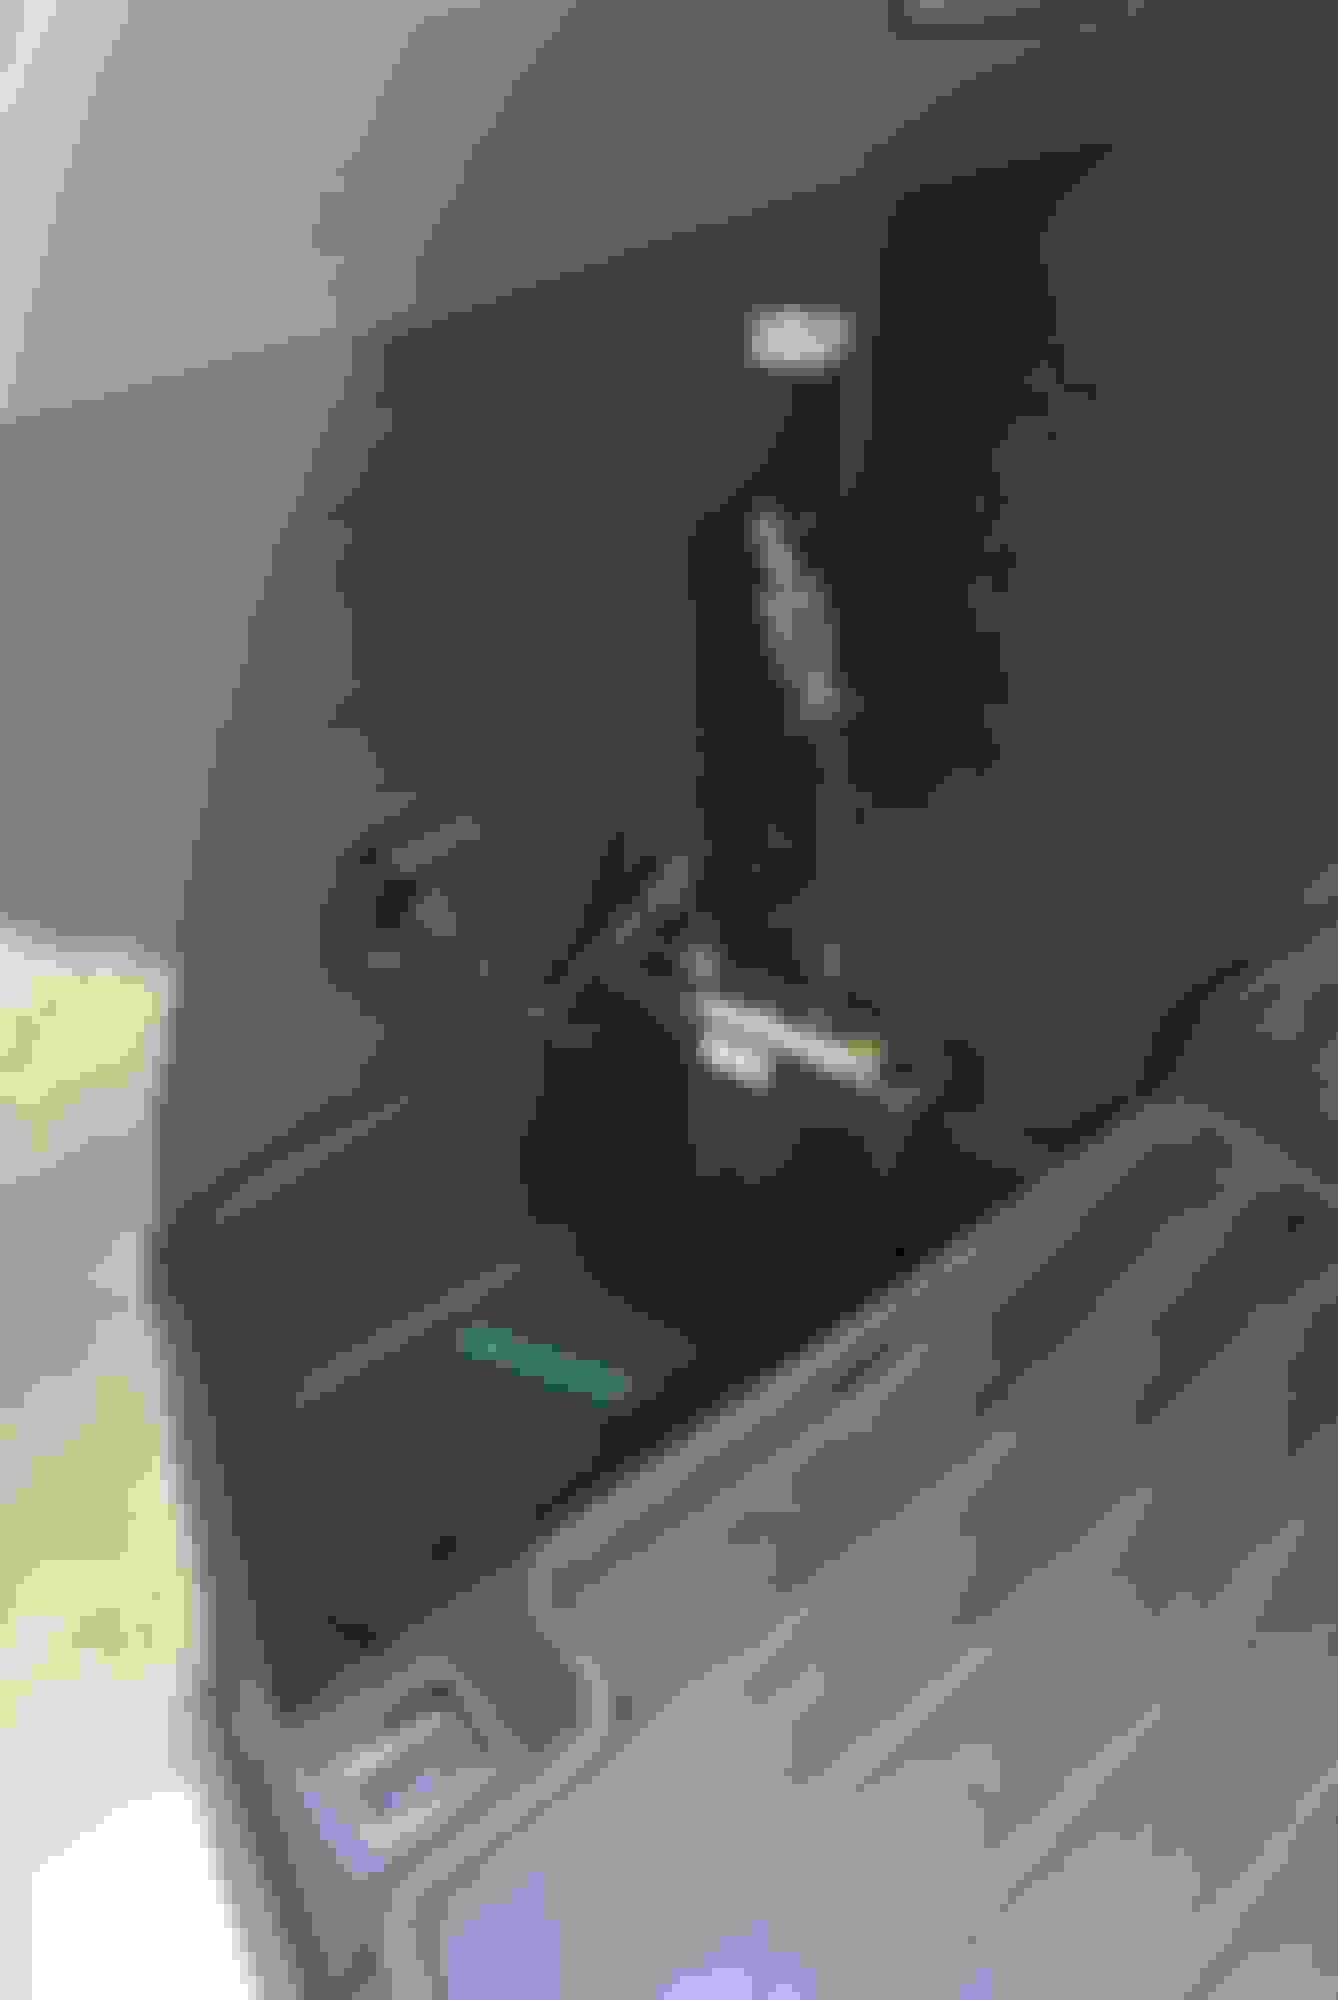
Anyway, here's a look at the back of my car when I had it all apart. You can see I have the video wire going high and the power wire going towards the middle of the side panel.
It took some time, but I was able to get the antenna wire into the left hatch hinge area and taped it around the arm. This is the same thing I did with the 19. When I got to the top of the window, I decided not to try and pry that panel off because I did not want to risk chipping or breaking the glass. So I just pulled the wire through, wrapped up the slack with a tie wrap and placed it in the hollow area up there, then tucked the wire along the glass. Hey, it's not perfect but it works.
One thing I discovered is that above that little space in the back on the drivers side that's plastic and has the power outlet above it, there is an access panel to allow you to get to the gas cap if it fails to open. It happened to be in a PERFECT place for me to run my power wire. I slipped it behind the panel, then dropped it through that opening and left it hanging there while I put the car back together. It's really not as bad as it seems, however, there was some NASTY black goo that was applied around the weather stripping on the drivers side of the hatch. Not sure why it was only there, but it is MESSY.
Anyway, got the car back together. I then had to put the connector back on the power wire for the camera (it's a cigarette lighter connector which would have been impossible to snake through where I had to get that wire through). As it turned out, it was just long enough to make it, although it left me no choice as to where I could put the battery. I used the velcro straps that came with the battery and put it where you see it. I turned out to be perfect as the outlet was very close and once I dress those wires it won't be bad at all.
So, it worked. It's working, and it wasn't that bad. So I leave this here as a reference in the old Dash Cam Reference thread, in case it helps others who attempt to do the same thing. Get the clip(s) (You need 1, but get a few extras just in case), download the wireless key fob install sheet, and get ready to take your car APART!! LOL
Thanks for the update and posting the play-by-play tutorial help. I'm still running my Blackvue DR900S Front/Back DashCam in my 2019 Acura RDX Tech. Thanks again for sharing.
Thanks for the update and posting the play-by-play tutorial help. I'm still running my Blackvue DR900S Front/Back DashCam in my 2019 Acura RDX Tech. Thanks again for sharing.
I never had one single issue with my DR900S, and I ended up getting some pretty amazing video from it over those 3 1/2 years. It's funny, I went to the Dash Cam Forum
and the talk over there was that there were a multitude of issues with the 900S and that it was pretty much a nightmare, which sorta pushed me into getting the 900X. I am always looking for reasons to upgrade, much to my wifes chagrin! LOL So I went ahead and did it. That was the primary reason. The 900S, like I said, was always very good to me, and I only had that little Magic Box for power. Never had a battery issue in that car - ever
Great job. I have the same front/rear cameras, the 900X, and the same battery back-up. Where we varied in installation is, I took the easy way out and just paid a pro to do it. I just don't have the confidence with all that plastic that make me think I would't have a big mess on my hands. The only thing I need to delve into is that on my batteries app, it shows C instead of F and I don't see a way to change that. But the camera quality appears great, love having front and rear, and overall just feel better knowing I have that video protection if I ever needed it. Your posting on this should go a long way in helping people who have the desire to do the install themselves.
Glad to see the new X-series cameras removes the need to use a Power Magic Pro add-on for voltage regulation/Parking Mode.. as much as I loved the idea of Blackvue cameras, I thought it was a bit ridiculous that they didn't have Parking Mode solved for internally.. Now I have a good reason to pick them up
Great job. I have the same front/rear cameras, the 900X, and the same battery back-up. Where we varied in installation is, I took the easy way out and just paid a pro to do it. I just don't have the confidence with all that plastic that make me think I would't have a big mess on my hands. The only thing I need to delve into is that on my batteries app, it shows C instead of F and I don't see a way to change that. But the camera quality appears great, love having front and rear, and overall just feel better knowing I have that video protection if I ever needed it. Your posting on this should go a long way in helping people who have the desire to do the install themselves.
Where did they put your battery? Did they put it where I did, or did they put it under a seat or on the floor in the car? I wondered about that. I really didn't want to have a battery and all of that wiring bunched up under a seat that moved back and forth. Plus, I did not want to have to remove the seat from the car to mount the thing! I also did not want the wire to the battery connected to the 12V outlet above the wireless charger. Less wires in the cockpit the better.
That's why I took the easy way (well, sorta easy way) out by heading for that back 12v outlet. After the first day, it's very cool. The battery comes with an app and you can easily check it's status on your phone when you're near the car. It seems to charge up rather fast. And the 900x actually lets you easily get a live view of each camera in that app without having to press any buttons or do anything special. So far, so good!

 01-05-2019 | 07:42 PM