When you click on links to various merchants on this site and make a purchase, this can result in this site earning a commission. Affiliate programs and affiliations include, but are not limited to, the eBay Partner Network.
Here is another small DIY, that i did not find, about a radiator flush / radiator drain / coolant flush / anti-freeze flush/ etc.
i have a used 2001 Acura TL, with more than 265K miles, and i did not know what was the condition of the radiator fluid.
So i decided to do a complete radiator flush and fill it with a new one.
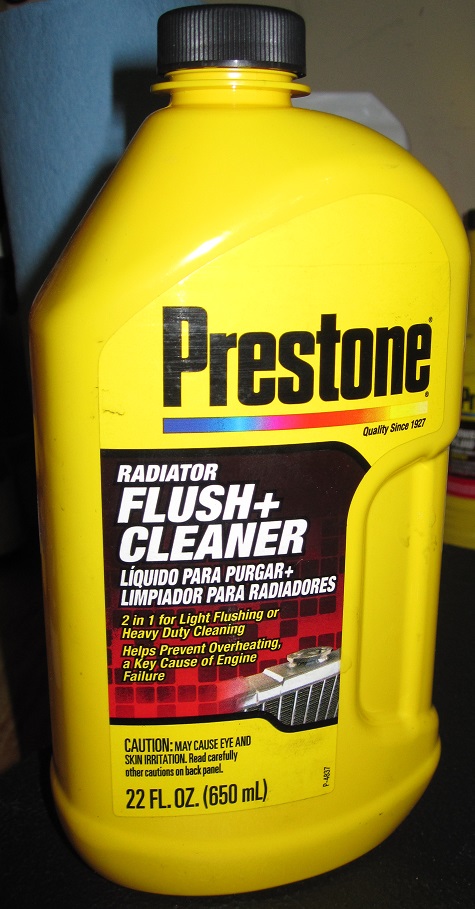
I found this Prestone radiator flush + cleaner for $3 on walmart, and decided to give it a try, before filling up with the new coolant. If you don’t do this just drain the old coolant and fill with a new coolant. If you use the prestone flush + cleaner, there are 2 options. Quick cleaner and deep cleaner. i went for a deep cleaner.
For a quick clean, drain the old coolant, pour the full bottle of prestone into the radiator, fill it up with distilled water, run the engine for 10-15 minutes, drain that fluid and fill up with the new coolant.
For a deep clean, drain the old coolant, pour the full bottle of prestone into the radiator and fill it up with distilled water. Use the car for a few days, 3-6 hours running, then drain that fluid. Fill up again with just distilled water. Drain the distilled water and then fill it up with new coolant. A bit time consuming, but i thought it was worth it. Anyways, here is the whole process.
So first open the radiator cap and the reservoir cap.
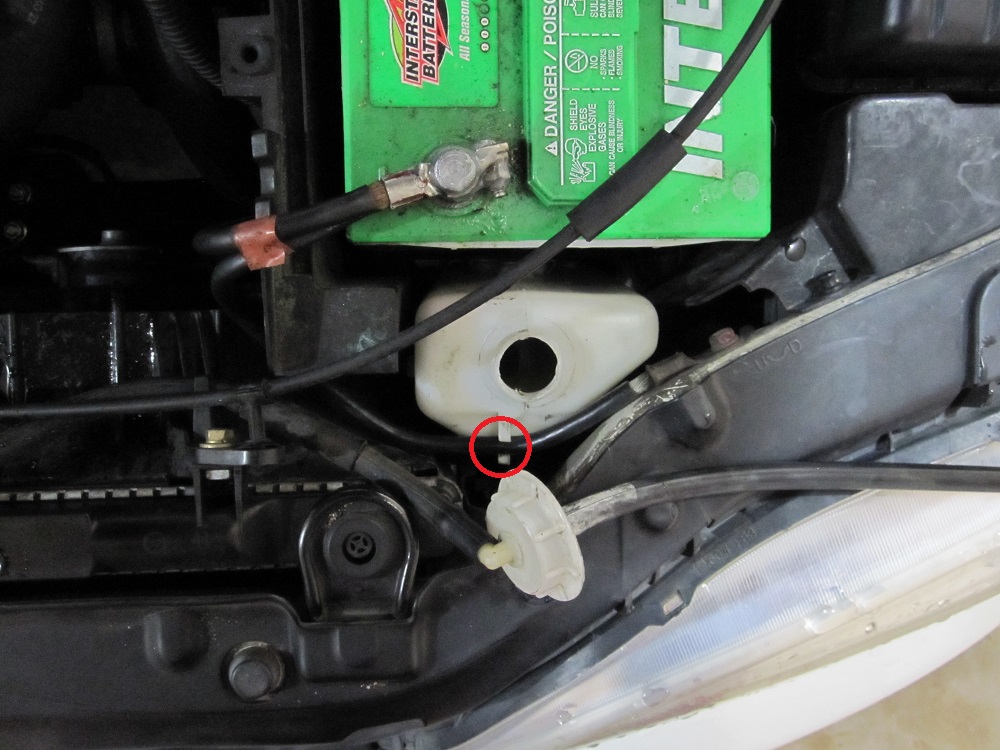
There is a ground wire locked on top of the reservoir. Remove it from the lock, just pop it out. Do not unscrew the wire.
Remove the reservoir, which is wedged into a 'V' shaped spot on the side of the battery, and remove the old coolant and clean it good.
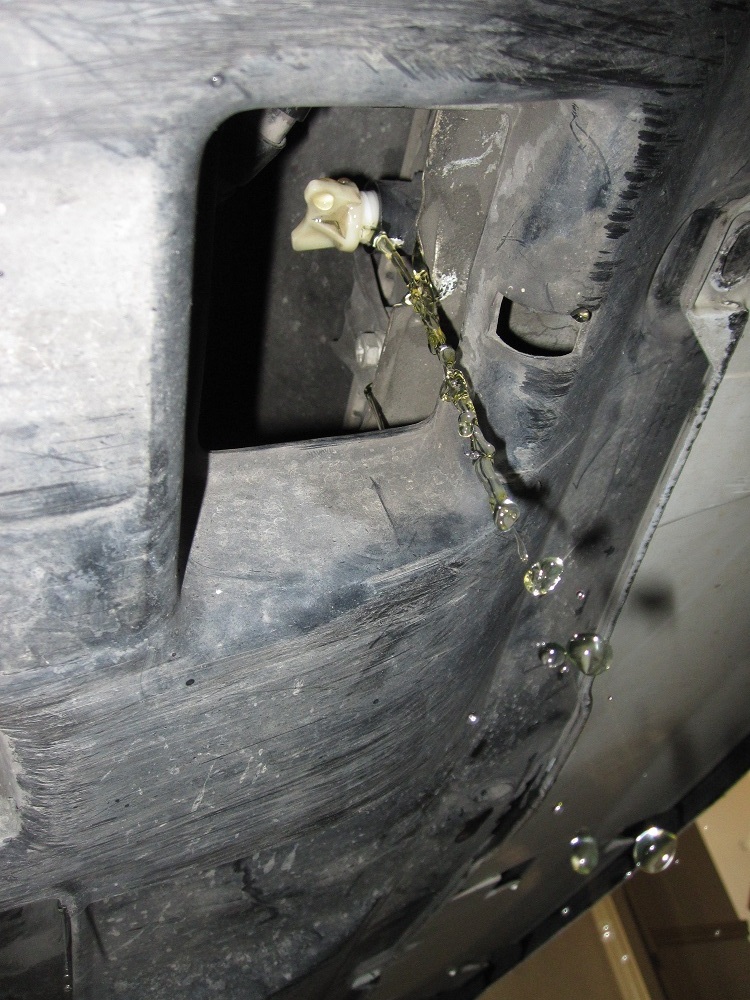
Open the drain port, below the radiator. Turn it a few threads and it should start draining. No need to remove it out. Make sure the radiator cap is not installed. Wait until there is no fluid coming out of the port. There is video below showing the exact location of these ports.
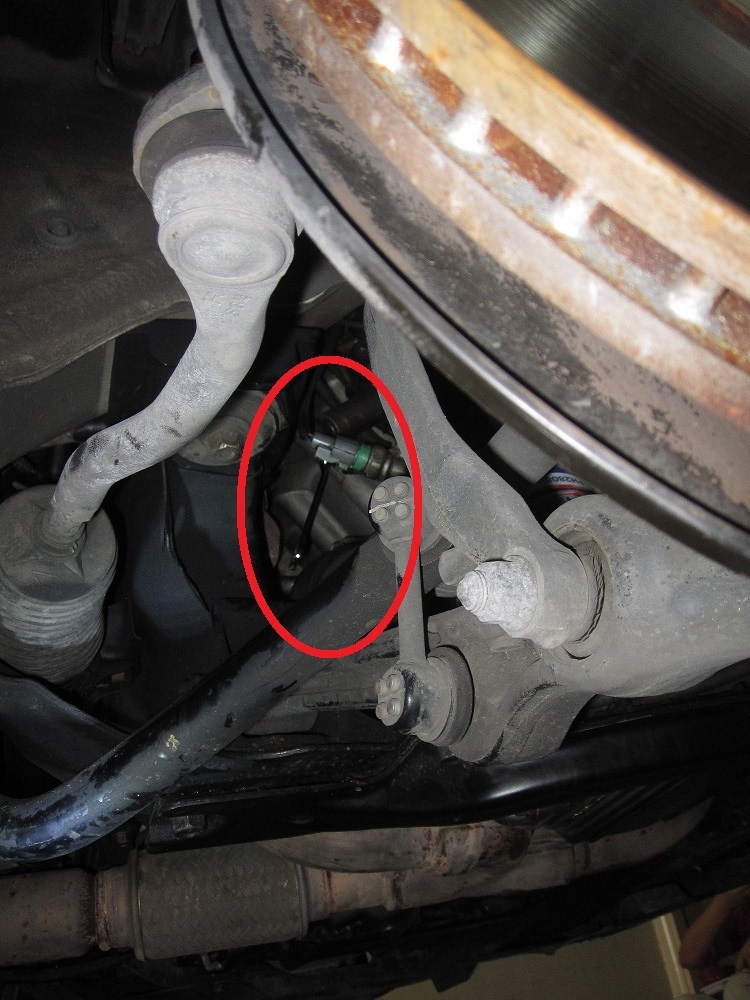
Now lift the car up, and put on the jack. Remove the passenger side front wheel. This will give you better access to the second drain port, which is located right underneath the engine. There is video below showing the exact location of these ports.
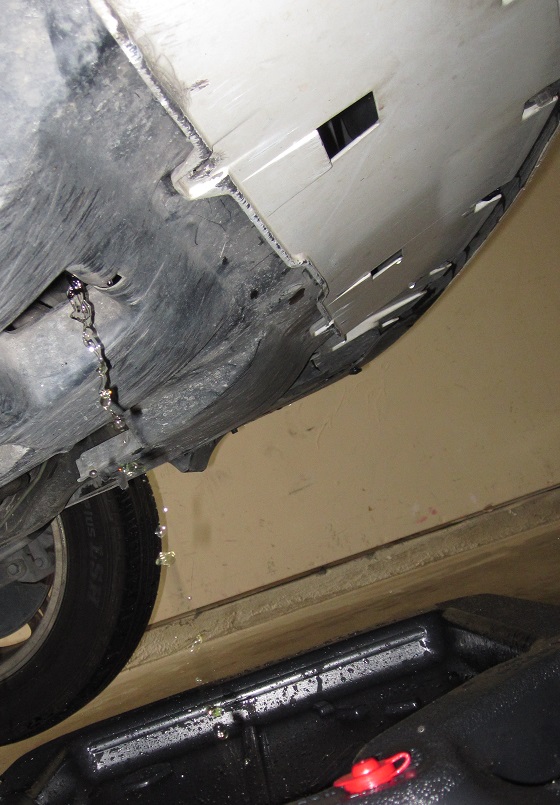
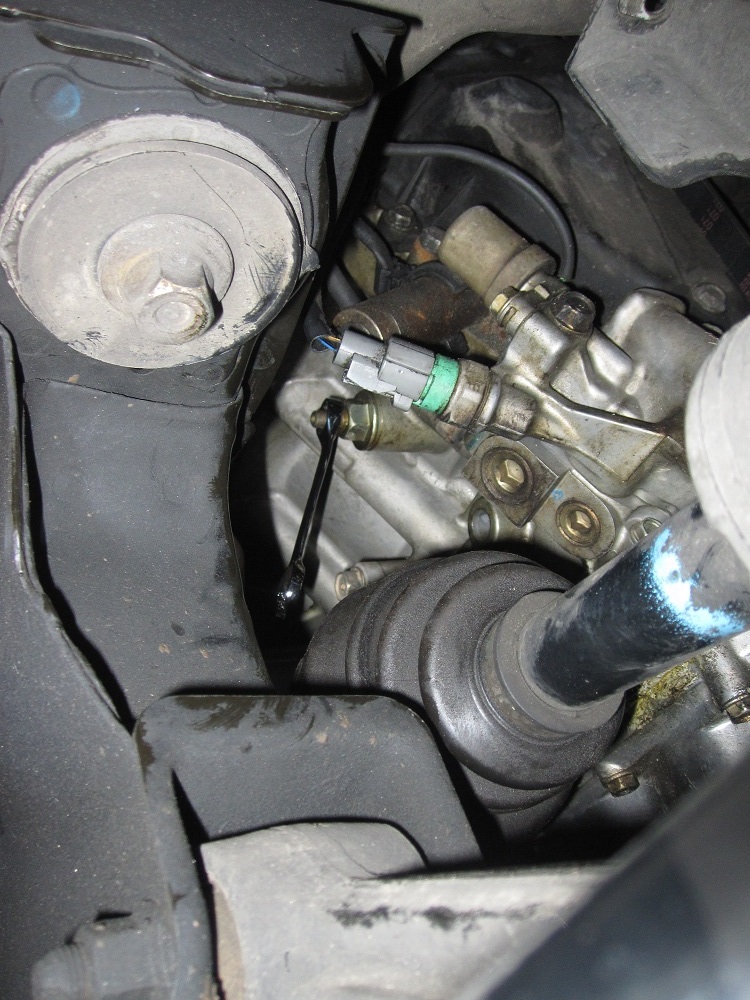
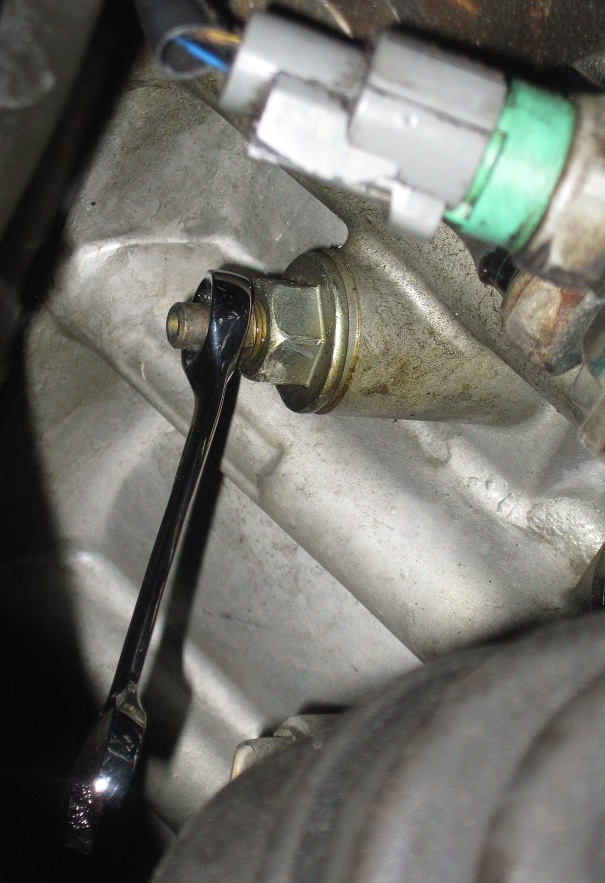
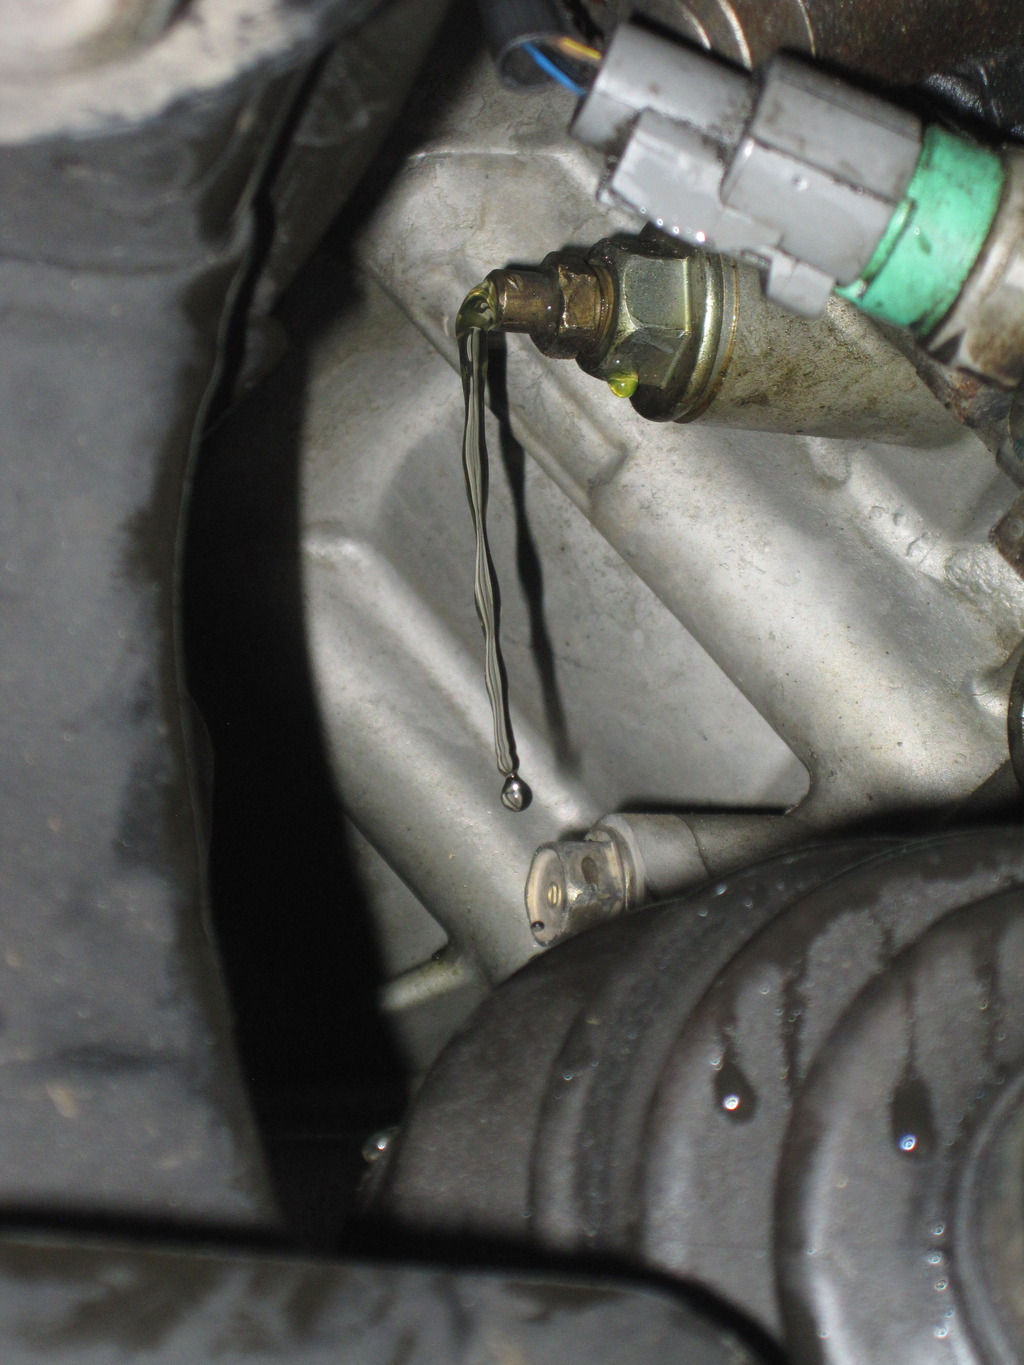
Now, use a 12mm stubby wrench to open the second drain port. It’s a tight squeeze there, and hopefully you have a small hand to reach in there. The drain port is the outside one, the smaller one, and not the bigger one. Usually it is a bit tight and you have use some tricks to get it loose. Again remember, turn it a few threads and it should start draining. No need to remove it out. If you have a tube that will fit that port you can use that to reduce the mess below the car. I did not have one, and anyways it is a difficult reach there, so I just used a few more paper towels.
Once it stops draining, tighten back the drain plug. Also tight up the drain plug below the radiator.
Slowly fill the radiator with new coolant and close the radiator cap. Fill the reservoir with the new coolant, up to the MAX level and install it back to its place. Put the cap, and put the ground cable back.
Start the car and let it run for some time until the radiator fan kicks in at least twice. You can rev it up to 2500-3000 rpm. Then shut off the car and let it cool. Once the car is cool, open the radiator cap and check the coolant fluid level. I had to fill it up a little bit. Also check the reservoir. Put the left tire back and you are good to go.
Excellent Write up! Just a notation: You may want to put your A/C to full HEAT with the car on and Shut down the car without turning the A/C off before removing the engine drain bolt... Otherwise you will mix old A/F in the Heater with you brand new A/F.
Excellent Write up! Just a notation: You may want to put your A/C to full HEAT with the car on and Shut down the car without turning the A/C off before removing the engine drain bolt... Otherwise you will mix old A/F in the Heater with you brand new A/F.
Did not know that, but it should be useful to others.
Its just a little A/F in there! Wont cause a problem but if your doing an engine block drain you might want to go all the way draining the Heater Core too. No point in going back now that you did your drain.
please ck the owner book and post exact details on burping= its not optional to do the 2000 rpm, its part of a procedure and its more than once!
the Heater MUST be on full hot before engine shutdown as skirm noted above = opens the mini radiator that is the heater, for complete system draining
Especially on burping it MUST be on full hot AND cabin fan on full speed!
OPEN cabin doors so you don't roast while holding at 2000 rpm
Standing over the engine when the fans come on is less than fun
The reason for heater being OPEN, is its ability to trap air- if not included in the burping!
Then you use the heater in a week, introducing air to the system
WE all know what happens when the coolant is just a tick low/air inside....just enough to mess with sensors and not enough to self correct from res bottle....
When mixing up your own coolant concentrate with distilled water, add half the water to rad first, then most of the coolant, then water, and last of coolant
Put some premixed aside for res bottle
coolant by itself it way thicker than the mix and you don't want it sitting at the bottom of radiator!
I was taught this as a young mechanic many decades ago
No need to tighten the radiator cap during burping, just leave it loose until the cooling fans come on a minimum of two times. Then tighten the radiator cap and check for leaks
Climate Control: Once you set the heater on full hot (heater core valve open) select manual mode and turn the fan to the lowest setting. That way the car will warm up faster.
my 01 owner book has more details on burping, including the number of fan on and off cycles at idle and at 2000
the rad cap is left loosely in place so the air can get out! but not spray coolant out if you chop the throttle at 2000,
Let it down easy to prevent surge
 05-24-2015, 02:35 AM