DIY: Seafoam 2nd GEN TL (sorta) work in progress

 09-22-2009, 07:01 PM
#642
yup. i got the steps down. spent like 5 hours reading all the posts one day. sifted through some of the misinformed posts etc. so i've got it down, and i've never even done it before, heh.
thx for the replies man.
thx for the replies man.
11-21-2009, 08:34 PM
#643
err soo..maybe someone can shed some light on this one for me. i was doing my follow up seafoaming 2k miles after my 1st one seafoam(just thru the vac port this time). as i took the tube off & started the car you'll of course hear that hissing sound...what didn't seem normal is the engine would throttle up n down & wouldn't stay steady - like last time. so i was like fuck my IACV prob needs cleaning, so i wasn't going to continue w/ the seafoaming...so i moved my car back to my driveway started it up 1 more time to see if it'd do it again & it didnt do it nearly as bad. so i was like like eh f it...might as well go ahead & sf. so i did about half a bottle of deep creep & did it the proper way. as i started it up after waiting 15min - check engine light was on.
here's my question... i know it's sometimes normal for check engine light to come on after this (I'M REALLY HOPING IT GOES AWAY IN THE NEXT 2 DAYS)..but it SHOULD go away right? also, if it doesn't, should i prob go get codes read at some local auto parts store? if so, i really hope it's jus the IACV needing to be cleaned
(note: when vac line is plugged up, it has normal idle-still does ... no up and down..)
11-21-2009, 08:57 PM
#645
coo, thx hANDYcaptd. & yes, made sure i did that part well.
11-22-2009, 10:04 PM
#646
i know most don't care, but for those of you who do, my CEL went away today during another 20min drive 
06-19-2010, 10:09 AM
#648
9th Gear

Join Date: Feb 2005
Posts: 9
Likes: 0
Received 0 Likes
on
0 Posts
Engine Overheats
Yesterday evening I did seafoam my 01TL. Connected a tube to the vacuum port on the TB and hovered the other end in the seafoam can.
Seems like everything going on with slurping and all. But, after 8min, half can done, I have observed that coolant is boiling and spilling from the overflow container.
At this time I stopped and waited for 15 min and continued spirited drive. CEL came ON, didn't care as I don't see it as an issue.
I was slightly concerned about overheating of the engine. Is this normal?
06-19-2010, 06:40 PM
#651
06-19-2010, 07:11 PM
#652
9th Gear
Join Date: Feb 2005
Posts: 9
Likes: 0
Received 0 Likes
on
0 Posts
The car is running fine now. The temp gauge stayed below half during my drive today.
06-19-2010, 11:32 PM
#653
9th Gear
Join Date: Feb 2005
Posts: 9
Likes: 0
Received 0 Likes
on
0 Posts
The needle was between 1/2 and 3/4th when I stopped seafoaming and switched off the ignition. I didn't check coolant level but the fan on the driver side was turning on and even didn't turn off for 10 minutes after I switched off the ignition.
The car is running fine now. The temp gauge stayed below half during my drive today.
The car is running fine now. The temp gauge stayed below half during my drive today.
When I idle the car the fans don't start at all even the temperature gauge shown 3/4th turn. As soon as I stop the engine the driver side fan comes ON and stays on for a while. The passenger side is not ON at all.
I didn't observe the issue with the fan before as I didn't the idle the car for longer time at all. I don't think, while driving, the fans are needed at all as the air get sucked-in anyway.
Hopefully someone would help me or throw some light at how to deal with this fan issue.
06-21-2010, 09:13 AM
#654
9th Gear
Join Date: Feb 2005
Posts: 9
Likes: 0
Received 0 Likes
on
0 Posts
Seems to be the problem is with the fan. Here is the strange behavior.
When I idle the car the fans don't start at all even the temperature gauge shown 3/4th turn. As soon as I stop the engine the driver side fan comes ON and stays on for a while. The passenger side is not ON at all.
I didn't observe the issue with the fan before as I didn't the idle the car for longer time at all. I don't think, while driving, the fans are needed at all as the air get sucked-in anyway.
Hopefully someone would help me or throw some light at how to deal with this fan issue.
Once I reconnect the cable back, the fan works now.
12-02-2010, 01:26 PM
#655
Intermediate

after reading all the post i can't seem to get a clear understanding of a term widely used "can" , i've been doing a 16oz into gas tank for 3 treatments. And now that time came to change my oil i will do same to it. now question is
do you guys put 8oz into oil or 16oz?? i run 02 tl-p
do you guys put 8oz into oil or 16oz?? i run 02 tl-p
12-02-2010, 02:39 PM
#656
either. you can do a full can in crankcase, as many have said they've used, but if you're paranoid putting that much in there, you can do ~half a can. remember, best practice is to buy a cheapass filter (ex: fram) & putting it on before doing this method. that way you know it'll catch whatever it cleans. if you plan on driving with it in there for a couple days(~150-200miles, irrc), make sure you monitor the dipstick daily. if you see anything sticking, change it asap.
but.. i'm sure 01tl4tl will chime in soon enough like he always does
but.. i'm sure 01tl4tl will chime in soon enough like he always does
12-02-2010, 09:34 PM
#657
Intermediate
haha sweet , i did gas and vac line today =D my car feels great, i'll prolly do my crankcase tomorrow, since i gotta change my oil tomorrow i'll prolly pour it in right before 15 driver to acura, what ya'll think of my plan??
12-04-2010, 06:54 PM
#658

a can is a 16 ounce metal continer of seafoam, or deep creep for vac port method
cleaning dose- MAX cleaning strength in gas is 2 oz per gal fuel= 1 can to just under half a tank gas
Do that twice and you got most everything!
maitenance dose every 5000-7500 miles is 1 can to 16 gallon, 1 oz per gal fuel
More than 2 oz per gal is wasted product- wont clean any stronger
Less than 3/4 oz per gal in gas is ineffective~ thats per seafoam website
in manifold vac port: 1/2 to 3/4 can . where ever it starts running really bad--stop there.
In oil: 1.5 oz per Qt of oil- thats approx 6-8 oz (many use half can -8 oz)
more than that ratio is wasted product
Drive 30 minutes if possible to achive real cleaning--
leave engine running, or warm, for oil change- make sure they know to run it to warm before draining,,if it gets cold the crud turns solid and wont drain
new oil filter method: if driving 150-200 miles with seafoam in old oil and expecting very dirty conditions inside,,3 bucks is good insurance to capturing crud
Once a filter reaches max capacity it closes or goes into bypass mode, so that no oil goes thru it,,crud keeps circulating--opposite our intent
01-16-2011, 10:35 PM
#659
Flyin' and Drivin'
I've seafoamed my 02 TLS before, but it's been a while.
I'm at 142,XXX miles. I've noticed a slight intermittent idle problem. I'll come to a stop sign and the RPMs drop below 500, like down to 200. It could be the IACV. So here's some questions. I've read through all 17 pages of this thread today, and it's just SO TEDIOUS. I really think we need an updated DIY post on the first page.
Anyways, here's my questions.
1. Assuming I have a small IACV (the problem has only happened once or twice) is it still safe to do SeaFoam? If that doesn't fix the problem, I'll just replace the IACV later.
2. I'm going to get a clear hose (I assume I can get it from home depot), but I just want to clarify it should be 5/16 in size.
3. The main picture that has been floating around this thread which points to the forward vac line, and has like 3 arrows on it, is that the correct line for my 02 TLS?
I have never done the oil crankcase SeaFoam, so I'm going to do it soon. I have my oil changed at the Acura dealer, so I'm not sure how much they put in. I vaguely remember the white seafoam can being maybe 8oz... 16 doesn't ring a bell, but I could be mistaken. If it is 16oz I should only use half of that right? My plan is to do an oil treatment, and then have it changed between 30-50 miles of being driven. Would it be a good idea since it's never been done before to do it again just after the oil change? I figured I might be able to get more crap out of it. Opinions?
01-17-2011, 04:03 AM
#660
we did a new diy thats much better- title seafoam diy-specifically 03 (it works on all years)
the arrows all point to the same metal nipple- thats the master vac port you use
white can of liquid is 16oz, pour half in crankcase and drive before oil change
Make sure they leave engine running when you get there- till worked on (only a few minutes hopefully)- if it gets cold the sludge reforms and settles on the bottem of the pan..needs 15 minutes engine running to get warm enough
No need to do again until next oil change
your rpm prob sounds IACV related- seafoam wont cure this prob all by itself~
Must remove TB assembly and clean IAC- make sure it rotates smoothly etc
if your store carries DEEP CREEP- seafoam aerosol- its way easier to use than hose and cup with liquid, while keeping rpm up..
for best application info: www.seafoamsales.com
most here are not using it correctly!!!- bad info in early diy,, or watched vids on tube with wrong vac line
heat, time and rpm are your freinds
we must use the master vac port- not the brake booster line!!
in the gas -add 1 can to just under half tank
01-17-2011, 04:07 AM
#661
when you remove the top plastic engine cover-
there is only 1 black rubber line going to the top area of TB- it has a special squeeze type clamp on it
when hose removed it reveals a metal nipple coming from the TB end of the deal
Thats the master vac and will suck seafoam from a cup-- an inch from the hose!!
never get hose directly in seafoam
early part of this diy says use fenderwell mounted smaller line and dip into liquid--thats a wrong port!!!
01-17-2011, 09:50 AM
#662
Flyin' and Drivin'
Thanks for the clarification. I'll be doing it tomorrow. So the IACV is easy to remove/clean? I've got all the helms manuals and stuff, but there isn't too much information about it. After I clean it with carb cleaner & seafoam, should I rinse it with water, and let dry? Maybe some WD40? Ive never seen the inside of one, but I assume based on your comments there must be some kind of rotary wheel in there.
01-17-2011, 10:53 AM
#663
its a rod that rotates in a cylinder,,,air holes get exposed as it turns.. etc
somewhere in gen2 is a diagram of it
parts to buy in advance- 1 TB to manifold gasket, 1 IACV cover gasket
just tell the guy at acura parts desk what job you are doing- they know what you need
First you need to remove TB assembly from engine- take to work bench
See diy for thermoblock install/egr cleaning for help- only 4 nuts but 1 a pita to reach
flip over- remove 2 screws on round cover
remove rubber gasket
release holder tab and remove rod- clean with carb cleaner and rag, no wd,
reassemble
Good idea to lube throttle return spring on TB plus lube inside the actual cables for throttle and cruise
01-17-2011, 10:54 AM
#664
keep water away from the TB!!!!!!!
01-17-2011, 10:57 AM
#665
you are probably due for the egr port cleaning -where you remove intake manifold and clean with wire rod/coat hanger and carb cleaner/solvent thru the passages and ports
approx every 75kmiles those clog and contribute to rough idle
Not a bad idea to do it now- that also removes the TB from car with the manifold,,
do both jobs and its done right!
also easier to remove that pita nut~
approx every 75kmiles those clog and contribute to rough idle
Not a bad idea to do it now- that also removes the TB from car with the manifold,,
do both jobs and its done right!
also easier to remove that pita nut~
01-17-2011, 02:35 PM
#666
Flyin' and Drivin'
You're talking about this DIY? This is probably the worst write up I've ever seen. The link Kris put in there doesn't work any longer, and there aren't any pics except for the one at the top of his post which doesn't really help out much.
https://acurazine.com/forums/showpos...67&postcount=8
01-17-2011, 03:40 PM
#667
Senior Moderator
You're talking about this DIY? This is probably the worst write up I've ever seen. The link Kris put in there doesn't work any longer, and there aren't any pics except for the one at the top of his post which doesn't really help out much.
https://acurazine.com/forums/showpos...67&postcount=8
https://acurazine.com/forums/showpos...67&postcount=8
01-17-2011, 07:43 PM
#668
Flyin' and Drivin'
Once I get everything opened up and cleaned, I wonder if a pressure washer would be of assistance? I've got one, and it might help clean up the IM once I've got all the crap off it.
01-17-2011, 10:36 PM
#669
Senior Moderator
That's kind of what I figured happened. Well I'll just go in there and wing it tomorrow. I've done it before, it's just been a long time and I have forgotten everything.
Once I get everything opened up and cleaned, I wonder if a pressure washer would be of assistance? I've got one, and it might help clean up the IM once I've got all the crap off it.
Once I get everything opened up and cleaned, I wonder if a pressure washer would be of assistance? I've got one, and it might help clean up the IM once I've got all the crap off it.
01-18-2011, 12:49 PM
#670
Flyin' and Drivin'
01-18-2011, 03:57 PM
#671
you will have a heck of a time cleaning and rinsing out the crud with the TB installed on the manifold,,
as in: how are you going to run water thru there to get carb cleaner and wire rod poking loosened crud out?
then compressed air dry the manifold, after shaking in every direction
as in: how are you going to run water thru there to get carb cleaner and wire rod poking loosened crud out?
then compressed air dry the manifold, after shaking in every direction
01-19-2011, 02:40 AM
#672
Flyin' and Drivin'
you will have a heck of a time cleaning and rinsing out the crud with the TB installed on the manifold,,
as in: how are you going to run water thru there to get carb cleaner and wire rod poking loosened crud out?
then compressed air dry the manifold, after shaking in every direction
as in: how are you going to run water thru there to get carb cleaner and wire rod poking loosened crud out?
then compressed air dry the manifold, after shaking in every direction

Like I said - I'll just have to wing it. Do I need to take the front/rear (or sides) of the IM off to properly clean it?
I didn't buy the TB gasket, so that's why I'm hesitant to take it off. The master technician that always works on my car at the dealer said I could reuse the IACV gasket provided it's not damaged. He said it's definitely worth a shot at cleaning before replacement.
It'll be interesting to see what I do with it tomorrow. Like I said I've done it before (although not extensive cleaning), and I assume I should use the seafoam AFTER I get done with the cleaning?
Edit: I really wish someone in ATL that has done this before is free tomorrow!
 01-19-2011, 03:06 AM
#673
try phee for help
if you remove the side panels covers- the plenums- thats a good place to clean as well
Get the tb to manifold gasket,,
ask your tech how on Earth you are supposed to clean and rinse the manifold properly with it on there!!
not gonna happen man~
dont be the person who shoves a rod thru the ports and calls it done!
clean IACV system fully before thinking replacement
seafoam- after will clean what you missed or got loosened up and is sitting there
01-19-2011, 09:37 PM
#674
Flyin' and Drivin'
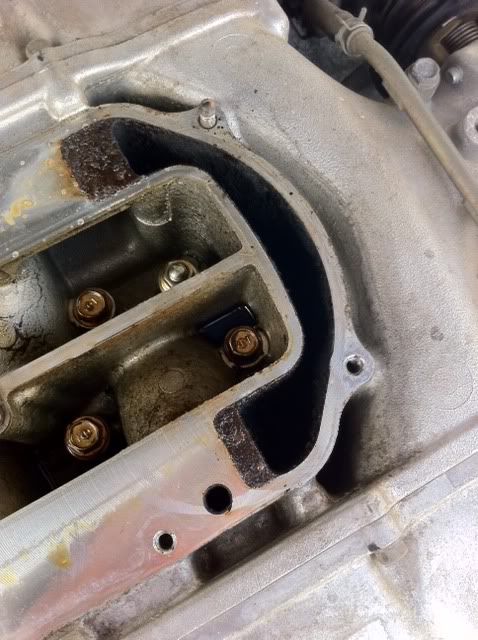
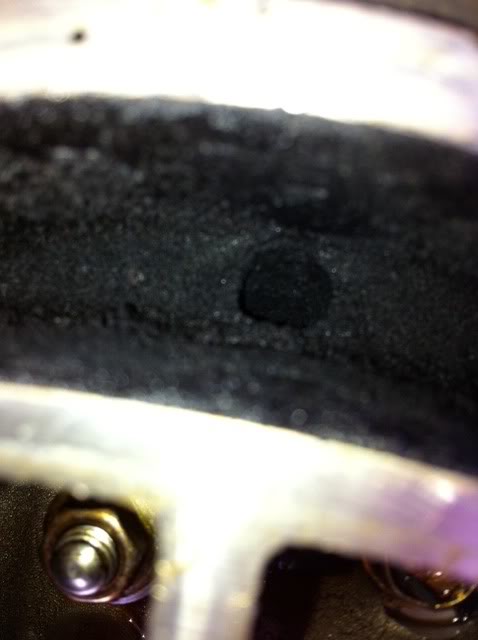
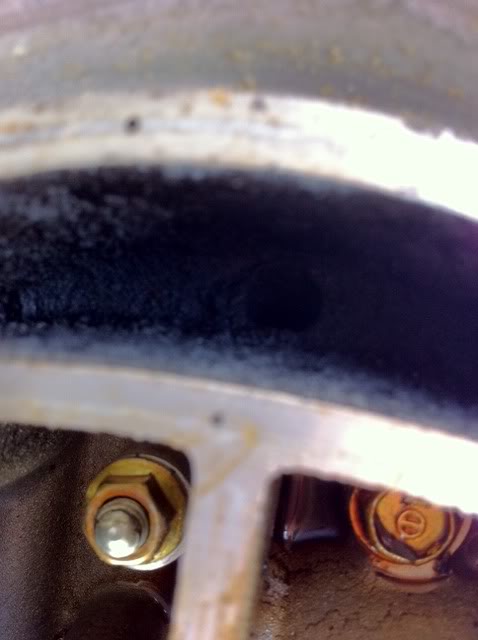
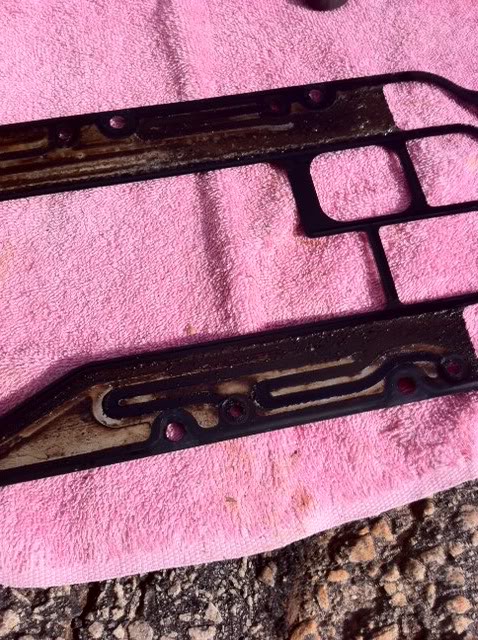
Got the TB gasket today. Haven't done any work on it. I opened up the top to the IM today to see what was going on. Here's some pics I took....
I would guess you could call it a little bit dirty!
I would guess you could call it a little bit dirty!
01-20-2011, 03:31 PM
#675
Flyin' and Drivin'
Ran into a slight problem. I can't for the life of me get this 12mm bolt off. It's the one in the center of the picture. It's the TCS control valve bracket. Page 9-5 of the helms manual. I've sprayed it with WD40 and SeaFoam Deep Creep. It just WILL NOT budge.
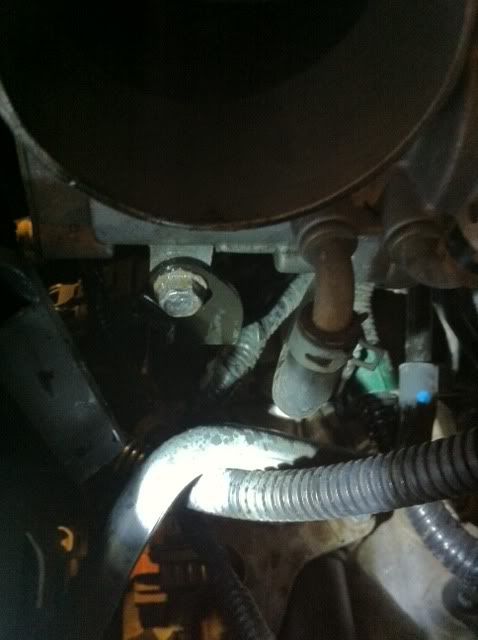
Any ideas?
Any ideas?
01-23-2011, 01:14 PM
#676
Flyin' and Drivin'
You'll have to watch it full screen - I didn't realize how small iPhone videos are on YouTube... But this is how to seafoam a TL! I just replayed the initial start on my homes CCTV system. Did it perfectly. Had my neighbor stay on the gas pedal as I sipped it in. Took about 3-5 minutes to suck the entire can up, let it sit for 20 minutes and bam! The CEL only flashed once, and that was it. It's all nice and clean now!
Video Link
Video Link
 01-23-2011, 07:21 PM
#678
seafoam says 10-15 minutes soak time- dont want it cooling off too much before the start and drive
01-23-2011, 07:27 PM
#679
the reason you wait until its moved most of the seafoam thru the plenums,
and is running on mostly gas:
is to avoid damage to internal parts- banging noises etc are not cool= incomplete combustion
1200~ for a minute or 2 after start- then DRIVE 2000 rpm, when it runs like its back on pure gas- 4000 rpm yadayada drive
you are pushing `liquified carbon` (seafoams description) thru, be reasonable about what you are doing to the engine as thats mixed with gasoline
