


DIY: Upper Control Arm (w/Pics)


Thread Starter
Drifting
Joined: Jun 2003
Posts: 2,128
Likes: 5
From: NJ
DIY: Upper Control Arm (w/Pics)
As 2G TLs start to get older more ball joints will probably start to need replacement. This is especially the case in regions where roads are terrible such as the NJ/NY area. Mine was making a knocking noise and had quite a bit of play in it which caused the steering wheel to shake on the highway. I know there is a DIY written for the 1st Gen by KaM but I thought it would be useful to have one for the 2G as well since I took pics. Also, thanks Kris (fsttyms1) for useful tips and trips.
Tools Required:
New Upper Control Arm (Left) - 51460-S84-A01
Floor Jack
Jack Stands
10MM Socket
12MM Socket
14MM Socket
17MM Socket
19MM Socket
Ratchet
Torque Wrench
Ball Joint Separator (Sears KDS3916)
Needle Nose Pliers
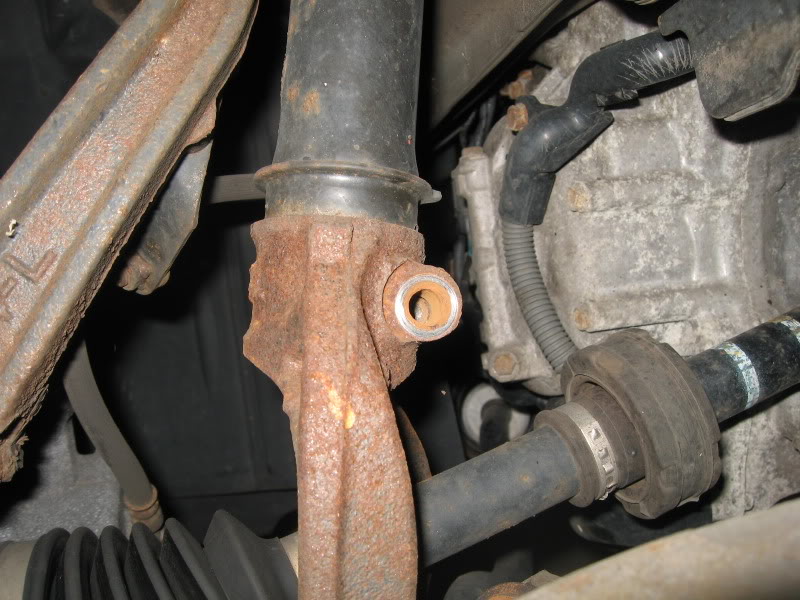
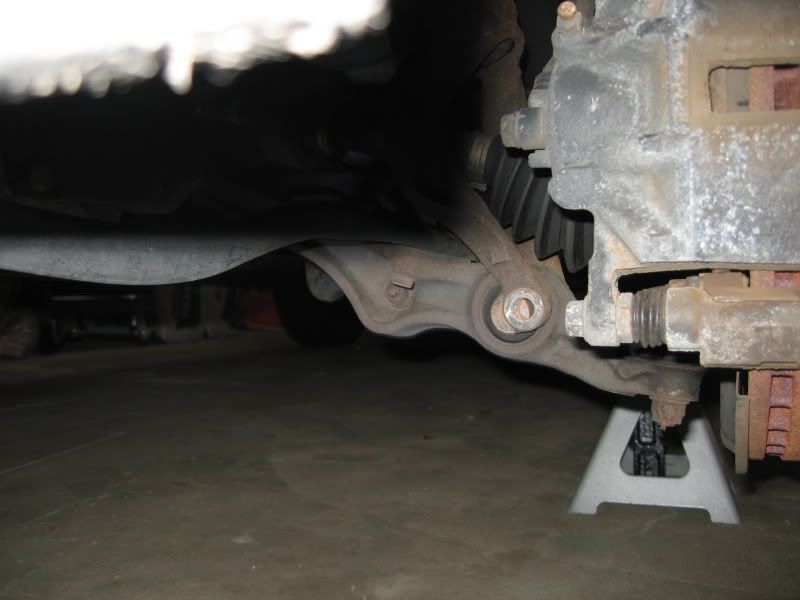
Here’s a view of the ball joint in question without the wheel removed.

First, remove the wheel and remove the damper fork by removing the upper 14MM bolt.
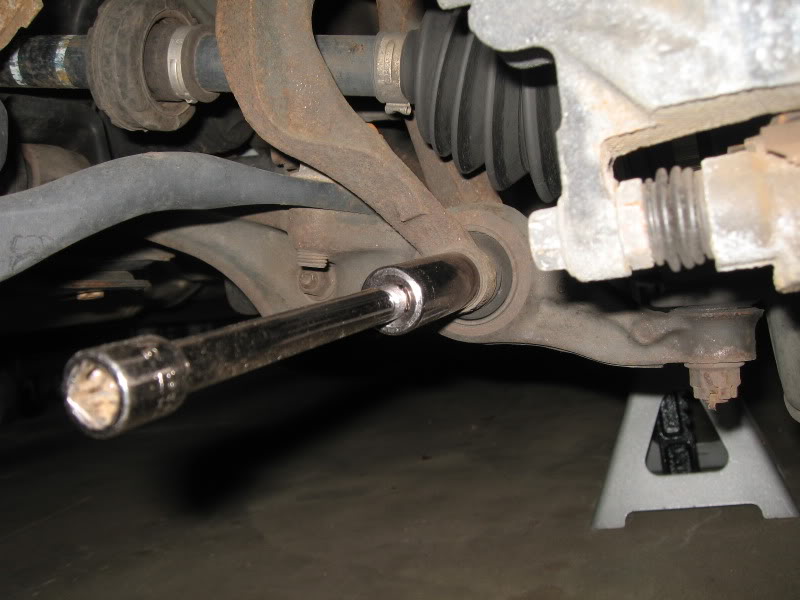
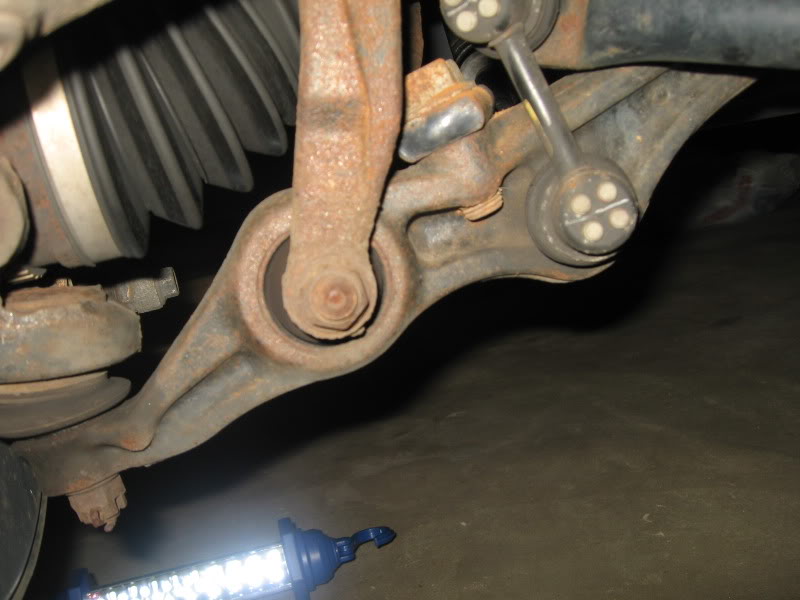
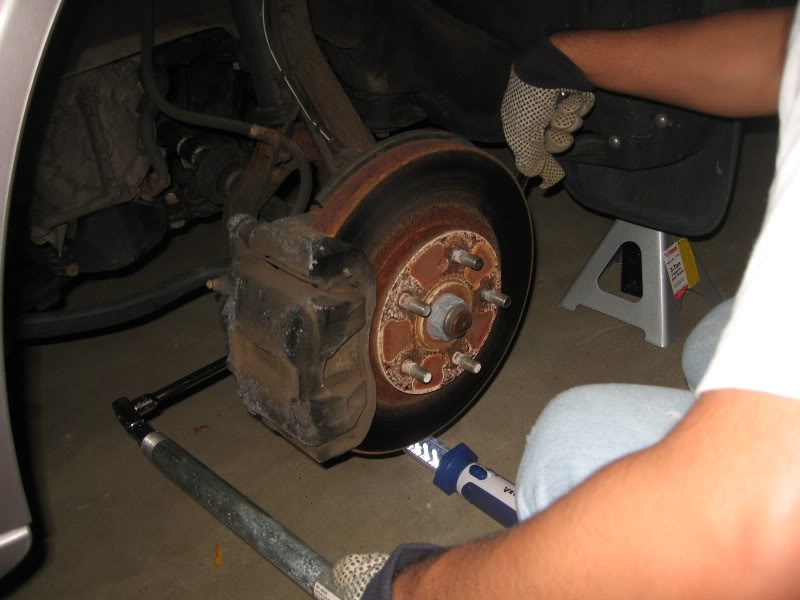
Remove the lower 17MM nut and bolt. It’s easiest to do if you just use a second ratchet and 17MM socket so there is one on each the nut and bolt (see the next few pics). If you don’t have an extra ratchet you can use a box wrench. The bolts are kind of rusty so a cheater far helps.
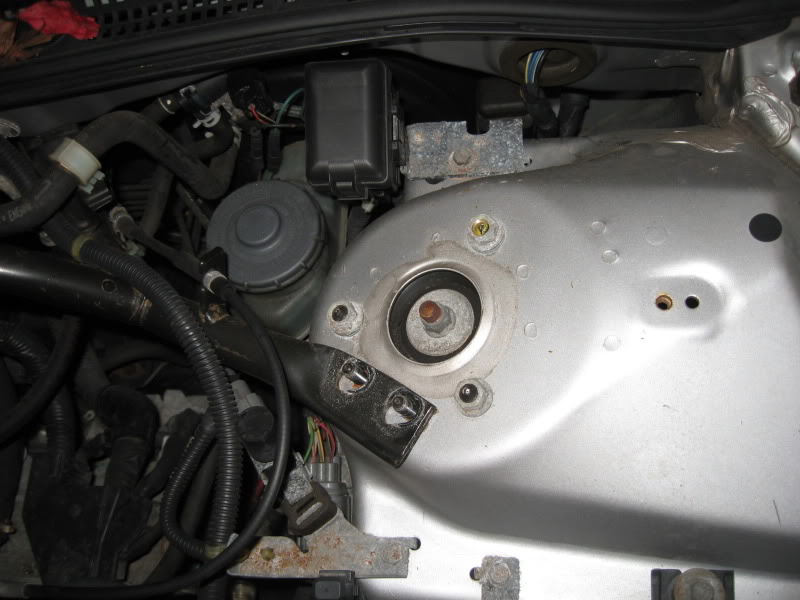
Remove the 5 nuts under the hood on top of the strut tower. DO NOT remove the middle nut! For some reason the 5 nuts aren’t all the same size, 2 are 10MM and the other 3 are 12MM. I guess two are different because they attach the strut bar.
Remove the wheel sensor bracket from the control arm (10MM).
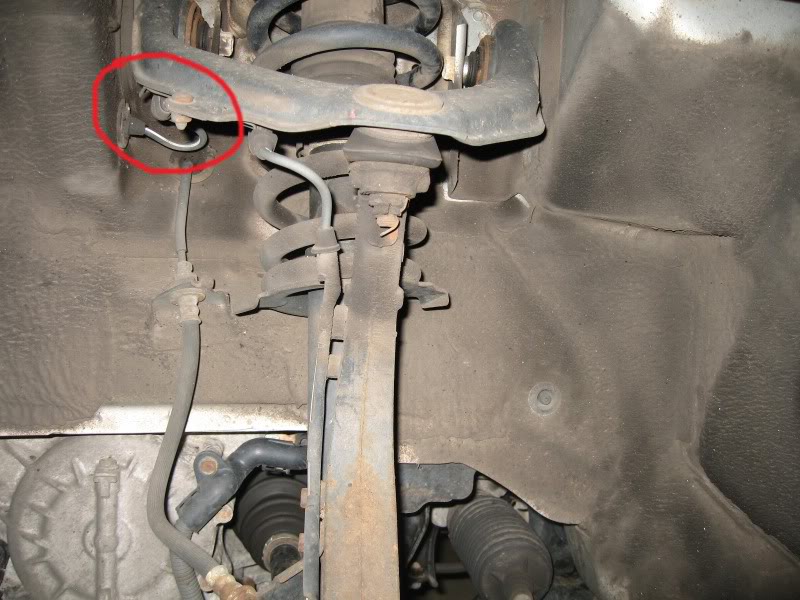
Remove the cotter pin and castle nut.

I didn’t pull the damper out yet because it was difficult to maneuver out with the control arm still attached to the knuckle. I used this ball separator as it was only $20 from Sears compared to the Honda one which is around $170. Seemed to work well, it only took a few turns with a ratchet to break it loose from the knuckle. It would have taken forever to separate the joint without it as it was on their very tight. I used a floor jack to support the steering knuckle so it does not fall to the floor; you can also tie it up instead.
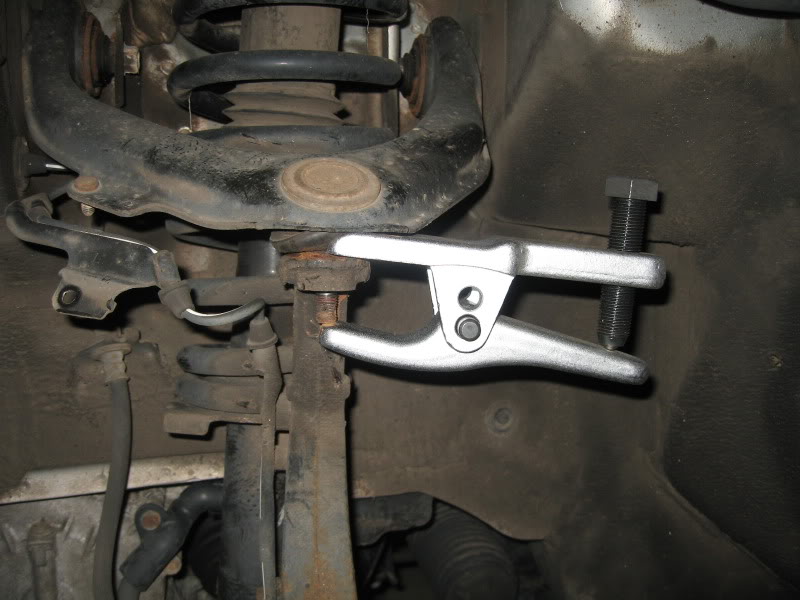
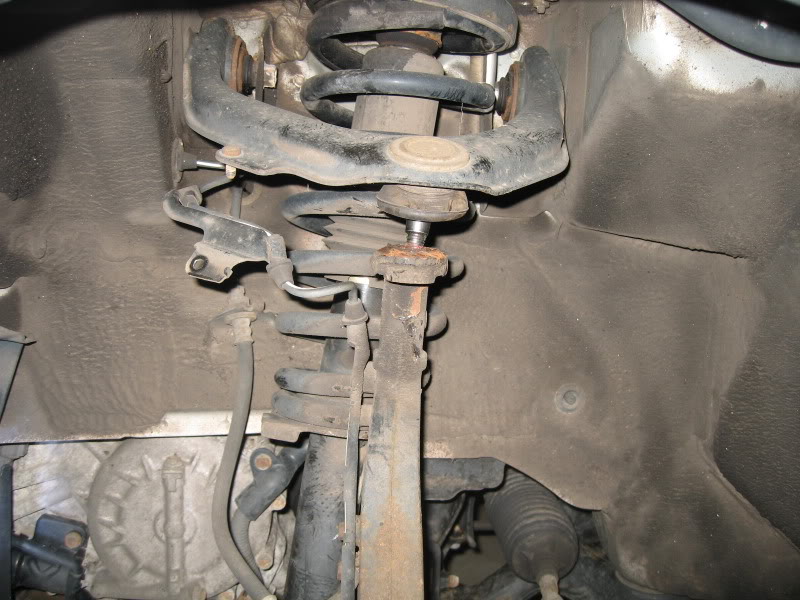
With the joint separated the damper came right out. This will give additional clearance when removing the control arm from the body. Remove the two bolts holding the control arm to the body and remove the arm.
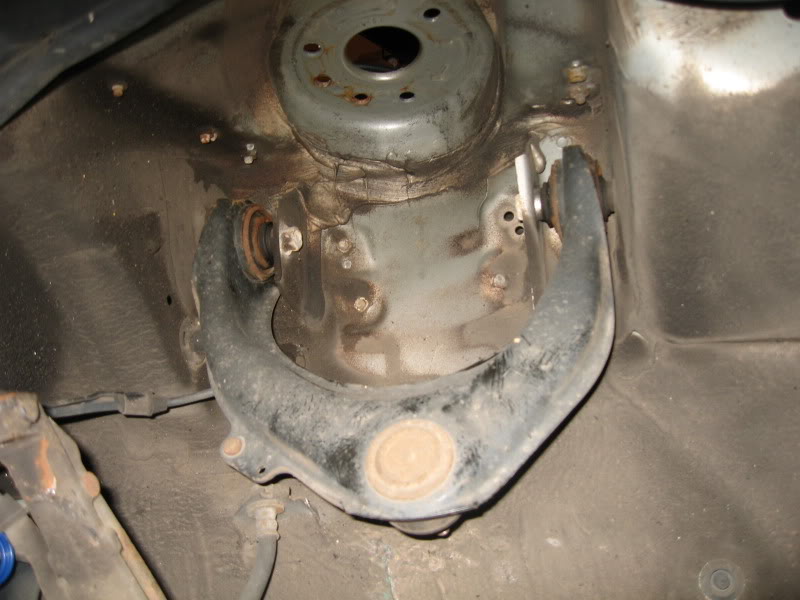
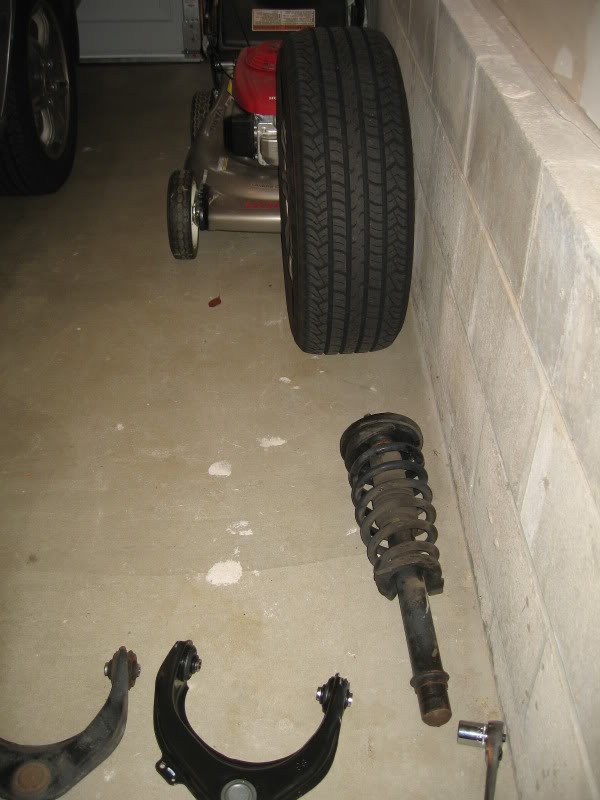
Install the new control arm and tighten the bolts to 47 ft/lbs.
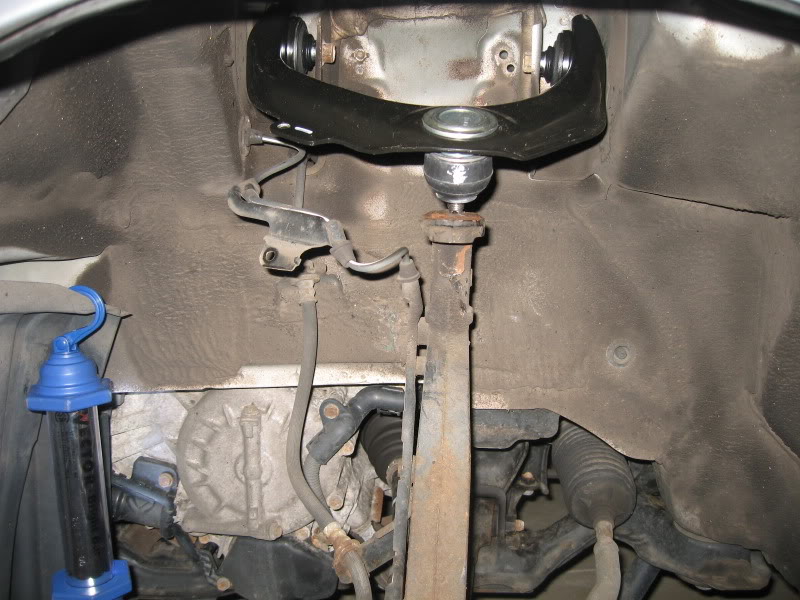
Install the castle nut and toque to 29 ft/lb. Then tighten it some more until the hole aligns with the slot the cotter pin goes into. Raise the steering knuckle with a floor jack slightly if you have to.
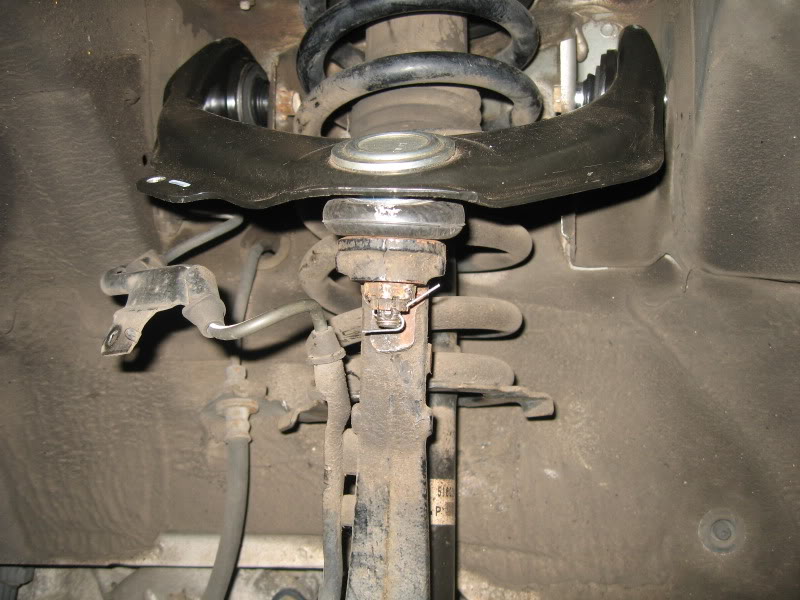
Re-install the wheel sensor bracket, re-install the damper and replace the five top bolts and re-install the lower damper fork bolt and nut and tighten to 47 ft/lbs.
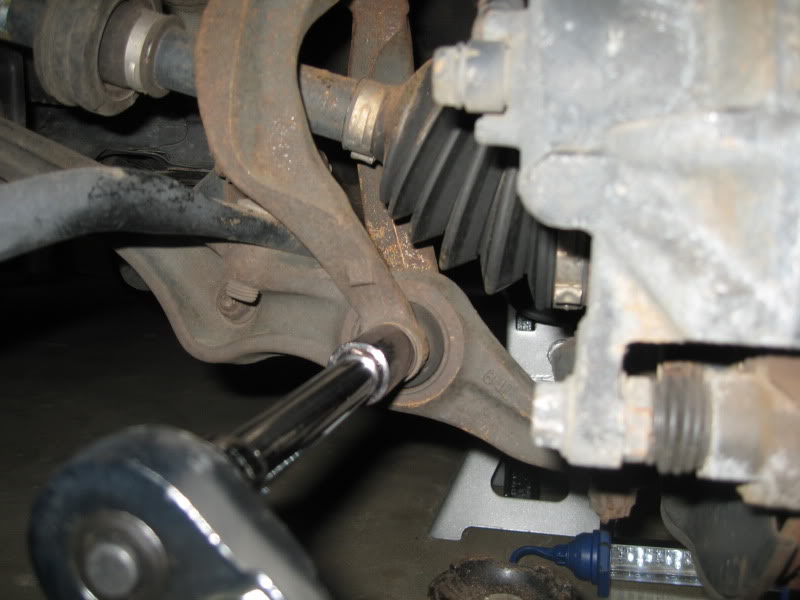
Re-install the upper damper fork bolt and tighten to 32 ft/lbs.
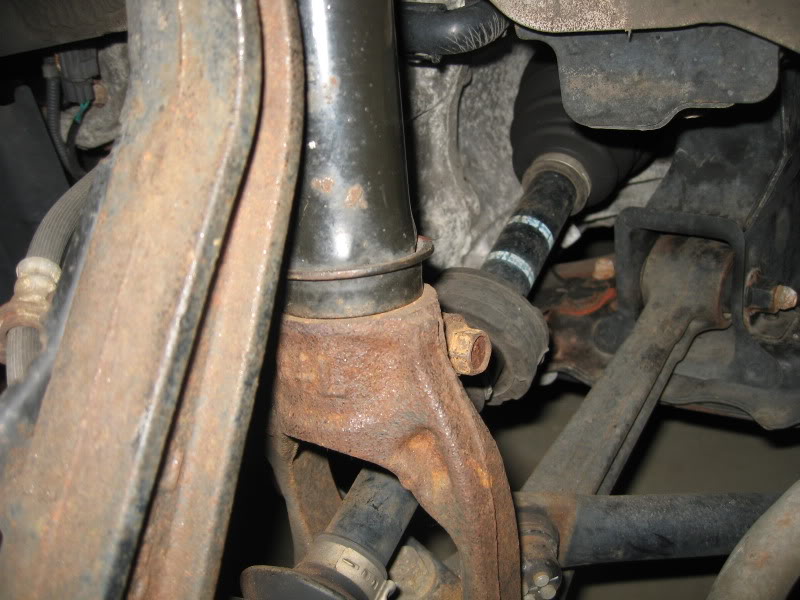
Re-install the wheel and torque lug nuts to 81 ft/lbs
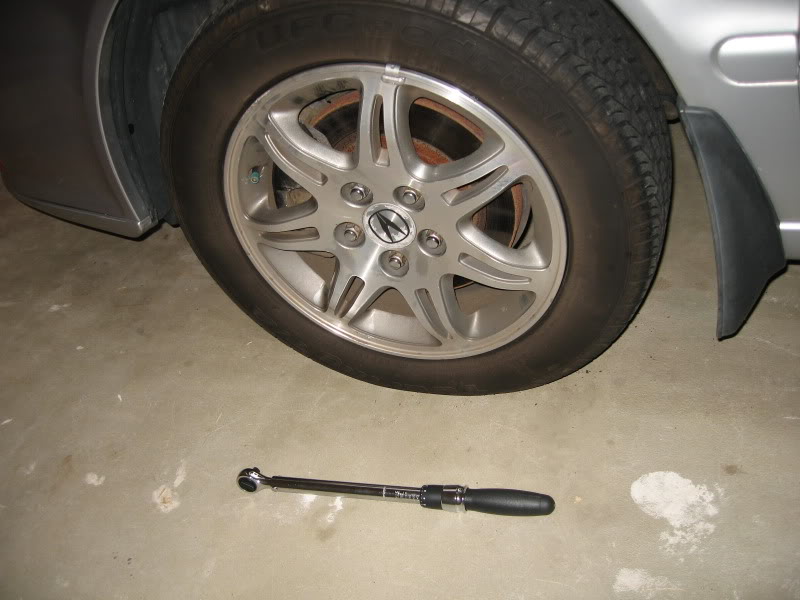
Tools Required:
New Upper Control Arm (Left) - 51460-S84-A01
Floor Jack
Jack Stands
10MM Socket
12MM Socket
14MM Socket
17MM Socket
19MM Socket
Ratchet
Torque Wrench
Ball Joint Separator (Sears KDS3916)
Needle Nose Pliers
Here’s a view of the ball joint in question without the wheel removed.
First, remove the wheel and remove the damper fork by removing the upper 14MM bolt.
Remove the lower 17MM nut and bolt. It’s easiest to do if you just use a second ratchet and 17MM socket so there is one on each the nut and bolt (see the next few pics). If you don’t have an extra ratchet you can use a box wrench. The bolts are kind of rusty so a cheater far helps.
Remove the 5 nuts under the hood on top of the strut tower. DO NOT remove the middle nut! For some reason the 5 nuts aren’t all the same size, 2 are 10MM and the other 3 are 12MM. I guess two are different because they attach the strut bar.
Remove the wheel sensor bracket from the control arm (10MM).
Remove the cotter pin and castle nut.
I didn’t pull the damper out yet because it was difficult to maneuver out with the control arm still attached to the knuckle. I used this ball separator as it was only $20 from Sears compared to the Honda one which is around $170. Seemed to work well, it only took a few turns with a ratchet to break it loose from the knuckle. It would have taken forever to separate the joint without it as it was on their very tight. I used a floor jack to support the steering knuckle so it does not fall to the floor; you can also tie it up instead.
With the joint separated the damper came right out. This will give additional clearance when removing the control arm from the body. Remove the two bolts holding the control arm to the body and remove the arm.
Install the new control arm and tighten the bolts to 47 ft/lbs.
Install the castle nut and toque to 29 ft/lb. Then tighten it some more until the hole aligns with the slot the cotter pin goes into. Raise the steering knuckle with a floor jack slightly if you have to.
Re-install the wheel sensor bracket, re-install the damper and replace the five top bolts and re-install the lower damper fork bolt and nut and tighten to 47 ft/lbs.
Re-install the upper damper fork bolt and tighten to 32 ft/lbs.
Re-install the wheel and torque lug nuts to 81 ft/lbs






Pro
Joined: Jul 2007
Posts: 581
Likes: 8
From: Hawaii
very nice. Props on the DIY.
I actually replaced left upper control arm not too long ago but I wasn't as thorough as you were in the replacement procedures. haha.
Luckily I have Tein coilovers so I was able to adjusted the sleeve so I had a lot of play with the spring. I just undid the through bolts that held the control arm, the abs bracket, and the ball joint bolt at and hammered the ball joint out by hitting it from from the bottom and it popped right out. Then I reversed the process minus the hammering.
I actually replaced left upper control arm not too long ago but I wasn't as thorough as you were in the replacement procedures. haha.
Luckily I have Tein coilovers so I was able to adjusted the sleeve so I had a lot of play with the spring. I just undid the through bolts that held the control arm, the abs bracket, and the ball joint bolt at and hammered the ball joint out by hitting it from from the bottom and it popped right out. Then I reversed the process minus the hammering.
S E L L


Joined: May 2007
Posts: 12,768
Likes: 51
From: Modesto, CA

Trending Topics


Thread Starter
Drifting
Joined: Jun 2003
Posts: 2,128
Likes: 5
From: NJ


Joined: Sep 2008
Posts: 78,249
Likes: 20,202
About the rust, I was thinking the same thing...since I live in S.Florida Salt and Snow is foreign to me and our parts are just dirty (hence, Dirty South) not corroded.
Great DIY.
Why would this go bad, if you don't mind me asking? I'm curious.
Great DIY.
Why would this go bad, if you don't mind me asking? I'm curious.

Great write up. This will help a lot of people.
Question though, is the ball joint separator necessary? Can't you PB blaster it and pry it off with a big flat head?
California...rust....HA! lol
Question though, is the ball joint separator necessary? Can't you PB blaster it and pry it off with a big flat head?
California...rust....HA! lol

 ,
, at least the wishbone lower bolt didn't sieze


Nice DIY. Make sure to keep an eye on the inner and outer lower control arm bushings as well. They tend to show wear when the mileage gets higher. It appears, in the third picture, that there may be some cracking/separation.  It also may be a shadow.
If you are so inclined, removal of the LCA is pretty straight forward and not difficult at all; however, the lower balljoint will need to be separated. That tool should do the trick without a problem.
The link below provides a balljoint separation technique that works also.
https://acurazine.com/forums/2g-cl-tires-wheels-suspension-54/simple-ball-joint-separation-740248/
It also may be a shadow. If you are so inclined, removal of the LCA is pretty straight forward and not difficult at all; however, the lower balljoint will need to be separated. That tool should do the trick without a problem.
The link below provides a balljoint separation technique that works also.
https://acurazine.com/forums/2g-cl-tires-wheels-suspension-54/simple-ball-joint-separation-740248/

Thread Starter
Drifting
Joined: Jun 2003
Posts: 2,128
Likes: 5
From: NJ


can i just buy the bushings?... http://i42.tinypic.com/zitzsm.jpg .. or is it better to buy the whole arm?
where can i buy just the bushings? are these it?
http://www.summitracing.com/parts/EN...105G/?rtype=10
where can i buy just the bushings? are these it?
http://www.summitracing.com/parts/EN...105G/?rtype=10
Last edited by JterrorC; Jul 20, 2010 at 06:11 AM.
can i just buy the bushings?... http://i42.tinypic.com/zitzsm.jpg .. or is it better to buy the whole arm?
where can i buy just the bushings? are these it?
http://www.summitracing.com/parts/EN...105G/?rtype=10
where can i buy just the bushings? are these it?
http://www.summitracing.com/parts/EN...105G/?rtype=10

Intermediate
Joined: Jul 2010
Posts: 46
Likes: 0
great write up, but i have an issue. why did you pull the whole strut out? thats a waiste of time IMHO. i did that exact ball joint in 2008. jacked the right side up, took the wheel off, undid the balljoint nut, undid the 2 bolts holding in the control arm, took it off while the strut was in place (never touched a thing pertaining to the strut) hammered out the old balljoint, pressed the new one in, up went the control arm over the strut, hooked the balljoint up, put tire on and it was finished.

Cruisin'
Joined: Jan 2007
Posts: 15
Likes: 0
I've pulled mine off a few times w/out taking off the strut. If I remember correctly, I just used a clamp to compress the spring slightly so the bolt would come out (in other words, compressed the spring so the gap would line up with the bolt travel).

Racer
Joined: Mar 2005
Posts: 474
Likes: 33
From: Toronto
Great write up ! Another one for the archive (DIY Section ?). We really should have some sort of prize for folks who do this valuable work.
One small point. When using the ball separator, I would have put the nut back on and leveraged against the nut and not the threads. Ever tried to start a nut with damaged threads ? Even if you manage to still damage the bottom threads, carefully backing the nut off will "repair" the damage.
Again, great work.
One small point. When using the ball separator, I would have put the nut back on and leveraged against the nut and not the threads. Ever tried to start a nut with damaged threads ? Even if you manage to still damage the bottom threads, carefully backing the nut off will "repair" the damage.
Again, great work.

Racer
Joined: Sep 2003
Posts: 290
Likes: 27
From: nj

I removed the shock which I calculated to takes less time that fingering in between the spring coils. Tapped the ball joint on the shaft and they pop right out.
And a little silicone spray on the surface rust will get rid of that nasty rust. just don't let it get on the rotors.
Both sides done and on the ground in an hour-40.
If you are not comfortable tightening the bolts by feel which takes experience use a torque wrench.
Going to do my intake manifold and a valve adjustment in a couple weeks. I'll post some shots.
And a little silicone spray on the surface rust will get rid of that nasty rust. just don't let it get on the rotors.
Both sides done and on the ground in an hour-40.
If you are not comfortable tightening the bolts by feel which takes experience use a torque wrench.
Going to do my intake manifold and a valve adjustment in a couple weeks. I'll post some shots.

Racer
Joined: Nov 2009
Posts: 410
Likes: 6
also another major mistake is torquing the bolts on the control arm and even more so for the ball joint, you'll never get the tapper locked in and you'll junk the spindle because it will wallird it out because it isn't seated. The bushing have an inner sleeve that prevents over tightening on the contol arm, and the ball joint has to be as tight as you can get it and still line up a slot with the hole in the ball joint. Never have I ever used a torque wrench to rebuild the front end of a car, you torque the wheel lugs if you don't know how to evenly torque something.
Last edited by rcb2000; Oct 1, 2010 at 08:57 AM.

Racer
Joined: Nov 2009
Posts: 410
Likes: 6
unless you have adjustable upper ball joins a major waiste of time and money, Toe will not be effected from changing a ball joint and thus the only thing that can be changed unless you have adjustable ball joints to allow camber adjustments.
2003 TL-p
Joined: Nov 2008
Posts: 1,587
Likes: 19
From: Reading, PA
after changing out my uppers, Toe was wayy out i had to have my wheel slightly cocked to the left just to drive straight. that was not from the new ball joints, it was just from taking apart the suspension and putting it back together. you must get an alignment after doing any kinda of suspension work, whether the parts you put in are adjustable or not.
chances are if you do any kinda of suspension work you can easy bump toe out of alignment, so get it checked. im well aware you cant adjust camber in our cars, and my camber is not bad enough to convince me to get adjustable uppers.