When you click on links to various merchants on this site and make a purchase, this can result in this site earning a commission. Affiliate programs and affiliations include, but are not limited to, the eBay Partner Network.
I had issues with squealing new brakes on the 3G TLS until I switched to Brembos. Which pads do you have?
Also, I believe the SM recommends silicone lubricant (comes with the pads) be applied to the back of the pad for Brembos. Probably the same for RL Advics.
I don't remember if mine came with any grease. I've got some silicone lubricant I can use though just in case. These are what I what:
From everything I had gathered online, it's normal for 'performance' pads to do that since they're made for high temps. But I'd sure like to get rid of the sequel if possible.
Originally Posted by 619rcr
+1. It's not that hard with the motor & trans removed.
I used jack stands on either side and a jack on the front. Went down a couple notches at a time until it was close enough to the ground.
Don't forget to disconnect the steering linkage from inside. Recommend removing driver airbag as well to avoid the chance of breaking the clock spring.
I'll be using my last pair of jack stands for the other CL, so that's a no-go. Guess I shouldn't have jacked up the rear of my car lol. I was thinking of using this new found dolly cart I have. Throwing it under, wrap the subframe with a ratchet trap, and slowly lower it onto the cart using my hoist, then rolling it out. I'll figure it out.
At what point is your car no longer considered an automatic? Is it when you pull the transmission, or when you remove the shifter, how about the ECU? Maybe it's all three.
Shifter has been removed. Interior underneath all the trim is disgusting. Bunch of goo & dog fur. Not from me, but the previous owner. Guess I have some more to cleaning up to do.
My clutch release boot came in today. Guess what! It has a tear in it. So I'll be returning that and getting another one.
IIRC'ly, you'll have to drill somewhere in the vicinity of the red circle below and maybe somewhere below the yellow arrow
to fasten the CL-S6 E-brake handle?
The green circles, I'm pretty sure, are good to go for easy connection.
IIRC'ly, you'll have to drill somewhere in the vicinity of the red circle below and maybe somewhere below the yellow arrow
to fasten the CL-S6 E-brake handle?
The green circles, I'm pretty sure, are good to go for easy connection.
It would appear some drilling will be required. It looks like the spots are already indented.
Stayed up a little bit late doing some work on the car. Got the shifter & cables in the car, while also having cleaned up the surrounding areas. Is my car considered a manual yet? Also pulled out the ECU while I was in there. Only had one bolt holding it in, and it was loose. Past me made it easier for future me lol.
Also separated the motor & auto transmission. Was a little bit sketchy, as I forgot to remove the 10mm bolts from the flex plate while the motor was still in the car. So I had it dangling with a couple of straps as I had my arm under there to remove them. The size of the automatic is honestly astounding when you compare it to the manual. She's heavy as hell, and ugly too. I can't wait to get the 6 speed in the car, but there's quite a bit to do before that happens. I'm already trying to hold back from putting on the clutch kit. I'm eager to open that bad boy.
Very refreshed to see that the leak isn't from the rear main seal or the oil pump housing. I don't remember if I redid the gasket on the oil pump housing, but I do believe I put in a new O ring for the rear main seal. I'll need to check the oil pan though. When I was pulling the transmission away, the engine fell about 2 inches onto the floor. No oil is leaking, but still need to check if there's any damage.
P2R headers have arrived! Much quicker than when my girl when she ordered them. Took her about 3 months since they were back ordered last year.
There is something I want to bring up about these headers. My girl when she had them installed, I don't remember how long into having them on, maybe two weeks, but she had an exhaust leak. At first, I figured it was from the flange where the headers meet the Y pipe. I tried a lot of things trying to figure out where it was coming from. Went back and forth removing them, putting them back on multiple times. Eventually, I just smothered all the flanges in copper gasket maker. The exhaust leak was still there.
619rcr also had an exhaust leak with his P2R headers. His fix was putting gasket maker where the headers connect to the heads. Don't recall exactly what his method was, but I eventually got around to checking it out on my girl's car.
Pulling the headers off, I immediately noticed a build up of soot on the corner edge of the metal gasket. Looking at the header itself, in the same spot, there was soot on corner edge. I didn't take pictures of this unfortunately.
But then I got curious as to why it was doing this. The nuts on the headers were torqued down tight. They looked like they were completely pushed up against the head. Well, I took my straight edge and put it up against the surface of the header and found this.
The gap might not be super big, but funny enough, that's the same corner it was leaking from. Both headers were like this. I didn't measure the gap. So I did 619rcr's method, and put copper gasket maker on both sides of the metal gasket, and threw them on, and no more exhaust leak on my girl's car. I've been waiting to bring this up because I wanted to see what a pair of brand new unused headers would look like with my straight edge.
No gap; perfectly flat. So now I'm confused. Either P2R already addressed this issue, or they warped when on the car. Either way, I have pictures to show that they are perfectly flat, and if I end up getting an exhaust leak in the future, then that means they probably warped. Either way, the fix is simply copper gasket maker on metal gasket.
I have some goodies coming Thursday relating to the gauge cluster. The 6 speed one had some dark brown stains on it. I scratched it off, but it still left behind brown spots that wouldn't come off. Well, I took a brillo pad and ended up scratching the lens. Thankfully, removing the lens is super easy, so I just swapped them, and fixed the speedometer while I was at it.
I might just go grab a new lens from the yard, depends on how much I care. Yard just brought in a 2013 TL. Need to check it for a J37, as well as grab the top plate for eBay. If it has the J37, that thing is coming home with me for future projects. Unfortunately, it's going to be raining all this weekend, and my friends were down to go as well. WHY NATURE WHY!
Last edited by Thefireball; 01-04-2023 at 12:09 AM.
E-brake pedal has been removed. I had forgotten that there would be some.. work involved with getting the clutch pedal installed. I'll be ordering that S2K bolt eventually. I could just replace the brake lines, but I'd prefer not having to rip up the carpet for a simple e-brake. Seems kinda silly.
So cutting this out is going to be a bit tricky. I'll probably use a Dremel. Being that mine blew up a couple months ago, I'll be asking my friend if I can borrow his. I have metal cutting wheels, so it'll be a piece of cake. But the issue lies with the black CL. How the hell am I supposed to mount the E-brake pedal onto it if this thing is simply welded on?
Suppose I'll be buying another set of CL-S 6 cup holders & E-brake for the black CL since I'm not capable of welding this back on. It'll at least be easier than rerunning the brake lines under the carpet. But that'll be tackled in the future.
Two out of the three wiring harness have been removed. It's still not clear if the third wiring harness needs to be replaced as well. I'm not entirely sure what the differences are, besides the fuse box listing 'VSA' on it. From everything that I've removed, nothing has been unplugged in the interior connected to that harness. Sooo.. hopefully it should be fine to stay in? Right?
I have the driver side wiring harness plugged into the wiper motor and hanging off to the side for now. Just wanted to get the whole wiper situation out of the way and done with. Don't want them in the way for when clean the engine bay up, nor do I want to cut a wire when drilling the holes.
Last edited by Thefireball; 01-04-2023 at 03:35 AM.
You could probably polish that lens back out to remove scratches but you need to not burn it in doing so.
Might be easier to get another at the junkyard.
I consider this a manual now
That's an interesting predicament with the foot brake.
Seems like a simple spot weld drill and re-weld would work.
Luckily when I was done pillaging my cls6, was able to transfer over the accord hand brake, crossmembers, etc to sell the mt to at converted shell.
maybe just part out the black car or sell as is. lol
Nice clear center 'LCD'.
Mine is starting to delaminate, perhaps due to baking in the humid FL sun?
A new 6MT 78146-S3M-A21; Combination Print Panel is $289.48.
Go figure, the automatic 78146-S3M-A13; Panel, Combination Print ; Printed Circuit Board is discontinued.
You could probably polish that lens back out to remove scratches but you need to not burn it in doing so.
Might be easier to get another at the junkyard.
I consider this a manual now
My friend is obsessed with detailing his cars & having good paint. He said he could fix it, as long as I helped him get to the stupid bottom valve cover bolts on his LS460.
Finally, I am in the 6 speed club!
Originally Posted by 619rcr
That's an interesting predicament with the foot brake.
Seems like a simple spot weld drill and re-weld would work.
Luckily when I was done pillaging my cls6, was able to transfer over the accord hand brake, crossmembers, etc to sell the mt to at converted shell.
maybe just part out the black car or sell as is. lol
I'm going to try and remove it without damaging it as best as I can. I might try and see if I can't attach it to the black CL. I'll probably just end up ordering the pieces though. Already found a hand brake & cup holders for cheap. Just don't want to spend the $$$ on it right now.
I guess I could part out the car, but I feel I could get more by selling it as a fully running car that's been fixed up. I'm hoping to sell it for more than what I paid for it. Besides, I want this car to go to some one who will appreciate it, and I want more CLs on the road. If it's a shell, there's a chance some one will make it a project car, but it'll just end up sitting in their backyard for years unfinished.
Originally Posted by zeta
Thefireball, it looks like your thread is 'Trending' on the Azine.
There's a trending page? P2R might have something to do with getting me trending since they just reposted my image on their Instagram story lol.
I might be the original hipster by going against the grain but if it's trending I do NOT want to click it.
I've always been like that myself. Everyone was playing COD or BF when I was a kid, but I was the weird one playing TF2 on my PC. Not a trend follower.
Some of the goodies arrived today.
Double din adapter for the radio, and some ice blue LEDs for the gauge cluster & other various switches. Unfortunately, they aren't dimmable, so I hope they aren't obnoxiously bright. Old lights are yellow and dim, and I've been wanting to do this for awhile. Still waiting on the ISO connector for the radio, and for the replacement clutch fork boot. Sure hope that radio isn't a waste of time. Doesn't have the greatest reviews, and it's the same price as the Kenwood that was in my car, which is a single din with no blue tooth.
Didn't do a whole lot yesterday. Was lazy. Could have left work early and did some more, but I just pissed away time at work watching SL troll videos & reading SBR manga.
Front half of the subframe is off. Really wasn't that difficult, nor was it as heavy as I was expecting to be. I did do it the way 619rcr suggested however, which worked pretty well. The back half is going to have to wait until I can cut off the Y pipe. It looks heavier, and I don't want to try and go maneuvering over the pipe.
Currently waiting for my friend to show up with the Dremel so I can work on getting this clutch pedal in.
Lights are in on the gauge cluster, as well as the climate controls & clock. What I was not aware of is that the switches, like the moon roof controls & hazards, use a smaller neo wedge light. Maybe a T3? I'll have to pick some of those up before put everything back together.
Guess I could have marked which ones I replaced on the back, but I'm lazy. All the T5s came with a new black backing. The bottom picture, all of the white circles are the new bulbs.
I have a question regarding the steering rack. Hoping some one has an answer before I get back from work. I'm going to attempt to remove the rear subframe anyways, because I'm impatient. Realized I can drop the entirety of the exhaust pretty low after I removed the Y pipe hanger.
I see that there are two lines coming out on the left that go into the subframe. Feeling around, it felt like it was attached to the rack, but also like it wasn't? Do these needs to be disconnected, or can they be left on? Also, you can see the one bolt next to those lines, and there's another one on the back. Will removing those completely disconnect the rack for me to remove? I already have the brackets underneath removed that were holding it in. Never messed with a steering rack before, so this is a little intimidating as I don't know what I'm dealing with.
The whole rack stays bolted to the crossmember. Disconnect the steering input shaft under the dash, before you lower the crossmember. You prob already have the outer tie rods popped at the knuckles and ps lines at the pump disconnected. Don't recall if I disconnected the long return line at the rack or the cooler. But, whatever is easier to access.
Also, don't forget to use something to keep the steering wheel from turning, like seatbelt thru the steering wheel, then to the seat. That or pull the whole driver airbag out.
What, so you mean to tell me that the rack will stay inside the rear frame instead of removing it? As for under the dash, do you mean inside the car, or under the dash as in outside of the car, aka the pic I presented in the last post.
Why hold the steering wheel with a strap, and why remove the airbag? Is that just to help keep it still when reinstalling the rack later so it's aligned the way it was when it came out?
What a pain in the ass this was. This was by far the most difficult thing to work with this entire thread. Broke two drill bits, a couple of different Dremel tips, and all of my Dremel metal cutting wheels. So much for attempting to cut it out cleanly. You can still see some parts of the old bracket at the bottom right.
What a pain in the ass this was. This was by far the most difficult thing to work with this entire thread. Broke two drill bits, a couple of different Dremel tips, and all of my Dremel metal cutting wheels. So much for attempting to cut it out cleanly. You can still see some parts of the old bracket at the bottom right.
Congrats!
What are you bellyaching about, the TL swap peeps have to cut the factory holes the CL chassis already includes.
Besides, your removal result does not look any worse than MaxBeast4Z's, though he had more work left to achieve proper fitment.
What, so you mean to tell me that the rack will stay inside the rear frame instead of removing it? As for under the dash, do you mean inside the car, or under the dash as in outside of the car, aka the pic I presented in the last post.
Why hold the steering wheel with a strap, and why remove the airbag? Is that just to help keep it still when reinstalling the rack later so it's aligned the way it was when it came out?
Originally Posted by 619rcr
The whole rack and crossmember comes out together. When you disconnect the rack inside the car, under the dash the steering wheel can easily spin around and break the airbag clock spring, which breaks the connection from the steering wheel to the airbag To prevent this, you can either remove the airbag, or keep the steering wheel fixed in place.
Forgot to add this image last night. Clutch pedal plunger thingy what ever it's called is installed, along with the Master & slave cylinders. But those are hanging off to the side for now.
Spent all night doing this. Black CL now has the automatic's subframe installed. I'll have to finish up getting the spindle installed and putting the wheels back on so I can get my jack stands back. I'll also reinstall the power steering lines at the same time. Really wasn't all that bad. Once I get the black CL back on it's wheels, I'll get the 6 speed subframe installed in no time. Then it's time to start assembling things. Speaking of which, I forgot to swap the brake pedals while I was in there. I'll do that later..
I am worried about swapping the steering racks though. My blue CL when having the steering wheel perfectly straight allowed access to the bolt for the linkage under the dash. But on the black CL, I had to turn the steering wheel half way to access the bolt. Is this not going to throw off the alignment significantly?
I am worried about swapping the steering racks though. My blue CL when having the steering wheel perfectly straight allowed access to the bolt for the linkage under the dash. But on the black CL, I had to turn the steering wheel half way to access the bolt. Is this not going to throw off the alignment significantly?
It's kind of unavoidable to need an alignment. Unless you paint the two sections of the joint with an alignment mark before you separate them, and also keep the same rack and all the tie rods the same.
You can pop the steering wheel off later and re-orient it straighter if need be.
It's kind of unavoidable to need an alignment. Unless you paint the two sections of the joint with an alignment mark before you separate them, and also keep the same rack and all the tie rods the same.
You can pop the steering wheel off later and re-orient it straighter if need be.
Figures.
Originally Posted by rockstar143
619rr
you are a good friend.
Absolutely this. From answering my never ending questions, dealing with my walls of texts in PMs, including sending a new message right after sending one with a new subject line, and helping me out with all this. I think I owe him something lol.
6 speed subframe was filthy. Covered in mud. How? I don't know.
So I pressure washed the bitch. The compressor arm underneath the pressure washer broke, and then fell off, then the motor turned. So I had to do some repair work, but got it back up and running in no time.
Pressure washing exposed some spots that are rusting. Y'all think it'll be fine, or should I hit it with a wire wheel and give it a touch up with some paint?
Wasn't even aware that there was an upgrade for them. What sort of a change would I expect from replacing them? They're cheap, so if it helps performance in some way, sure.
Edit: I just realized you said what they do, but the text was hidden because it's white, lol. Yeah, I guess I'll get them when I order new auto trans mounts. I still need to test if the auto ones will work on the manual.
Last edited by Thefireball; 01-08-2023 at 04:43 PM.
Welp, I ordered them, along with a new rear main seal for the J32. That thread was enough to convince me to get the moogs. You're a bad influence getting me to buy parts.
I was going to order 3 transmission mounts. Two to test, and one to replace the auto one that tore. But they were coming from 4 different warehouses, and the total came out to $95. So I'll wait to get those other parts later. I also picked up a tube of polyurethane from Home Depot yesterday. So I'll be Polly filling that rear engine mount here soon.
Hopefully, those Moogs will help tame any wheel hop you may have with that beastly sixer J35.
IIRC'ly, when you get them from RA, open up the box and try to squeeze them, they should be difficult to compress by hand. At least the ES 16.7103 one's that I went with were.
Then when you get to installing them try to squeeze the removed soft OEM's, you'll notice a big difference.
Just make sure to follow the Helms directions, when installing, because there is a proper front & rear orientation, regarding bushes themselves, on the end of the radius rod. Also, make sure to torque them just like the Helms states, if you re-use the self-locking nut use some loctite to help keep them in place.
I saved the image that some one posted in that thread so I know which way they go on. Loctite I will use if the moogs don't come with new ones.
Also forgot to mention. I have two full sets of 3G TL-S valve springs & retainers that I'll be throwing onto my J35 while it's out, considering I'm still using the weaker springs & retainers that originally come on the J35A3. Might be one of the reasons why my motor wants to stall out on a cold start, that or it's because the valve seats have some pitting, or because of my 4 inch intake. Loves to sit at about 400-500RPMs at idle until it warms up, and gets real close to stalling, but never does. But either way, stronger springs & retainers will be a good upgrade with how I drive. Just wish I had some J35A8 RL cams. I had two sets of 3g TL-S J35A8 cams, but I sold them to P2R because I wanted the RL cams instead.
Let's hope I don't drop a retainer or two through the various holes on the cylinder heads.
Last edited by Thefireball; 01-08-2023 at 07:26 PM.
6 speed subframe is in.
Also removed the radius arms & bushings in preparation of the moogs coming in.
Just got done poly filling the rear mount.
Hoping to clean it up a bit once it dries.
This is what I used:
I know there's different stiffness with sort of thing. Not sure how stiff this stuff is. Just need something to prevent further tearing of the rubber until I have the funds for proper aftermarket polyurethane mounts. Not concerned about vibrations.
Lot of of progress.
I'd def get some rustoleum on the blemished subframe before you put the motor back in.
Also, good tip from Zeta on the radius rod bushings. The rubber ones are spongy and don't hold up well to torque. Which is a primary contributor to wheel hop on hard launch. They can also throw off your wheel caster, which can cause pulling.
Yeah.. I forgot about that. Was at the store holding two different tubes, and wasn't sure which one to get. So I went based on color. It was either grey or black. But it turns out, I'm not the only one who went with this stuff.
Originally Posted by 619rcr
Lot of of progress.
I'd def get some rustoleum on the blemished subframe before you put the motor back in.
Also, good tip from Zeta on the radius rod bushings. The rubber ones are spongy and don't hold up well to torque. Which is a primary contributor to wheel hop on hard launch. They can also throw off your wheel caster, which can cause pulling.
I tried spraying the frame after cleaning it up, but it wasn't sticking. Could have put some more effort into it, but I gave up. I probably revisit it before putting the motor/trans back in though.
Glad to hear they're actually a significant upgrade. The bushings that came out really weren't that worn, but definitely were soft. My car is going to be handling goooood was all these new suspension parts are on. Only thing that's not getting touched is the shock & coils, which is a bummer. All in due time.
Also come to found out that the 'surprise' item that I ordered was the wrong thing. Hasn't shown up yet. More on that when it shows up.
Well, the blue TL-S was noticeably faster than my base TL but in relation to the S4 or corvette doesn't seem that fast.
My main measure of a car is how enjoyable it is to cruise around if that's the purpose of it and how fun it is to rip around in
if it's kinda quick.
I've driven a couple of different cars, never a Corvette or a V8 muscle car. I know there's faster & better cars out there, but I fell in love with the 2G CL. It's honestly more comfortable than my 3G TL. I like it because it's different. You hardly ever see them being modified, and you don't see them that often on the road. Not to mention, I personal prefer the looks of the CL over the 3G TL, but that might because I'm biased since I prefer coupes.
Like I mentioned before, I don't follow trends. I don't want to be like every other person with a civic, a 350z or G35. Everyone and their mom owns a challenger/charger/Camaro/mustang/Corvette. I can't go for a drive with out seeing one. Gets real old. Also gets real boring watching races where it's this LS swapped car vs that LS swapped car.

 01-02-2023, 09:52 AM


 Thankfully, removing the lens is super easy, so I just swapped them, and fixed the speedometer while I was at it.
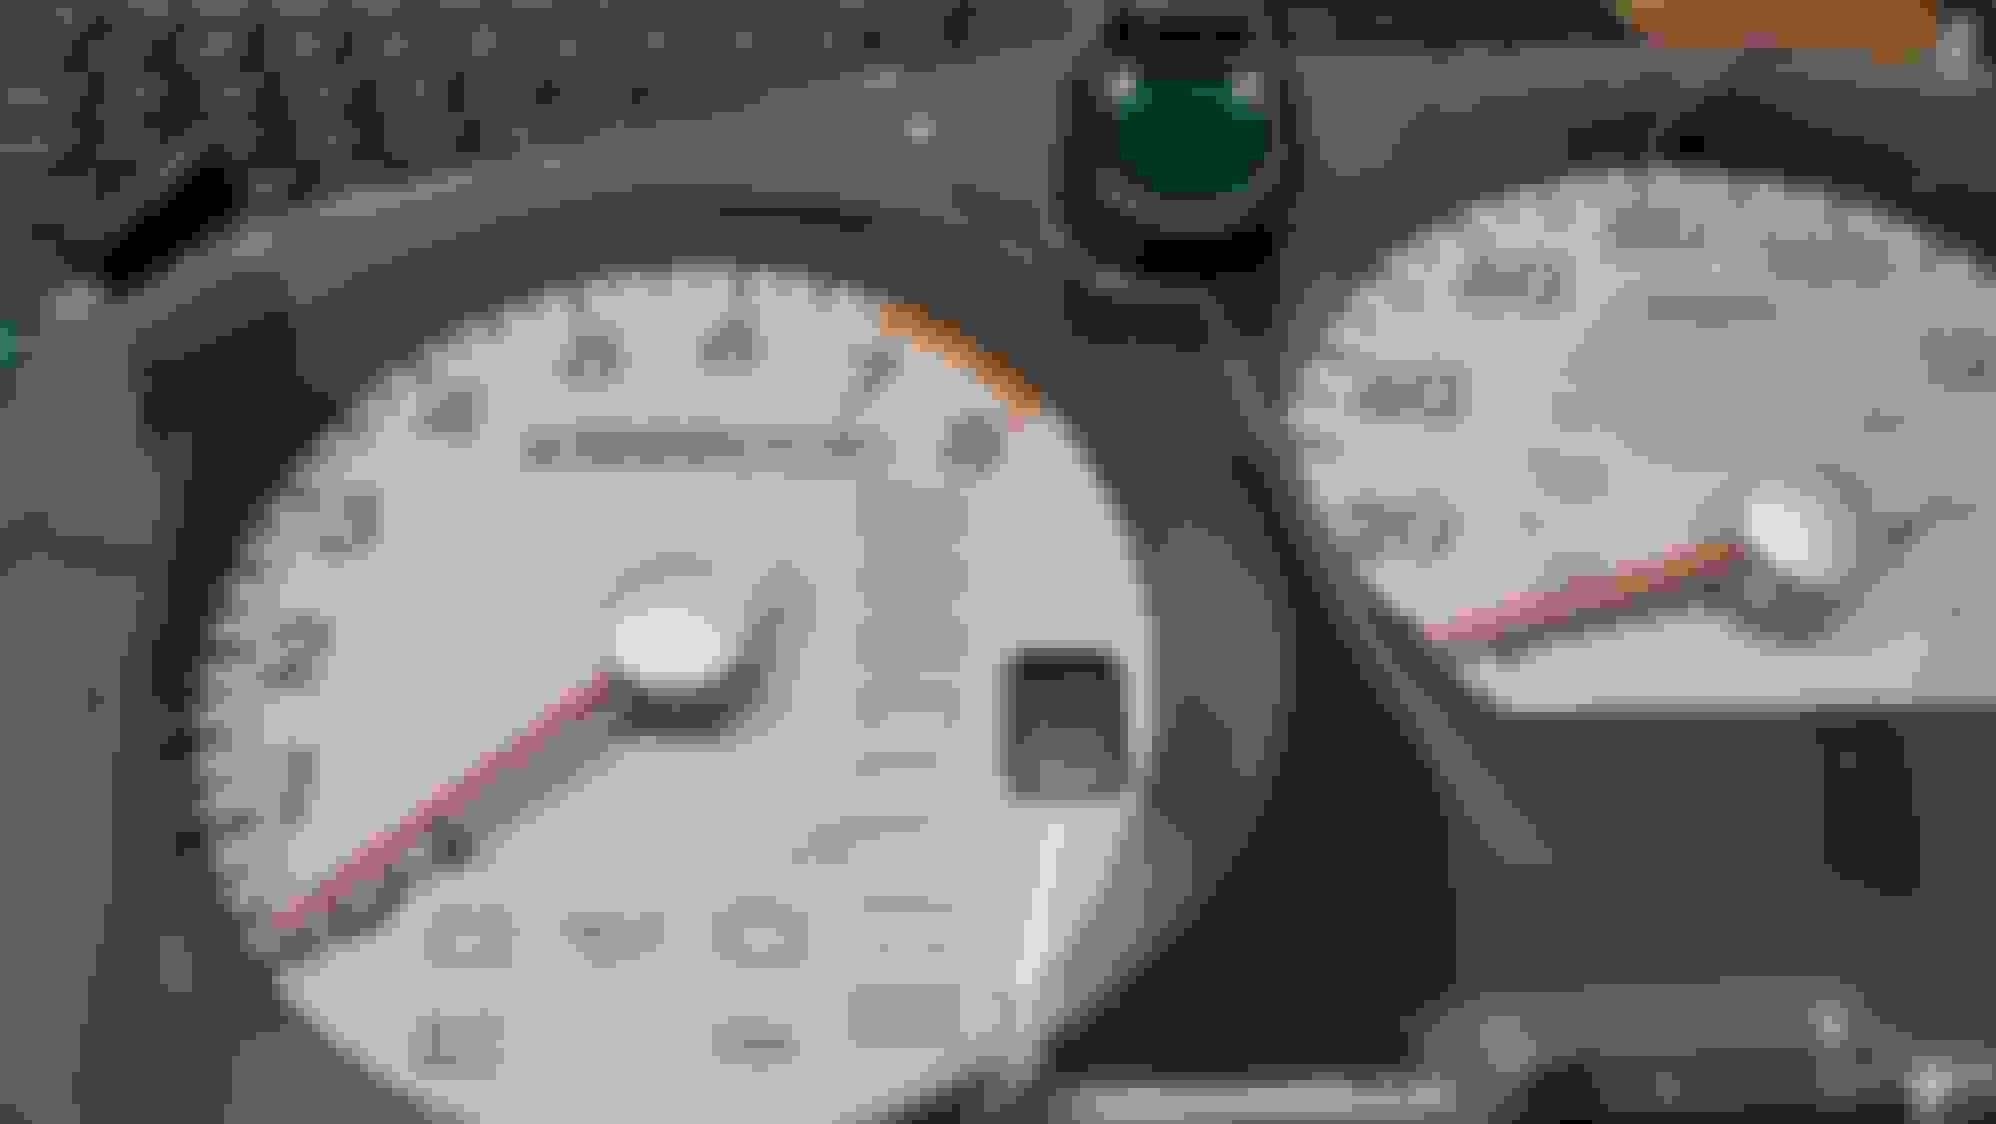


 Speaking of which, I forgot to swap the brake pedals while I was in there. I'll do that later..