Acura: How to Replace Brake Master Cylinder
The brake master cylinder is the heart of the brake system, and if faulty, can lead to reduced braking performance or even an accident. Often misdiagnosed as air in the brake system, a brake pedal that slowly sinks to the floor is an indication that the master cylinder should be replaced. In the interest of the safety of all drivers on the road, replace your bad master cylinder to restore braking performance.
This article applies to all Acura models.
The brake master cylinder acts as a pump that converts the mechanical force applied to the brake pedal into hydraulic pressure that forces brake fluid throughout the brake system. With the aid of a vacuum assisted brake booster, the end of the brake pedal pushes on a small rod inside of the master cylinder called a piston. Depending on the vehicle, the piston is fitted with various seals and springs to help control the movement of brake fluid as the brake pedal is depressed. As the piston travels through its stroke in the master cylinder bore, brake fluid, which is non-compressible, makes its way to each brake caliper and applies pressure to the brake caliper pistons, thus slowing or stopping the car.
Unfortunately, with age and use, the piston seals in the master cylinder can stick or tear, causing brake system malfunctions. Additionally, neglected brake fluid maintenance can cause the master cylinder bore to corrode and allow brake fluid to leak by the seals, thus reducing braking performance. Master cylinder rebuild kits are available to restore functionality; however, many find replacing the entire master cylinder unit to be a much more cost-effective solution. This article will outline the procedure for replacing the brake master cylinder on various Acura models.

Materials Needed
- Metric wrench and socket set
- 3/8'' drive ratchet and extensions
- Metric flare nut wrench set
- Bench vise
- Bench bleeding kit
- Syringe or turkey baster
- Large Phillips screwdriver or blunt metal object
- Shop rags
- DOT 3 or DOT 4 brake fluid
- New brake master cylinder
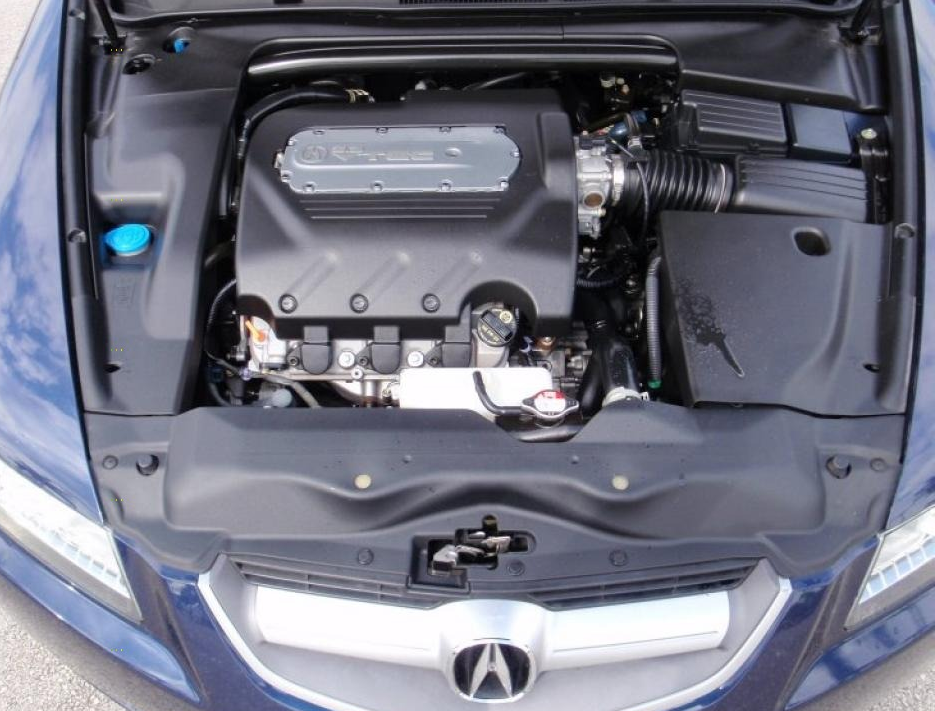
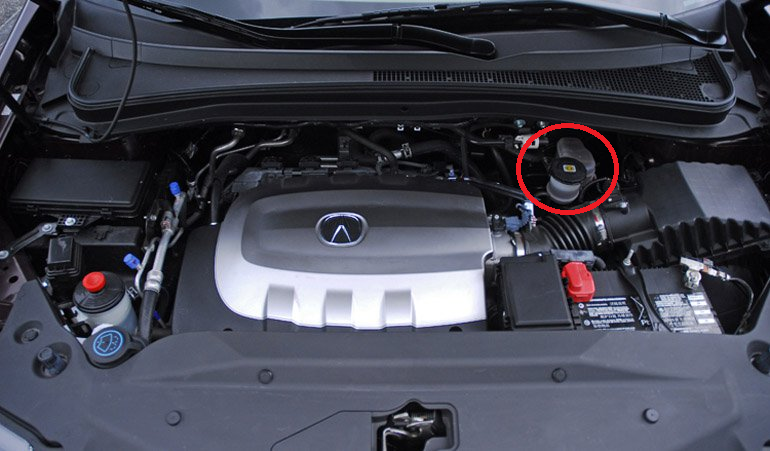
Step 1 – Gain access to master cylinder
Depending on the model vehicle in which you are working on, the master cylinder may be obstructed by trim cover panels, relay boxes, or a strut brace.
-
Examine the engine bay and remove the necessary covers or components obstructing the master cylinder. Most of these components either clip into place or are secured with a couple of screws or bolts, which are easily removed.
Step 2 – Remove master cylinder
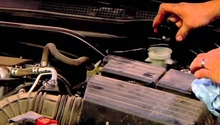
Once the brake master cylinder is accessible, you can begin removing it from the vehicle.
-
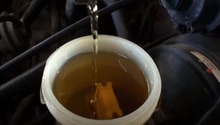
Begin by removing the brake reservoir cap, and, using a syringe or turkey baster, siphon as much fluid from the reservoir as possible.
-
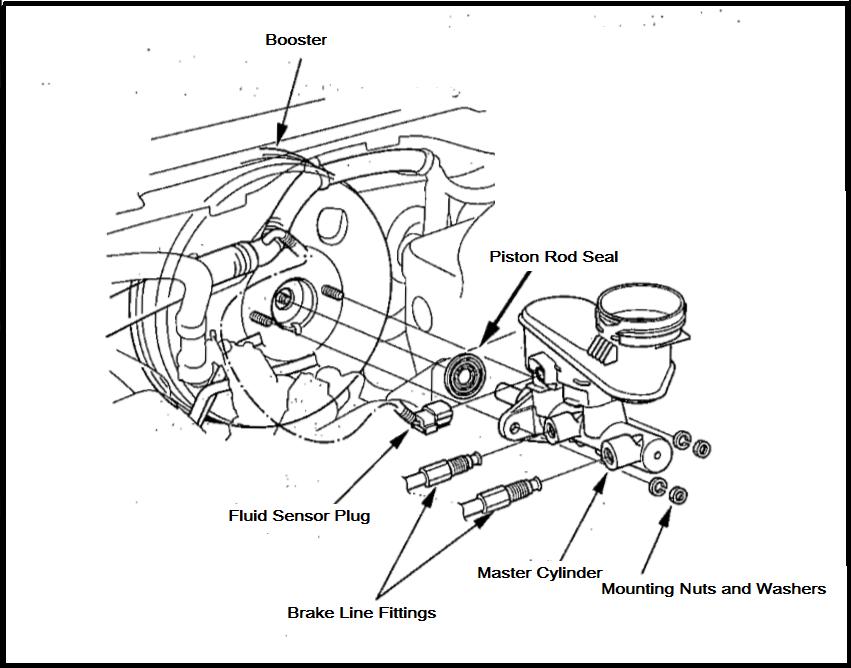
Disconnect the brake fluid level sensor from the reservoir.
-
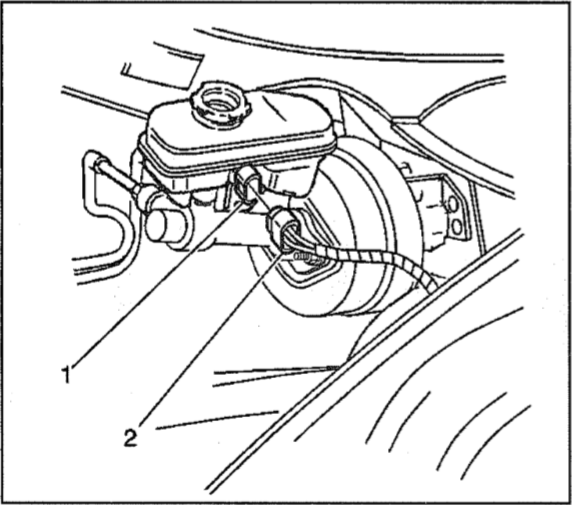
Using the appropriate sized flare nut wrench (line wrench), disconnect the hard brake line fittings from the master cylinder. Have shop rags handy to catch any emerging brake fluid.
-
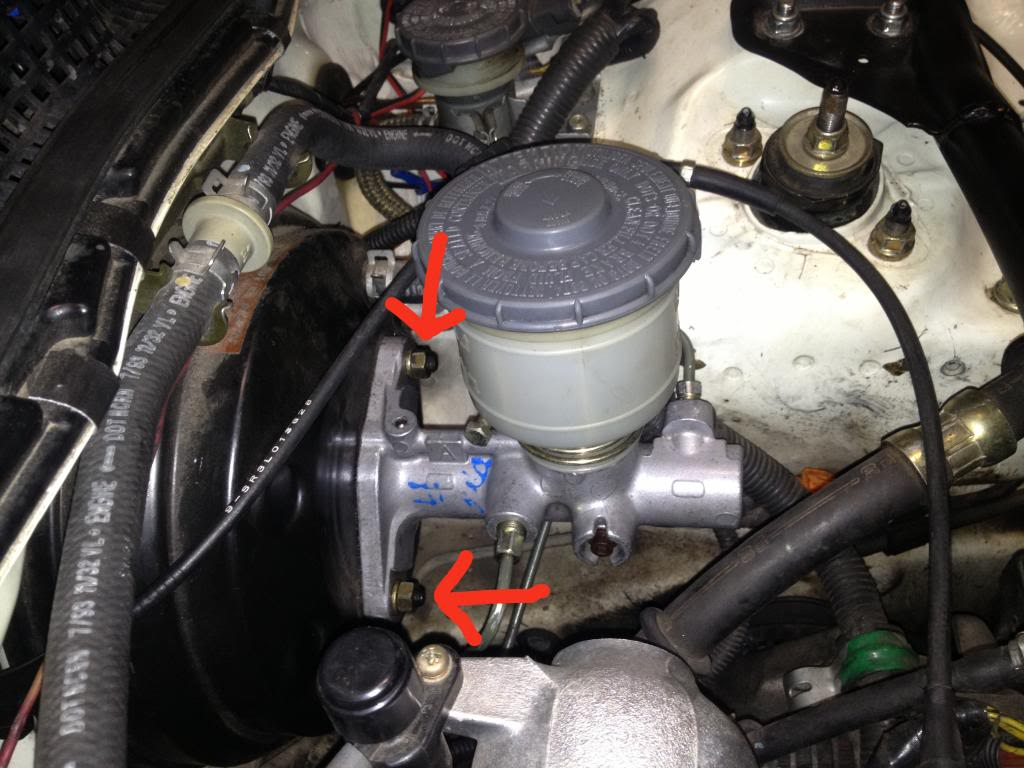
Remove the nuts securing the master cylinder to the brake booster. Remove the master cylinder from the vehicle, taking care not to damage the hard brake lines.
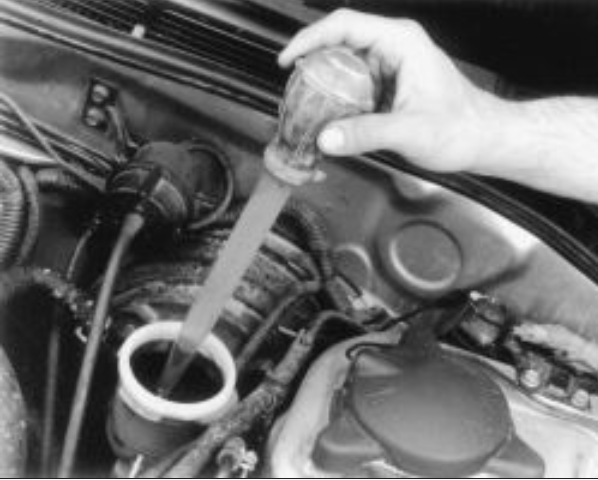
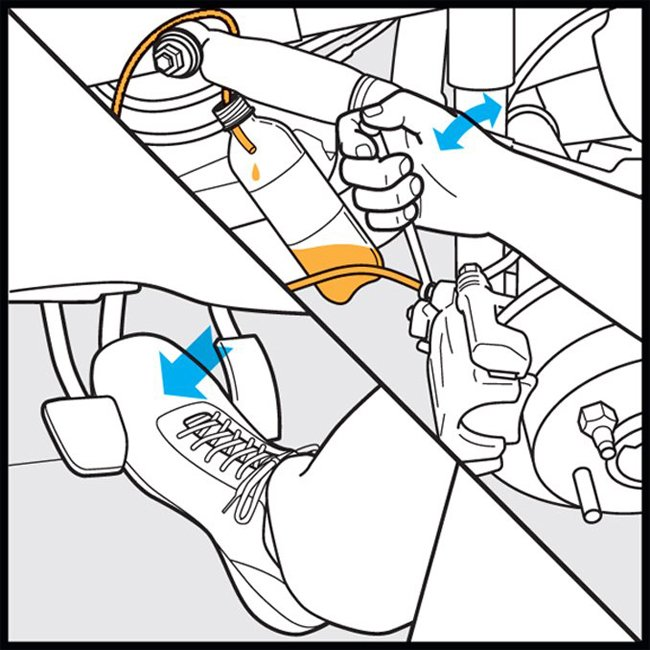
Step 3 – Bench bleed new master cylinder
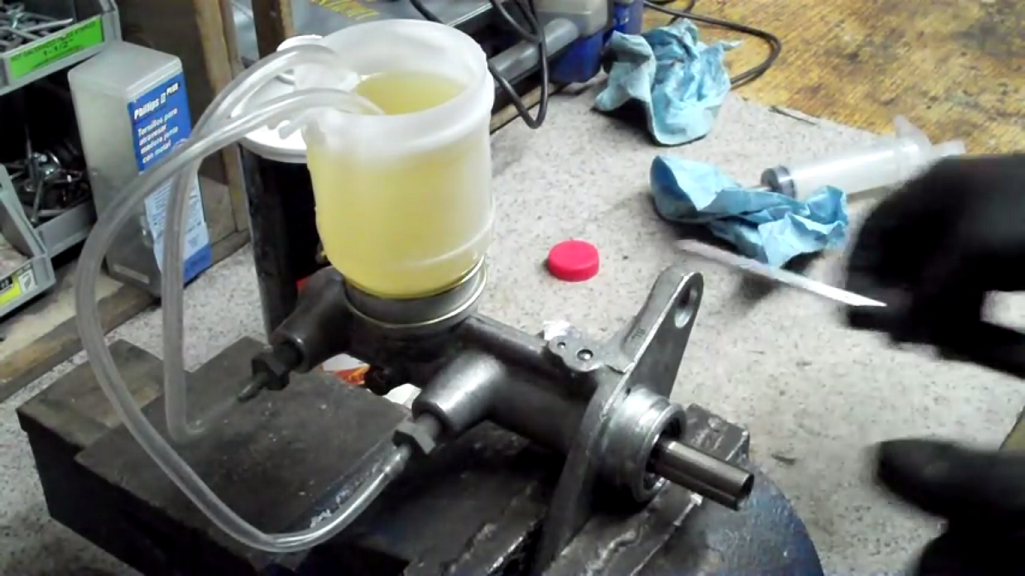
While not always necessary, it is highly recommended that the new master cylinder be bench bled before installation. Bench bleeding fills the master cylinder with brake fluid and removes any air that would otherwise make bleeding the brake system of all residual air quite difficult. Many replacement master cylinders include a bench bleeding kit, but they are also readily available at any auto parts store.
-
With the new master cylinder securely clamped in a bench vise at its mounting flange, install the necessary fittings from the bench bleeding kit into the brake line ports. Attach the clear hoses to the fittings and route them into the reservoir. Then fill the reservoir with fresh brake fluid.
-
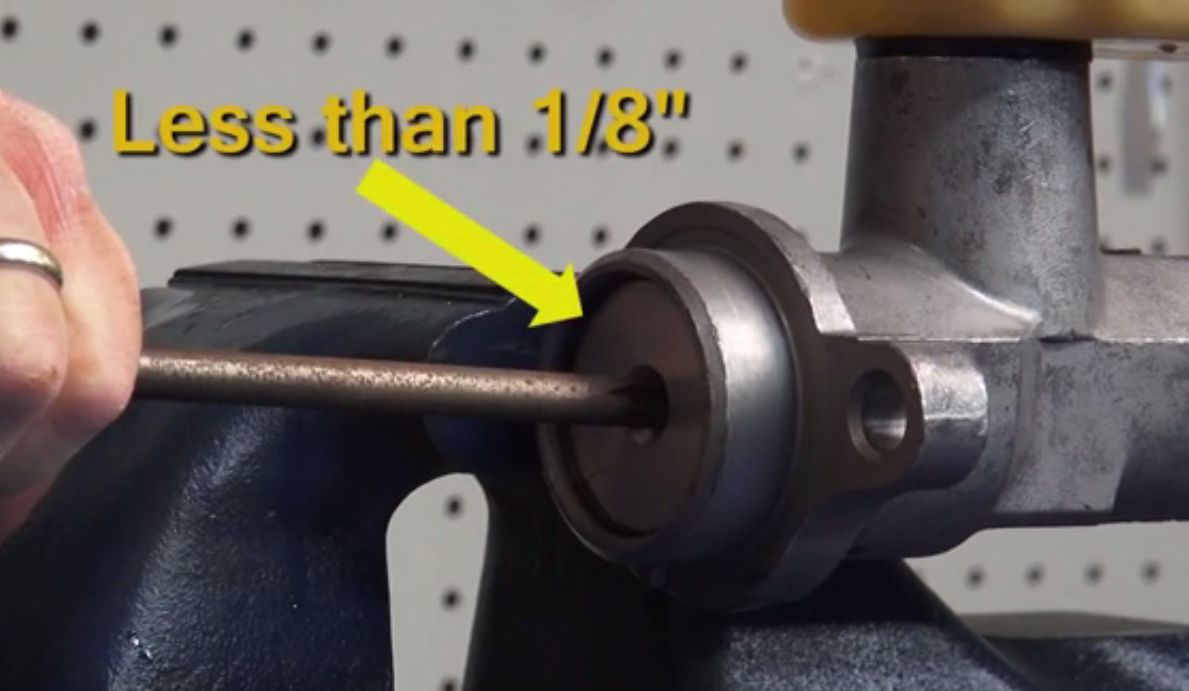
With the hoses submerged in brake fluid, use a blunt object, such as a metal rod or large Phillips screwdriver, to depress the piston. Continually depress the piston and let it return while monitoring the hoses for air bubbles. The piston will become increasingly more difficult to depress as air is removed from the system. Once the hoses are free of air bubbles and the piston stroke will only travel approximately 1/8", it is properly bled and ready to be installed in the vehicle.
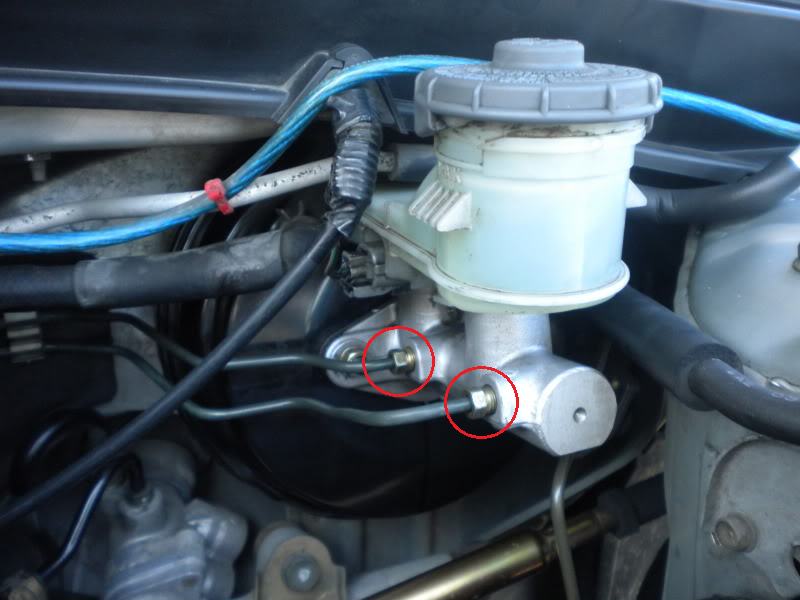
Step 4 – Install new master cylinder
- Remove the fittings and hoses from the master cylinder before capping off the brake line ports to prevent brake fluid loss while installing the master cylinder.
- Slide the new master cylinder onto the brake booster studs. Be sure to install a new piston rod seal as well. Tighten the mounting nuts to approximately 10-12 ft/lbs.
- Remove the brake line port plugs and thread the hard line fittings into the master cylinder. Tighten the brake line fittings to approximately 20 ft/lbs.
- Reconnect the brake fluid level sensor plug.
Step 5 – Bleed brake system
Any time a brake line is opened, air will be introduced into the brake system and will require the brakes to be bled. Bleed the brake system of all residual air as outlined in How to Replace Brake Fluid of your particular Acura model before re-installing any components that were removed in Step 1. (The article can be found under the Brakes category - AcuraZine.com.)
Related Articles
- Acura MDX: How to Replace Brake Fluid - AcuraZine.com
- Acura TL: How to Replace Brake Fluid - AcuraZine.com
- Acura RDX: How to Replace Brake Fluid - AcuraZine.com
- Acura TSX: How to Replace Brake Fluid - AcuraZine.com
Related Discussions
- Replacing Brake Master Cylinder Simple Question - AcuraZine.com
- Master Cylinder Replacement DIY - AcuraZine.com
- Replacing Brake Master Cylinder - AcuraZine.com