DIY: Trim Removal
 05-20-2012, 05:53 PM
#1
ROTAREDOM
Thread Starter
DIY: Trim Removal
Hey pussies, here is your personal guide (with pictures) to help you rip out your trim without breaking it so you can paint it/wrap it/ or replace it all together.
Let's begin
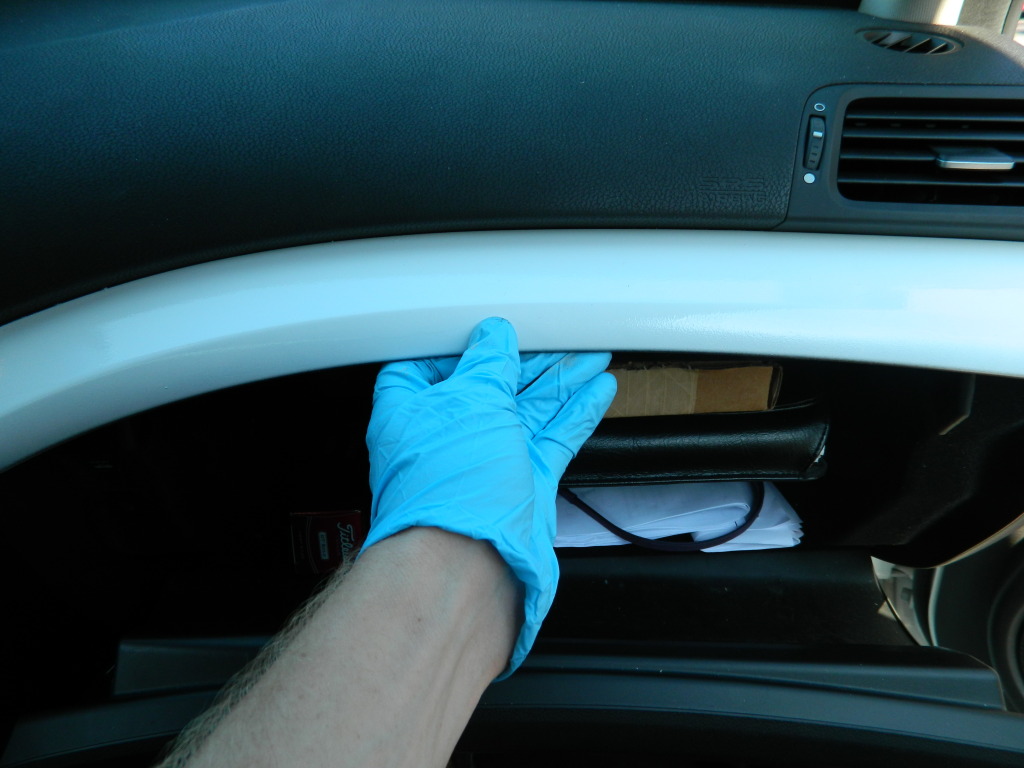
Let's start with something you know very well. Opening your glove box ( which no one actually uses for gloves, I think it should be called gun safe, trojan dispenser, bob marley box, or something to that nature)
Cool, you did it fucker! This is the easiest one. Now take two hands and grasp underneath the trim and pull straight outward toward your body. Like this...
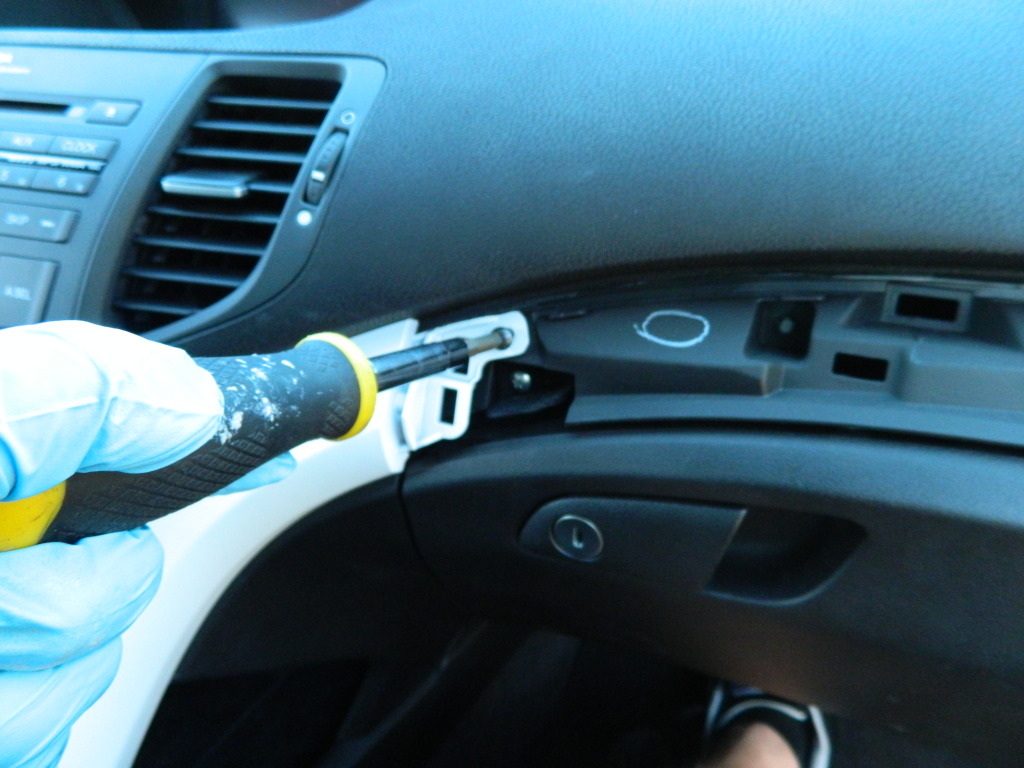
Hahaha damn, you're feeling confident now aren't you! Go get your screw driver! I'll wait here! Take out this screw! You have to turn it left....
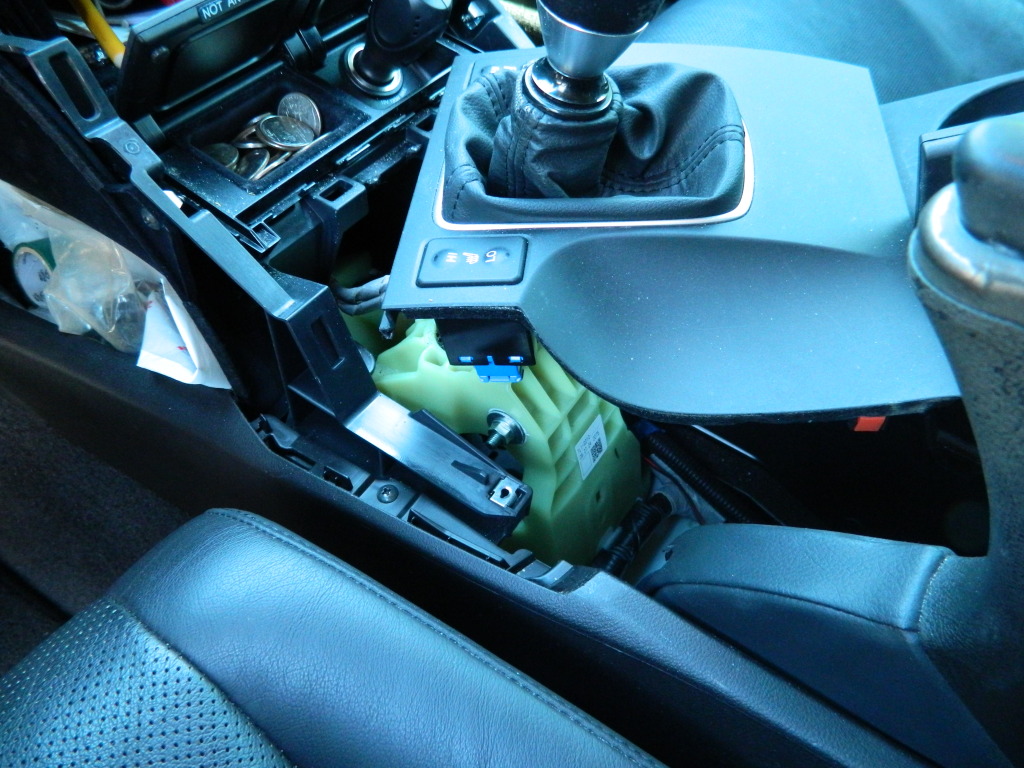
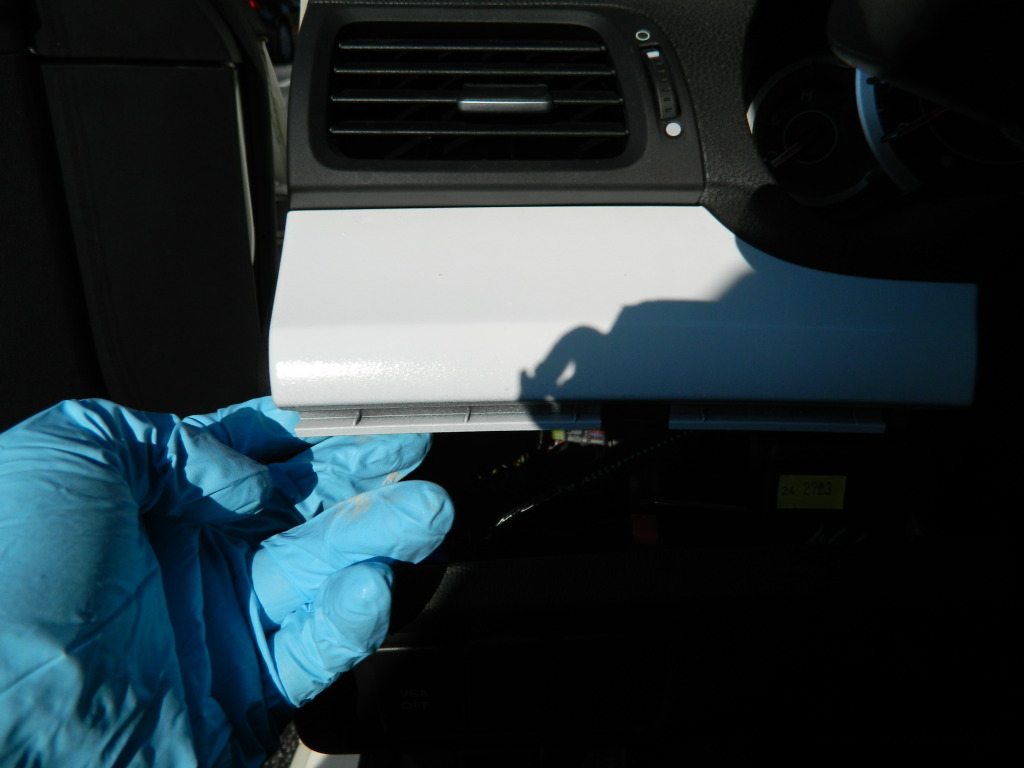
Now the scariest part of the removal happens here!!!! Don't shit your panties, but you are going to take two hands and pull straight up on the door to your center console! I know you feel like you have HULK strength right now, but you aren't going to break it! Just pull straight up and tell yourself ssjoeboe9 is the shit and wouldn't let you fuck up your car!
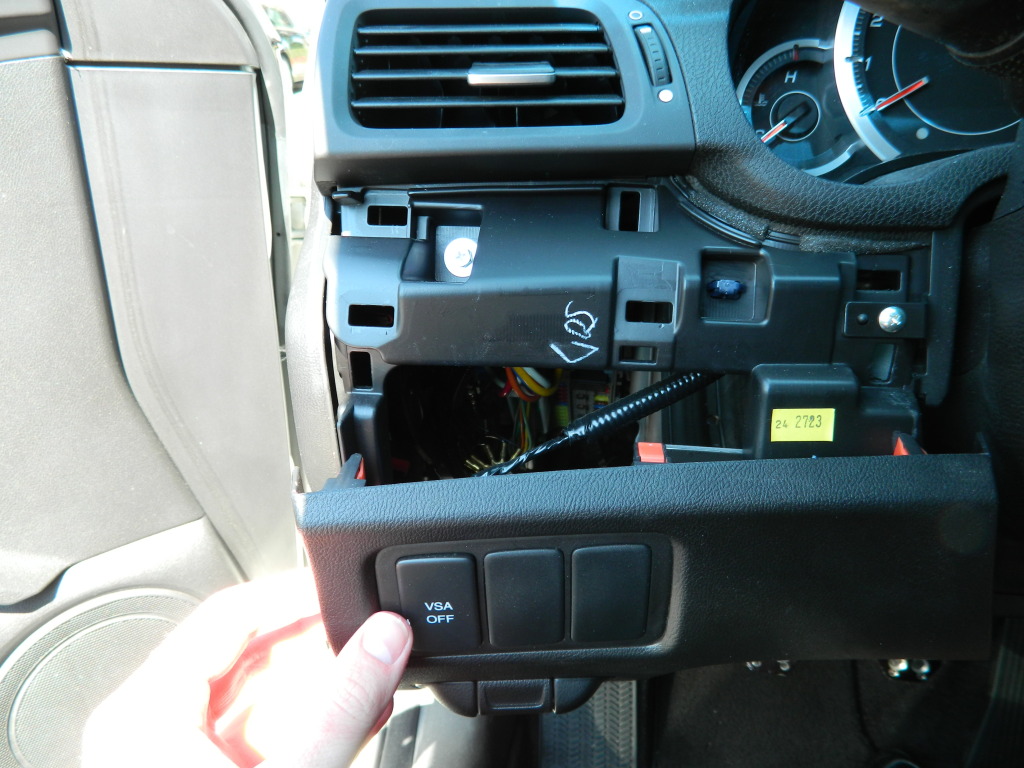
PWNED!!!! Go ahead and say fuck you fucking trim piece, I owned your ass! Time to get your screw driver out again, and take these 2 screws out!!
Here is the driver's side
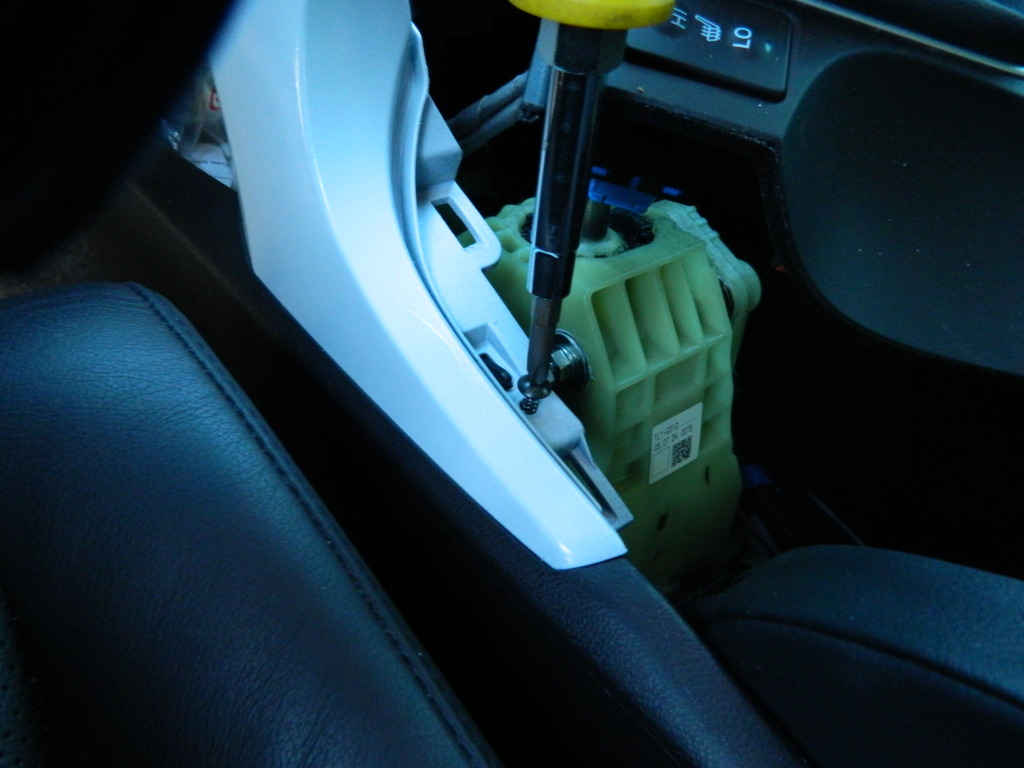
Now, all you have to do is pull up a little bit on the tab that held the screw in place, and pull outward at the same time. Do the same thing to the driver side! AND NO, there is only ONE screw holding the driver side center piece in place. It'll look like this after you remove it!
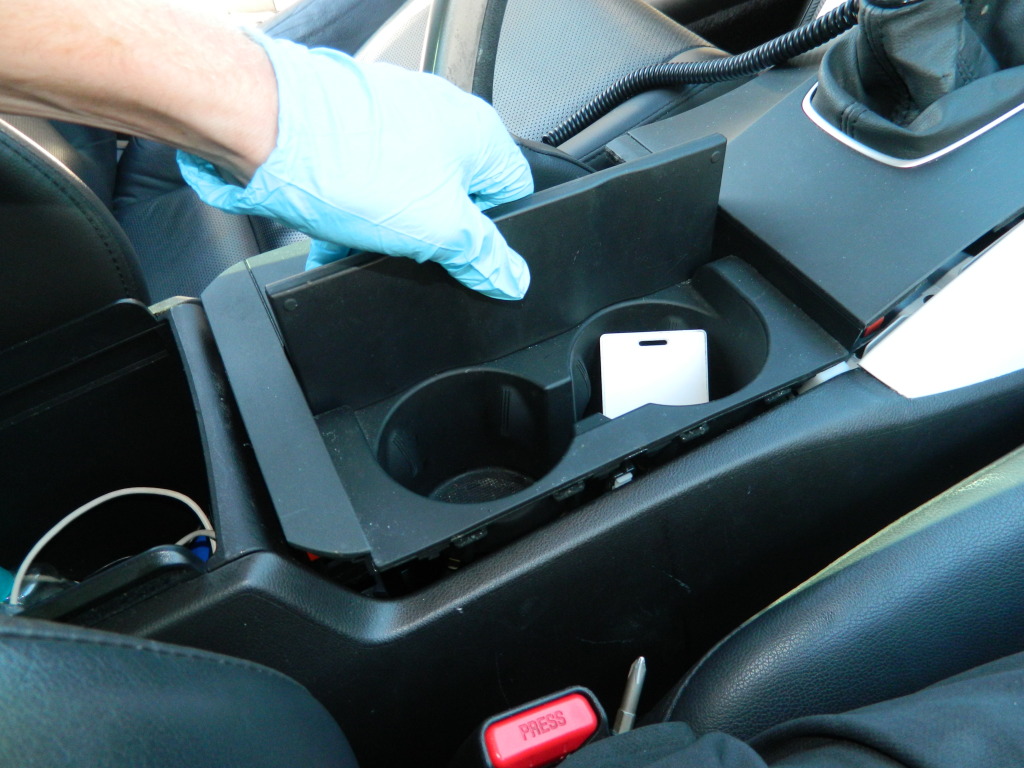
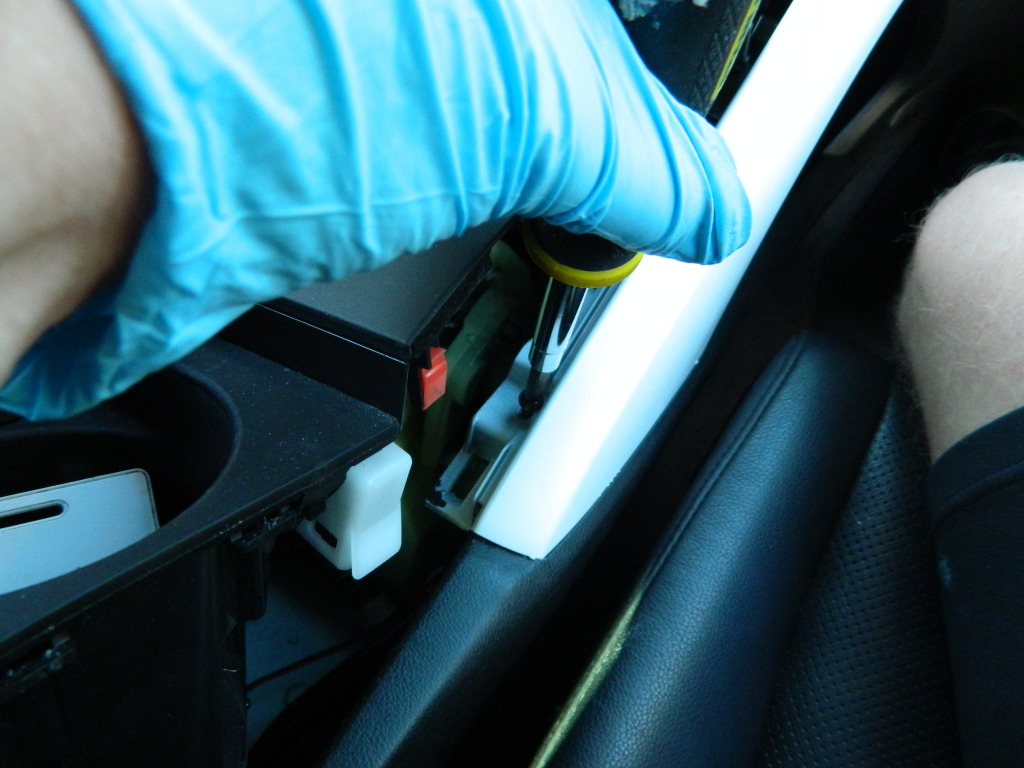
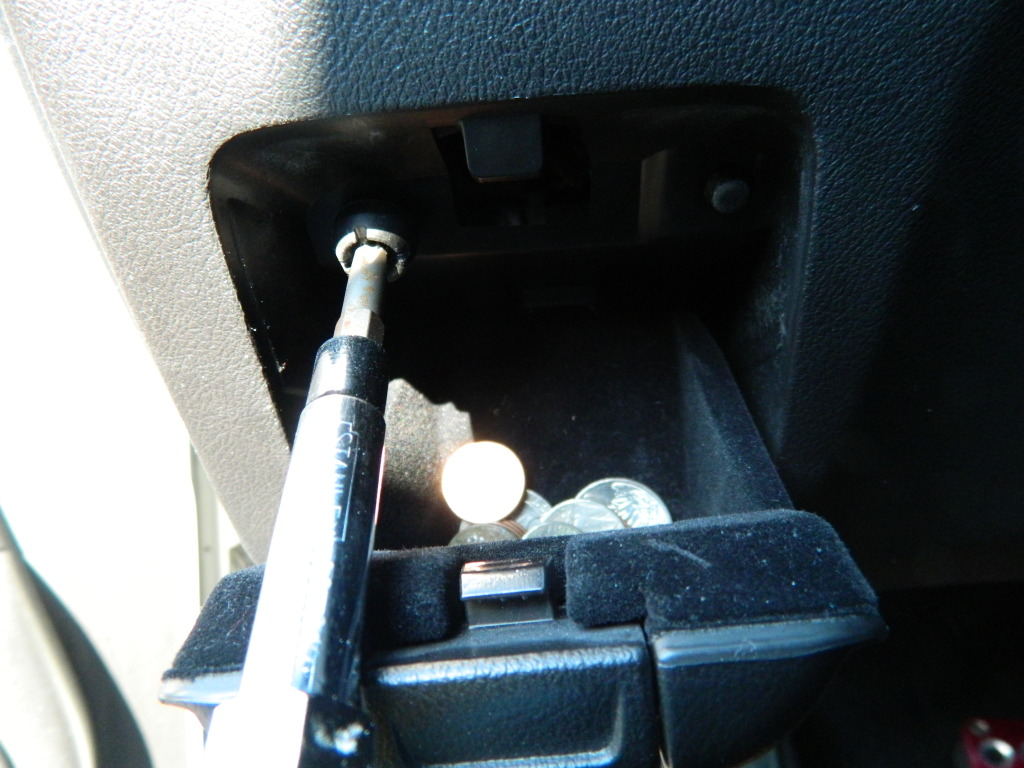
See this shit was easier than you thought!! Open up your change holder on the driver side and remove that little piece of shit screw!
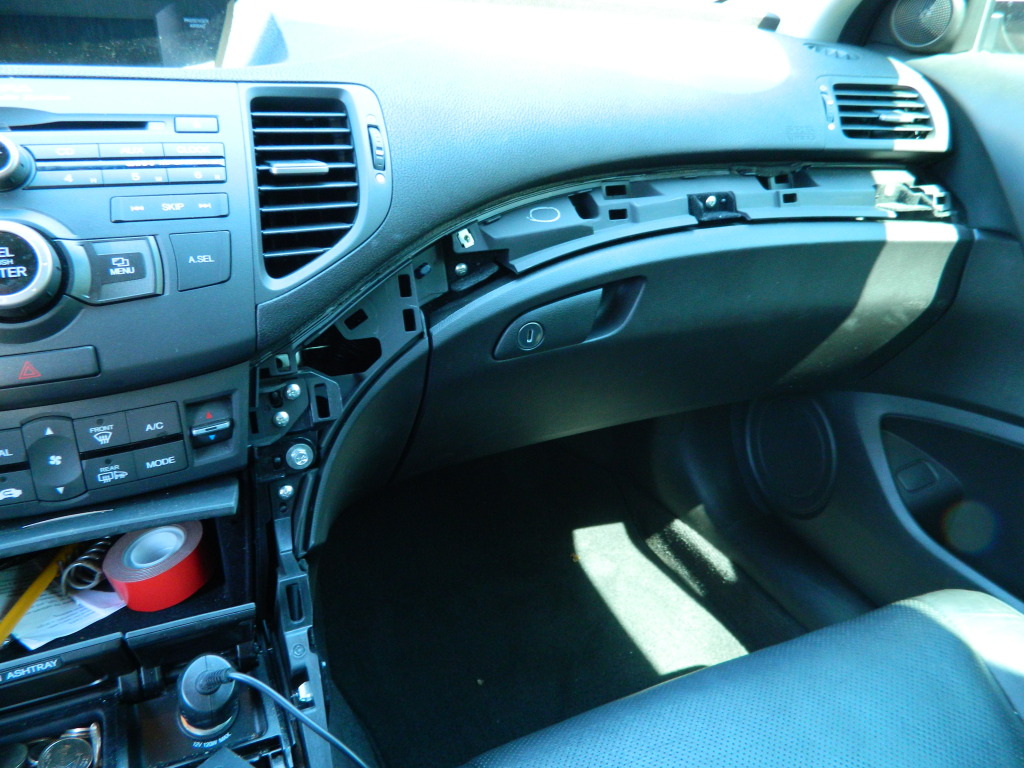
Now just pull down the plastic covering, you can grab underneath and pull straight down, you don't need to pull it all the way out (what a relief, I hate when you have to pull it out completely!)
Now you have the leverage to pull out your small trim piece, grab underneath and use some of the HULK strength you had earlier!
That's it brahh... you can officially rip apart your $30,000 + Acura without breaking it!
Let's begin
Let's start with something you know very well. Opening your glove box ( which no one actually uses for gloves, I think it should be called gun safe, trojan dispenser, bob marley box, or something to that nature)
Cool, you did it fucker! This is the easiest one. Now take two hands and grasp underneath the trim and pull straight outward toward your body. Like this...
Hahaha damn, you're feeling confident now aren't you! Go get your screw driver! I'll wait here! Take out this screw! You have to turn it left....
Now the scariest part of the removal happens here!!!! Don't shit your panties, but you are going to take two hands and pull straight up on the door to your center console! I know you feel like you have HULK strength right now, but you aren't going to break it! Just pull straight up and tell yourself ssjoeboe9 is the shit and wouldn't let you fuck up your car!
PWNED!!!! Go ahead and say fuck you fucking trim piece, I owned your ass! Time to get your screw driver out again, and take these 2 screws out!!
Here is the driver's side
Now, all you have to do is pull up a little bit on the tab that held the screw in place, and pull outward at the same time. Do the same thing to the driver side! AND NO, there is only ONE screw holding the driver side center piece in place. It'll look like this after you remove it!
See this shit was easier than you thought!! Open up your change holder on the driver side and remove that little piece of shit screw!
Now just pull down the plastic covering, you can grab underneath and pull straight down, you don't need to pull it all the way out (what a relief, I hate when you have to pull it out completely!)
Now you have the leverage to pull out your small trim piece, grab underneath and use some of the HULK strength you had earlier!
That's it brahh... you can officially rip apart your $30,000 + Acura without breaking it!

The following 12 users liked this post by ssjoeboe9:
4dr4bangrAccord (05-20-2012),
apinwp09GBTSX (05-20-2012),
benben01 (05-20-2012),
ed_423 (05-20-2012),
icu2tsx (06-07-2012),
and 7 others liked this post.
 05-20-2012, 06:46 PM
#3
ROTAREDOM
Thread Starter
haha just cause you have 1 bumper removal doesn't mean shit mayne!
I think this is my 4th DIY... get on my level.
Also, I ripped off my CF wrap cause I was having problems so I was gunna take it apart anyways and thought I would help the community out. Next DIY is roof spoiler.. I hope lol
I think this is my 4th DIY... get on my level.
Also, I ripped off my CF wrap cause I was having problems so I was gunna take it apart anyways and thought I would help the community out. Next DIY is roof spoiler.. I hope lol
05-20-2012, 06:58 PM
#4
haha just cause you have 1 bumper removal doesn't mean shit mayne!
I think this is my 4th DIY... get on my level.
Also, I ripped off my CF wrap cause I was having problems so I was gunna take it apart anyways and thought I would help the community out. Next DIY is roof spoiler.. I hope lol
I think this is my 4th DIY... get on my level.
Also, I ripped off my CF wrap cause I was having problems so I was gunna take it apart anyways and thought I would help the community out. Next DIY is roof spoiler.. I hope lol
05-20-2012, 07:30 PM
#5
ROTAREDOM
Thread Starter
It looks like a shitty spoiler at the moment, with one side HARD! My roommates haven't been too happy with my recent "smelly" activities occurring at the apartment. Hopefully after everything is glassed I will be able to use some body filler and make it look perfect. We will see how it turns out. To stay on topic... this is my interior trim removal thread. Please move all other shitty comments to my development thread!

Trending Topics
05-20-2012, 08:27 PM
#8
ROTAREDOM
Thread Starter
No problemo guys!!
If you got any question's post em here. OR if you need inspiration I can find a quote for you!
If you got any question's post em here. OR if you need inspiration I can find a quote for you!
 05-20-2012, 08:42 PM
#10
SeeYou2Crew #2
btw joe, you have a shit load of quarters in that "not an astray" area. i used to have some, but not nearly as many!
and awesome, next up, remove cup holder area and make a cup holder led illumination!
and awesome, next up, remove cup holder area and make a cup holder led illumination!
05-20-2012, 09:01 PM
#11
ROTAREDOM
Thread Starter
WTF?! Cup holder LED?! are you serious?! What fucking color bro?! Throw up some photos and I'll make it look legit!

The following users liked this post:
ssjoeboe9 (05-20-2012)
05-20-2012, 09:55 PM
#13
 05-20-2012, 10:05 PM
#14
ROTAREDOM
Thread Starter
Nice, I'll accept this post on my thread since people might be concerned with the differences in M/T and Auto. Who wants to post steering wheel trim removal??
 05-21-2012, 09:39 AM
#17
ROTAREDOM
Thread Starter
Well I figured a normal DIY was boring. Plus I always felt more confident when I came to a difficult part of the DIY and someone has already said don't worry, it'll feel like you are going to break it, but you wont. But we have ALLLL been at a point during a DIY and we say to ourselves " Why does it not say this part will be hard? Why does it show one picture and its removed? Is it supposed to bend this far back? Was the snap supposed to happen?" So I figured I would walk you through it as if I was standing over your shoulder saying, yeah brooo it's supposed to be like that.
05-21-2012, 09:50 AM
#18
Everyday I'm rofling
Well I figured a normal DIY was boring. Plus I always felt more confident when I came to a difficult part of the DIY and someone has already said don't worry, it'll feel like you are going to break it, but you wont. But we have ALLLL been at a point during a DIY and we say to ourselves " Why does it not say this part will be hard? Why does it show one picture and its removed? Is it supposed to bend this far back? Was the snap supposed to happen?" So I figured I would walk you through it as if I was standing over your shoulder saying, yeah brooo it's supposed to be like that.
The following users liked this post:
MC MiYoung3269 (05-21-2012)
05-21-2012, 11:56 AM
#19
Well I figured a normal DIY was boring. Plus I always felt more confident when I came to a difficult part of the DIY and someone has already said don't worry, it'll feel like you are going to break it, but you wont. But we have ALLLL been at a point during a DIY and we say to ourselves " Why does it not say this part will be hard? Why does it show one picture and its removed? Is it supposed to bend this far back? Was the snap supposed to happen?" So I figured I would walk you through it as if I was standing over your shoulder saying, yeah brooo it's supposed to be like that.
 05-21-2012, 04:46 PM
#21
lol @ stak's comments 
but srsly good look to joe for putting the diy up there. it is always 100% moar better when you don't feel like christopher columbus discovering america when doing the diy's.
but srsly good look to joe for putting the diy up there. it is always 100% moar better when you don't feel like christopher columbus discovering america when doing the diy's.
The following users liked this post:
ssjoeboe9 (05-21-2012)
05-21-2012, 05:20 PM
#22
ROTAREDOM
Thread Starter
05-22-2012, 08:29 AM
#24
ROTAREDOM
Thread Starter
06-05-2012, 01:22 PM
#25
CR
Join Date: Dec 2006
Location: Louisville, KY
Age: 38
Posts: 375
Likes: 0
Received 16 Likes
on
15 Posts
Thanks for pointing me in this direction! My wife has already scratched up her interior on her SE a bit. Looking to wrap the center with CF around the cup holders, shifter, coin etc.
Is it hard to wrap the dip to the left of the shifter under the e-brake? First time using a CF Wrap.
Is it hard to wrap the dip to the left of the shifter under the e-brake? First time using a CF Wrap.
06-05-2012, 04:41 PM
#26
ROTAREDOM
Thread Starter
Thanks for pointing me in this direction! My wife has already scratched up her interior on her SE a bit. Looking to wrap the center with CF around the cup holders, shifter, coin etc.
Is it hard to wrap the dip to the left of the shifter under the e-brake? First time using a CF Wrap.
Is it hard to wrap the dip to the left of the shifter under the e-brake? First time using a CF Wrap.
06-09-2012, 05:03 PM
#27
CR
Join Date: Dec 2006
Location: Louisville, KY
Age: 38
Posts: 375
Likes: 0
Received 16 Likes
on
15 Posts
Got the main part done, looks great. Now for the ash tray/change holder thing and the lighter. Is their only one screw that needs to be taken out to remove that? Or is it the trim around it and the screw?
 06-10-2012, 12:53 PM
#30
ROTAREDOM
Thread Starter
Dude sweet! Glad I could help you guys out!!
08-04-2012, 02:55 PM
#31
Racer
I dropped gift card into the slot on the right side of the parking brake.
would i be able to just lift the door of the cup holder to get to it? or would i need to take the other trim off first?
would i be able to just lift the door of the cup holder to get to it? or would i need to take the other trim off first?
08-04-2012, 05:31 PM
#32
ROTAREDOM
Thread Starter
You will be good to go man. No need to take the trim off. Good luck with it, if you are in there already might as well install some led footwell lights and hook up the wires to the center.
 10-22-2012, 02:23 PM
#34
Burning Brakes
I think you have to search for Honda Spirior. The units that I see everyone have has the Honda logo on it and I don't really like it.
I don't know if you can trust this website but I like the layout on this unit a lot more. Do it for the forum brave one!
http://www.cargpsnavi.com/honda-spir...va8ika3grjt284
I don't know if you can trust this website but I like the layout on this unit a lot more. Do it for the forum brave one!
http://www.cargpsnavi.com/honda-spir...va8ika3grjt284
 10-26-2012, 09:44 AM
#38
ROTAREDOM
Thread Starter
no problem!!!!!!!!!!
 12-17-2012, 03:33 PM
#40
Everyday I'm rofling
^ I want so badly.