
DIY: Trim Removal
 05-02-2014, 07:42 AM
#41
Hey man, bit of a wiring noob here.
Firstly, AWESOME write up will use this for sure when I take out my trim to either CF wrap or plasti dip..
I wouldn't mind doing the LED cupholder thing also, where would I wire that up to for it to be on with the headlights?
Firstly, AWESOME write up will use this for sure when I take out my trim to either CF wrap or plasti dip..
I wouldn't mind doing the LED cupholder thing also, where would I wire that up to for it to be on with the headlights?
 05-02-2014, 09:37 AM
#42
ROTAREDOM
Thread Starter
So for the cup holder thing I had planned on cutting a halo ring, kinda like BMW style headlights around each cup holder. So you would have to cut the plastic and the rubber lining. I would have glued plexiglass underneath the plastic piece and then used the $20 LED lights you can buy at Autozone and wire it the same way I did the footwell. The light should be plenty to shine up through the cup holder.
The reason I didn't ever do it was because I know that cutting rubber is difficult, especially if there are no straight lines.
Good luck though, I would love to see how yours turns out!
05-02-2014, 09:42 AM
#43
TSX AMG Type //M i-VVT

i lol everytime i read this guide.
The following users liked this post:
ssjoeboe9 (05-02-2014)
05-02-2014, 10:22 AM
#44
TSX AMG Type //M i-VVT
The following users liked this post:
ssjoeboe9 (05-02-2014)
05-02-2014, 10:45 AM
#45
ROTAREDOM
Thread Starter
Damn, I didn't know kits even existed!
Check and see how the fitment is, I'm def gunna buy some red ones if they fit!
Check and see how the fitment is, I'm def gunna buy some red ones if they fit!
05-02-2014, 10:53 AM
#46
ROTAREDOM
Thread Starter
Actually... Im gunna buy this kit lol it looks sweet!
05-02-2014, 11:04 AM
#47
TSX AMG Type //M i-VVT
3 inch should fit perfect. Gonna order it.
05-02-2014, 02:22 PM
#48
ROTAREDOM
Thread Starter
I think the ID of the cup holder is exactly 3in so Im prolly gunna go with the 2 3/4" disc. That'll allow 1/8" clearance all the way around and some extra room for illumination.
Buying now!
Buying now!
05-02-2014, 02:24 PM
#49
TSX AMG Type //M i-VVT
^^ Good idea, i'll go with that also probably.
Also, where's a good place to get switched 12v that comes on with the headlights?
Also, where's a good place to get switched 12v that comes on with the headlights?
05-02-2014, 02:38 PM
#50
ROTAREDOM
Thread Starter
My plan is to just hook it up to the 12V port that goes to the center console. I don't mind that it will turn on automatically when the car starts. Not only do I like the red LED footwell for my color scheme, it's also the lowest frequency in the visible light spectrum so it's the least bothersome at night. So for me I'm just gunna let it glow all the time. It's actually gunna look pretty sweet when you close the lid too haha. I'm excited! Good find!
05-02-2014, 02:53 PM
#51
TSX AMG Type //M i-VVT
Hmm yeah maybe i'll leave it on all the time. Its gonna look so cool when bottles are lit up at night lol.
05-03-2014, 01:49 AM
#52
Sooo I wired my LED footwell lights directly to one of the ports in the center console. Youll see it when you take the trim pieces off. I didn't splice anything, just kinda shoved the wires in the back end of cigarette port. It just needs to have a firm connection. The lights always turn on as soon as my car turns on. I left extra wiring in case I ever wanted to add a switch, but I never did.
So for the cup holder thing I had planned on cutting a halo ring, kinda like BMW style headlights around each cup holder. So you would have to cut the plastic and the rubber lining. I would have glued plexiglass underneath the plastic piece and then used the $20 LED lights you can buy at Autozone and wire it the same way I did the footwell. The light should be plenty to shine up through the cup holder.
The reason I didn't ever do it was because I know that cutting rubber is difficult, especially if there are no straight lines.
Good luck though, I would love to see how yours turns out!
Or shall I just wait for another awesome DIY?
 05-03-2014, 06:37 AM
#53
TSX AMG Type //M i-VVT
lol you should have read the above posts.
05-03-2014, 10:10 PM
#55
Everyday I'm rofling
Those look cool! When it is completely dark outside any small amount of light in the car is really noticeable. I would imagine these to be too bright out of the box without wiring in a resistor.
05-04-2014, 10:10 AM
#56
ROTAREDOM
Thread Starter
05-04-2014, 10:11 AM
#57
ROTAREDOM
Thread Starter
I'll take pictures when I install mine, I'll let yall know how the light output is.
05-04-2014, 10:15 AM
#58
TSX AMG Type //M i-VVT
I'll do the same also. And you are getting red right? I'll be doing blue.
05-04-2014, 10:19 AM
#59
ROTAREDOM
Thread Starter
 guess he ships from FL.
05-07-2014, 09:43 PM
guess he ships from FL.
05-07-2014, 09:43 PM
#61
ROTAREDOM
Thread Starter
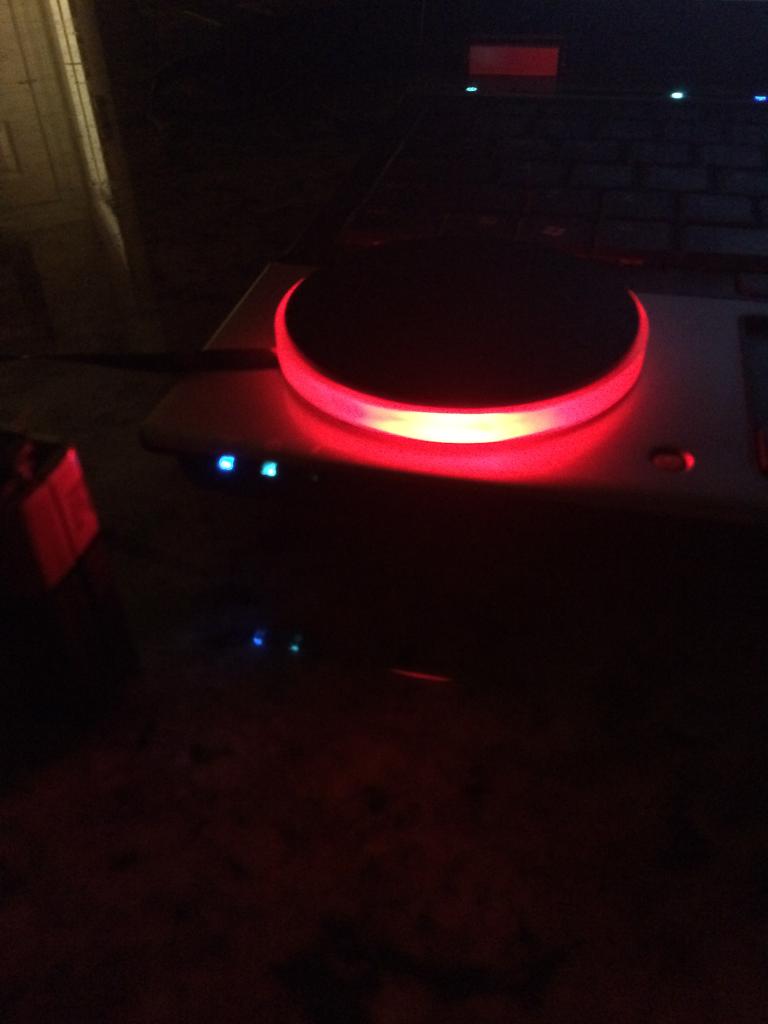
Blew a fuse trying to test this thing out lol but here is what it looks like from the consumer perspective.

The following users liked this post:
iCrap (05-07-2014)
05-07-2014, 09:53 PM
#62
TSX AMG Type //M i-VVT
Mine should be here Monday and i'll prob install on Wednesday and get pics.
05-08-2014, 09:50 AM
#63
ROTAREDOM
Thread Starter
Alright, so I ended up wiring the new LED discs to my existing LED footwell lights instead of trying to plug directly into the 12V source. Seemed to work out better this time lol
Here is a quick guide..
1. Pull up on your cup holder door so that you can get access to the entire trim piece.
2. You'll notice that the cup holder is lined with rubber and then fastened to the hard plastic with tabs. Go ahead and remove the cotton filter from the underneath.
3. There is a small gap in the hard plastic where you will run your wire from the hole you make in the rubber.
4. From the back side I used a nail to kinda make a small hill where it would puncture the rubber on the top side and used a permanent marker to kinda mark the spot.
5. Then I got a 1/4" drill bit and made a hole at the locations I marked. It'll seem like a way bigger hole then you need but when you take the bit out of the hole the rubber kinda closes around itself.
6. Come in from the back with needle nose pliers and grab the ends of the disc wires and pull it thru.

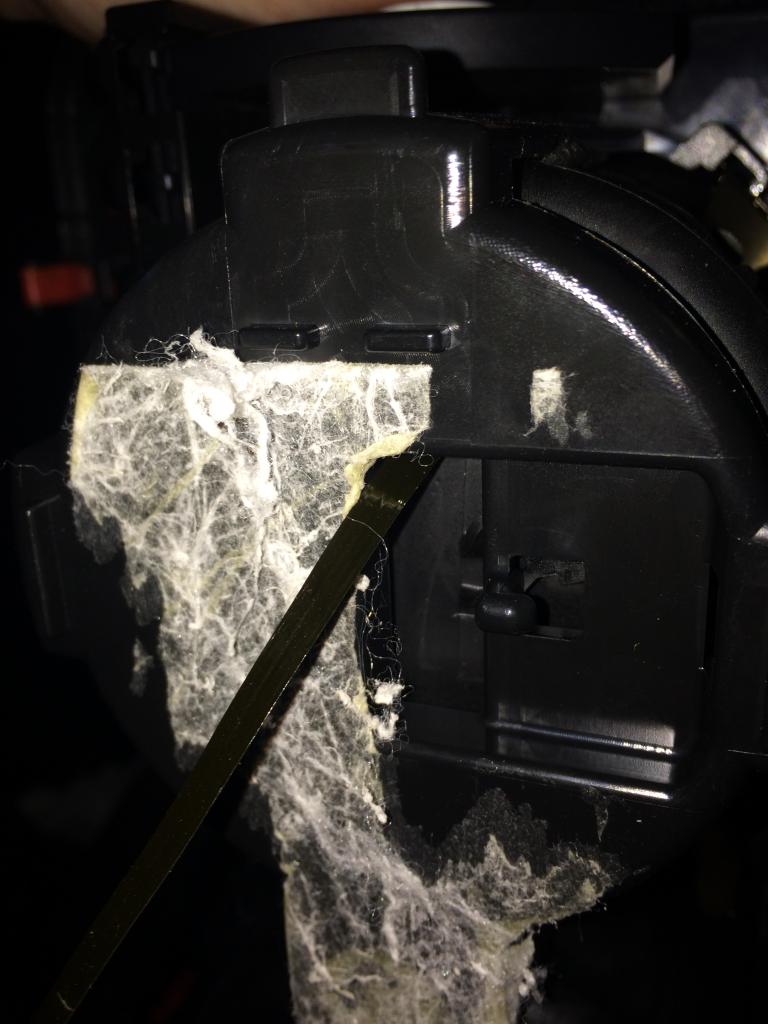
7. When I pulled both disc wires through I combined both the red wires and then the black wires together and joined them with my existing LED footwell lights.
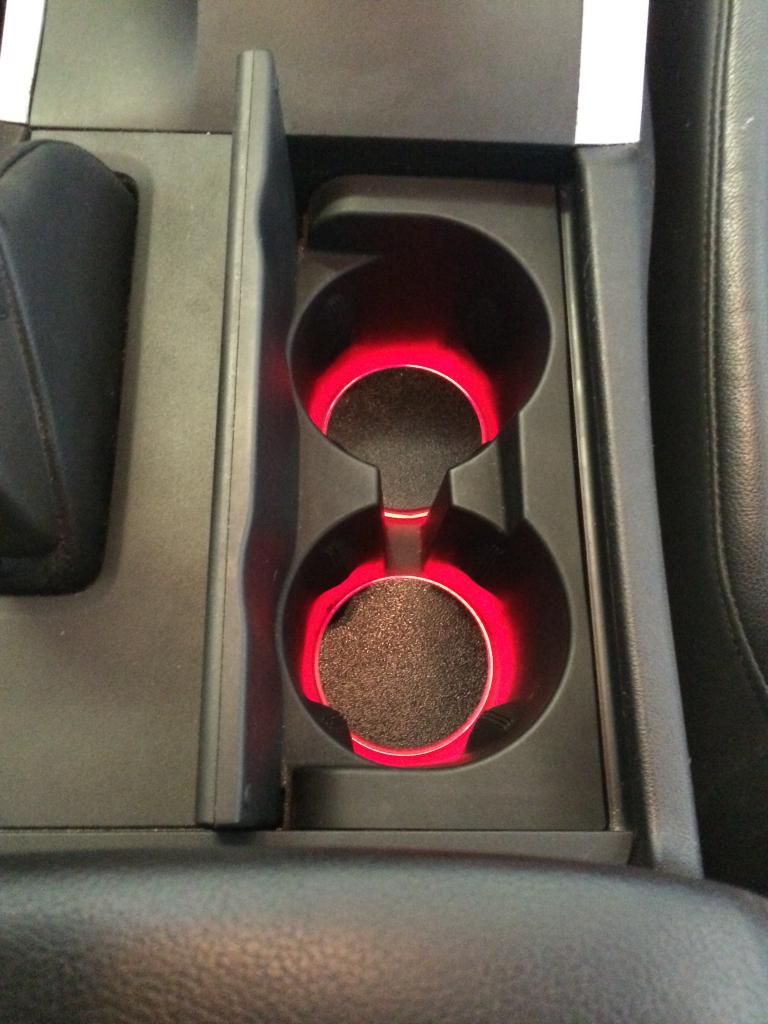
Here are the end results... looks pretty clean! Matches my footwell and really not very bothersome. I have 30% tint and you can't see them from the outside of the car. Ill let yall know tonight if you can see them at nighttime.
Here is a quick guide..
1. Pull up on your cup holder door so that you can get access to the entire trim piece.
2. You'll notice that the cup holder is lined with rubber and then fastened to the hard plastic with tabs. Go ahead and remove the cotton filter from the underneath.
3. There is a small gap in the hard plastic where you will run your wire from the hole you make in the rubber.
4. From the back side I used a nail to kinda make a small hill where it would puncture the rubber on the top side and used a permanent marker to kinda mark the spot.
5. Then I got a 1/4" drill bit and made a hole at the locations I marked. It'll seem like a way bigger hole then you need but when you take the bit out of the hole the rubber kinda closes around itself.
6. Come in from the back with needle nose pliers and grab the ends of the disc wires and pull it thru.
7. When I pulled both disc wires through I combined both the red wires and then the black wires together and joined them with my existing LED footwell lights.
Here are the end results... looks pretty clean! Matches my footwell and really not very bothersome. I have 30% tint and you can't see them from the outside of the car. Ill let yall know tonight if you can see them at nighttime.
05-08-2014, 08:38 PM
#64
Alright, so I ended up wiring the new LED discs to my existing LED footwell lights instead of trying to plug directly into the 12V source. Seemed to work out better this time lol
Here is a quick guide..
1. Pull up on your cup holder door so that you can get access to the entire trim piece.
2. You'll notice that the cup holder is lined with rubber and then fastened to the hard plastic with tabs. Go ahead and remove the cotton filter from the underneath.
3. There is a small gap in the hard plastic where you will run your wire from the hole you make in the rubber.
4. From the back side I used a nail to kinda make a small hill where it would puncture the rubber on the top side and used a permanent marker to kinda mark the spot.
5. Then I got a 1/4" drill bit and made a hole at the locations I marked. It'll seem like a way bigger hole then you need but when you take the bit out of the hole the rubber kinda closes around itself.
6. Come in from the back with needle nose pliers and grab the ends of the disc wires and pull it thru.


7. When I pulled both disc wires through I combined both the red wires and then the black wires together and joined them with my existing LED footwell lights.
Here are the end results... looks pretty clean! Matches my footwell and really not very bothersome. I have 30% tint and you can't see them from the outside of the car. Ill let yall know tonight if you can see them at nighttime.

Here is a quick guide..
1. Pull up on your cup holder door so that you can get access to the entire trim piece.
2. You'll notice that the cup holder is lined with rubber and then fastened to the hard plastic with tabs. Go ahead and remove the cotton filter from the underneath.
3. There is a small gap in the hard plastic where you will run your wire from the hole you make in the rubber.
4. From the back side I used a nail to kinda make a small hill where it would puncture the rubber on the top side and used a permanent marker to kinda mark the spot.
5. Then I got a 1/4" drill bit and made a hole at the locations I marked. It'll seem like a way bigger hole then you need but when you take the bit out of the hole the rubber kinda closes around itself.
6. Come in from the back with needle nose pliers and grab the ends of the disc wires and pull it thru.
7. When I pulled both disc wires through I combined both the red wires and then the black wires together and joined them with my existing LED footwell lights.
Here are the end results... looks pretty clean! Matches my footwell and really not very bothersome. I have 30% tint and you can't see them from the outside of the car. Ill let yall know tonight if you can see them at nighttime.
Although, I do want to install footwell lights also so is there a tutorial somewhere?
Thanks man!
05-08-2014, 10:55 PM
#65
TSX AMG Type //M i-VVT
There is a 12v source that goes into the arm rest thing, easiest thing would be to tap into that.
I dunno how he did his footwell lights but you can tap into the existing under-dash lights as well for that.
I dunno how he did his footwell lights but you can tap into the existing under-dash lights as well for that.
05-09-2014, 03:34 PM
#66
ROTAREDOM
Thread Starter
I actually didn't splice into the 12v source, I just kinda folded the ends of the wires to make a "thicker" wire and pushed it into the corresponding positive and negative terminals. When you look you'll see the copper pieces that it needs to touch. I'm sure Icrap can take a pic when he does his. This way if you need to remove anything you've never spliced the original wires.
05-12-2014, 02:54 PM
#67
TSX AMG Type //M i-VVT
Super easy install. 5 minutes max...


The following 2 users liked this post by iCrap:
Ridiqueulous (05-12-2014),
ssjoeboe9 (05-12-2014)
05-12-2014, 07:37 PM
#68
TSX AMG Type //M i-VVT
 05-12-2014, 08:06 PM
#69
Everyday I'm rofling
icrap, put a water bottle on it and take a picture!!!
05-12-2014, 08:44 PM
#70
TSX AMG Type //M i-VVT
ill take one tomorrow. shitty phone cam can't capture it.
08-30-2014, 12:45 PM
#72
Instructor

I am interested in doing this mod- can anyone point out to me which wire I need to tap into if I want to have this light dimmed when headlight is on?
Alternative option is- if no splicing is required- where is this copper piece for 12v?
Thanks!
Alternative option is- if no splicing is required- where is this copper piece for 12v?
Thanks!
08-30-2014, 01:59 PM
#73
TSX AMG Type //M i-VVT
08-30-2014, 03:24 PM
#75
ROTAREDOM
Thread Starter
You have to make a hole in the rubber of your cup holder but that's it. No wire splicing necessary.
08-30-2014, 10:59 PM
#76
TSX AMG Type //M i-VVT
You don't need to drill the hole since its just rubber... you can cut a little hole with an xacto knife or something.
 08-30-2014, 11:32 PM
#78
TSX AMG Type //M i-VVT
I bought the 3 inch which is a perfect fit, but joe with with the slightly smaller size if I remember correctly.
http://www.ebay.com/itm/290837889369
http://www.ebay.com/itm/290837889369
08-31-2014, 08:15 PM
#80
ROTAREDOM
Thread Starter
Yeah, I went with 2 3/4" so that I had an even 1/8" clearance and more reflective light in the cup. I think either size looks good though.