When you click on links to various merchants on this site and make a purchase, this can result in this site earning a commission. Affiliate programs and affiliations include, but are not limited to, the eBay Partner Network.
Alright, I'm doing this for Utah (our first turbo Cu2 in North America). Enjoy!
From your Wideband Controller you should have an Analog Output, on my particular controller (UEGO, the one that came with my Prosport Evo Wideband Gauge) it came with a wire harness for analog out. In the wire bundle I had a green, brown, and black wire. Green= narrow band (we won't be touching this wire) Brown= Wideband, and Black=ground.
Check your wiring diagram for which wires you will need. Your wideband wire will be going to your ECU (pin # A24). And your Ground wire will obviously be grounded somewhere on your vehicle.
My gauges are located in the center pocket area of my dash
So the most convenient place to route my wires back into the engine bay is located beneath the passenger side footwell carpet. You will see the sunroof drain tube and a convenient place to cut a hole and run your wires.
Now you run your analog out wire through this hole and it will look something like this...
I bought some 18 gauge wire (doesn't necessarily have to be 18) and extended my ground wire and added a 1/4" ring terminal to the end. I grounded on the passenger side near the washing fluid. There is already a ground at this location
Extend your Wideband wire the length needed to reach "ECM/PCM" This is your ECU unit located in your engine bay right next to your Air Intake Box.
I found it easier to detach my intake tube and remove the top cover of the intake box to reach the correct ECU Connector. The one you want to detach is last one, the hardest one to reach, and the closest to the ground when viewing from up top. This is ECU connector A. When you take it out and look at where you have disconnected you will see a "square embossed" on the ECU side, this denotes connector A.
I do not have pictures of the front, but the color of the plastic ECU connectors will be WHITE!!! This also denotes you have the correct terminal. The pinout is shown below. You want to use ECU pin #A24. This is ELD (Electrical Load Detector) From the back the wire will be Blue and Black. It's also next to empty slot, and then a red and yellow wire. Easy to Find.
Next, use Hondata's help guide to remove the pin ( honestly it's pretty difficult) and if you can get your hands on a new pin, it would be even better)
It'll look something like this when you get it out. Not very clear, but you understand.
I couldn't detach the wire from the base of the pin completely so I ended up cutting it slightly to remove it. I then stripped a small section of the wideband input I had extended to the ECU location and crimped my wire into place ensuring i had good contact with the entire metallic base of the pin (the white part, not the brass) It looked like this when I finished. Sorry for the focus, stupid iphone.
Then insert the pin and push the white plastic surround back into place to lock the pins (this is mentioned in the hondata help link. Reinstall anything that you have previously taken off.
I recommend that you thoroughly check that your connections are secure and water tight. Use heat shrink and try to ensure that your wires are mounted in a manner that if water does get on them that the water would run down to section that IS NOT where you have extended the wire. GOOD LUCK.
Last edited by ssjoeboe9; Oct 27, 2014 at 09:53 PM.
Not sure about the controller. I didn't even take a 2nd look at it. Just whatever came with the Wideband kit I bought.
If you used a separate pin then you should have no problem re-installing the OEM ELD wire. I reused the pin, so maybe for me it might be a little more difficult. I don't plan on going back to stock so it will be left that way haha
I wonder - I don't think that the car would be able to pass emissions in the future right? or can the wideband provide the correct voltage for the secondary o2 sensor?
I wonder - I don't think that the car would be able to pass emissions in the future right? or can the wideband provide the correct voltage for the secondary o2 sensor?
Thanks Joboe, what do we have to do on the flash pro to show the wideband readings ? and will it still show voltage on the flash pro data ?
Oh that's a good idea add a resistor if needed, I need to start working on passing the emissions test in april
Last edited by UTAH TSX; Oct 28, 2014 at 04:09 PM.
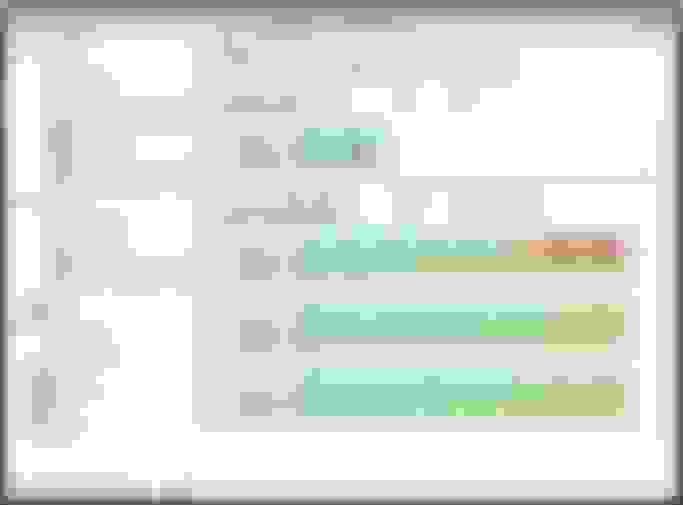
Sorry guys, I should have walked you through how to setup your Flash Pro software so you can see your wideband. See below..
In Flashpro window select Closed Loop on the left hand side. Then from the dropdown menu for Wideband input and select ELD.
You will need to upload the calibration to your car since you have made a change. Once completed you can create a display that looks something like this..
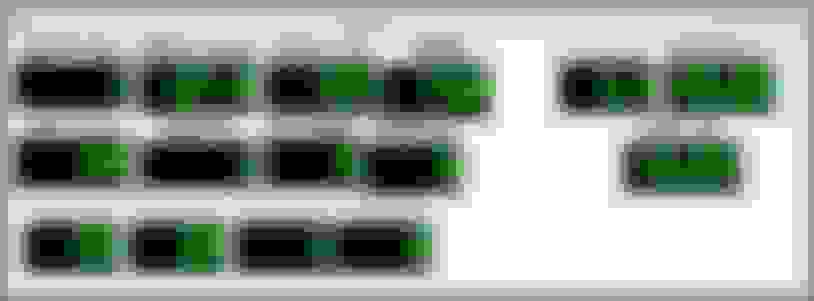
As per iselfdevi's request I've posted a picture of the ECM/PCM connector with the primary A/F sensor pin-out (Connector C- pins 29 and 30).
I'd like to mention that in our previous thread we were speaking about the primary sensor being narrowband, and after further investigation, I've found out that the OEM primary sensor IS indeed a wideband signal to the ECU. You can see this by looking at the signal column. I would still very much recommend replacing your secondary O2 sensor with an aftermarket wideband for boosted setups for extra security.
As well, here is the link to the previous thread where we had a conversation about using an aftermarket sensor to send/replace OEM primary A/F sensor signal.
i was wondering. Since you have both the stock primary and aftermarket wideband installed, can you compare the signals from both sensors? Im curious as to how accurate the stock primary o2 is.
If the oem primary o2 sensor is a wideband then you wouldnt have to connect it to the ELD pin. You can just connect it to the C29 pin. This would be better for me since I wouldn't have to disable anything for an aftermarket wideband sensor. This would make passing emissions possible.