
E-003: DIY OEM Deck Spoiler Install (Drilling & 3M adhesive)

Thread Starter
Instructor
Joined: Nov 2006
Posts: 172
Likes: 5
From: Northern Virginia
E-003: DIY OEM Deck Spoiler Install (Drilling & 3M adhesive)
Well been reading this RL forum for almost a year now and I haven't seen anyone post a thread with a step by step (photo) instruction for installing a deck spoiler. I couldn't decide if I was going to drill and use 4 bolts to attach or just use the 3M adhesive method w/o drilling. I have read of several owners just using the 3M adhesive to do the install w/o drilling. I think everyone who did it this way, was happy with their results. No gaps and didn't have to break out the drill either. My biggest concern was if it would hold up 3-5 years from now. I keep my cars for a long while. At the the same time, some owners who have had it installed at the dealerships have complained about gaps. Stating that the OEM adhesive on the spoiler was not strong enough, even with drilling and securing it with 4 bolts. This got me thinking....why not use the 3M adhesive & drill it and secure it with the 4 bolts. Why not have the best of both ways,huh?
The next step for me to find a deal on ebay for the spoiler, and after searching I found a deal for an OEM black deck spoiler. I got it for $240.00 with free shipping. The seller gave me free shipping b/c I mentioned that I bought the wood steering before from them. Anyway, this weekend was the weekend and I tried to photo document every step. The whole process took about 1.5 hours, using the Acura directions provided. I hope this helps out anyone who wants to attempt an install of the spoiler themselves. I guess time will tell if doing it both ways will be effective, but at least I have no regrets. I'm very happy with the outcome. Plus I know I saved some money on doing the labor myself.
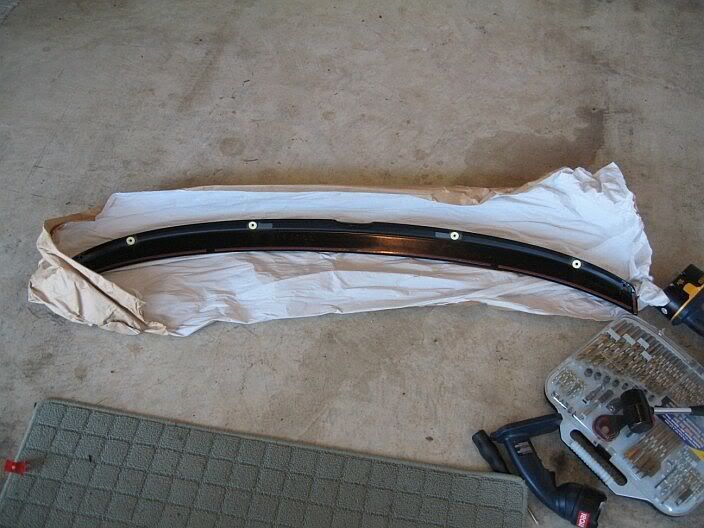
Spoiler in the box and before installing
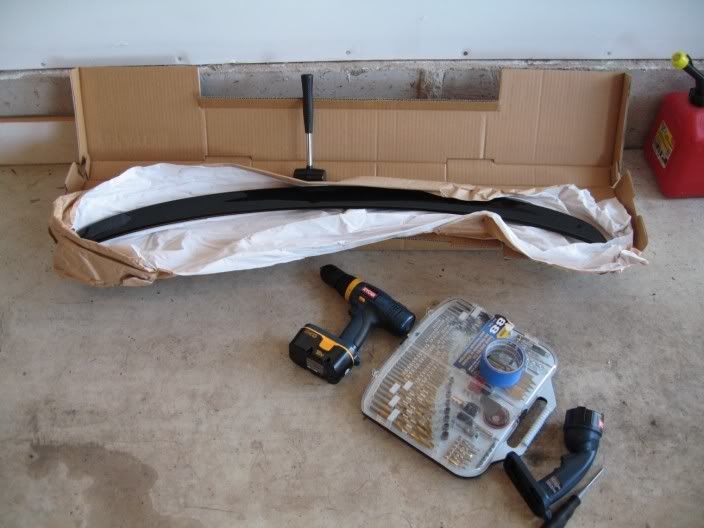
Without the deck spoiler
Attaching the adhesive to the spoiler to mark the drilling stickers on the trunk
Marking the trunk with positioning and placement
Attaching spoiler and pressing to transfer the stickers on the trunk
The marking stickers left behind on the trunk
Another angle of the stickers from the middle
Marking the center point before drilling
After drilling the hole with the drill
4 holes drills, no turning back now?
Attaching the additional 3M adhesive to the deck spoiler (in red)
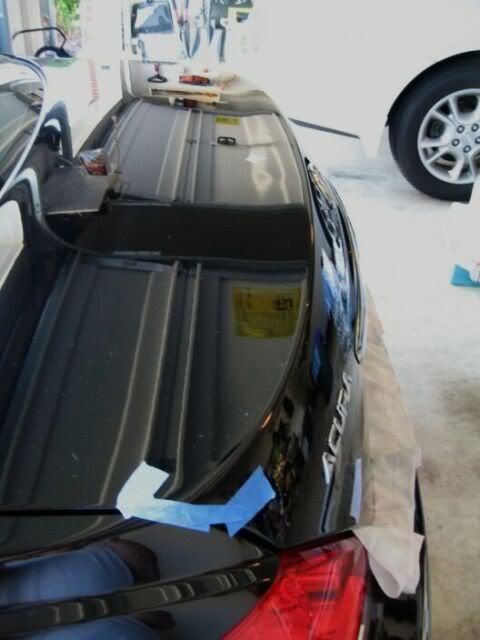
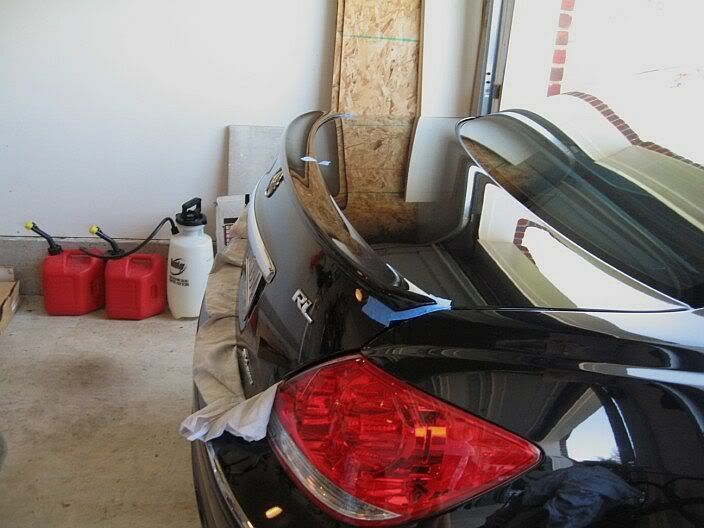
Spoiler is bolted on with the 4 bolts and 3M adhesive attached to the trunk
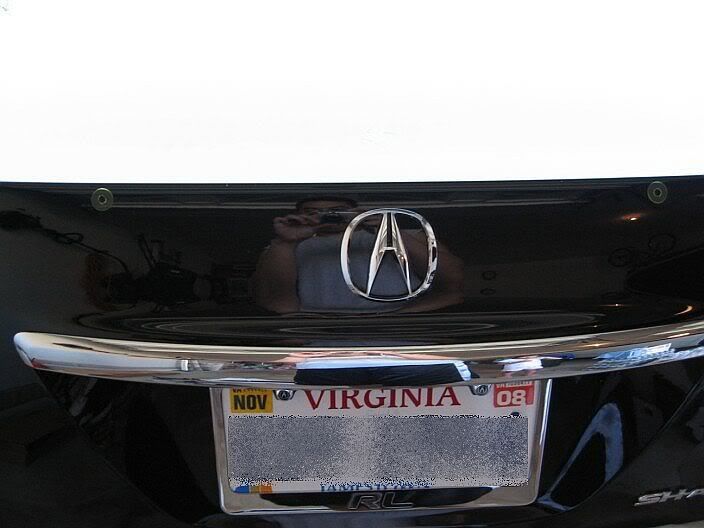
Marking tape removed and the finish product
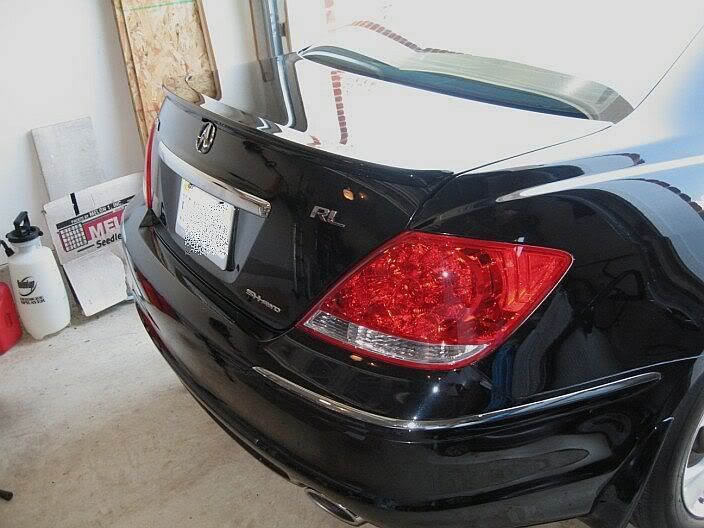
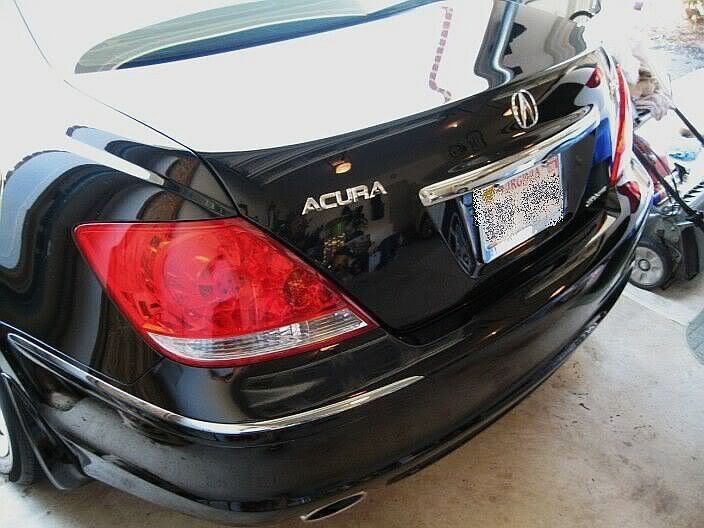
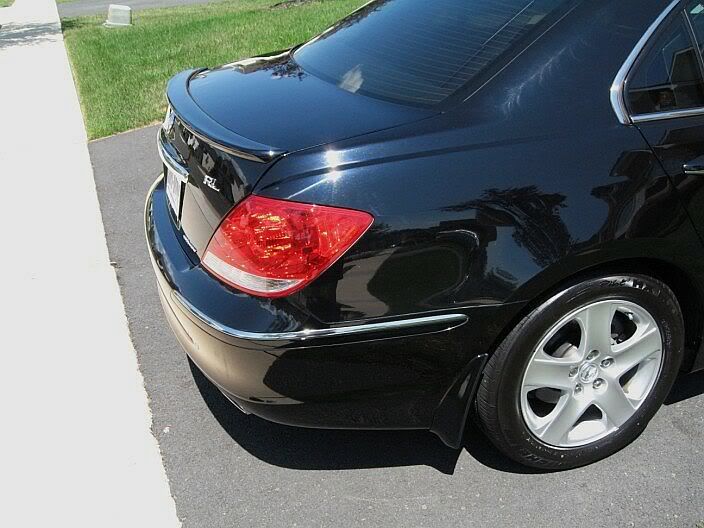
Top angle of the deck spoiler after install
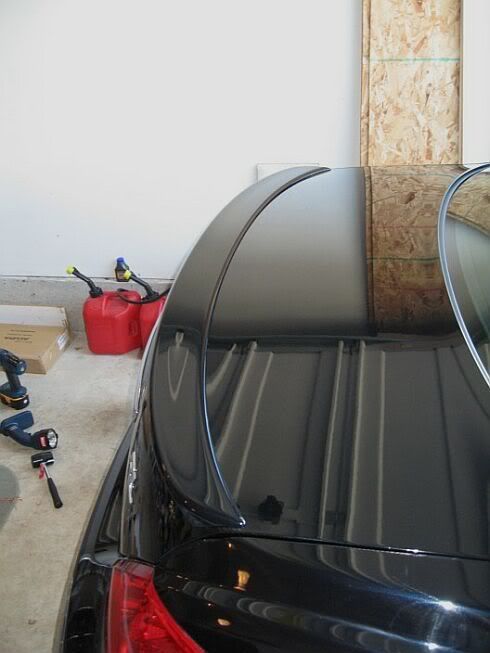
Side view, no gaps anywhere
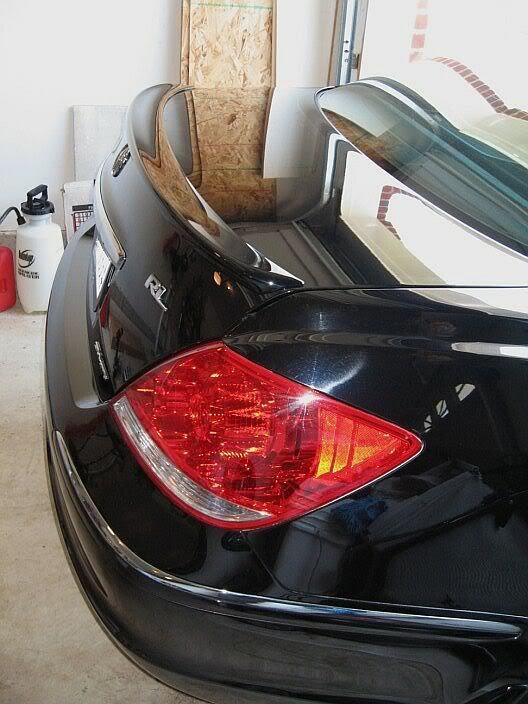
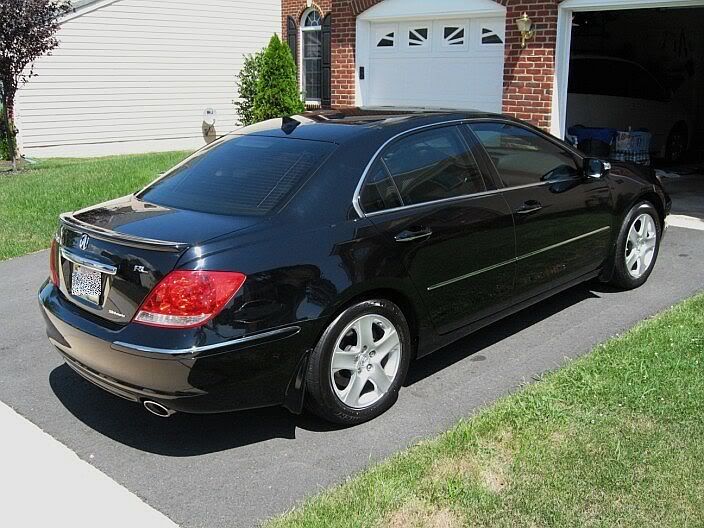
The new look with the spoiler. I like it! Much sportier...
Another close up
The next step for me to find a deal on ebay for the spoiler, and after searching I found a deal for an OEM black deck spoiler. I got it for $240.00 with free shipping. The seller gave me free shipping b/c I mentioned that I bought the wood steering before from them. Anyway, this weekend was the weekend and I tried to photo document every step. The whole process took about 1.5 hours, using the Acura directions provided. I hope this helps out anyone who wants to attempt an install of the spoiler themselves. I guess time will tell if doing it both ways will be effective, but at least I have no regrets. I'm very happy with the outcome.
Plus I know I saved some money on doing the labor myself.Spoiler in the box and before installing
Without the deck spoiler
Attaching the adhesive to the spoiler to mark the drilling stickers on the trunk
Marking the trunk with positioning and placement
Attaching spoiler and pressing to transfer the stickers on the trunk
The marking stickers left behind on the trunk
Another angle of the stickers from the middle
Marking the center point before drilling
After drilling the hole with the drill
4 holes drills, no turning back now?
Attaching the additional 3M adhesive to the deck spoiler (in red)
Spoiler is bolted on with the 4 bolts and 3M adhesive attached to the trunk
Marking tape removed and the finish product
Top angle of the deck spoiler after install
Side view, no gaps anywhere
The new look with the spoiler. I like it! Much sportier...
Another close up

Thread Starter
Instructor
Joined: Nov 2006
Posts: 172
Likes: 5
From: Northern Virginia
Originally Posted by neuronbob
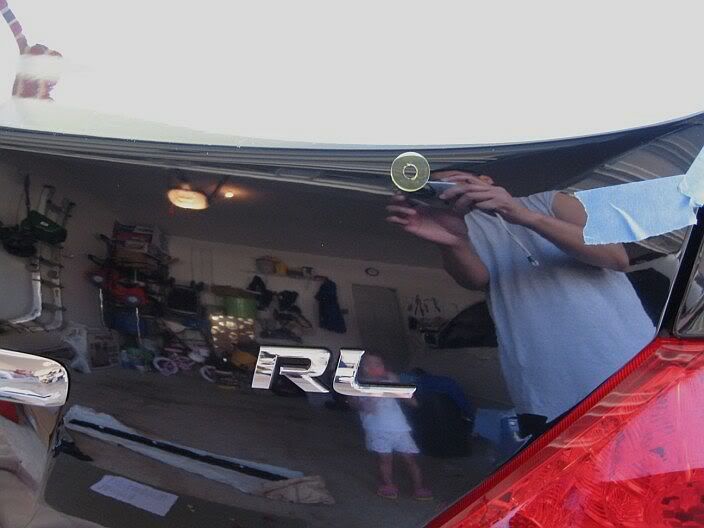
Looks good! I see you had an extra-special little helper in the garage with you, too (see reflection in one of the pictures)! 
 I think she caused me the extra 15 minutes during the install, but this is was the only way my wife would allow me to do the install during the day.
Thread Starter
Instructor
Joined: Nov 2006
Posts: 172
Likes: 5
From: Northern Virginia
Originally Posted by TampaRL
Thanks for posting vluu.
But for Pete's sake...clean up that garage!
But for Pete's sake...clean up that garage!
Now that all all the RL mods have been done... my next project is to clean up that garage.
I know, it is a mess!
Trending Topics

Three Wheelin'
Joined: Oct 2001
Posts: 1,442
Likes: 1
From: In my house
Can you see the top edge of the spoiler when you look out the back window? I dont have the backup camera but will be just fine gauging how much room I have behind me for parallel parking so long as I can see the back of the car (via the top of the spoiler).
Thread Starter
Instructor
Joined: Nov 2006
Posts: 172
Likes: 5
From: Northern Virginia
Originally Posted by 2002AcuraTL
Can you see the top edge of the spoiler when you look out the back window? I dont have the backup camera but will be just fine gauging how much room I have behind me for parallel parking so long as I can see the back of the car (via the top of the spoiler).
Thread Starter
Instructor
Joined: Nov 2006
Posts: 172
Likes: 5
From: Northern Virginia
Originally Posted by plastikman
Nice Job, looks good ! I could never do that, if I messed up at all I would never forgive myself. I had my dealer do mine, just gave me the peace I needed.
I just made sure I followed the instructions precisely and took my time. This was the first time I ever installed a spoiler on any car I have owned. My other 2 cars, I opt to have the dealers install it. I figured if I did mess up with the drilling and the bolts didn't line up with the spoiler, my backup plan would be to plug the 4 holes on the trunk and use 3M adhesive to attach the spoiler. So, no one would ever see my mistake. Lucky for me, it came out perfect and was an"error-free" install. Is there anyone out there who has installed their own backup camera for a 2006? Would love to try this mod.
Burning Brakes


Joined: Apr 2006
Posts: 834
Likes: 21
From: San Diego
Great job, and thanks for the photos. I think taking a drill to my trunk would cause me to break out in flopsweat.
Did you have to remove the inner liner of the trunk to secure the bolts through the holes?
Rob144
Did you have to remove the inner liner of the trunk to secure the bolts through the holes?
Rob144
Three Wheelin'
Joined: Oct 2001
Posts: 1,442
Likes: 1
From: In my house
Is this the 3M tape that you used - 3M model 5344??
http://cgi.ebay.com/ebaymotors/ws/eB...m=260104990597
Although I dont have a fear of drilling holes (I did it on my 2nd Gen TL) I was wondering if the holes are really necessary given that the spoiler is pretty small and I'd imagine pretty lightweight?
http://cgi.ebay.com/ebaymotors/ws/eB...m=260104990597
Although I dont have a fear of drilling holes (I did it on my 2nd Gen TL) I was wondering if the holes are really necessary given that the spoiler is pretty small and I'd imagine pretty lightweight?
Three Wheelin'
Joined: Oct 2001
Posts: 1,442
Likes: 1
From: In my house
I see there is a 2nd 3M tape that is like the 5344, but its a tad thinner, the model 5314. Might be less gap with this one?? 
http://www.ghgc.com/materials/automotive.htm
http://www.ghgc.com/materials/automotive.htm
Thread Starter
Instructor
Joined: Nov 2006
Posts: 172
Likes: 5
From: Northern Virginia
Originally Posted by Rob144
Great job, and thanks for the photos. I think taking a drill to my trunk would cause me to break out in flopsweat.
Did you have to remove the inner liner of the trunk to secure the bolts through the holes?
Rob144
Did you have to remove the inner liner of the trunk to secure the bolts through the holes?
Rob144
A word of advice. When threading the 4 bolts to the spoiler...if you have a ratchet extender, then use that b/c I tried to thread the bolts without it and it was difficult to hold the spoiler in place and get a good angle to thread the bolt. It's not easy to reach without the a ratchet extender. Once I used that... the bolt threads lined up so easy and I was done! Plus you don't want to risk dropping one of the bolts into the lining of the trunk. That's what happened to and it was pain trying to get it out.
Thread Starter
Instructor
Joined: Nov 2006
Posts: 172
Likes: 5
From: Northern Virginia
Originally Posted by 2002AcuraTL
I see there is a 2nd 3M tape that is like the 5344, but its a tad thinner, the model 5314. Might be less gap with this one??
http://www.ghgc.com/materials/automotive.htm
http://www.ghgc.com/materials/automotive.htm
Thread Starter
Instructor
Joined: Nov 2006
Posts: 172
Likes: 5
From: Northern Virginia
Although I dont have a fear of drilling holes (I did it on my 2nd Gen TL) I was wondering if the holes are really necessary given that the spoiler is pretty small and I'd imagine pretty lightweight?[/QUOTE]
I only did both b/c I heard that when dealers install it without the extra 3M adhesive.... the edging and middle don't hold down well. I wanted to make sure over time... the 3M adhesive would give that missing bond in the areas that didn't have it. Combination of both drilling and 3M should eliminate that. As I said in my thread, I live in the VA and there is 100+ degree heat in the summer and then freezing cold weather in the winter. How long before the 3M adhesive looses its strength. Then if the spoiler does become loose, how would I get the spoiler off without damaging it. I figured my approach is the safer than sorry. I guess for ones who choose to just use the 3M adhesive without drilling.... only time will tell, but I'm sure it works just as well. I probably just went above and beyond..really?
One other thing. The spoiler on the TL is smaller than the RL one. The TL spoiler only sits on top of the trunk, where the RL is on the top and edges over the edge of the trunk.

Asian07RL
Joined: Jan 2005
Posts: 453
Likes: 2
From: Warrington, PA
Most cars used 3M heavy duty exterior double tape for all the moldings.
You should not have any problem.To remove the the tape, you can use dental floss (wax) to remove with the help of hair dryer to deactivate the adhesive.
You should not have any problem.To remove the the tape, you can use dental floss (wax) to remove with the help of hair dryer to deactivate the adhesive.
Thread Starter
Instructor
Joined: Nov 2006
Posts: 172
Likes: 5
From: Northern Virginia
Originally Posted by AsianTL
Most cars used 3M heavy duty exterior double tape for all the moldings.
You should not have any problem.To remove the the tape, you can use dental floss (wax) to remove with the help of hair dryer to deactivate the adhesive.
You should not have any problem.To remove the the tape, you can use dental floss (wax) to remove with the help of hair dryer to deactivate the adhesive.
.....keep that in mind if I have to ever remove the 3M adhesive.
Thread Starter
Instructor
Joined: Nov 2006
Posts: 172
Likes: 5
From: Northern Virginia
If anyone is interested... I was just searching on Ebay for RL stuff and I saw that some seller is selling some OEM RL deck spoilers for starting bids of $65 and $17 shipping. I was like "WOW".... I dropped over $200 for mine and wished I had come across this deal when trying to buy mine. As it turns out... they didn't have a black one anyway. 
Just thought I would pass the information along to anyone who's thinking of adding a spoiler. Perfect opportunity for a bargain! Just search for "Acura RL spoiler". I think they have; Silver, Lakeshore, Gold, and Blue. Good luck!
Just thought I would pass the information along to anyone who's thinking of adding a spoiler. Perfect opportunity for a bargain! Just search for "Acura RL spoiler". I think they have; Silver, Lakeshore, Gold, and Blue. Good luck!
Intermediate
Joined: Oct 2012
Posts: 35
Likes: 8
From: Indianapolis (Motor Sports Capital of the World)
It looks awesome! Great Job! I might try this with my 2006 Pearl White RL Well been reading this RL forum for almost a year now and I haven't seen anyone post a thread with a step by step (photo) instruction for installing a deck spoiler. I couldn't decide if I was going to drill and use 4 bolts to attach or just use the 3M adhesive method w/o drilling. I have read of several owners just using the 3M adhesive to do the install w/o drilling. I think everyone who did it this way, was happy with their results. No gaps and didn't have to break out the drill either. My biggest concern was if it would hold up 3-5 years from now. I keep my cars for a long while. At the the same time, some owners who have had it installed at the dealerships have complained about gaps. Stating that the OEM adhesive on the spoiler was not strong enough, even with drilling and securing it with 4 bolts. This got me thinking....why not use the 3M adhesive & drill it and secure it with the 4 bolts. Why not have the best of both ways,huh?
The next step for me to find a deal on ebay for the spoiler, and after searching I found a deal for an OEM black deck spoiler. I got it for $240.00 with free shipping. The seller gave me free shipping b/c I mentioned that I bought the wood steering before from them. Anyway, this weekend was the weekend and I tried to photo document every step. The whole process took about 1.5 hours, using the Acura directions provided. I hope this helps out anyone who wants to attempt an install of the spoiler themselves. I guess time will tell if doing it both ways will be effective, but at least I have no regrets. I'm very happy with the outcome. Plus I know I saved some money on doing the labor myself.
Spoiler in the box and before installing
Without the deck spoiler
Attaching the adhesive to the spoiler to mark the drilling stickers on the trunk
Marking the trunk with positioning and placement
Attaching spoiler and pressing to transfer the stickers on the trunk
The marking stickers left behind on the trunk
Another angle of the stickers from the middle
Marking the center point before drilling
After drilling the hole with the drill
4 holes drills, no turning back now?
Attaching the additional 3M adhesive to the deck spoiler (in red)
Spoiler is bolted on with the 4 bolts and 3M adhesive attached to the trunk
Marking tape removed and the finish product
Top angle of the deck spoiler after install
Side view, no gaps anywhere
The new look with the spoiler. I like it! Much sportier...
Another close up
The next step for me to find a deal on ebay for the spoiler, and after searching I found a deal for an OEM black deck spoiler. I got it for $240.00 with free shipping. The seller gave me free shipping b/c I mentioned that I bought the wood steering before from them. Anyway, this weekend was the weekend and I tried to photo document every step. The whole process took about 1.5 hours, using the Acura directions provided. I hope this helps out anyone who wants to attempt an install of the spoiler themselves. I guess time will tell if doing it both ways will be effective, but at least I have no regrets. I'm very happy with the outcome.
Plus I know I saved some money on doing the labor myself.Spoiler in the box and before installing
Without the deck spoiler
Attaching the adhesive to the spoiler to mark the drilling stickers on the trunk
Marking the trunk with positioning and placement
Attaching spoiler and pressing to transfer the stickers on the trunk
The marking stickers left behind on the trunk
Another angle of the stickers from the middle
Marking the center point before drilling
After drilling the hole with the drill
4 holes drills, no turning back now?
Attaching the additional 3M adhesive to the deck spoiler (in red)
Spoiler is bolted on with the 4 bolts and 3M adhesive attached to the trunk
Marking tape removed and the finish product
Top angle of the deck spoiler after install
Side view, no gaps anywhere
The new look with the spoiler. I like it! Much sportier...
Another close up


10th Gear
Joined: Apr 2015
Posts: 11
Likes: 3
Chrome B-Pillars
Speaking of chrome B-pillars, I recently bought a used NBP RL and it has the chrome pillars. Do you know if this is normal? I would prefer to black it out, but I am not sure the best way to do that.
Senior Moderator
Joined: Dec 2010
Posts: 31,897
Likes: 7,251
From: Austin, TX
It is actually very abnormal. People who find themselves buying chrome b-pillars should be get a psychiatric evaluation. See the OP for what normal RLs look like.
The best way to get back to stock depends on how the chrome got there. If it is the stock trim wrapped, you could possibly remove the wrap. If the trim peice was replaced, you could either put a black wrap over the chrome, or buy a new piece. Good luck.
The best way to get back to stock depends on how the chrome got there. If it is the stock trim wrapped, you could possibly remove the wrap. If the trim peice was replaced, you could either put a black wrap over the chrome, or buy a new piece. Good luck.
10th Gear
Joined: Apr 2015
Posts: 11
Likes: 3
I just did this same spoiler install along with a 35% tint. While I am still not a big fan of the chrome pillars, I think it is remedied by the tint and creates a nice contrast.
Adding the lip spoiler and the tint really upgrades the look! What a wonderful car, I don't know what to do next...
https://i.imgur.com/sLCtZI4.jpg
Adding the lip spoiler and the tint really upgrades the look! What a wonderful car, I don't know what to do next...
https://i.imgur.com/sLCtZI4.jpg

Instructor


Joined: Aug 2015
Posts: 162
Likes: 12
I just did this same spoiler install along with a 35% tint. While I am still not a big fan of the chrome pillars, I think it is remedied by the tint and creates a nice contrast.
Adding the lip spoiler and the tint really upgrades the look! What a wonderful car, I don't know what to do next...
https://i.imgur.com/sLCtZI4.jpg
Adding the lip spoiler and the tint really upgrades the look! What a wonderful car, I don't know what to do next...
https://i.imgur.com/sLCtZI4.jpg


Cruisin'
Joined: Aug 2014
Posts: 23
Likes: 5
I'm bored right now and looking for my next project, and this looks interesting. My main concern would be how much does the "much sportier" look with the spoiler detract from the executive, button-downed professional look of the RL pre-spoiler?
i.e. I like the understated approach/look of my RL. Will adding the spoiler change the executive look?
i.e. I like the understated approach/look of my RL. Will adding the spoiler change the executive look?


Thread
Thread Starter
Forum
Replies
Last Post
cycdaniel
1G TSX Performance Parts & Modifications
8
Dec 17, 2019 10:58 AM
nanos
Car Parts for Sale
26
Nov 12, 2015 08:41 PM