When you click on links to various merchants on this site and make a purchase, this can result in this site earning a commission. Affiliate programs and affiliations include, but are not limited to, the eBay Partner Network.
How will you mitigate all the water pooling after the project is complete?
To give a little previous information
Before There were two 15x15in drain boxes. I don't have a great picture and this is the best one I could find from before.
There was one on the side of the driveway which you can see there and then another directly behind the drivers side rear tire at the end of the driveway just out of view. At most, the water would pool out 3-4ft from the one on the side of the driveway if it had a small build up of pine needles during a huge storm but they both emptied through a 6in smooth green drain pipe far into the back yard very quickly.
Currently, the plan is to tie all the new gutters and existing house gutters on that side into one 6in corrugated pipe. We will then do a center 15x15in drain box with slope coming from each of the garage doors, a slot drain in front of the garage bay I want to be able to wash cars in, and a slot drain in front of the breezeway into the existing 6in pipe that the two old driveway drains fed into. I have my reservations though as to whether or not that drain pipe is big enough for all those gutter sections but after a conversation with the builder today he assured me if we need to dig for a second one it would be covered to make sure there are no water issues. I told him I would like to have his gutter guy calculate me the water numbers at 100yr rain level for the new garage and what to expect when tying it into that existing drain line. I think a secondary location to send the garage gutters might be needed to not flood my current drain field and kill all the trees in that area. I am not sure how we get that line to have slope though with out digging a big trench that could kill other trees unfortunately since we are builder a retaining wall around the structure to meet grading requirements for water runoff.
So I feel somewhat ok with the plan but not fully sold on if it will be enough yet. He is going to bring some septic die so we can try and find where all my gutters are outputting for sure.
I think I share the same concern with volume. That's a lot of roof area to all be funneled into a 6" pipe.
Assuming for now that the trees won't be an issue, do you have to worry about flooding any neighbors?
The tree concern hopefully is just me overblowing things. Although, I did lose about 6 trees in the drainage area over the last 24 months. Hopefully, it is just a coincidence though. There are still more than 4x that left in that area of the woods that gets very wet during large rain storms. Of the 6 that died, 5 were pines, and I think we had some pine beatles come through and reck havoc on things is more likely the case.
Thankfully my property is wider than it is deep for one and then also the property has a drainage ditch in the back built along what was an old road behind the neighborhood before the neighborhood was even built so all the water eventually runs to that.
While I was gone for the holidays they got a little bit of work done between the weather.
My large custom rear window was installed as well as the frame for the deck.
I was told it took 5 guys to get this window in place. It is 8ft wide by 5.5ft high.
They then moved on to the small deck off the loft area.
Snagged some close ups once I got home.
They ended up one board short so there is still a board to go on the front face edge.
Little car content to add. I took the V Wagon home for Christmas to PA. Just under 1000 mile trip so not around 1800 on it since the rebuild. Running stronger than it ever has which is nice.
Before I had left to go out of town I had found out that with all the rain and moisture in the air that I had built my fence to too tight of tolerances. The expansion had pushed the latch into the other side of the gate.
I decided the easiest fix would be to recess the latch 1/8in into one side of the gate and make it flush. I broke out the router and made two passes.
Work then started on getting the rest of the garage space prepped for the main slab pour.
I had them dig 4in deeper 3ftx3ft pads roughly about where the posts for the lift will be
In addition to that they wanted to improve the drainage so they could actually pour the slab in case more rain was going to come. (Hint, it is coming, and a lot of it)
One of the first things they did was remove more of the existing slab so they had more space to work with to grade and force water away from the garage openings.
They dug a trench then at the end of the slab so that they could funnel the water towards
At the same time, they started digging in the back to find the old rain pipe to tie into.
They found it but realized although the outlet in my backyard is 6in the pipe at the driveway is only 4in. This created a much larger project as they wanted to make it 6in all the way. This was not planned for this day and I was not home which caused a small but fixable issue.
They then started digging further back
I wasn't home to tell them that was the same path the electric line to my shed and firepit area was run
They dug up one side of the backyard in several places trying to find the 4 to 6in transition
Yahtze! They found it. It is an odd solution is a 4in from the driveway drain merges with the 4in from the gutter drain for that corner of the house. However, it stays 4in for another foot before going to 6in. What a terrible design and a bottle kneck.
The decision then was made to dig the trench further back as they could just make the drain a straight line through the breezeway to the merge point.
They ended up using double wall corrugated drainage pipe instead of PVC. I am unsure of the positives and negatives of this. I know they put gravel under the entire length of pipe while setting the slope so hopefully, there is no issues with it long term.
They used a ton of various fittings to connect it to the PVC gutter line and the remaining PVC line out into my woods
For the time being, they have created a double Y drain head that is buried in the ground in a bunch of gravel. The plan is for this to remain in place till the end of the project when a new driveway is poured with the final 3 slot drains and 15x15 or 18x18 drain box.
The drainage ditch along the slab is filled with 12in of crushed stone. The gradded soil was then covered with 3in of gravel.
Thankfully they also put a bunch of straw down to try and make it easier to walk around after all the rain which is appreciated.
This has kept much from getting done this weekend. We added another pup to the house. Found this little guy online over Christmas and finally brought him home Friday. Wyatt is a 3 month old mix. No clue about his parents so not 100% sure how large he will get but pretty sure he has a good bit of routweiler in him.
I did manage to get about 4hr in today on the attic floor. It should help in running wires up there in the next couple of weeks. Added a couple of extra braces cause some of the subfloor scraps I was using had some cracks. Nice view down from 22ft up.
No more zip panel scraps left so I finally have to go buy 5-6 sheets of OSB to finish the other side of the garage.
Last edited by CCColtsicehockey; Jan 7, 2024 at 10:34 PM.
Sweet progress! Corrugated pipe has holes in it throughout the length to pull in water from the whole length, not just the drain at the end. That's probably why they used it. The double wall both keeps structural strength and prevents dirt from getting in the pipe. I'm surprised they didn't cover it with a filter sock but your clay soil probably doesn't seep in very much anyway.
Sweet progress! Corrugated pipe has holes in it throughout the length to pull in water from the whole length, not just the drain at the end. That's probably why they used it. The double wall both keeps structural strength and prevents dirt from getting in the pipe. I'm surprised they didn't cover it with a filter sock but your clay soil probably doesn't seep in very much anyway.
Turns out the double wall corrugated pipe is solid on the inside. Honest not sure for the purpose vs just going PVC but there are no holes in the stuff they used. There were some left over pieces laying around so I was able to check it out.
A good bit has happened in the last 3 weeks. Slacking on my part on the updates. The puppy has been a bit of a handful so far and the last week my SO has been sick so he has been all my responsibility.
Rough plumbing under the slab was done about 2 weeks ago just before the huge rainstorm that hit the east cost.
Water comes in at the back of the building and under the stairs where the hot water tank will reside.
Water lines then head to the bathroom
Then to the front of the garage where there will be a garage sink primarily for detailing reasons but useful in other ways. Drain heads out the front of the building to catch the slope and tie into my septic.
We didn't have to wait long to test out the new larger drainage pipe with the big storm that came through back on Jan 9th.
Started off fairly usual. On decently large storms this is about what I would get output wise out of the two old driveway drains.
This is a little more than the standing water that typically shows up but it is cause of the run off from the roof right now that should be handled by the gutters to the back of the property later on.
Then we got the heaviest of the storm which lasted for about a good hour. Maybe only seen a storm that heavy one other time in the last 10 years being here.
Even with the extra work the garage still flooded again
Scrolling back through my video footage this was the highest point it got even with the extra drains it didn't keep up
In 18min it was gone though
I am not all that worried though as right now you have the roof dumping tons of water on the driveway which will eventually be piped out the back. Unfortunately, this likely means digging up my backyard yard though to add a second 6in solid pipe as we don't think the current pipe can handle the gutters too after seeing that backup.
Once that dried out they came and got the prep work for the concrete done
This past Monday we finally got around to getting the slab poured. I threw them for another curve ball first thing in the morning just like I did with the last slab. Happened to see a lift the weekend prior that had the power run under the slab. Super clean install so I wanted to do the same. Thankfully the concrete truck was late so no real hold up to things.
Glad I saw this idea as I had not thought about it and was kind of not liking the idea of 3ft of conduit coming off the left wall to the top of the lift
And it is pour time, truck 1
Truck 1 finished
About to start truck 2
Finishing up truck 2 and measuring for truck 3
Pouring complete. Onto the finishing.
Some less than safe practices for putting up some plastic to keep the heat in. They were setting up to run two propane heaters.
I still do not understand their rush to cut the lines in this particular slab as they let all the heat out of the building while doing so for a good 45min.
It took almost 3hrs for the other side to cure enough for them to finish and cut it
Packing up to finally head out. That was a long day.
It is staring to feel like a garage now that it has a slab.
This Monday they came by and framed in the bathroom and installed the landing for the future staircase.
It is staring to feel like a garage now that it has a slab.
It�s amazing how much completing that part changes the feeling of progress on a project like this. We had our floor put down yesterday, and it finally felt like a room to me and not a construction zone. Such a small change in comparison to the scope of the project, but for me, one of the biggest impacts.
Coming along nicely.
Completely misread the part with the water run & thought you had water intrusion from outside, not that the water lines were coming in there.
Coming along nicely.
Completely misread the part with the water run & thought you had water intrusion from outside, not that the water lines were coming in there.
We definitely had some water intrusion actually during the storm for where the pipes go under the foundation. The soil around the outside though has not be tamped back down and we don't have any gutters to carry that water away. It isn't from the pipes themselves though.
Turns out the double wall corrugated pipe is solid on the inside. Honest not sure for the purpose vs just going PVC but there are no holes in the stuff they used. There were some left over pieces laying around so I was able to check it out.
Interesting, that's a new one for me!
Project is coming along awesome, super jealous of your new space. Going to be freaking awesome when it's done. Oh and the power routed to where the lift is going to be is super smart, great idea.
On Friday I requested some updated lighting diagrams from Hyperlite. I wanted to try 200w lights at the current location and a new location. I also had them do the readings at 3ft vs ground level like they had been doing since that would be more likely closer to working height. The current locations with the 200w lights upped me from mid 40s to mid 50s in the corners and 90s in the middle up from 70s. It still was only giving me 60s along the walls.
The next design was to move the lights to new positions. From 6ft 9in to 5ft 3in off the front and back walls and from 6ft to 5ft off the left and right walls. This would bump the numbers up considerably.
They are still not exactly at 100FC but might be close enough. If I need any extra light I can always turn the cans on with them at the same time. Although the cans are only going to total half of one of the high bays so maybe will make no difference.
I had a follow up to this previous post planned and even hosted the pictures but guess I never got around to posting it. Now I will be able to provide an even more in-depth follow up.
After the last set of lighting diagrams Hyperlite provided I was pretty set on the 200w light being the light I would want. However, I over analyze everything so I couldn't just order all 4. I ordered just 1 for some testing.
Hyperlite 200W HERO UFO style light with a claimed 28800lm per light
Temporary install with some string hanging from a collar tie
No slab so obviously this test was from a good while ago. The amount of light this one light puts out is more light than I have ever had in any garage I have worked on either at my house or my dads. I would say we are off to a good start.
Last week the lights went on sale so I ordered 3 more.
With the slab poured here is 1 light taken with a set exposure on my phone to try and best show the actual light and not the phone improving the exposure. I do think on the computer now it looks a little dark.
Since I had not finished the attic on the other side of the garage I ended up hanging the other 3 lights on the side they would not go on but wanted to see how much light they put out. The answer is.....a lot. Again this is only 3 and when all said and done there will be 4 of these in the 24x27ft working bay of the garage. These lights also are hung roughly 17-18ft from the ground right now and in the final location will be more like 15-16ft off the ground also raising the FC value at working height.
I was also concerned about just plugging and unplugging an extension cord with 800 watts of lighting on it so I ordered an inline switch since this likely will light the garage for the next month or two. I considered building my own but the cost of two decent plug ends was more than what Amazon was charging for this piece.
Managed to get the last of the attic/catwalk floor finished this weekend as well. I am happy to not have any more plywood to move up a ladder like this.
We also got a load more rain this weekend and I am starting to wonder if we need to focus on gutters and drainage plans sooner rather than later. I know typically you leave that till the end of the project. However, I would prefer this not to keep happening every time we have more than half an inch of rain.
It is clearly seeping up through the expansion joint material used at the edges of the slab along the stem wall
This most recent storm actually brought in enough water that it brought traces of clay silt in too
My builder assures me this is normal and once we build the retaining wall around the outside of the building, add a french drain in front of that retaining wall, put on gutters, and the siding is covering the seem between the walls and the block, that none of this will be an issue anymore.
Definitely will want to have it in writing. Warranty I am honestly not sure. I should dig back through my builders contract and look for anything in that.
That said at least in my head I have a really great solution to this but it likely takes a decent amount of time to accomplish.
On the areas that are going to have the retaining wall, I would like to dig down like 6in lower than planned final grading. Cover the ground in black plastic that slopes towards the ditch for the french drain at the foot of the retaining wall. Also, have that plastic start like 4in up the block foundation stem wall. Then cover it all in 4-6in of gravel. This is likely overkill but then again that is what I am known for. In my head though it should pretty much solve all possible water issues though.
The planned retaining wall will be roughly 5-6ft away from the stem wall. The ground will slope 1-1.25in per foot so run off should be great already.
IMO you should make this more of a problem for the builder than a problem for you. They signed up for it to do it right and should get that result. There has been enough huge rainfalls to highlight the flaws with the drainage that they should know what and how to fix the issues to make it work as it should.
IMO you should make this more of a problem for the builder than a problem for you. They signed up for it to do it right and should get that result. There has been enough huge rainfalls to highlight the flaws with the drainage that they should know what and how to fix the issues to make it work as it should.
The thing is they won't do anything until the gutters are installed and the grading is finished and water is being pushed away from the house. They won't do gutters till the siding is on and they can't do siding apparently till the electrical rough in is finished for some reason. I have never been happier to see 10 day forecast with no rain in it though. We have been averaging 1-2in of rain per week and had one in there with like 3.5in for the last 5 weeks now. Why couldn't just one of those been snow too.
I am not planning on doing anything about it myself for sure. The plan I detailed is one I would like to see them do but I think it is unlikely they will do that at first.
I would for sure start keeping a diary of rain events with pictures and what happened when, along with any conversations you have with the builder, what concerns you expressed and their responses. If nothing else, it'll help to keep a timeline in order in case you need to refer back to it.
J's garage used to get water intrusion and it annoyed me to no end.
I'm sure you'll get it figured out, my friend. Just bumps in the road.
The end goal is going to be well worth all the headaches along the way.
The electrician started on Monday and have made decent progress in two days. They are not here today though. They have knocked out about 80% of the second floor wiring as well as about 70% of the corner shop area wiring. I have to travel for work the next two days and have a laundry list of things to go over with them so not sure I want them to come back till Friday if possible so we don't have to do rework.
After finishing the car bay layout, I moved on to working on the corner shop lighting. The area is 23x19 with 10ft ceilings and a bump out on the side that is 8x10. I am primarily working in the 23x19 area. This is the layout I have come up with so far. To the right of the middle row there is an LVL that hangs down to 9ft in the room.
This is the fixture I am looking at right now. https://storefront.fsg.com/buy/produ...naire/77100903 I want something that has a somewhat finished look to it but the main thing I am looking at is for CRI or 90+. If anyone has other fixtures of the same size that put out around 4000 lumens and CRI of 90+ I am interested to hear about them.
I wish I could generate the heat maps but I am struggling to figure out the DIALux application. I have at least been able to get https://www.visual-3d.com/tools/interior/ to work for me and it says I should have FC of 89 at 3ft which would be work bench height. I would likely then add either 2 or 3 of these fixtures to the 8x10 area of the shop.
I try but not always. The last two night I was up till past midnight working on the electrical plan to have it updated for some changes once speaking with the electricians on Monday. Then up again the next day at 6am.
My shop is ~17ftx17ft with 8ft ceilings and I have 8x 4100 lumen 5K color temp lights in there. It's bright as fuck. Like I have to squint for a second when I flip them on. Putting 15 of them up on your ceiling is going to be blinding lol. The lights are evenly spaced on the ceiling and I get no shadows anywhere. Makes for easy work in terms of detail cutting/marking/whatever. The only issue I have is there's one part where the soffit overhangs and casts a shadow but I only use that space for storage so no big deal. I'm going to add some more lights in that area eventually. I can take pics later if you're interested.
You are making my point that it seems like I need to do more than the original 11 that was in the plan plus 5 recessed. Seems like 16 might be the way to go then.
Not a lot of major updates but progress nonetheless has been happening over the last 3 weeks.
Went to use my deck umbrella the other day and well it just disintegrated at the top and fell to the ground. Almost bought a new one but for some reason, I went and looked as I didn't know they made replacement covers for some reason. Much easier to replace the cover than replace the entire thing for like 5x the cost of a cover on Amazon.
They also delivered the doors. They were special order and somehow the lumber yard managed to mess up the order. The two full light doors were correct. However, the person doors for the breezeway, one for the house garage and one for the new garage came with the wrong window configuration.
The doors are not supposed to have inserts for the windows but rather 6 panel windows recessed in the door so that everything is paintable. Thankfully I think the solution is just to get new door panels instead of having to wait for full new hung doors since they were special order for 2x6 walls since they don't stock them.
The interior stairs were also installed. Not exactly what I was looking for though. I was considering some rustic reclaimed barn treads that were squared off. The price though per tread was way more than I wanted to pay through the source I am getting my wood wall coverings. The builder tried his source which came back at the same price I was finding. He then ordered the stair assembly without my knowledge. I had figured I would hear back from him first before that was done.
This is a more formal/traditional style staircase and I am after something more modern like below.
Still working on what the resolution is for this. I am waiting to see what might be able to be done to these prebuilt stair assemblies vs having to rip them out and rebuild them.
Removing the trim under the tread makes them a little more modern but I still would prefer squared off treads. It might be a compromise though.
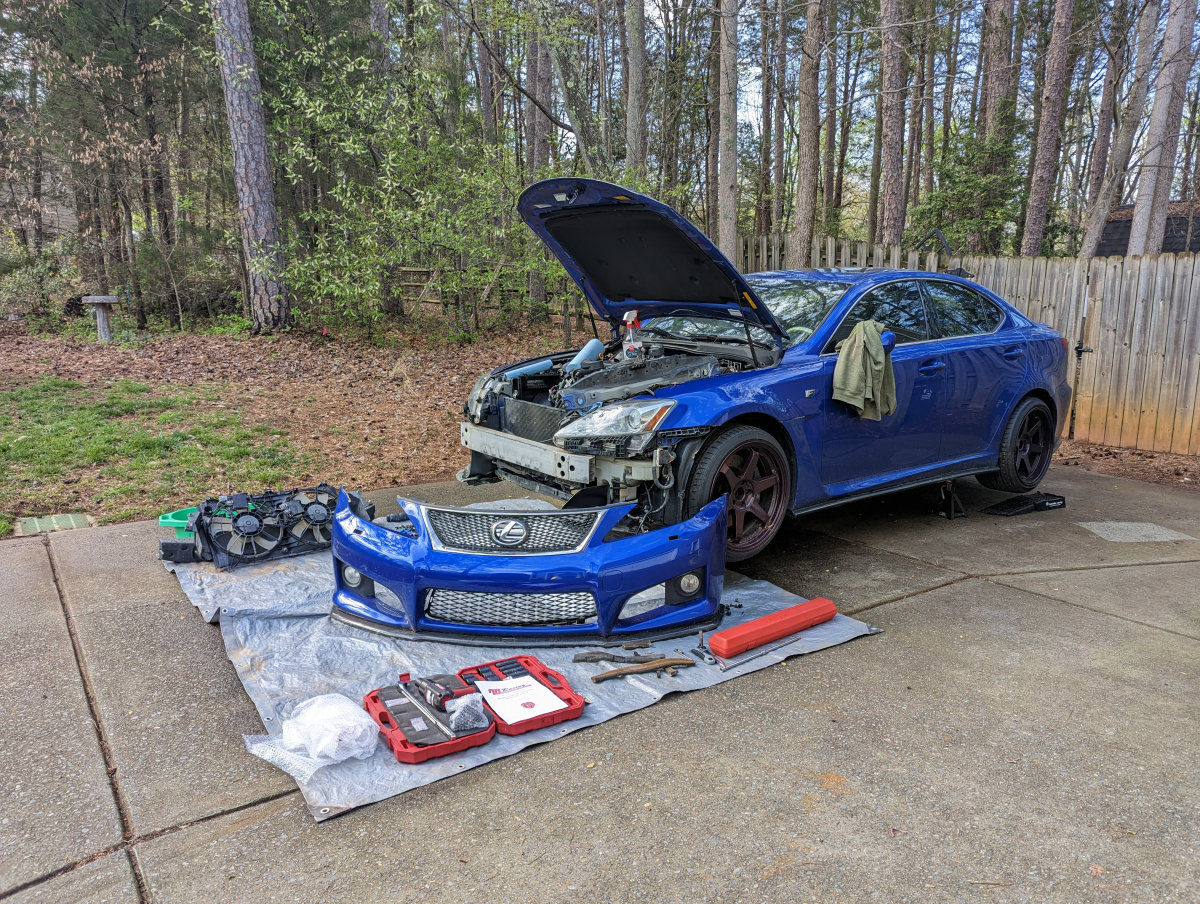
Might be the last garage work done in the old garage. Maybe not though depending on how many trips I rack up in the VWagon. Got the last break in oil change done on it. Normal 3k mile changes from here on out. I also did the first oil change on the girlfriend's new IS350 FSport.
Been struggling with finding decking and color combos that I like A big fan of two tone decks and I want to do this small deck in whatever I plan to redo the house deck in myself in a couple of years. I started off looking at Wolf PVC decking but after taking samples home and letting them outside in the cold overnight a while back absolutely hated the way they felt.
I have pretty much settled on the Trex Transcend Lineage line at this point. It is middle of the road price point. There is another PVC option by Azek that I like as well but it is $1.50 more a linear foot and not what I want to pay for the eventual house deck.
I really wanted a grey and grey deck combo. However, so many of the grey colors are blue greys and the house is a brown grey. When put up next to the house the blue in them really pops and not in a good way. This was the best of the worst and the picture doesn't show it as much as it is in person but still just doesn't work.
The light grey/brown color, the smaller sample, is the color the main part of the deck will be. I want something that will be relatively cool because of the dogs in the summer and reds/browns do not stay as cool.
I am leaning toward this color combo now.
The brown would just be the picture frame and all vertical pieces.
Here are the only two photos I can find with the actual deck colors together but I would be doing the reverse.
Some car related content. A good buddy of mine from Pittsburgh picked up a new two the other week and came down for a long weekend visit.
The weather was in the 60s so we needed to do some driving. Didn't have the time for a run to the dragon and the girls were not really up for that either. Luckily there are two nearby areas only a little over an hour away called Little Switzerland and the Dragons Whip.
Cars started off clean
Unfortunately at Little Switzerland, it was raining so not much hard driving to be had.
On the way from Little Switzerland to the Devil's Whip we ran into some wet salty roads too. Thankfully the Devil's Whip was dry and we got to get some good driving in there.
Needed a good bath after getting home but was nice to get a good drive in during the winter months.
I have started stocking up on the low voltage supplies I need to start doing that wiring myself. Hopefully, the rest will show up today so I can get underway this week. I hope to have it all done in 2 weeks tops. Roughly the end of the first week of March.
My dad is in town so decided to take him up on his continued offer to help out with any work I need to do myself. Needed to get a 40ft trench dug between the house and where the network will enter the garage. We got on that this weekend.
Laid out the path. Eventually marked it with spray paint.
Thankfully there were not too many sections that were still too hard with all the soil work done for site prep and digging up for drainage that had already occurred.
Day 1 results finished with my dad looking it over
Knocked out the rest of it yesterday 40ft long, 1ft deep, will be putting in the 1.5in conduit that will have a 6 strand fiber bundle as well as 2 pulls of 12/2 alarm cable to extend the alarm system into the garage.
Have also started to try and figure out the exact placement of the two interior cameras over the garage bays. I think this is the location I Have settled on for the working bay.
The electricians have also been here on and off over the last two weeks. They have gotten a decent amount of things pulled so far.
Lumber has also shown up for them to finish the framing in of the attic lift hoist.
Not a huge fan of 12ft interior space outlet code. With a wall of cabinets for the wet bar and 2 walls of glass in the loft, we are ending up with a ton of floor outlets to meet code.
Your deck samples look like the newer Transcend Lineage line. If you're curious about Island Mist (grey) and Carmel (light brown), those are the colors on our deck. The subtle contrast color in the grain on the Carmel is grey.


 The last two night I was up till past midnight working on the electrical plan to have it updated for some changes once speaking with the electricians on Monday. Then up again the next day at 6am.