
Upgraded from OEM to 6000K HID's
 11-13-2011, 05:45 PM
#1
Advanced
Thread Starter

Upgraded from OEM to 6000K HID's
Now I why the stealership wants $250 per HD bulb replacement, man what a job. After removing both front wheels and whell arch liners I have now swapped by low beam OEM HID's for a pair of 6000K's to match the color temp of the LED switchbacks in my parking\turn signals and the 6000K HID's in the fogs. See before and after below:
BEFORE (well during really)


AFTER


BEFORE (well during really)
AFTER

The following 2 users liked this post by englishtony2002:
Acura_Dude (11-14-2011),
TinyRK (11-14-2011)
11-13-2011, 06:16 PM
#3
^
Absolutely. In turns of output, it's not an upgrade, it's a downgrade. It might now match the OP's switchbacks, but vision is hampered, while affecting the vision of the person in front of the OP at night. In terms of looks alone, it might match better, but performance-wise it's detrimental.
It "looks" better, though!
The following users liked this post:
JnC (11-16-2011)
11-14-2011, 02:13 PM
#5
The factory HID low beams are 4300k. K is for kelvin or color essentially. Lumen is light output. The stock bulbs are technically the brightest but the 5000k bulbs, which are a natural white appear brighter. Even the 6000k, which has a tint of blue, appears brighter although it actually isn't.
11-14-2011, 08:57 PM
#6
Advanced
Thread Starter
Excelerate - while I get it that the lumen output for 6K is down on 4K, why do we humans see it, or perceive it as brighter? In fact if we human drivers see the light as brighter then surely it is? After all it is for the benefit of the human eye that we illuminate the road in order to see better.
Any additional comments?
Drove home from the office tonight on normal route as they did not appear any brighter, nor did they appear any less bright, just whiter, especially when traveling behind a lighter colored vehicle, white or silver for example.
Any additional comments?
Drove home from the office tonight on normal route as they did not appear any brighter, nor did they appear any less bright, just whiter, especially when traveling behind a lighter colored vehicle, white or silver for example.
Trending Topics
11-14-2011, 10:30 PM
#8
David_Dude
Looks good. I really don't like how the OE bulbs in the 4th gen TL look anyway (seen it in person and it doesnt put out that crisp look like the other Acura models), especially after seeing so many 2G TSXs. TSX's OE bulbs look great, well the look i should say. It's definitely housing design.
11-14-2011, 11:46 PM
#9
Team Owner
iTrader: (2)
Join Date: Jan 2008
Location: Kansas City, MO (Overland Park, KS)
Posts: 36,545
Received 6,470 Likes
on
5,162 Posts
Looks good Tony.
11-15-2011, 11:10 AM
#10
Irish_Viking

I have a set of Lumes 6000k bulbs in my high beams. Haven't driven too much at night since I've had them installed. I think I might put the same bulbs in my lows as well.
11-15-2011, 12:02 PM
#11
Excelerate - while I get it that the lumen output for 6K is down on 4K, why do we humans see it, or perceive it as brighter? In fact if we human drivers see the light as brighter then surely it is? After all it is for the benefit of the human eye that we illuminate the road in order to see better.
Any additional comments?
Drove home from the office tonight on normal route as they did not appear any brighter, nor did they appear any less bright, just whiter, especially when traveling behind a lighter colored vehicle, white or silver for example.
Any additional comments?
Drove home from the office tonight on normal route as they did not appear any brighter, nor did they appear any less bright, just whiter, especially when traveling behind a lighter colored vehicle, white or silver for example.
The following users liked this post:
Acura_Dude (11-15-2011)
11-15-2011, 12:15 PM
#13
Irish_Viking
11-15-2011, 12:48 PM
#14
Advanced
Thread Starter
REMOVAL
As I quoted, removing one wheel at a time and unclipping the wheel arch liners gives you access to the back of the HID assembly.
First twist the side marker lamp from the headlight assembly and remove the wire clip from the frame and let it hang freely, this will aid access.
Twist off the 3" diameter water seal, anti-clockwise, by rotating it only like 1/16th of a turn, if you look closely you will see a small tab at the 12 O'Clock position (looks it it should have a screw in it but it does not), the turning movement is limited by it.
Then you will see a large silver "connector", this is the D2S connector, twist through less than 1/16th of turn very carefully anti-clockwise. NOTE THE ANGLE IT IS AT AFTER TWISTING, YOU WILL NEED TO OFFER IT BACK UP AT THE SAME ANGLE WHEN YOU REATTACH IT. Now pull it away from the bulb, i.e. out of the headlight assembly, it will stay there as it is attached to a ground wire.
Now you will be able to see the back of the bulb which is held in place with a spring clip, this needs to be unclipped on both sides. The bulb will now be free and can be pulled out of the headlight assembly.
RE-ASSEMBLING
Place the new bulb into the headlght and reattach the clip, paying special attention to the orientation of the small plastic lugs on the bulb - They must be at 3 O'Clock and 9 O'clock (aligned horizontally) - see below in the top right illustration - please ignore the bottom right part of the image it shows the lugs incorrectly., they are at 90 degrees to the notch at the top.
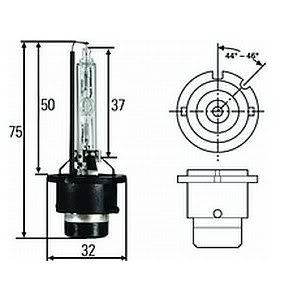
This will ensure that the notch you see at the top is correctly lined up with the housing. If you are using aftermarket D2S bulbs this plastic housing will be made to accomodate other variants (D2C etc.) so it will have more notches than shown above, so alignment is crucial.
Now carefully offer up the silver connector at the angle it was at after you twisted it off and twist it back on clockwise. Reattach the water seal and twist it clockwise to lock it.
If you are changing color temp of bulbs, TEST NOW. If you find that this bulb is defective now is the time as you can easily reinstall the old one and call the job off until another day, you certainly do not want to drive around with two different color bulbs.
That completes one side - repeat and enjoy your new lights.
Last edited by englishtony2002; 11-15-2011 at 12:50 PM.
11-15-2011, 12:56 PM
#15
Advanced
Thread Starter
HID will not work in DRL\High Beam, they would simply bling everybody as they would act only a high beams as they are either on or off with no intermediate state as with the halogen DRL's.
11-16-2011, 12:25 AM
#17
Racer

Looks good. I really don't like how the OE bulbs in the 4th gen TL look anyway (seen it in person and it doesnt put out that crisp look like the other Acura models), especially after seeing so many 2G TSXs. TSX's OE bulbs look great, well the look i should say. It's definitely housing design.
OP, what brand bulbs did you go with? looks good otherwise

-DeL
11-16-2011, 12:38 AM
#18
David_Dude
Its not the bulbs that makes the TSX headlights look better, its the lens. The TSX lens are cleaner and sharper vs the TL lens are foggier. I know, because when I did my headlights, I blacked them out, changed out the lens to TSX-Rs and got Philips 85122WX bulbs..just my .02
OP, what brand bulbs did you go with? looks good otherwise
-DeL
OP, what brand bulbs did you go with? looks good otherwise
-DeL
 11-16-2011, 08:18 AM
#19
Senior Moderator
its not that we see it brighter. its just the color is different and you see it as brighter. 4300k has a yellowish color vs 5000k(white) and 6000k(white with bluish tint). you may not see the difference in lighting between your new bulbs vs the stock ones on a clear day. When its foggy, raining, or snowing, thats when you will notice the visibility isn't the same
11-16-2011, 12:27 PM
#20
David_Dude
Illuminated GREAT. But rainy weather, it was easy to be seen, but hard to actually see on roadways in the dark, especially when there's extra light from street lights and buildings. Now when it's dry you're good to go.
11-16-2011, 01:26 PM
#21
Advanced
Thread Starter
Its not the bulbs that makes the TSX headlights look better, its the lens. The TSX lens are cleaner and sharper vs the TL lens are foggier. I know, because when I did my headlights, I blacked them out, changed out the lens to TSX-Rs and got Philips 85122WX bulbs..just my .02
OP, what brand bulbs did you go with? looks good otherwise
-DeL
OP, what brand bulbs did you go with? looks good otherwise
-DeL
Light intensity at close distance is really not noticably different from OEM, but longer distance suffers.
I am also interested in blacking out the headlight surrounds myself (like JNC provides) and this topic of the TSX lens is intriguing since I would be right in there and swap would be easy.
Anybody tell me what the difference between the TSX Lens and the TSX-R Lens that is referred to in multiple posts?
Also anybody that has swapped the TSX Lenses in tell me where they came from?
Thanks.
11-16-2011, 01:28 PM
#22
Advanced
Thread Starter
I agree. I had 6000K bulbs in my last car and on smoothly paved roads it looked like I didn't have my lights on. It was like the light was absorbed into the darkness of the asphalt OR that light wasn't being reflected and scattered. Now the painted lines on the road reflected light pretty well. Illuminated GREAT. But rainy weather, it was easy to be seen, but hard to actually see on roadways in the dark, especially when there's extra light from street lights and buildings. Now when it's dry you're good to go.
Illuminated GREAT. But rainy weather, it was easy to be seen, but hard to actually see on roadways in the dark, especially when there's extra light from street lights and buildings. Now when it's dry you're good to go.
The following users liked this post:
Acura_Dude (11-16-2011)
11-21-2011, 09:19 AM
#23
Racer
Actually bought a real cheap Xentec pair of 6K's ($15 shipped), wanted to scope out the effect first. Will order a brand name pair, probably at 5000K\5100K for the long haul, these are just a bit too blue for me.
Light intensity at close distance is really not noticably different from OEM, but longer distance suffers.
I am also interested in blacking out the headlight surrounds myself (like JNC provides) and this topic of the TSX lens is intriguing since I would be right in there and swap would be easy.
Anybody tell me what the difference between the TSX Lens and the TSX-R Lens that is referred to in multiple posts?
Also anybody that has swapped the TSX Lenses in tell me where they came from?
Thanks.
Not really sure the difference between the TSX and TSX-R lens are, couldn't really find the regular TSX lens and saying "TSX-R" sounds better
I got my bulbs and lens from The Retrofit Source, which specializes in lighting and converting. Good guys and great customer service. I blacked out my own headlights and its pretty easy to do, as long as you know what your doing and willing to take the risk, but JnC does a great job at providing that service. Good luck!-DeL
11-21-2011, 12:23 PM
#24
WINNING
Nirav, I did the job myself.
REMOVAL
As I quoted, removing one wheel at a time and unclipping the wheel arch liners gives you access to the back of the HID assembly.
First twist the side marker lamp from the headlight assembly and remove the wire clip from the frame and let it hang freely, this will aid access.
Twist off the 3" diameter water seal, anti-clockwise, by rotating it only like 1/16th of a turn, if you look closely you will see a small tab at the 12 O'Clock position (looks it it should have a screw in it but it does not), the turning movement is limited by it.
Then you will see a large silver "connector", this is the D2S connector, twist through less than 1/16th of turn very carefully anti-clockwise. NOTE THE ANGLE IT IS AT AFTER TWISTING, YOU WILL NEED TO OFFER IT BACK UP AT THE SAME ANGLE WHEN YOU REATTACH IT. Now pull it away from the bulb, i.e. out of the headlight assembly, it will stay there as it is attached to a ground wire.
Now you will be able to see the back of the bulb which is held in place with a spring clip, this needs to be unclipped on both sides. The bulb will now be free and can be pulled out of the headlight assembly.
RE-ASSEMBLING
Place the new bulb into the headlght and reattach the clip, paying special attention to the orientation of the small plastic lugs on the bulb - They must be at 3 O'Clock and 9 O'clock (aligned horizontally) - see below in the top right illustration - please ignore the bottom right part of the image it shows the lugs incorrectly., they are at 90 degrees to the notch at the top.
This will ensure that the notch you see at the top is correctly lined up with the housing. If you are using aftermarket D2S bulbs this plastic housing will be made to accomodate other variants (D2C etc.) so it will have more notches than shown above, so alignment is crucial.
Now carefully offer up the silver connector at the angle it was at after you twisted it off and twist it back on clockwise. Reattach the water seal and twist it clockwise to lock it.
If you are changing color temp of bulbs, TEST NOW. If you find that this bulb is defective now is the time as you can easily reinstall the old one and call the job off until another day, you certainly do not want to drive around with two different color bulbs.
That completes one side - repeat and enjoy your new lights.
I changed both my headlight bulbs to phillips 6k and did not have to remove the wheels from the car....also changed the fog lights and put hids in them, also no wheels removed..
11-21-2011, 12:31 PM
#25
Advanced
Thread Starter
Why go through all the extra hassle and clearance problems? Why not jack her up and pull the wheel, whole lot easier and quicker? I know it can be done without - but why?
11-22-2011, 10:16 AM
#26
WINNING
turn the wheel all the way to the left and change the passanger light bulb...
turn the wheel all the way to the right and change the driver side bulb...
thats all..
took less than 10 minutes with no hassle of lifting her up and putting her down...she stayed on the floor
11-22-2011, 11:40 AM
#27
Advanced
Thread Starter
why jack her up?....
turn the wheel all the way to the left and change the passanger light bulb...
turn the wheel all the way to the right and change the driver side bulb...
thats all..
took less than 10 minutes with no hassle of lifting her up and putting her down...she stayed on the floor
turn the wheel all the way to the left and change the passanger light bulb...
turn the wheel all the way to the right and change the driver side bulb...
thats all..
took less than 10 minutes with no hassle of lifting her up and putting her down...she stayed on the floor
You got arms like the dude in the Incredibles
 11-22-2011, 11:42 AM
#28
WINNING
So you remove the front lip spoiler and the push-button clips on the wheel arch liner and can get your hand up high enough to reach the headlight bulb? I was able to use that method to replace the parking bulbs btu could not reach the headlights that way.
You got arms like the dude in the Incredibles
You got arms like the dude in the Incredibles
 11-22-2011, 12:45 PM
#29
Irish_Viking
When you say you have 6000K in your high beams, you mean the non-HID DLR\High Beam? Or do you mean that you have 6000K in your HID projectors and want to fit them in your "lower" fogs too?
HID will not work in DRL\High Beam, they would simply bling everybody as they would act only a high beams as they are either on or off with no intermediate state as with the halogen DRL's.
HID will not work in DRL\High Beam, they would simply bling everybody as they would act only a high beams as they are either on or off with no intermediate state as with the halogen DRL's.
11-23-2011, 04:27 PM
#30
Advanced
Thread Starter
this haveing been said, it means that you are subjecting the HID Ballasts to voltage that is being modulated between 0v and 12v (nominal) DC voltage, a condition that will surely cause damage in the long term.
11-23-2011, 04:54 PM
#31
Moderator
^
Absolutely. In turns of output, it's not an upgrade, it's a downgrade. It might now match the OP's switchbacks, but vision is hampered, while affecting the vision of the person in front of the OP at night. In terms of looks alone, it might match better, but performance-wise it's detrimental.
It "looks" better, though!
Absolutely. In turns of output, it's not an upgrade, it's a downgrade. It might now match the OP's switchbacks, but vision is hampered, while affecting the vision of the person in front of the OP at night. In terms of looks alone, it might match better, but performance-wise it's detrimental.
It "looks" better, though!
I don't get why people always go, "6000K and up will affect your vision." Seriously? If you have a hard time driving at night with 6000K HID headlight, then you shouldn't be driving at all.
11-23-2011, 05:21 PM
#32
Irish_Viking
Be careful Livestrong, after taking pictures of my modified LED DRL's it is apparent that the power reduction when in DRL mode is using Pulse Width Modulation, a DC version of what a household dimmer switch does. Is say it is apparent because you actually see the flicker on the camera LCD preview screen before taking the picture.
this haveing been said, it means that you are subjecting the HID Ballasts to voltage that is being modulated between 0v and 12v (nominal) DC voltage, a condition that will surely cause damage in the long term.
this haveing been said, it means that you are subjecting the HID Ballasts to voltage that is being modulated between 0v and 12v (nominal) DC voltage, a condition that will surely cause damage in the long term.
I wonder if I should have them removed now because I didn't know any of this previous to having them installed.
11-23-2011, 05:30 PM
#33
Advanced
Thread Starter
I haven't noticed a flicker at any point with the lights. The shop that installed them just said my DRL's wouldn't work because not enough power is being sent to power the DRL itself. I didn't think this was an issue because I always turn my lights on manually.
I wonder if I should have them removed now because I didn't know any of this previous to having them installed.
I wonder if I should have them removed now because I didn't know any of this previous to having them installed.
The following users liked this post:
Livestrong_TL (11-23-2011)
11-23-2011, 06:15 PM
#34
I haven't noticed a flicker at any point with the lights. The shop that installed them just said my DRL's wouldn't work because not enough power is being sent to power the DRL itself. I didn't think this was an issue because I always turn my lights on manually.
I wonder if I should have them removed now because I didn't know any of this previous to having them installed.
I wonder if I should have them removed now because I didn't know any of this previous to having them installed.
Yep - you will not see them flicker when the car is supplying only the DRL voltage because it is not enough to fully power up the Ballasts, but I do not know what harm it might be doing to the Ballast circuitry. I have posted this specific question on a new thread to see if anybody out there knows if the TL uses PWM to supply the DRL's or not, lets see what turns up.
11-23-2011, 06:19 PM
#36
Irish_Viking
Yep - you will not see them flicker when the car is supplying only the DRL voltage because it is not enough to fully power up the Ballasts, but I do not know what harm it might be doing to the Ballast circuitry. I have posted this specific question on a new thread to see if anybody out there knows if the TL uses PWM to supply the DRL's or not, lets see what turns up.
11-23-2011, 11:18 PM
#38
Irish_Viking
11-24-2011, 02:49 PM
#40
Irish_Viking