
Unable to remove front rotor - HELP please!

Thread Starter
Outta my way!!
Joined: Sep 2003
Posts: 153
Likes: 0
From: Denver, CO
Hi guys,
I hope some one can help me out here.
I am trying to replace front rotors on 2004 TL AT.
After removing the wheel and piston assembly, I am stuck with removing spindle nut - the thing wont budge
I suppose to "un-bend" (raise the stake as per manual page 18-13) the lip on that nut and unscrew it. I am using 36mm socket on a 1/2" drive breaker bar to undo it, I stepped on it with all 150lbs I have, but no luck
I used Liquid Wrench on this nut, no help.
While "raising the stake" by hammering a flat screwdriver under it (between spindle and the nut), I might have damaged the threads a little, I am not sure, so maybe this is the reason I am unable to remove the nut, but it looks all in tact to me..
How am I suppose to "raise the stake" , is there a proper way and tool for it?
I will try to post pix in a bit.

Thread Starter
Outta my way!!
Joined: Sep 2003
Posts: 153
Likes: 0
From: Denver, CO
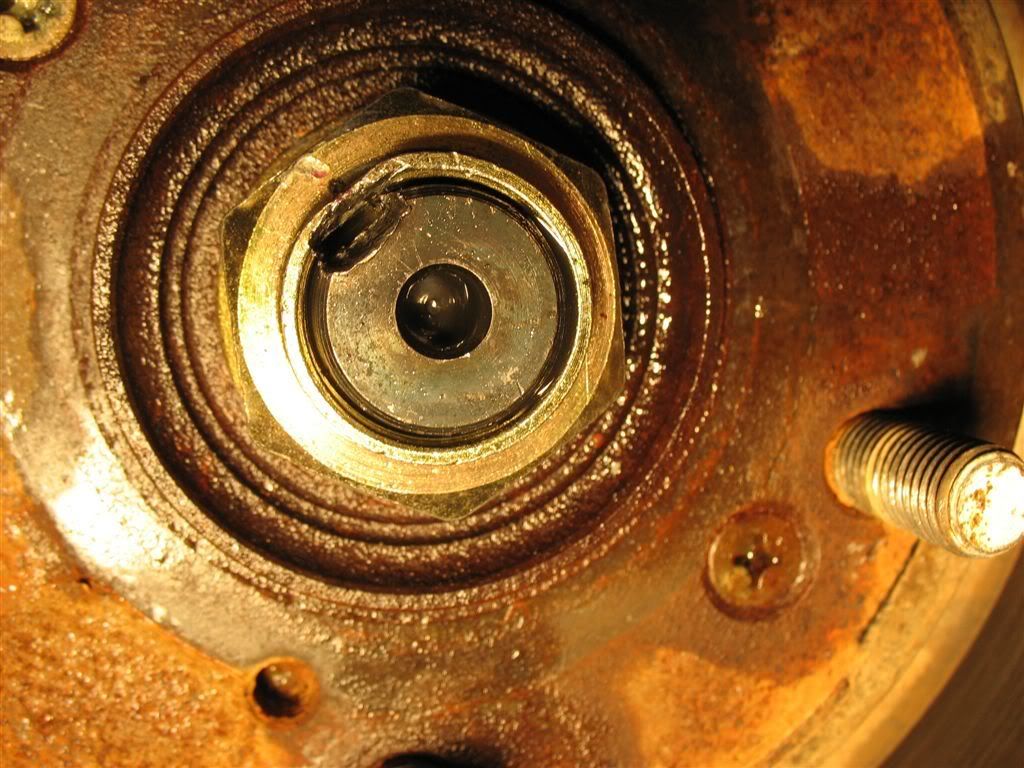
Do I have to remove spindle nut in order to remove a front rotor?
I just looked at new rotor and it doesn't look like it is retained by a spindle nut.. It looks like the rotor is retained by two 6mm screws only, am I missing something?
I just looked at new rotor and it doesn't look like it is retained by a spindle nut.. It looks like the rotor is retained by two 6mm screws only, am I missing something?

Team Owner
Joined: Sep 2006
Posts: 33,535
Likes: 1,142
yes- you missed the whole point of the 2 screws- they hold the rotor on during assembly at the factory and they get rusted or stuck in place.
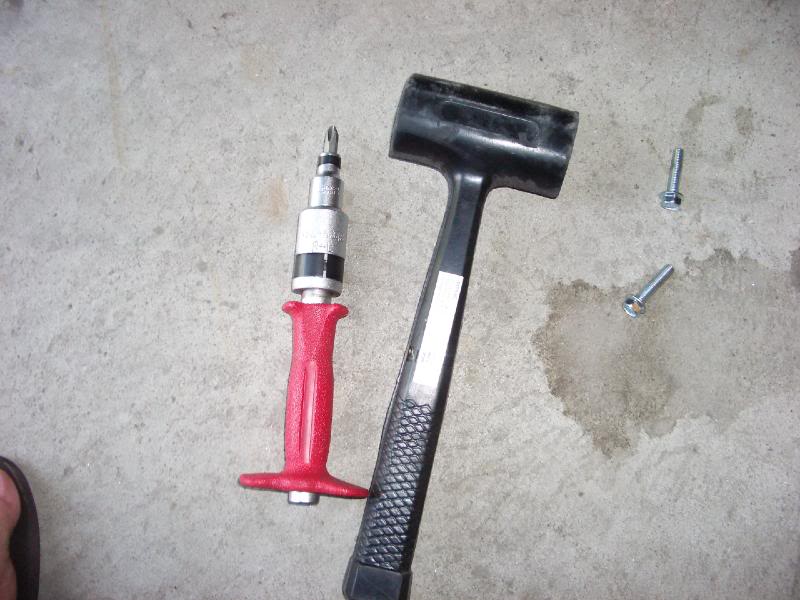
An impact screwdriver works well with some wd as pretreatment, or drill them out with a carbide tip bit- screws not required for install of new rotors
GET AWAY FROM THE BIG NUT
An impact screwdriver works well with some wd as pretreatment, or drill them out with a carbide tip bit- screws not required for install of new rotors
GET AWAY FROM THE BIG NUT
No need to remove the large nut. Remove the 2 screws in this pic, you will probably need an impact driver as pictured below the rotor.

Also once the screws are remove if it is still stuck you can use 2 bolts in those holes to pull it off like this: (this is rear rotor but exact same idea)
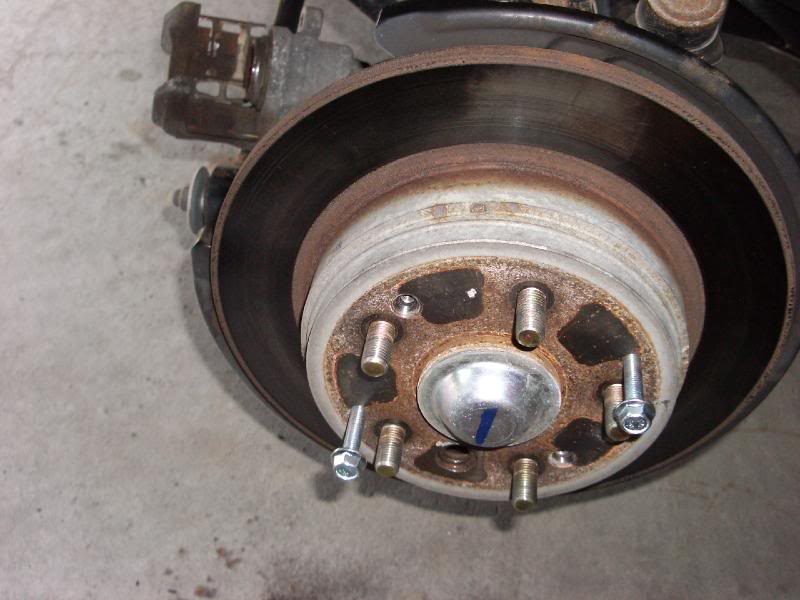
Also once the screws are remove if it is still stuck you can use 2 bolts in those holes to pull it off like this: (this is rear rotor but exact same idea)
Thread Starter
Outta my way!!
Joined: Sep 2003
Posts: 153
Likes: 0
From: Denver, CO
Thanks guys for your replies, no need to remove a big nut - I figured that by looking at the new rotor. Not sure why manual suggests this sequence.
I had to use impact driver to remove two retaining screws, so all is good now.

I had to use impact driver to remove two retaining screws, so all is good now.
The book says that because the directions they give are for removing the rotor with the intent to replace the wheel bearing and removing the nut is essential for that. However because the brakes section refers you to the suspension sections for rotor removal instructions there should be a annotation to skip that step.
Trending Topics
Team Owner
Joined: Sep 2006
Posts: 33,535
Likes: 1,142
See what happens when you try to follow the instructions!!! DOH!!
Checking in with azine before any job is the right plan. There are a few good DIY on front and rear brake jobs for gen2.
Most of the things you can DIY, are in the DIY actually
Checking in with azine before any job is the right plan. There are a few good DIY on front and rear brake jobs for gen2.
Most of the things you can DIY, are in the DIY actually
Thread Starter
Outta my way!!
Joined: Sep 2003
Posts: 153
Likes: 0
From: Denver, CO
Yeah, my bad on following instructions
And even if the suspension section calls for removing rotor, then WTH do they want ppl to remove spindle nut before removing the rotor?
Honda should have annotated that section better for rotor removal only, I agree!
No more reading TL manual without cheking with azine
And even if the suspension section calls for removing rotor, then WTH do they want ppl to remove spindle nut before removing the rotor?
Honda should have annotated that section better for rotor removal only, I agree!
No more reading TL manual without cheking with azine


Thread
Thread Starter
Forum
Replies
Last Post
Oakes
Wash & Wax
10
Oct 12, 2015 11:17 AM