
Tie-rod ends

Tie-rod ends
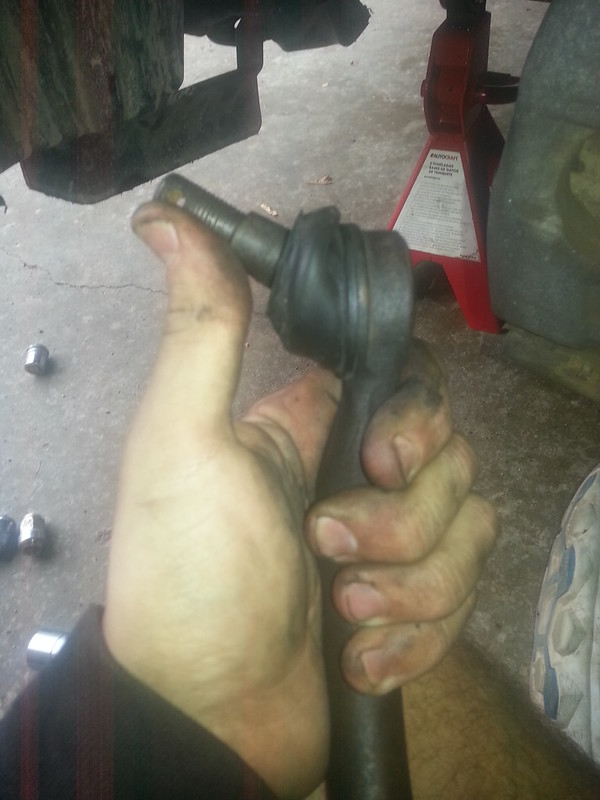
Last time I had the car up at my cousin's lift to do a changeover, I noticed a little bit of leakage from one of the tie-rod ends. I couldn't tell if the boot was torn, it seemed to be leaking from the edge of the boot where it meets the tie-rod end. I know I SHOULD have taken a picture of course, but I didn't.
The steering really doesn't have any play. I rocked on the tie rod a little bit and it seemed solid, It DOES move a little if I twist it, I think that is normal correct? I tried rocking the rim up and down and side to side and there was no play, again the wheel felt solid.
So in many cases, a leak from a boot means replace. Of course dirt/water gets in and it only gets worse from there. Some people say to worry about replacing the tie rod only when symptomatic. Which is better?
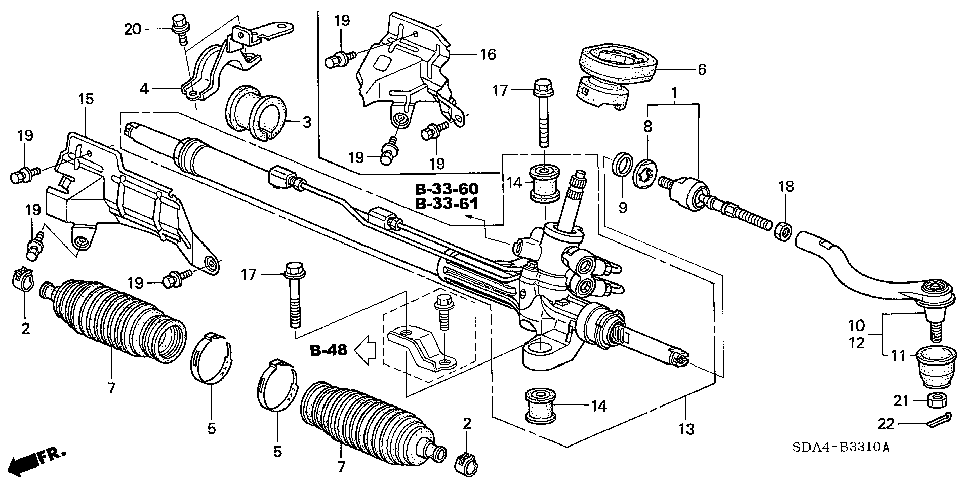
If I do have to replace, I find Acura's diagram pretty confusing. #10 and #12 are the tie-rod ends for the left and right side. Part number #11 is the boot and shown as a separate part. I thought it comes together sealed and pressed with grease? If I buy #10 or #12 will it come with #11?

And then there's this from the manual. I always thought the tie rods were not serviceable. But it looks like they are. If that's true, then perhaps the seepage I am seeing is therefore maybe not a cracked boot but maybe just normal seepage from the edges because that's how they're designed? Is this common, am I just seeing something that's pretty normal? Do I even need to replace them in the first place, there's a better question.
The steering really doesn't have any play. I rocked on the tie rod a little bit and it seemed solid, It DOES move a little if I twist it, I think that is normal correct? I tried rocking the rim up and down and side to side and there was no play, again the wheel felt solid.
So in many cases, a leak from a boot means replace. Of course dirt/water gets in and it only gets worse from there. Some people say to worry about replacing the tie rod only when symptomatic. Which is better?
If I do have to replace, I find Acura's diagram pretty confusing. #10 and #12 are the tie-rod ends for the left and right side. Part number #11 is the boot and shown as a separate part. I thought it comes together sealed and pressed with grease? If I buy #10 or #12 will it come with #11?
And then there's this from the manual. I always thought the tie rods were not serviceable. But it looks like they are. If that's true, then perhaps the seepage I am seeing is therefore maybe not a cracked boot but maybe just normal seepage from the edges because that's how they're designed? Is this common, am I just seeing something that's pretty normal? Do I even need to replace them in the first place, there's a better question.
Yea that's what I was thinking. There are other areas where the parts diagrams sometimes looks like it lists 2 different part numbers. When in actuality it comes together and separate. I know the diagram shows a bracket but I wish it was more clear.
But what I find interesting is that the tie-rod is serviceable. The boot itself is $10. I bet half the mechanics don't have that special tool besides the dealer. Why bother for a $40 part in total.
But what I find interesting is that the tie-rod is serviceable. The boot itself is $10. I bet half the mechanics don't have that special tool besides the dealer. Why bother for a $40 part in total.
Cruiser
Joined: Jan 2004
Posts: 484
Likes: 39
From: Maryland
Mr Tire told me I needed the left tie rod ends replaced. I double checked and didn't see any excess grease and there was a little play when you twist the tie rod. How much play should there be? I don't want to order new tie rod ends and there is actually nothing wrong. I will be getting another opinion soon, but just wanted to see what the forum opinion is.

Trending Topics
Cruiser
Joined: Jan 2004
Posts: 484
Likes: 39
From: Maryland
yeah I know, but there is some thing wrong on the passenger side due to tire wearing on the inside. So on the safe side I will be replacing the tie rod ends, its not hard to do. I have 326k on it and it wouldn't hurt to do so. Now I am trying to decide if I should go with Moog or OEM....any suggestions
Instructor
Joined: Aug 2014
Posts: 136
Likes: 45
From: Jackson, MI
If you have to do the tie rods do them in pairs because either way you need an alignment. It's not a hard job either. Easy to do on your own.


Intermediate
Joined: Jul 2004
Posts: 41
Likes: 6
From: Worcester, MA
DIY - Tie Rod replacement video
My front passenger outer tie rod actually just went. It was very similar to yours @rockyfeller with a slight leak. Once I had it off you could hear water had made it's way in. My state inspection had failed because of it. I have the feeling the guys at the local tire place may have gotten lazy during an alignment or two and used only one wrench to tighten/loosen it; but hard to say might have just been time.
I did take a video of the driver side replacement if it is of any help to anyone. I figure the 3rd gen forum might be dying down but we also might start running into the same parts finally failing.
I did take a video of the driver side replacement if it is of any help to anyone. I figure the 3rd gen forum might be dying down but we also might start running into the same parts finally failing.
Last edited by pgemme; Apr 15, 2015 at 03:10 PM. Reason: Video Showing up twice


Awesome pgemme! The small tips along the way are VERY helpful! I knew the outers were easy but the inners seemed tricky. One of the best DIYs I've seen because you explained everything so clearly that almost anyone can do it. Now I know I can tackle it. Thank you.
Last edited by rockyfeller; Apr 21, 2015 at 10:51 AM.
Intermediate
Joined: Jul 2004
Posts: 41
Likes: 6
From: Worcester, MA
No problem guys. Thanks for the comments. If anything else needs replacing I'll be sure to make a DIY for it. So far 10 years in and other than brakes and rotors the Tie-Rods have been the only thing.
Three Wheelin'


Joined: Dec 2014
Posts: 1,482
Likes: 212
If you mark the tire rod locking nut with something, and turn it half a turn, check to see how far forward the tie rod now moves and return to prvious position (this is your reference point). Now twist off the old tie rod, and tighten the new tie rod until you hit the end, and twist back to the reference point. You can now finish off by tightening the tie rod locking nut and check to see the mark aligns. This way you don't need an alignment.

Thread
Thread Starter
Forum
Replies
Last Post
jterp7
3G MDX (2014-2020)
9
Feb 3, 2016 08:34 PM