
3G Rear Extended Stud Install - Pics inside

Thread Starter


Joined: Sep 2008
Posts: 78,249
Likes: 20,202
Mods, feel free to merge with the Front stud thread found here. Maybe put them together and just make it a stud swap entry in the garage.
https://acurazine.com/forums/3g-tl-tires-wheels-suspension-97/d-042-3g-front-rear-extended-stud-install-843718/
Ok, so a few months ago I made a DIY thread for swapping to extended studs to run type 1 spacers etc or just to even change out a stripped one.
Using a friend of mine's information (Nitrous, fender guy and wheel whore extraordinaire), the service manual I bought from ebay...and some tools...I was able to swap out the rears too.
Time: About 2 hours, taking your time.
Difficulty: Probably a 4 out of 10, 10 being difficult.
Tools:
remove your rims, duh, everything needed for that.
12MM, 14MM socket and ratchet and 17MM wrench will get your rear calipers off, I'm assuming you already know how to do that.
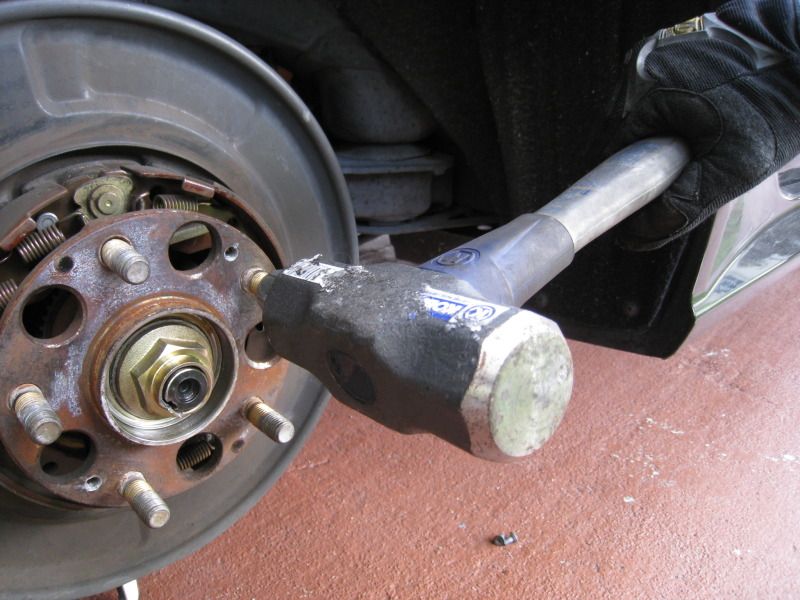
Philips to remove your rotor screws (let's hope you've done this before, if not...hammer their heads with a socket extension and sledge to knock rust loose, then impact them off...put some antiseize on the underside of heads to make easy to remove later).
A 32MM socket...preferably 6 point and a 1/2" socket breaker bar...
Lastly...set of punches and hammer to be able to take hub cap off and another to be able to bend notch in hub axle nut out and back in to be taken off.
Ok, so here we go, very easy...hardest part for me was getting the new studs in...I don't know if the knurls were slightly larger or what (more on that later)...but I DID buy the Honda/Acura ones from ebay...they are ichiba ones because believe it or not, it's not that easy to find the stud you want. My goal was to buy a stud that was long enough to run with a 10MM or smaller type 1 spacer...but still short enough to use on the oem rims with NO spacers and oem closed ended lug nuts. Mission accomplished...these are 40mm of threading which is about 10 to 15Mm longer than our oem studs. Perfect...
Ok, so back to it...
here's the ebay link for the extended studs
http://www.ebay.com/itm/230689870057...ht_4294wt_1438
and here is the link to some akata v1 spacers...64.1 so no vibrations...
http://www.ebay.com/itm/330393205317...#ht_1472wt_952
but cheaper to buy individually rather than spending the money on a set of ichiba or eibach at $105+ for the set. This set up ran me $44+$34...
also, if anyone is wondering, I did this to be able to rotate my tires the traditional way. My offsets are 10mm different front rear so I wanted to keep same stance, but be able to rotate. The concavity is so slight you can't tell which one should be front or back anyway
DIY Part...
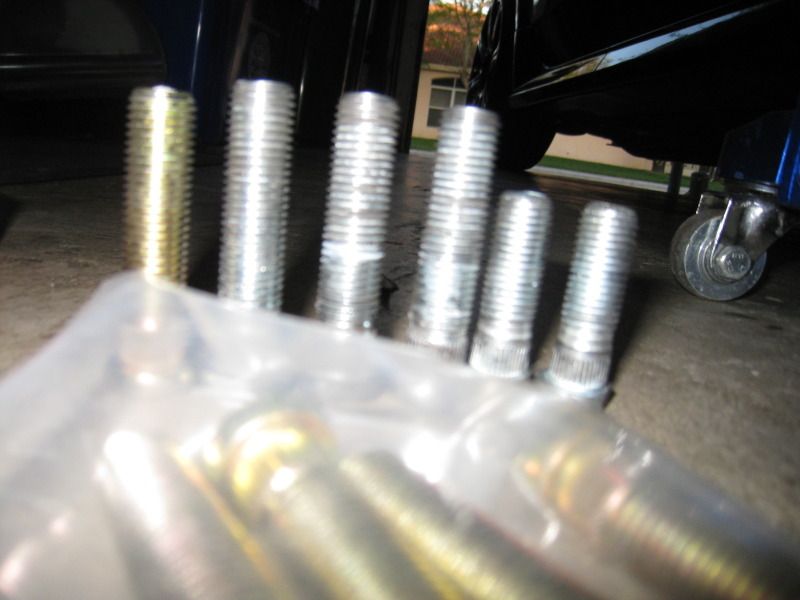
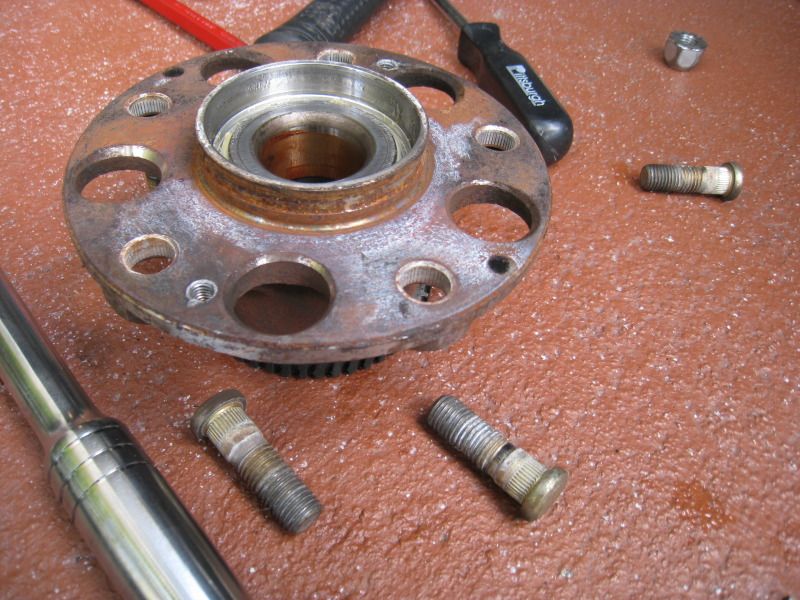
Here is the stud difference in sizes. The longest ones are the 45MM ones that came with the eibachs that were too long for my work lugs (whole other headache)...the one all the way on the left is the 40MM I've linked below, and the shorties are the oems.
rim off, you can get cracking on removing the hub center.
I marked the position but it's uneccessary
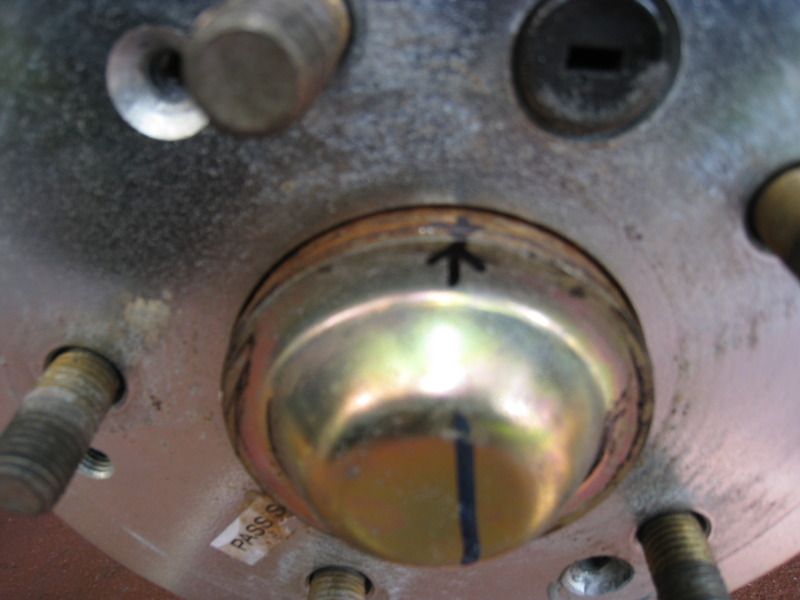
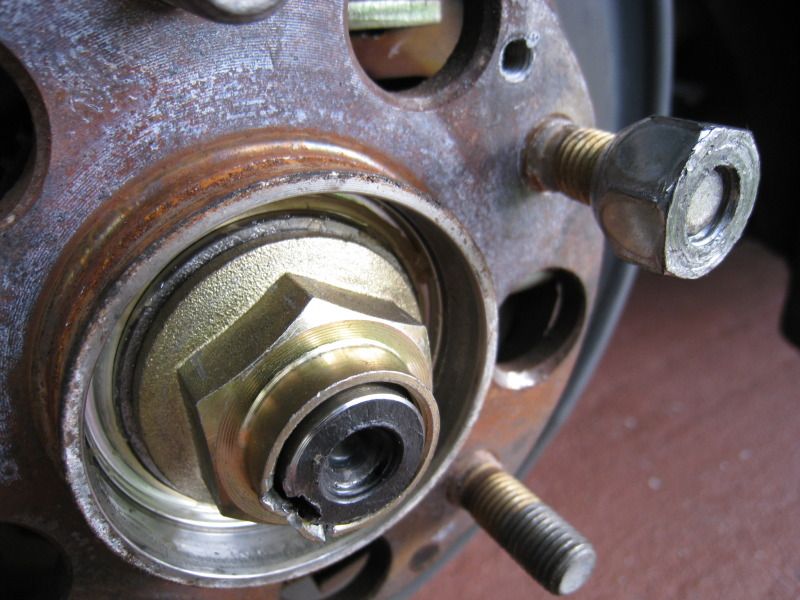
Here's what's under...don't worry about marking this either, when you retorque, it'll be at same position. (come to think of it, this kinda removes the need for a torque wrench...)

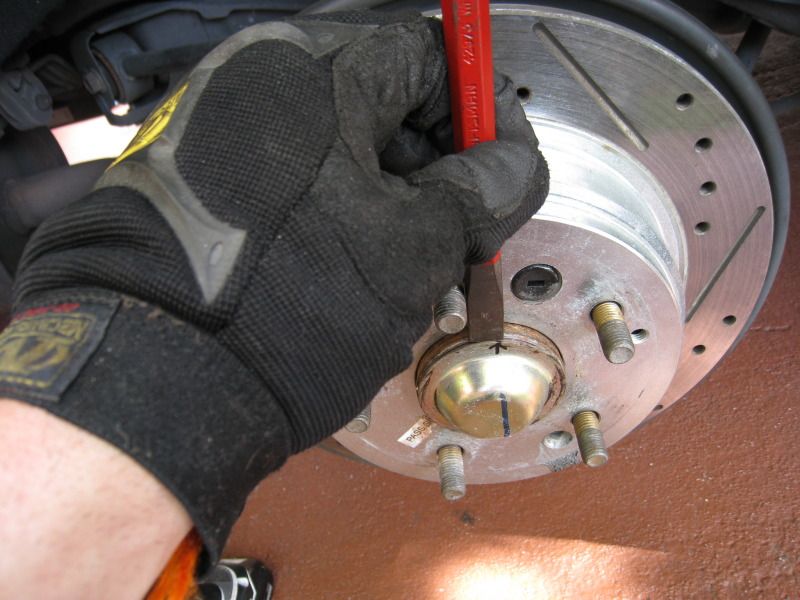
use the punch to hammer that little dip in the nut straight, or at least straight enough to get the socket turning. Don't full remove nut yet, just hand tighten it back on. Easier to knock the studs out while on the car.
Here it is, with caliper off, and rotor removed.
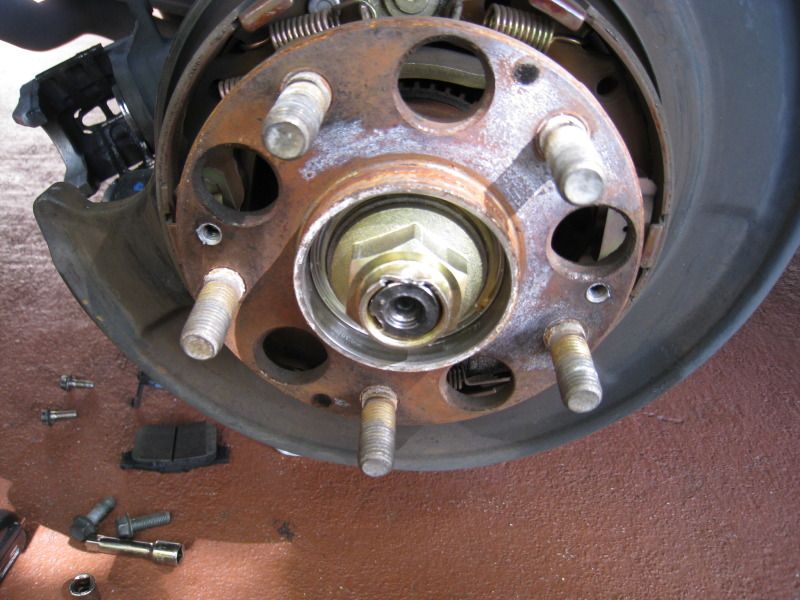
Hammer off studs, using a open ended nut to avoid damaging the studs
get some motherfkrrrrrr
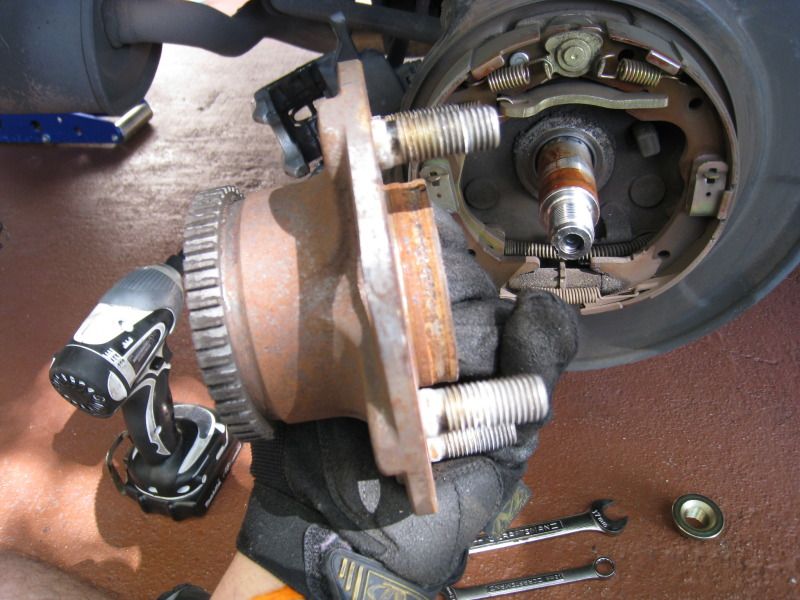
once they are all out, undo the 32MM nut and this thing slides RIGHT off...
clearly, this picture is from when I first took it off prior to realizing easier to knock them off while on the car
momma said knock you out...
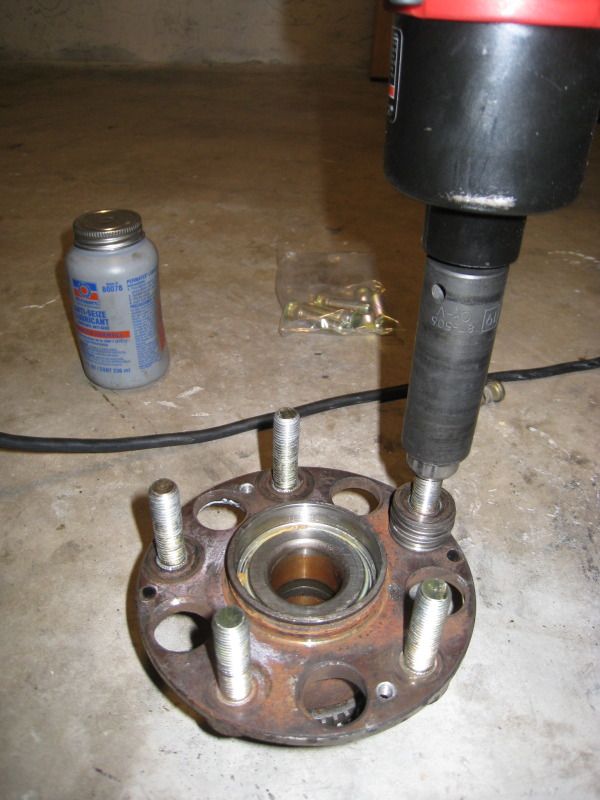
I do NOT know why the knurls were so hard going in but I had to hit them with my impact gun on full torque...and it still took a while to get them all the way in. On the 2nd side, I used some antiseize to kinda lube up entry (that's what HE said!!!) of the knurl into it's seat...helped...also found a larger washer that helped center the lug nut I was using to torque down
Once that's done...
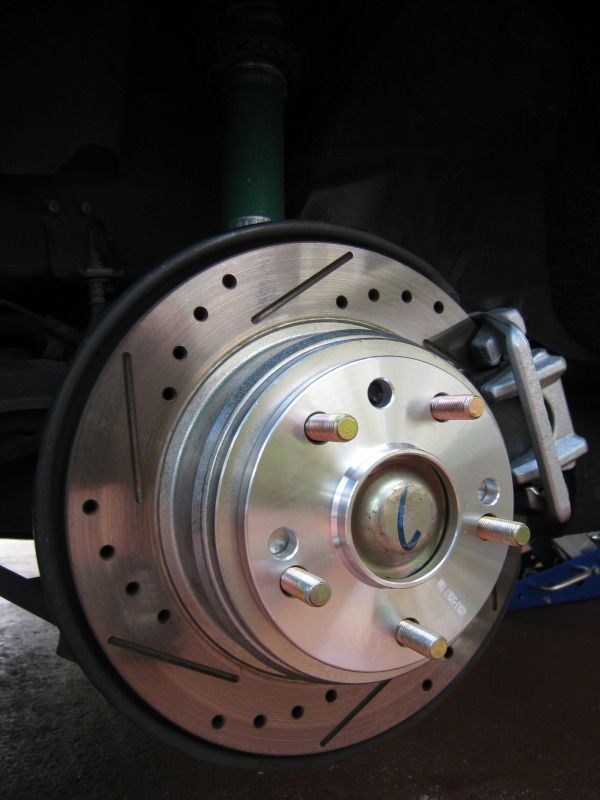
torque the center axle nut back to 134ft/lb torque...tap the little groove back in, and put it all back together...
yay!

Done
That's it...feel free to add to this, or ask anything I may have missed. Enjoy!
EDIT: Last thought, I did clean up inside the bearing a little of brake shoe does etc...and put a little bearing grease by hand on both inside and outside part of bearing and on shaft (they paid extra...) then a dab of motor oil on the under side of the axle nut which was recommended (presumably to prevent seizing in the future).
J.
https://acurazine.com/forums/3g-tl-tires-wheels-suspension-97/d-042-3g-front-rear-extended-stud-install-843718/
Ok, so a few months ago I made a DIY thread for swapping to extended studs to run type 1 spacers etc or just to even change out a stripped one.
Using a friend of mine's information (Nitrous, fender guy and wheel whore extraordinaire), the service manual I bought from ebay...and some tools...I was able to swap out the rears too.
Time: About 2 hours, taking your time.
Difficulty: Probably a 4 out of 10, 10 being difficult.
Tools:
remove your rims, duh, everything needed for that.
12MM, 14MM socket and ratchet and 17MM wrench will get your rear calipers off, I'm assuming you already know how to do that.
Philips to remove your rotor screws (let's hope you've done this before, if not...hammer their heads with a socket extension and sledge to knock rust loose, then impact them off...put some antiseize on the underside of heads to make easy to remove later).
A 32MM socket...preferably 6 point and a 1/2" socket breaker bar...
Lastly...set of punches and hammer to be able to take hub cap off and another to be able to bend notch in hub axle nut out and back in to be taken off.
Ok, so here we go, very easy...hardest part for me was getting the new studs in...I don't know if the knurls were slightly larger or what (more on that later)...but I DID buy the Honda/Acura ones from ebay...they are ichiba ones because believe it or not, it's not that easy to find the stud you want. My goal was to buy a stud that was long enough to run with a 10MM or smaller type 1 spacer...but still short enough to use on the oem rims with NO spacers and oem closed ended lug nuts. Mission accomplished...these are 40mm of threading which is about 10 to 15Mm longer than our oem studs. Perfect...
Ok, so back to it...
here's the ebay link for the extended studs
http://www.ebay.com/itm/230689870057...ht_4294wt_1438
and here is the link to some akata v1 spacers...64.1 so no vibrations...
http://www.ebay.com/itm/330393205317...#ht_1472wt_952
but cheaper to buy individually rather than spending the money on a set of ichiba or eibach at $105+ for the set. This set up ran me $44+$34...
also, if anyone is wondering, I did this to be able to rotate my tires the traditional way. My offsets are 10mm different front rear so I wanted to keep same stance, but be able to rotate. The concavity is so slight you can't tell which one should be front or back anyway
DIY Part...
Here is the stud difference in sizes. The longest ones are the 45MM ones that came with the eibachs that were too long for my work lugs (whole other headache)...the one all the way on the left is the 40MM I've linked below, and the shorties are the oems.
rim off, you can get cracking on removing the hub center.
I marked the position but it's uneccessary
Here's what's under...don't worry about marking this either, when you retorque, it'll be at same position. (come to think of it, this kinda removes the need for a torque wrench...)
use the punch to hammer that little dip in the nut straight, or at least straight enough to get the socket turning. Don't full remove nut yet, just hand tighten it back on. Easier to knock the studs out while on the car.
Here it is, with caliper off, and rotor removed.
Hammer off studs, using a open ended nut to avoid damaging the studs
get some motherfkrrrrrr
once they are all out, undo the 32MM nut and this thing slides RIGHT off...
clearly, this picture is from when I first took it off prior to realizing easier to knock them off while on the car
momma said knock you out...
I do NOT know why the knurls were so hard going in but I had to hit them with my impact gun on full torque...and it still took a while to get them all the way in. On the 2nd side, I used some antiseize to kinda lube up entry (that's what HE said!!!) of the knurl into it's seat...helped...also found a larger washer that helped center the lug nut I was using to torque down
Once that's done...
torque the center axle nut back to 134ft/lb torque...tap the little groove back in, and put it all back together...
yay!
Done
That's it...feel free to add to this, or ask anything I may have missed. Enjoy!
EDIT: Last thought, I did clean up inside the bearing a little of brake shoe does etc...and put a little bearing grease by hand on both inside and outside part of bearing and on shaft (they paid extra...) then a dab of motor oil on the under side of the axle nut which was recommended (presumably to prevent seizing in the future).
J.
Last edited by rockstar143; Mar 26, 2012 at 06:32 PM.

Thread
Thread Starter
Forum
Replies
Last Post
cycdaniel
1G TSX Performance Parts & Modifications
8
Dec 17, 2019 10:58 AM