
RV6 V2 Precat Delete Interest
 02-12-2010, 05:38 PM
#121
Burning Brakes
i will be posting my video on this thread https://acurazine.com/forums/3g-tl-performance-parts-modifications-112/stock-exhaust-note-mid-muffler-resonator-delete-762078/
I already have some video clips of my exhaust note in couple different scenarios...I will do same once RV6 upgrades are in so stay posted and check out the videos if you haven't already
I already have some video clips of my exhaust note in couple different scenarios...I will do same once RV6 upgrades are in so stay posted and check out the videos if you haven't already
 02-12-2010, 06:04 PM
#122
9th Gear

Join Date: Jan 2010
Age: 34
Posts: 9
Likes: 0
Received 0 Likes
on
0 Posts
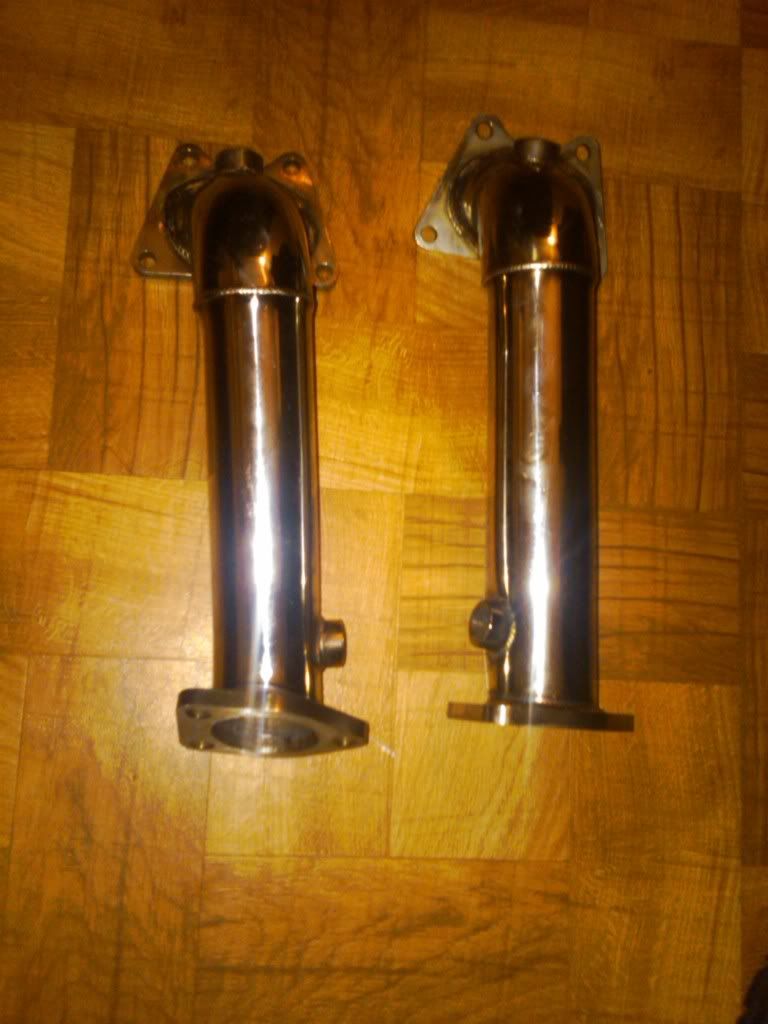
got mine today they look great but by the bottom sensor it has like a dent is it suppose to be like that does any one else have that...my bad just read the fyi feel mad stupid lol the dent is normal lol thanx rich cant wait to put these bad boyz on
Last edited by J6speed; 02-12-2010 at 06:07 PM.
 02-14-2010, 12:13 AM
#126
Burning Brakes
Okay finally, better late then neva. What a crazy day wow, but at the end of the day operation successful, so to make this kinda of short, completed my PCD V2, J-pipe and Test Pipe install, and let me tell you I hate  F*ing winter...My third cat bolts were rusted seized solid only way it came out was with a sawzall cutter, so that put me in a 2hourdelay doing that and then rear cat bolts to J-pipe was also seized but those I was able to torch off with a torchgun.....

Anyway I was running around with my trying to find a cutter and torch and then after that got done, my next issue was the rear PCD didnt want to fit in smoothly had to use a prybar and place it on the rear flange where goes to header threads and hit end of prybar with a hammer to get the PCD holes thru the threads on the headers.....
The rest of the way was pretty straight forward, some things I did as mentioned before I removed that shaft bracket and also removed rear bracket opposite end of shaft and then removed the heat shield from the rear PCD and my rear came out from the bottom which was pretty easy once both those brackets were removed...front kept everything in place and came thru top just gotta be patient and wiggle her thru up....
So I would have a video clip each step of the way but I was press for time cuz I used my lift at work and they were closing doors at 4 and I finished 4:30(shop foreman cut me a break thank god ) So with rusty delay it took me roughly 7hours to finish which is not bad considering delay which in video clip I said 1hr delay or so ended up being 2hr+ delay....so if you dont have my issue with rusty bolts and have a lift I would say give or take it would take between 3-5hrs to complete depending on your knowledge and quickness....Glad I used a lift but like someone stated up top alot of lift up,down,up.down,up,down u get the point
I did manage a quick clip of the issues I had with rusty bolts man I hate rust bolts and winters
http://www.youtube.com/watch?v=jZsIm0sLm4g
I did get some video clips of sound after I finished, not the best quality but it will do for now....I am going to post some fly-by pics when I get a chance as well
here is link to exhaust sounds before and after...
https://acurazine.com/forums/showthread.php?t=762078
all in all satisfied with product Thanks Richie, and drove car for about 20miles or so afterwards and loving the power and sound
F*ing winter...My third cat bolts were rusted seized solid only way it came out was with a sawzall cutter, so that put me in a 2hourdelay doing that and then rear cat bolts to J-pipe was also seized but those I was able to torch off with a torchgun.....Anyway I was running around with my
trying to find a cutter and torch and then after that got done, my next issue was the rear PCD didnt want to fit in smoothly had to use a prybar and place it on the rear flange where goes to header threads and hit end of prybar with a hammer to get the PCD holes thru the threads on the headers.....The rest of the way was pretty straight forward, some things I did as mentioned before I removed that shaft bracket and also removed rear bracket opposite end of shaft and then removed the heat shield from the rear PCD and my rear came out from the bottom which was pretty easy once both those brackets were removed...front kept everything in place and came thru top just gotta be patient and wiggle her thru up....
So I would have a video clip each step of the way but I was press for time cuz I used my lift at work and they were closing doors at 4 and I finished 4:30(shop foreman cut me a break thank god
) So with rusty delay it took me roughly 7hours to finish which is not bad considering delay which in video clip I said 1hr delay or so ended up being 2hr+ delay....so if you dont have my issue with rusty bolts and have a lift I would say give or take it would take between 3-5hrs to complete depending on your knowledge and quickness....Glad I used a lift but like someone stated up top alot of lift up,down,up.down,up,down u get the pointI did manage a quick clip of the issues I had with rusty bolts man I hate rust bolts and winters
http://www.youtube.com/watch?v=jZsIm0sLm4g
I did get some video clips of sound after I finished, not the best quality but it will do for now....I am going to post some fly-by pics when I get a chance as well
here is link to exhaust sounds before and after...
https://acurazine.com/forums/showthread.php?t=762078
all in all satisfied with product Thanks Richie
, and drove car for about 20miles or so afterwards and loving the power and sound


 02-16-2010, 11:27 AM
#131
Burning Brakes
man that sucks, but yeah you should be able to switch it without taking everything out, well it might be a PITA depending where you are doing this but most def possible...either way good luck...So Im assuming you got a CEL when you put them on top?
02-16-2010, 11:40 AM
#132
9th Gear
Join Date: Jan 2010
Age: 34
Posts: 9
Likes: 0
Received 0 Likes
on
0 Posts
yea i got a cell it ran good but some times it would idel funny and n lag wene i get on it but dam i felt huge gains cant wait tell its running right tho so i can drive it with more confidance
02-16-2010, 12:34 PM
#133
Safety Car
Be sure to do an idle relearn after the install.
First disconnect the battery and reconnect after 15 minutes.
Then,
1) With a completely cold engine (wait until late tonight or tomorrow if needed)
2) Turn off Climate Control (AC / heater), radio, headlights, seat warmer, etc.
3) Start engine
4) DON'T TOUCH THE THROTTLE or anything else
5) Allow the engine to idle for 15-20 minutes in winter, or 10-15 minutes in summer.
6) Don't touch the gas pedal, brake pedal, or anything else... ok, just reminding you
If you are comfortable to do so, you can exit and leave the car after starting it. Just remember to return in 20 minutes.
02-16-2010, 01:21 PM
#135
Burning Brakes
^^i guess i covered this when driving like 20miles or so after doing this, because I been idling pretty good nothing unusual, warm up phase is good and also i didnt do a ecu reset which I believe it was you Inaccurate who didnt either. i wanted to see if something unusual would happen but everything is 100 so far(knock on wood).....I guess I can let it idle for 20min today when I leave since its snowing out and I can warm her up before going home...good to know info though by the way
Last edited by BostonSilverTypeS; 02-16-2010 at 01:23 PM.
02-16-2010, 01:34 PM
#136
Safety Car
BostonSilverTypeS,
Right. I didn't do a reset after my install just out of curiosity.
You are right that the computer we eventually learn on it's own. The computer averages out new stuff that it sees with the old stuff that it saw in the recent past. Therefore, the computer will gradually acquire the new tune over a period of time.
You mention that you would let it idle for 20 minutes this evening. I think that this will *not* work without first disconnecting the battery. We need to erase the previous tuning history from the computer by disconnecting the battery. Now with no prior history, the computer can learn fresh without having to dilute what it sees with all of that "outdated" stuff it learn beforehand.
02-16-2010, 03:05 PM
#137
Burning Brakes
^yea ur right, i'll disconnect the battery forgot to mention that...but yeah i think thats what happened in my case as it adjusted while on the drive after the install
02-16-2010, 09:46 PM
#138
et.org
iTrader: (1)
Join Date: Apr 2009
Location: Texas
Posts: 35
Likes: 0
Received 0 Likes
on
0 Posts
had mine installed last weekend, there's a really bad rattle/rasp around 2500rpm not sure if it's something rattling under the car...I think i'm gonna add a resonator back to my exhaust
 02-16-2010, 10:30 PM
#141
Burning Brakes
did you remove the unnecessary brackets as far as rattle goes...but the rasp is normal at around 2500rpm....that would be the only annoying part of this mod to some, but i personally dont mind as I can manage to not drive around 2500rpm...
02-17-2010, 03:51 AM
#142
Former Sponsor
Thread Starter

Be sure to do an idle relearn after the install.
First disconnect the battery and reconnect after 15 minutes.
Then,
1) With a completely cold engine (wait until late tonight or tomorrow if needed)
2) Turn off Climate Control (AC / heater), radio, headlights, seat warmer, etc.
3) Start engine
4) DON'T TOUCH THE THROTTLE or anything else
5) Allow the engine to idle for 15-20 minutes in winter, or 10-15 minutes in summer.
6) Don't touch the gas pedal, brake pedal, or anything else... ok, just reminding you
If you are comfortable to do so, you can exit and leave the car after starting it. Just remember to return in 20 minutes.
First disconnect the battery and reconnect after 15 minutes.
Then,
1) With a completely cold engine (wait until late tonight or tomorrow if needed)
2) Turn off Climate Control (AC / heater), radio, headlights, seat warmer, etc.
3) Start engine
4) DON'T TOUCH THE THROTTLE or anything else
5) Allow the engine to idle for 15-20 minutes in winter, or 10-15 minutes in summer.
6) Don't touch the gas pedal, brake pedal, or anything else... ok, just reminding you
If you are comfortable to do so, you can exit and leave the car after starting it. Just remember to return in 20 minutes.
I will install them on my TL and you can drive it first. Before we go through the install again.
02-17-2010, 07:16 AM
#143
Safety Car
Rich,
You can use my pictures and/or posted text (partial or verbatim) for personal and/or business use. The usage may include printed or otherwise instructions to be included with your commercial products. The usage may include being content for your personal and/or business website(s).
The above is the official answer that you can keep for your records. The freindly anwer is - Sure man, glad to help.
02-17-2010, 12:19 PM
#144
et.org
iTrader: (1)
Join Date: Apr 2009
Location: Texas
Posts: 35
Likes: 0
Received 0 Likes
on
0 Posts
which bracket? I didn't installed it myself I just had the shop follow the instructions as posted on here...if you don't mind could you snap a picture or describe what bracket you are talking about so I can try to see if it was removed or remove it? thanks!

 02-17-2010, 06:20 PM
#150
Burning Brakes
...even getting a nice gold/bluish tint on the PCD and J-pipe, man I need a camera
02-18-2010, 04:07 PM
#152
Burning Brakes
^^yea 2500rpm is real raspy with no resonator, from what I hear the resonator should fix that rasp, so if you do get a resonator post a clip if u can? there might be clips already but no time to go search, maybe one of these slow days i'll go look it up
02-19-2010, 02:42 PM
#153
et.org
iTrader: (1)
Join Date: Apr 2009
Location: Texas
Posts: 35
Likes: 0
Received 0 Likes
on
0 Posts
i've been trying to find a resonator to buy but i'm not sure which one to get. this is how my exhaust is set up right now. i have the PCD, stock jpipe, and the "stage 3" with teh dynomax resonator and the midmuffler delete. where on the exhaust should i add a resonator and which one to get?
02-19-2010, 05:48 PM
#155
Burning Brakes
i've been trying to find a resonator to buy but i'm not sure which one to get. this is how my exhaust is set up right now. i have the PCD, stock jpipe, and the "stage 3" with teh dynomax resonator and the midmuffler delete. where on the exhaust should i add a resonator and which one to get?
so you want to have 2 resonators?? I'm confused you have have a dynomax resonator so do you want to replace that resonator or get a second??
02-19-2010, 07:23 PM
#156
holy hell!!!! Rasp and a half!... i have XLR8 Res Exhaust... and installed the PCDs today heres a video
http://www.youtube.com/watch?v=3HuibcwEEac
http://www.youtube.com/watch?v=3HuibcwEEac
02-19-2010, 10:35 PM
#157
Safety Car
The PCD are monsters !!!
Must tame the monster
The various resonators are discussed in-depth in the link below.
The Drone is unreal! Help! (click here)
This one too.
XLR8 J-pipe install.......Not liking the sound! (click here)
Must tame the monster
The various resonators are discussed in-depth in the link below.
The Drone is unreal! Help! (click here)
This one too.
XLR8 J-pipe install.......Not liking the sound! (click here)
02-20-2010, 08:42 AM
#158
The PCD are monsters !!!
Must tame the monster
The various resonators are discussed in-depth in the link below.
The Drone is unreal! Help! (click here)
This one too.
XLR8 J-pipe install.......Not liking the sound! (click here)
Must tame the monster
The various resonators are discussed in-depth in the link below.
The Drone is unreal! Help! (click here)
This one too.
XLR8 J-pipe install.......Not liking the sound! (click here)
02-20-2010, 08:47 AM
#159
Chapter Leader (NY/NJ)
iTrader: (10)
Inaccurate is like www.lmgtfy.com