Sweet interior lighting upgrade with pics and how to.
 08-27-2011, 09:08 PM
#1
Safety Car
Thread Starter
iTrader: (4)
Sweet interior lighting upgrade with pics and how to.
I was able to finally get some pictures as it was very hard to capture the output of exactly what I did so that people can see it in the pictures. Im the kind of guy that likes OEM looking improvements and mods so this is a very subtle mod that matches the OEM ambient lighting perfectly. So dont expect some crazy blue or red interior lights...basically, I dont want the inside of my car to look like a night club. I was inspired to do this mod after being in a few newer vehicles that have very similar OEM night ambient lighting. One of them being the new 2011 Jeep Grand Cherokee Overland that has an unbelievable interior.
Since I have a Type S I used red 3mm LED's however this mod can be done to the base TL's in blue as well. I dont think the older 04-06 TL's have footwell ambient lighting but all 07+ TL's do and these match the overhead lights and footwell lights perfectly. Just adds a real nice touch to the interior that is not overdone and looks like it could have come factory.
To do this all you will need is a total of 4 pre-wired (with resistors) 3mm LED's in the color of your choice. To match OEM Type S would be red, and base TL would be blue. To help diffuse the light output of the LED I trimmed off the edge of the LED's and also sanded them down slightly so the lens appeared frosted. The door handle LED's are mounted in the top rear corner, and the lower door pocket lights get mounted in the screw access hole for the door panel. Obviously the door panels have to come off as all the work is done from inside the door panel. Thats a simple job though. I drilled holes from inside the door panel and mounted the LED's inside the holes and secured with a heat glue gun. From inside the cabin you cannot see the actual bulbs they are hidden just like the footwell lights or overhead ambient lights. To power these lights I simply stole power and ground from the door lock switch. So these lights will go on and off with the other interior lights and even dim with the rest of them too. I wanted to get a power source from within the door panel that way if for whatever reason I needed to remove the door panel at later date I didnt have to worry about cutting wires that ran into the door. Sorry I dont have pics of the actual install but it really was not that hard so hopefully my description is good enough.
Here are the final results:


This is the car that insprired this mod the 2011+ Jeep Grand Cherokee Overland...LOVE these things and will probably be getting one for the wife in the not too distant future.


Since I have a Type S I used red 3mm LED's however this mod can be done to the base TL's in blue as well. I dont think the older 04-06 TL's have footwell ambient lighting but all 07+ TL's do and these match the overhead lights and footwell lights perfectly. Just adds a real nice touch to the interior that is not overdone and looks like it could have come factory.
To do this all you will need is a total of 4 pre-wired (with resistors) 3mm LED's in the color of your choice. To match OEM Type S would be red, and base TL would be blue. To help diffuse the light output of the LED I trimmed off the edge of the LED's and also sanded them down slightly so the lens appeared frosted. The door handle LED's are mounted in the top rear corner, and the lower door pocket lights get mounted in the screw access hole for the door panel. Obviously the door panels have to come off as all the work is done from inside the door panel. Thats a simple job though. I drilled holes from inside the door panel and mounted the LED's inside the holes and secured with a heat glue gun. From inside the cabin you cannot see the actual bulbs they are hidden just like the footwell lights or overhead ambient lights. To power these lights I simply stole power and ground from the door lock switch. So these lights will go on and off with the other interior lights and even dim with the rest of them too. I wanted to get a power source from within the door panel that way if for whatever reason I needed to remove the door panel at later date I didnt have to worry about cutting wires that ran into the door. Sorry I dont have pics of the actual install but it really was not that hard so hopefully my description is good enough.
Here are the final results:
This is the car that insprired this mod the 2011+ Jeep Grand Cherokee Overland...LOVE these things and will probably be getting one for the wife in the not too distant future.

The following users liked this post:
CubanLynx84 (08-28-2011)
08-27-2011, 11:20 PM
#6
I'm Craig
iTrader: (2)
Very nicely done. The Type-S interior is lit so much differently than the base TLs. Does the color/brightness ever bother you? That bright red upper brow would piss me off at night.
08-28-2011, 12:48 AM
#7
Registered 3.5L Member
James (We'll be on a first name basis now, as your handle is a bitch to type) AGAIN with the lights!! Looks great my friend...you've given me even more lighting ideas! Nice job!!!
Trending Topics
08-28-2011, 02:20 AM
#8
Safety Car
Thread Starter
iTrader: (4)
Justnspace,
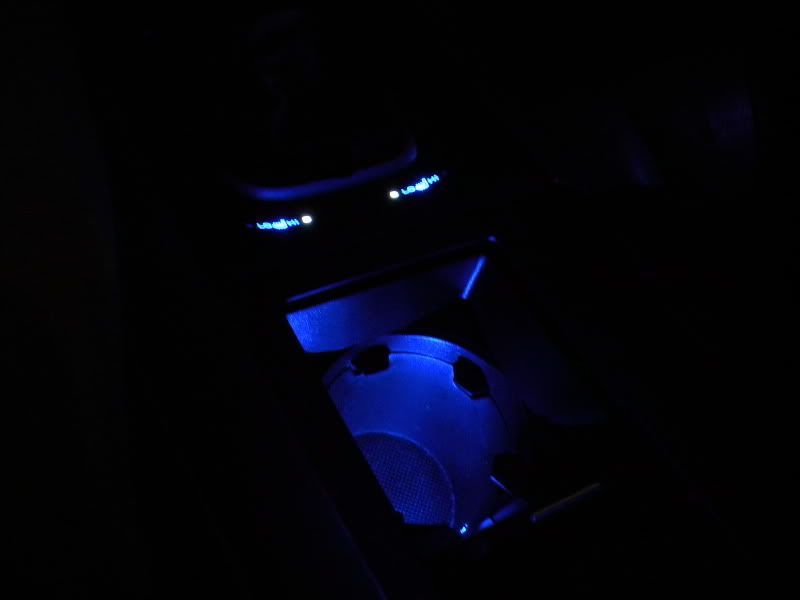
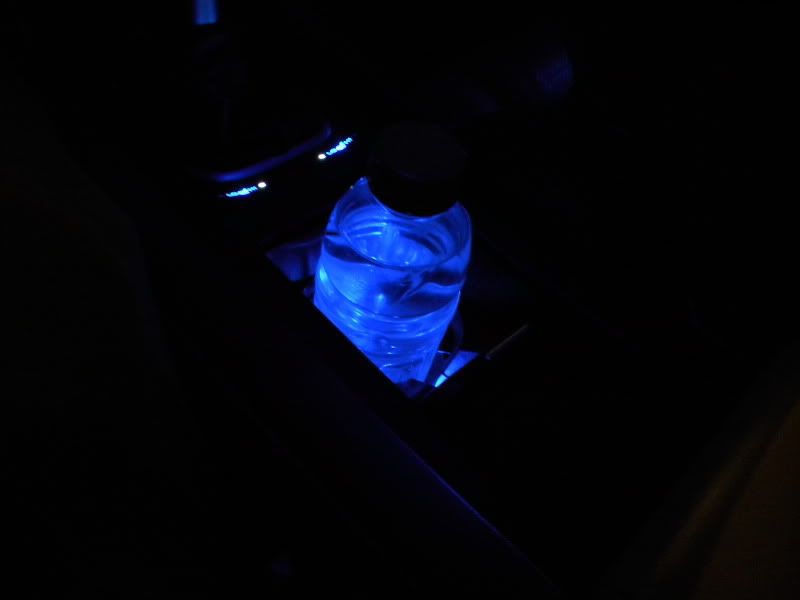
Good idea on the cup holder one. I have not really considered it but mainly because I have that cover closed all the time unless there is a drink in there. But I do have several extra LED's so I can try anything. The other reason is technically that area is already illuminated by the overhead ambient lights, but if I wanted something a little more pronounced kind of like that Jeep interior above I could.
Usmarinedelta,
Thanks for the compliments. As for the color I think you may have confused the two extra pictures of the newer Grand Cherokee interior as being my TL's interior. That is not my TL I simply posted those to show what some newer cars have done with putting LED's in certain places. The only thing I did to my interior was added an LED to the door handle pockets and door panel storage pocket. Like I said it's real subtle, but looks nice at night.
The following users liked this post:
07tl-s6spd (08-29-2011)
 08-28-2011, 09:39 AM
#13
I'm Craig
iTrader: (2)
Well remember these are pictures so you can't really base the cars interior lighting based on those. No the oem interior lighting does not piss me off it's not too bright and I personally think the red is easy on the eyes. I may have had the "full bright" button pressed in those pictures which is maybe why it appears very bright. As far as the color I think the read looks really cool although I also enjoyed the color of my base 07 TL as well. They are both nice in their own ways I guess you could say.
08-28-2011, 10:52 AM
#16
Safety Car
Thread Starter
iTrader: (4)
James
 08-28-2011, 07:03 PM
#18
Safety Car
Thread Starter
iTrader: (4)
Depending on how happy I feel tonight or tomorrow I will possibly remove my door panel to help you guys out and will post some pics.
stand by
James
08-28-2011, 07:28 PM
#19
08-28-2011, 08:14 PM
#20
Safety Car
Thread Starter
iTrader: (4)
Here guys I went ahead and took off my passenger side door panel and took pictures. Hopefully these are better than whats in the garage. As mentioned above you can tap into the wires but then your making a huge hassle when it comes time to remove the door panel as your going to have wires from the door panel into the door shell which is a huge pain. My method and you have every self contained inside the door panel.
Here are the pics hope this is what you guys were looking for.


This is the location of the lower pocket LED. Drill the hole from the other side then push the LED through and secure with hot glue gun. I like this stuff as it dries pretty much right away, but is easy to remove if need be. its also clean and easy to use.

This is the location of the upper door handle LED. Its covered in electrical tape but drill this hole from this side and secure using the same method as the lower LED.

Here is the door lock switch. You can see where the 12V side goes and the ground is the lowest prong. You are looking at the switch from the top of it. So when your looking at the door panel the black wire gets soldered to the lowest spot, and the red one goes to the third from the bottom. You will have to remove the switch to do this but its just two screws.


Here is an over exposed picture but its just to show the lights. In person they are much more subtle and are about the same brightness as the other OEM ambient lights.

Here are the pics hope this is what you guys were looking for.
This is the location of the lower pocket LED. Drill the hole from the other side then push the LED through and secure with hot glue gun. I like this stuff as it dries pretty much right away, but is easy to remove if need be. its also clean and easy to use.
This is the location of the upper door handle LED. Its covered in electrical tape but drill this hole from this side and secure using the same method as the lower LED.
Here is the door lock switch. You can see where the 12V side goes and the ground is the lowest prong. You are looking at the switch from the top of it. So when your looking at the door panel the black wire gets soldered to the lowest spot, and the red one goes to the third from the bottom. You will have to remove the switch to do this but its just two screws.
Here is an over exposed picture but its just to show the lights. In person they are much more subtle and are about the same brightness as the other OEM ambient lights.
Last edited by LoveMyTL-S; 08-29-2011 at 08:19 AM. Reason: Fixed
The following users liked this post:
LoveMyTL-S (08-29-2011)
08-28-2011, 08:29 PM
#22
Race Director
iTrader: (8)
Looks very "sweet" indeed!
Not too bright =)
Not too bright =)
08-28-2011, 08:59 PM
#24
Safety Car
Thread Starter
iTrader: (4)
Well I didnt see what the problem was as the two leads I tapped were directly from the wire harness themselves so I dont really see what the difference is. I followed the wiring from the harness and it literally goes directly to these prongs and does not go through any other circuitry prior to that point. The other spots however do so do not go to any other spot except for what I have shown. So if there is something im missing please let me know as I do want to know.
EDIT:
I accidentially said the wrong thing on which points to solder to. The black wire gets soldered to the lowest spot, and the red wire goes to the 3rd from the bottom (not second like I original stated). So if the switch was held upright black is at bottom, then you skip a spot, then red one gets soldered in.
Last edited by JTS97Z28; 08-28-2011 at 09:02 PM.
08-28-2011, 09:42 PM
#25
Fearless DIY Guy
iTrader: (2)
By tapping an already relatively unstable source (the lock switch is one of them), you can confound the matter and may create additional draw on the source for the doorhandle. It SHOULDN'T. But the power flow in this car is a goddamn mystery at some spots.
 08-29-2011, 08:20 AM
#28
Senior Moderator
EDIT:
I accidentially said the wrong thing on which points to solder to. The black wire gets soldered to the lowest spot, and the red wire goes to the 3rd from the bottom (not second like I original stated). So if the switch was held upright black is at bottom, then you skip a spot, then red one gets soldered in.
I accidentially said the wrong thing on which points to solder to. The black wire gets soldered to the lowest spot, and the red wire goes to the 3rd from the bottom (not second like I original stated). So if the switch was held upright black is at bottom, then you skip a spot, then red one gets soldered in.
Great work! Very clean and subtle lighting.
08-29-2011, 03:45 PM
#32
Safety Car
Thread Starter
iTrader: (4)
Here is the link for the LED's that I purchased. Keep in mind these are red since I have a Type S, but I would assume base TL owners would use blue.
http://www.ebay.com/itm/320588187775
08-29-2011, 10:50 PM
#34
Race Director
iTrader: (8)
What exactly do you mean? Thats what this entire thread is about is how I now have LED's installed in my front driver and passenger doors
Here is the link for the LED's that I purchased. Keep in mind these are red since I have a Type S, but I would assume base TL owners would use blue.
http://www.ebay.com/itm/320588187775
Here is the link for the LED's that I purchased. Keep in mind these are red since I have a Type S, but I would assume base TL owners would use blue.
http://www.ebay.com/itm/320588187775
 09-03-2011, 10:45 AM
#38
Justnspace,
Good idea on the cup holder one. I have not really considered it but mainly because I have that cover closed all the time unless there is a drink in there. But I do have several extra LED's so I can try anything. The other reason is technically that area is already illuminated by the overhead ambient lights, but if I wanted something a little more pronounced kind of like that Jeep interior above I could.
Good idea on the cup holder one. I have not really considered it but mainly because I have that cover closed all the time unless there is a drink in there. But I do have several extra LED's so I can try anything. The other reason is technically that area is already illuminated by the overhead ambient lights, but if I wanted something a little more pronounced kind of like that Jeep interior above I could.
,a LED strip in the cup holder .
09-03-2011, 02:36 PM
#39
Team Owner
iTrader: (2)
Join Date: Jan 2008
Location: Kansas City, MO (Overland Park, KS)
Posts: 36,545
Received 6,470 Likes
on
5,162 Posts
James, I love it! That looks fantastic-come back to Kansas City and let's do that to my Type S!