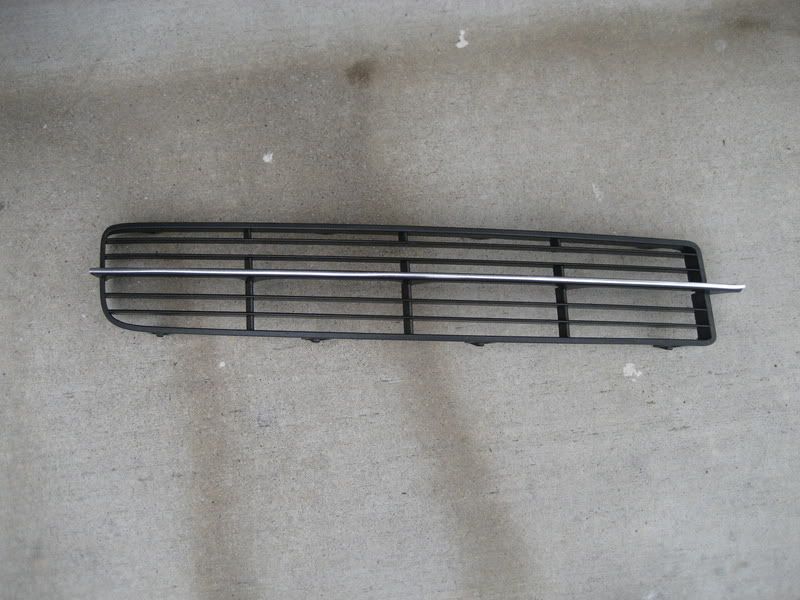
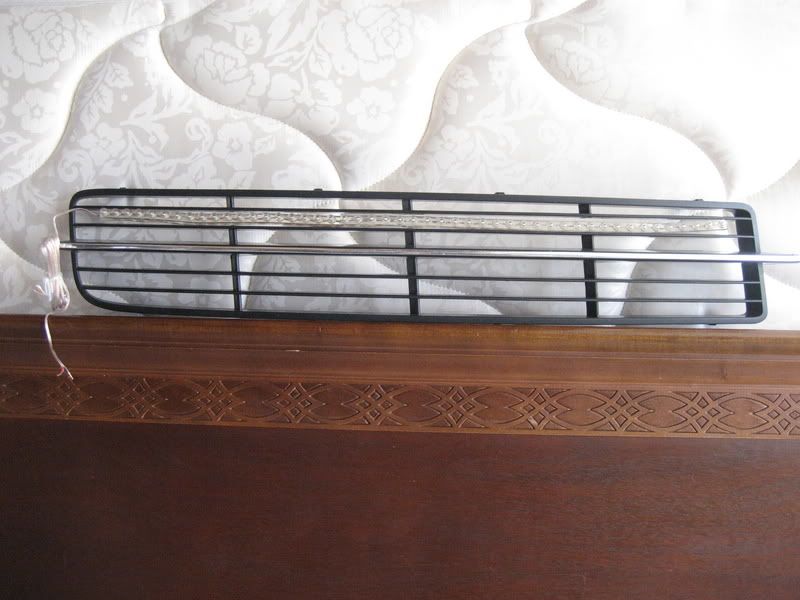
DRL L.E.D. Mod
#122
I'm going to test putting them up front just to see fitment and to let others see how this type of LED will work. I will most likely end up putting these in my trunk for lights there. These would work great for that as they won't stick down like the cold cathode lights.
#123
Here are the LEDs on the car. The center bar is thinner, however it could still be flattened, the LED strip 3Med on and then maybe put a small bead of silicon behind the strip where it goes above/below the center strip. Just a thought.
I'll see if I have time to get a couple of night shots tonight. If not I'll do them tomorrow.
DRL off:


DRL On:

LED strip is on left side. It is easier to see at this distance then it shows in the pic.

DRL chopped to be on both sides. Right side is chopped from same shot with LEDs on right:


I'll see if I have time to get a couple of night shots tonight. If not I'll do them tomorrow.
DRL off:


DRL On:

LED strip is on left side. It is easier to see at this distance then it shows in the pic.

DRL chopped to be on both sides. Right side is chopped from same shot with LEDs on right:


#125
There is also a black wire hanging down as well. It was just to give power to the LEDs from the battery so I could take pics. I didn't fully install them. Just 3 small pieces of 3M tape to hold them on temporarily.
I was planning on getting some night pics taken tonight but I just got home and am exhausted. I'll take some night pics tomorrow.
I was planning on getting some night pics taken tonight but I just got home and am exhausted. I'll take some night pics tomorrow.
#127
you know what i think would look hot... is if you did this backwards... sot hat the leds are facing the other side, that way you dont see the actual bulbs/lights coming from the front, but you see the hue/glow inside the grill... might look 
might be asking a lot, but if you get a chance, could you do this backwards? or did i just sound like an idiot and not type it well enough to make sense lol

might be asking a lot, but if you get a chance, could you do this backwards? or did i just sound like an idiot and not type it well enough to make sense lol
#128
^-- You mean having the LED strip placed on top of or below the center bar so that the light shines up/down respectively to illuminate the grill area? I can try to play around with that tonight.
#129
Originally Posted by tehloxely
Hrmm... I don't know if I'm lovin it. The leds are spaced too far apart. And maybe not bright enough. Just my 2c.
#130
Originally Posted by Buda
^-- You mean having the LED strip placed on top of or below the center bar so that the light shines up/down respectively to illuminate the grill area? I can try to play around with that tonight.
#131
Ahh I get it now. Not sure if that will produce much light at all as the strips are pretty flat and mounting the strip with the LEDs against the back of the grill could cause not much light to get past. Mounting would also be a problem. I'll see about trying that as well as putting them on the rear of the grill facing inward toward the engine bay.
#132
Definitely looks cool. You will always get that "what the freak was that??" reactions by passerbys.
Problem is I doubt this will serve a real DRL function if that was your goal. It looks more like an accent light rather than a visual safety device. These will be very visible at night but hardly in the daytime. DRL headlights will fare much better. Otherwise you have to go for a high mcd LED option like the ones Audi uses. I doubt they are using mini-SMT LEDs.
Problem is I doubt this will serve a real DRL function if that was your goal. It looks more like an accent light rather than a visual safety device. These will be very visible at night but hardly in the daytime. DRL headlights will fare much better. Otherwise you have to go for a high mcd LED option like the ones Audi uses. I doubt they are using mini-SMT LEDs.
#133
If you're into the "neon underglow" thing, also known as "puddle lights" today... Line the bottom of your blody kit with those strips.
Lots of neat options there. I'm definately getting a set of those in blue to replace the little blue led clusters I'm using for interior accent lighting.
Lots of neat options there. I'm definately getting a set of those in blue to replace the little blue led clusters I'm using for interior accent lighting.
#134
Yeah those strips definitely have some uses and with how thin they are it makes keeping them out of the way very easy. I was thinking about the interior with these as well. Especially if the light output is less than the cold cathodes. I want accent lighting. Not daylight.
Oh yeah, when I ordered this I only purchased the 12" one but they sent me the 24 inch (2 x 12). You can also cut the strip in 3 places and it will still work.
When it gets darker I'll get those night shots.
Oh yeah, when I ordered this I only purchased the 12" one but they sent me the 24 inch (2 x 12). You can also cut the strip in 3 places and it will still work.
When it gets darker I'll get those night shots.
#135
Night "shots"
So pictures just were not giving the right results as to what it looked like so I got out the camcorder.
http://img532.imageshack.us/my.php?image=drlci9.flv
http://img532.imageshack.us/my.php?image=drlci9.flv
#137
Originally Posted by Buda
So pictures just were not giving the right results as to what it looked like so I got out the camcorder.
http://img532.imageshack.us/my.php?image=drlci9.flv
http://img532.imageshack.us/my.php?image=drlci9.flv
hey thanks a lot! that grill light looks sweet! I want to somehow figure out a way to make that grill light up like in that video, but hit the strips/bulbs... hmmmm lol
#139
OK well they look good for night use only. I wouldn't put them on the front bar though. I would embed them a bit more in (since the strip is black).
Also would you show us a show with the headlights on?
Also would you show us a show with the headlights on?
#142
I haven't done the installation on the ones that I got. I have just temporarily mounted them to try out different spots. I'm still not sure what route I'm going to use. However I think sandiegodrive did a write up on his install earlier in this thread.
#144
Originally Posted by lyk3n0other8
Installation Process write up please
#145
Thread Starter
Back after 1 Year!
Joined: Aug 2006
Posts: 1,047
Likes: 33
From: Chula Vista, CA (San Diego County)
Originally Posted by Buda
Ok guys, I have another idea about that center bar and the LEDs for the day time. Sandiegodrive, how thick are those LEDs that you installed?

#147
By connect them, what do you mean? Connect up power, connect to each other, attach to car, or run wire to switch inside the car?
All of this really depends on where you want to put them and how/when you want them to come on.
All of this really depends on where you want to put them and how/when you want them to come on.
#150
Originally Posted by sandiegodrive
Well I finally got the lights on with the help of Sun Diego CL-S and they look great!
Sun blazing and you can call these D.R.L.
We drove down the street and people driving the other way had the "what is that?!" look on them
Sun Diego CL-S will upload more pics shortly. Until then I'm waiting for the Sun to go down a bit and then night time pics too when these lights will really shine


Sun blazing and you can call these D.R.L.
We drove down the street and people driving the other way had the "what is that?!" look on them

Sun Diego CL-S will upload more pics shortly. Until then I'm waiting for the Sun to go down a bit and then night time pics too when these lights will really shine


By the way, the whip is looking nice.
#151
Originally Posted by Sun Diego CL-S
Ivan. the pics you posted look great but don't do this mod justice. they look great in person. 
after we removed the bumper, we pulled both lower grilles from the bumper and cleared out some bars in order to have one clean slot for the LED strip.
here you see Ivan using the Dremel to make everything flush and even.

grille without and then with strip.


i wasn't so sure about using this stuff for the install, but it was easy to maneuver and really holds tight!

this is after the glue application and placement of strips. they are splinted in place while the glue dries.


talk about haywire!


this is the switch that was chosen.

finished product looks great even when not rolling.


after we removed the bumper, we pulled both lower grilles from the bumper and cleared out some bars in order to have one clean slot for the LED strip.
here you see Ivan using the Dremel to make everything flush and even.

grille without and then with strip.


i wasn't so sure about using this stuff for the install, but it was easy to maneuver and really holds tight!

this is after the glue application and placement of strips. they are splinted in place while the glue dries.


talk about haywire!


this is the switch that was chosen.

finished product looks great even when not rolling.

#153
Thread
Thread Starter
Forum
Replies
Last Post
rp_guy
Member Cars for Sale
9
07-16-2017 08:33 AM
LogicWavelength
3G TL Photograph Gallery
33
11-01-2015 10:38 AM
InFaMouSLink
Car Parts for Sale
6
10-27-2015 07:52 PM


 looks too flashy for my taste. I like the clean and simple look. just my
  no hate!!!!!
