
DIY: HID Bulb Change w/o Bumper Removal !!! 3G Garage #G-004


Thread Starter
Instructor
Joined: Apr 2006
Posts: 152
Likes: 14
DIY: HID Bulb Change w/o Bumper Removal !!! 3G Garage #G-004
HEY GUYS...THOUGHT THIS MIGHT HELP AS I'VE READ SOME INQUIRIES ABOUT REMOVING THE BUMPER TO SWAP OUT THE OEM D2S....DON'T TAKE OFF THAT BUMPER!!! Install took me about 30 minutes as the torx screw was a little bit of a challenge to remove....here's the pics:
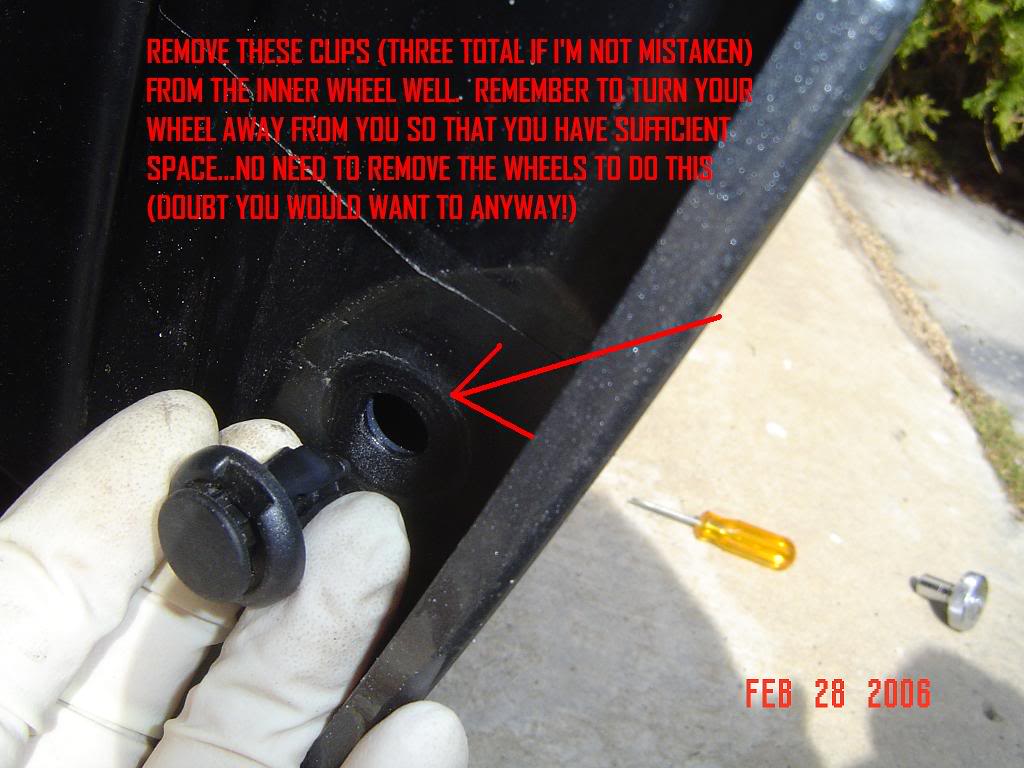
1. Remove the clips from the inner fenderwell...
2. Unbolt bottom bolts and one clip similar to those found in the inner fenderwell. These bolts are located at the bottom of the bumper at the sides. Loosening these will allow you to pull the fender liner away to access the headlights from the wheel well.

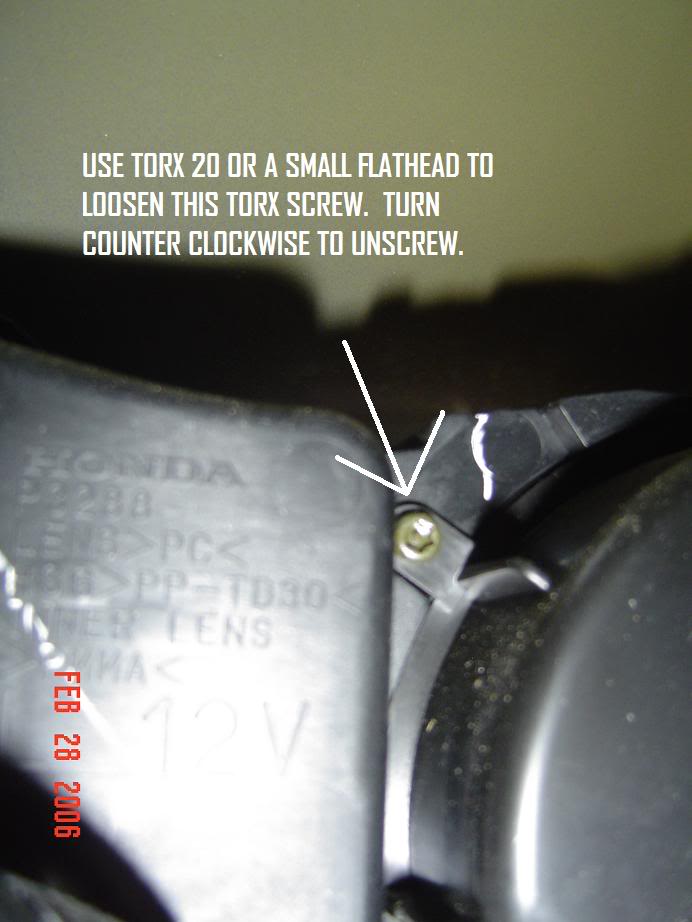
3. There is little space in there (drivers side is alot harder than the passenger side d/t space contraints...stick a digital camera in there and snap some photos so that you know what it looks like...from here on, you'll probably be doing everything by feel so having a picture in front of you will help... You don't need to buy a torx screwdriver...just stick a small flathead into the 'star' pattern of the screw...this should give you enough "bite" to loosen the screw (remember..go counter clockwise to unscrew)
4. Once the torx screw is off, untwist the headlight cover to reveal the HID connector and projector.
***CAUTION: BEFORE GOING PAST THIS STEP...UNDO THE HID BALLAST CONNECTORS ACCESSED THROUGH THE ENGINE BAY...REMEMBER...THESE THINGS CRANK OUT 25,000 VOLTS AND WOULD FRY YOU IN A SECOND!!!
- to do this: first remove the engine bay covers.
A: drivers side: take off air intake cover (two clips you pull out)
you should be able to see the HID balast (silver rectangular thing
mounted under headlight. Undo this white connector...
B: passenger side: you should be able to see the hid ballast on this
side. unplug white connector there.
You could undo the battery, but I ddin't want to lose any settings so I just unplugged the ballast connectors just to be safe....
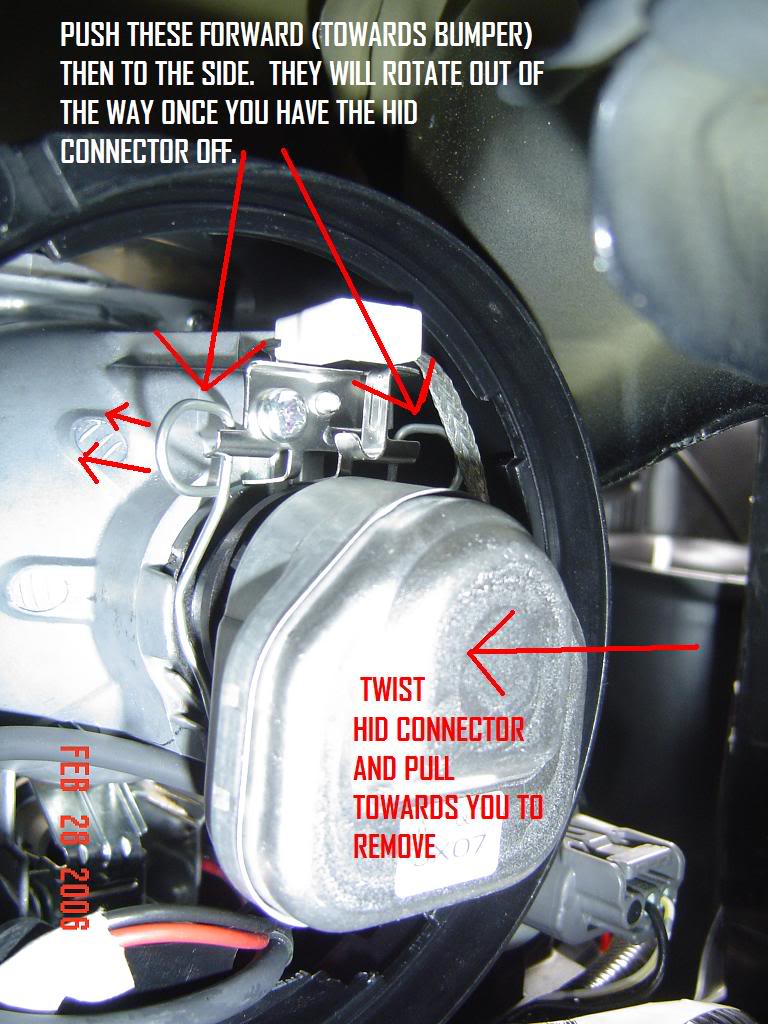
Now back to the HID connector: twist the HID connector and pull towards you to remove. Then undo the two silver tension springs on either side of the bulb by pushing towards the front of the vehicle and at the same time to the side...the tension springs will then rotate out of the way. You can then pull out the bulb and replace with your aftermarket D2S bulbs...Remember not to touch the bulb. Install everything in reverse order...
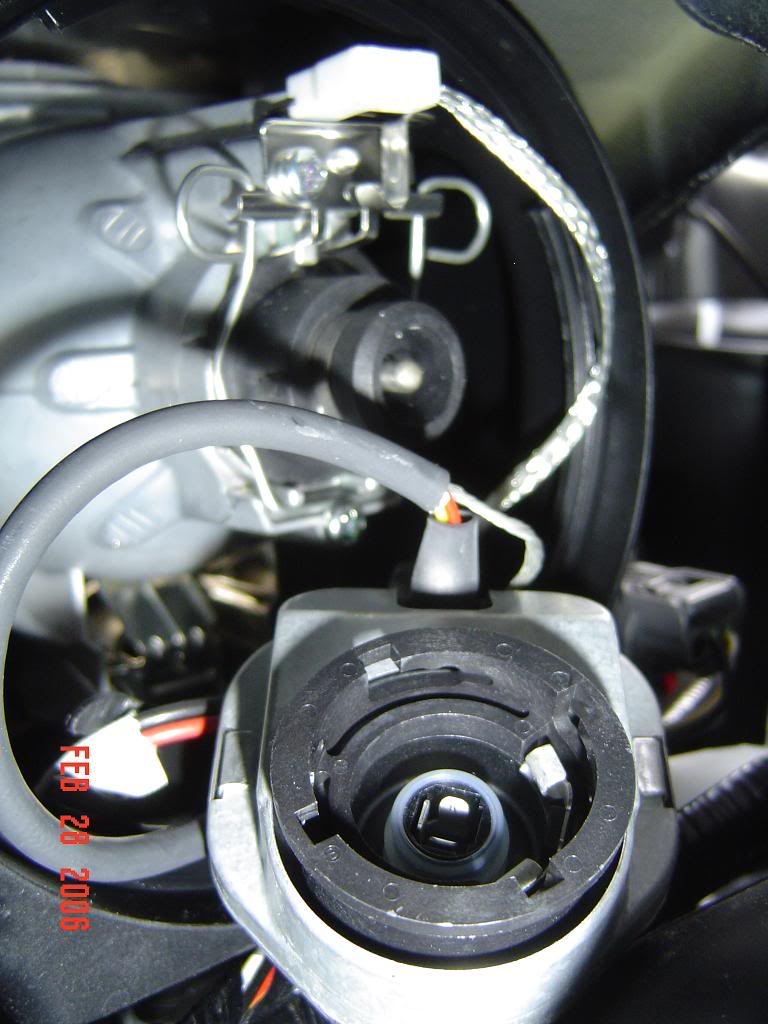
5. connector off...
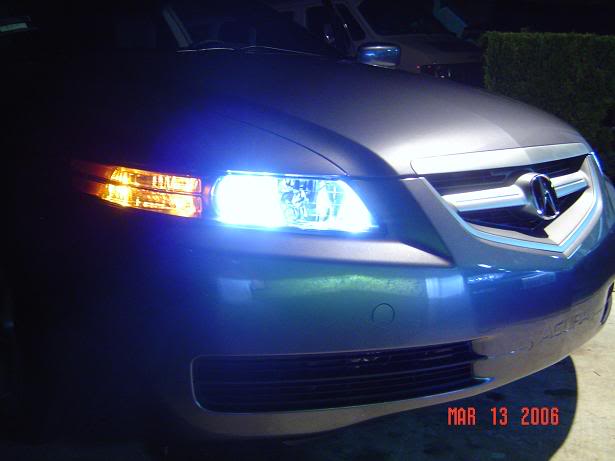
6. Here's the final product using McCulloch 8000k
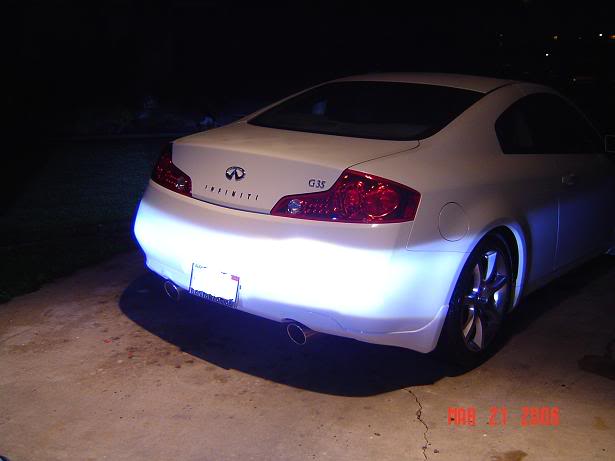
Example of cutoff line against my sis's G35...plenty of light if you ask me. 8000k's are NOT as bright as OEM 4300k, but they are still bright. I just wonder what the projector mod would look like with these bulbs in place. The overall purple/blue output is similar to the cut-off line found with modded projectors using the standard 4300k's.
Hope this helps everybody...PM me or post if you've got any questions.

1. Remove the clips from the inner fenderwell...
2. Unbolt bottom bolts and one clip similar to those found in the inner fenderwell. These bolts are located at the bottom of the bumper at the sides. Loosening these will allow you to pull the fender liner away to access the headlights from the wheel well.
3. There is little space in there (drivers side is alot harder than the passenger side d/t space contraints...stick a digital camera in there and snap some photos so that you know what it looks like...from here on, you'll probably be doing everything by feel so having a picture in front of you will help... You don't need to buy a torx screwdriver...just stick a small flathead into the 'star' pattern of the screw...this should give you enough "bite" to loosen the screw (remember..go counter clockwise to unscrew)
4. Once the torx screw is off, untwist the headlight cover to reveal the HID connector and projector.
***CAUTION: BEFORE GOING PAST THIS STEP...UNDO THE HID BALLAST CONNECTORS ACCESSED THROUGH THE ENGINE BAY...REMEMBER...THESE THINGS CRANK OUT 25,000 VOLTS AND WOULD FRY YOU IN A SECOND!!!
- to do this: first remove the engine bay covers.
A: drivers side: take off air intake cover (two clips you pull out)
you should be able to see the HID balast (silver rectangular thing
mounted under headlight. Undo this white connector...
B: passenger side: you should be able to see the hid ballast on this
side. unplug white connector there.
You could undo the battery, but I ddin't want to lose any settings so I just unplugged the ballast connectors just to be safe....
Now back to the HID connector: twist the HID connector and pull towards you to remove. Then undo the two silver tension springs on either side of the bulb by pushing towards the front of the vehicle and at the same time to the side...the tension springs will then rotate out of the way. You can then pull out the bulb and replace with your aftermarket D2S bulbs...Remember not to touch the bulb. Install everything in reverse order...
5. connector off...
6. Here's the final product using McCulloch 8000k
Example of cutoff line against my sis's G35...plenty of light if you ask me. 8000k's are NOT as bright as OEM 4300k, but they are still bright. I just wonder what the projector mod would look like with these bulbs in place. The overall purple/blue output is similar to the cut-off line found with modded projectors using the standard 4300k's.
Hope this helps everybody...PM me or post if you've got any questions.

AM
Joined: Feb 2006
Posts: 86
Likes: 3
From: NYC
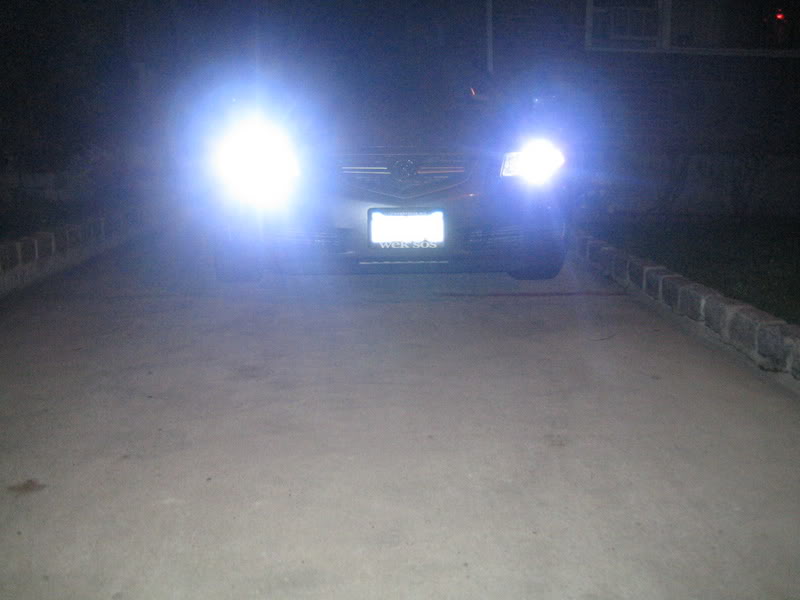
thanks alot very helpful and saved alotta time here are some pics of my 6000k upgrade. took only about 30 40 mins max with small hands. pics arent that great ill try to get better ones but you cant really notice the less light output but it sure looks great and different from all the other million TL's on the road
[IMG]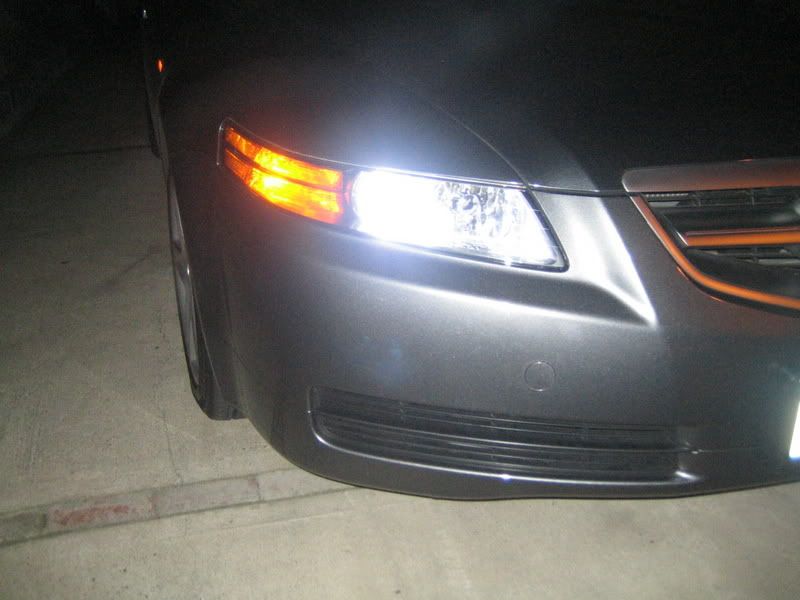 [/IMG]
[IMG] [/IMG]
[IMG]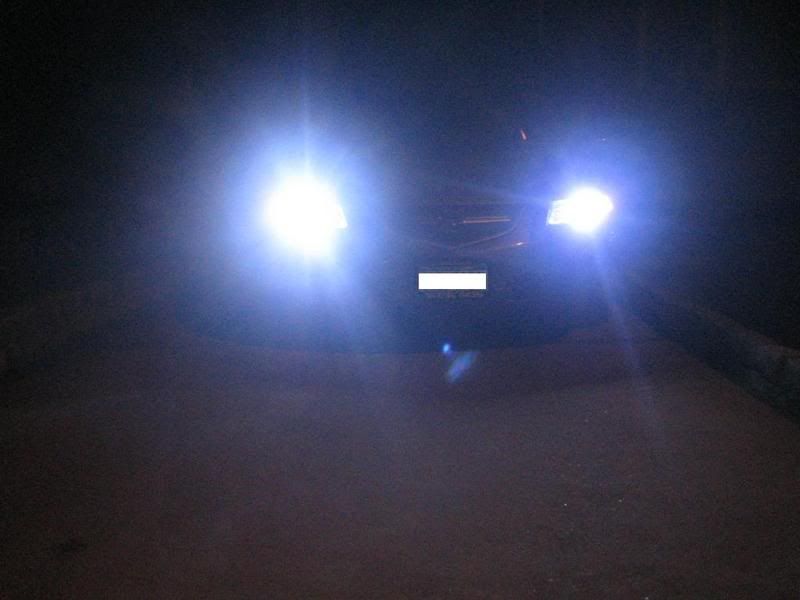 [/IMG]
[IMG]
[/IMG][IMG]
[/IMG][IMG]
[/IMG]

Trending Topics
G35Killerrr
Joined: Aug 2005
Posts: 457
Likes: 0
From: Rowland Hts > Mira Loma ,CA
Guy Becareful to buy the HID blub on ebay, I bought a 12000K a while ago for like $90ish and the blub burned my Ignitor after 3 months(driver Side the day @ AZ mega meet at Long Beach  ) and i have to replace for $100 by myself (warrenty not cover)
) and i have to replace for $100 by myself (warrenty not cover)
AM
Joined: Feb 2006
Posts: 86
Likes: 3
From: NYC
Originally Posted by KenUA6
Guy Becareful to buy the HID blub on ebay, I bought a 12000K a while ago for like $90ish and the blub burned my Ignitor after 3 months(driver Side the day @ AZ mega meet at Long Beach ) and i have to replace for $100 by myself (warrenty not cover)
) and i have to replace for $100 by myself (warrenty not cover)
I LOVE MY TL
Joined: Aug 2006
Posts: 158
Likes: 0
From: Salem,New Hampshire
im sure it wont burn the lens out of your headlamp..i got a retrofit done for my accord and it was a s2k projector..the light beams and wide and sharp cutoff..and i went u t0 5300k -6000k with no problems..soo you dont hhave to worry much..people that doesnt have HID projectors are using it and still got no problems with it..
Advanced
Joined: Sep 2006
Posts: 85
Likes: 0
From: FLO-RIDA
Would there be a problem replacing my stock HID bulb w/ a 8000K one? Please let me know. I'm thinking about changing it soon, need to know before I change it or else I would have to return it. PM me w/ the answer. Thanks.
acura-cl.com OG
Joined: Oct 2002
Posts: 5,348
Likes: 1
From: Rhode Is Land?
Originally Posted by aznchino16
Would there be a problem replacing my stock HID bulb w/ a 8000K one? Please let me know. I'm thinking about changing it soon, need to know before I change it or else I would have to return it. PM me w/ the answer. Thanks.
i don't know if anyone else ran into this problem, but when i opened up my 2006 headlamps, the bit was not a torx 20. it was a torx 20 tamper proof with a prong in the middle. It would have been impossible to remove this without the tamper proof bit and/or without removing the headlamps.
just giving any other 06 owners a heads up.
AM
Joined: Feb 2006
Posts: 86
Likes: 3
From: NYC
Originally Posted by ding069
no problems.
i don't know if anyone else ran into this problem, but when i opened up my 2006 headlamps, the bit was not a torx 20. it was a torx 20 tamper proof with a prong in the middle. It would have been impossible to remove this without the tamper proof bit and/or without removing the headlamps.
just giving any other 06 owners a heads up.
Former Sponsor
iTrader: (1)
Joined: Mar 2004
Posts: 9,877
Likes: 624
From: www.ExceleratePerformance.com
Originally Posted by nan08
i wonder how long these aftermarket HID bulbs last? any idea guys? 6500 and 8000 are cool.
nan08
nan08
Former Sponsor
iTrader: (1)
Joined: Mar 2004
Posts: 9,877
Likes: 624
From: www.ExceleratePerformance.com
Originally Posted by Slammed_JDM
upgrading the bulb might burn the shit out of the lens on the headlamp. my stock bulbs are burning my headlamp. so i can imagine aftermarket bulbs.
Modding my TL in
Joined: Jun 2005
Posts: 317
Likes: 1
From: Chicago SW Burbs
This documentation was great! One thing though, I used a flat head on the drivers side and once the screw dropped, I found out it was a tamper proof tork #20 bit and used that on the passenger side. I recently ordered a tamper proof kit off of Ebay for $7.00. It took me 1.5 hours to do. About an hour and 20 minutes on the drivers side and 10 minutes on the passengers side with the right bit. I recommend getting the right bit and it will save you a lot of time, probably 20 minutes.
My username is lame
Joined: Jul 2006
Posts: 357
Likes: 0
From: Bay Area
my brother managed to change the light bulbs for me without having to do it this way. i don't know exactly how he did it. but for the passanger side, he just removed a few bolts, and got the cover out and just swapped the bulbs. for the driver side, he had to take out the battery, and changed it from there. took him about 30mins for the whole thing.


I think that you need to lower your passenger headlight beam. Ask blackura he explained it pretty well. It invloves a philips driver and turning some teeth and parking against a wall.
Har/934
Joined: Apr 2005
Posts: 35
Likes: 2
From: New Carrollton MD
Originally Posted by xcelir8TL
This documentation was great! One thing though, I used a flat head on the drivers side and once the screw dropped, I found out it was a tamper proof tork #20 bit and used that on the passenger side. I recently ordered a tamper proof kit off of Ebay for $7.00. It took me 1.5 hours to do. About an hour and 20 minutes on the drivers side and 10 minutes on the passengers side with the right bit. I recommend getting the right bit and it will save you a lot of time, probably 20 minutes.


10th Gear
Joined: Apr 2009
Posts: 10
Likes: 0
From: Cali
First off, good DIY. I gotta put in some new bulbs tomorrow and this thread is totally helpful. Is Nokiaboy808 correct about just taking out the fuse?
Last edited by npham722; Apr 29, 2009 at 07:49 PM.
Its ALOT easier and will provide MORE room if you remove the battery. Trust me, I tried without removing the battery, that was a FAIL!

Instructor
Joined: May 2006
Posts: 203
Likes: 2
DIY At Your Own Risk!
Driver's side HID turned pink. Knew about this thread. Good deal on replacements on Ebay. About 1 PM got my stuff together and started. Tamper proof Torx worked like a charm. All downhill after that. Old bulb came out OK, but could not get the retainer clips to hold the new bulb although I reseated it about 100 times. Finally gave up, started removing the bumper. With bumper off discovered that the service manual left out a few things about removing the light unit. Did get it into a position where I could deal with the clips. Eventually got the new bulb in, cover on, working--at about 9:15 PM. Tomorrow I will put the bumper back on, and Monday I will make an appointment with dealer service to install the other bulb. However much they charge me it will be worth it. Not a pleasant experience.
The purpose of this rant is not to criticize DCC or the others who have evidently found this method successful. It is simply to warn people that if unforeseen difficulties arise there is little margin for sorting them out using this method, the "official" method is time-consuming and, at least in the 04 service manual, missing a few important steps, and that this might be an excellent situation in which to use a credit card instead of a socket wrench.
If I am angry with anyone it is with Honda. I love my TL, but who ever heard of a car that had to have its front end removed to change a light bulb?