When you click on links to various merchants on this site and make a purchase, this can result in this site earning a commission. Affiliate programs and affiliations include, but are not limited to, the eBay Partner Network.
Some of you may have seen my post about having my mirror clipped by a truck while I was stopped at a light. I decided to create a new thread so that in the future members can have a reference if they chose to replace their mirror glass and housing on their own. It's really not very difficult, especially with this information. I had to hack it a bit but now I know exactly what to do and am posting it here. It should take you less than a half an hour if you're slightly good with a screwdriver!
So, here's a look at the original damage:
Thanks to the responses in my original thread, mostly from pgeorg, I was able to purchase the housing and the glass for a grand total of about $66! Not bad, I thought. If you glass is broken but your housing is fine, the glass was around $28 by itself. And you will have a fairly easy time replacing it.
Here's a look at what comes with the housing. It's 3 pieces, the plastic top piece that comes in the color of your car, the bottom portion, and the front portion that the glass will sit in.
The first step is to remove the glass. Here's a look at the replacement glass from the back side. You can see where I put the two arrows, they point to the hooks that hold the top of the glass to the glass motor.
To remove the broken glass, move the mirror with the motor control so that it is pitched up and towards the car. Take a long flat blade screwdriver and wedge it between the glass and the motor. Stay very close to the glass.
If you have the mirror moved towards the car, you will be able to look into the housing from the side and see where the screwdriver is going. You want to pop the bottom of the glass assembly off the motor which will free it up so you can drop it down and slide out the top tabs to release the glass. It's actually easier than it sounds, besides, the glass is already broken, right?
Here's a look at the glass after removal. You can see where the tabs went, and how the whole thing comes together. You will reverse this step in a bit (unless you are just replacing the glass)
There are two wires that attach to the glass assembly for the glass heater. They are not marked differently, and I am not sure if there is a polarity, but I marked them anyway and made sure that I put them back in the same place that they came from:
Unplug the heater connector wires, and remove the sticky tape that is on the mirror panel of the motor. The new glass will have it's own sticky tape.
NOW - The most critical part of this whole deal and something that I did not know about or could see in the drawings.
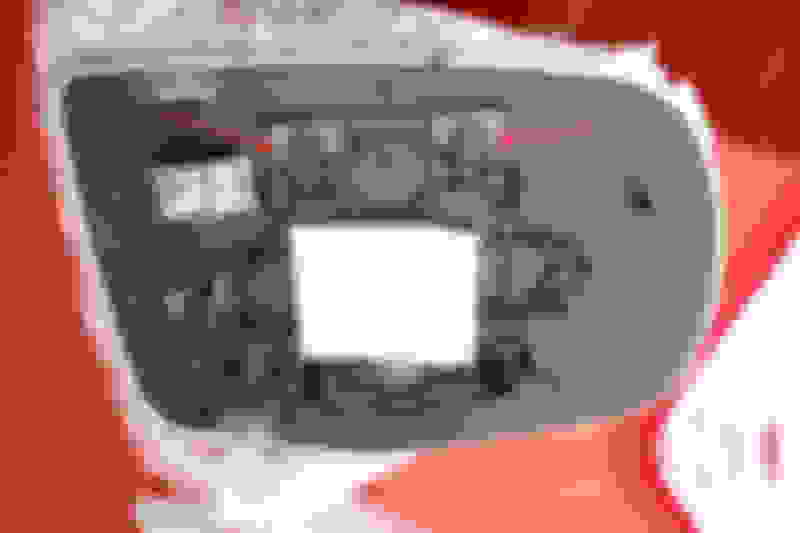
There is a screw that passes through both the bottom and the front of the housing. It is not visible or accessible unless you turn the mirror assembly away from the car. It is located UNDER the assembly, but you won't see it or be able to get to it without spinning the mirror a bit to get to it from underneath. Here is a crude, out of focus, through the old mirror picture of where it is.
Look carefully at the picture above, and understand that I am holding the old mirror up to the car so you can see where the screw is. It's out of focus, but the arrows are pointing to its location.
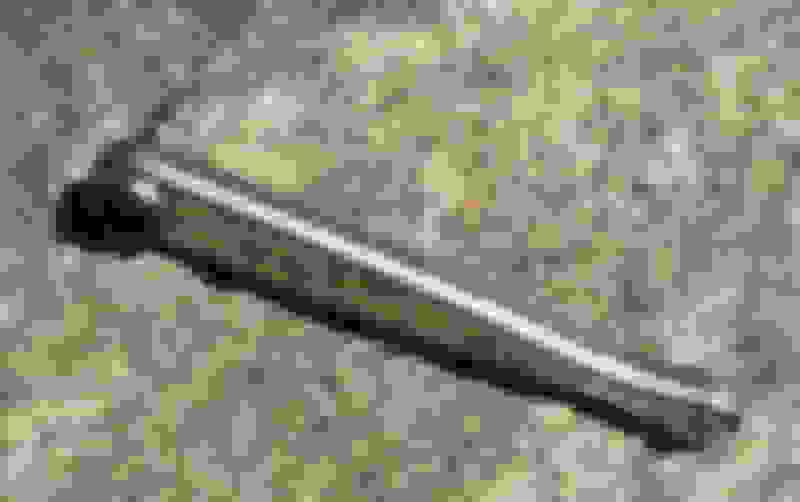
You can feel it with your finger once you move the mirror away from the car. This screw is impossible to get to without a 90 degree #1 Phillips. I used a ratchet tool with a #1 Phillips bit. This is a must.
If you don't have one, you are not getting to this screw.
This screw has been put in tight, and probably when the mirror was off the car! So you just have to be careful and try and get it out. This is the hardest part of the job (unless you want to take apart the door, remove the mirror from the car, then get to the screw with a regular screwdriver.
The Bottom and Front Housing have small tabs that secure them to the mirror with THIS SCREW. Here's a look at where the screw is with both pieces of the housing removed.
It will give you a better idea of where this screw is.
Once you have this screw out, you can unscrew the "easy" screws that hold the painted back cover to the front housing piece. Unplug the electrical connector for the turn signal lights and the painted cover will come off with a bit of fiddling. You can then easily remove the front and bottom pieces of the housing, leaving you with just the mirror motor and platform, just like the picture above.
You are now home free!
Remove the turn signal light assembly from the old bottom housing (one silver Phillips screw) and attach it to the new housing bottom.
Place the new housing bottom onto the mirror assembly and line it up so that the screw hole lines up with the hole in the mirror assembly (the one with the pain in the butt screw)
You will just have to move the bottom around until you can get it in there and lined up. I might help pivoting the mirror assemble back and forth. Just get the holes lined up as shown below and the bottom piece in the proper seating position
Once the bottom section is in, snap the painted top piece in place as best you can, connect the turn signal electrical connector, then put the front housing piece in place. You will have to move all three pieces around until you get a good fit. You can replace the inner screws you took out (Not that screw yet) until the housing is in place and feels right. Once everything is in the proper place, it's time to put that famous screw back in. Make sure that the hole in the assembly, the hole in the bottom housing piece, and the hole in the front housing piece are all lined up. Spin the mirror around until you can get to the screw with your 90 degree #1 Phillips, and put it in - snuggly. I would not torque it, but that's me.
All that's left now is to replace the glass.
Take the new glass and leave the front bubblewrap on it just for safety. Remove the backing from the sticky pad, move the mirror motor to the same position it was in when you took out the old glass, slip the upper tabs into the slots, then CAREFULLY press on the middle section of the glass until you hear it snap in. It will take considerable force, but be gentle. When one side snaps in, the other will follow. It's a bit awkward, but it will snap in place eventually.
Excellent write-up with great pix. This is what I'm used to seeing when I was actively following Bimmerforums for my 97M3. Was able to save a ton of money doing repairs and mods myself. Hope this kicks off more DIY guides, which should use this as a model.
I need to remove the back cover, the red on in your pictures, since it has a big crack in it, do I need to remove the difficult screw you mentioned? Or I just need to remove the glass panel and remove those screws that hold the back cover to the housing? Thank you very much!
I need to remove the back cover, the red on in your pictures, since it has a big crack in it, do I need to remove the difficult screw you mentioned? Or I just need to remove the glass panel and remove those screws that hold the back cover to the housing? Thank you very much!
My gut reaction was NO, but just to be sure I ran down to the garage where I still have the old red piece. That piece does not go through the "difficult screw" so you should be fine. Just pull the glass, remove the Phillips screws holding the back cover on and you should be good!
My gut reaction was NO, but just to be sure I ran down to the garage where I still have the old red piece. That piece does not go through the "difficult screw" so you should be fine. Just pull the glass, remove the Phillips screws holding the back cover on and you should be good!
This is great. I had found the secret screw, but found that the vehicle really did a job on my mirror assembly. Does anyone know what the part number of the actual mirror actuator is? The part that surrounds the shaft is essentially shattered on mine and has now fallen off.
I see that you can purchase a mirror sub-assembly that includes a collection of the mirror parts, but its not clear it includes the actuator part.
I still use it - and to those B&M'ers, I have not crashed my car due to looking at my phone. Actually, now that CarPlay works better than it did a year ago, a just use the phone up there as an info point, or if I'm playing 5.1 files I still use it for Waze when I need it.
First, thanks for the write up. It has helped a lot so far.
I got my mirror housing off and discovered the broken part is the central plastic shaft as mentioned above by dank. I was able to remove the actuator from the broken part but found that the broken piece requires ordering the entire mirror assembly (of course). It will be in next week so I'll update then.
Unfortunately this does require removing the entire mirror from the vehicle so I assume I'll have to remove the interior door panel to complete the job.
This site and post specifically is super helpful thank you! I just bought a 2020 RDX and a week in had a rock on the highway cause a blister on my driver's side mirror cover. I noticed the awesome website to order a replacement cover but is there a minimal way of just removing and replacing the cover? Everything else with my mirror works fine. Thank you!
This site and post specifically is super helpful thank you! I just bought a 2020 RDX and a week in had a rock on the highway cause a blister on my driver's side mirror cover. I noticed the awesome website to order a replacement cover but is there a minimal way of just removing and replacing the cover? Everything else with my mirror works fine. Thank you!
See Post #5 above. Just pull the glass off and the cover will unscrew. Everything else stays intact.
any chance you could let me know where to purchase the parts for less than the $900 the dealer wants?
Originally Posted by oblio98
Some of you may have seen my post about having my mirror clipped by a truck while I was stopped at a light. I decided to create a new thread so that in the future members can have a reference if they chose to replace their mirror glass and housing on their own. It's really not very difficult, especially with this information. I had to hack it a bit but now I know exactly what to do and am posting it here. It should take you less than a half an hour if you're slightly good with a screwdriver!
So, here's a look at the original damage:
Thanks to the responses in my original thread, mostly from pgeorg, I was able to purchase the housing and the glass for a grand total of about $66! Not bad, I thought. If you glass is broken but your housing is fine, the glass was around $28 by itself. And you will have a fairly easy time replacing it.
Here's a look at what comes with the housing. It's 3 pieces, the plastic top piece that comes in the color of your car, the bottom portion, and the front portion that the glass will sit in.
The first step is to remove the glass. Here's a look at the replacement glass from the back side. You can see where I put the two arrows, they point to the hooks that hold the top of the glass to the glass motor.
To remove the broken glass, move the mirror with the motor control so that it is pitched up and towards the car. Take a long flat blade screwdriver and wedge it between the glass and the motor. Stay very close to the glass.
If you have the mirror moved towards the car, you will be able to look into the housing from the side and see where the screwdriver is going. You want to pop the bottom of the glass assembly off the motor which will free it up so you can drop it down and slide out the top tabs to release the glass. It's actually easier than it sounds, besides, the glass is already broken, right?
Here's a look at the glass after removal. You can see where the tabs went, and how the whole thing comes together. You will reverse this step in a bit (unless you are just replacing the glass)
There are two wires that attach to the glass assembly for the glass heater. They are not marked differently, and I am not sure if there is a polarity, but I marked them anyway and made sure that I put them back in the same place that they came from:
Unplug the heater connector wires, and remove the sticky tape that is on the mirror panel of the motor. The new glass will have it's own sticky tape.
NOW - The most critical part of this whole deal and something that I did not know about or could see in the drawings.
There is a screw that passes through both the bottom and the front of the housing. It is not visible or accessible unless you turn the mirror assembly away from the car. It is located UNDER the assembly, but you won't see it or be able to get to it without spinning the mirror a bit to get to it from underneath. Here is a crude, out of focus, through the old mirror picture of where it is.
Look carefully at the picture above, and understand that I am holding the old mirror up to the car so you can see where the screw is. It's out of focus, but the arrows are pointing to its location.
You can feel it with your finger once you move the mirror away from the car. This screw is impossible to get to without a 90 degree #1 Phillips. I used a ratchet tool with a #1 Phillips bit. This is a must.
If you don't have one, you are not getting to this screw.
This screw has been put in tight, and probably when the mirror was off the car! So you just have to be careful and try and get it out. This is the hardest part of the job (unless you want to take apart the door, remove the mirror from the car, then get to the screw with a regular screwdriver.
The Bottom and Front Housing have small tabs that secure them to the mirror with THIS SCREW. Here's a look at where the screw is with both pieces of the housing removed.
It will give you a better idea of where this screw is.
Once you have this screw out, you can unscrew the "easy" screws that hold the painted back cover to the front housing piece. Unplug the electrical connector for the turn signal lights and the painted cover will come off with a bit of fiddling. You can then easily remove the front and bottom pieces of the housing, leaving you with just the mirror motor and platform, just like the picture above.
You are now home free!
Remove the turn signal light assembly from the old bottom housing (one silver Phillips screw) and attach it to the new housing bottom.
Place the new housing bottom onto the mirror assembly and line it up so that the screw hole lines up with the hole in the mirror assembly (the one with the pain in the butt screw)
You will just have to move the bottom around until you can get it in there and lined up. I might help pivoting the mirror assemble back and forth. Just get the holes lined up as shown below and the bottom piece in the proper seating position
Once the bottom section is in, snap the painted top piece in place as best you can, connect the turn signal electrical connector, then put the front housing piece in place. You will have to move all three pieces around until you get a good fit. You can replace the inner screws you took out (Not that screw yet) until the housing is in place and feels right. Once everything is in the proper place, it's time to put that famous screw back in. Make sure that the hole in the assembly, the hole in the bottom housing piece, and the hole in the front housing piece are all lined up. Spin the mirror around until you can get to the screw with your 90 degree #1 Phillips, and put it in - snuggly. I would not torque it, but that's me.
All that's left now is to replace the glass.
Take the new glass and leave the front bubblewrap on it just for safety. Remove the backing from the sticky pad, move the mirror motor to the same position it was in when you took out the old glass, slip the upper tabs into the slots, then CAREFULLY press on the middle section of the glass until you hear it snap in. It will take considerable force, but be gentle. When one side snaps in, the other will follow. It's a bit awkward, but it will snap in place eventually.
I'm going to attempt to replace my damaged side mirror housing thanks to your excellent instructions. My mirror is not damaged, just the housing. Do you think I will be able to replace the housing without removing the mirror? I'd rather not remove the mirror for fear of breaking it.
I'm going to attempt to replace my damaged side mirror housing thanks to your excellent instructions. My mirror is not damaged, just the housing. Do you think I will be able to replace the housing without removing the mirror? I'd rather not remove the mirror for fear of breaking it.
No, you'll have to pull the mirror off to get to the mounting screws that hold the back of the mirror housing to the main housing, but don't worry.
Take a big flat blade screw driver and follow the directions I posted above. Make sure you move the mirror with the controls to the position I show, that way you can get that screwdriver in the proper spot to snap out the little hook deals. Study the pictures and look at the mirror picture that shows the back of it when it's off the car. You can then see all you have to do to pop it off.
IF I can do it, you can do it! At least you have directions!
Sorry to revive an old thread, but I would also like to upgrade the side view mirrors to be auto dimming on my A-Spec. Do you know if just purchasing the mirror would be sufficient to get the auto dimming functionality?
Sorry to revive an old thread, but I would also like to upgrade the side view mirrors to be auto dimming on my A-Spec. Do you know if just purchasing the mirror would be sufficient to get the auto dimming functionality?
I followed all of this, the mirror works fine but it has a very slight shake. I replaced 5 screws. To buy them it says there are 6. Is there something else that would make it shake, ever so slightly. If it were not for the mirror image I would not notice it. I do notice the other side is very firmly in place.

 09-02-2018 | 04:09 PM