Some Questions I have reguarding a drop
 08-31-2009, 04:39 PM
#1
Just some questions I have about drops, since I've never done a drop and dont know what is needed..
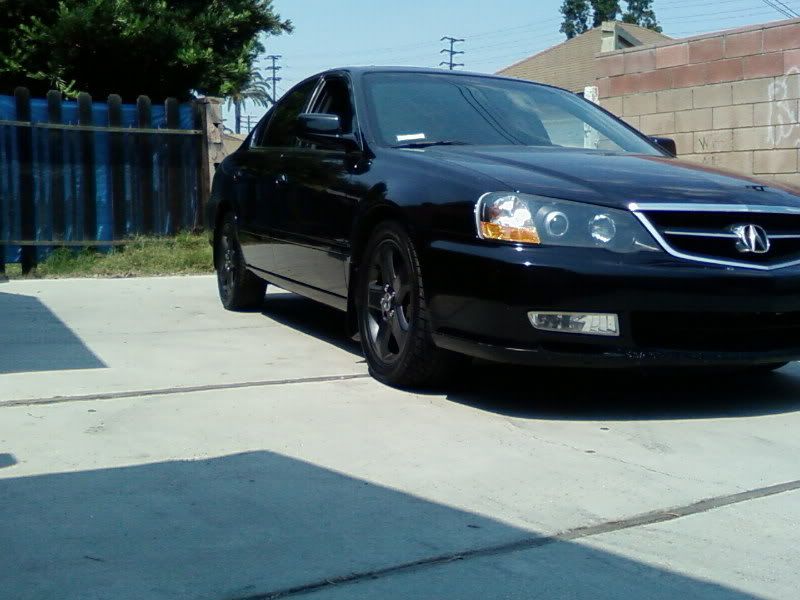
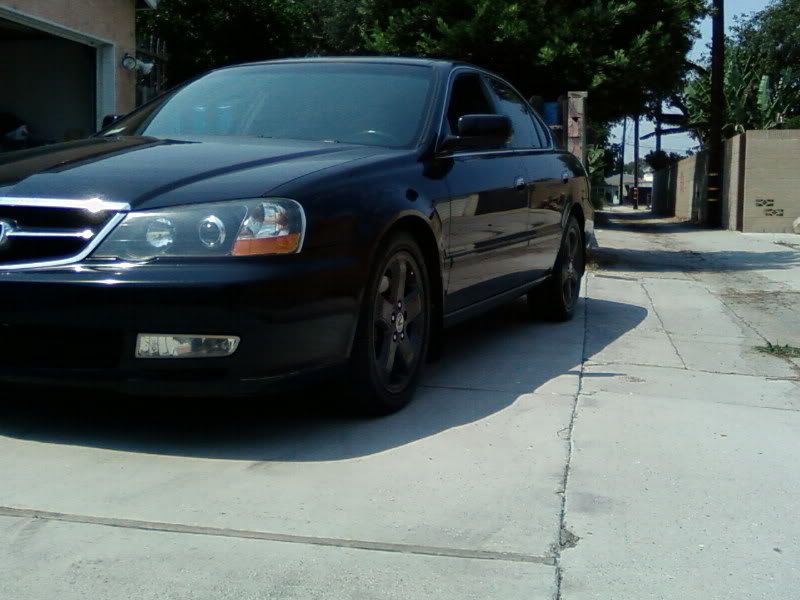
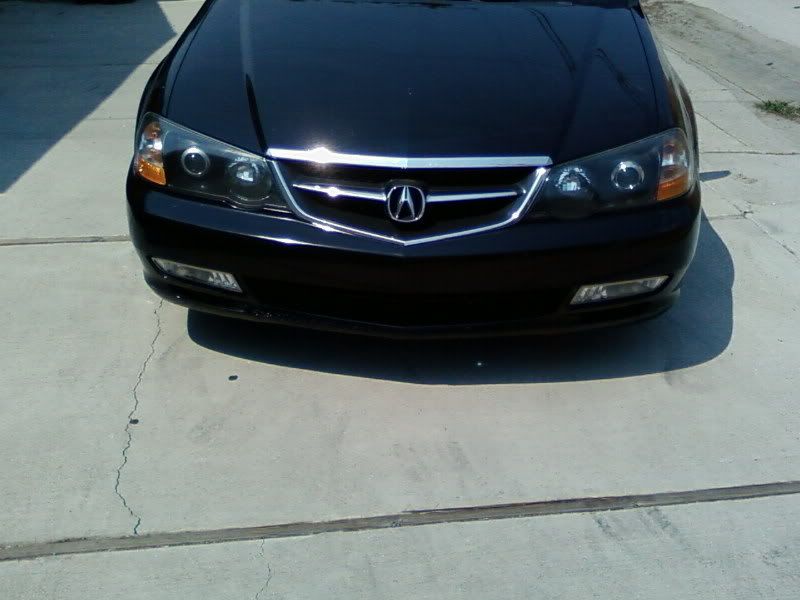
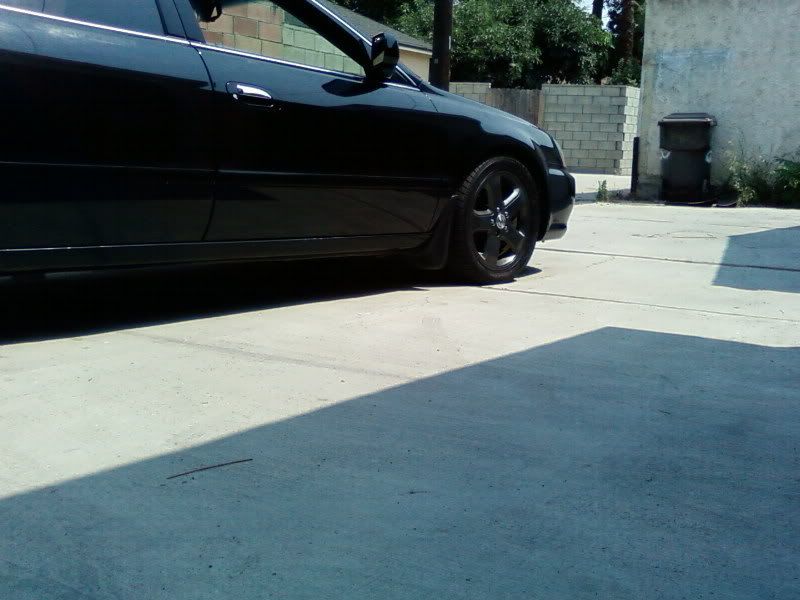
I currently have a 2001 TL-P
Questions:
1) How much of a gap should I leave for a car that is daily driven?
2) What exactly do I need for a drop
3) Any changes in comfort when dropping?
4) Anything I should know/keep-in-mind when doing a drop?
I appreciate your help.
I currently have a 2001 TL-P
Questions:
1) How much of a gap should I leave for a car that is daily driven?
2) What exactly do I need for a drop
3) Any changes in comfort when dropping?
4) Anything I should know/keep-in-mind when doing a drop?
I appreciate your help.
 08-31-2009, 04:51 PM
#2
im just gonna copy and paste.
SHOCKS, SPRINGS, COILOVERS!!!
Don�t run the OEM dampers with any lowering springs, Progressive rate springs don�t have a definitive spring rate because as their compressed their rate will increase, although they will be more comfortable than a linear rate spring, which rate will always stay constant.
�For Street use, It really makes very little difference what suspension you buy. If you are looking for a soft ride, pick one with a low spring rate. Dampers, do make a difference here. However ride quality is mostly influenced by Mid to high shaft speed valving (mostly bump). And really good single ajustible dampers, ones that allow you to tweak your cars hanlding the best, Should only adjust low speed rebound.
And this is why what damper you choose for street use doesnt really matter... Because most if not all of these "coilover" companys run Single adjustible dampers that adjust both bump and rebound with the same knob, which is silly for any sort of tuning for handling. AND the dampers the do run adjust mostly in the Mid speed valving range, limiting their usefull ness for any thing other then tweaking your ride quality.�
�Sure �pre-built� coilovers are easier. They are very convient, the car handles better than stock but not as well as it could. With a bit of luck someone else has �tuned� the coilover to your car. Will it be tuned specifically for you, no. They are tuned for a wide variety of customers with many different wants out of a suspension kit. Most of which are street drivers.
If you decide to order individual suspension parts then you can choose exactly what you want for your car, the use of the vechile, and your own driving style. Can a �pre-built� coilover compete with a separate spring shock combination, maybe/maybe not.
If you are only driving you car on the street and you will never see the track or any type of competition then a �pre-built� coilover is probably fine for you. If you want the absolute best out of your car and can take the car there then I would say stay away from most of the �pre-built� coilover kits. Either way it won�t matter if this is a street car you will never get the max out of your suspension on the street, and chances are your car isn�t properly prepared anyway, why is this, you don�t know what adds that last 10th of a second unless your timed.�.
Why am I in such dislike of any of the �pre-built coilovers? Dampers and Valving!!!!
�With all of the items that come with your coilovers the damper is the most expensive part that comes with the kit. A lot of companies promote the # of adjustment "clicks" on their dampers as a feature, with out posting a dynograph of the adjustment range of that damper.... well its time to start questioning why. Because "32 way adjustible" really tells me squat about the damper other then it is suposidly adjustible. It doesnt tell me what gets adjusted, it doesnt tell me the range in which those things get adjusted in. in order to lower costs, they end up using dampers of a more primitive design. you'll notice that most if not all use dampers that adjust both their bump valving and rebound valving with one knob. There's a reason for this, as dampers of this sort are easier to design and manufactur (theres only one set of Valve stacks that need to be turned with the adjuster, Vs ones where you only adjust rebound that have two sets of valve stacks, one that gets alterd by the adjustment knob and one that doesnt). Great for the company as they can sell their "coilovers" for less, bad for tuners because you now have an inferior damper. Also valving adjustment range tends to be very limited with the "cheep" coilovers.
In the whole, why would some one want a single adjustible damper to only adjust Rebound rather then Bump and rebound at the same time... well, that deals more with ride quality and how the car reacts to rough surfaces and impacts. See, bump valving has a much bigger influence on how the car reacts to impacts then rebound... It could be said that stiffer bump valving sort of Fakes a higher spring rate. The problem with that is, since they have the side effect of "faking" a stiffer spring, you are also "faking" a higher suspension frequency.... meaning the car will have less traction over bumps and rough surfaces. With a damper that adjusts bump and rebound at the same time, you end up running in to an issue of "I need stiffer valving to get the car to handle and respond the way I want, but I cant run to high of a bump valving with out making the car unstable in turns that arnt perfectly smooth"
"Low speed Valving deals primairly with Handling, as it influences how quickly weight gets transfered around the chassis.
High speed Valving deals primairly with how the shock reacts to impacts, such as bumps and ruts....
Mid speed Valving deals a bit with both.
then you get in to Bump Valvling Vs Rebound Valving.
Bump Primiaily deals with ride quality.
Rebound Primaily deals with handling."
There you have it this is why �pre-built� coilovers are not ideal for competition. For most these are perfectly fine for daily/street driving, but if you even think you will do any competiton then double think your purchase of a �pre-built� coilover.
SPRING RATES, WHEEL RATES, ROLL COUPLE DISTRIBUTION AND SUSPENSION FREQUENCIES!!!
Spring rates are the force it takes to compress the spring. A linear spring has a set rate. A progressive spring doesn't, it will contiune to raise in rate as it is compressed. Not so good for competition. Spring rates are eh, its the wheel rates that is the important information to know. The wheel rate will always be less than the spring rate, that is the motion ratio of the suspension, picture it as a lever. The wheel rate is the spring rate at the tires contact patch. Who cares what your wheel rate is, well that is the best way to figure out your roll couple distribution. Roll Couple is the balance of Roll resistance at the front of the car Vs the rear of the car and directly influences the oversteer/understeer balance of the cars Roll couple. Roll couple is adjusted with spring and anti-roll bar rates. All that really is is the difference in stiffness (roll resistacne) front to back. The stiffer end of a vehicle will lose traction first. So if a car�s front suspension is stiffer that the rear, the roll couple distribution will produce understeer because the front end is handling more weight transfer. Chances are your car is heavily biased to the front. This is why the car understeers in most situations.
Let me start with the higher the suspension frequency grip decreases. SO WHAT? Well this frequencey is a measure of how many cyles per minute or in a second, the car would go through and bounce up and down on springs alone. This matters greatly to you because the stiffer the suspenion is the less contact pactch will be touching the ground over rough surfaces, and if the tires in the air your not gaining traction or grip. The more grip your tires can make, the more force your putting into the car so you will need to up the resistance to body roll to keep it at an acceptable level. Race tires need a much stiffer suspension than a street tire. Cause their grip is that much higher and will cause the body to roll, losing camber and reducing grip.
In simpler terms...you want to run the softest springs you can get away with that reduces body roll to an Livable level, and has an approperate roll couple balance to give you the oversteer/understeer charateristics you want with the most grip your car can achieve.
Tuning a car to be neutral in almost all turns is an impossibility. Also neutral would not be the "fast" way around alot of turns. And you will only find out an ideal setup against the clock not on the street.
08-31-2009, 04:52 PM
#3
another
What are springs and struts? Why do springs effect my ride? Whats the difference between shocks and struts? Why stiffer?
Ok, first you have to understand the difference between the springs and the shocks and their stiffness. Its not the same thing. You dont want a stiff spring and a soft shock, but you can be just fine with a soft spring and a stiff shock.
the principal behind it is that as a spring gets smaller, the rate gets higher. The higher the springrate, the quicker and harsher the bouncing of the spring. However, the higher the springrate, the less the spring compresses where it usually would the most on stock springs. This is what causes bad rides and also what gives better performance as in less body roll. Frankly, thats what it gives you.
The principal behind shocks is that the shock compresses a certain amount (of course) as the spring does, but it really isnt absorbing the "shock" per say. No matter what shock you have, no matter how stiff or soft it is, whatever, its not doing the work, the spring is. The shock works to STOP the spring from the bouncing caused by its compression and decompression. However quick the shock reacts or rebounds will affect how much of it you feel and how much the car moves.
---
Why shouldnt I put an aftermarket spring on stock shocks?
This is why you dont just throw any damned spring on the stock shocks - you all that want a technical answer - this is it. It takes power to stop a progressive rate spring. Your stock springs are not progressive. They are evenly spaced apart. This means when you hit a bump in the road, the entire spring can compress, there are no dead coils persay. It takes a lot less power to stop a non progressive spring. Think of it like you have a 1 foot long spring with evenly spaced coils, you hold it down, and let it go. Now you do that again with a 8 inch tall spring that has all the coils near the top all close together, even touching. THis means that you have a lot less spring pushing it. BUt principal physics says its going to decompress a hell of a lot quicker, thus faster.
Now, I am a supporter of Eibach, they have awesome quality springs. They are a world renound company. But despite whatever they say, over and over, and whatever your friends or people on this board say, you cant make a shorter, progressive rate spring to work with stock shocks. Its springrate may be at the limits, it may feel about like stock, but it aint. under your car your shocks are working the hardest they have in a while to carry that springload. Now, whatever the claims, however long your friends have had them, is absolutely fabulous, go for it. If they say they are for stockers, then they are. But I have seen prokits blow stock shocks as fast as race springs. It happens easily. However, they are the least likely to do it. So if you are gonna cheap out, cheap out the right way. (I wonder if I could get that published in an oxy moron book...)
---
What has more effect on my ride and performance? Springs or Shocks? Both?
Now, addressing the question of which has more of an effect on the ride. Well, the spring. But the shock has an equal effect WHEN you have the spring. Heres how that works. You know how I talked about the spring absorbing the shock and compressing, and the shock matching it to stop the compression? Well, the same principal applies going into, say, a hard 75 degree turn at 75. What happens? Your spring compresses. You can certainly tell on stock springs, its less obvious with aftermarket springs though. But anyhow, in this instance, the quicker that shock can come out of compression and stop the springs compression, the more even your car will remain. Thus less body roll, and a still yet centered center of gravity. This equals control. Good control. Cant just the spring do this? Yes yes, of course, but even when you put that spring on stock shocks and head to the twisties, your car will still roll. Not as much, of course, but it will fluxuate. You lack evenness and clarity and preciseness. Your crux lies in how well that shock will respond.
--
I heard that I can cut and melt my stock springs...is this a good way to save money and lower my car?
NO!! Since your stock springs arent highly pro rate, you will be cutting off your springrate as you go. You will have a very stiff, often uneven, harsh ride and you will blow your stock shocks. You also can never revert back and if you screw one thing up you are basically screwed alltogether. Its a money trap.
--
What are the differences between different brands and genres of springs?
Well, generally springs, as they get lower, have a higher and higher springrate, which is how close together the spring coils are to each other - but a prorate spring gathers coils together towards the top and spreads out as they move down. The lower the springrate, the softer the spring, the higher the car sits.
Eibach is the choice spring for many people as they claim compatibility with stock struts, which is not all that far off, however they are still a highly progressive spring, even though they have a relatively lower springrage, and really are still putting a lot of pressure on your struts, its just unrealized since the springs have a lower springrate at the bottom.
Neuspeed springs and H&R springs are basically the "next step" up. They offer an allright ride, but they are a lot stiffer than eibach springs and a tad less progressive. They still progress down, except the coils are closer together. These offer higher performance.
There are others, like Suspension Techniques, Intrax, Sprint, BBK, etc. Most of these springs are as high or high of a springrate as the Neuspeeds, but some of them are notorious for sagging or being to stiff. However, The designs can be nice and great for the right application, like using S/T sport springs which are a very small drop.
--
Ok, enough technical jargon, what about the actual drop height of the springs...what are some different springs?
Here are some springs and their average drops (it varys from generation)
S/T Sport or Neuspeed Sofsport about a 1.0" drop, 3 finger gap
Eibach Prokits are about a 1.4" drop, 2 finger gap
Neuspeed / H&R Sports are about a 1.8" drop, 1 finger gap
Eibach Sportlines are about a 2"+ drop, 0-1 finger gap
Neuspeed / H&R Race are about a 2.25" drop, usually no gap, depends on strut
and the catagories for most sport and race springs from other companies (intrax, suspension tech, sprint are about the same drop as neuspeeds.
--
Thats nice, but my parents dont want me to lower my car, is there anything I can do that they might be OK with?
Sure, you can go with a minor drop spring like S/T Sport or Eibach prokits. Im sure you will notice the stance of the springs but your parents may not unless they just stare at the car or they always have something to compare it to. Most of all you get rid of a lot of that ugly gap.
--
I dont race, I just want people to see me and like my ride. What should I do?
The thing is, if you want the look and comfort and are not extremely concerned about performance, grab up the prokits or sportlines... they are just a softer spring to put it bluntly.
--
Whats up with that guy? Why would you lower a car just for looks? I want the best performance baby.
In that case, I would say go with Neuspeed springs. There is a noticeable difference in the performance, but the ride suffers more. The best performance springs are the high springrate springs, but your comfort is compromised. If you are really into it, go for some Race series springs, but I mean if you are really into it.
--
Ok, you mentioned struts earlier, but what do I need to do about them?
Well, on just about any car, if you replace your springs, your stock struts arent going to take it near as well, they cant stop the springs. First off, the springs are stiffer...no matter what. THe thing about eibachs is they still they arent uniform and they arent stock springs, and they will be stiffer. Eventually with any spring, especially the very stiff ones like Neuspeed, etc, you are going to blow out your struts...eventually. some people take weeks some months some can go a year but it doesnt matter - Ive seen people blow shocks with prokits just as fast as H&R Race, its still money you have to spend later if you dont do it now.
08-31-2009, 04:56 PM
#4
as to answer your questions specifically.
1) you can DD at any height that you find is suitable to you.
see what kind of roads you daily drive in most.. are they mostly smooth.. or are there very little minor humps/bumps.. or are there like.. grooves in the road that when lowering it will cause your car to be stuck.. you figure that out...
2) taken from the DIY thread. obviously you need the choice of drop(spring/coilover) you're going for
3) any dropping changes the ride comfort to a little more stiff.. now depending on what you drop with...... we'll go from there...
4) aligntment aligntment aligntment
then, depending on how low you are planning on going... and blah blah blah..
1) you can DD at any height that you find is suitable to you.
see what kind of roads you daily drive in most.. are they mostly smooth.. or are there very little minor humps/bumps.. or are there like.. grooves in the road that when lowering it will cause your car to be stuck.. you figure that out...
2) taken from the DIY thread. obviously you need the choice of drop(spring/coilover) you're going for
I just got done lowering my car this weekend and it wasn't so bad. If I was given some more tips and directions, I think it would have gone a bit smoother. Otherwise, it's a pretty straight forward installation with a little bit of elbow grease. The instructions that I will be giving is exact procedures that I used to lower the car. I guess there are other ways, but these are the steps I did in order.
I lowered my 03 TL and I'm not sure of it's the same as the 99-01 models, but I imagine it's very similar if it's not identical.
Tools Used:
Air compressor ( Will make this DIY REAL easier if you had this)
Any kind of jacks - Floor jack would be best though, IMO.
Jack stands
Rachets- big and small ( not sure about the size, maybe 3/4" and 1/2")
14 mm Open end / box wrench
17 mm socket
14 mm socket
14 mm deep socket
19 mm socket ( for spring compressor)
12 mm socket
10 mm deep socket
WD-40
Hex Key Wrench - I forgot what size to use, but you can find out for yourself.
Spring Strut Compressor- Can be rented from Autozone( w/ a deposit)
I'm assuming that you all know how to remove the wheel and place it on jack stands so I'll just skip that part.
Removing suspension:

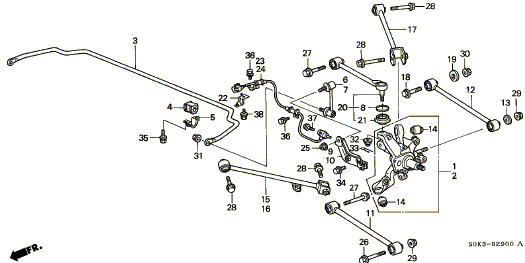
1) First off, I started on the front suspension. I wanted to tackle the 17 MM bolt on the Lower Control Arm where the suspension sat on. ( #22 and #24 on the above diagram). On one side, thats where the #22 bolt goes through to connect the LCA to the strut, and on the other side, there's a nut(#24) . I used two rachets with 17 mm sockets, one on each side. I found it easier trying to loosen the end with the nut, so I used the other side to hold it in place while I loosen. It's not going to be easy to loosen this bolt, so use a hammer to tap it to get it loose. Once you get the nut off, use a small screw driver and place it at the tip of the bolt and tap it out. Now, the bolt is off, so put the nut back on the bolt and put it aside so you don't misplace it or kick it somewhere.
2) Next, I unbolted the 14mm bolt ( #20 on the above diagram). With that taken off, you can slide the fork (#17/18) down while the strut stays in place. Now, the #17/18 fork can be taken out and put aside.
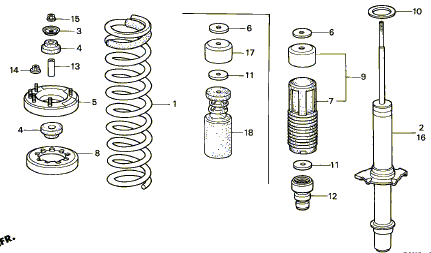
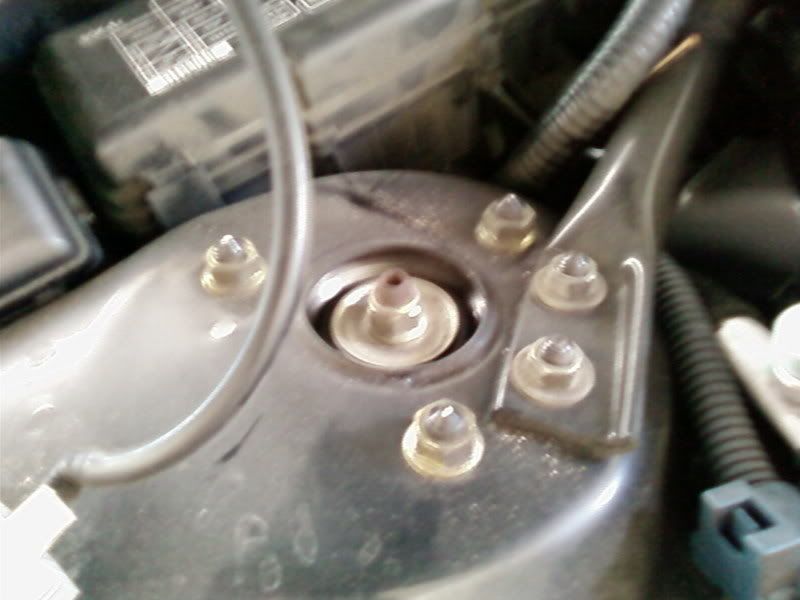
3) Next thing to do is to go under the hood and remove the top part of the suspension. This can be done by removing five nuts. Three of them requires using a 14 mm socket, and the other two, connects the Sway bar to the suspension. To take the two screws from the sway bar off, use a 12 mm socket.
4) With all the nuts and bolts taken off, the suspension should be able to come out. Have someone help press down on the brakes so that it gets you enough clearance to put out the entire suspension.
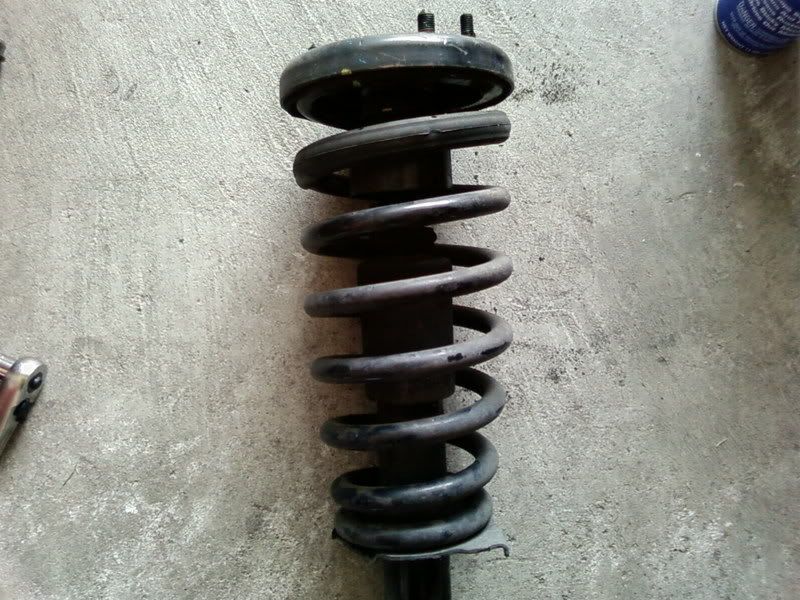
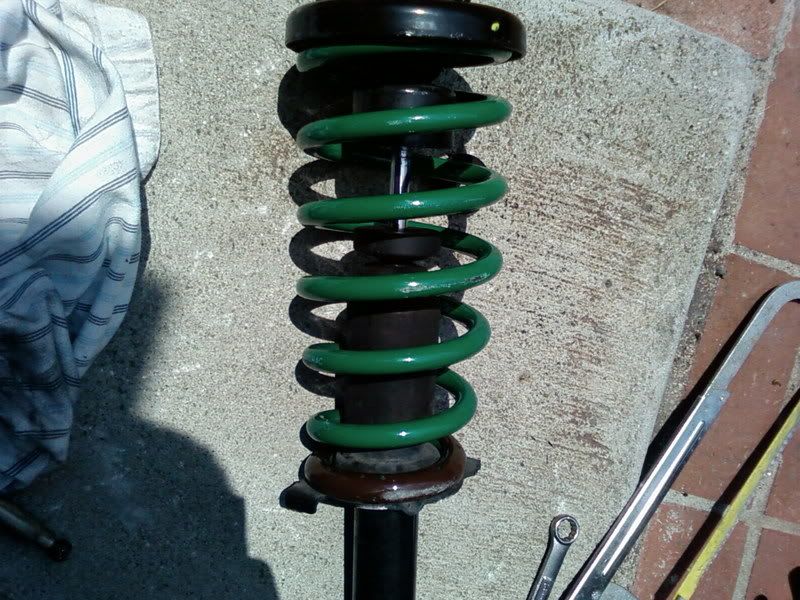
Voila, it should look like this..
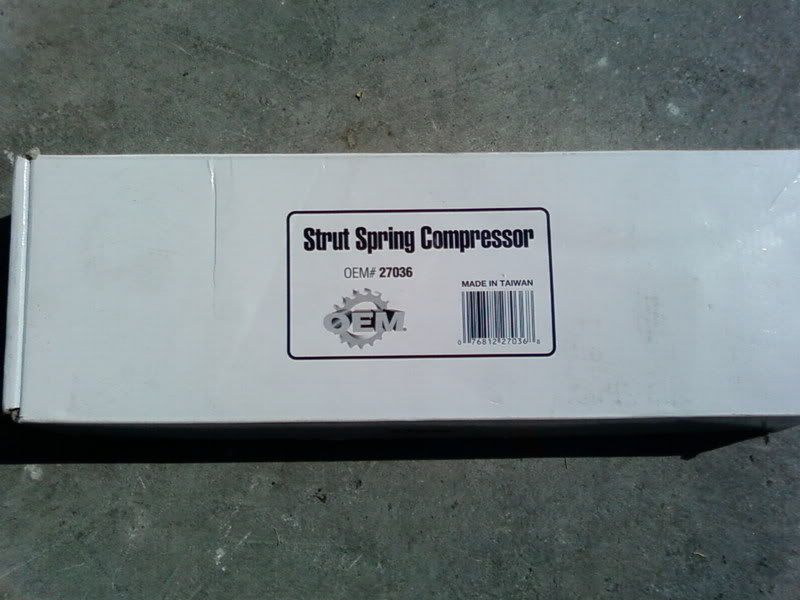
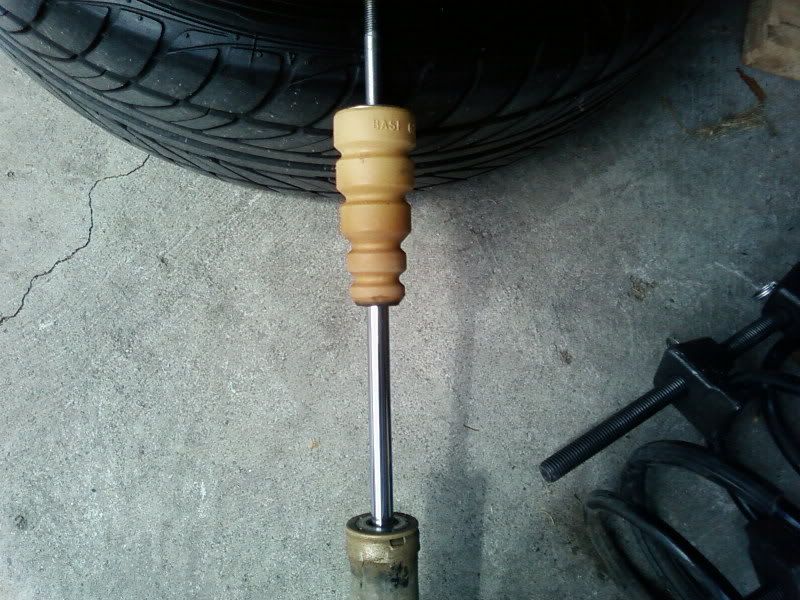
Removing Spring from Strut
Ok, here comes the fun part...removing the springs from the strut. I went to autozone to rent the spring strut compressor, so you guys can do the same. They made me put a $43 dollar refundable deposit.
This is what I got.
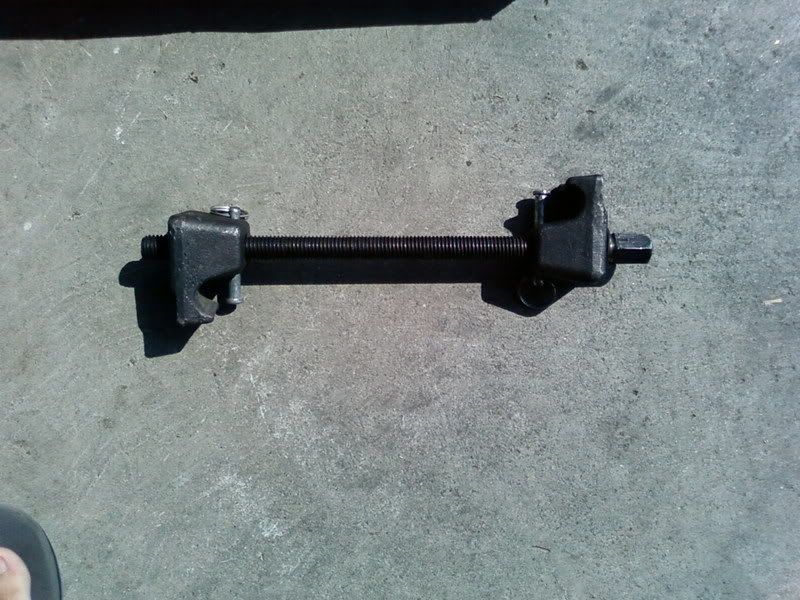
It comes with two, one for each side of the spring.
1) First of all, take a look at the bottom of the strut. There is one side that has a notch. That must be aligned to the top mounting bracket. If they are not aligned correctly, you'll have a problem.
One of two things will happen if they aren't straight.
a) The bottom strut will sit back on the Fork Bracket, but the top 5 bolts will not fit back into the holes.
or
b) The top five bolts will fit through to the top, and the bottom of the strut will not sit back into the Fork Bracket.
So mark before you remove the spring, mark the notch on the bottom of the strut and make a mark on the Mounting bracket.
2) Put the Top part of compressor on the spring, and the bottom part more towards the bottom. Push in the clip so that it stays in place. Do that to both sides.
3) Now, evenly, tighten both sides.
It should look something like this...
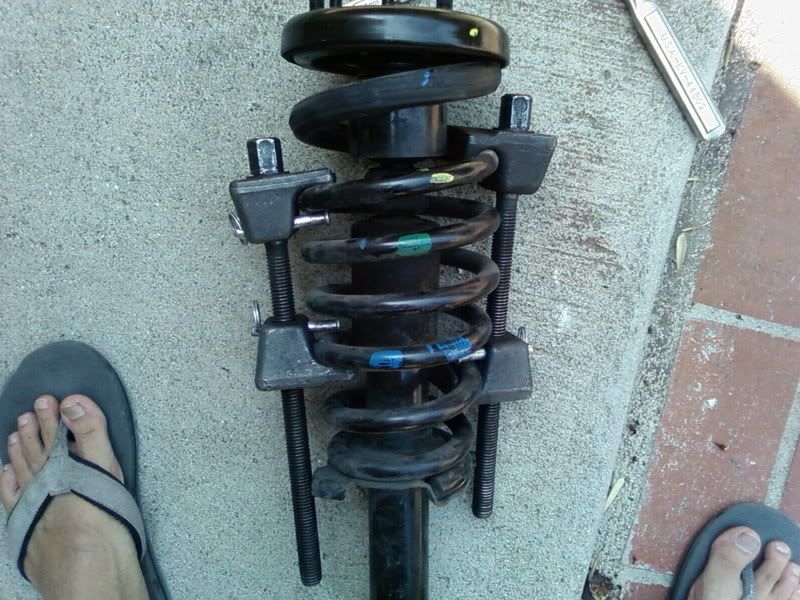
The way I can tell that it's tight enough is when the spring isn't putting too much pressure on the top mounting cover.
4) Now it's time to remove the top mounting cover. To do this, you'll need the Hex Key wrench along with an open end/ box wrench.
5) What I did was lay down the spring and aimed it away from me. This is just in case when you take the top off, and the spring is still not compressed all the way, it can shoot away from you, not killing you. Then, with the Hex Key wrench, put it through the top of the strut, while at the same time putting the open end / box wrench in. I sprayed a little WD-40 on the threads so it can come out easier. Then, twist down while holding the hex key in place. If it's too hard, use something to beat down the open end / box wrench to knock it loose. So once the nut is almost coming out, slowly take it off with caution, just incase it'll fly out.
6) If you are at this step, then you probably didn't kill yourself. haha. So now, slip the top mounting cover off and slide out he spring from the strut. Put it aside.
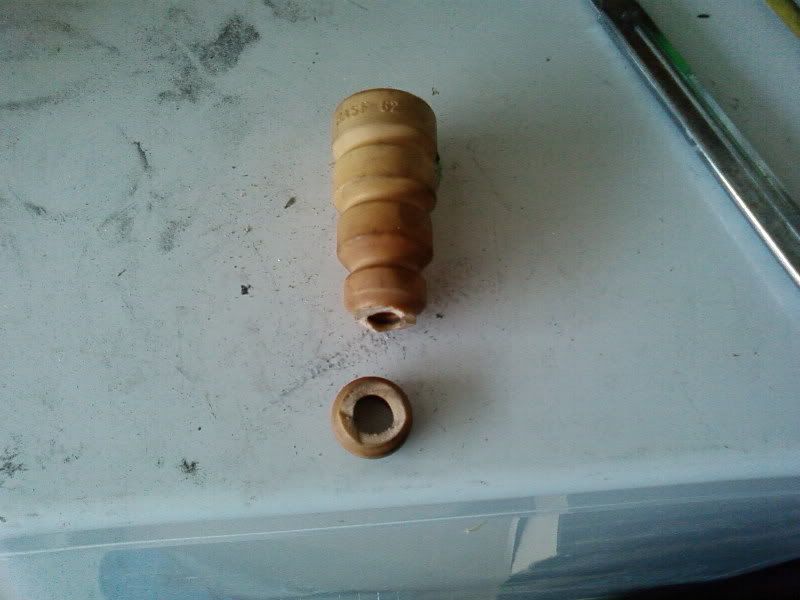
Cutting Rubber Bump Stop
The installation guide that I got from Tein said that the front rubber bump stop has to be trimed 1.6" amd the rear .6".
The bump stop looks like this,
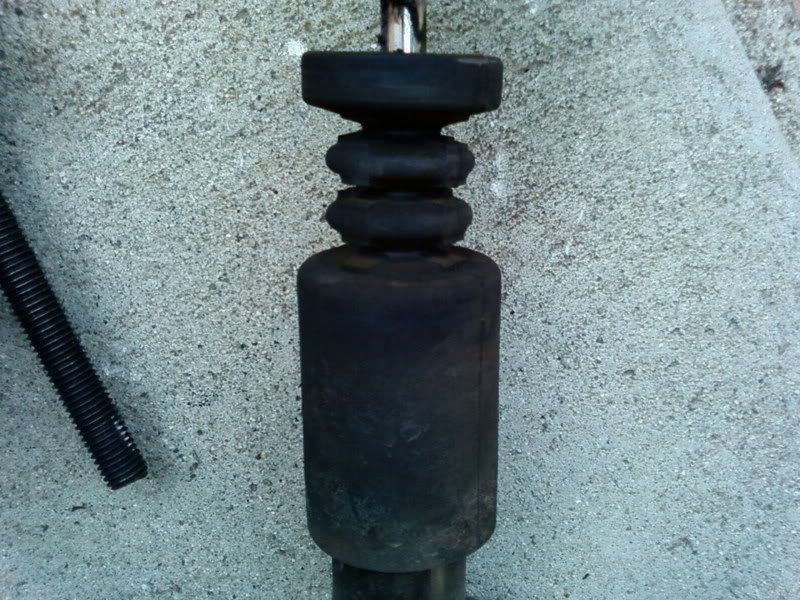
I guess you are able to pull the bump stop off before you cut to avoid any damages to the piston. I couldn't find out how to take it out so I just cut it with caution. There's a boot that covers the piston from dust so I didn't cut that. I cut off one notch above that boot. It looks like this,
Remove it from the strut and trash it!
Springs back on the strut
1) Remove the Spring Strut Compressor from your stock springs by evenly loosening it until it comes off.
2) Grab your new springs and put the compressors on it like on step #2 and #3.
3) Put the spring back on the strut and make sure that the end of the bottom of the spring is sitting against the end. Kind of hard to explain, but you'll know what I'm talking about when you look at the base where the spring sits on the strut.
4) Now, make sure you put EVERYTHING back in the strut before you got and tighten everything. This is EXACTLY what I didn't do. I forgot to put a spacer back in the strut before I tightened everything up and put the entire suspension back in. It wasn't until I lowered my car back down to finish up when I noticed that damn spacer sitting behind me. That's exactly what i did when I saw the spacer sitting there. After I thought I was done with that side, I had to take EVERYTHING back out and redo it. So learn from my mistakes and make sure EVERYTHING is placed back on the strut before continuing.
5) Place the top mounting cover back on and line it up with the markings you made. Now tighten the top nut. Then, uncompress the springs and it should look like this.
Installing Suspension back on
1) Slide the suspension back in place. It also helps to have someone press down on the brakes to give you some clearance.
2) Now, stick the suspension back to the top and screw on the five nuts.
3) Slide back the Fork Bracket back on the bottom of the strut and put the 14 mm bolt back on.
4) Grab the 17 mm bolt and have someone help you while you press down on the brakes. Slide the bolt all way through to the other side. This might be a bit tricky, but you just have to nudge the brakes a little so that it aligns with the struts. Put the 17mm nut back on and tighten.
5) Tighten the top five nuts and you are officially done with one suspension. Do the same to the other side and you should be done with the front. It should look like this,

Rear Suspension
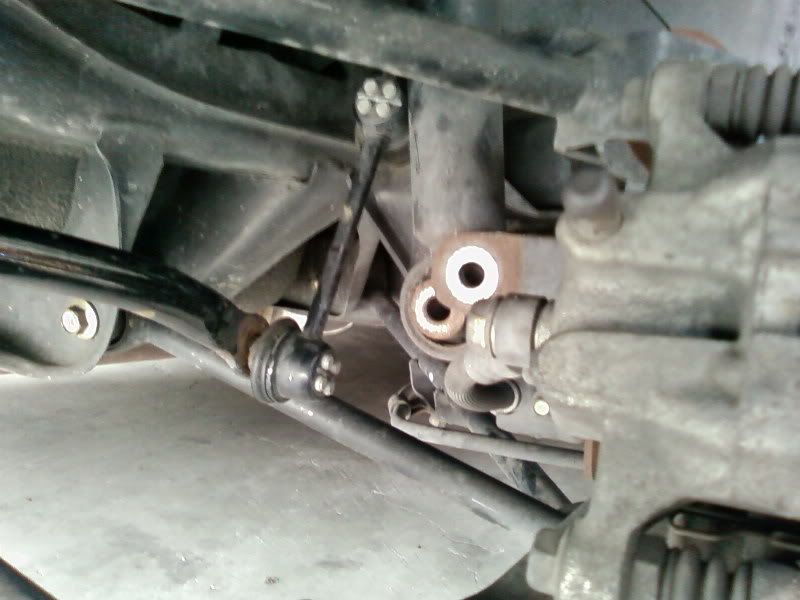
While doing the rear, I found that it was a bit trickier to do because it had things that obstructed my clearance. If you follow my directions step by step, you won't have a problem. One problem that you will run into is the end links. Once you've taken off the 17 mm bolts, you'll find that the end links are preventing the shocks from coming out. The end links connects the rear sway bar to the rear brakes system by way of a bracket called the Link Stabalizer. So, theses are the steps I did in order to remove the rear suspension with ease.
Removing Rear Seats
1) The rear seat is in your way and has to be taken out before you can access two bolts that holds the susension from the top. The bottom seats come out first. If you take a look at the cup holder/ arm rest on the back seat, there are two clips or markings on each side to the left and right of the arm rest. Directly below it between the bottom seat and top seat, there's a 10 mm bolt. Using a 10 mm socket with an extension and you'll be able to remove those two bolts. If you grab the bottom of the seat on the driver side and pull up, it'll just pop out of place because of a clip. Do the same to the other side and you'll be able to remove the bottom seat.
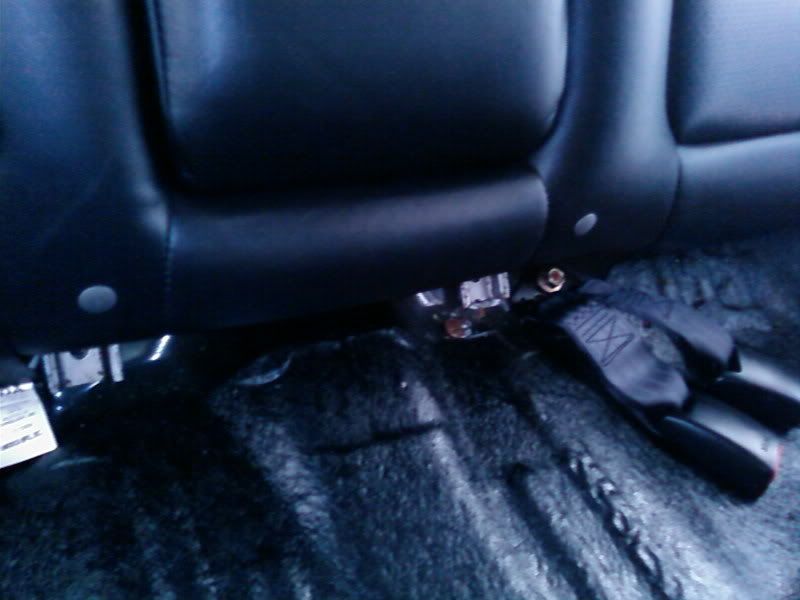
2) To remove the back portion of the seat, on both sides of the seats, close to the doors, there's a 10mm bolt that needs to be taken off. Take both sides off.
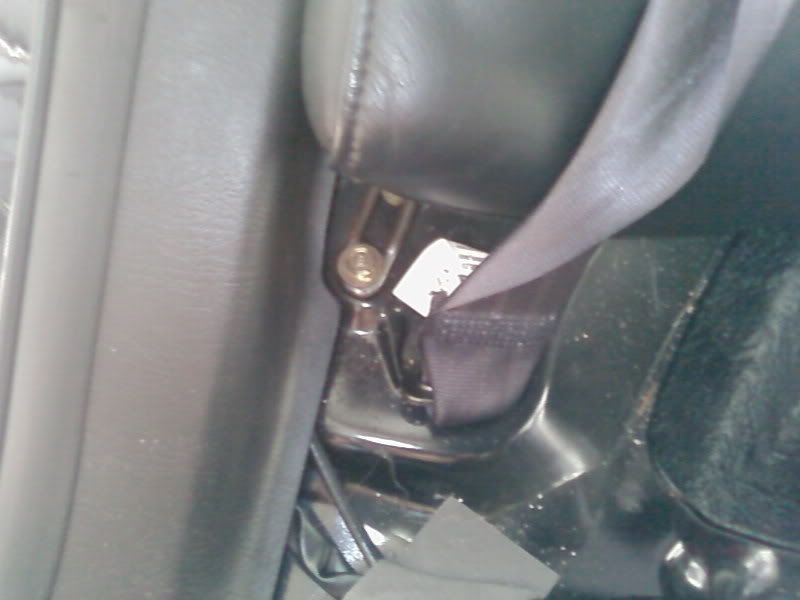
3) With the two bolts off, now you need to grab the seat from the bottom and lift up so that the two metal brackets come out and pull out the seat.
4) Now, if you look on either side, you can barely access the top suspension by lifting up the rear deck lid. There are only two 14 mm bolts. Remove that and the top should be about to come out.
#6 and #7 is the rear end links. It's pretty much a little bar that has two bolts, one on each end. # 9 and #10 is the Link Stabalizer that has to be taken off. If you follow the top line on the diagram, it'll lead you to #6 and #7.
End links are pictured to the left of the shocks,
1) Remove the 17mm Bolt from the LCA.
2) There are two ends on the end link, one that is closer to the engine, and one closer to the trunk. The end that connects to the Rear Sway bar must be taken off first. This is taken off with a 14mm open end/ box wrench with the Hex Key Wrench.
3) Once that end link is taken off, the Link stabalizer must be removed with a 14mm deep socket. Be careful here because there's a wire there that looks like a sensor, so don't rip this. You might mess up and this could happen to you.
4) Once the Link Stabalizer bracket is off, you'll have room to push the end of the strut away from you through to the bottom. Have someone push down on the brakes and you'll have enough clearance to take that sucker out.
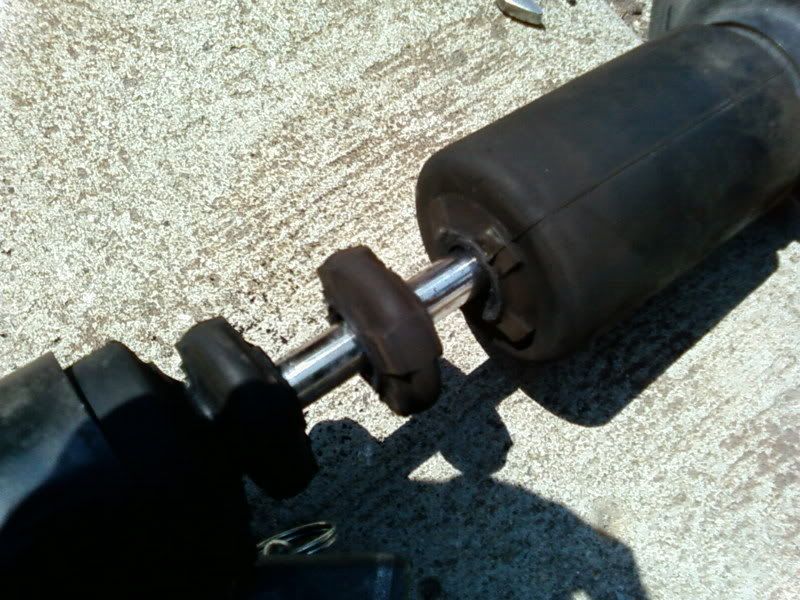
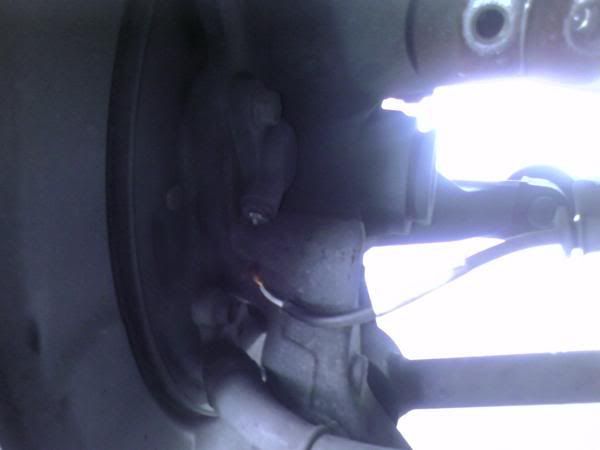
The rear strut has a big boot that covers the rubber bump stop, so remove it and you'll reveal the bump stop. It looks a little different from the front, but I was able to take this out from the pistons to cut it. I just cut the bottom part and placed it back in .
Do the same as you did to the front suspension and it's time to put it back in.
1) Shove the suspension back on and screw the top portion in first.
2) Slide the bottom of the strut so that it's aligned with the LCA. The Link stabalizer doesn't have to go in yet.
3) Slide in the 17 mm bolt through to the other side where it meets the Link Stabalizer.
4) Screw in the 17 mm bolt so that it screws into the link stabalizer bracket a bit.
NOTE : If you look at the Link Stabablizer bracket, where it meets the LCA, it has a little groove that has to go back into the LCA. Make sure it does this when the 17 mm bolt is tightening up.
5) Now, take the 14 mm bolt and bolt up the Link Stabalizer, but don't tighten it all the way. You have to put the end link back on the sway bar. I found out that it was hard for me to the end link back on the sway bar, so what I did was remove the other end link from the Link Stabalizer. Then put the end link back on the sway bar.
6) Tighten the 14mm bolt on the Link stabalizer all the way.
7 Tighten the 17 mm bolt on the LCA all the way.
8) Now, you must put the end link back on the Link Stabalizer. It's going to be difficult, but what I did was press down on the rear sway bar so that the bolt slides into the hole. It's still not all the way in right now, but using a jack, lift up the brakes. This will lift up a little bit and will allow for the bolt on the end link to go through, allowing you to put the bolt on.
9) Tighten everything thing and you are done!!!
I spoke to Kris( Fsttyms1) about this process and he was able to remove the rear without having to remove the end links. He just removed the Link Stabalizer and was able to move it out of his way and put it back with not problem. Unfortunately, it didn't work out too well for me, so I did a little extra work. You guys can use anyway to remove the rear, but the way that I explained was the best way for me. Repeat for the other side and put back your seats and you are done.
Last step is to wash your car and take lots of pictures!! Haha. You've done it. You've saved yourself from 150 to 200 bucks of labor. Hope that helps.
Before:

After:

I lowered my 03 TL and I'm not sure of it's the same as the 99-01 models, but I imagine it's very similar if it's not identical.
Tools Used:
Air compressor ( Will make this DIY REAL easier if you had this)
Any kind of jacks - Floor jack would be best though, IMO.
Jack stands
Rachets- big and small ( not sure about the size, maybe 3/4" and 1/2")
14 mm Open end / box wrench
17 mm socket
14 mm socket
14 mm deep socket
19 mm socket ( for spring compressor)
12 mm socket
10 mm deep socket
WD-40
Hex Key Wrench - I forgot what size to use, but you can find out for yourself.
Spring Strut Compressor- Can be rented from Autozone( w/ a deposit)
I'm assuming that you all know how to remove the wheel and place it on jack stands so I'll just skip that part.
Removing suspension:
1) First off, I started on the front suspension. I wanted to tackle the 17 MM bolt on the Lower Control Arm where the suspension sat on. ( #22 and #24 on the above diagram). On one side, thats where the #22 bolt goes through to connect the LCA to the strut, and on the other side, there's a nut(#24) . I used two rachets with 17 mm sockets, one on each side. I found it easier trying to loosen the end with the nut, so I used the other side to hold it in place while I loosen. It's not going to be easy to loosen this bolt, so use a hammer to tap it to get it loose. Once you get the nut off, use a small screw driver and place it at the tip of the bolt and tap it out. Now, the bolt is off, so put the nut back on the bolt and put it aside so you don't misplace it or kick it somewhere.
2) Next, I unbolted the 14mm bolt ( #20 on the above diagram). With that taken off, you can slide the fork (#17/18) down while the strut stays in place. Now, the #17/18 fork can be taken out and put aside.
3) Next thing to do is to go under the hood and remove the top part of the suspension. This can be done by removing five nuts. Three of them requires using a 14 mm socket, and the other two, connects the Sway bar to the suspension. To take the two screws from the sway bar off, use a 12 mm socket.
4) With all the nuts and bolts taken off, the suspension should be able to come out. Have someone help press down on the brakes so that it gets you enough clearance to put out the entire suspension.
Voila, it should look like this..
Removing Spring from Strut
Ok, here comes the fun part...removing the springs from the strut. I went to autozone to rent the spring strut compressor, so you guys can do the same. They made me put a $43 dollar refundable deposit.
This is what I got.
It comes with two, one for each side of the spring.
1) First of all, take a look at the bottom of the strut. There is one side that has a notch. That must be aligned to the top mounting bracket. If they are not aligned correctly, you'll have a problem.
One of two things will happen if they aren't straight.
a) The bottom strut will sit back on the Fork Bracket, but the top 5 bolts will not fit back into the holes.
or
b) The top five bolts will fit through to the top, and the bottom of the strut will not sit back into the Fork Bracket.
So mark before you remove the spring, mark the notch on the bottom of the strut and make a mark on the Mounting bracket.
2) Put the Top part of compressor on the spring, and the bottom part more towards the bottom. Push in the clip so that it stays in place. Do that to both sides.
3) Now, evenly, tighten both sides.
It should look something like this...
The way I can tell that it's tight enough is when the spring isn't putting too much pressure on the top mounting cover.
4) Now it's time to remove the top mounting cover. To do this, you'll need the Hex Key wrench along with an open end/ box wrench.
5) What I did was lay down the spring and aimed it away from me. This is just in case when you take the top off, and the spring is still not compressed all the way, it can shoot away from you, not killing you.
Then, with the Hex Key wrench, put it through the top of the strut, while at the same time putting the open end / box wrench in. I sprayed a little WD-40 on the threads so it can come out easier. Then, twist down while holding the hex key in place. If it's too hard, use something to beat down the open end / box wrench to knock it loose. So once the nut is almost coming out, slowly take it off with caution, just incase it'll fly out. 6) If you are at this step, then you probably didn't kill yourself. haha.
So now, slip the top mounting cover off and slide out he spring from the strut. Put it aside.Cutting Rubber Bump Stop
The installation guide that I got from Tein said that the front rubber bump stop has to be trimed 1.6" amd the rear .6".
The bump stop looks like this,
I guess you are able to pull the bump stop off before you cut to avoid any damages to the piston. I couldn't find out how to take it out so I just cut it with caution. There's a boot that covers the piston from dust so I didn't cut that. I cut off one notch above that boot. It looks like this,
Remove it from the strut and trash it!
Springs back on the strut
1) Remove the Spring Strut Compressor from your stock springs by evenly loosening it until it comes off.
2) Grab your new springs and put the compressors on it like on step #2 and #3.
3) Put the spring back on the strut and make sure that the end of the bottom of the spring is sitting against the end. Kind of hard to explain, but you'll know what I'm talking about when you look at the base where the spring sits on the strut.
4) Now, make sure you put EVERYTHING back in the strut before you got and tighten everything. This is EXACTLY what I didn't do. I forgot to put a spacer back in the strut before I tightened everything up and put the entire suspension back in. It wasn't until I lowered my car back down to finish up when I noticed that damn spacer sitting behind me.
That's exactly what i did when I saw the spacer sitting there. After I thought I was done with that side, I had to take EVERYTHING back out and redo it. So learn from my mistakes and make sure EVERYTHING is placed back on the strut before continuing. 5) Place the top mounting cover back on and line it up with the markings you made. Now tighten the top nut. Then, uncompress the springs and it should look like this.
Installing Suspension back on
1) Slide the suspension back in place. It also helps to have someone press down on the brakes to give you some clearance.
2) Now, stick the suspension back to the top and screw on the five nuts.
3) Slide back the Fork Bracket back on the bottom of the strut and put the 14 mm bolt back on.
4) Grab the 17 mm bolt and have someone help you while you press down on the brakes. Slide the bolt all way through to the other side. This might be a bit tricky, but you just have to nudge the brakes a little so that it aligns with the struts. Put the 17mm nut back on and tighten.
5) Tighten the top five nuts and you are officially done with one suspension. Do the same to the other side and you should be done with the front. It should look like this,
Rear Suspension
While doing the rear, I found that it was a bit trickier to do because it had things that obstructed my clearance. If you follow my directions step by step, you won't have a problem. One problem that you will run into is the end links. Once you've taken off the 17 mm bolts, you'll find that the end links are preventing the shocks from coming out. The end links connects the rear sway bar to the rear brakes system by way of a bracket called the Link Stabalizer. So, theses are the steps I did in order to remove the rear suspension with ease.
Removing Rear Seats
1) The rear seat is in your way and has to be taken out before you can access two bolts that holds the susension from the top. The bottom seats come out first. If you take a look at the cup holder/ arm rest on the back seat, there are two clips or markings on each side to the left and right of the arm rest. Directly below it between the bottom seat and top seat, there's a 10 mm bolt. Using a 10 mm socket with an extension and you'll be able to remove those two bolts. If you grab the bottom of the seat on the driver side and pull up, it'll just pop out of place because of a clip. Do the same to the other side and you'll be able to remove the bottom seat.
2) To remove the back portion of the seat, on both sides of the seats, close to the doors, there's a 10mm bolt that needs to be taken off. Take both sides off.
3) With the two bolts off, now you need to grab the seat from the bottom and lift up so that the two metal brackets come out and pull out the seat.
4) Now, if you look on either side, you can barely access the top suspension by lifting up the rear deck lid. There are only two 14 mm bolts. Remove that and the top should be about to come out.
#6 and #7 is the rear end links. It's pretty much a little bar that has two bolts, one on each end. # 9 and #10 is the Link Stabalizer that has to be taken off. If you follow the top line on the diagram, it'll lead you to #6 and #7.
End links are pictured to the left of the shocks,
1) Remove the 17mm Bolt from the LCA.
2) There are two ends on the end link, one that is closer to the engine, and one closer to the trunk. The end that connects to the Rear Sway bar must be taken off first. This is taken off with a 14mm open end/ box wrench with the Hex Key Wrench.
3) Once that end link is taken off, the Link stabalizer must be removed with a 14mm deep socket. Be careful here because there's a wire there that looks like a sensor, so don't rip this. You might mess up and this could happen to you.
4) Once the Link Stabalizer bracket is off, you'll have room to push the end of the strut away from you through to the bottom. Have someone push down on the brakes and you'll have enough clearance to take that sucker out.
The rear strut has a big boot that covers the rubber bump stop, so remove it and you'll reveal the bump stop. It looks a little different from the front, but I was able to take this out from the pistons to cut it. I just cut the bottom part and placed it back in .
Do the same as you did to the front suspension and it's time to put it back in.
1) Shove the suspension back on and screw the top portion in first.
2) Slide the bottom of the strut so that it's aligned with the LCA. The Link stabalizer doesn't have to go in yet.
3) Slide in the 17 mm bolt through to the other side where it meets the Link Stabalizer.
4) Screw in the 17 mm bolt so that it screws into the link stabalizer bracket a bit.
NOTE : If you look at the Link Stabablizer bracket, where it meets the LCA, it has a little groove that has to go back into the LCA. Make sure it does this when the 17 mm bolt is tightening up.
5) Now, take the 14 mm bolt and bolt up the Link Stabalizer, but don't tighten it all the way. You have to put the end link back on the sway bar. I found out that it was hard for me to the end link back on the sway bar, so what I did was remove the other end link from the Link Stabalizer. Then put the end link back on the sway bar.
6) Tighten the 14mm bolt on the Link stabalizer all the way.
7 Tighten the 17 mm bolt on the LCA all the way.
8) Now, you must put the end link back on the Link Stabalizer. It's going to be difficult, but what I did was press down on the rear sway bar so that the bolt slides into the hole. It's still not all the way in right now, but using a jack, lift up the brakes. This will lift up a little bit and will allow for the bolt on the end link to go through, allowing you to put the bolt on.
9) Tighten everything thing and you are done!!!
I spoke to Kris( Fsttyms1) about this process and he was able to remove the rear without having to remove the end links. He just removed the Link Stabalizer and was able to move it out of his way and put it back with not problem. Unfortunately, it didn't work out too well for me, so I did a little extra work. You guys can use anyway to remove the rear, but the way that I explained was the best way for me. Repeat for the other side and put back your seats and you are done.
Last step is to wash your car and take lots of pictures!! Haha. You've done it. You've saved yourself from 150 to 200 bucks of labor.
Hope that helps. Before:
After:
4) aligntment aligntment aligntment
then, depending on how low you are planning on going... and blah blah blah..
 08-31-2009, 05:44 PM
#7
Join Date: Mar 2009
Posts: 705
Likes: 0
Received 0 Likes
on
0 Posts
Trending Topics

 08-31-2009, 08:32 PM
#12
Keep It Simple in
iTrader: (8)
Join Date: May 2008
Location: Pomona, California
Age: 31
Posts: 2,279
Likes: 0
Received 21 Likes
on
14 Posts
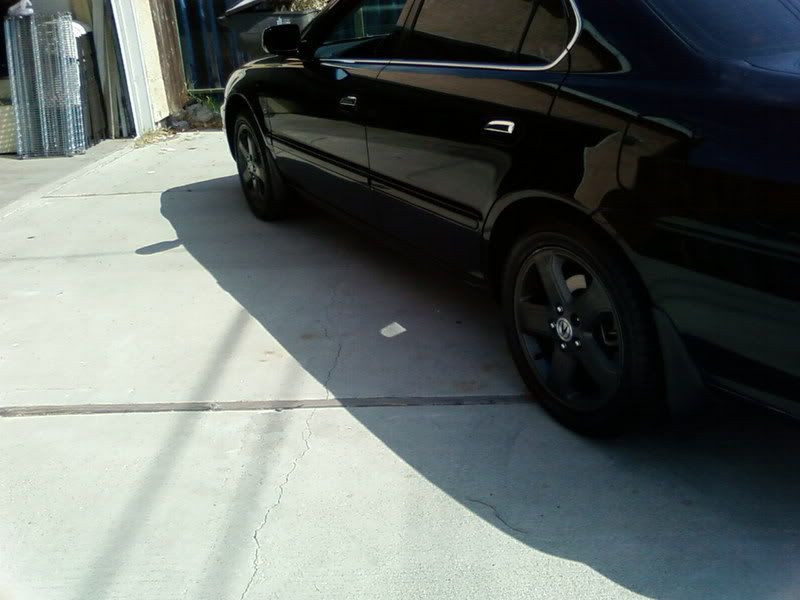
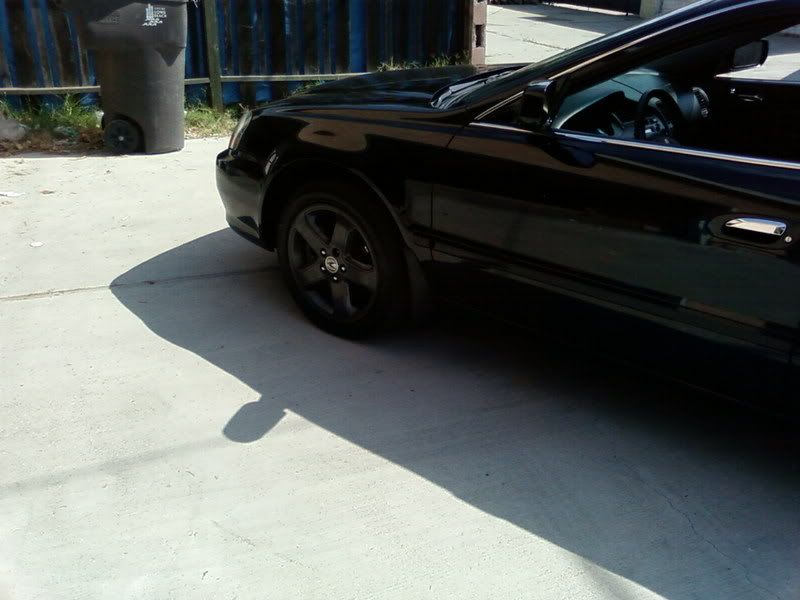
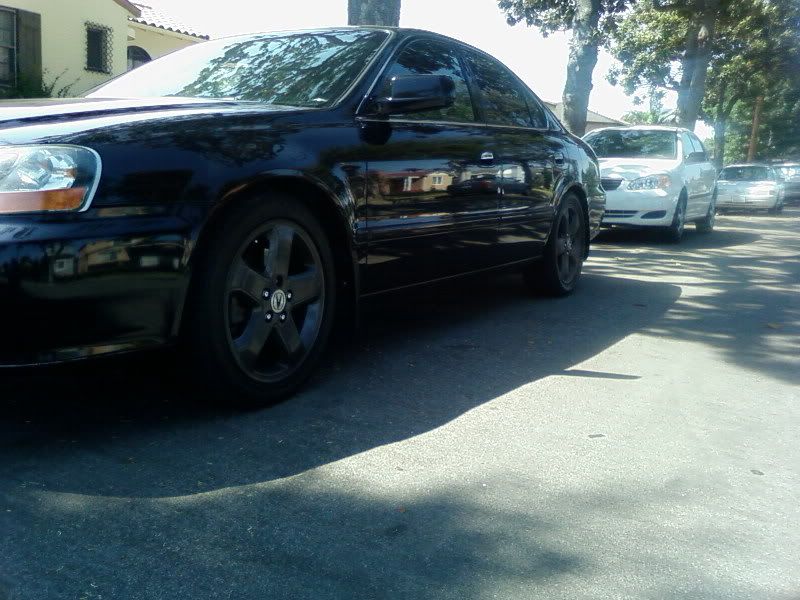
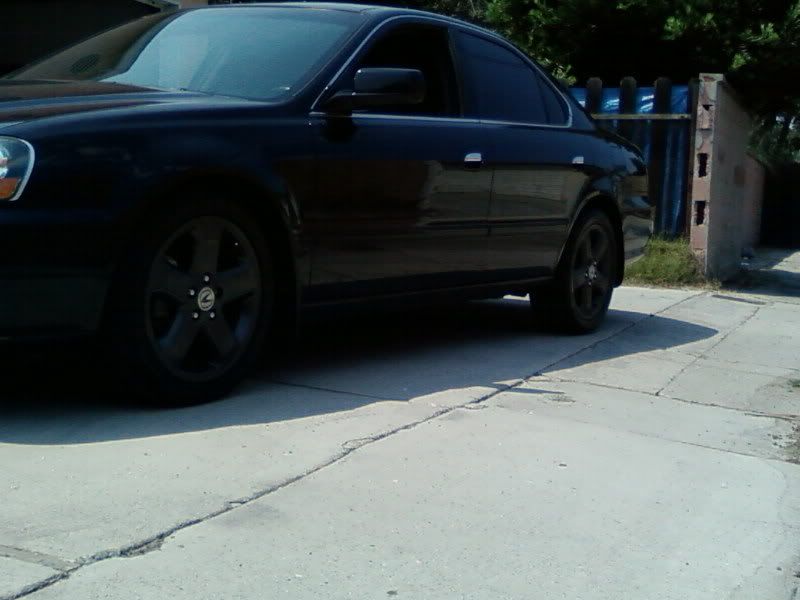
I honestly think Eibach Pro-Kit is perfect for daily driving around my part. (Which ill have for sale next month along with my Tokico Illumina shocks)
And if you complete this install by yourself, you'll feel like a beast....or at least I did.
And if you complete this install by yourself, you'll feel like a beast....or at least I did.
09-01-2009, 10:57 AM
#13
6MT Someday..
Join Date: Jun 2008
Location: Louisville Ky
Age: 45
Posts: 1,229
Likes: 0
Received 0 Likes
on
0 Posts
Yeah...I still love my overall ride with the eibach pro/tockio blue combo for a DD. If it was a weekend only garage whore (ahem..jjashaa  ) it would be slammed...
) it would be slammed...

Thread
Thread Starter
Forum
Replies
Last Post
Medinak12
3G TL Audio, Bluetooth, Electronics & Navigation
2
09-23-2015 07:11 PM
Skirmich
2G TL (1999-2003)
37
09-15-2015 06:41 PM